How to Provision a Custom Server – A General Guide

6 min read

Introduction

We have servers from providers all over the world connected to the GridPane platform. Generally, as long as you have everything setup correctly in step 1 (below), and your provider is not doing anything “non-standard”, almost all good quality server providers will work with GridPane.

If you’re running you’re own hardware, you should also check out this article: 
Running GridPane on a Local Virtual Machine (VM) Demo

Table of Contents

Important

  • GridPane requires a BRAND NEW KVM virtualized VPS or bare metal server with only standard Ubuntu 22.04 LTS (recommended) or 20.04 LTS image installed.
  • Once initial provisioning is complete at the provider, log in to your server via console or SSH and run our provisioning command as ROOT.
  • Please do not use servers with less than 1GB of RAM as these cannot be supported and don't offer adequate resources for both the server stack and your websites.
  • GridPane does not support ARM servers.

Existing Guides

We also have articles for provisioning servers via our Custom Server option at the following providers:

  1. Google Cloud Platform
  2. Amazon EC2
  3. Hetzner
  4. OVH
  5. Katapult

These guides may also be helpful to refer to when provisioning at other providers.

Step 1. Create Your Server at Your Provider

It’s important to make sure your server meets the following 3 requirements.

1. Ports

Make sure ports 22, 80, and 443 are open. They usually are by default on almost all providers.

2. Firewall Whitelisting

If your provider has an active firewall, you may need to add the following three IP addresses to your whitelist: 35.199.11.215130.211.115.235, and 35.245.53.150. Learn more here:
Whitelisting GridPane at Your Server Providers

3. ARM is not Support

ARM servers are not supported by GridPane, and these typically require application versions to be compiled for it in most cases. Most providers don’t offer this as an option.

Step 2. Connect Your Server to GridPane

Back in your GridPane dashboard, navigate to your Servers page and click on Custom VPS:

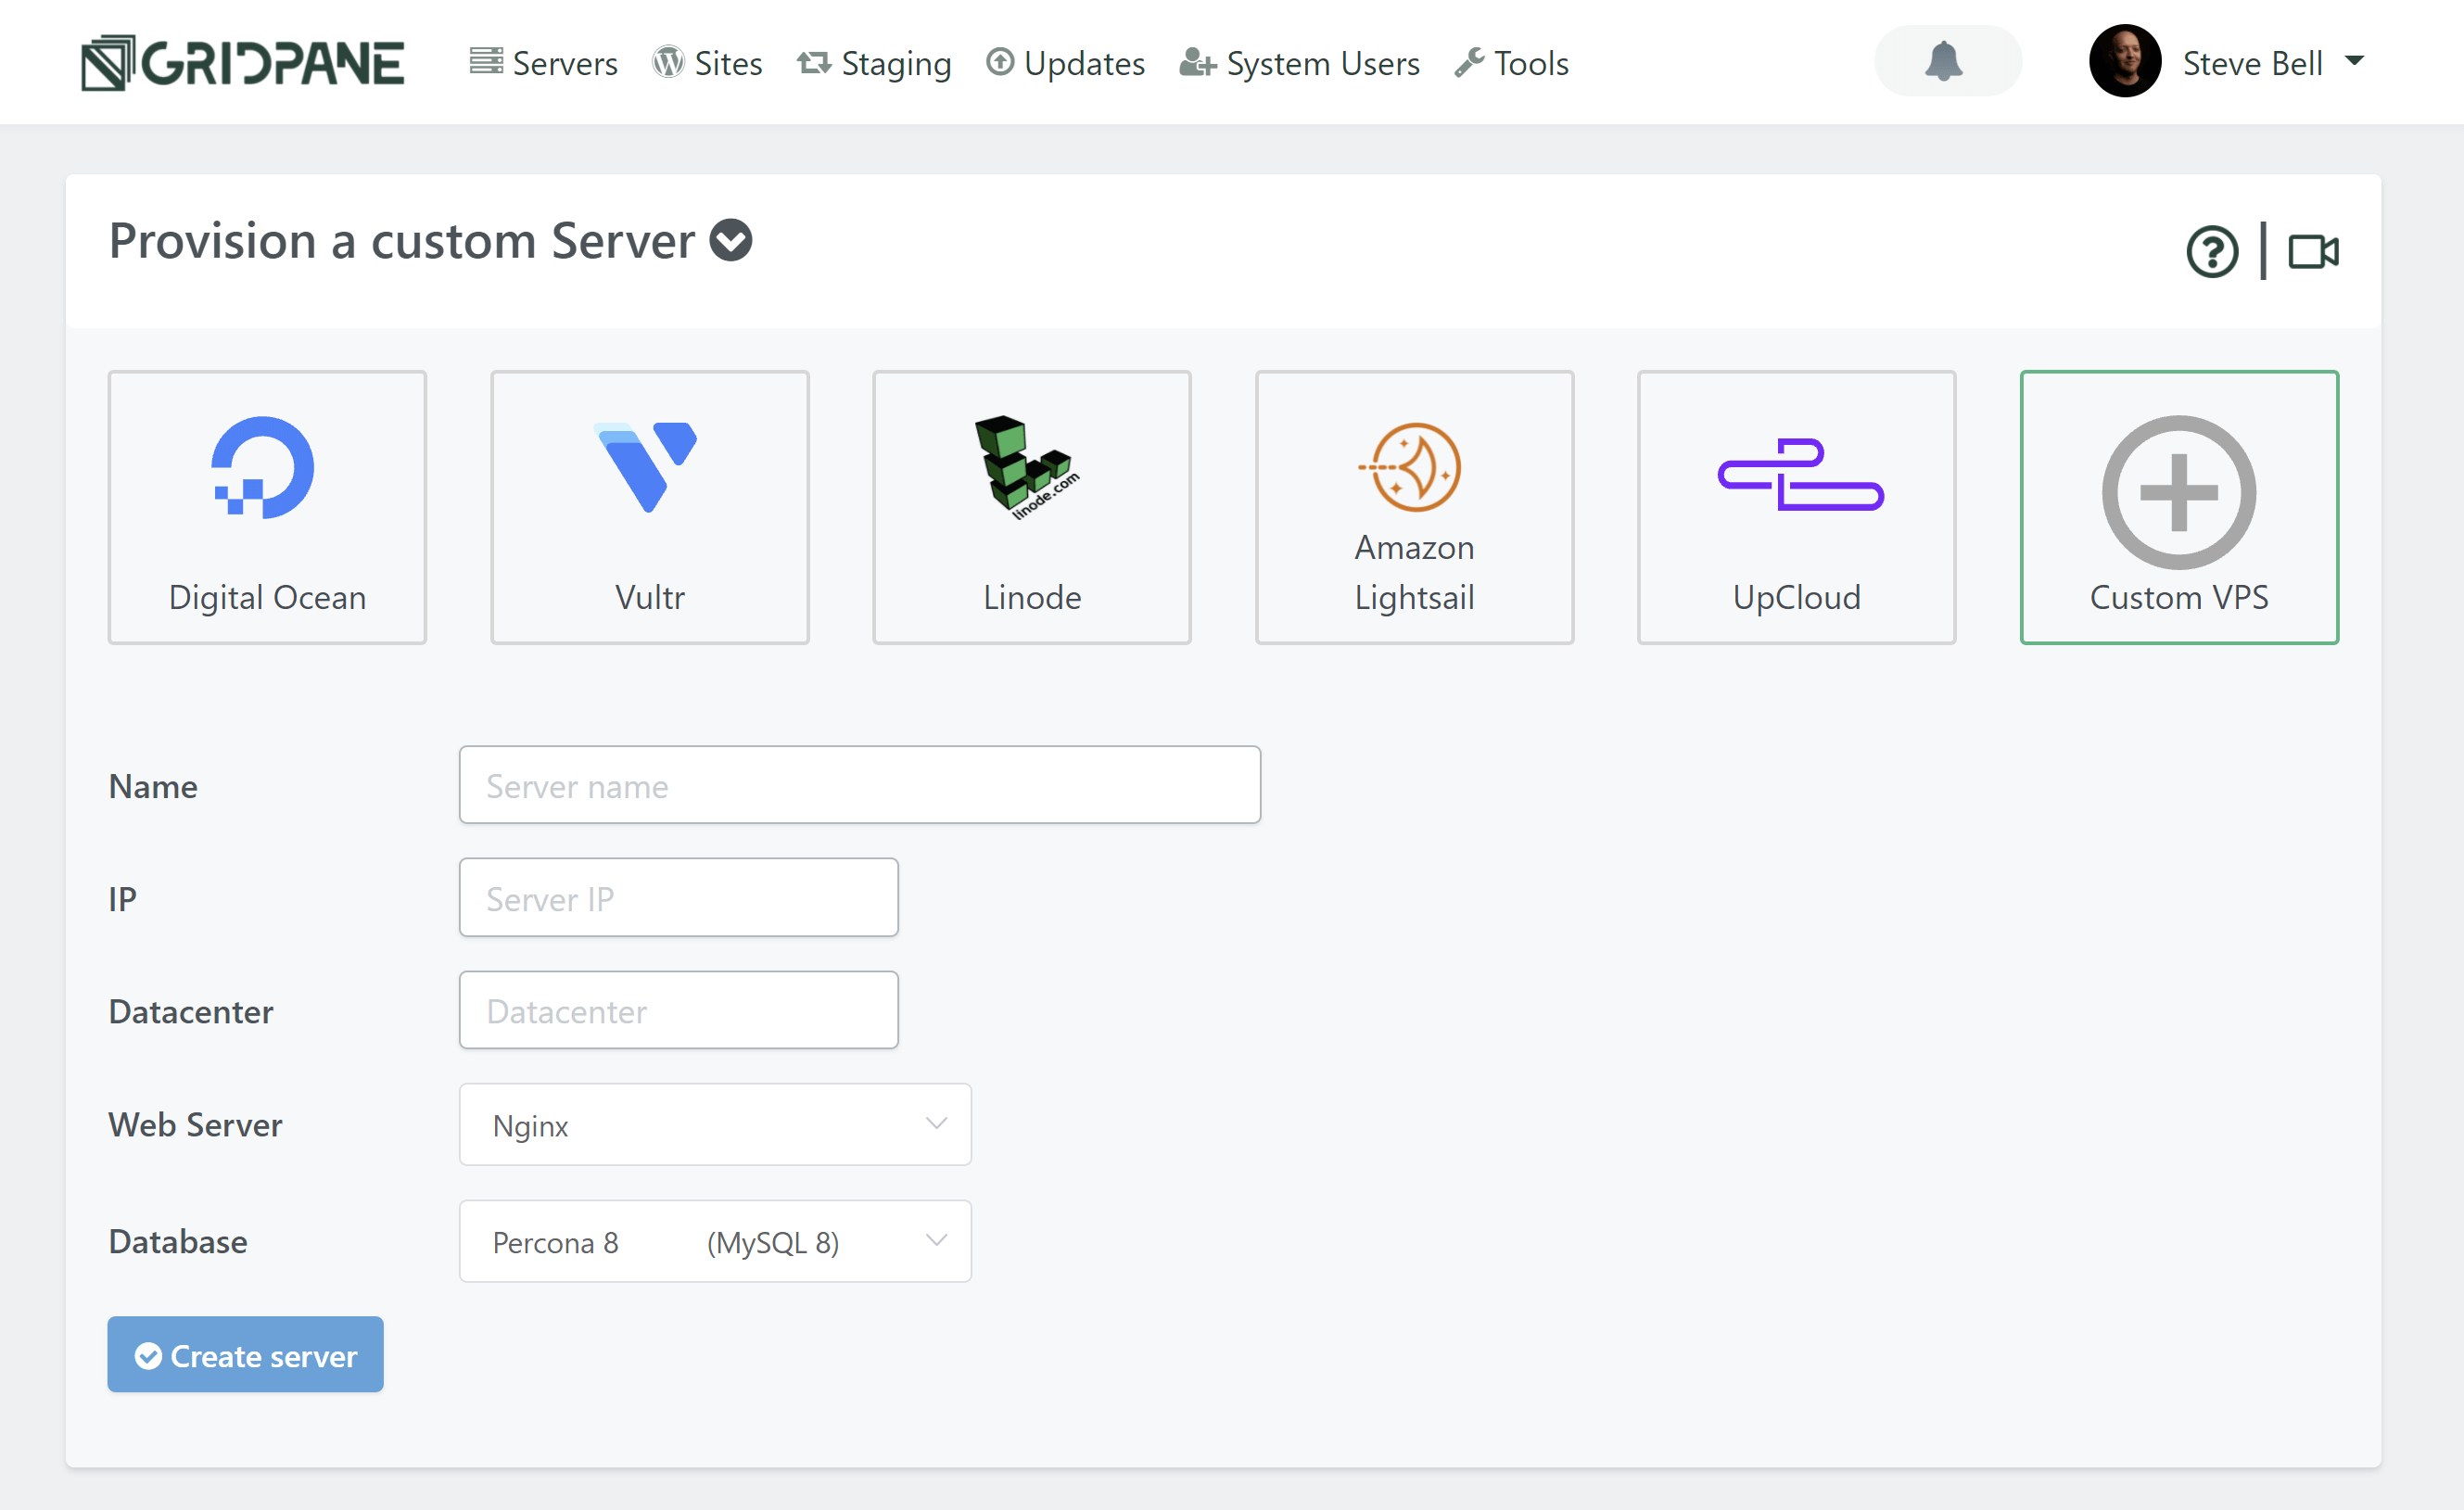
Configure Your Server

Enter the name, server IP address, and the Datacenter name you wish to use.

Note: The Datacenter name is for your reference only, so feel free to give it a name that makes the most sense for you. As this example’s server is in Falkenstein, we’ll go ahead and enter this.

OS Version

We recommend that you choose Ubuntu 22.04 LTS as the default OS.

Choose Your Web Server

You have the option to choose between Nginx and OpenLiteSpeed. This is largely personal preference. If you’re unsure which one to choose, start with Nginx.

Choose your database

If you’re on the developer plan you’ll have the option to choose between Percona and MariaDB for your database. 

Percona is a drop-in replacement for MySQL and includes security, availability, and availability features that are only available in enterprise MySQL. It has removed query caching, and it has more advanced aspects for things like storing and managing JSON as a storage format. 

MariaDB could mean fewer issues importing old WordPress websites from low-quality hosting environments. It will likely use less RAM than Percona and may offer performance benefits for some websites.

Both are excellent options.

Provider backups

We highly recommend that you enable provider backups. It’s a small price to pay for the extra insurance they offer.

Additional note: You will need to set this up directly at your server provider when using our custom server option.

Create your server

Click the Create Server button when you are happy with your configuration choices.

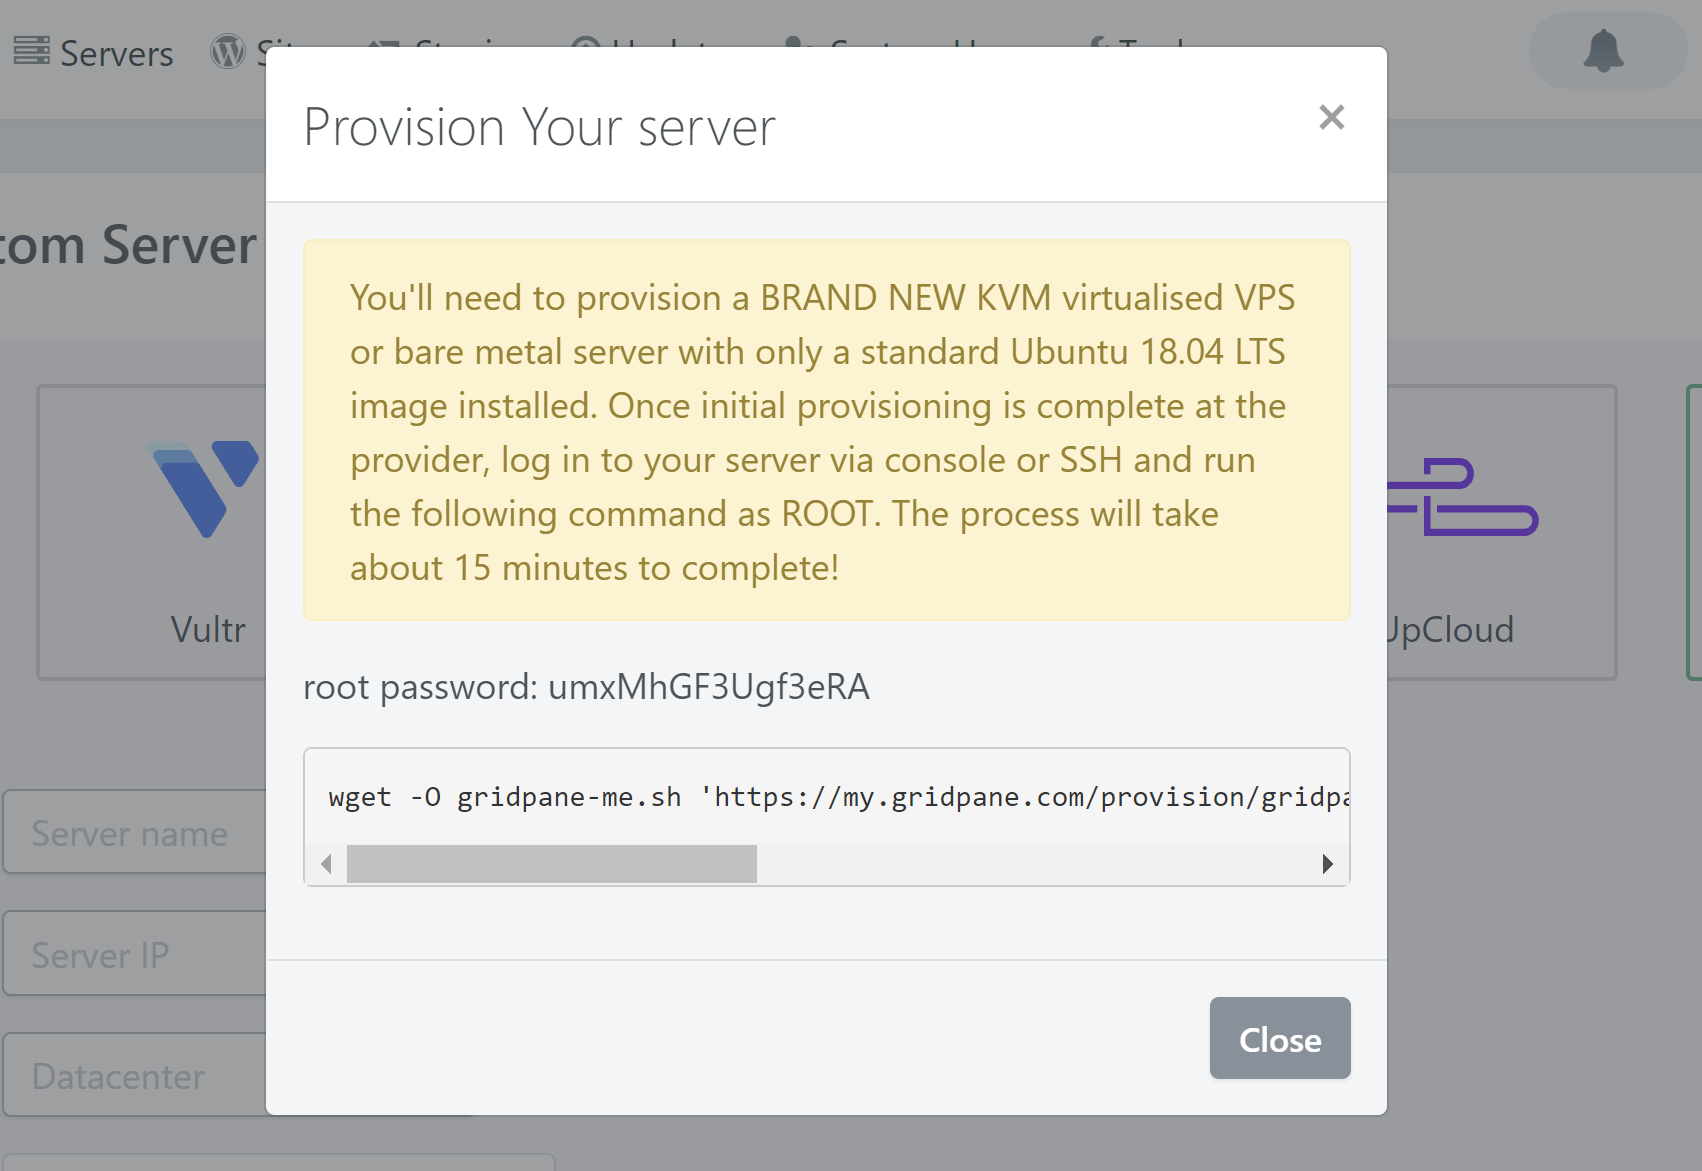
Once you click Create Server, a popup modal will contain your root password and a command-line string. Copy that string and paste in into a text document – you’ll need it in a moment.

Step 3. Connect to Your New Server

The first time you connect to any new server you’ll be prompted with a security alert about the servers fingerprint. Click Yes to continue.

If you didn’t add an SSH key during the setup process, you’re provider will likely have emailed you the root password. They may also allow you to connect to your server directly through their own console.

Step 4. Run the Provisioning Code

Now connected to your server, you can complete the final steps.

1. Ensure you’re running as the root user

If you’re not running as root, paste the following and hit enter:

sudo -s

IMPORTANT

Sometimes a server will change the formatting of our provisioning code. For example, it will change https:// to https;//, or append http:// before https:// like this: http://https://provisioningcode….. If you receive an error after pasting, double-check that the hasn't made it's own changes to our code and try again.

2. Enter Your Provisioning Code

We’re now logged in and/or running as root and it’s time to paste in the provisioning code that you copied in step 2.

Right click > Paste and then press Enter. The code the will do the rest. A few minutes later you’ll see the following message in the image below (example taken from our Hetzner article), and you can then close the terminal by typing:

exit

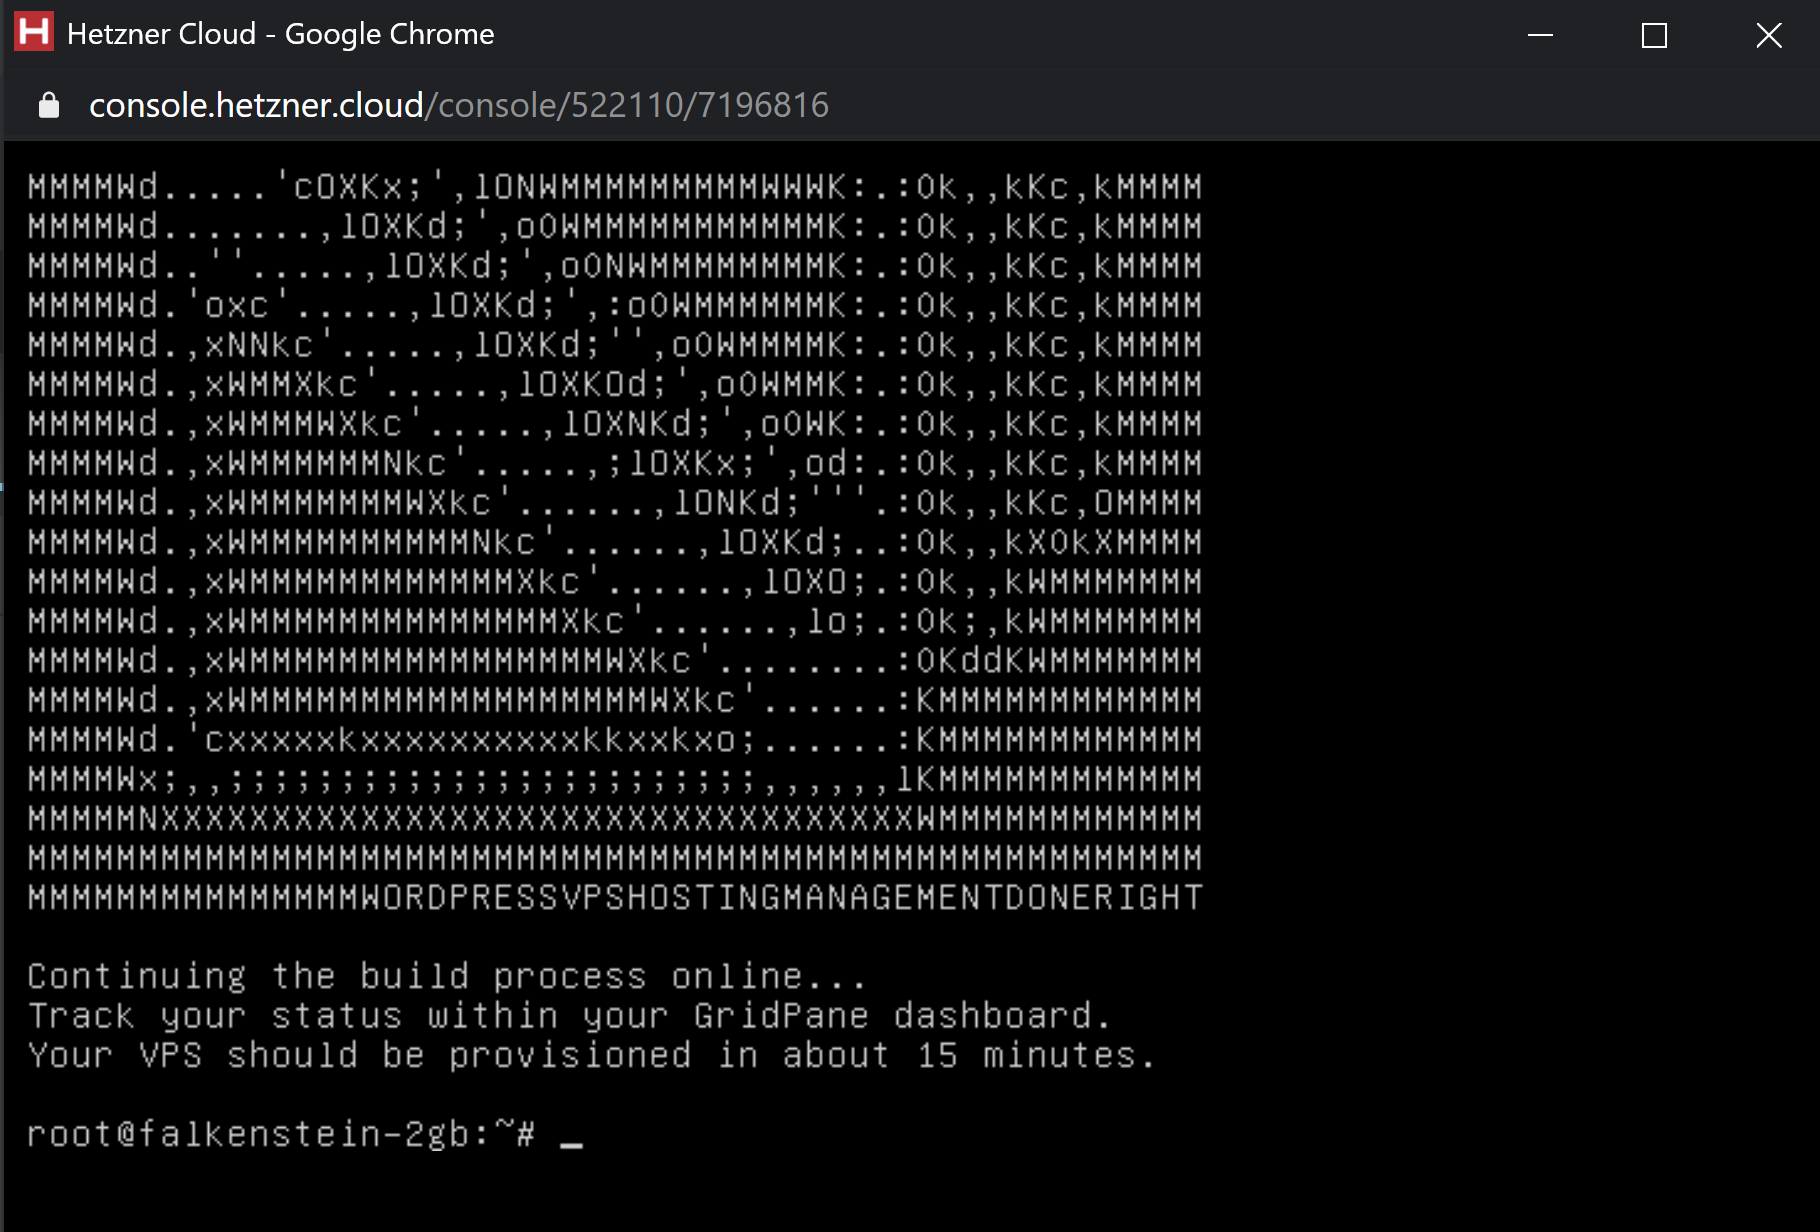
Step 5. Wait for Approx 10 Minutes

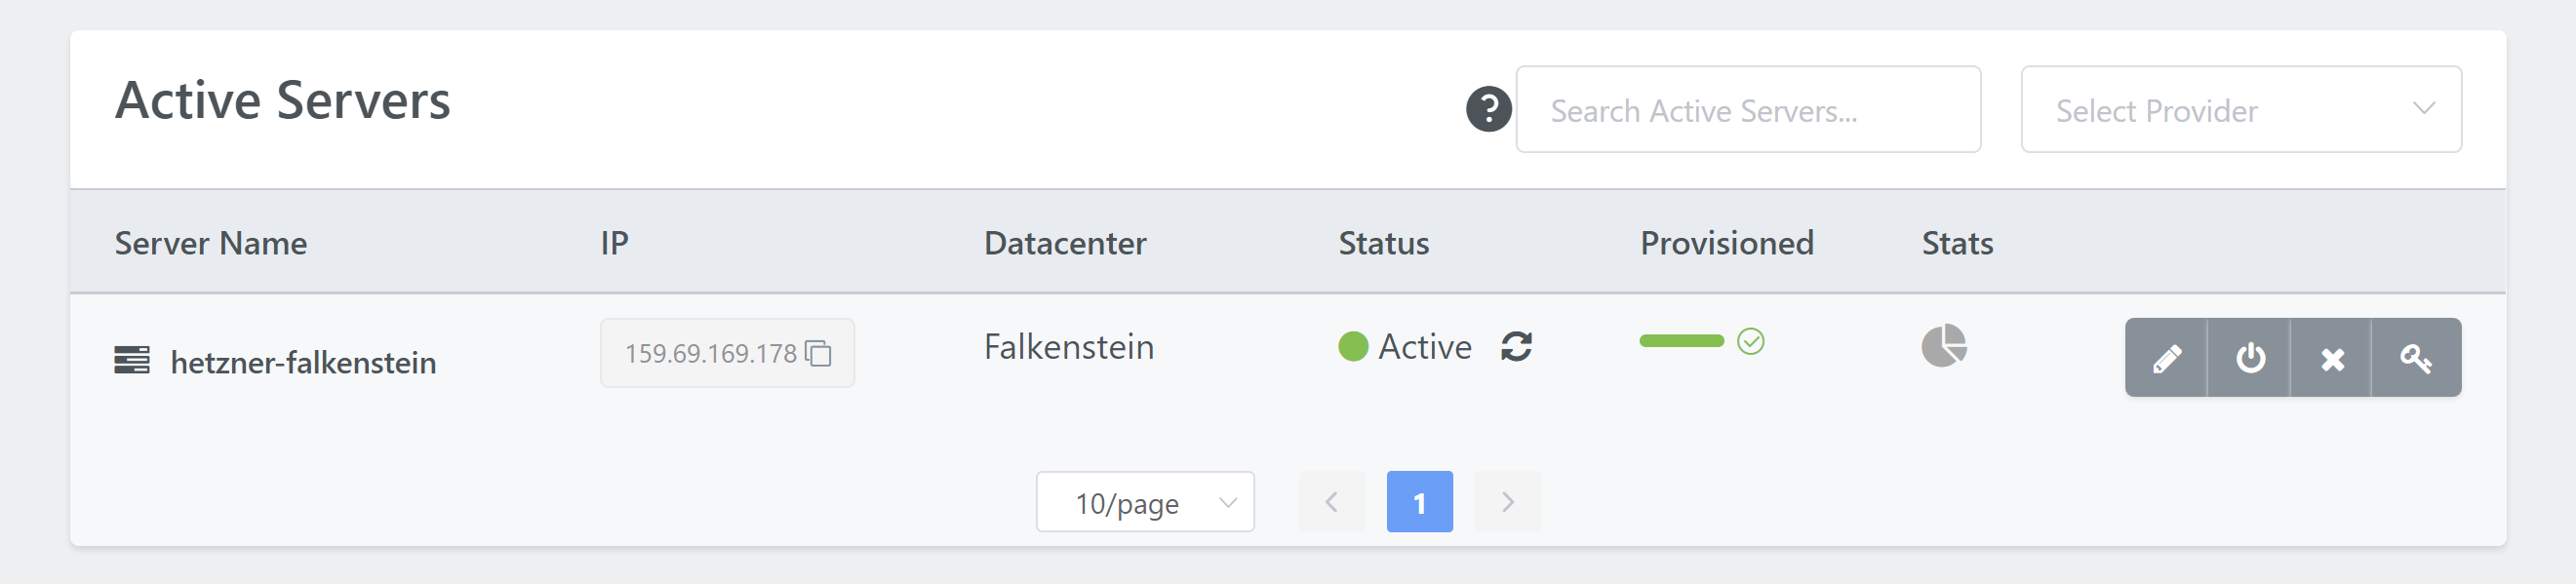
You can monitor the rest of your servers provisioning progress inside the Servers page of your account. Approximately 10 minutes later it will be ready to use inside your GridPane account.

Congratulations! Next Steps

Now that your server is live, you’re ready to start creating and configuring new WordPress websites.

To deploy a site click on the Sites link in the GridPane main menu to begin the process. We have a separate article that details the steps in detail for you.