Step 1. Sign Up for Google Cloud Platform
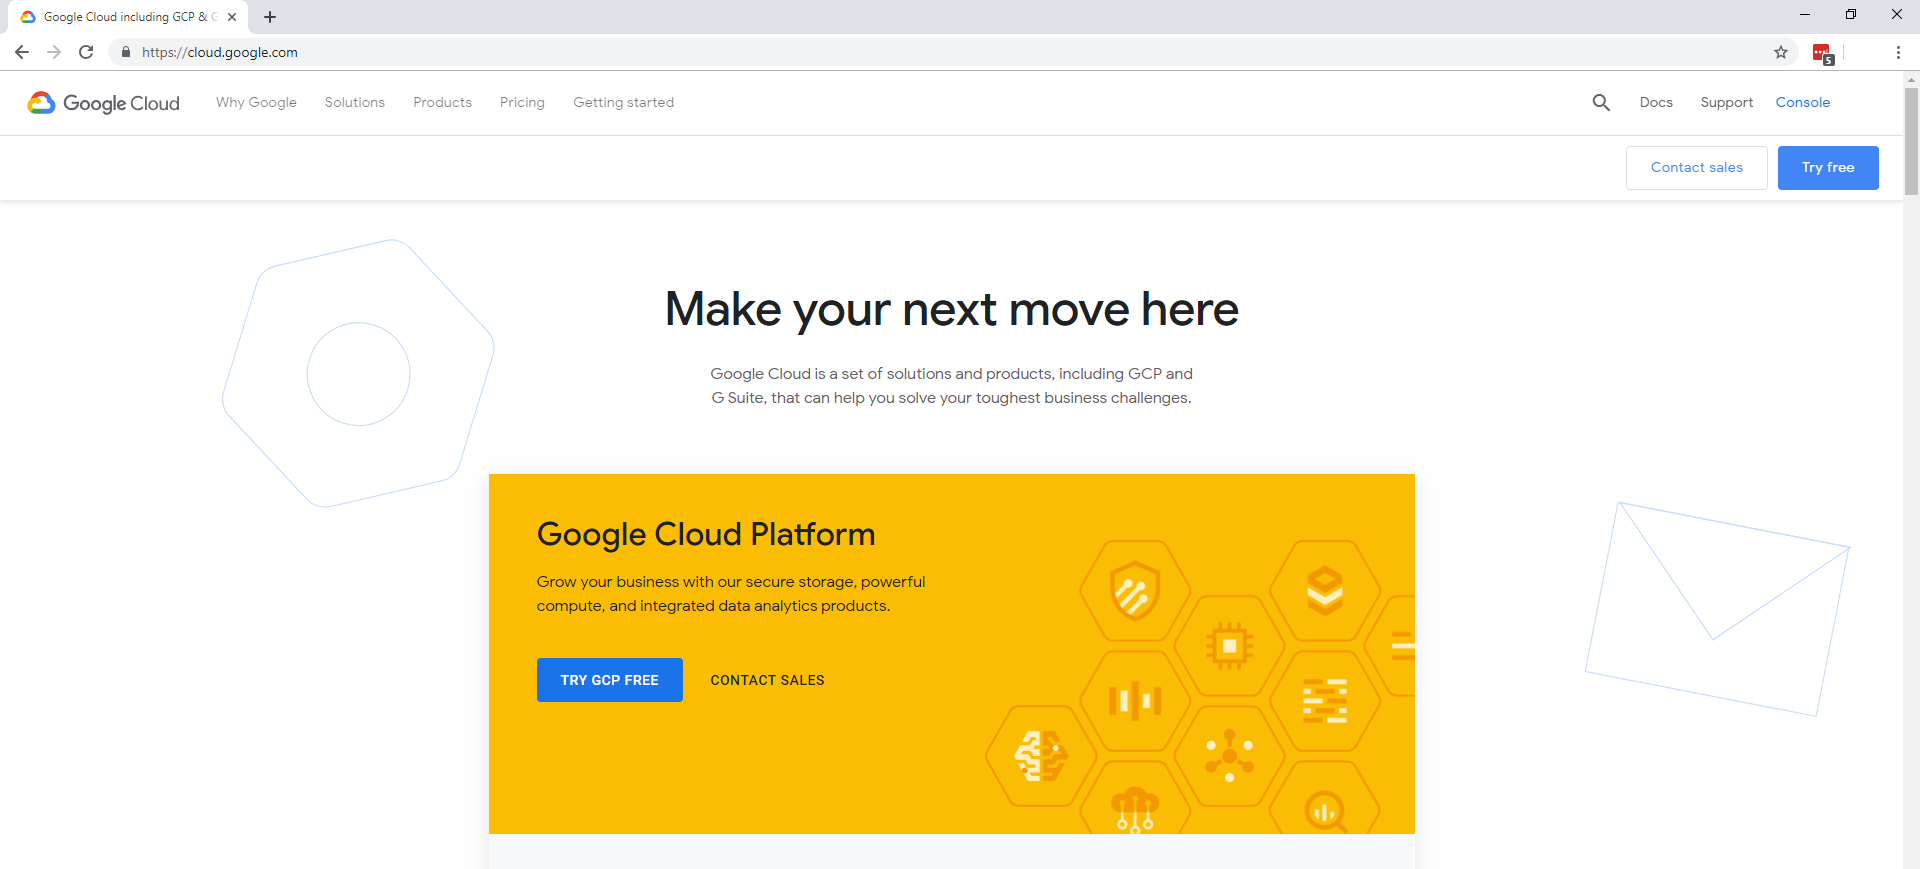
First, navigate to cloud.google.com and click on Try GCP Free. By completing this process, you will receive $300 in credits to spend on Google Cloud Platform over the next 12 months.
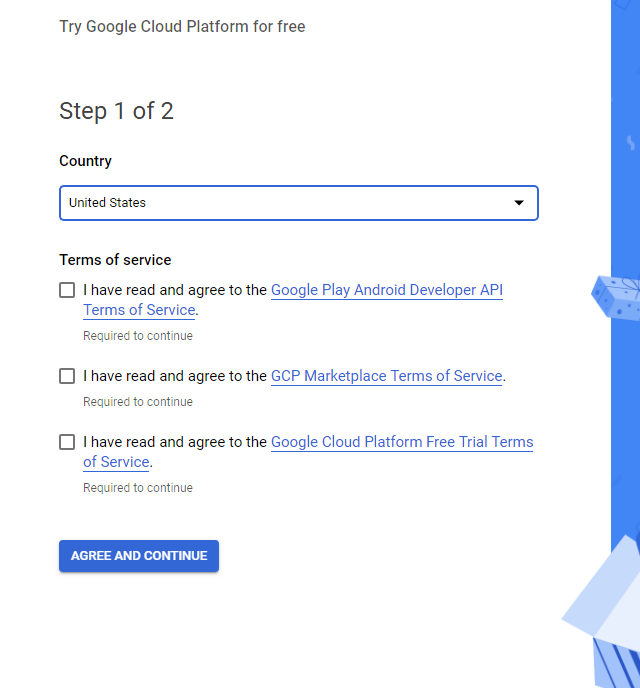
Select your country and agree to the terms of service. Depending on the type of Google account and services you already have, the number of terms you must agree to will vary. Once you continue, Google will require a credit card to make sure you are a human. You will not be charged unless you manually upgrade to a paid account.
On the next page, enter your account details and add a credit/debit card or bank account then proceed to start your trial.
Step 2. Create Your Google Cloud Platform Server
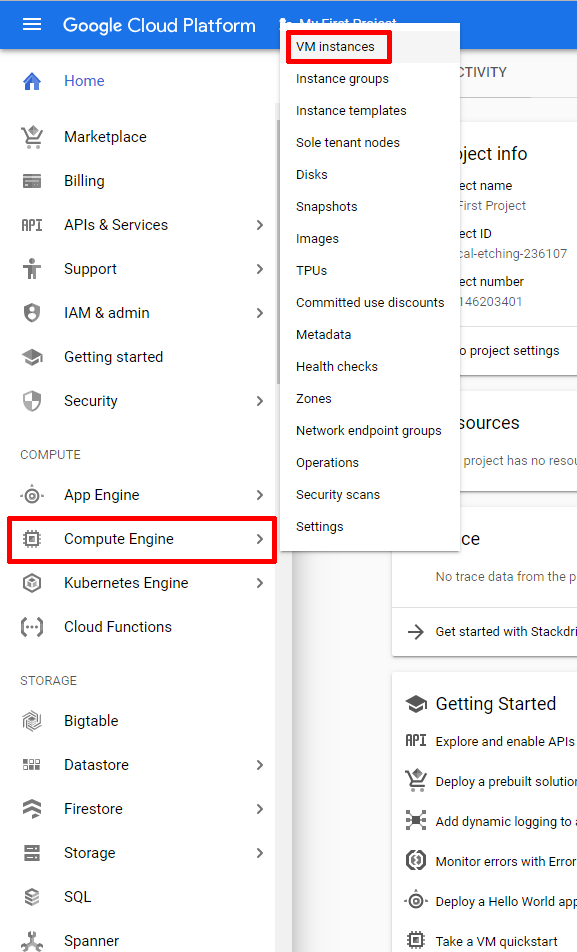
In the left sidebar, click on Compute Engine and then VM instances.
Note: If this is your first time creating a server, you will need to click Enable Billing, after which Google Cloud Platform will have to complete a short setup within your account. You will not be charged as you are still within your $300/12month trial period.
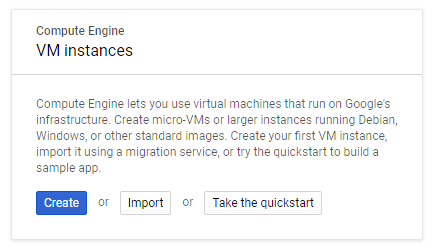
Click the Create (or the create instance blue plus (+) button if you already have an existing server) button to create the server.
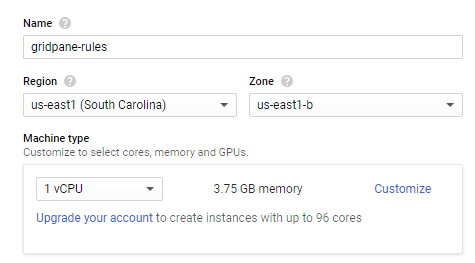
Name your instance something accurate such as “gridpane-rules” and select a zone (location). Choosing a location closest to most of your end users is generally best.
For Machine Type, use the drop-down to select one of many preconfigured CPU and memory options. Should none of those suit your needs, you can create a custom configuration by clicking Customize.
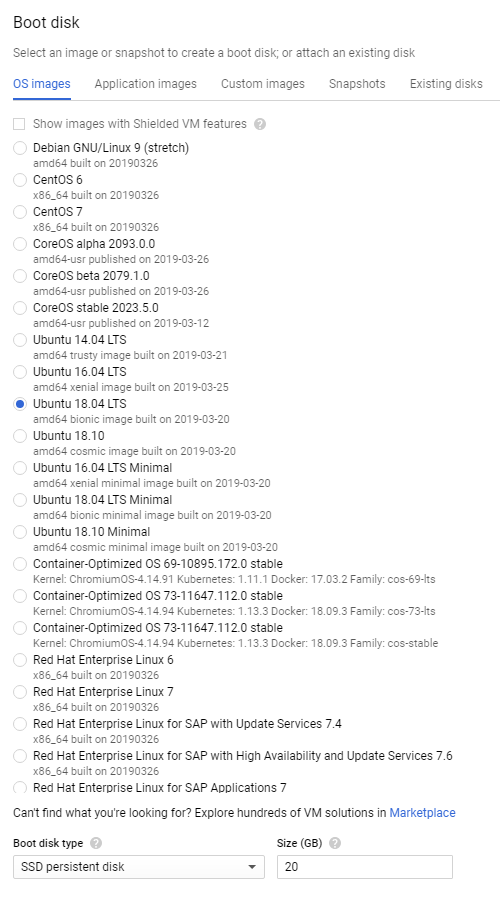
For Boot Disk, select Ubuntu 22.04 LTS. Do NOT use Ubuntu Minimal images.
For Boot Disk Type, select “SSD Persistent Disk” with at least 25GB (30+ as a minimum would be even better – please disregard the “20” in the screenshot below). Click the Select button when you’re done.
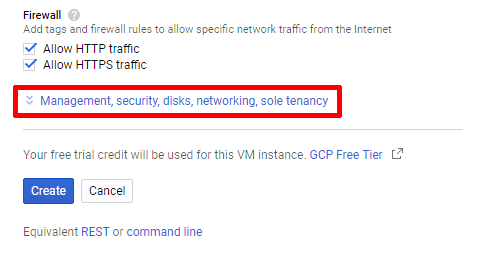
Leave Identity and API access at their default values and make sure to select BOTH checkboxes to allow HTTP and HTTPS traffic under Firewall.

Now you’ll need to reserve a Static IP Address for your server. This is VERY IMPORTANT as GridPane cannot manage your server without having a Static IP Address to reference.
Click and expand the Management, security, disks, networking, sole tenancy section.
- Click Networking.
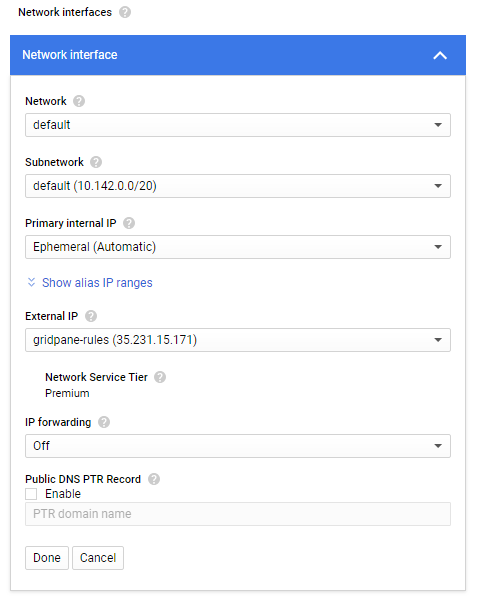
- Under Network interfaces, click on the default network interface to edit it.
- Under the External IP section, select the drop-down menu and click on Create IP Address.
- In the resulting pop-up window, name your Static IP Address and optionally give it a Description.
- Click Reserve to finish creating and assigning the address to this server.
The resulting screen should look similar to this:
Click Create, and your server will begin building. Build times will vary, but for this test, the server was built in under a minute.
Step 3. Allow GridPane To Access Your Google Cloud Server
GridPane requires an open port to communicate with your new server. Expand the main left menu and scroll down to VPC Network under the Networking heading. Then select Firewall Rules.
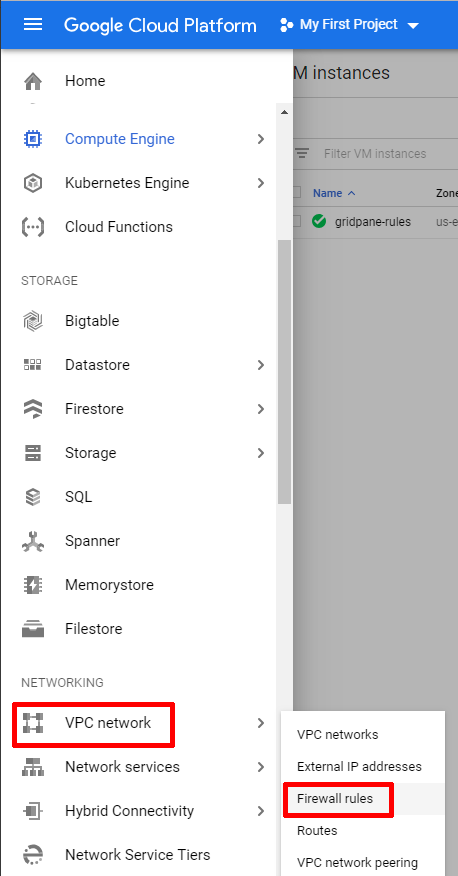
Click on Create Firewall Rule at the top and enter the following information:
- Name: gridpane-port
- Description: Required by GridPane
- Logs: off (unless later it is determined you need them)
- Network: default
- Priority: 1000
- Direction of traffic: Ingress
- Action on match: Allow
- Targets: All instances in the network
- Source Filter: IP Ranges
- Source IP ranges: 0.0.0.0/0
- Second source filter: None
- Protocols and ports: Specified protocols and ports: tcp:11371
Click Create when finished, the resulting Firewall Rule will look like this:
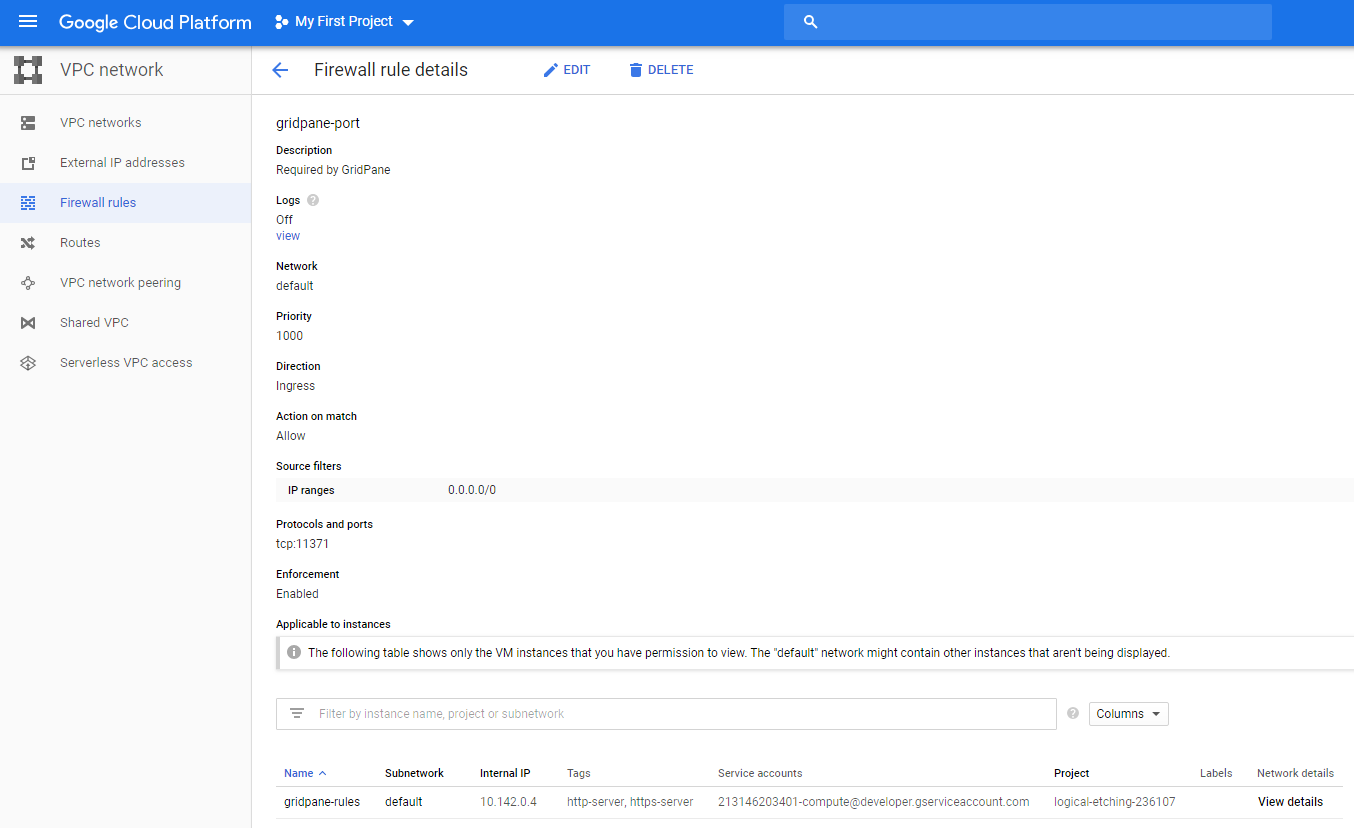
This Firewall rule will allow all incoming traffic from any IP address to your server’s TCP port 11371. GridPane’s security will lock down and protect this port from any traffic originating from any location other than GridPane, directly on the instance via UFW.
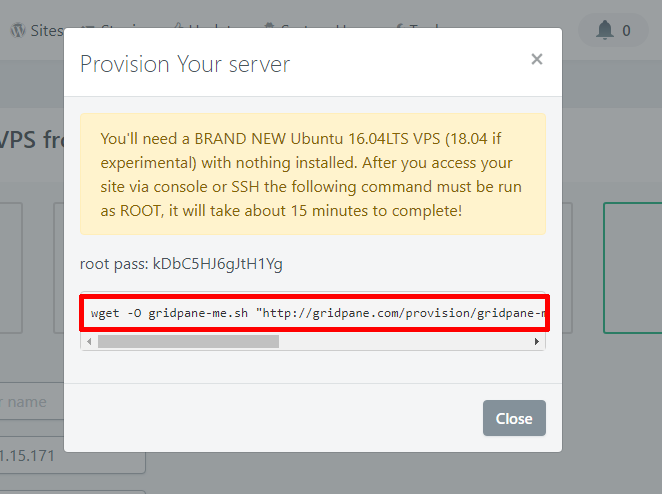
Copy Your Provisioning Command
Once you click Create Server, a popup modal will contain your root password and a command line string. Copy that string – you’ll need it in a moment.
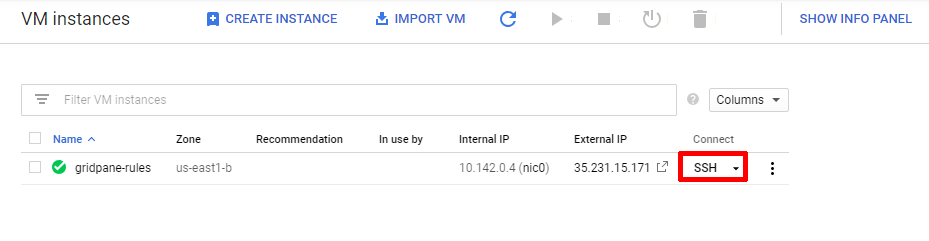
Step 5. Run Your Provisioning Command
Now use any client to log into your server or click the SSH button within the VM Instances dashboard.
Type the following command to allow for root-level commands to be run:
sudo -s
Then enter the string copied from the popup modal to install GridPane:
This will initiate Stage 1 of installation. It will only take a few moments and ends when this message displays.
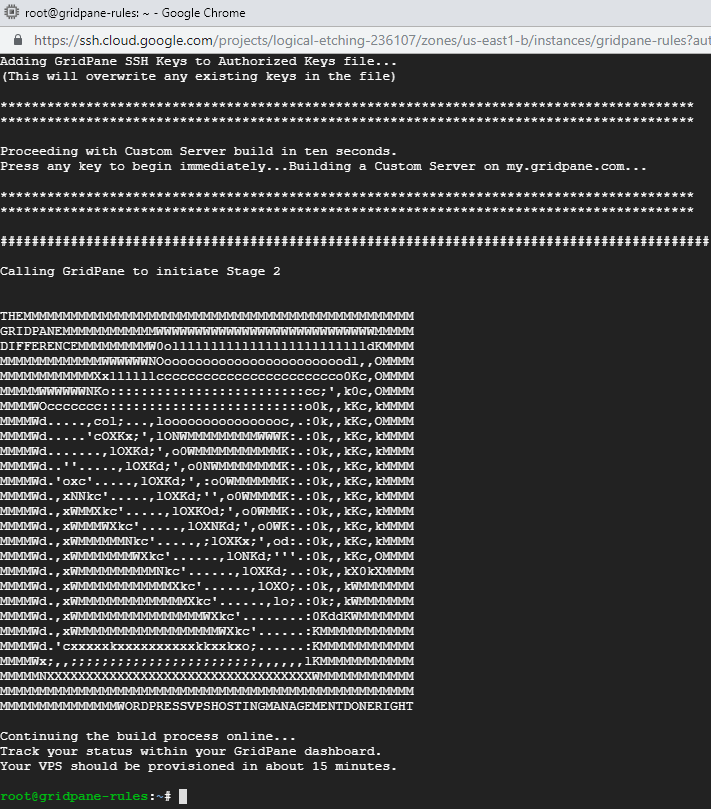
Approximately 15 minutes later, your new server will be complete, available on the GridPane dashboard, and ready to build WordPress sites.

Congratulations! Next Steps
Now that your server is live, you’re ready to start creating and configuring new WordPress websites.
To deploy a site click on the Sites link in the GridPane main menu to begin the process. We have a separate article that details the steps in detail for you.
