Provision a Hetzner Server Using Our Custom Server Option

9 min read

Important: Arm64 is Not supported

GridPane does not support arm64-based servers. Please ensure you do not choose this option within your Hetzner account.

Introduction

In this article, we’re going to provision a Hetzner Cloud Server (VPS) and then install GridPane from the command line. If you already have an account and servers at Hetzner, you can skip to step 3.

Table of Contents.

Important

  • GridPane requires a BRAND NEW KVM virtualized VPS or bare metal server with only standard Ubuntu 22.04 LTS (recommended) or 20.04 LTS image installed.
  • Once initial provisioning is complete at the provider, log in to your server via console or SSH and run our provisioning command as ROOT.
  • Please do not use servers with less than 1GB of RAM as these cannot be supported and don't offer adequate resources for both the server stack and your websites.
  • GridPane does not support ARM servers.

About Hetzner

Hetzner is a very interesting EU based hosting company that owns and operates several of its own datacentres in Germany, Finland and they now also offer servers the US. Their prices are very competitive and from what I’ve seen also have a very good reputation, and they’ve been around for a long time – founded in 1997.

Hetzner offers both dedicated servers and VPS servers (which they call “Cloud” servers), and they have VPS options that come with dedicated vCPUs and flexible storage.

Step 1. Create a Hetzner Account

Head over to https://www.hetzner.com and create an account if you haven’t already. I’m not 100% clear on whether approval is required to get started as I was almost immediately approved to start creating servers, but just know that there may be an approval process (and if there is, please do let us know, and I will update this article accordingly).

Add your details and payment info, and then we’re good to begin.

Step 2. Create a Project

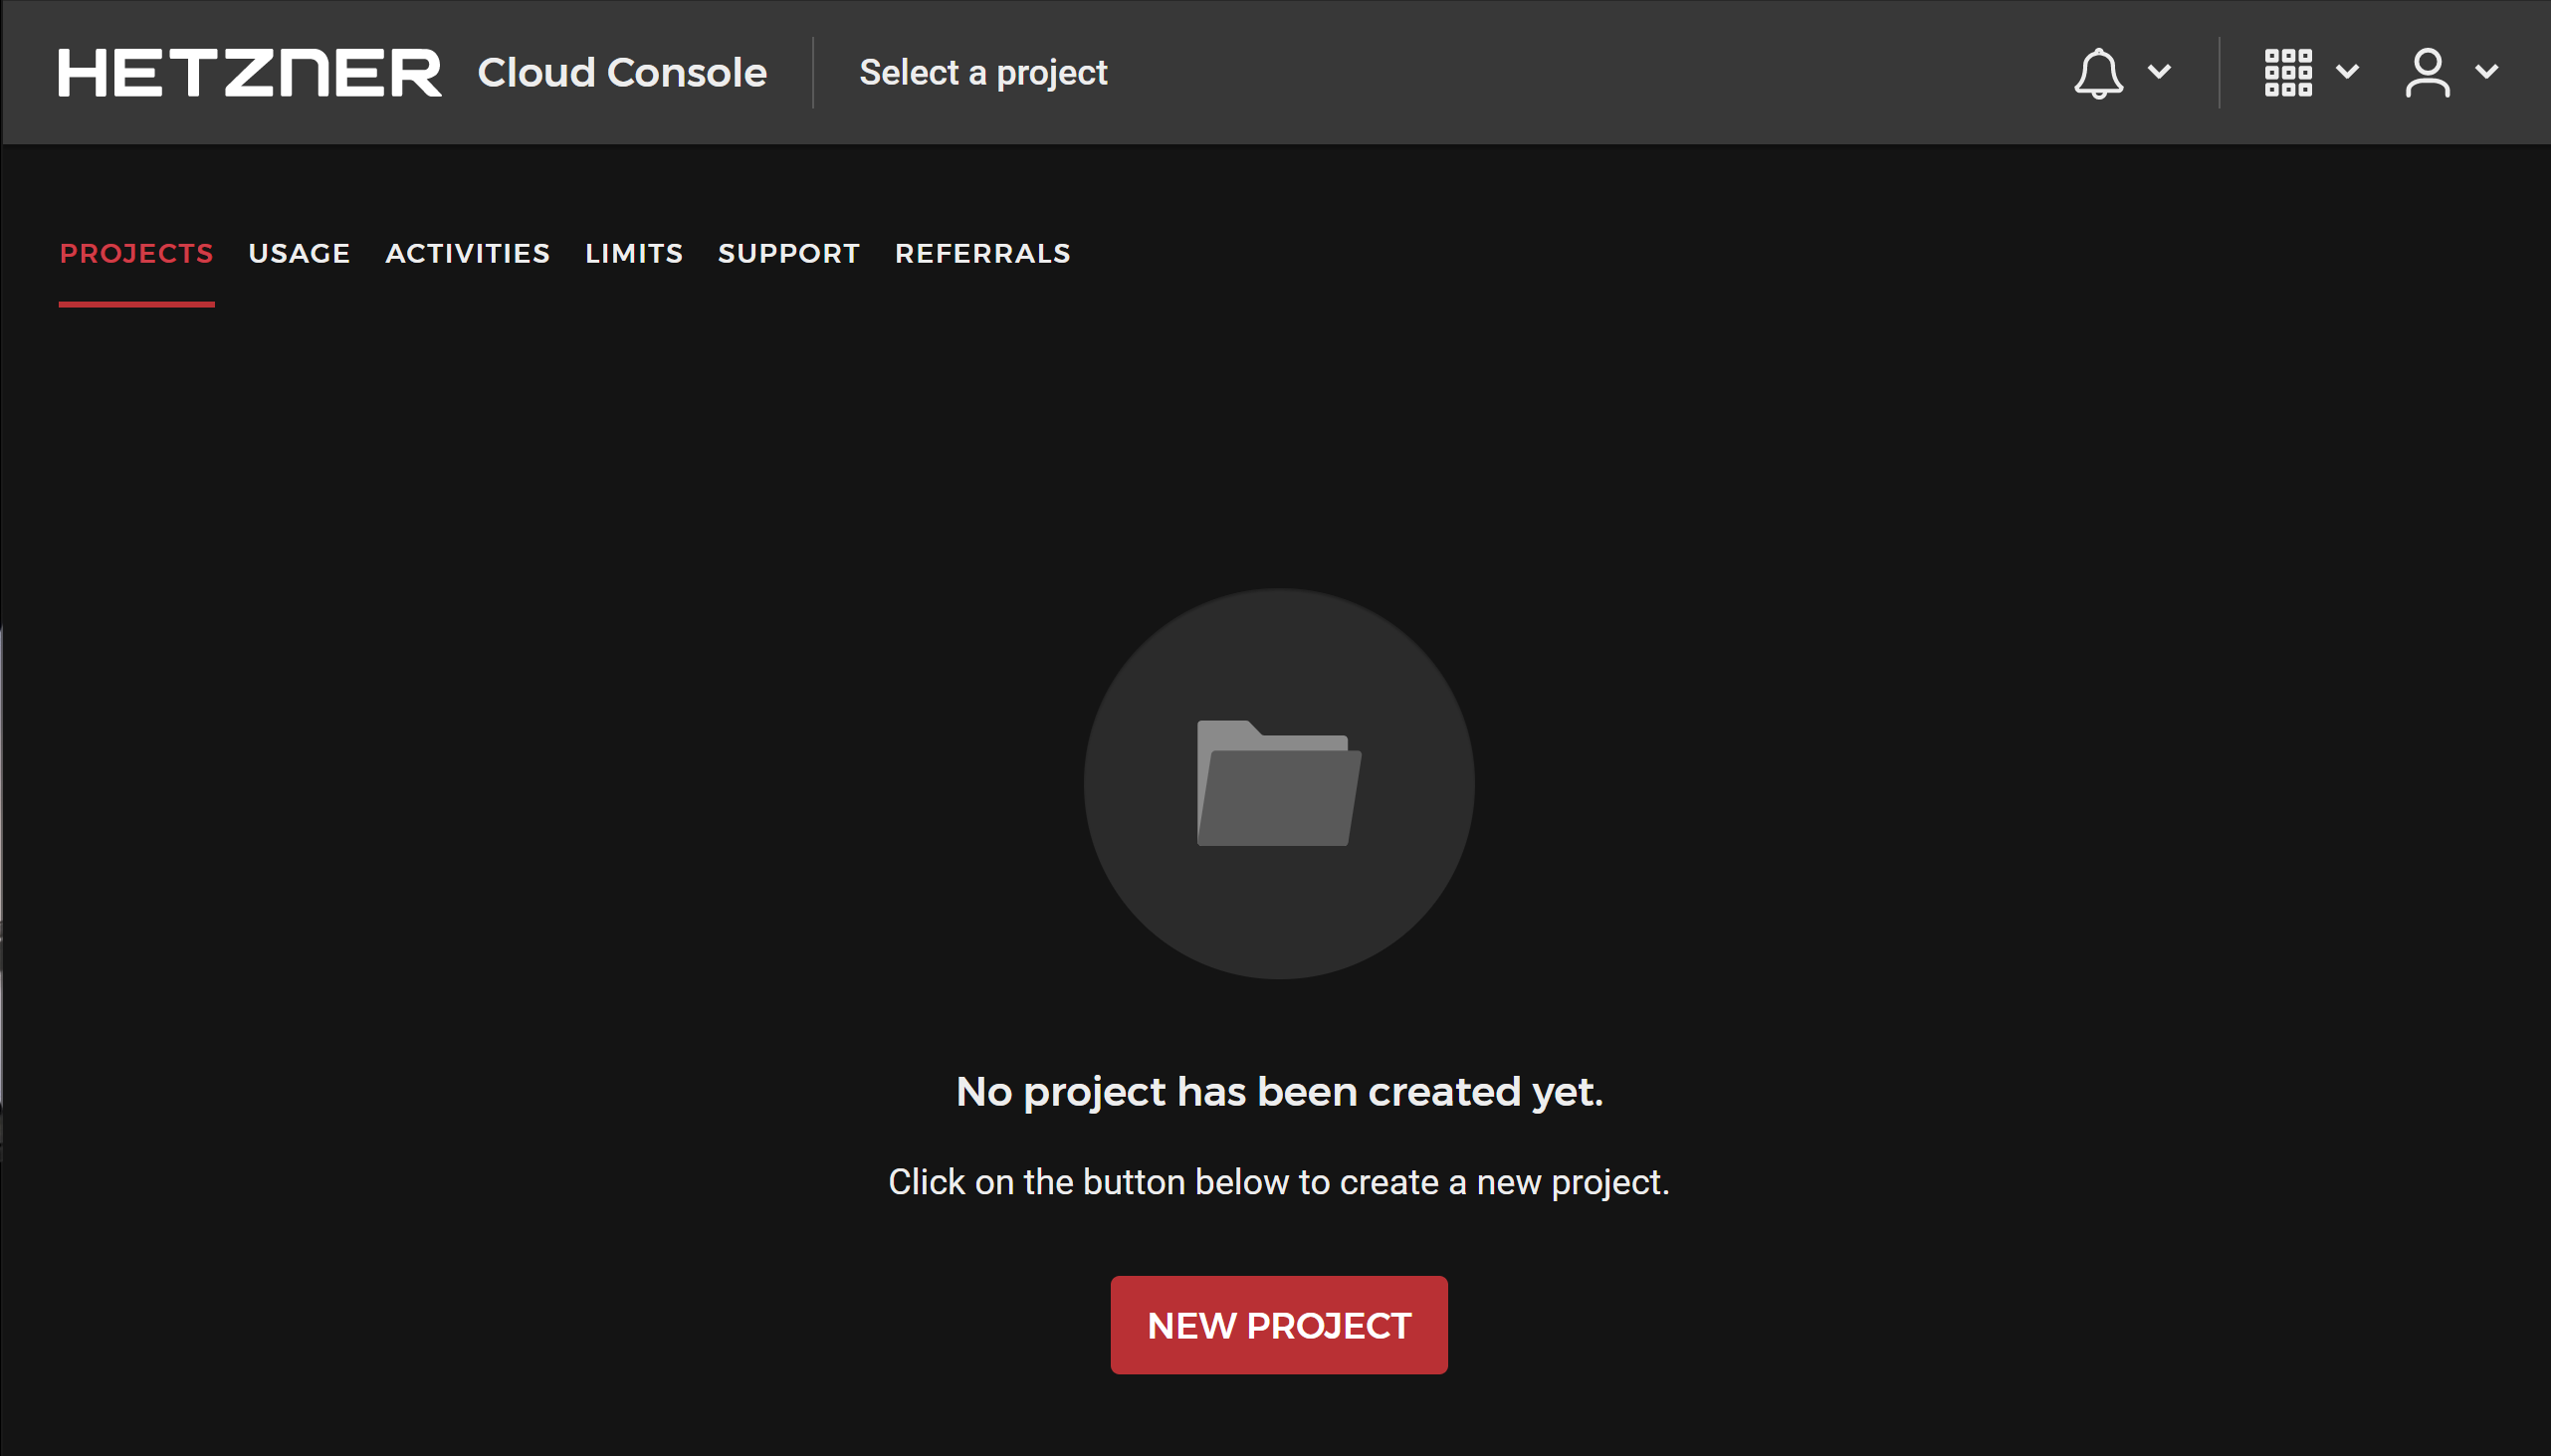
Before you can create a server you first need to create a project.

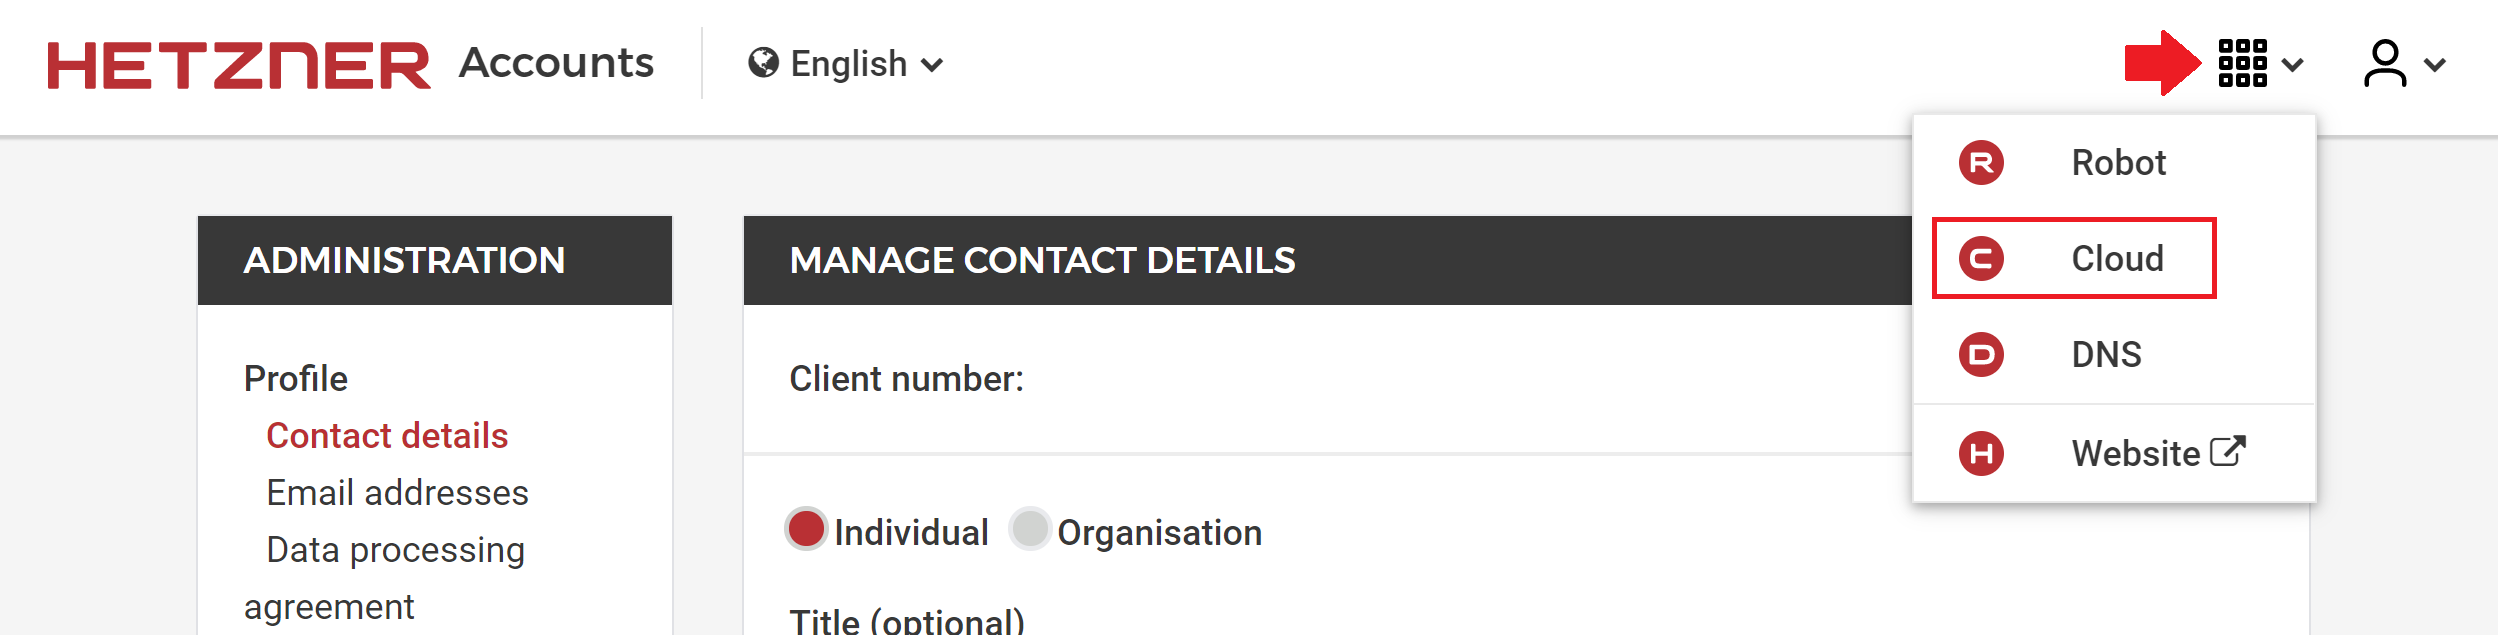
From the dropdown in the top right, select “Cloud”:

You’ll be taken to their pretty cool dashboard, and here you can create a new project:

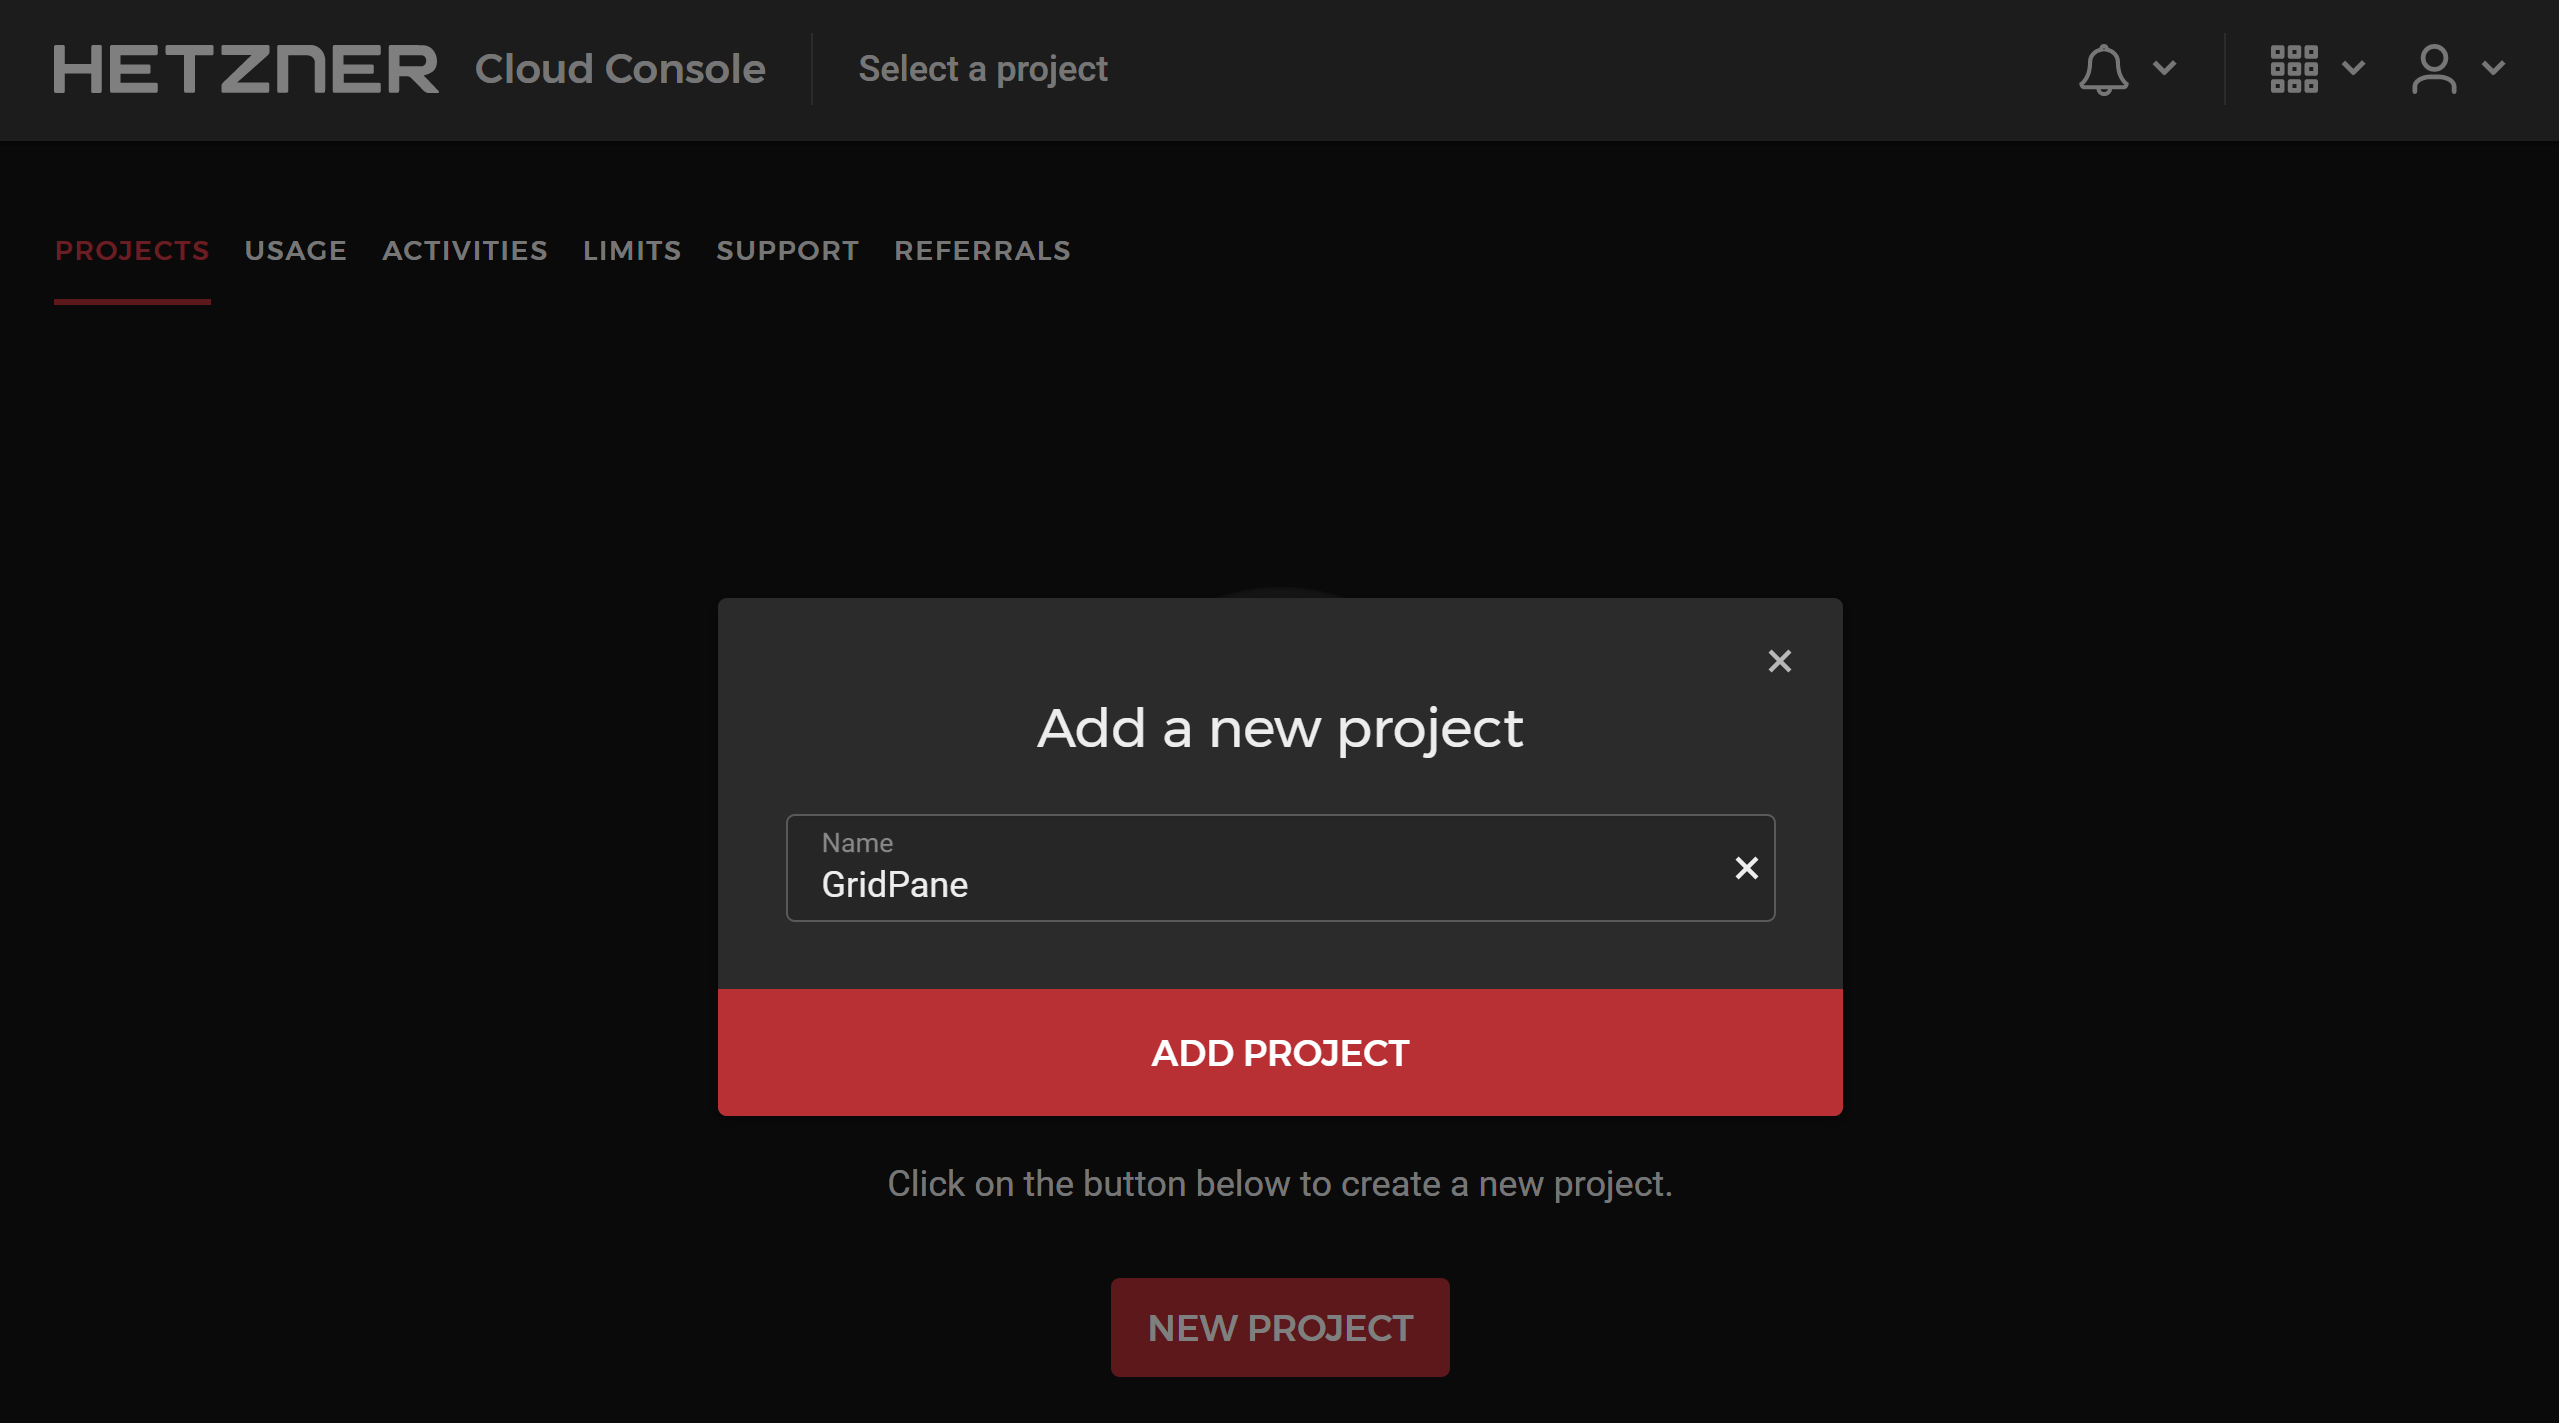
Click the big red button, and a modal will open to give your project a name – I’ve named mine GridPane, but feel free to choose whatever name makes sense for you:

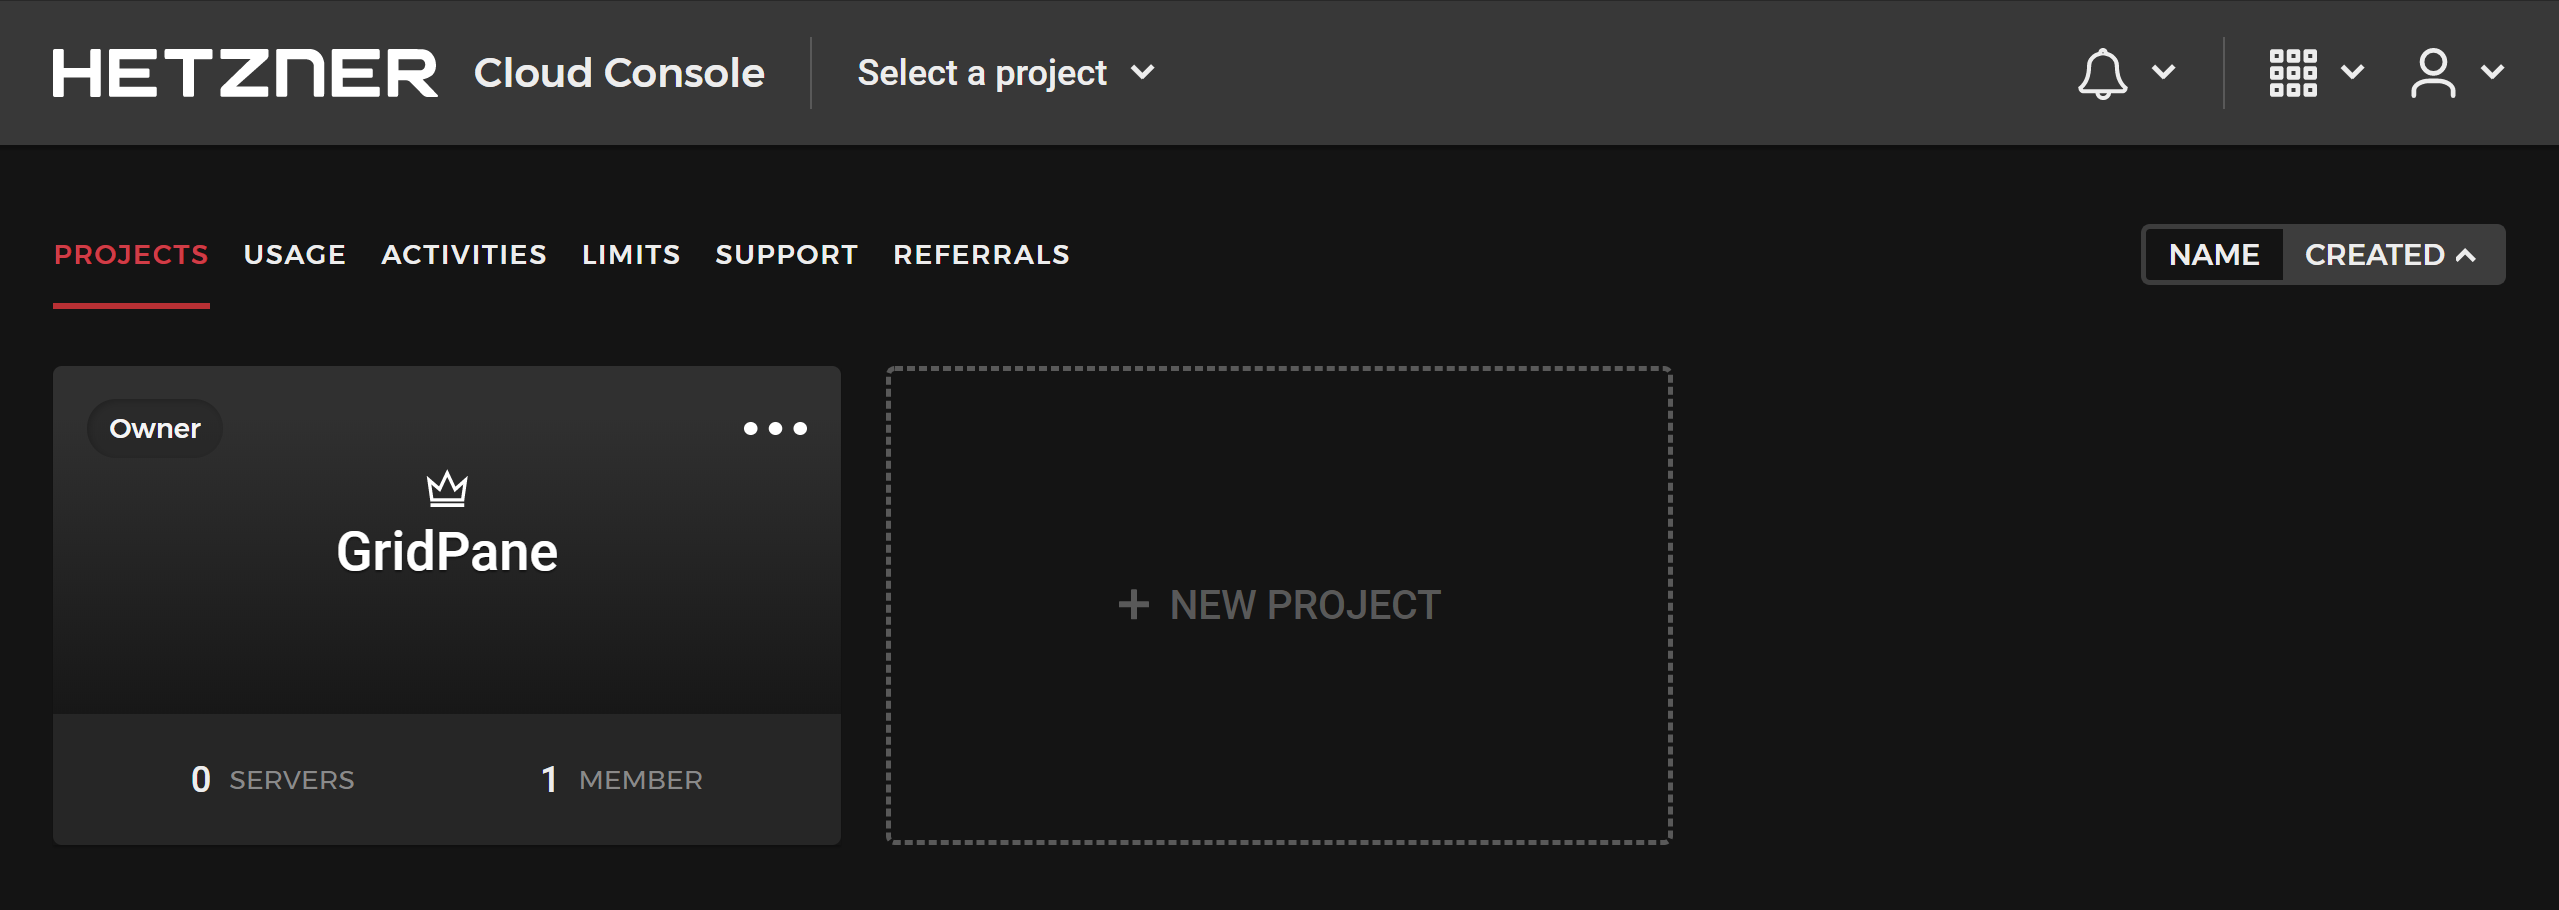
And your project has been created:

Step 3. Create a Server

Information

Hetzner may place a 10-server limit on your account. If you experience this, reach out to their support, and they should get you sorted.

Now that we’ve created a project we can create our server. Click on your project and you’ll be taken to the following screen:

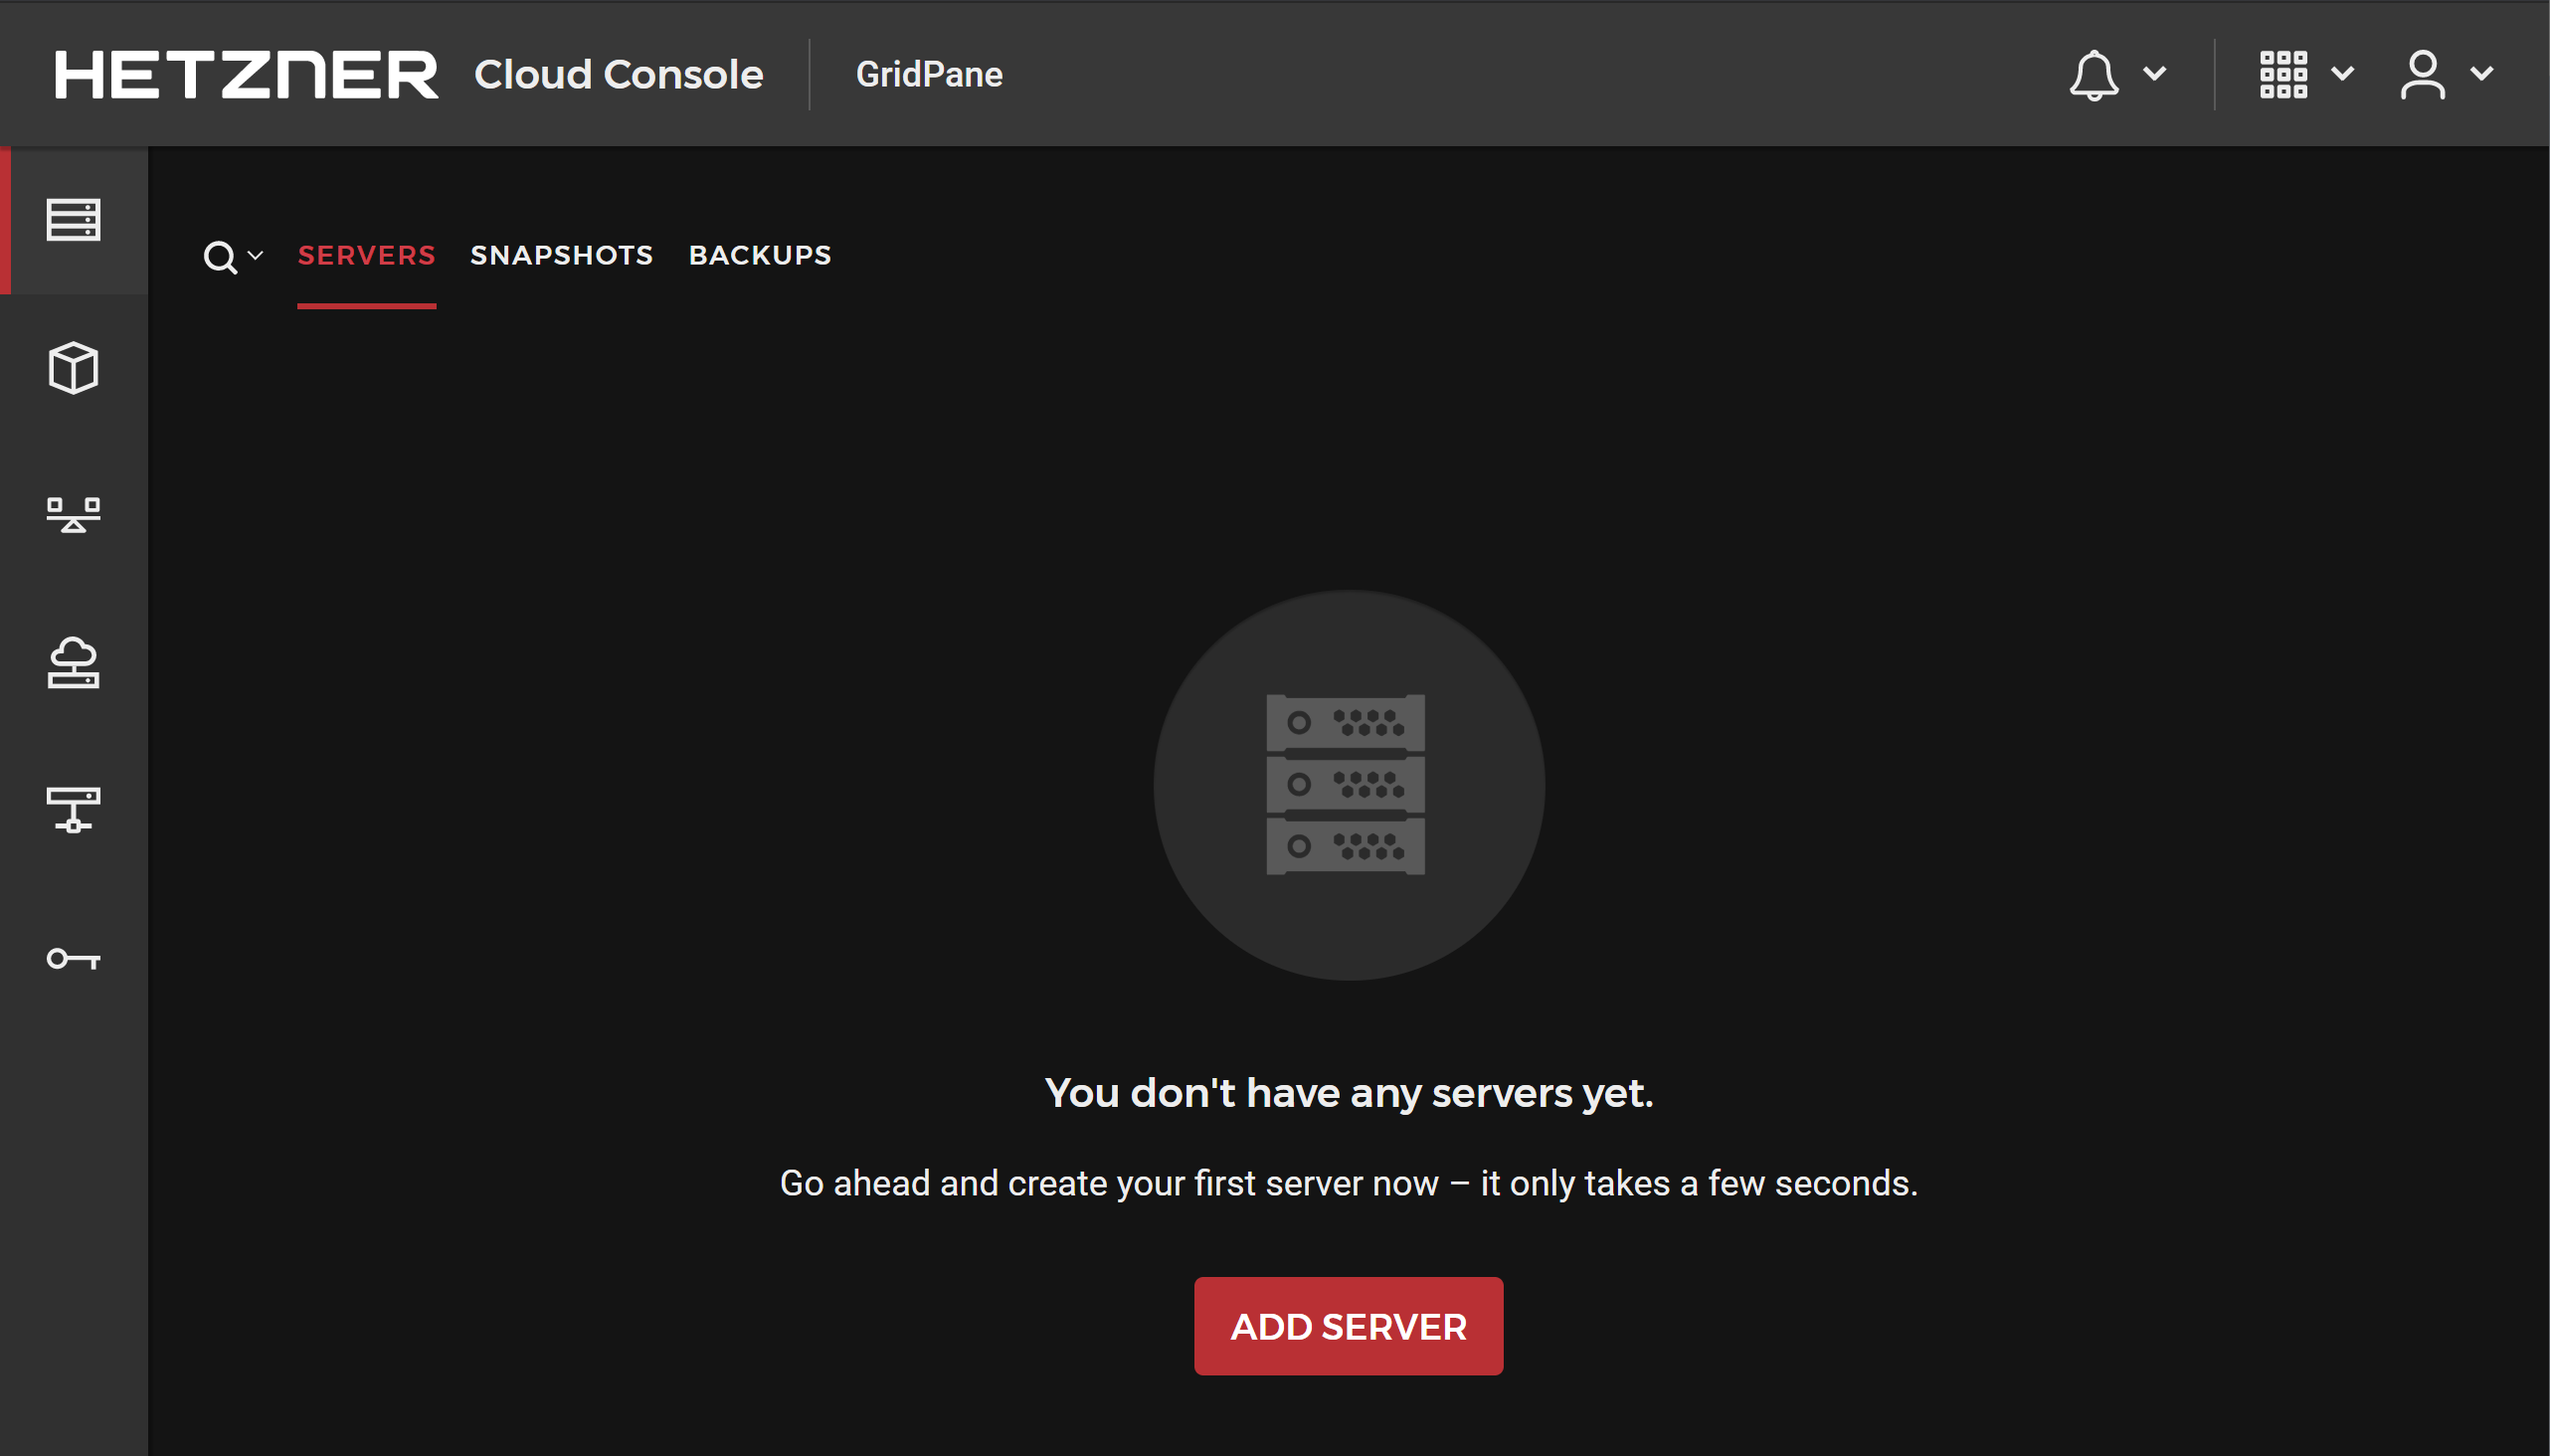
Click the red Add Server button to get started.
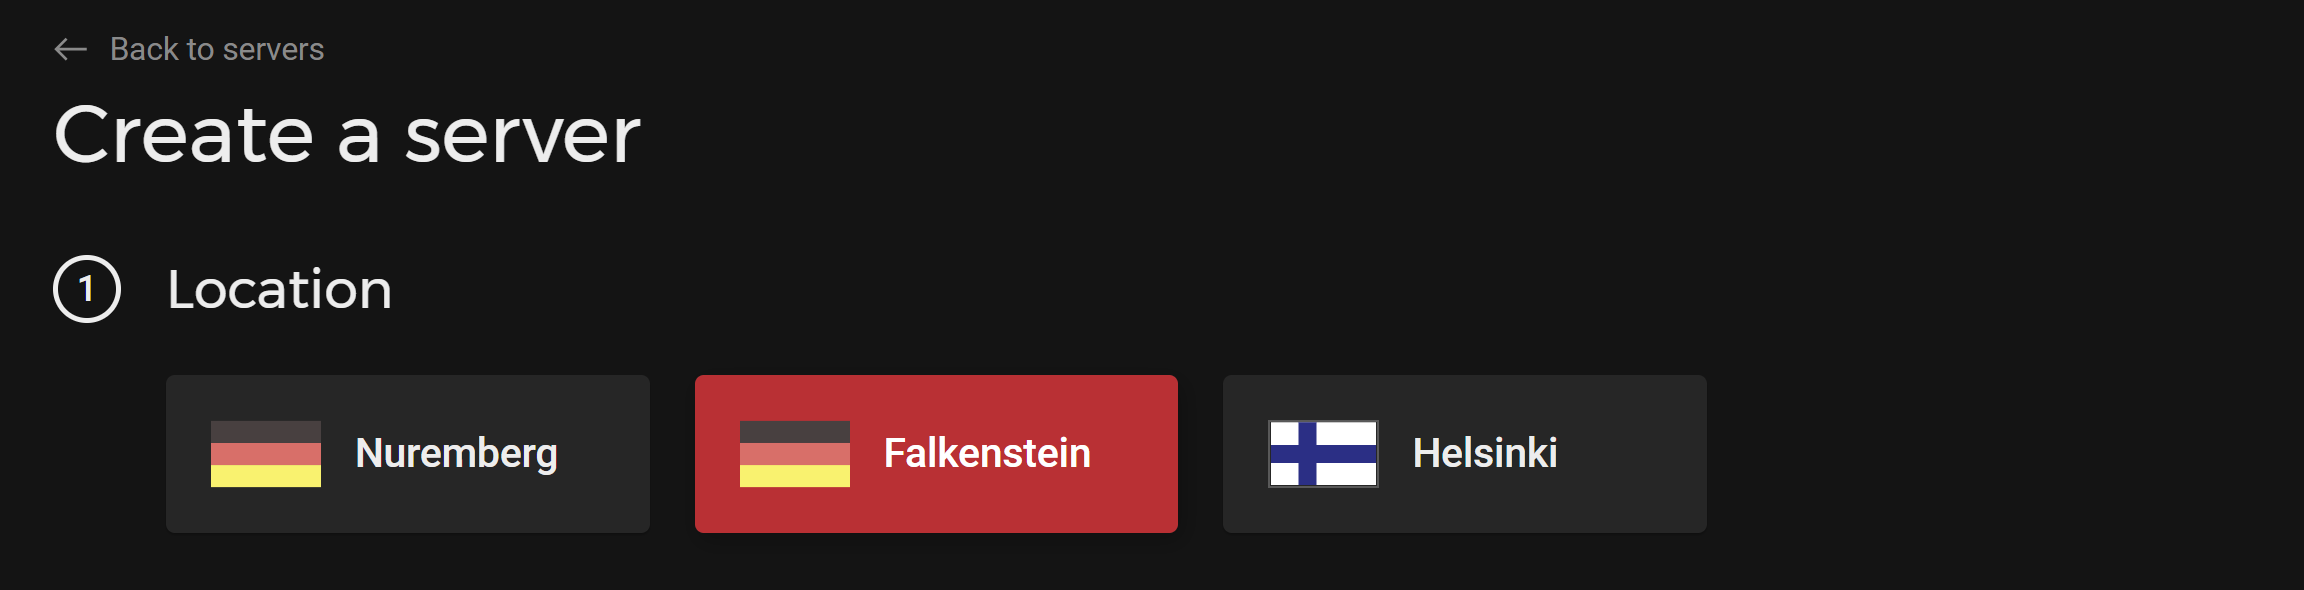
1. Location

Choose your preferred server location. Hetzner have server 2 locations in Germany and 1 location Finland. 
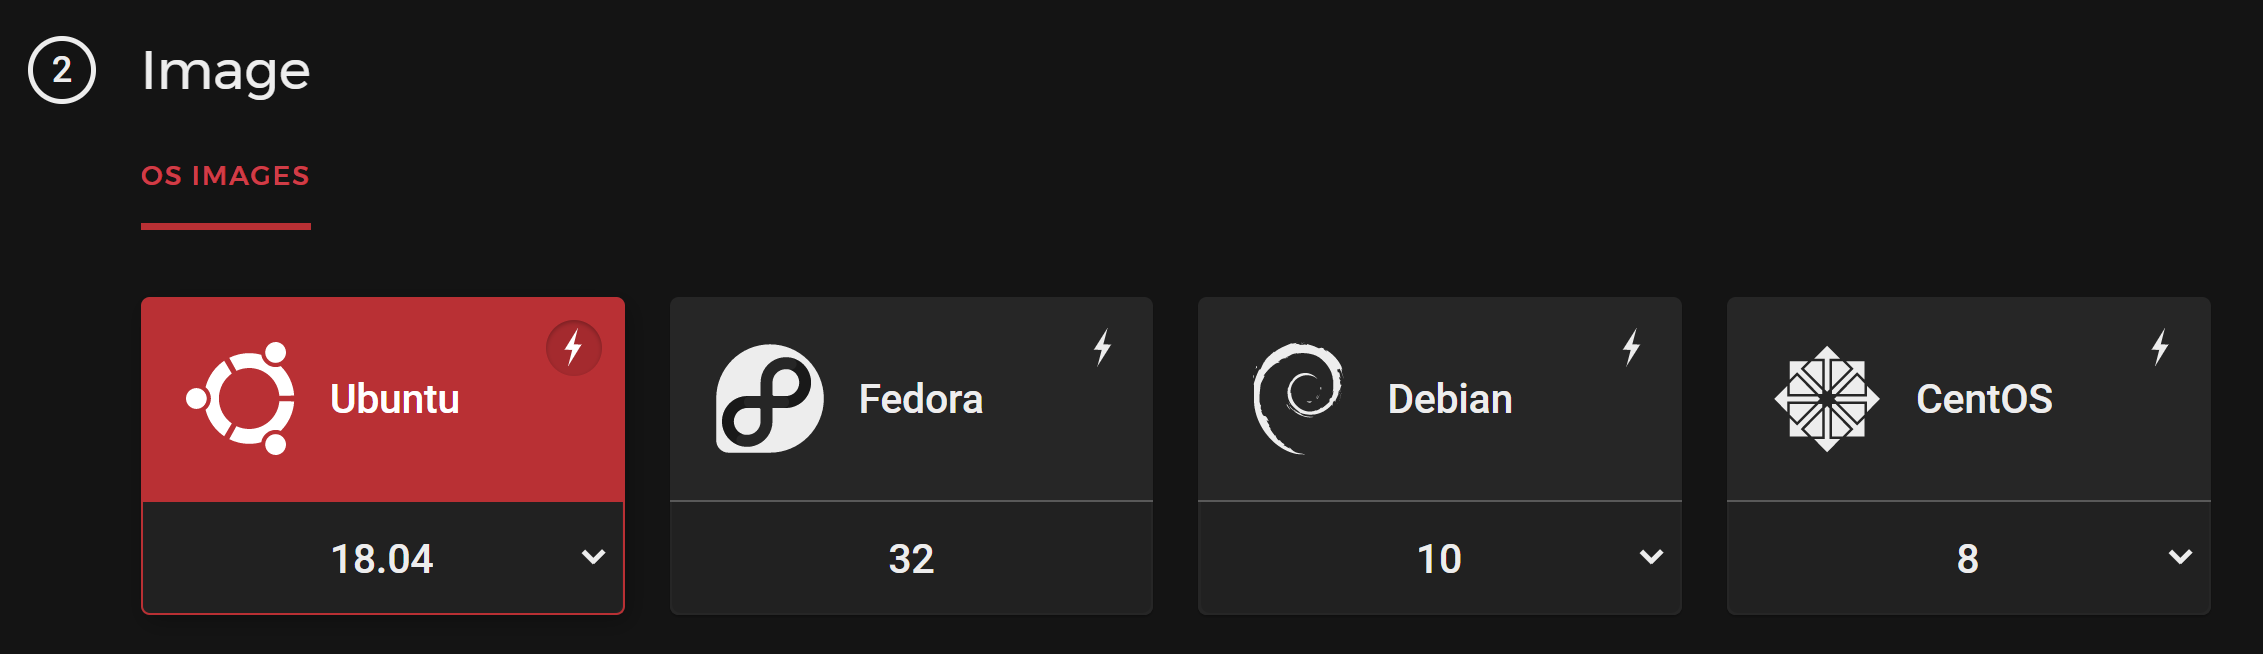
2. Image

Here, it’s important to choose Ubuntu 22.04 (recommended) or Ubuntu 20.04. GridPane will not work with any other platform/Linux distribution.
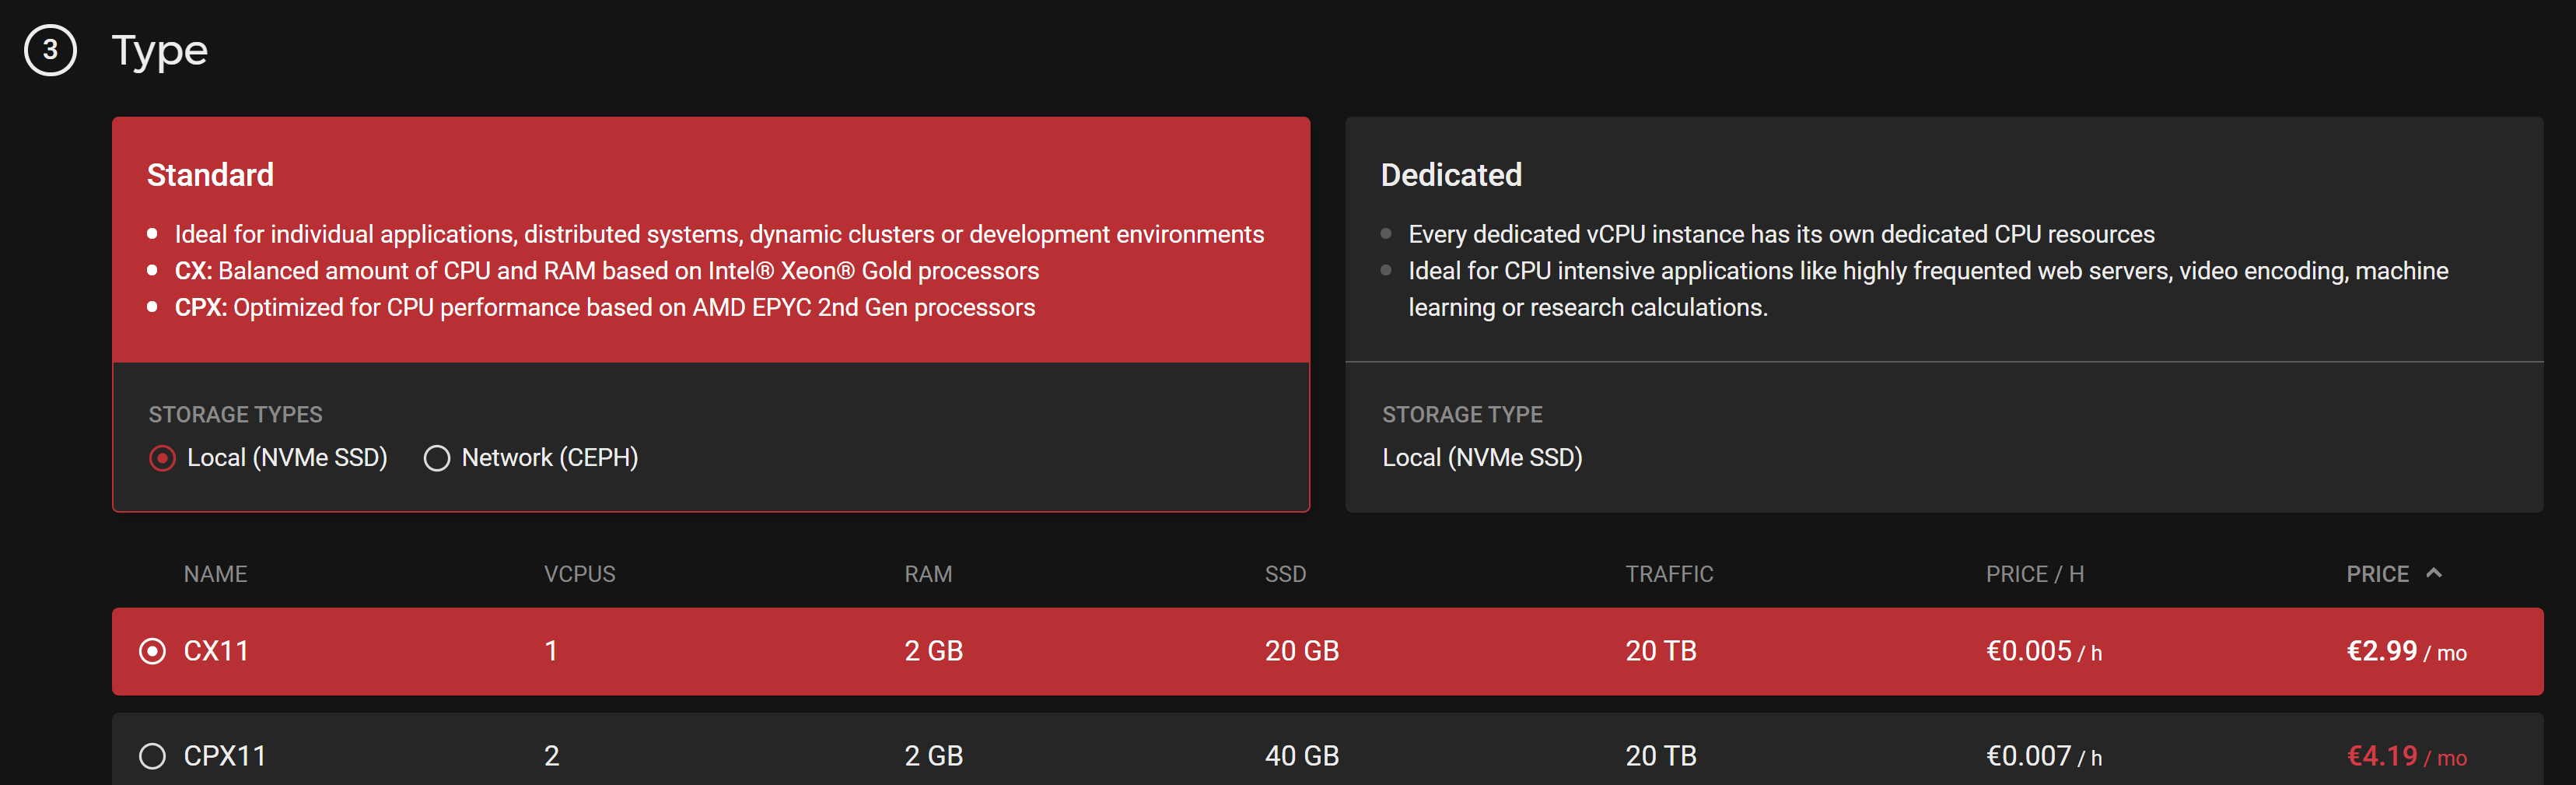
3. Type

Choose your server type (VPS or dedicated) and plan.

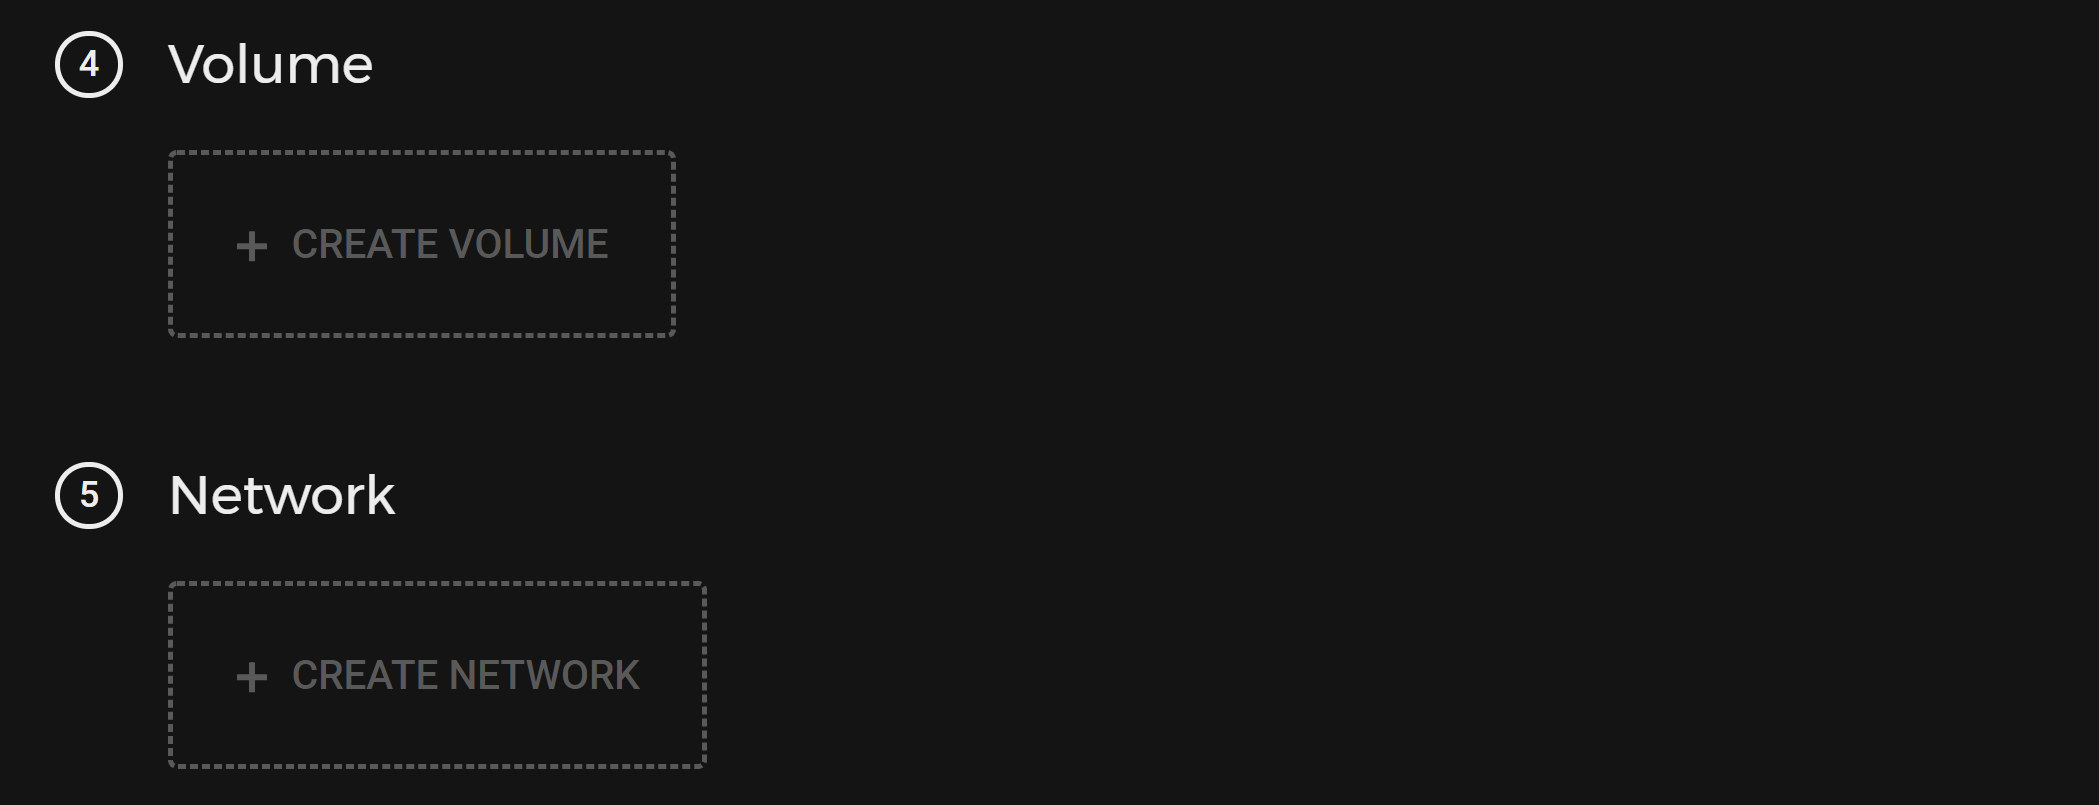
4 and 5. Volume / Network

You can leave these two options empty.

6. Backups

We strongly recommend server backups. They’re excellent insurance, and it’s entirely possible they may save you one day.

Backups cost an additional 20% of your server price (at the time of writing, but likely always) and do not include “Volumes”.

7. SSH Key

Add an SSH key if you wish to do so. This is the most secure way to connect to your server. 

As many new users don’t yet have an SSH key, I’ll provision this server with a password for demonstration purposes, and GridPane will lock down and prevent password logins in the future. In step 5 I’ll explain how to connect both via SSH and via password.

8. Name

Finally, give your server a name that makes sense for you, and you’re good to go.

Finally check all your settings, check the price, and then when you’ve confirmed all is correct hit the Create & Buy Now button.

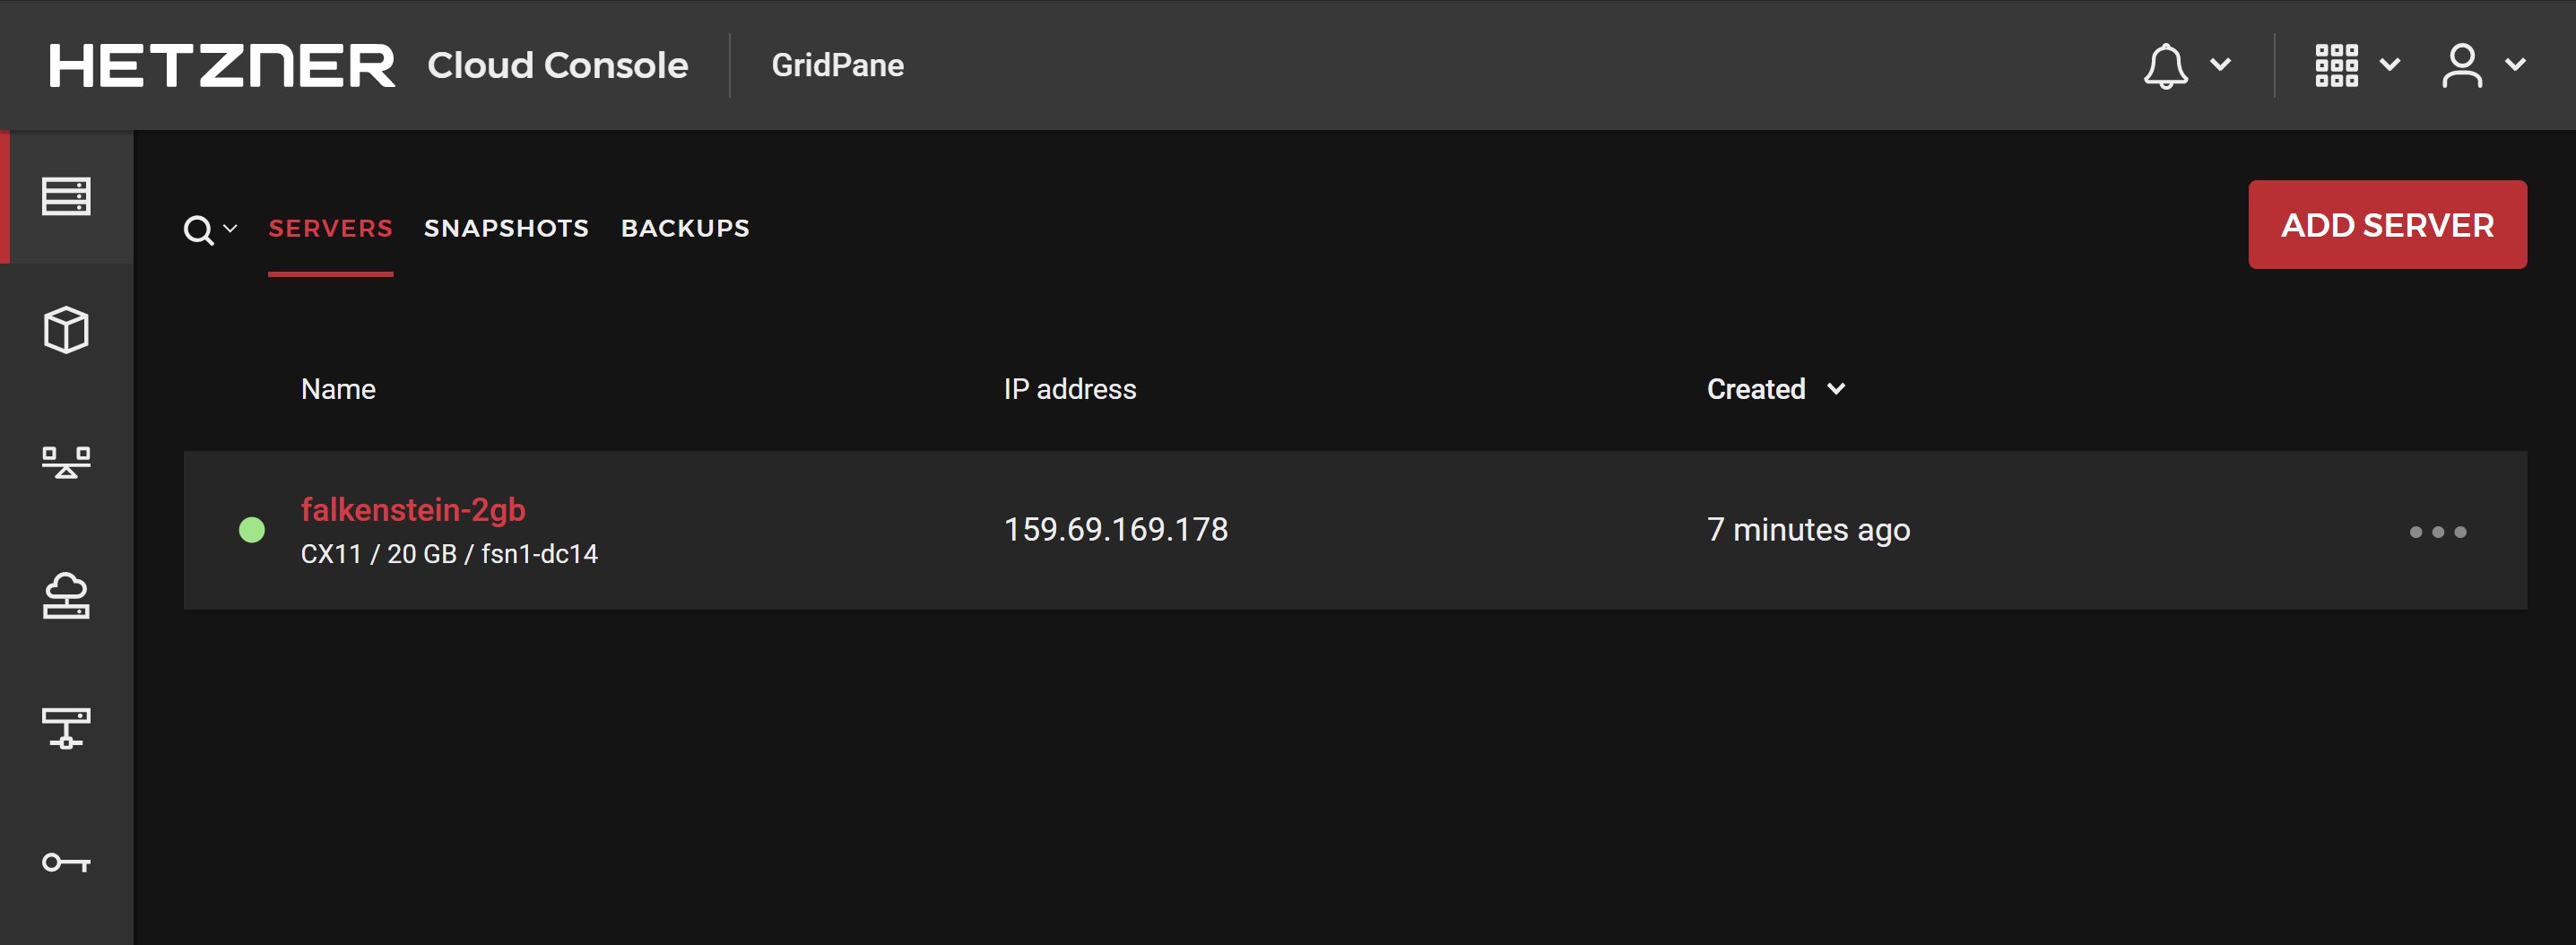
You’ll then see your new server in your servers page:

Step 4. Connect Your Server to GridPane

Back in your GridPane dashboard, click on Custom VPS from the servers page.

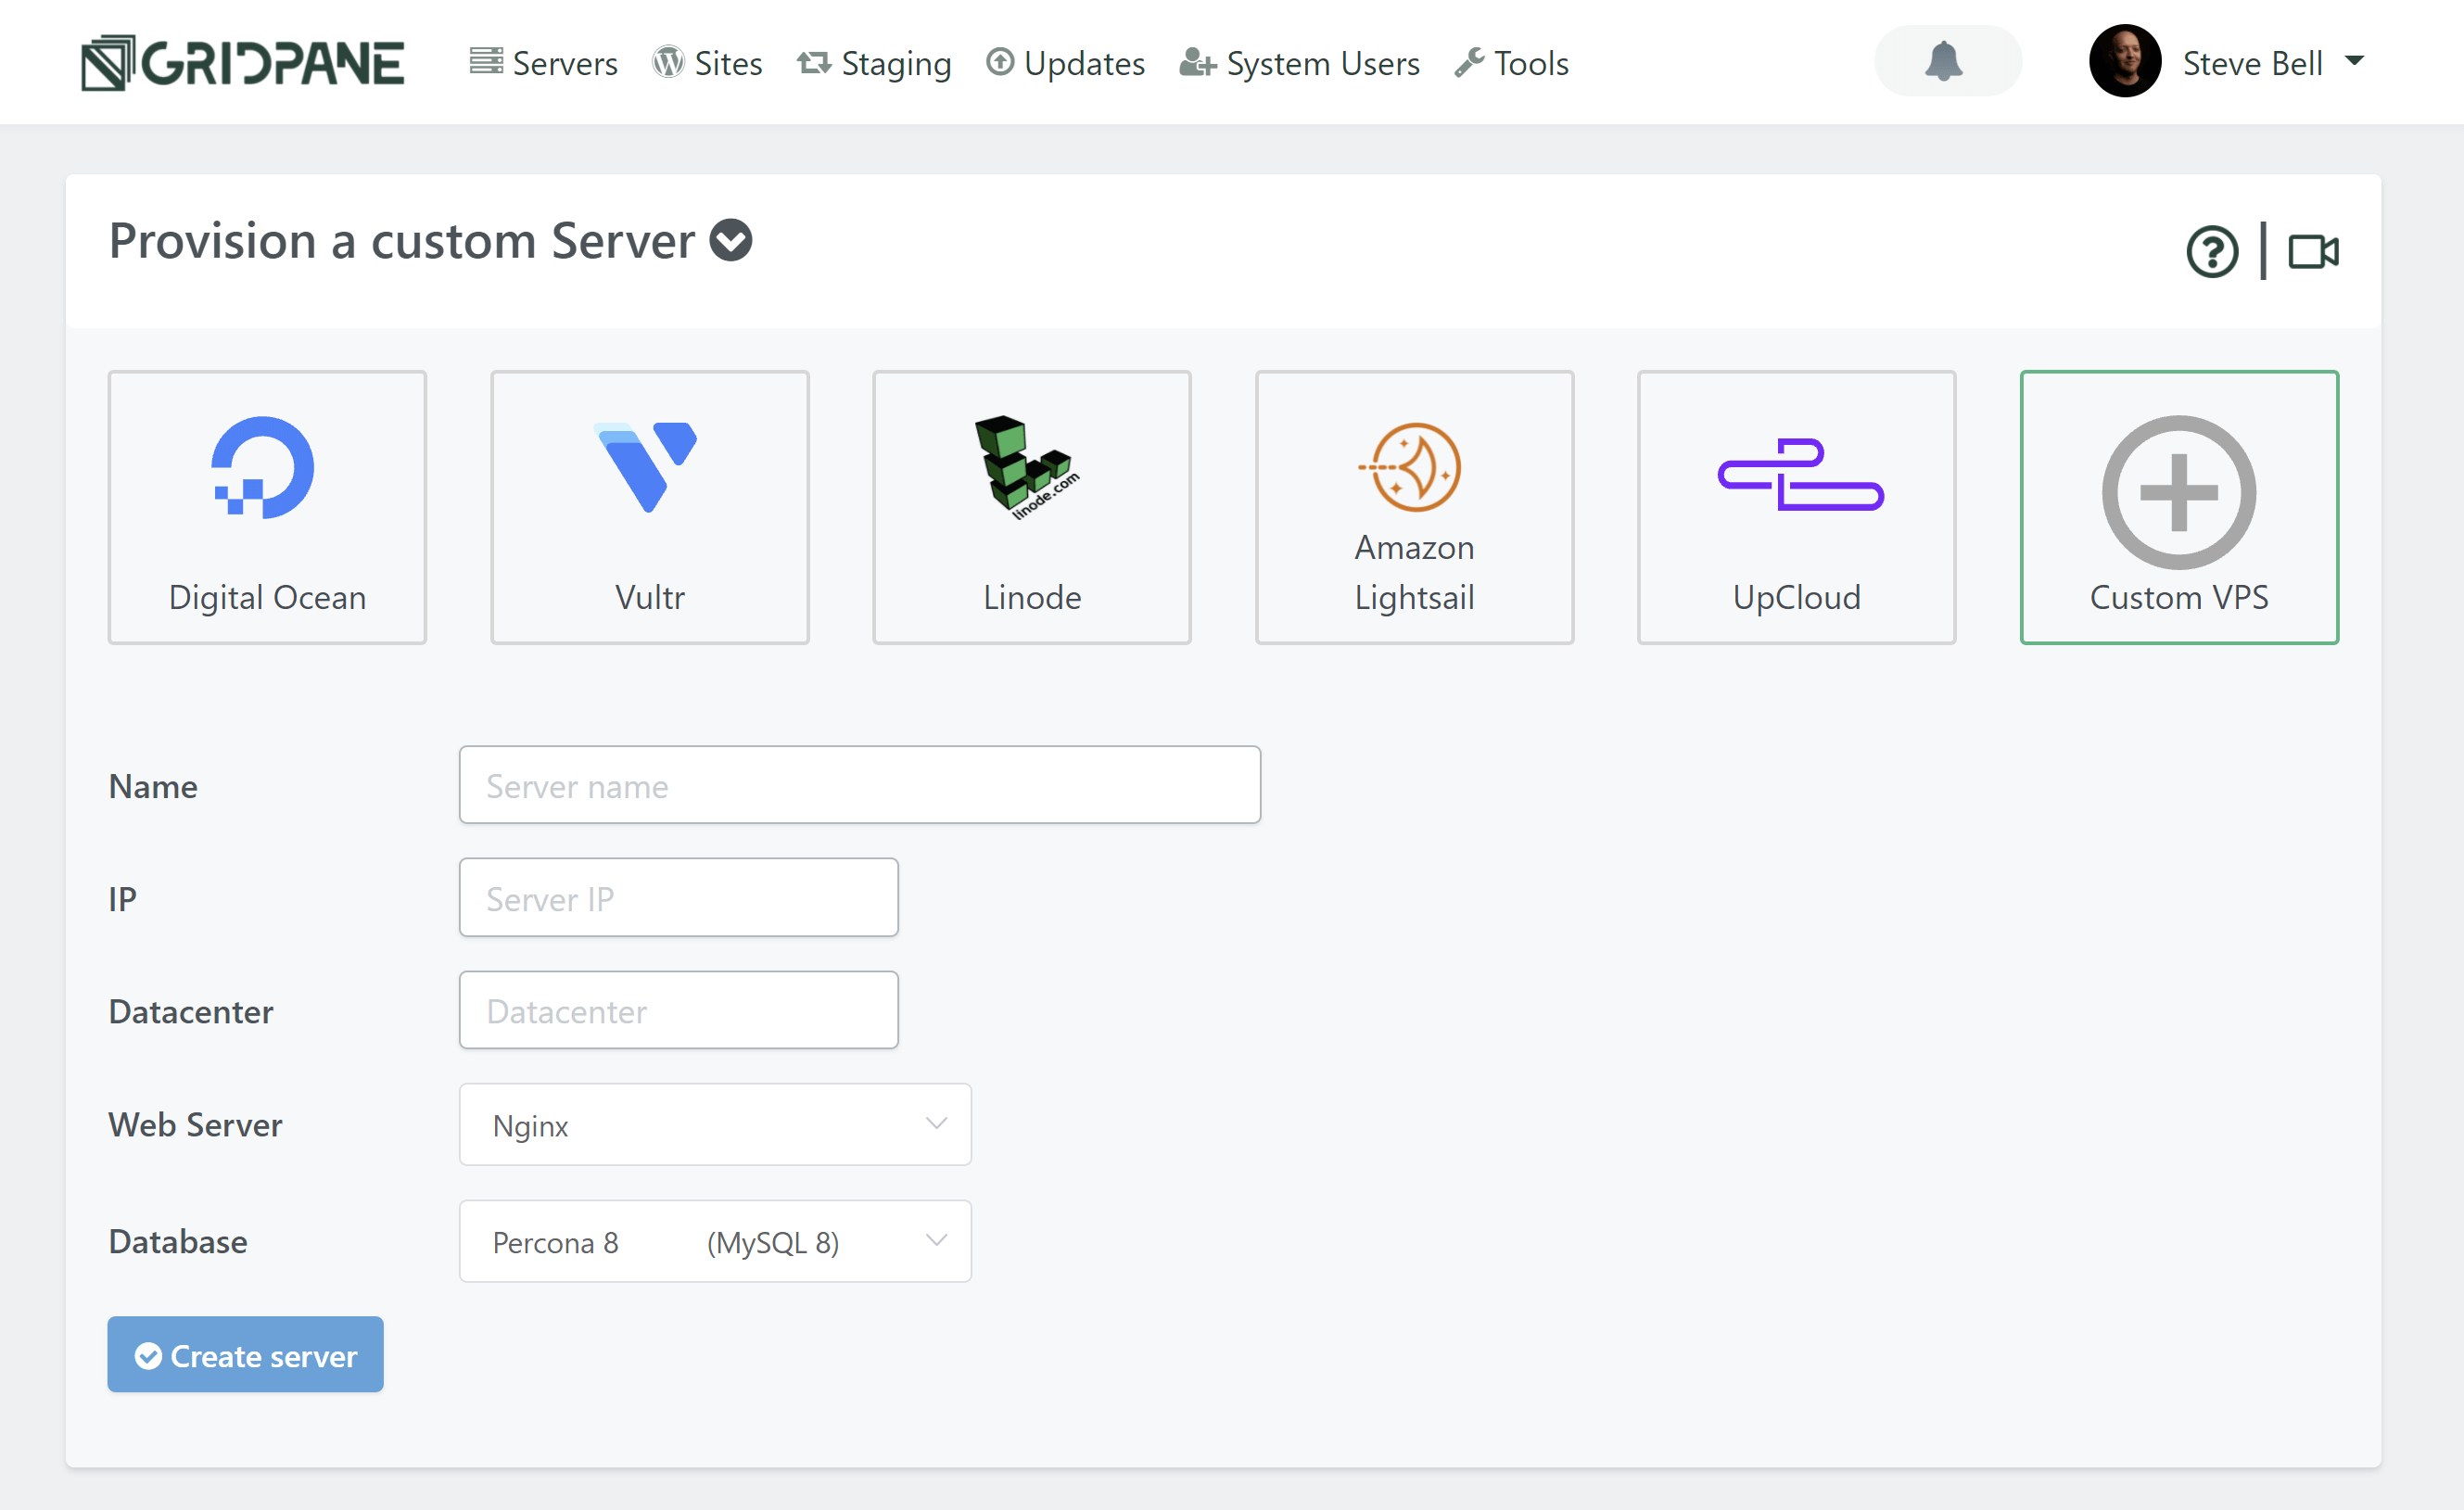
Configure Your Server

Enter the name, IP, and the data center name you wish to use.

Note: The Datacenter name is for your reference only, so feel free to give it a name that makes the most sense for you. As this example server is in Falkenstein, we’ll go ahead and enter this.

Add Your Server IP

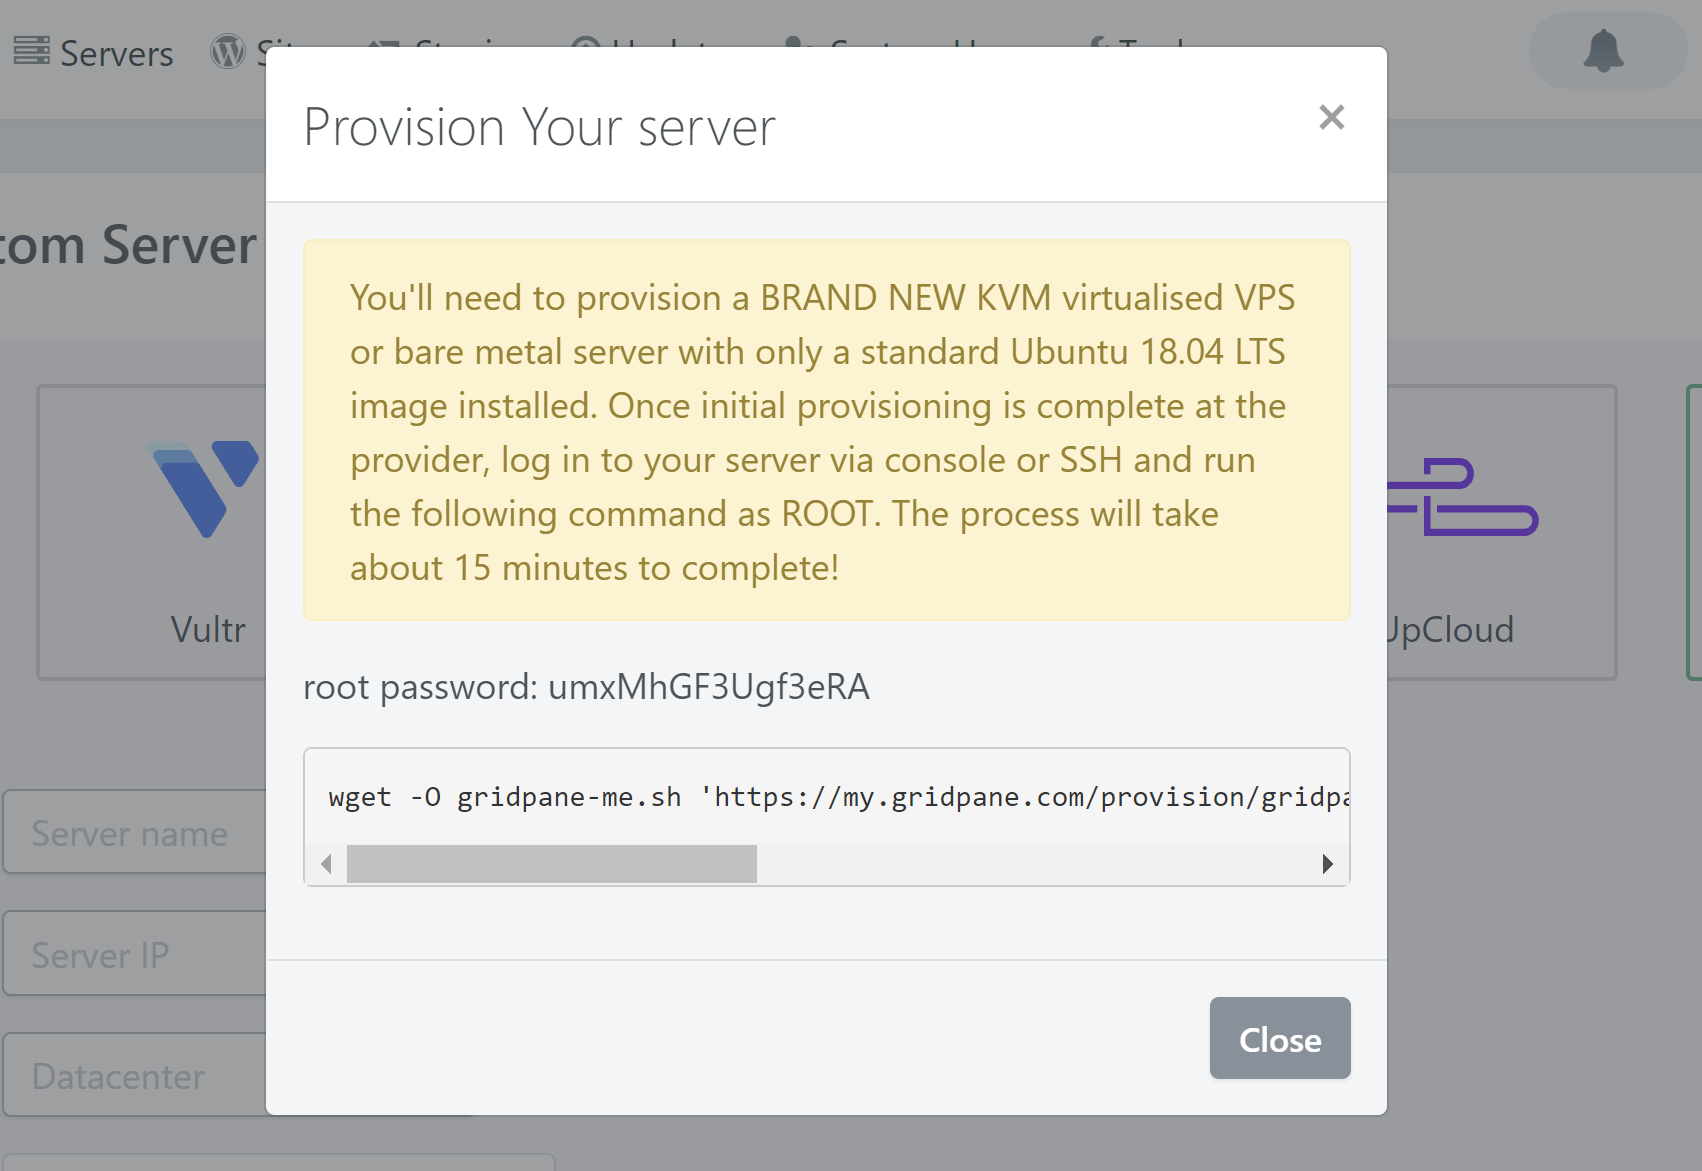
Add your server’s public IP address.

OS Version

We recommend that you choose Ubuntu 22.04 LTS as the default OS.

Choose Your Web Server

You have the option to choose between Nginx and OpenLiteSpeed. This is largely personal preference. If you’re unsure which one to choose, start with Nginx.

Choose your database

If you’re on the developer plan you’ll have the option to choose between Percona and MariaDB for your database. 

Percona is a drop-in replacement for MySQL and includes security, availability, and availability features that are only available in enterprise MySQL. It has removed query caching, and it has more advanced aspects for things like storing and managing JSON as a storage format. 

MariaDB could mean fewer issues importing old WordPress websites from low-quality hosting environments. It will likely use less RAM than Percona and may offer performance benefits for some websites.

Both are excellent options.

Provider backups

We highly recommend that you enable provider backups. It’s a small price to pay for the extra insurance they offer.

Additional note: You will need to set this up directly at your server provider when using our custom server option.

Create your server

Click the Create Server button when you are happy with your configuration choices.

Once you click Create Server, a popup modal will contain your root password and a command-line string. Copy that string and paste it into a text document – you’ll need it in a moment.

Step 5. Connect to Your Hetzner Server

If you added your SSH key, then you can connect to your server using your preferred terminal (Putty, Terminus, Powershell, etc).

The first time you connect to any new server, you’ll be prompted with a security alert about the server fingerprint. Click Yes to continue.

If you didn’t add an SSH key, then Hetzner will have emailed you the root password. You’ll need this now to log in.

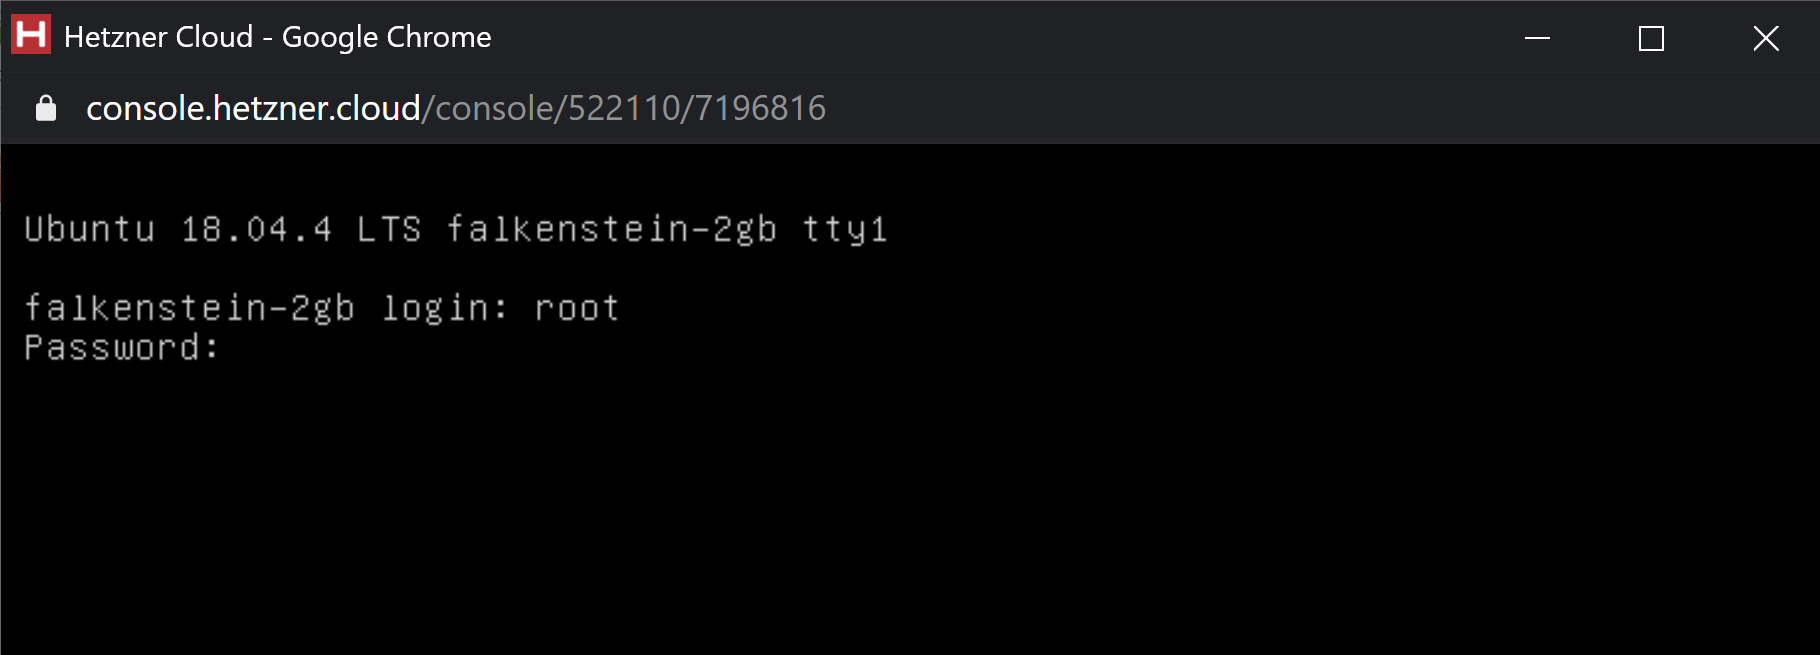
Connect Via Hetzner’s Console

Hetzner has an integrated console that you can use to connect to your server for the first time. You can find this on your servers page by clicking on the three dots on the right-hand side of your server’s bar and choosing console from the dropdown. This will immediately open the console in a new window:

Here, first type:

root

Then, enter the password that Hetzner emailed to you by right-clicking inside the terminal and selecting Paste.

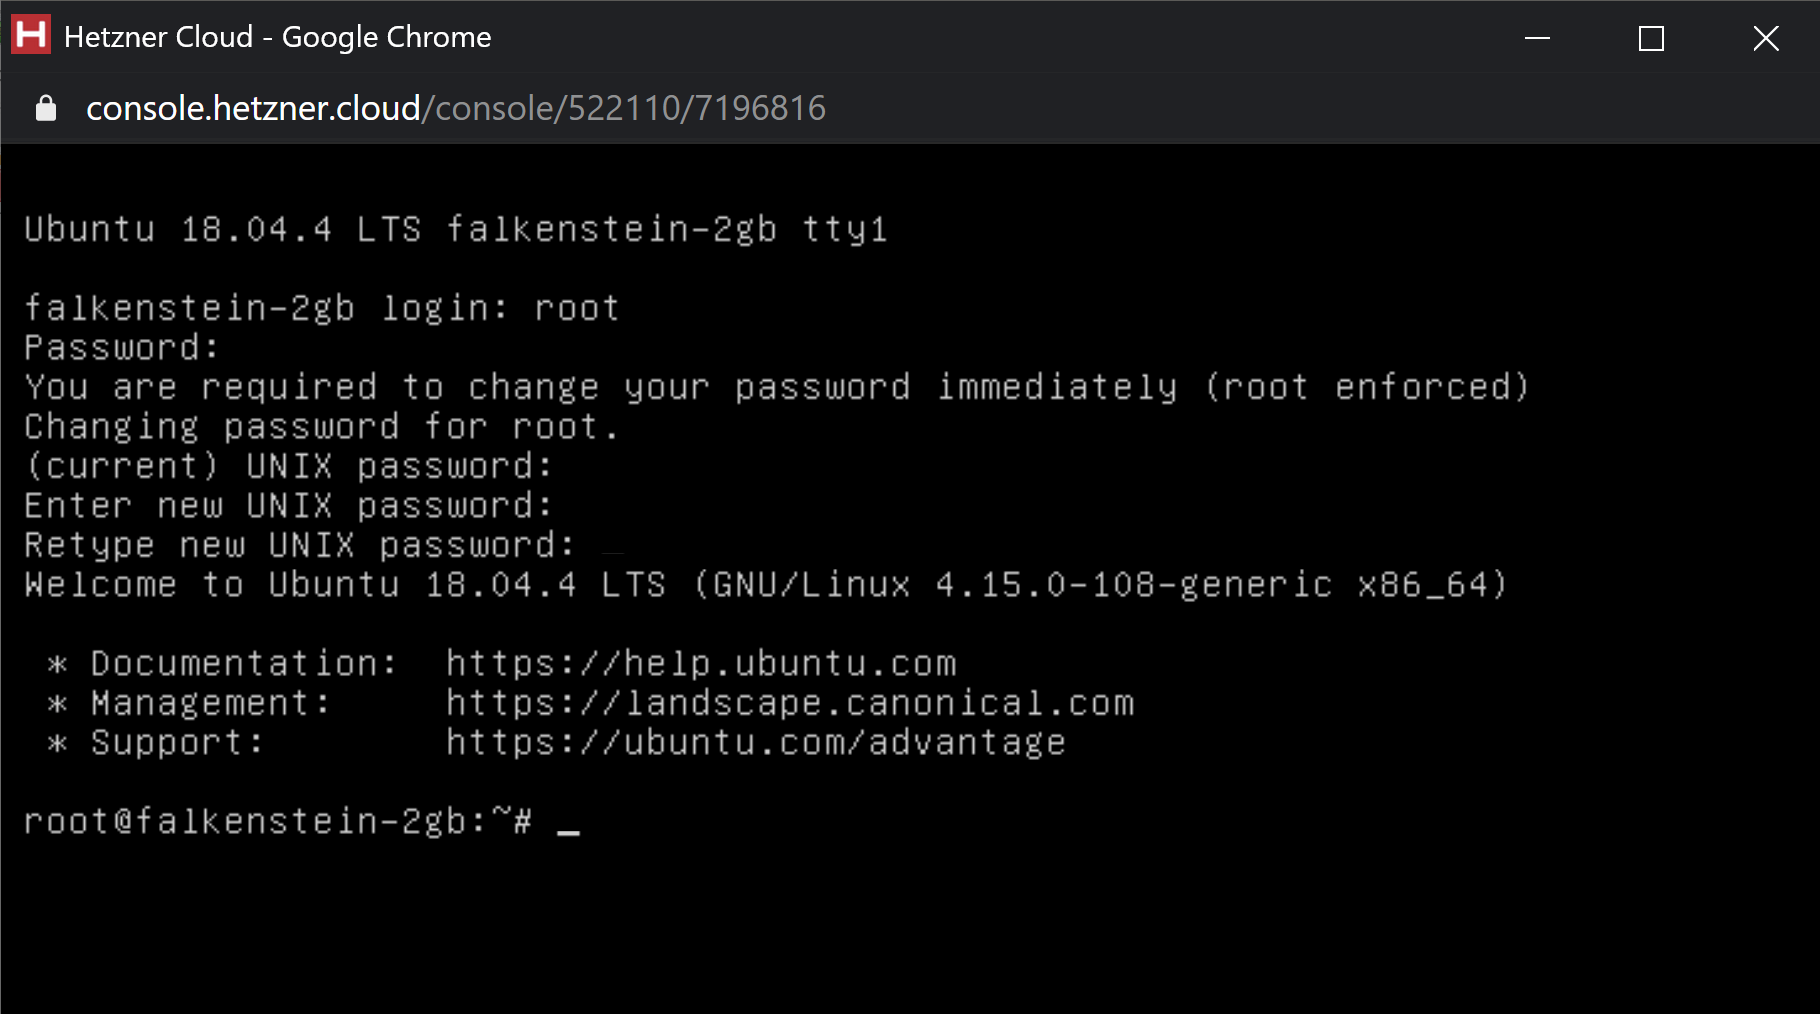
You’ll be forced to reset your password: –

  1. First, re-paste the password Hetzner sent to you
  2. Enter your new password
  3. Re-enter your new password

You’re now good to go!

Step 6. Provision Your Server

Hetzner states that they now only ship with minimal images. In response to this, and other server providers potentially also shipping with minimal images, our provisioning scripts have been updated to take this into account.

IMPORTANT

Hetzner sometimes changes the formatting of the code. For example, it will change https:// to https;//, or append http:// before https:// like this: http://https://provisioningcode….. If you receive an error after pasting, double-check that Hetzner hasn't made it's own changes to our code and try again.

2. Enter Your Provisioning Code

We’re now logged in as root and it’s time to paste in your provisioning code that you copied in step 4.

Right-click> Paste and then press Enter. The code will do the rest. A few minutes later, you’ll see the following message in the image below, and you can then close the terminal by typing:

exit

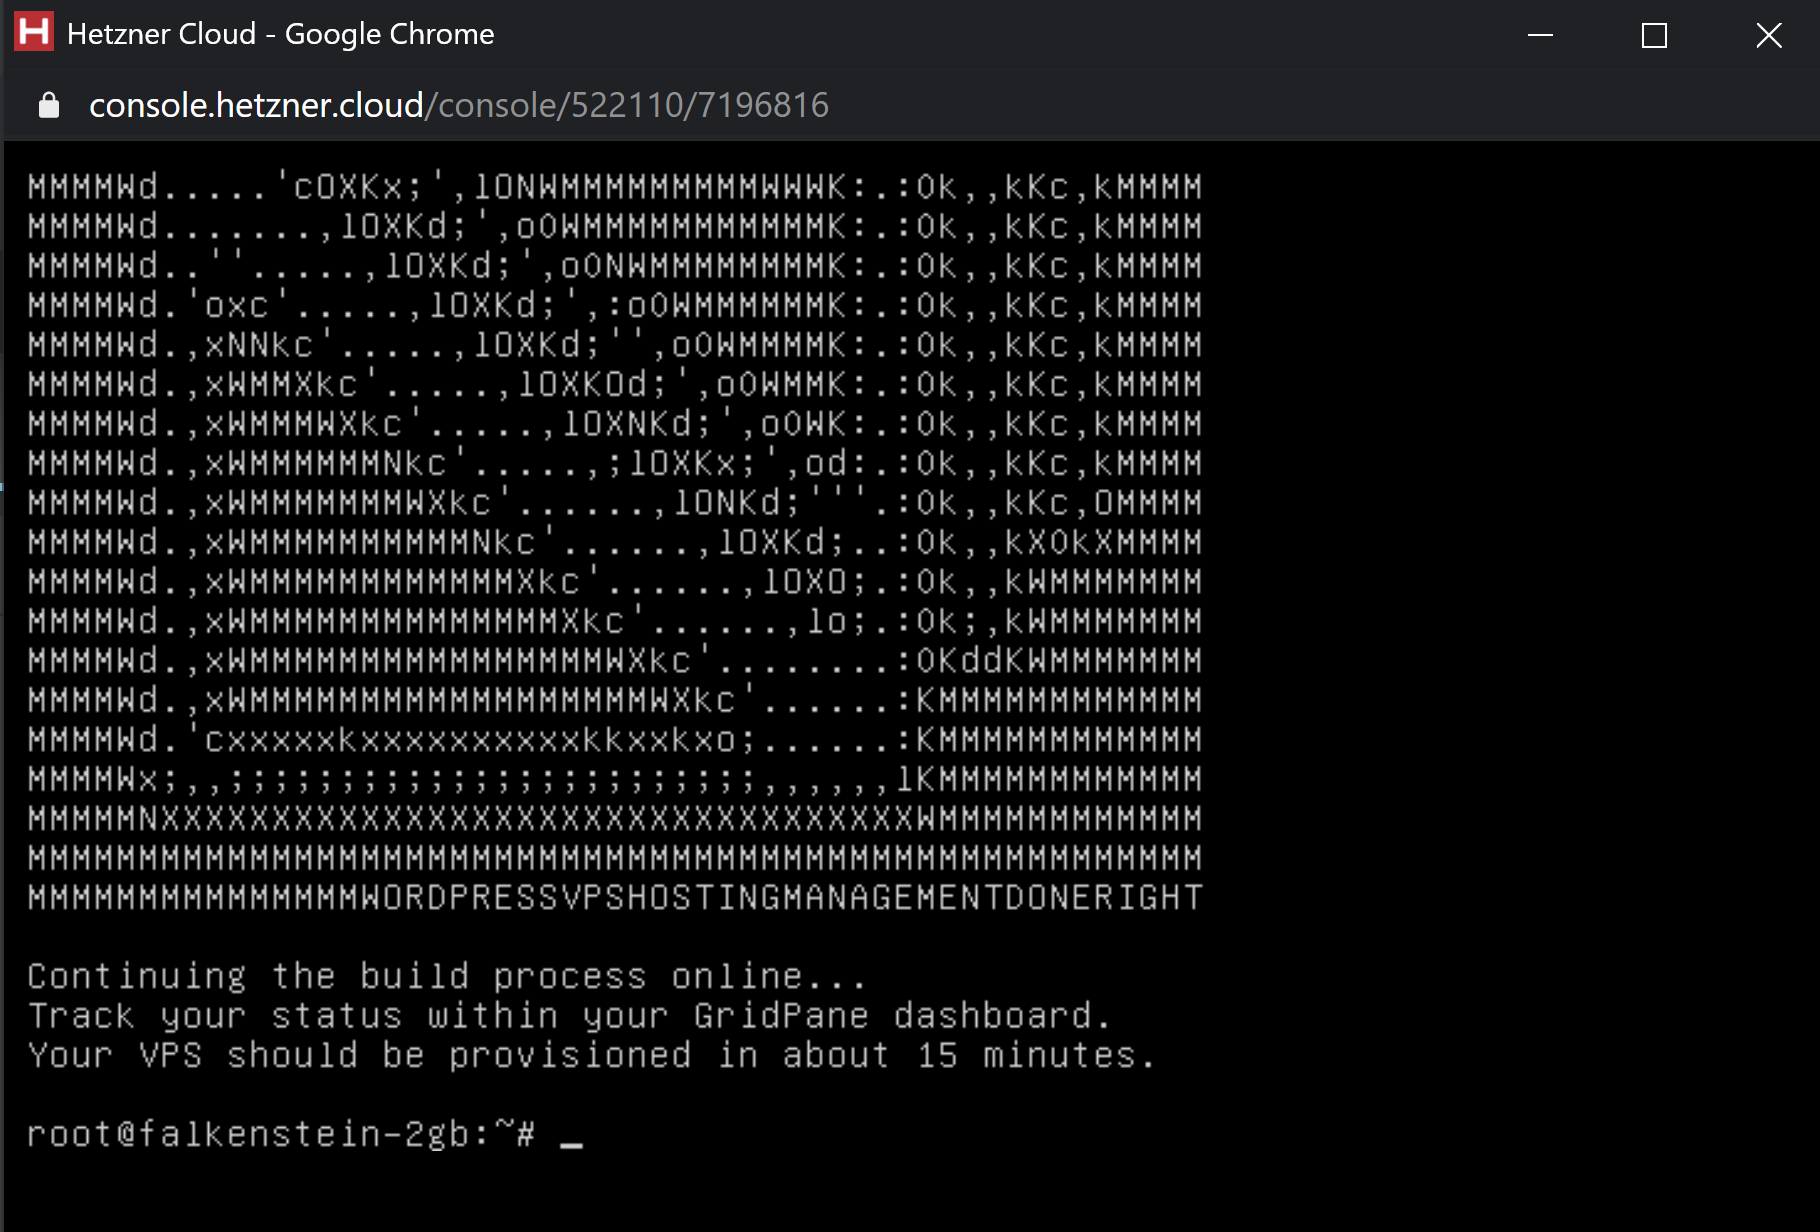
Step 7. Wait for Approx 10 Minutes

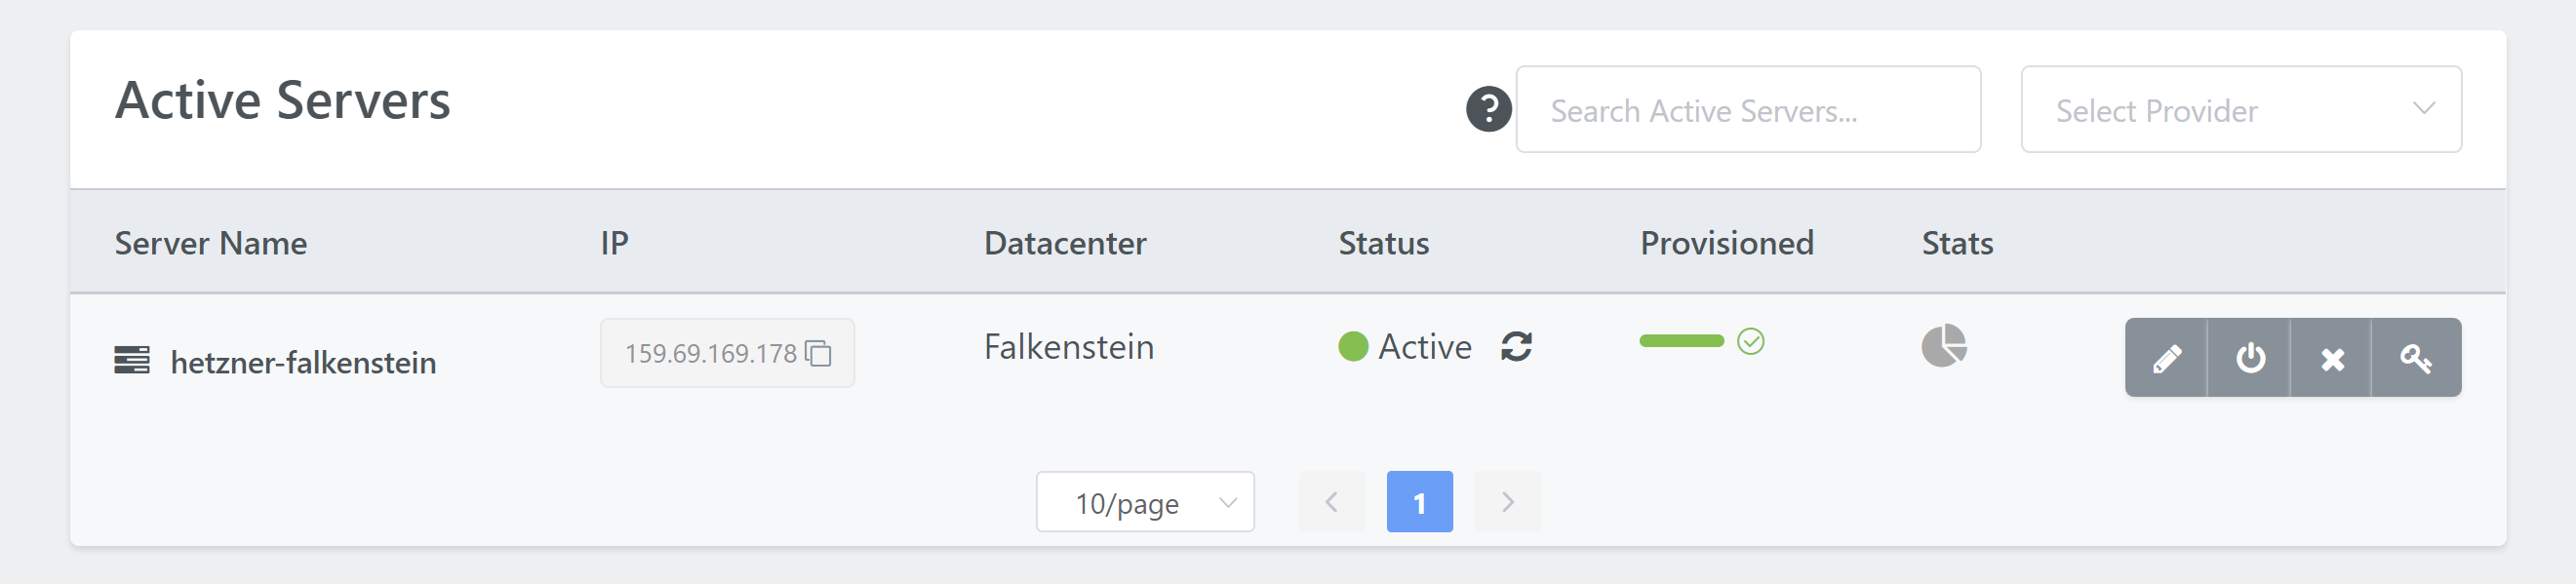
You can monitor the rest of your server’s provisioning progress inside the Servers page of your account. Approximately 10 minutes later, it will be ready to use inside your GridPane account.

Congratulations! Next Steps

Now that your server is live, you’re ready to start creating and configuring new WordPress websites.

To deploy a site, click on the Sites link in the GridPane main menu to begin the process. We have a separate article that details the steps in detail for you.

Common Reasons for Hetzner Servers Failing to Provision Correctly

Hetzner is a provider that our team here at GridPane thinks highly of. That said, there are some common issues we routinely see in support related to provisioning their servers.

1. Arm64-architecture Servers

These can be pre-selected by default, but these servers will not work with GridPane. Please ensure you are NOT trying to provision an Arm54 server.

2. Hetzer Alters Our Provisioning Code

This is also detailed above, but when pasting our provisioning code into Hetzer’s console, the “https://” part may be altered, which will need to be manually corrected.

3. Hetzners IP ranges have been banned by Google Cloud

If your IP ranges have been banned by GCP, your server will not be able to connect to our platform, and it will fail at 10%. There is nothing that we (GridPane) can do about this, and it is an issue you will need to contact Hetzner support for further information and assistance.