How to Open the Website Configuration Modal
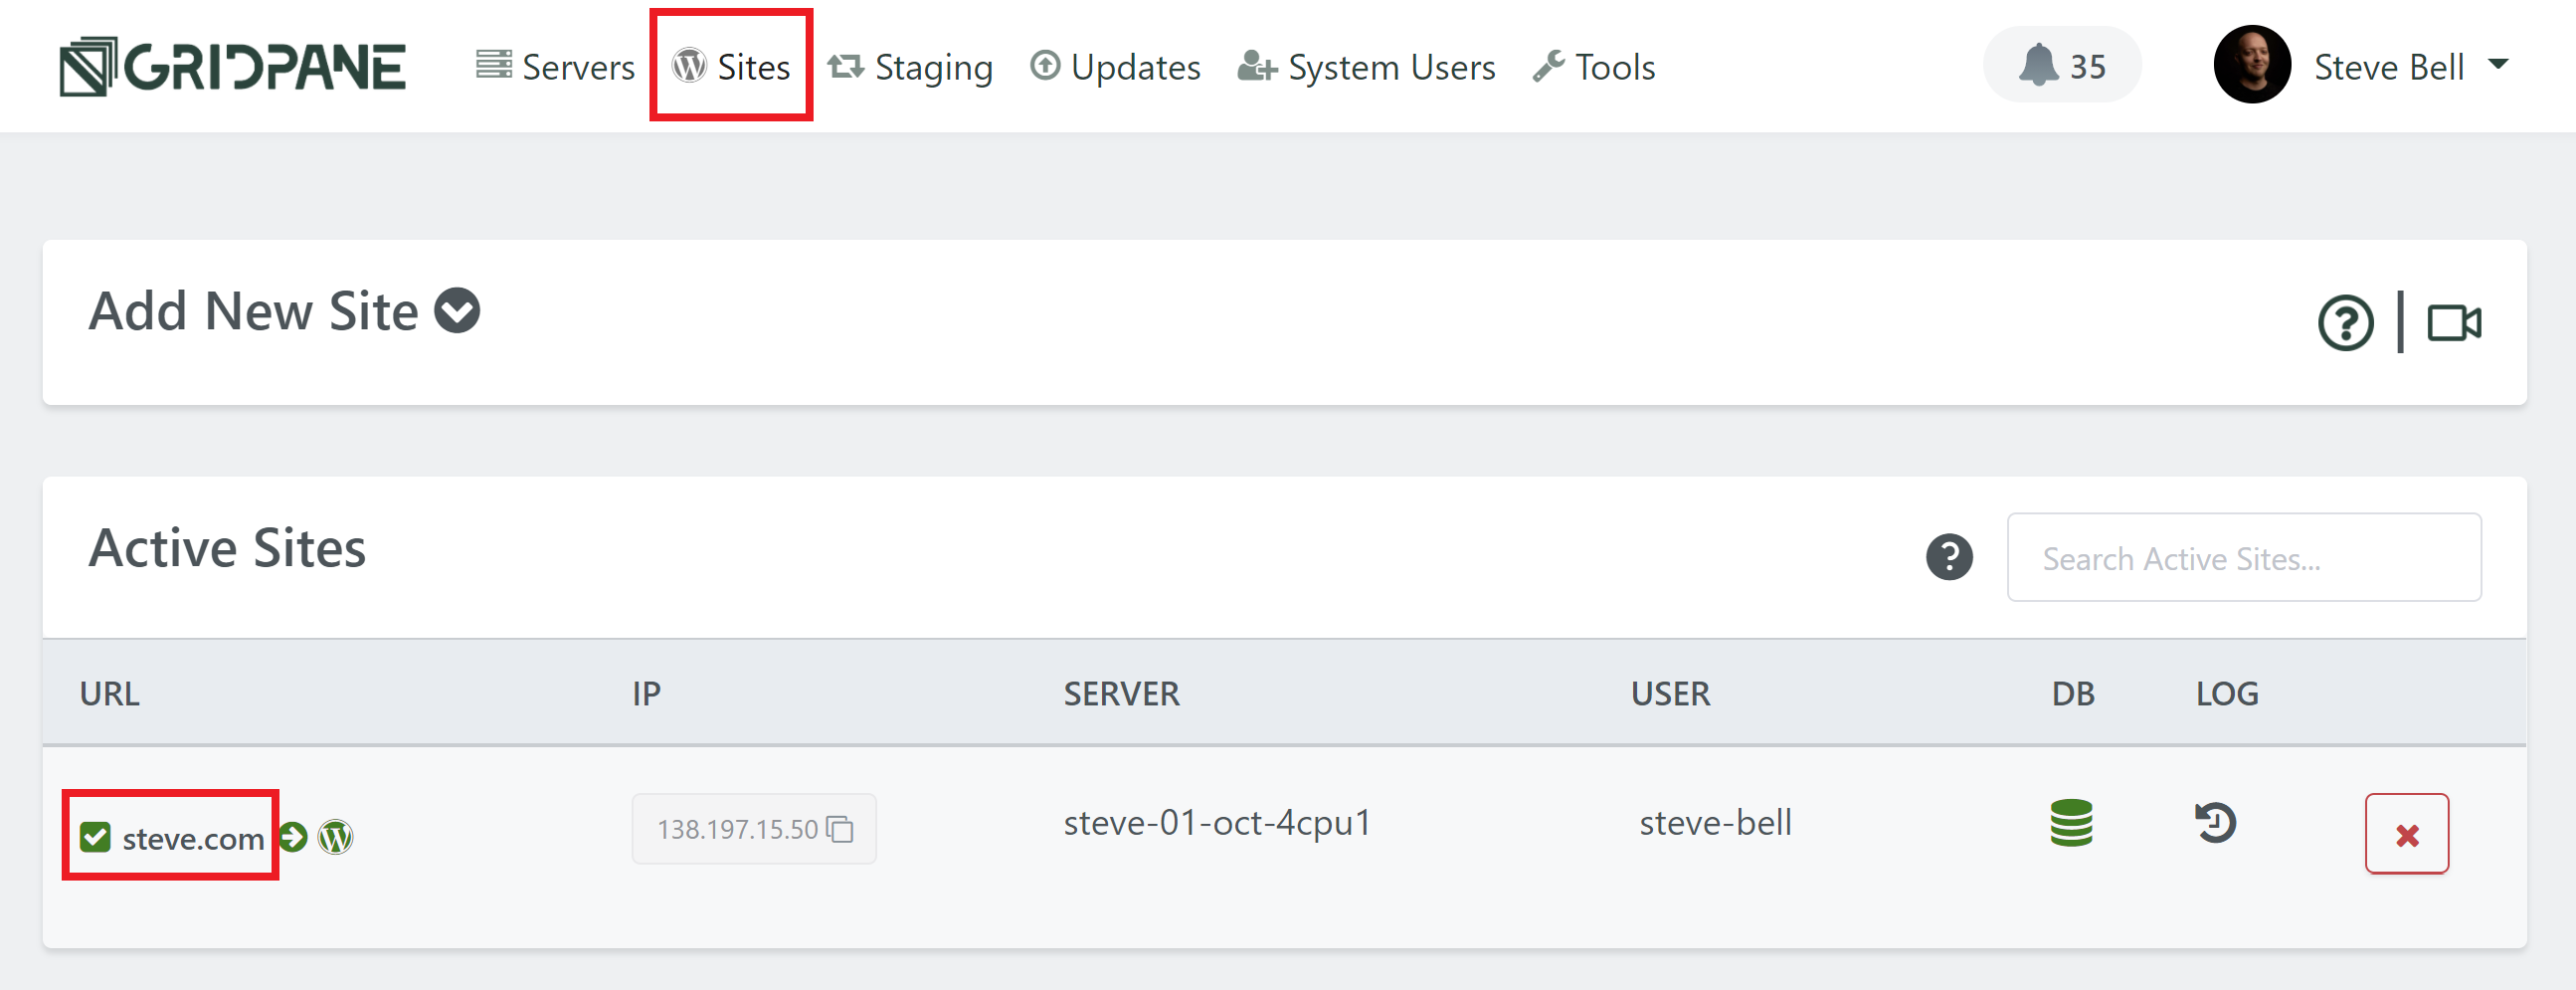
If your brand new to GridPane and are setting up your first websites, you can access the configuration modal by heading over to the Sites page inside your GridPane account, and then clicking on the name of the website you would like edit:
Syncing Your Firewalls
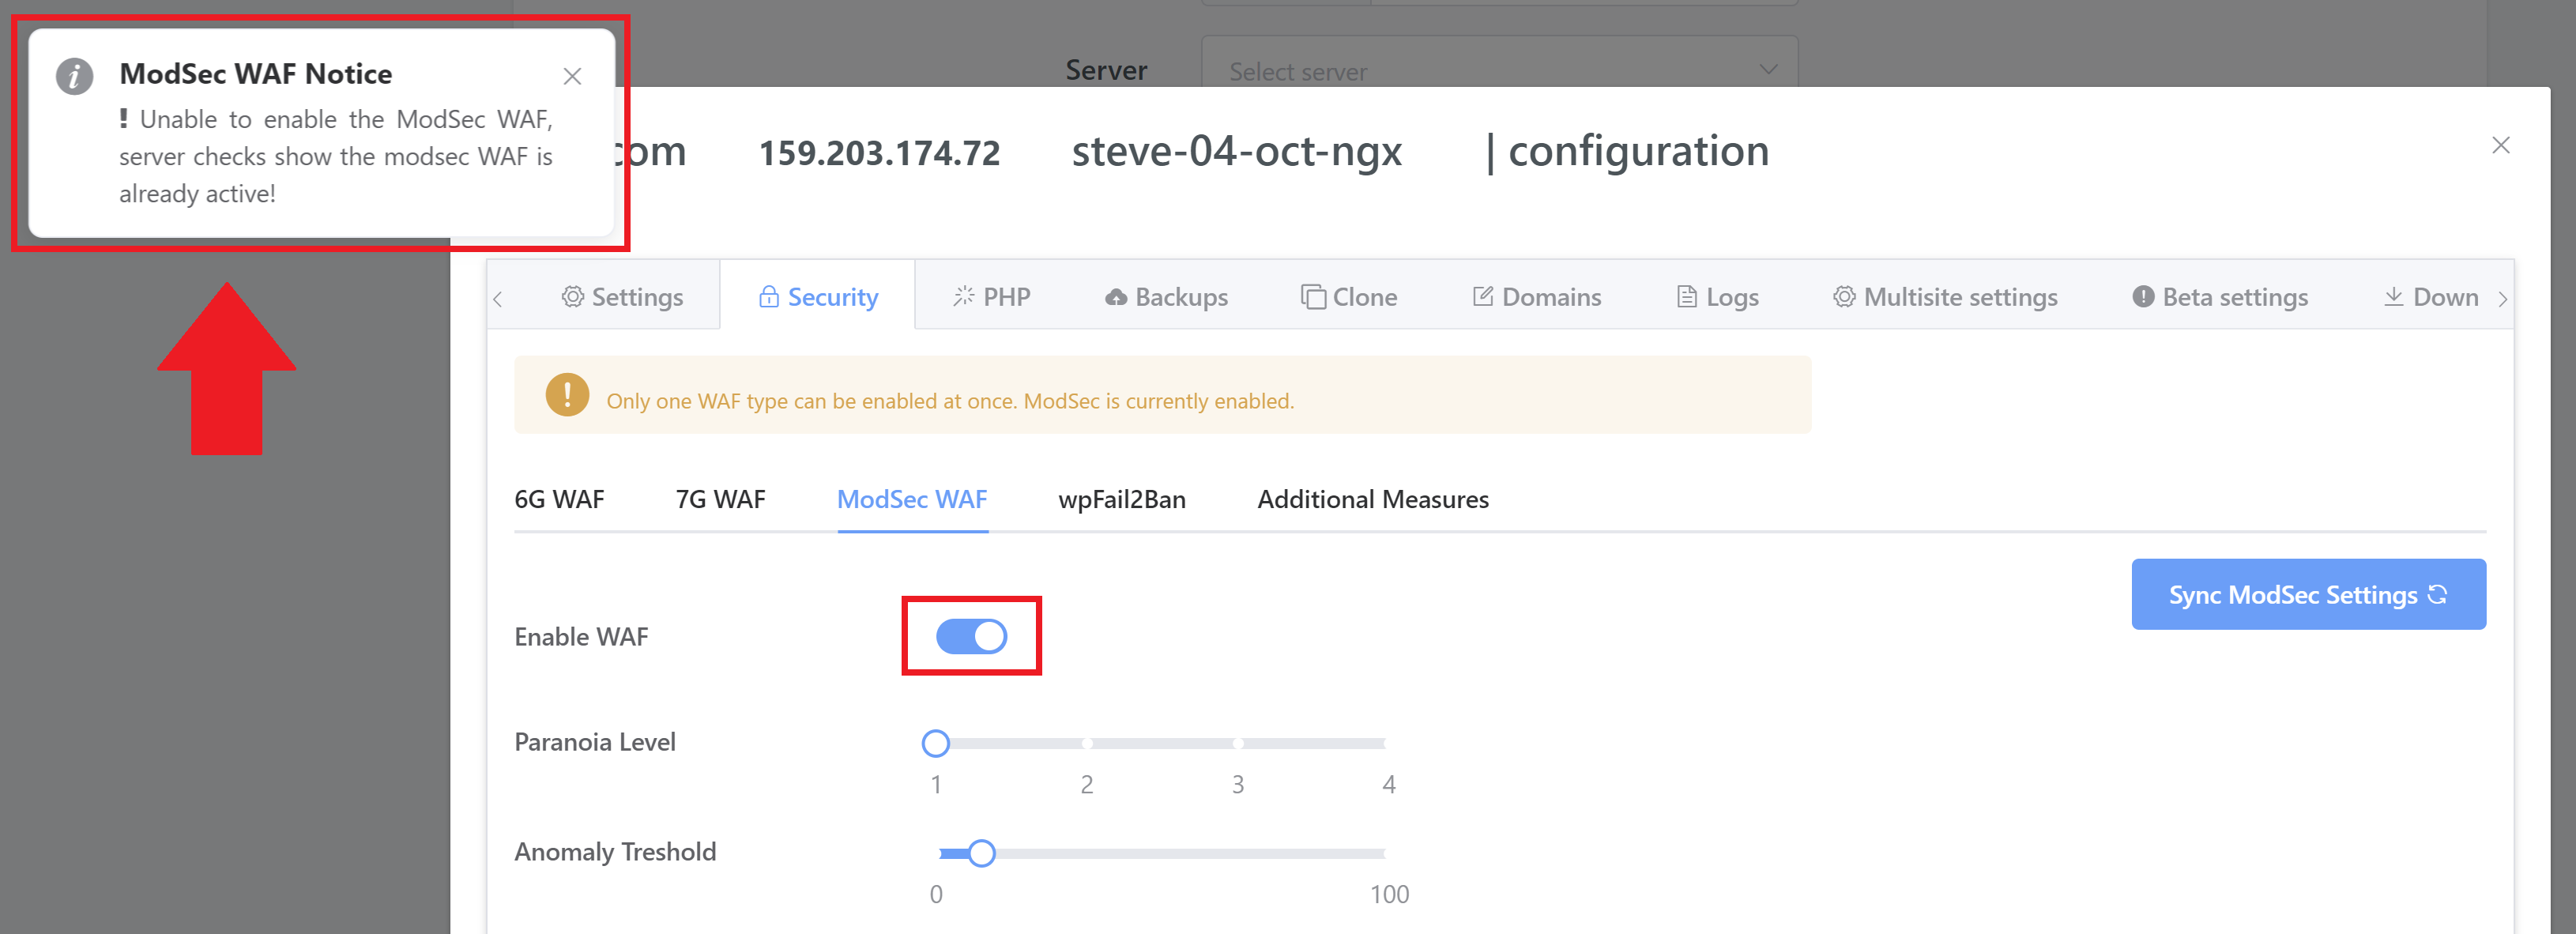
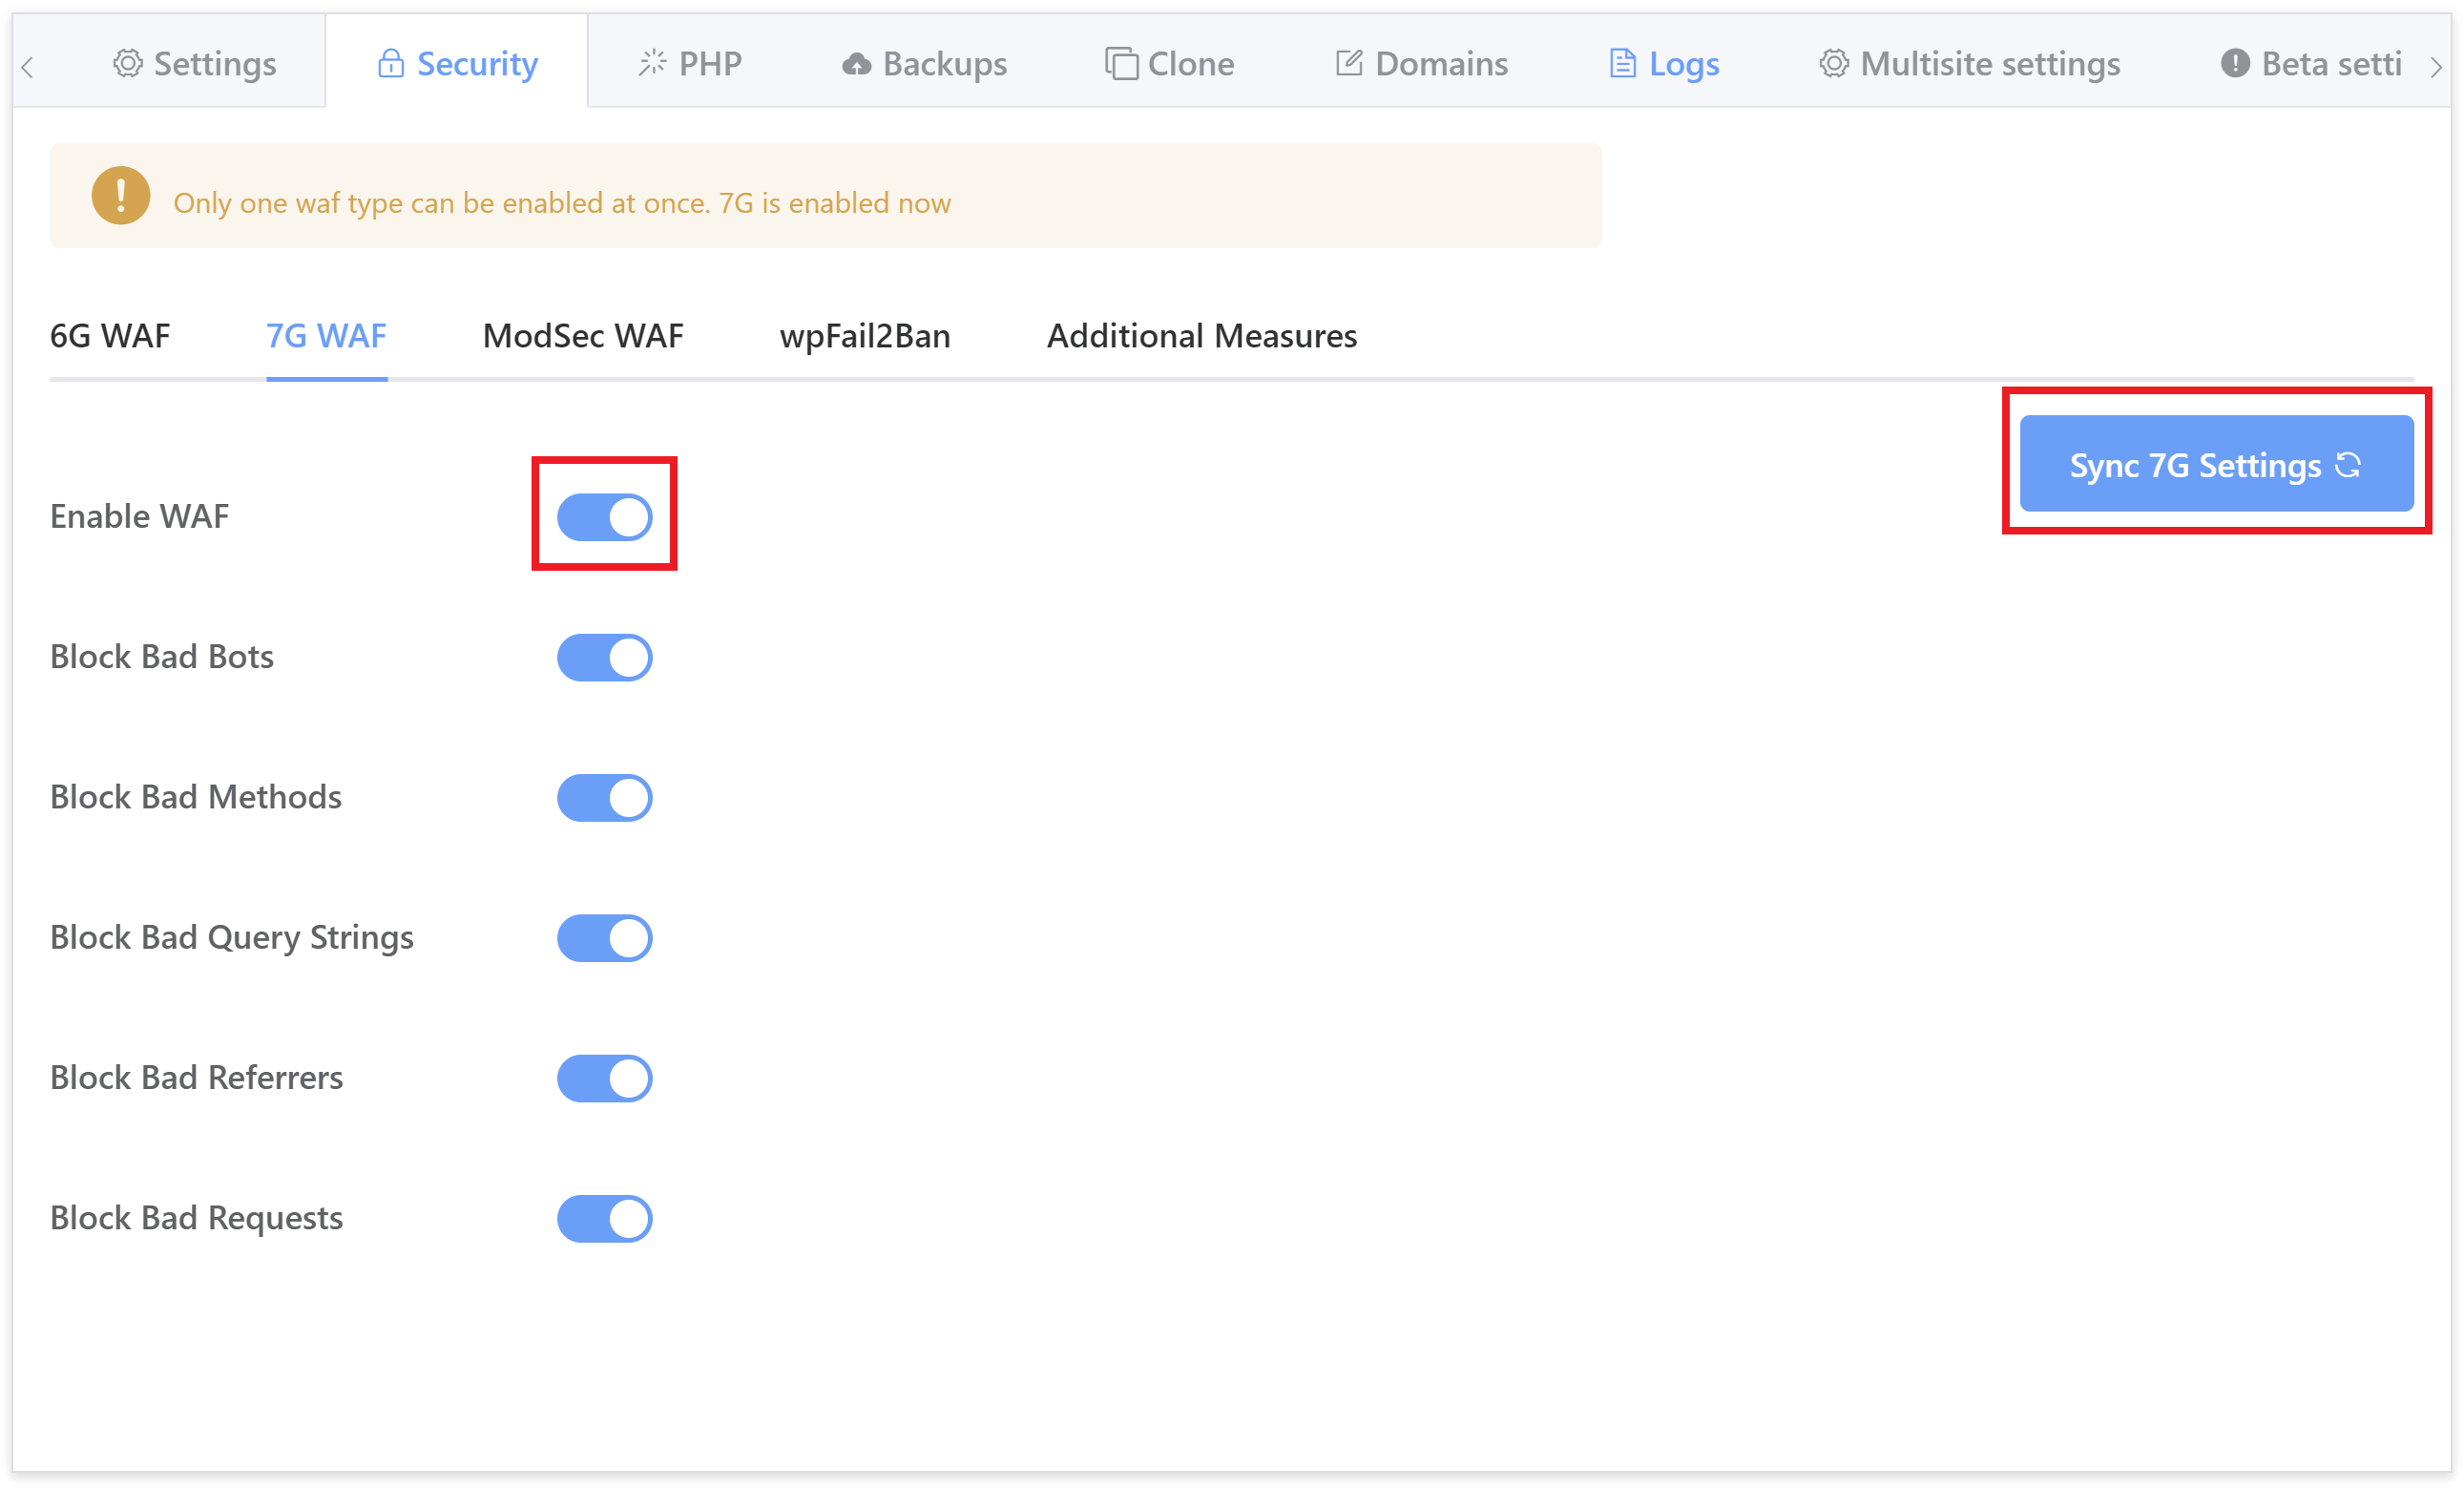
For any existing websites, you will see that the new tab UI doesn't display the current state of your WAF. Please toggle it on - you'll see a notice telling you that it's already enabled:
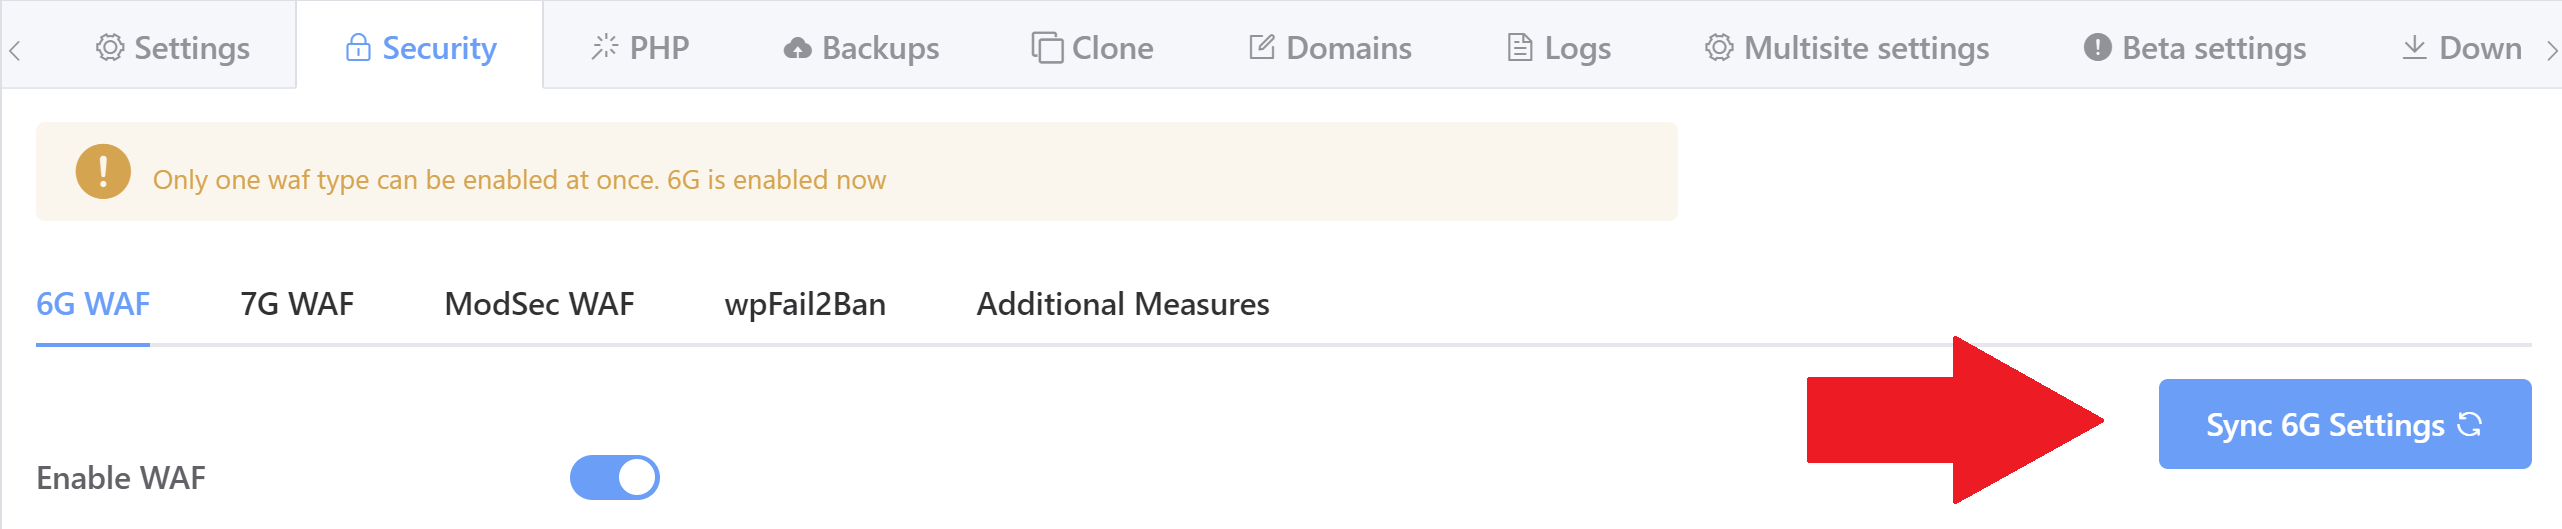
Then hit the sync button to sync up the UI to display the settings configured on your server:
6G WAF
Currently the most popular option on our platform, the 6G Firewall is lightweight and provides a wide array of protection against malicious URI requests, bad bots, spam referrers, and other attacks.
As well as providing extra security at the server level, keeping bad traffic off of your server helps preserve server resources and can positively affect your website’s performance.
Both the 6G and 7G WAF were originally developed by Jeff Starr at Perishable Press for Apache-based servers. We have adapted it for Nginx, modularised it to allow for granular per site and per rule block control, per rule whitelisting, and added logging, but none of this could be done without Jeff’s original incredible work
It requires no configuration for almost all use cases, simply toggle it on and your website is all set – all of the options you see below are active by default.
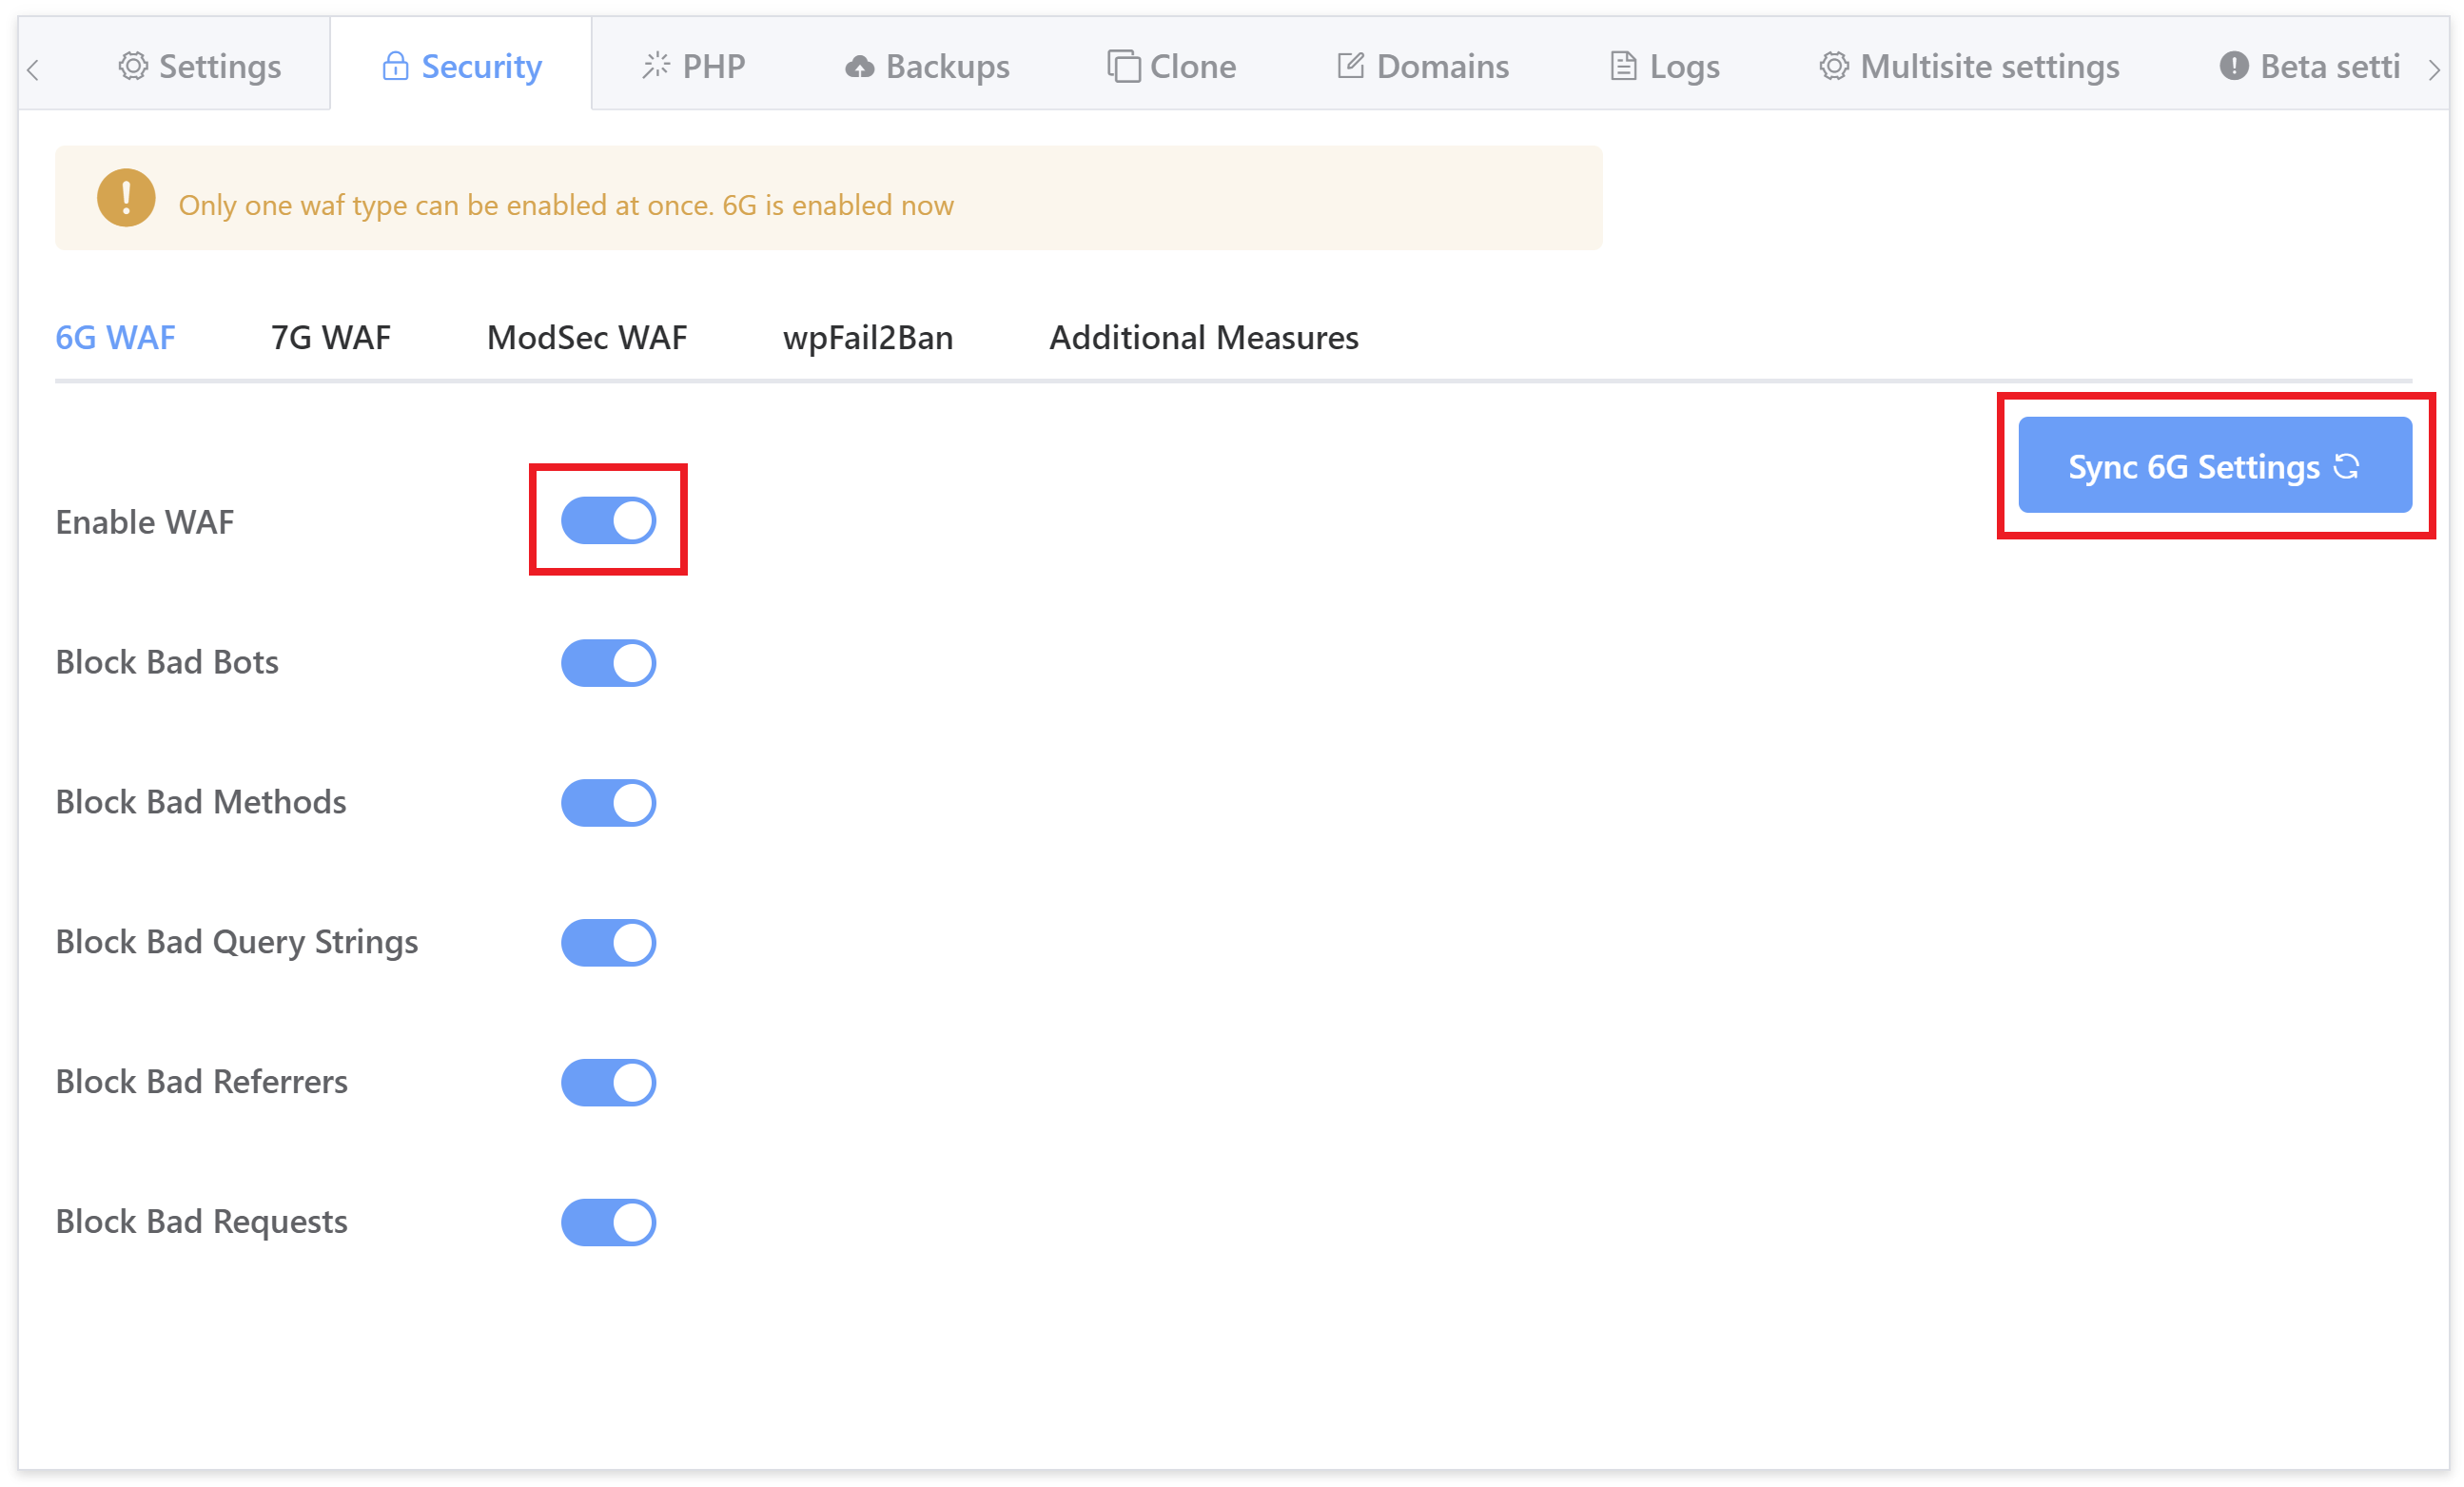
While no configuration is usually necessary, you can enable/disable the rulesets you see in the security tab as needed. To learn more about what each of these settings, please see the following article:
7G WAF
The 7G Firewall is the successor to the 6G Firewall. Exciting times!
7G was officially moved out of beta to its full production website-ready release on September 7th 2020. It’s extremely lightweight and provides server-level protection against a wide range of malicious requests, bad bots, automated attacks, spam, and a whole lot more.
We’re currently working on writing our own GridPane specific documentation for the 7G Firewall, but if you would like to learn more about it in the meantime, please check out Jeff Starrs overview directly on his website here:
https://perishablepress.com/7g-firewall
7G builds upon 6G and earlier predecessors. No configuration is necessary and the out-of-the-box defaults are ideal for almost all use cases. Simply toggle it on and your website is all set – all of the options you see below are active by default.
ModSecurity WAF
Developer accounts also have access to the ModSec WAF.
We use the full OWASP foundation 3+ Core Ruleset (CRS) to protect your sites from a wide array of attack vectors including:
- SQL Injection (SQLi)
- Cross-Site Scripting (XSS)
- Local File Inclusion (LFI)
- Remote File Inclusion (RFI)
- PHP Code Injection
- Java Code Injection
- HTTPoxy
- Shellshock
- Unix/Windows Shell Injection
- Session Fixation
- Scripting/Scanner/Bot Detection
- Metadata/Error Leakages
ModSecurity is a highly comprehensive WAF, but it’s not as simple as set and forget like 6G and 7G. To get the most out of ModSecurity you’ll want to fine-tune it. It’s also more resource intensive than the other two options, but overall it’s more effective and suitable for enterprise level websites.
The OWASP Core Ruleset contains many generic attack patterns, which means that many newly discovered web application vulnerabilities are caught automatically without requiring frequent rule updates. Since you can control the configuration, you can adjust the strictness of the CRS to your liking and make fine-grained exceptions to the policy (Source).

To learn about configuring ModSecurity, including the paranoia and anomaly threshold settings, please see the following articles:
Part 2. WP Fail2Ban Plugin Integration
Fail2Ban is an intrusion prevention software framework that’s highly effective at preventing brute-force attacks. We have a direct integration with the WP Fail2Ban WordPress plugin, which itself integrates with Fail2Ban at the server level.
We highly encourage it’s use as not only will keep your websites secure against brute force attacks, it will keep it free of annoying, resource-hungry bot traffic, pingbacks, and comment spam.
If you’ve already setup Fail2Ban on your websites using our GP-CLI, please hit the sync button in the top right corner of the tab:
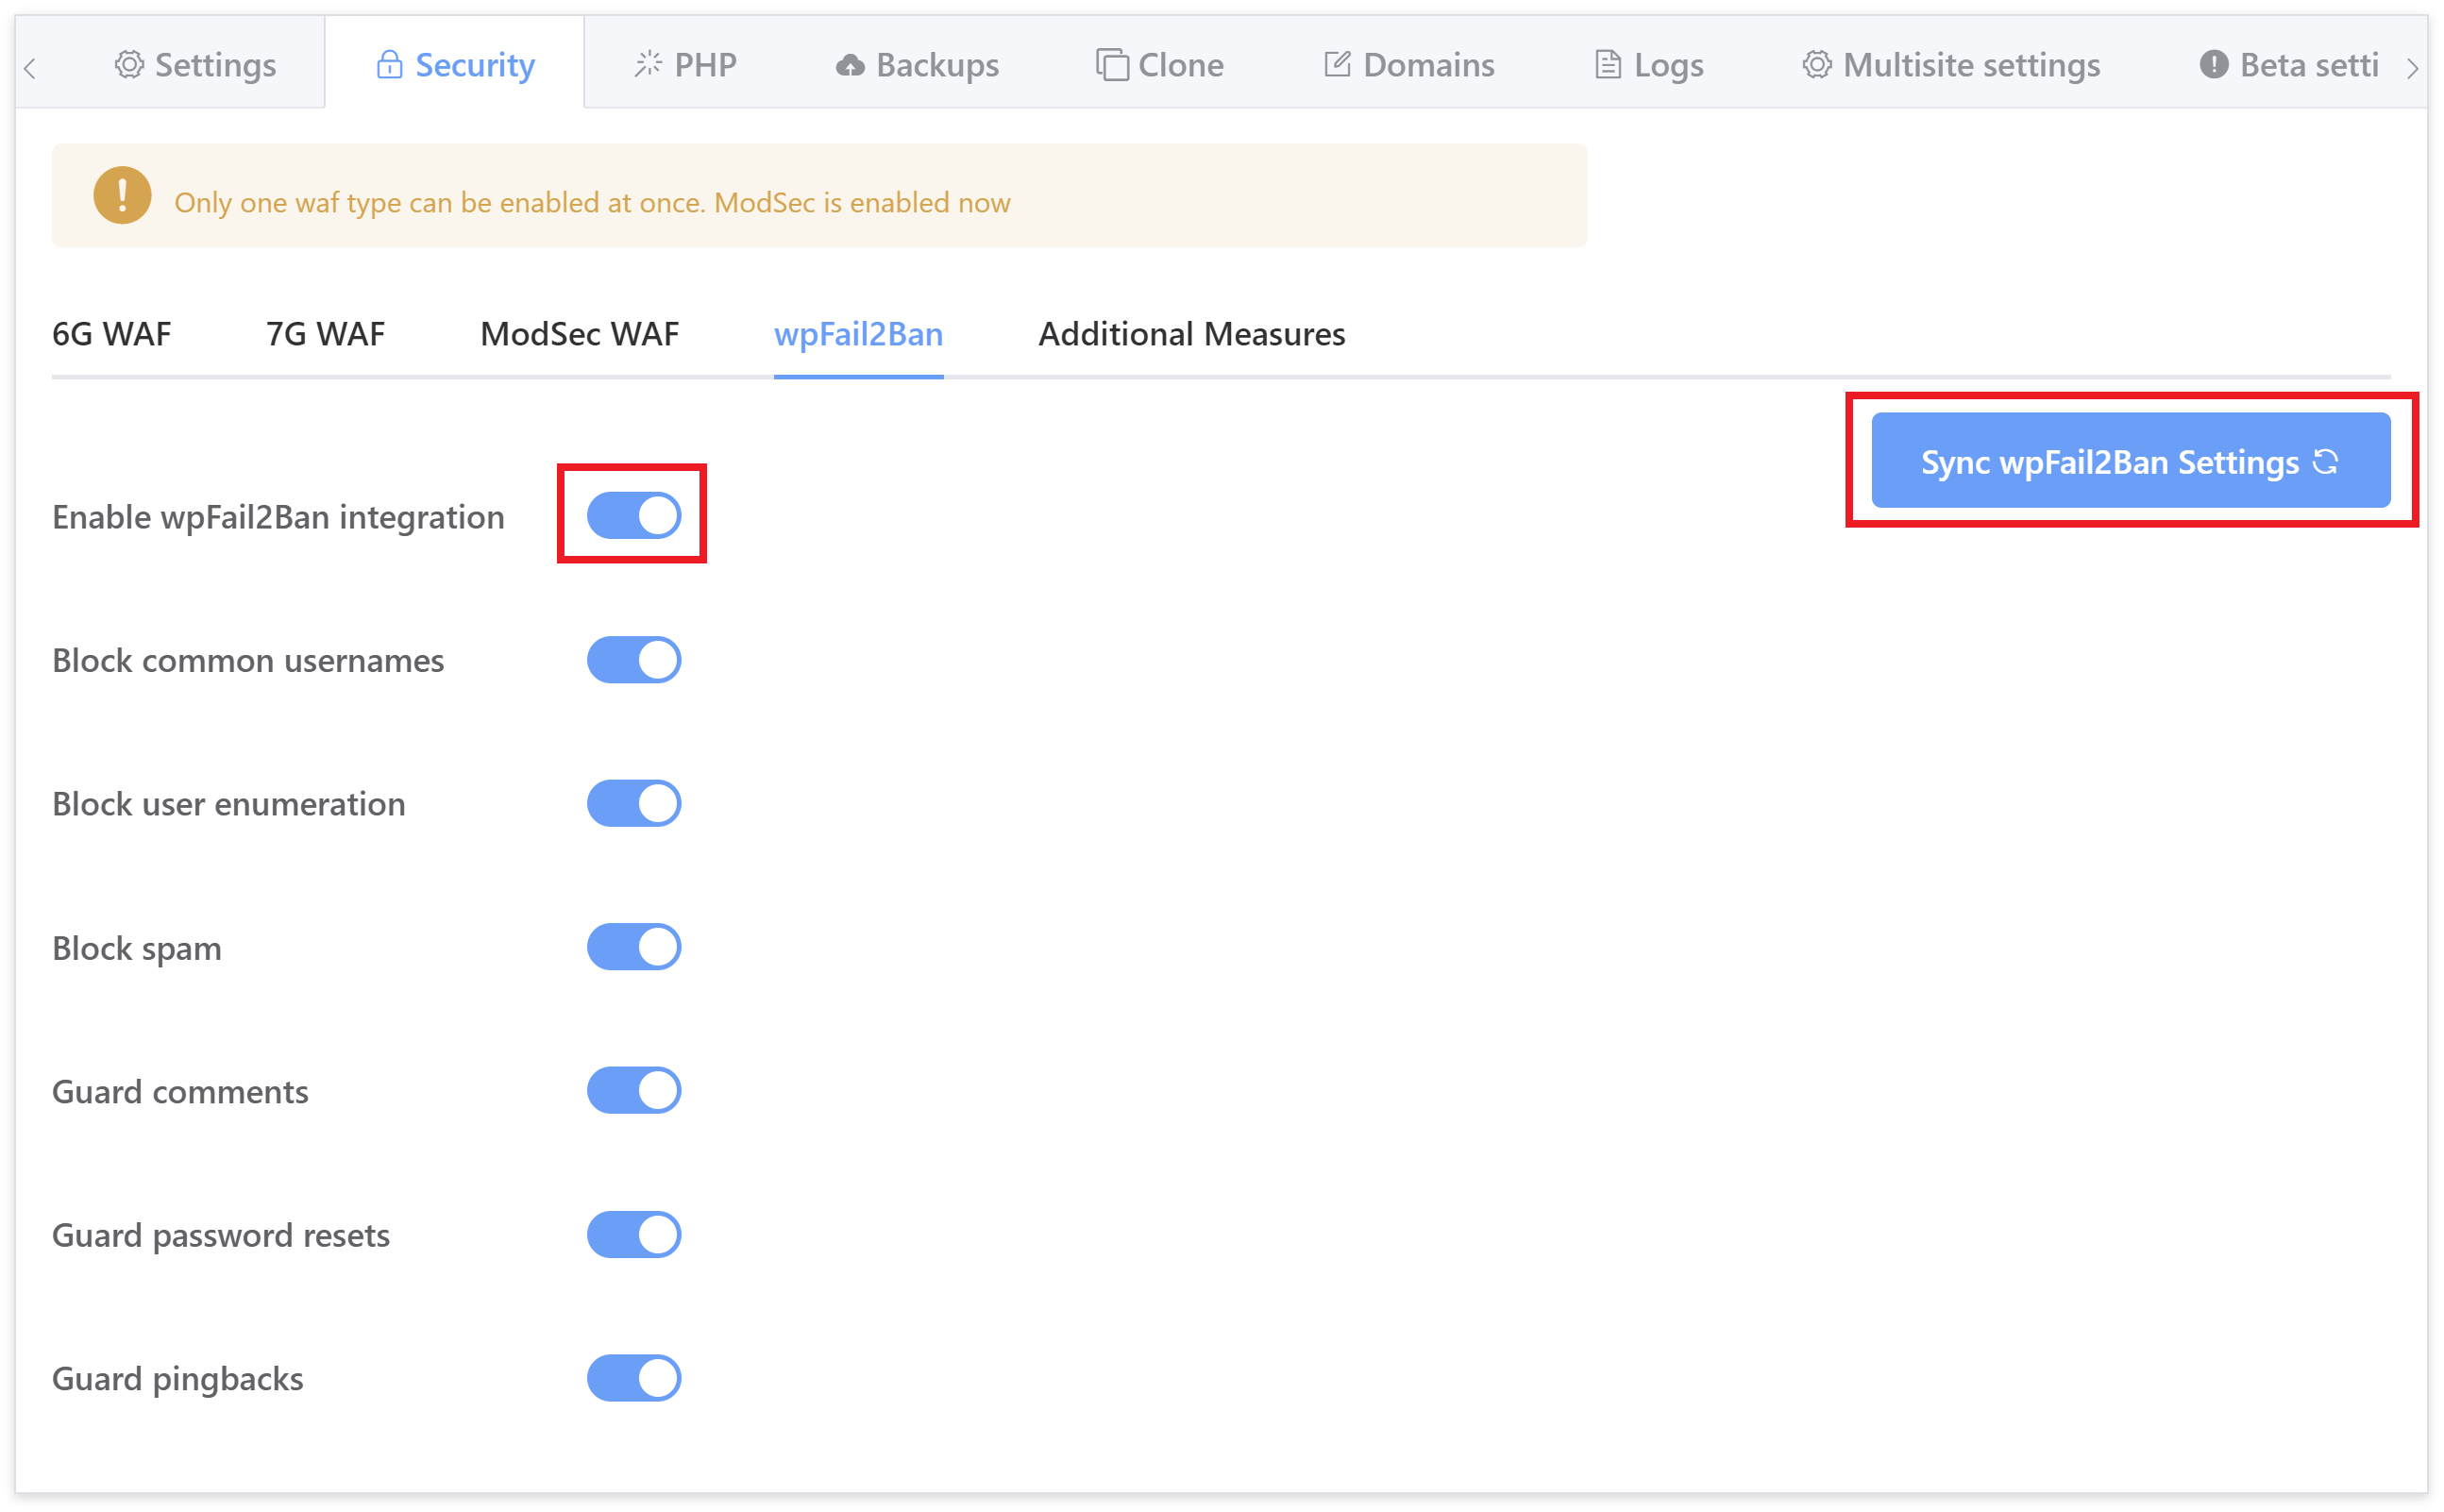
All settings are recommended, however, please be sure to read this article to make sure you understand how it works, and what it’s doing to help keep your websites protected:
Configuring Fail2Ban to Prevent Brute Force Attacks
There are two parts to the above article. The toggles that you see above are covered in Part 2. Part 1 is a separate set of GP-CLI that you can use to configure Fail2Ban to limit login attempts if you’d like to do so.
Part 3. Additional Measures / Nginx and OLS Hardening
The Additional Measures tab contains a variety of options to further lock down your websites. We highly recommend you both take advantage of them and learn exactly what they all do. Unlike the other tabs, each of these settings are completely independent from one another and have to be activated individually.
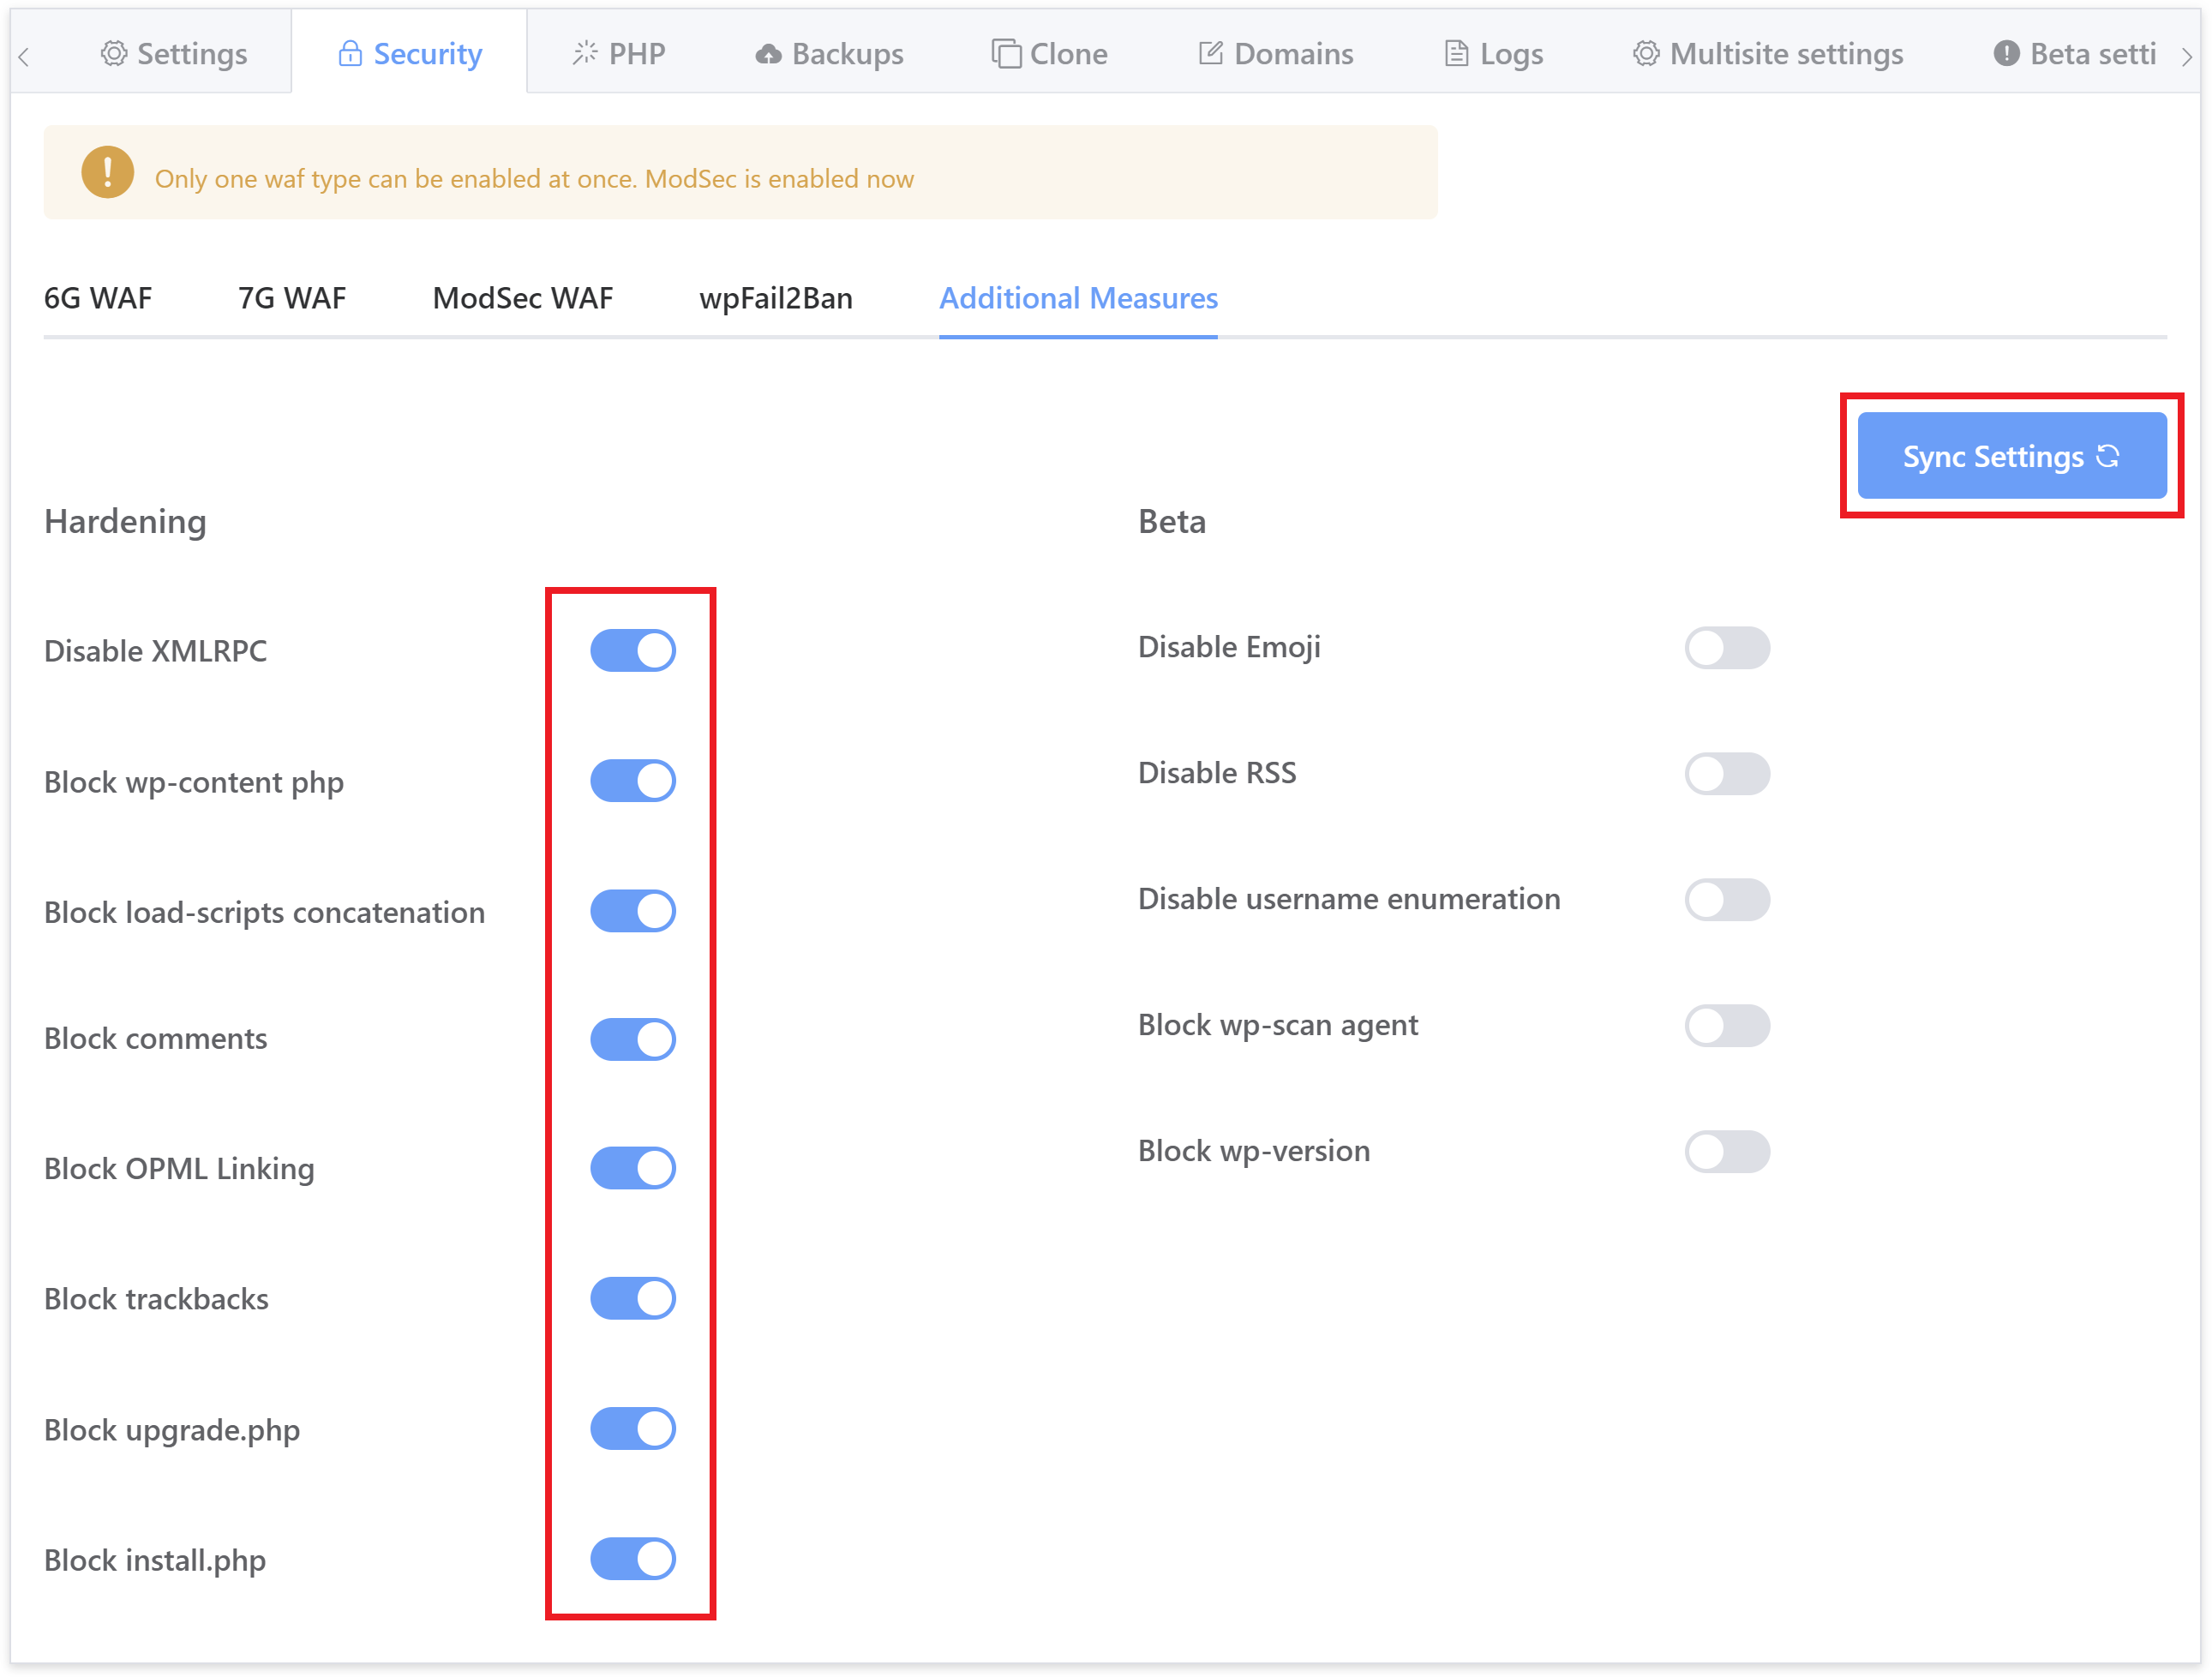
You can learn about what each function does in our Nginx/OpenLiteSpeed hardening article here (the GP-CLI commands are now hooked to the toggles you see in the image above):
WordPress Website Hardening Measures on Nginx and OpenLiteSpeed (OLS)