Introduction
The GridPane Stack incorporates the 6G Web Application Firewall in all plans. The 6G WAF was originally developed by Jeff Starr at Perishable Press for Apache-based servers. We have adapted it for Nginx, modularised it to allow for granular per site and per rule block control, per rule whitelisting, and added logging, but none of this could be done without Jeff’s original incredible work
6G is an excellent lightweight firewall that parses requests for anything anomalous or malicious looking, based on a collection of rules for:
- Bad Bots
- Bad Methods (disallowed HTTP request methods)
- Bad Query Strings
- Bad Referrers
- Bad Requests
Enabling/Disabling of the firewall, and now enabling/disabling all rulesets can be done via the GridPane platform GUI, or via GP-CLI. Whitelisting of rules based on incoming requests can easily be configured using our modular includes.
Using the Firewall
1. Provision a server and deploy a GridPane Site
We have documentation on provisioning up and managing servers here:
And documentation about deploying and managing GridPane sites here:
2. Enable/Disable the GridPane 6G WAF
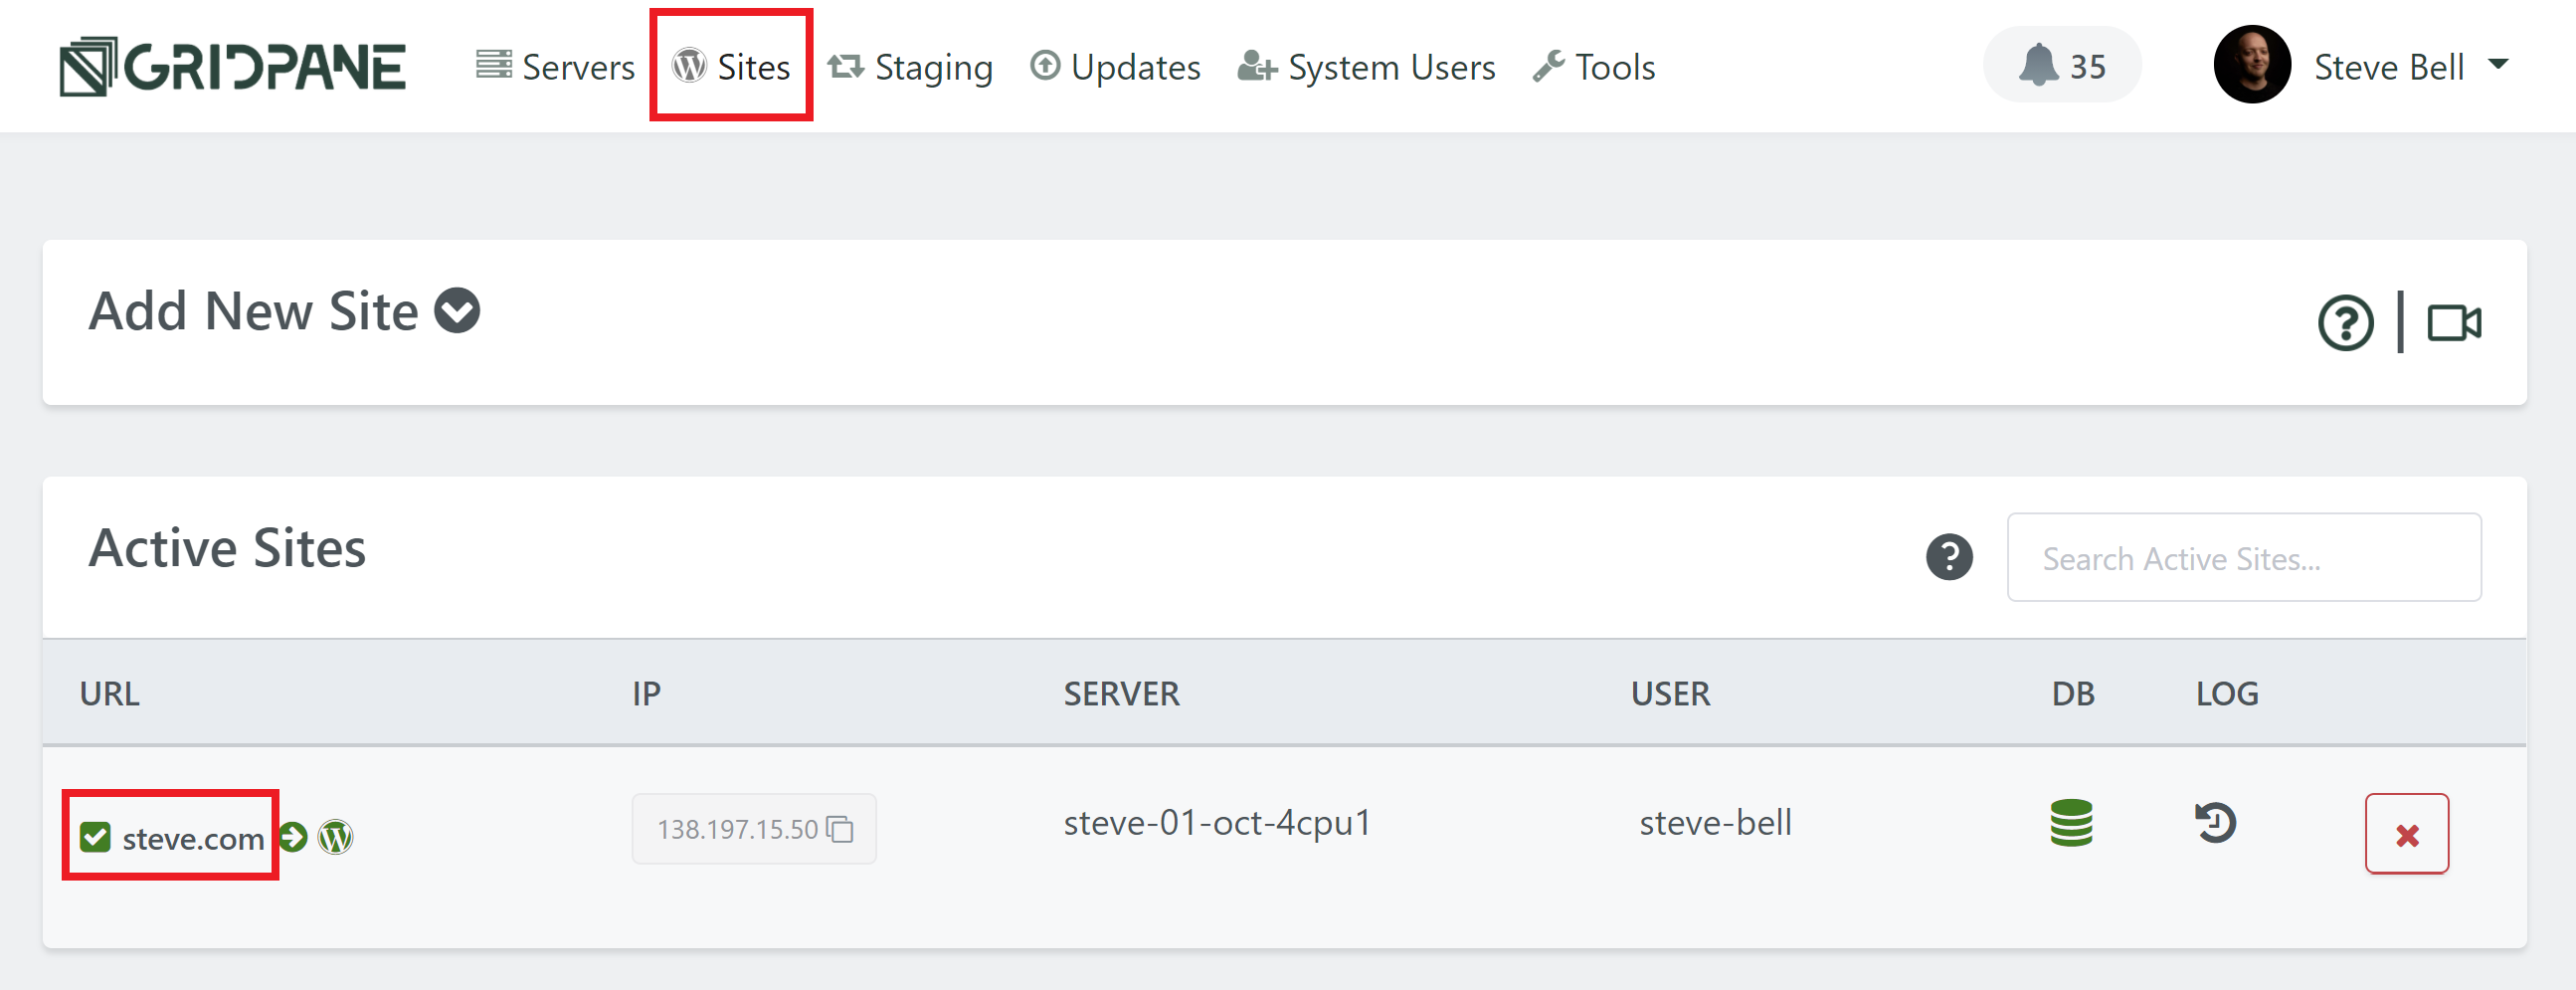
Head over to the Sites page of your GridPane account, and click on the name of your website to open up the website configuration modal:
Click through to the security tab and you’ll several different options for securing your websites. Select the 6G firewall and toggle on the Enable WAF option:
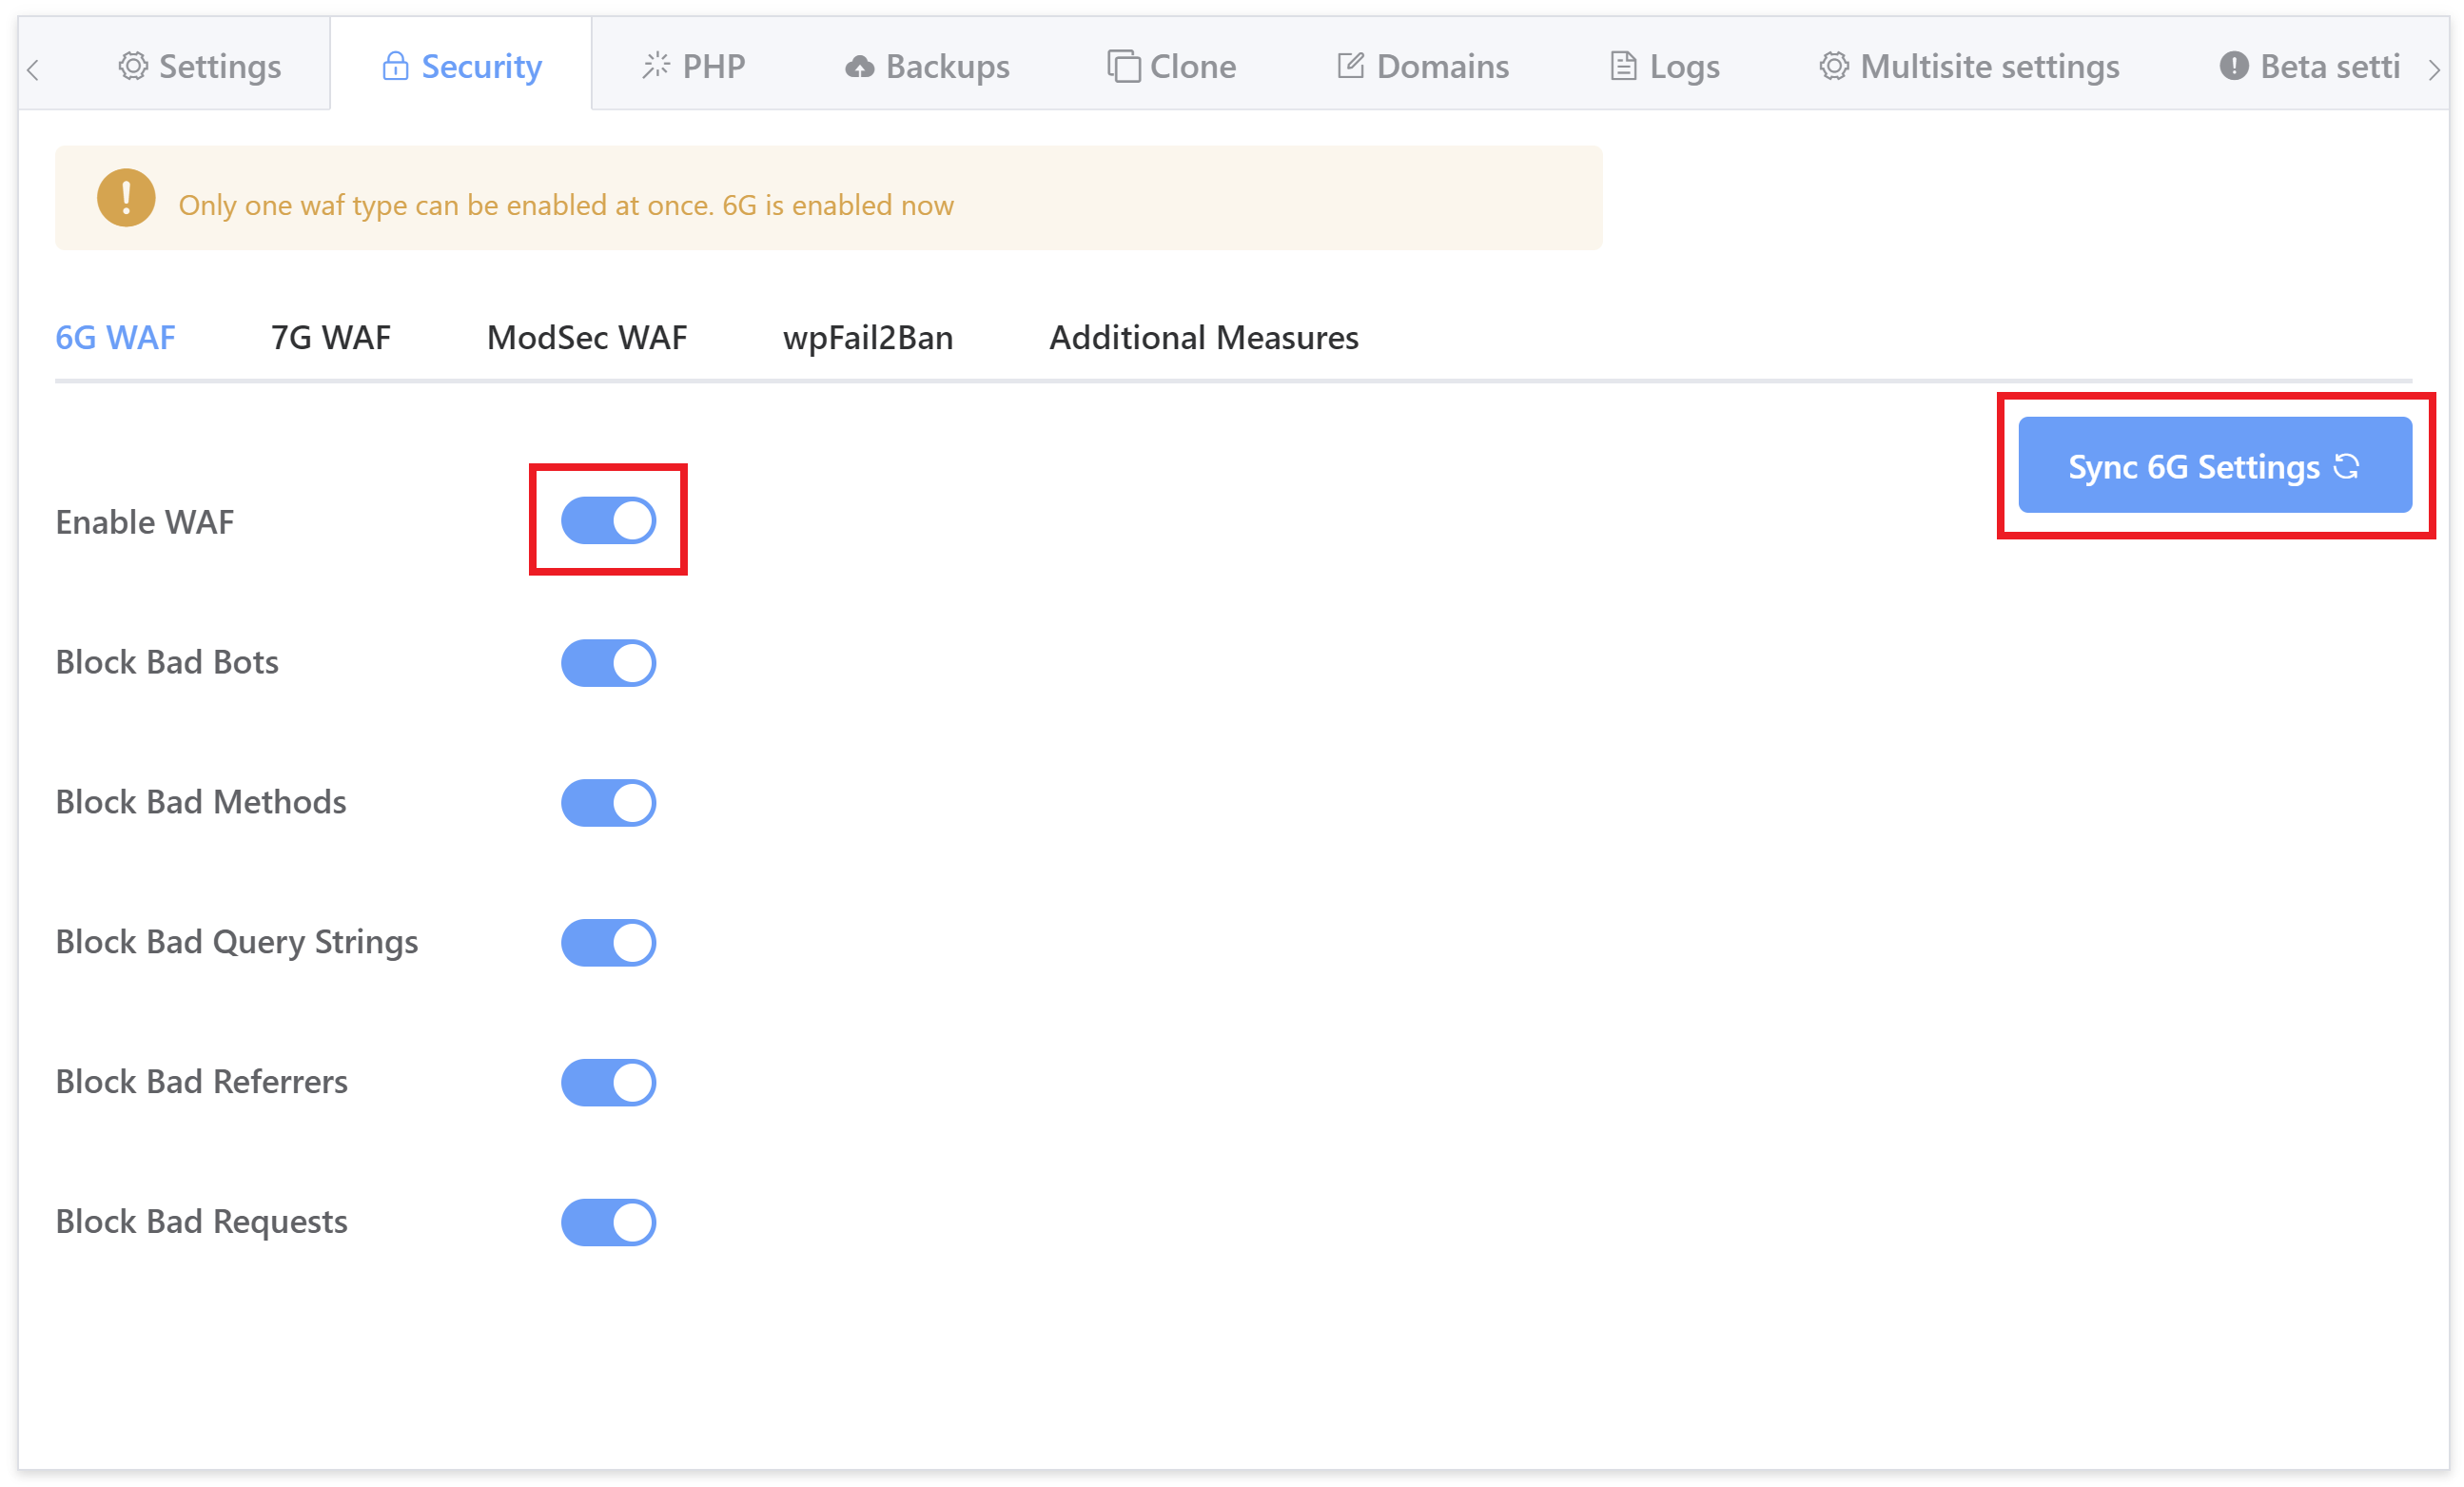
For any existing sites, please also hit the sync button to sync the UI and the server together and bring everything up-to-date. For more information on using the security tab, check out:
Secure Your WordPress Websites: An Overview of the Security Tab
3. The 6G WAF Logs
We have enabled logging of all blocked requests with information regarding which ruleset and specific rule has blocked the request. Currently, the log is not available to view in the UI.
It can be viewed by SSH/SFTP as root user here:
/var/www/{site.url}/logs/6g.logOr accessed by SFTP as a system user here:
/Sites/{site.url}/logs/6g.logThe log provides useful information about the request that can be used to analyze whether a whitelist or exclusion needs crafting and to tune the firewall to ensure false positives are handled correctly.
Here we can see an example of a blocked request:
[21/Jan/2020:06:18:35 +0000] [":bad_request_11:"] 104.151.51.115 an-example.com "GET /wp-config.php HTTP/2.0" 403 "-" "Mozilla/5.0 (Macintosh; Intel Mac OS X 10.15; rv:73.0) Gecko/20100101 Firefox/73.0"
A request from IP 104.151.51.115 has been blocked by the Bad Request ruleset and specifically rule 11. We can use this information to disable the ruleset or craft a specific exclusion to bypass this block.
4. Enable/Disable 6G WAF Rulesets
The GridPane version of the 6G WAF has been modularised so that each block of rulesets can enabled and/or disabled individually.
This can be done either directly inside the website configuration modal, or via GP-CLI by logging in to your server by SSH as root user.
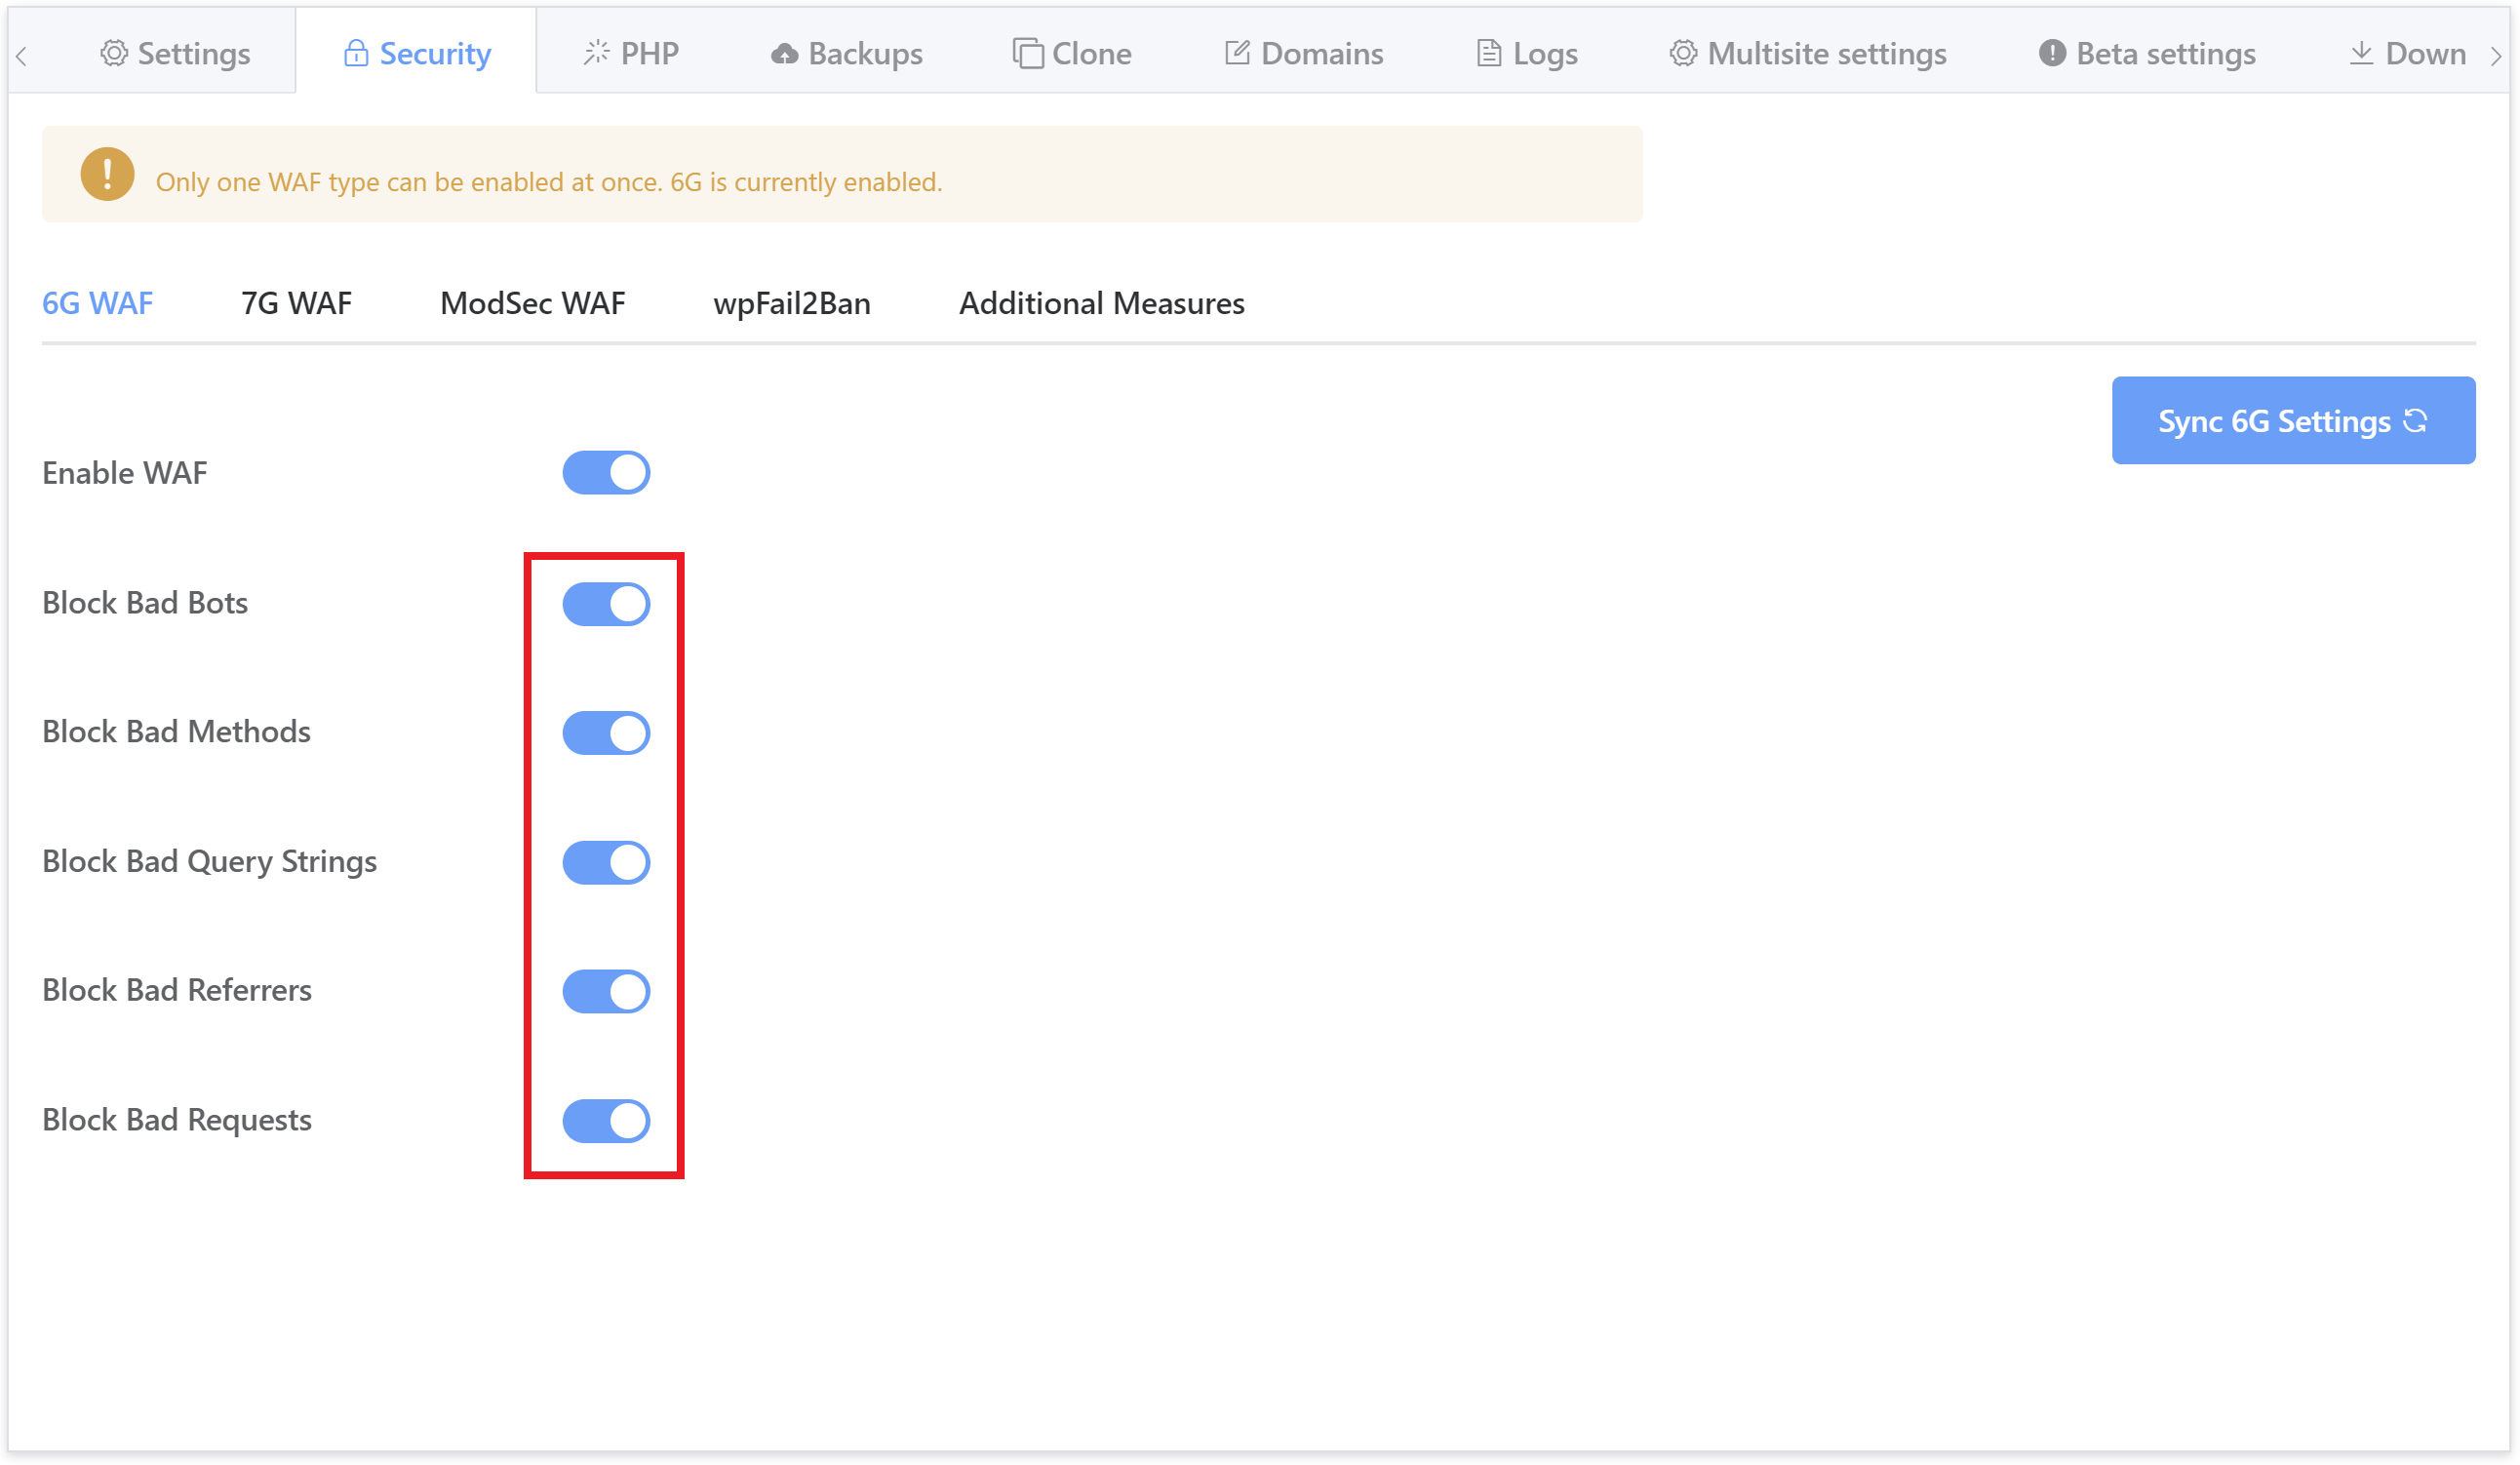
By default when you enable the GridPane 6G firewall for the first time then all rulesets are active.
From inside the security tab, simply toggle rulesets on and off as needed:
The GP-CLI commands to enable/disable each ruleset in a granular fashion are as follows. Replace {site.url} with your site primary domain.
Bad Bots
gp site {site.url} 6g -bad-bots on
gp site {site.url} 6g -bad-bots off
For example:
gp site gridpane.com 6g -bad-bots off
Bad Query Strings
gp site {site.url} 6g -bad-query-string on
gp site {site.url} 6g -bad-query-string off
For example:
gp site gridpane.com 6g -bad-query-string off
Bad Referrers
gp site {site.url} 6g -bad-referer on
gp site {site.url} 6g -bad-referer off
For example:
gp site gridpane.com 6g -bad-referer off
Bad Requests
gp site {site.url} 6g -bad-request on
gp site {site.url} 6g -bad-request off
For example:
gp site gridpane.com 6g -bad-request off
Bad Methods
gp site {site.url} 6g -bad-methods on
gp site {site.url} 6g -bad-methods off
For example:
gp site gridpane.com 6g -bad-methods off
5. Create WAF Whitelists when necessary.
We can use the information provided by the 6G log to create WAF rules to whitelist any false positives that we may get or to ensure that requests we know to be safe bypass the firewall.
Each site’s individual 6G configuration file can be found here:
/etc/nginx/common/{site.url}-6g.confWhen a request breaches a rule it changes one of the following Nginx variable state from 0 to 1:
$6g_drop_bad_bot$6g_drop_bad_method$6g_drop_bad_query_string$6g_drop_bad_referer$6g_drop_bad_request
The state of this variable triggers the dropping or pass-through of the request being processed.
Within that configuration file there are also two includes, a server-wide file include and a site-specific file include set to match a wildcard pattern:
include /etc/nginx/extra.d/6g-context.conf;
include /var/www/{site.url}/nginx/*-6g-context.conf;
Any whitelist we add to /etc/nginx/extra.d/6g-context.conf will be active on all sites on the server but must also be copied into /etc/nginx/extra.d/_custom/6g-context.conf to ensure it persists config file updates.
If we want a whitelist to only be active on a specific site, then we will use the site wildcard. An example of such a site-specific whitelist file would be:
/var/www/gridpane.com/nginx/whitelists-6g-context.conf
Crafting an exclusion is quite simple. Below we will provide several examples.
Example 1. Whitelist a ManageWP IP against all Rules
Let us assume your ManageWP installation is using the following IP 54.191.137.17 to connect to and manage your WordPress site gridpane.com.
First create a file on the following filepath:
/var/www/gridpane.com/nginx/managewp-whitelist-6g-context.conf
(by SSH/SFTP as root)
/Sites/gridpane.com/nginx/managewp-whitelist-6g-context.conf
(by SFTP as system user)
Within that configuration file add the following to bypass allow any requests coming from that ManageWP IP to bypass all rulesets.
Set up the following rule to test the bypass:
if ($remote_addr = "54.191.137.17") {
    set $6g_drop_bad_request 0;
    set $6g_drop_bad_referer 0;
    set $6g_drop_bad_query_string 0;
    set $6g_drop_bad_method 0;
    set $6g_drop_bad_bot 0;
    set $args "${original_args}";
    set $drop_log 0;
}
Always check your Nginx syntax before reloading Nginx:
nginx -t
gp nginx reload
Example 2. Whitelist an IP against a single rule of a ruleset
Let us assume you want to open up your firewall to PUT requests from an IP 199.199.199.199. The bad methods ruleset blocks the following methods:
- Connect (rule 1)
- Debug (rule 2)
- Delete (rule 3)
- Move (rule 4)
- Patch (rule 5)
- Put (rule 6)
- Trace (rule 7)
- Track (rule 8)
When your external resource tries to connect you will get a log error similar to the following
[21/Jan/2020:06:18:35 +0000] [":bad_methods_6:"] 199.199.199.199 gridpane.com "PUT /wp-content/plugins/awesome-plugin/plugin.php HTTP/2.0" 405 "-" "Mozilla/5.0 (Macintosh; Intel Mac OS X 10.15; rv:73.0) Gecko/20100101 Firefox/73.0"
We can see the request from IP 199.199.199.199 has breached the bad_methods ruleset, rule 6.
First create a file on the following filepath:
/var/www/gridpane.com/nginx/PUT-whitelist-6g-context.conf
(by SSH/SFTP as root)
/Sites/gridpane.com/nginx/PUT-whitelist-6g-context.conf
(by SFTP as system user)
Within that configuration file add the following:
set $exclusion_rule_match "";
if ($remote_addr = "199.199.199.199") {
    set $exclusion_rule_match 6;
}
if ($bad_method = $exclusion_rule_match) {
    set $6g_drop_bad_method 0;
    set $args "${original_args}"; #restore original args value
    set $drop_log 0;
}
This sets the rule to exclude based on the whitelisted IP, then checks the method rule breached against the rule whitelisted by the IP. If they match, then the request is not dropped. Notice the bypass is still logged as a possible breach with a Bypassed marker.
Always check your Nginx syntax before reloading Nginx:
nginx -t
gp nginx reload
Example 3. Disable a rule server-wide
Let us assume you want to open up your firewall by disabling specific rule sets, maybe you’ve seen this in your logs:
[03/Jun/2020:04:37:05 +0000] [":bad_querystring_7::bad_querystring_7:"] 111.222.333.444 dev.site.com "GET /wp-admin/admin-ajax.php?action=wp_reset_run_tool&_ajax_nonce=30166e1e57&tool=create_snapshot_step&extra_data%5Buid%5D=fvrzlw&extra_data%5Baction%5D=copy&extra_data%5Bdata%5D=wp_cli_scripts&extra_data%5Bdescription%5D=Copying+table+%3Ci%3Ewp_cli_scripts%3C%2Fi%3E HTTP/1.1" 403 "https://dev.site.com/wp-admin/tools.php?page=wp-reset" "Mozilla/5.0 (Windows NT 10.0; Win64; x64) AppleWebKit/537.36 (KHTML, like Gecko) Chrome/83.0.4103.61 Safari/537.36"
This particular example is from a plugin called WP-Reset, but you can use this example for other blocks.
To apply this server-wide, you would want to edit the following file:
/etc/nginx/extra.d/6g-context.conf
(this can only be done through SSH/SFTP as root).
Within that configuration file add the following:
set $exclusion_rule_match "";
if ($bad_querystring) {
   set $exclusion_rule_match 7;
}
if ($bad_querystring = $exclusion_rule_match) {
   set $6g_drop_bad_query_string 0;
   set $args "${original_args}"; #restore original args value
   set $drop_log 0;
}
This sets the rule to exclude based on the specific rule being triggered.
Always check your Nginx syntax before reloading Nginx:
nginx -t
gp nginx reload
Finally, copy 6g-context.conf into _custom so that it persists:
root@server:/etc/nginx/extra.d# cp 6g-context.conf _custom/6g-context.conf
But… I want to log all requests that pass my whitelist
This isn’t advised for a few reasons, logging takes resources and all the passing requests will still be logged in the Nginx access log so there is no real need to duplicate the logging, however more importantly in the whitelist rules above you can see we are resetting the built-in Nginx writable variable $args with the $original_args.
This is because Nginx logging only allows you to use preset variables, and the vast majority of these are not writable. The $args variable however is writable. During the filtering of requests through the rules, any that breach a rule have their reasons written to $6g_reason which then overwrites the $args variable. However, before we do this we store the original $args value in a temporary $original_args variable because any request that is whitelisted will need the original value restored before the request can be processed.
We can temporarily log requests bypassing the rules via our whitelists for testing purposes by setting the following variable values in our whitelist:
$args "${6g_reason}:Bypassed";
set $drop_log 0;
For example:
if ($bad_method = $exclusion_rule_match) {
    set $6g_drop_bad_method 0;
    set $args "${6g_reason}:Bypassed";
    set $drop_log 1;
}
Now any request that passed due to the whitelisting will log out like so:
[21/Jan/2020:06:18:35 +0000] [":bad_methods_6::Bypassed"] 199.199.199.199 gridpane.com "PUT /wp-content/plugins/awesome-plugin/plugin.php HTTP/2.0" 405 "-" "Mozilla/5.0 (Macintosh; Intel Mac OS X 10.15; rv:73.0) Gecko/20100101 Firefox/73.0"
But remember, while this temporary logging is active the request will not be processed normally, it has been stripped of all query parameters and arguments.
To enable normal processing remember to reset the following variables:
set $args "${original_args}";
set $drop_log 0;
But… I am behind a proxy and can’t access my Real IP?
That shouldn’t be any problem GridPane comes autoconfigured with Real IP set up for all Cloudflare, StackPath, and Sucuri proxies. It can also be easily configured for any other proxy using the following include:
/etc/nginx/extra.d/realip-context.conf
If you are using a proxy then we would replace the $remote_addr Nginx variable with the $realip_remote_addr nginx variable instead.
Like so:
if ($realip_remote = "54.191.137.17") {
    ...
}
Whitelists for Specific Plugins
This was generously contributed by one of our power-users to help others who may experience similar issues.
If you’re finding that 6G WAF is conflicting with/blocking certain plugins, you can add an exclusion rule that looks at the Nginx request_url and checks to see if the path is for your specific plugin/s. If it is, it then allows the request.
You can use this exclusion instead of completely disabling full rule sets.
Step 1. First check the 6G log to find the specific error
View the file with the following command, and start from the latest results and work backwards (replace site.url with your websites domain name):
cat /var/www/site.url/logs/6g.log
You should see an error attached to something along the lines of [":bad_request_7:"]. Now we know the error causing the conflict, we can create our exclusion.
Step 2. Create and add your exclusion
Open the 6g-context.conf and run the following command:
nano /etc/nginx/extra.d/6g-context.conf
Here we can add our exclusion rule so that it will take effect on all websites on your server. It looks as follows:
set $exclusion_rule_match "";
if ($request_uri ~ ^/wp-content/plugins/plugin-name/) {
set $exclusion_rule_match {rule number};
}
if ($bad_request = $exclusion_rule_match) {
set $6g_drop_bad_request 0;
set $args "${original_args}"; #restore original args value
set $drop_log 0;
}
Here’s a real-world example for the Woocommerce Services plugin and Jetpack: –
set $exclusion_rule_match "";
if ($request_uri ~ ^/wp-content/plugins/woocommerce-services/) {
set $exclusion_rule_match 7;
}
if ($request_uri ~ ^/wp-content/plugins/jetpack/) {
set $exclusion_rule_match 7;
}
if ($bad_request = $exclusion_rule_match) {
set $6g_drop_bad_request 0;
set $args "${original_args}"; #restore original args value
set $drop_log 0;
}
Once you’ve added your exclusion we need to copy it into the _custom directory to ensure it persists. You can do this with the following command:
cp /etc/nginx/extra.d/6g-context.conf /etc/nginx/extra.d/_custom/6g-context.conf
Step 3. Check and reload Nginx
Next check your Nginx syntax with:
nginx -t
If there are no errors present you can reload Nginx to make the changes go live:
gp ngx reload
You may also need to clear your website’s cache.