Introduction
Of all of the plugins that are available to migrate a WordPress website from one host to another, Migrate Guru is one of the most reliable and one of the easiest to use.
Tens of thousands of websites have been migrated from other hosts to GridPane, including 70GB news websites, 450+ subsite multisites, and pretty much every kind of website you can imagine. For big websites it can take some time (sometimes 24+ hours for truly huge websites), but it is incredibly reliable and 100% free.
We highly recommend it, and once you’ve migrated your first website, any future websites will be quick and easy.
Origin and Destination Note
In this article, we will be referring to the site you wish to migrate as the origin site and the site or server being migrated into as your destination site or server.
Migrating Multiple Sites? Create a Bundle
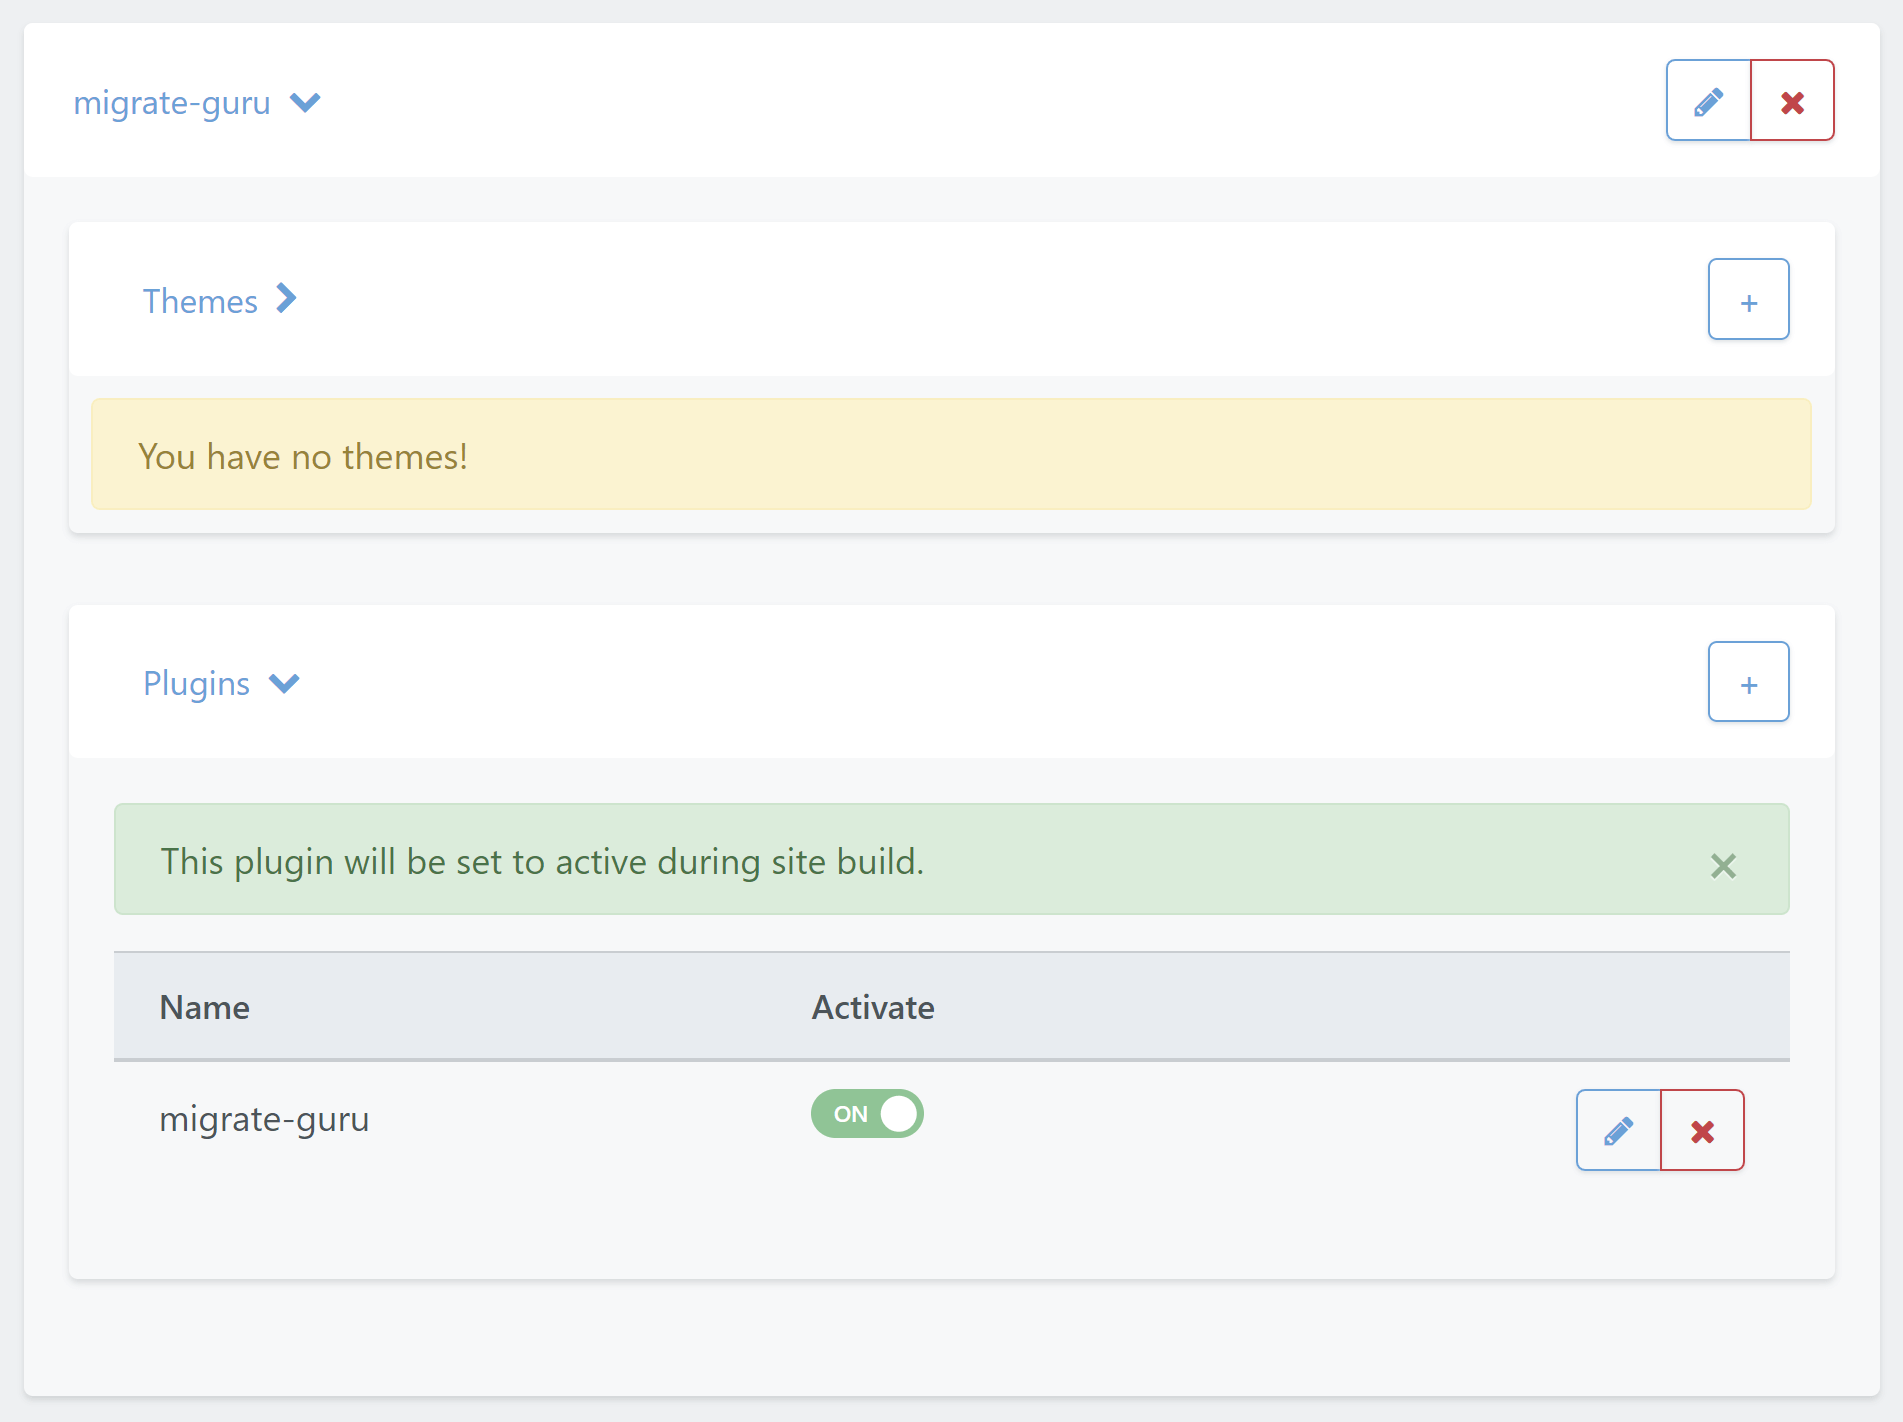
If you’re migrating multiple websites, why not create a bundle inside your GridPane account that installs and activates the Migrate Guru plugin for you?
This will eliminate the need to install the plugin manually each time, and save you a little bit of time per website.
Learn how to create a bundle here: Using GridPane Bundles.
Step 1. Set Up Your Destination Website
You’ll need a server and your destination website set up and created before you begin. If you don’t already have these set up, these articles offer some getting started guidance:
Provision an SSL Certificate
If possible, it’s always best to provision an SSL certificate before you begin your migration.
If you’re using Cloudflare or DNSME, you can provision an SSL before you change your DNS records by using the DNS API domain verification method. Alternatively, if the website’s DNS is not using either Cloudflare or DNSME, you can use the proxy challenge method instead. Details can be found in these articles:
- Provisioning an SSL for a domain using DNS API Domain verification
- Provisioning an SSL for a domain using DNS API Domain verification by Proxy Challenge
Migrate Guru Key
If using the token option to migrate your website, log in to your destination website, install and activate the Migrate Guru plugin, and then click through the plugin settings page. Here you will see the the option to create a migration key:
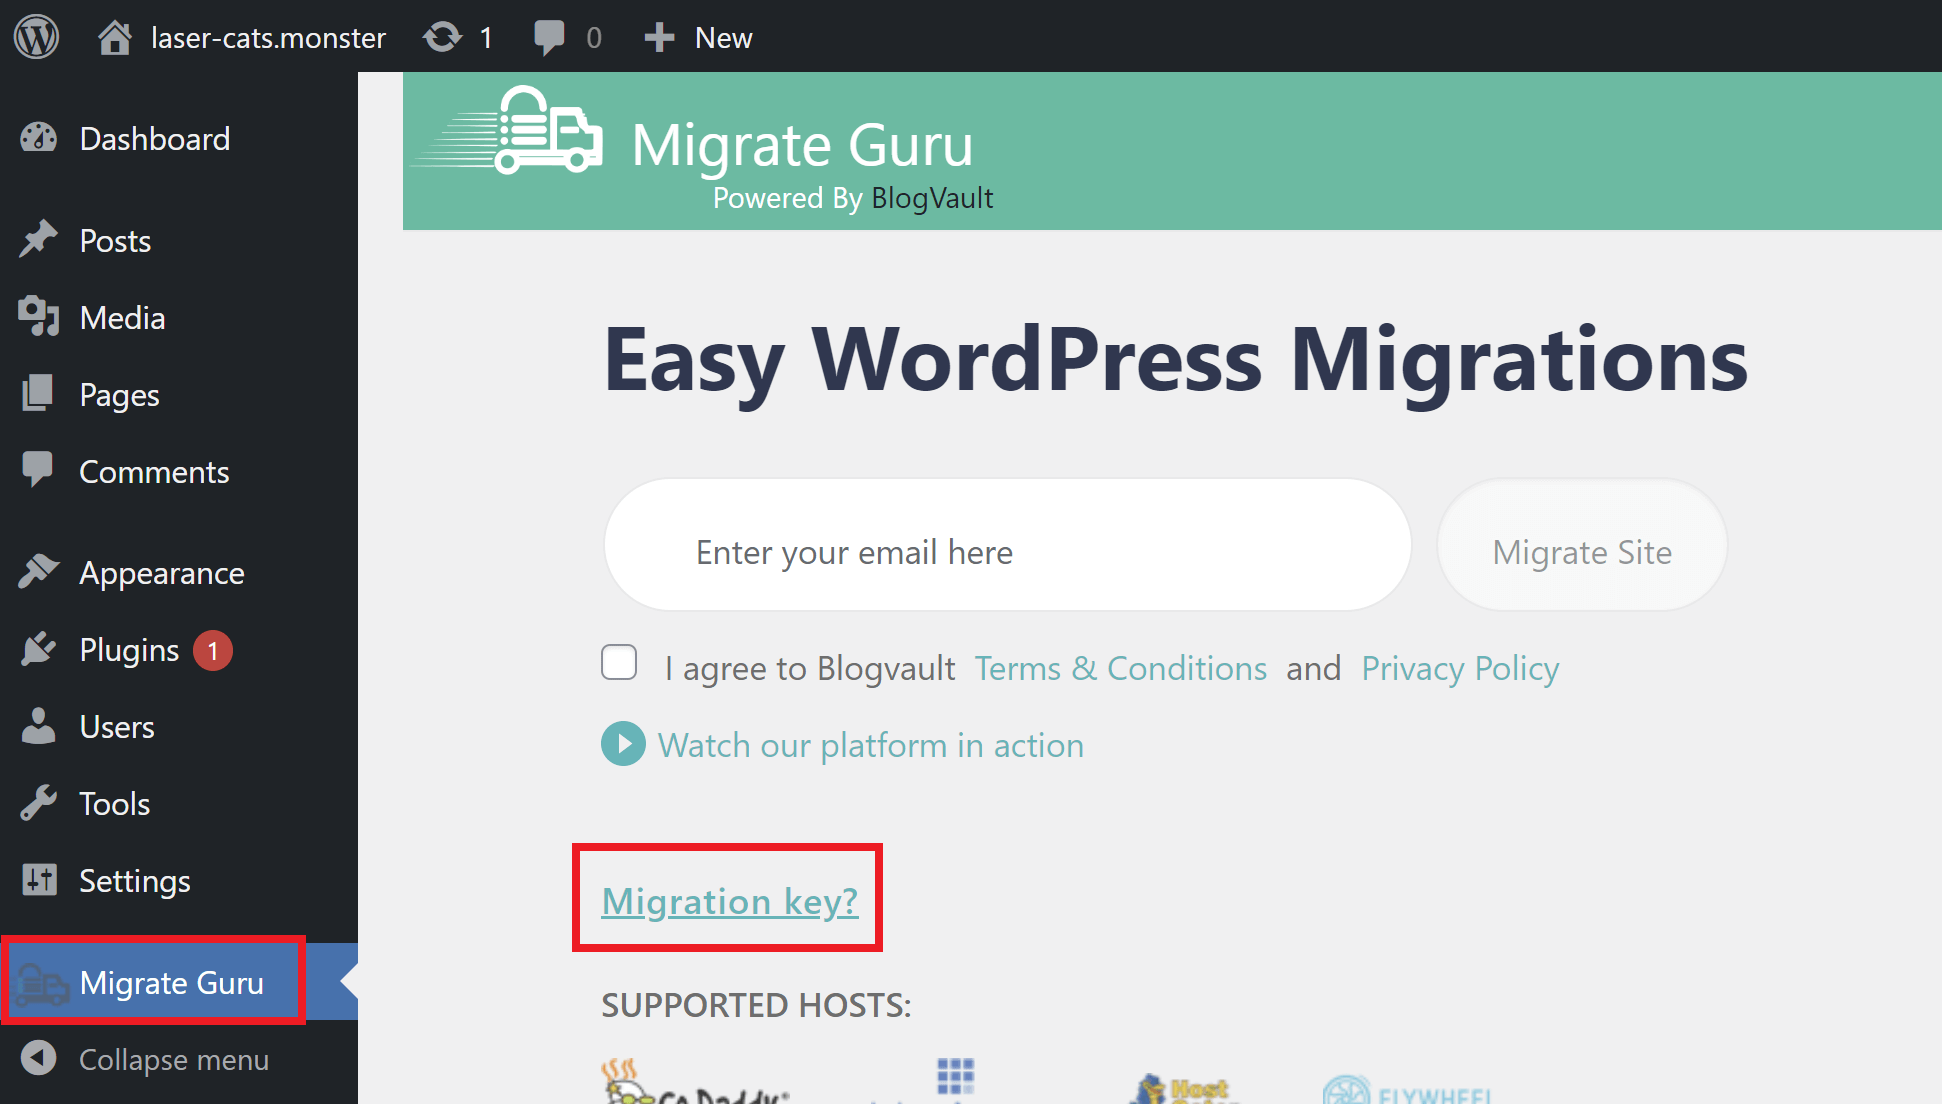
Click this and it will reveal your key:
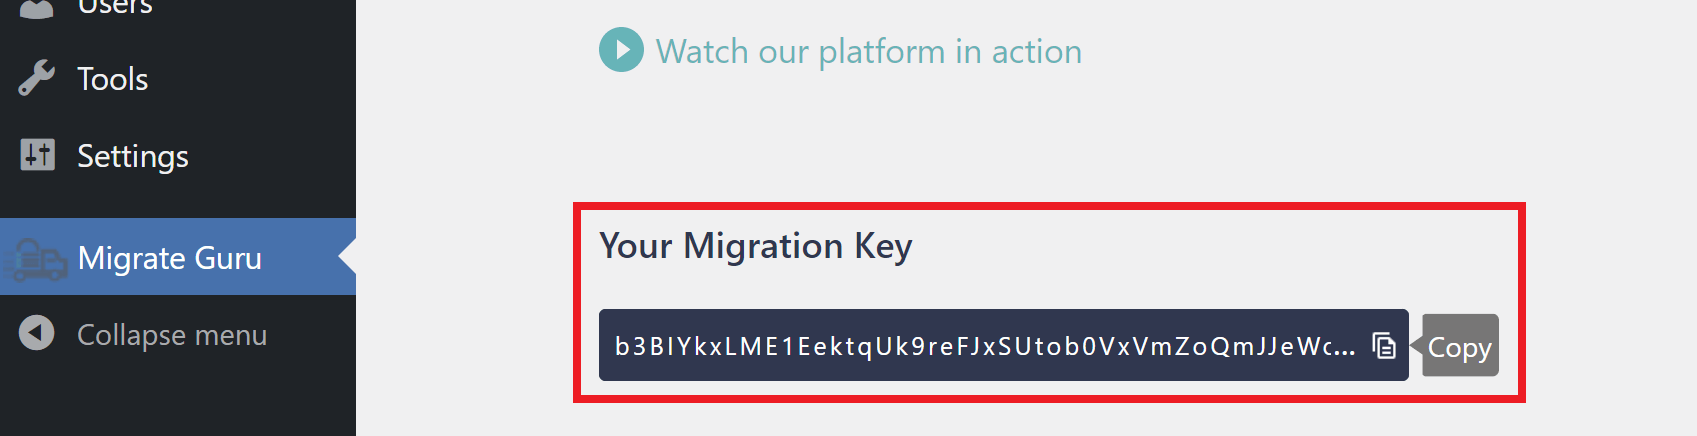
Click the clipboard icon to copy it.
Step 2. Configure Your Origin Website
Now that your destination website is set up, it’s time to configure the Migrate Guru plugin inside of your origin website.
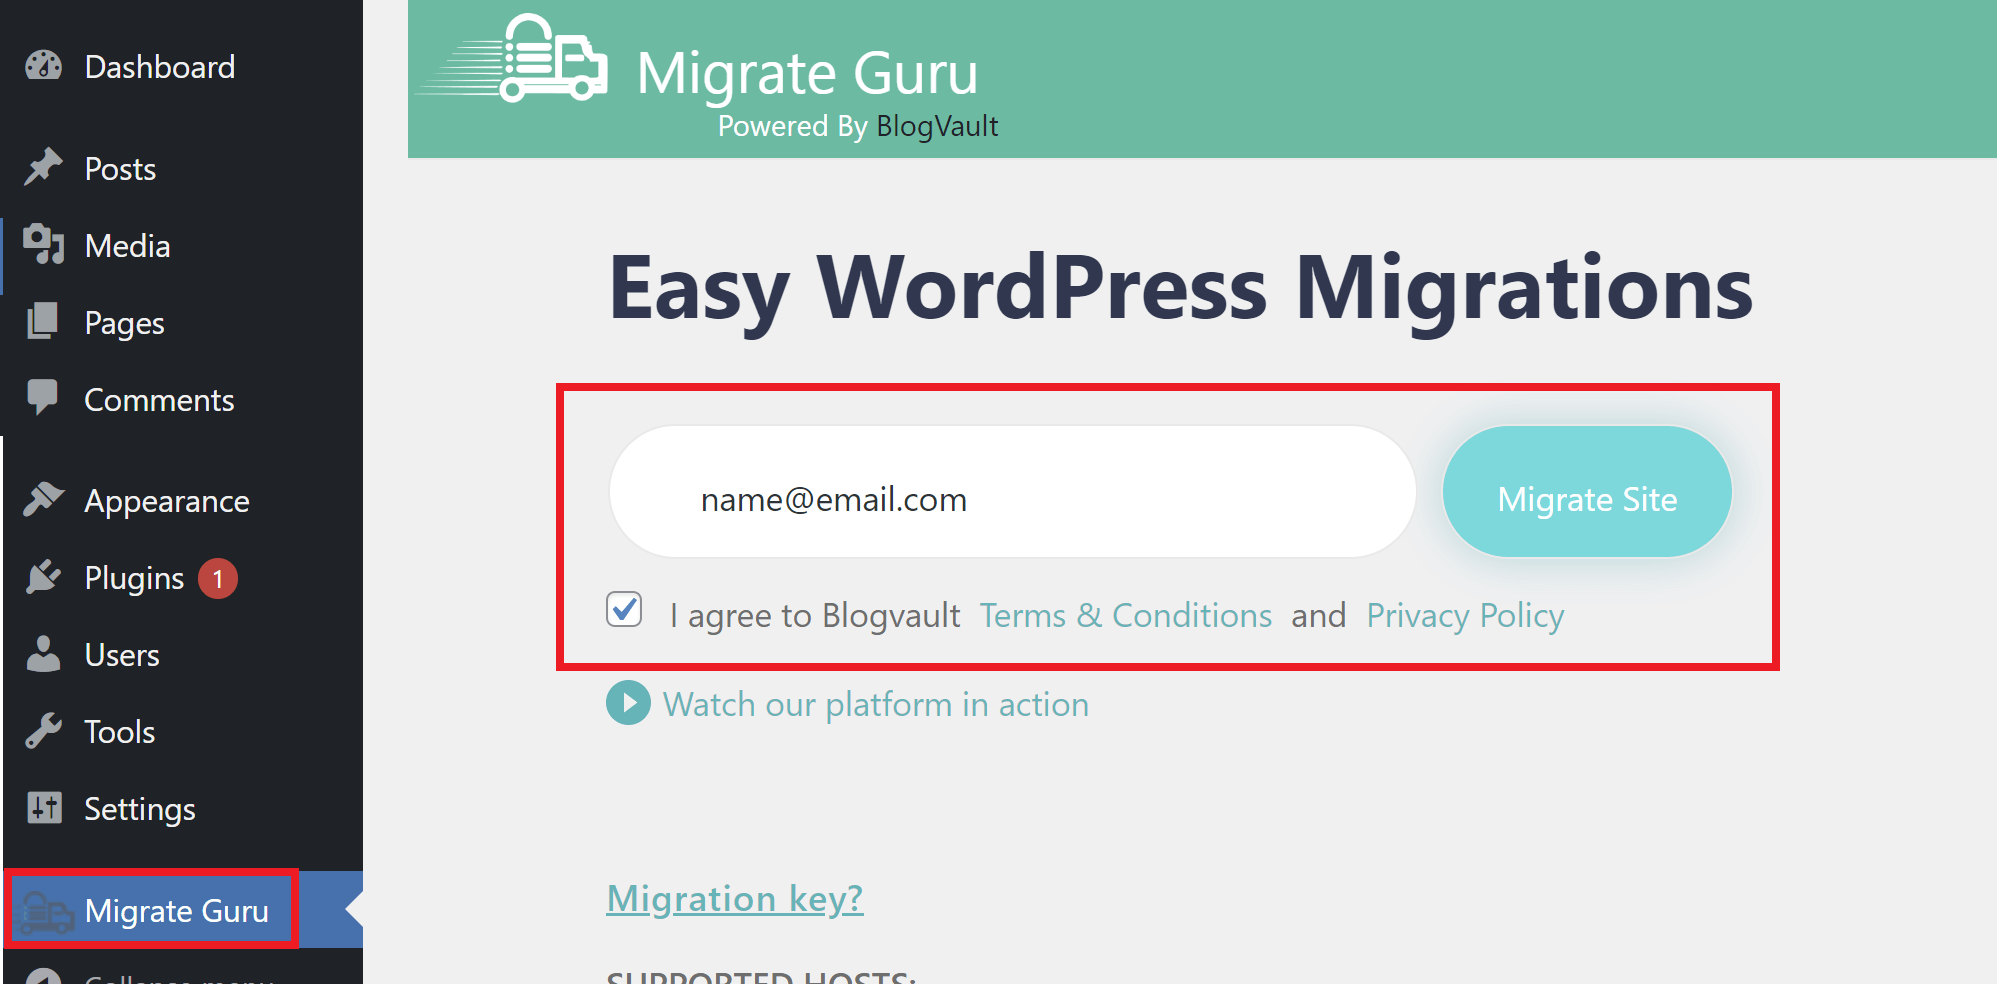
If you haven’t already, go ahead and install and activate Migrate Guru on your origin site.
Go to Migrate guru and add your email address and then agree to the terms & conditions to proceed.
On the next page, select “Other Host”:
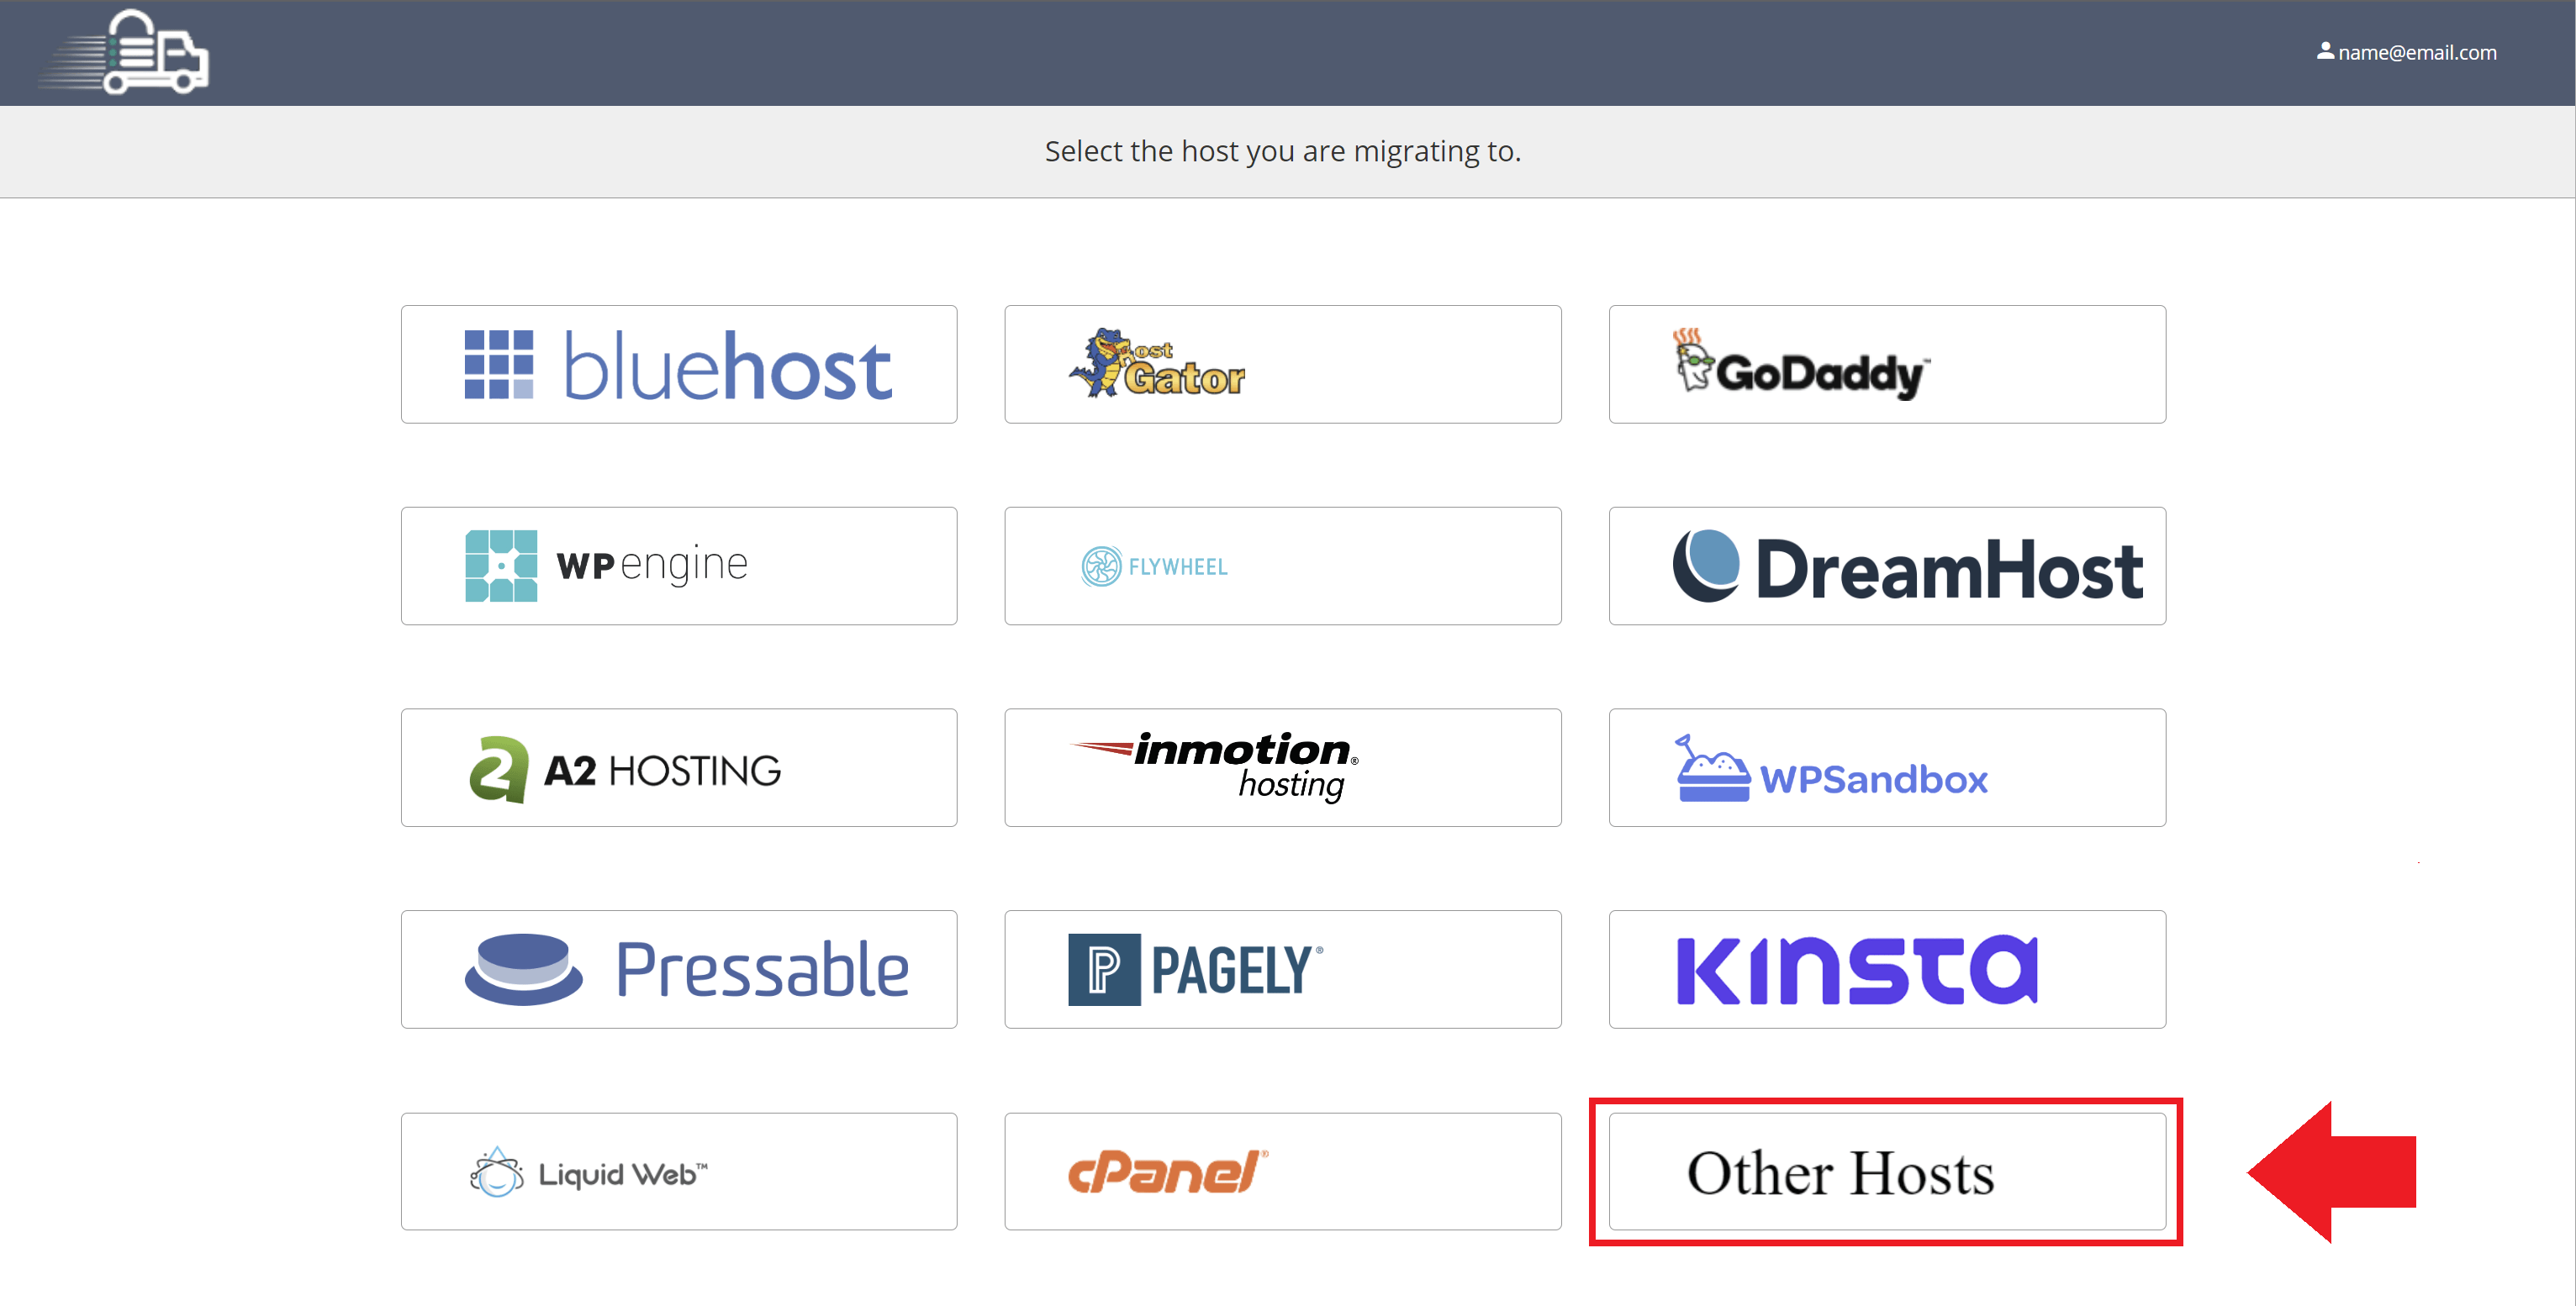
The name of this may vary in the future, so if that’s the case, you’re looking for the option that isn’t a specific host.
Step 2.1 Key Method Configuration
Once you have your key from your destination website, the key method is super simple. On the migration configuration page, simply enter your key:
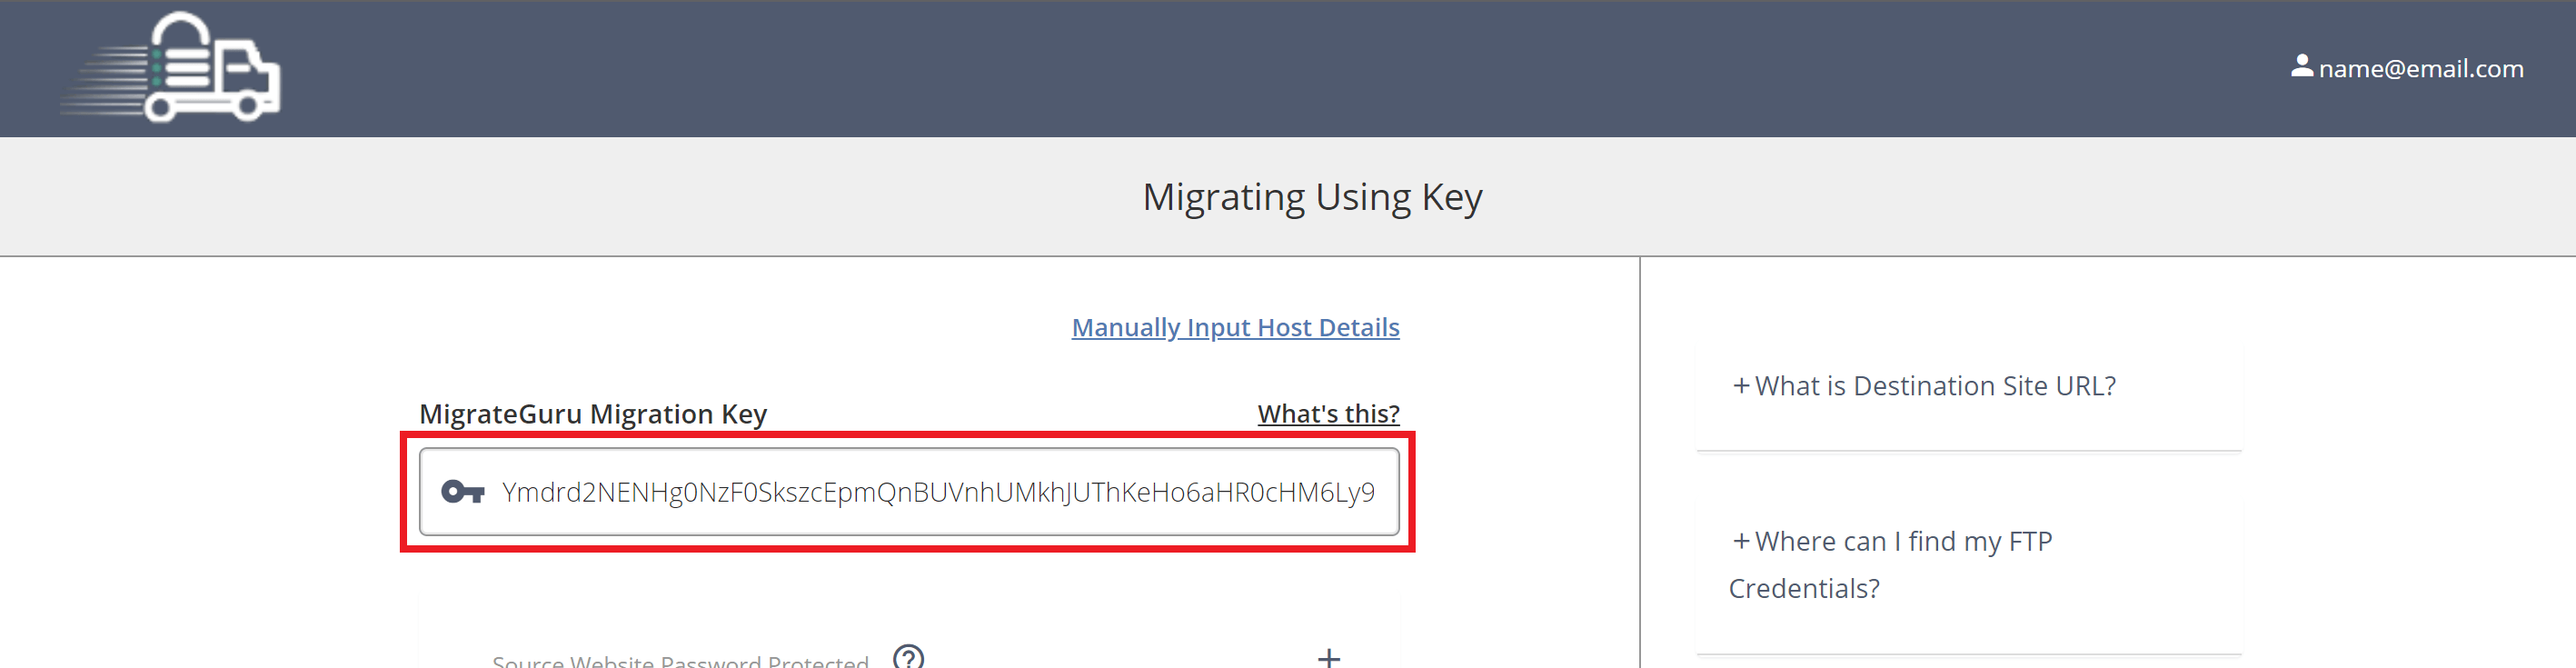
That’s it! Now just click the Migrate button to begin your migration.
Step 2.2 SFTP Method Configuration
By default, Migrate Guru will show you the key migration option. To change to SFTP, click “Manually Input Host Details“:

From here, carefully add the SFTP details of your destination site. Here is filled out example:
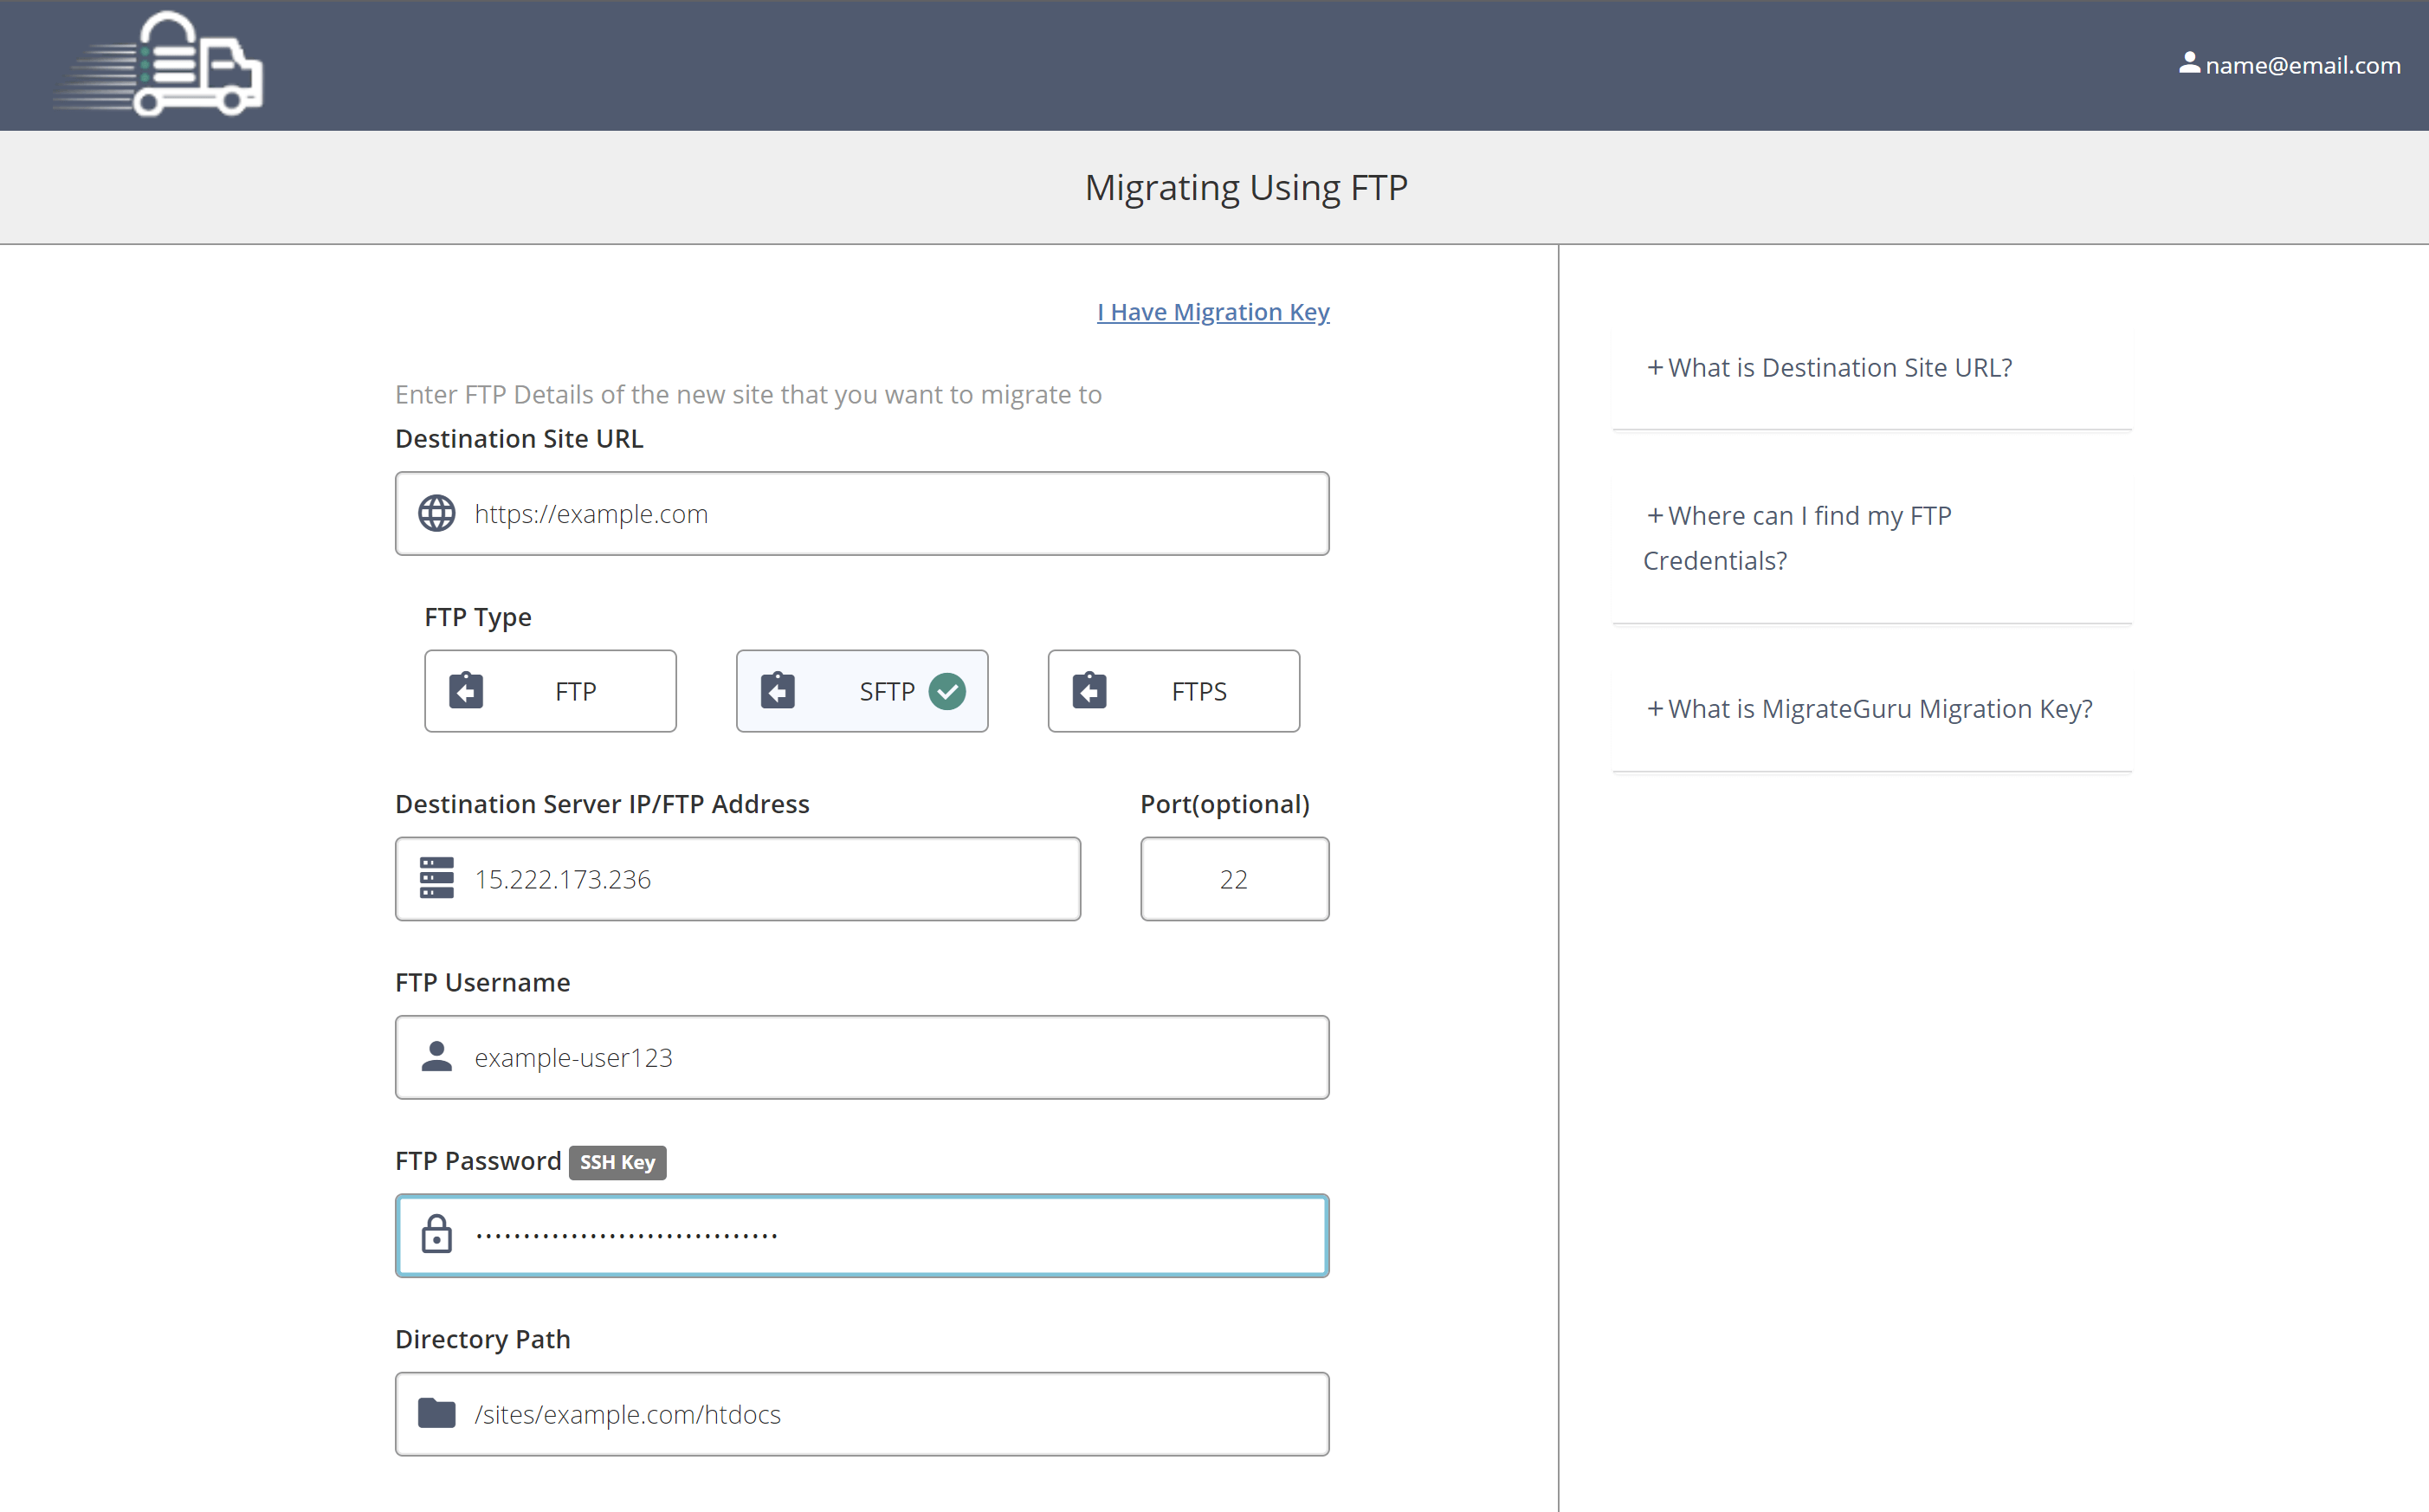
Destination Site URL
On the Destination URL, if the site has SSL then it’s https://
Without SSL it’s http://
FTP Type
Select SFTP.
Destination Server IP and Port
Add your destination server on GridPane. You can ignore the port.
FTP Username
Add the System User you created for the destination site.
FTP Password
You can find your password on the System Users page. Find your system user and click on the little eye icon to open up and view your password:
![]()
Alternatively, you can create a new password by clicking on the padlock icon:
![]()
Directory path on Ubuntu 20.04
On Ubuntu 20.04, the directory path looks as follows:
/sites/site.url/htdocs
For example:
/sites/example.com/htdocs
Directory path on Ubuntu 22.04
On Ubuntu 22.04 (including PeakFreq servers), the directory path looks as follows:
/home/system-user-name/sites/site.url/htdocs
For example:
/home/mysiteuser/sites/mywebsite.com/htdocs
Step 3. Start Your Migration
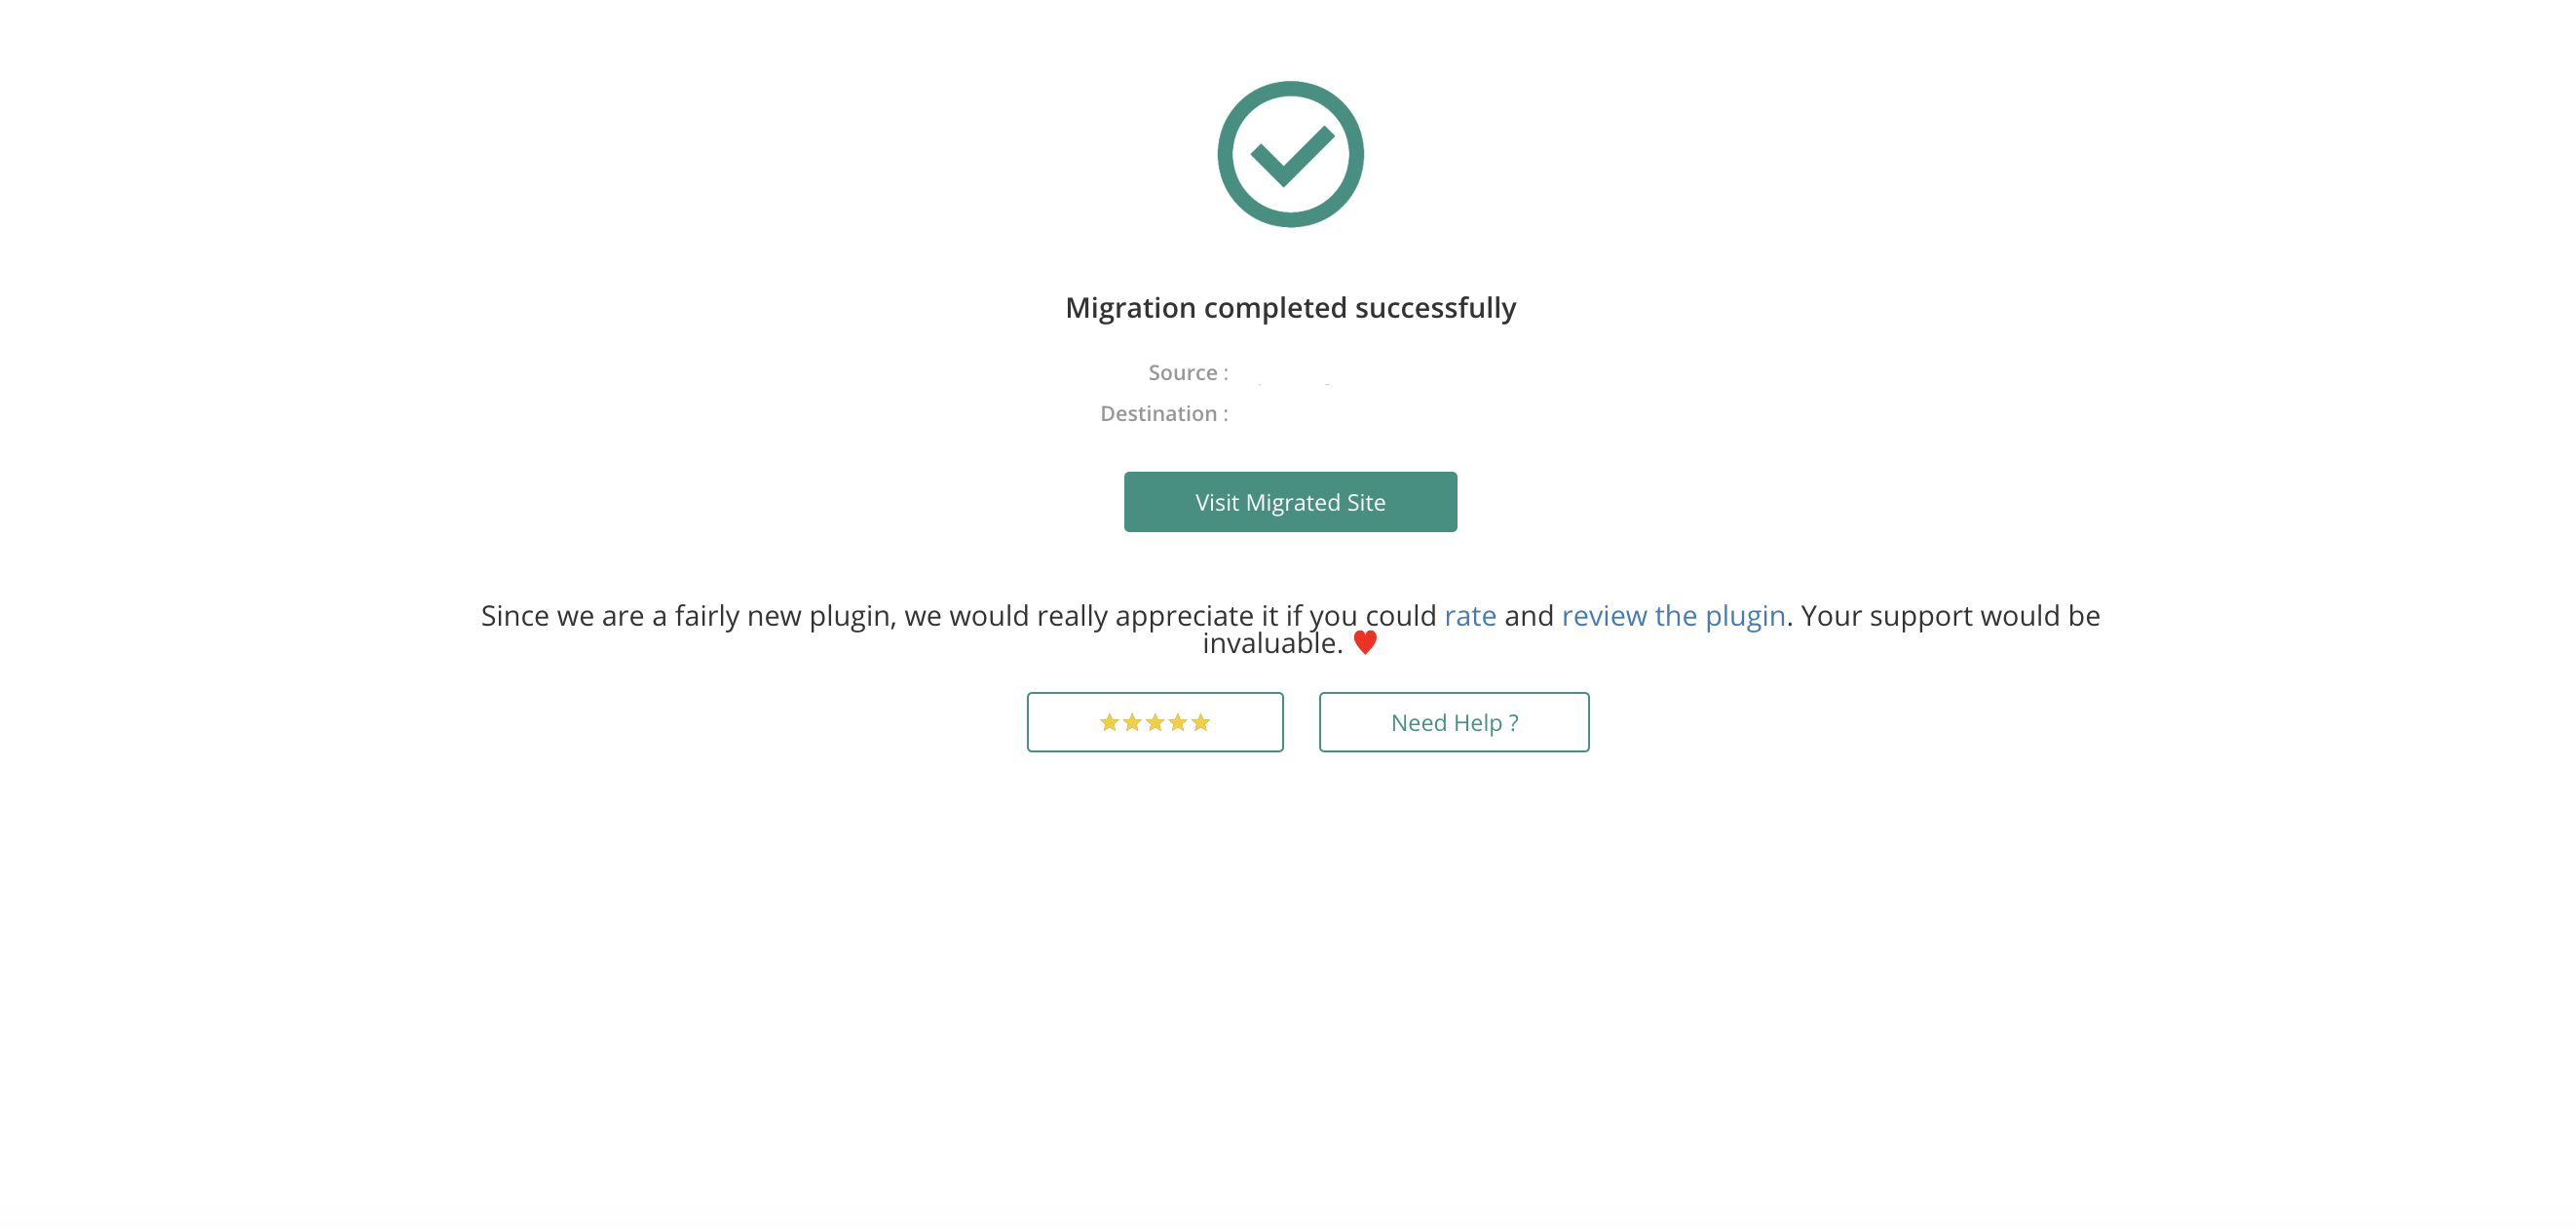
Once all your information has been added, click the Migrate button at the bottom of the page to begin your migration. If all the details are correct then you should get this page below.
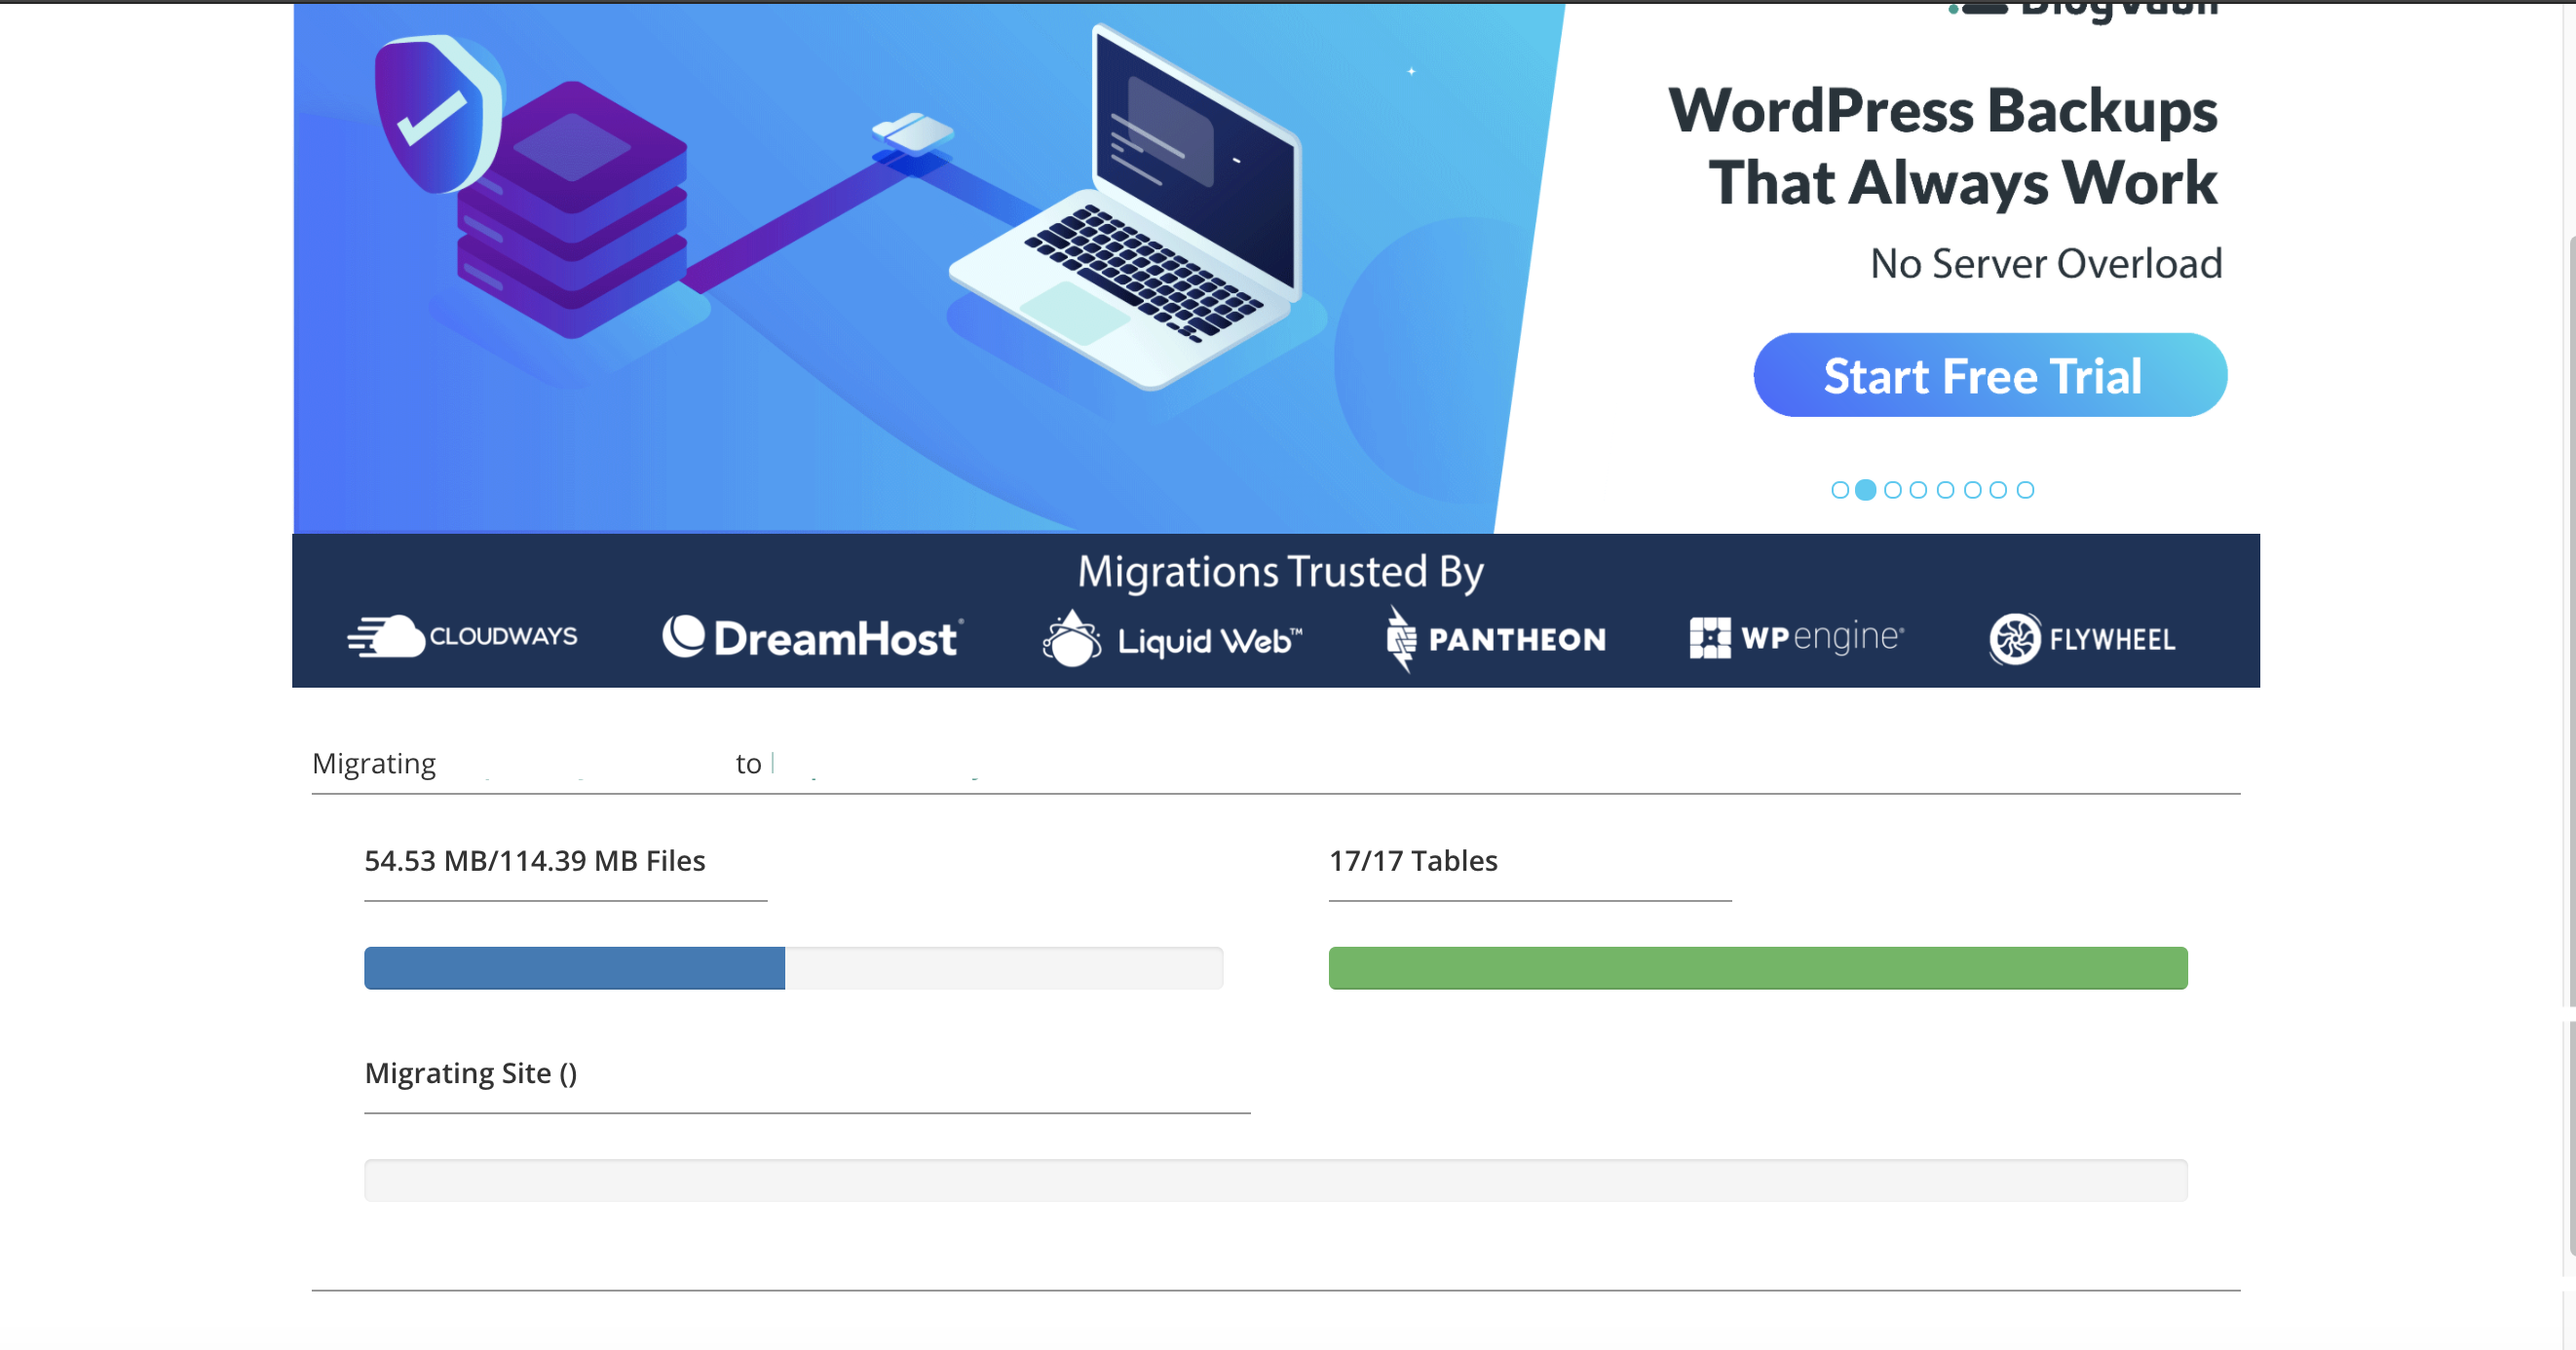
Once the migration has completed, you should get a confirmation message and email.
Incorrect Database Table Prefix
The Problem
You’ve imported your site, but all the plugins are deactivated and content is missing.
Diagnosis
We sometimes see this when migrating from managed hosts such as Kinsta and WP Engine. Here you need to check to see if the database table prefix is “wp_”. You can do this by clicking on the database icon next to your website to open up phpMyAdmin:
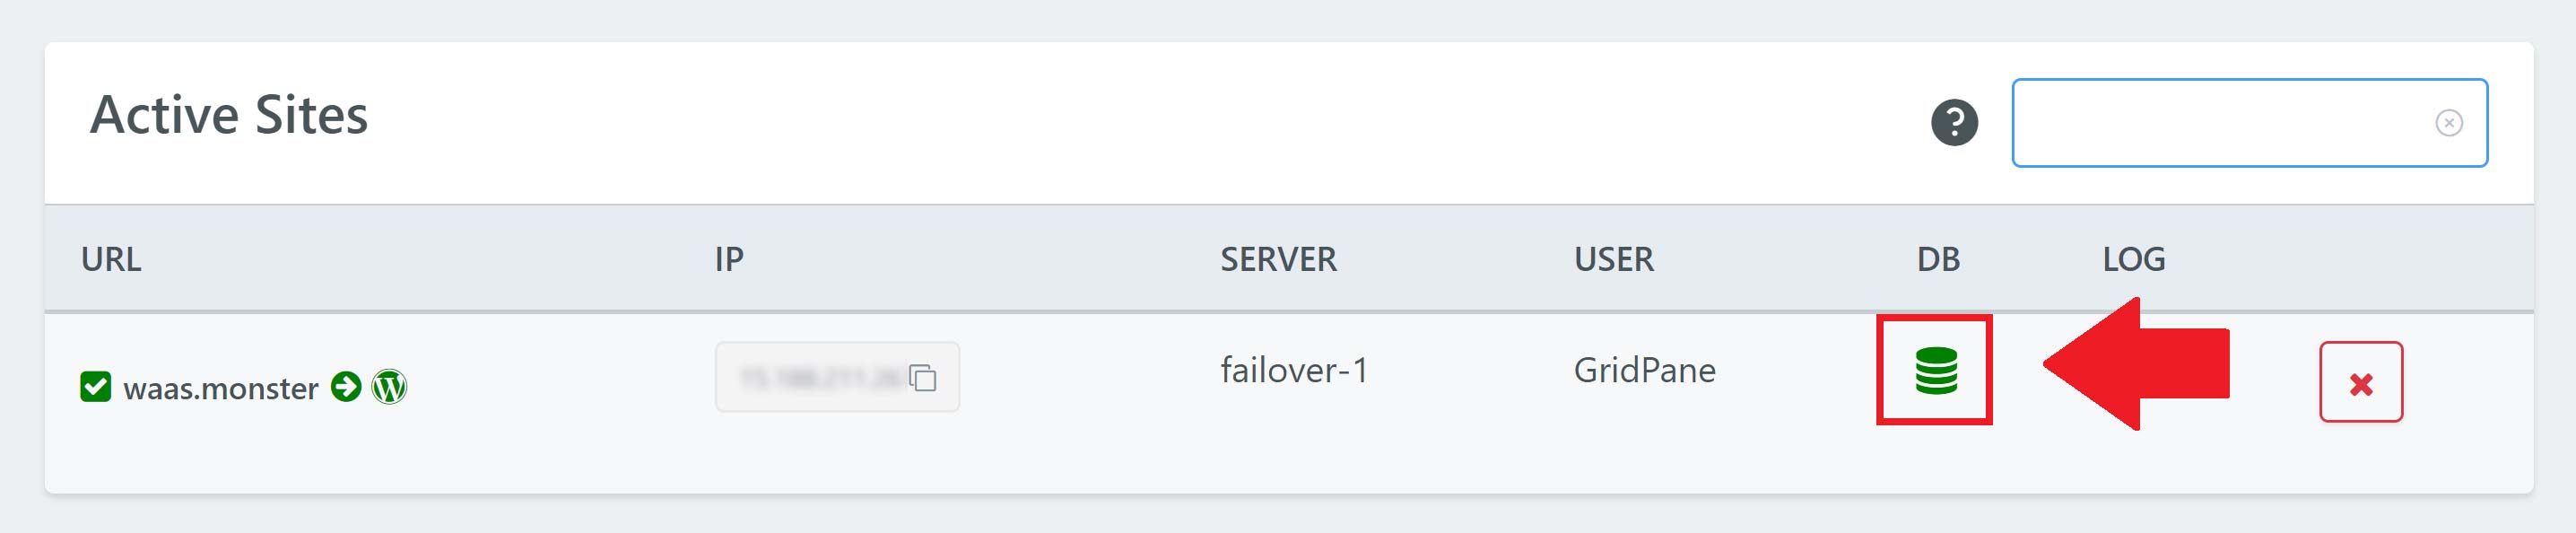
We’re looking to see if these match up (be sure to check thoroughly as the original database tables from the sites creation may still be there):

A custom prefix could potentially be anything, but often looks something like: “wp87f_“
The Solution
If your table prefix doesn’t match up, but all your database tables are using the same prefix, you can edit the table prefix in your wp-config.php via SFTP (download, edit, reupload) or the command line.
To edit via the command line type the following command (switch out “site.url” with your domain name):
nano /var/www/site.url/wp-config.php
Edit your prefix, and then hit Control+O, and then enter to save the file. Exit with Control+X.