Step 1. Locate Your Server and Database Configuration Details
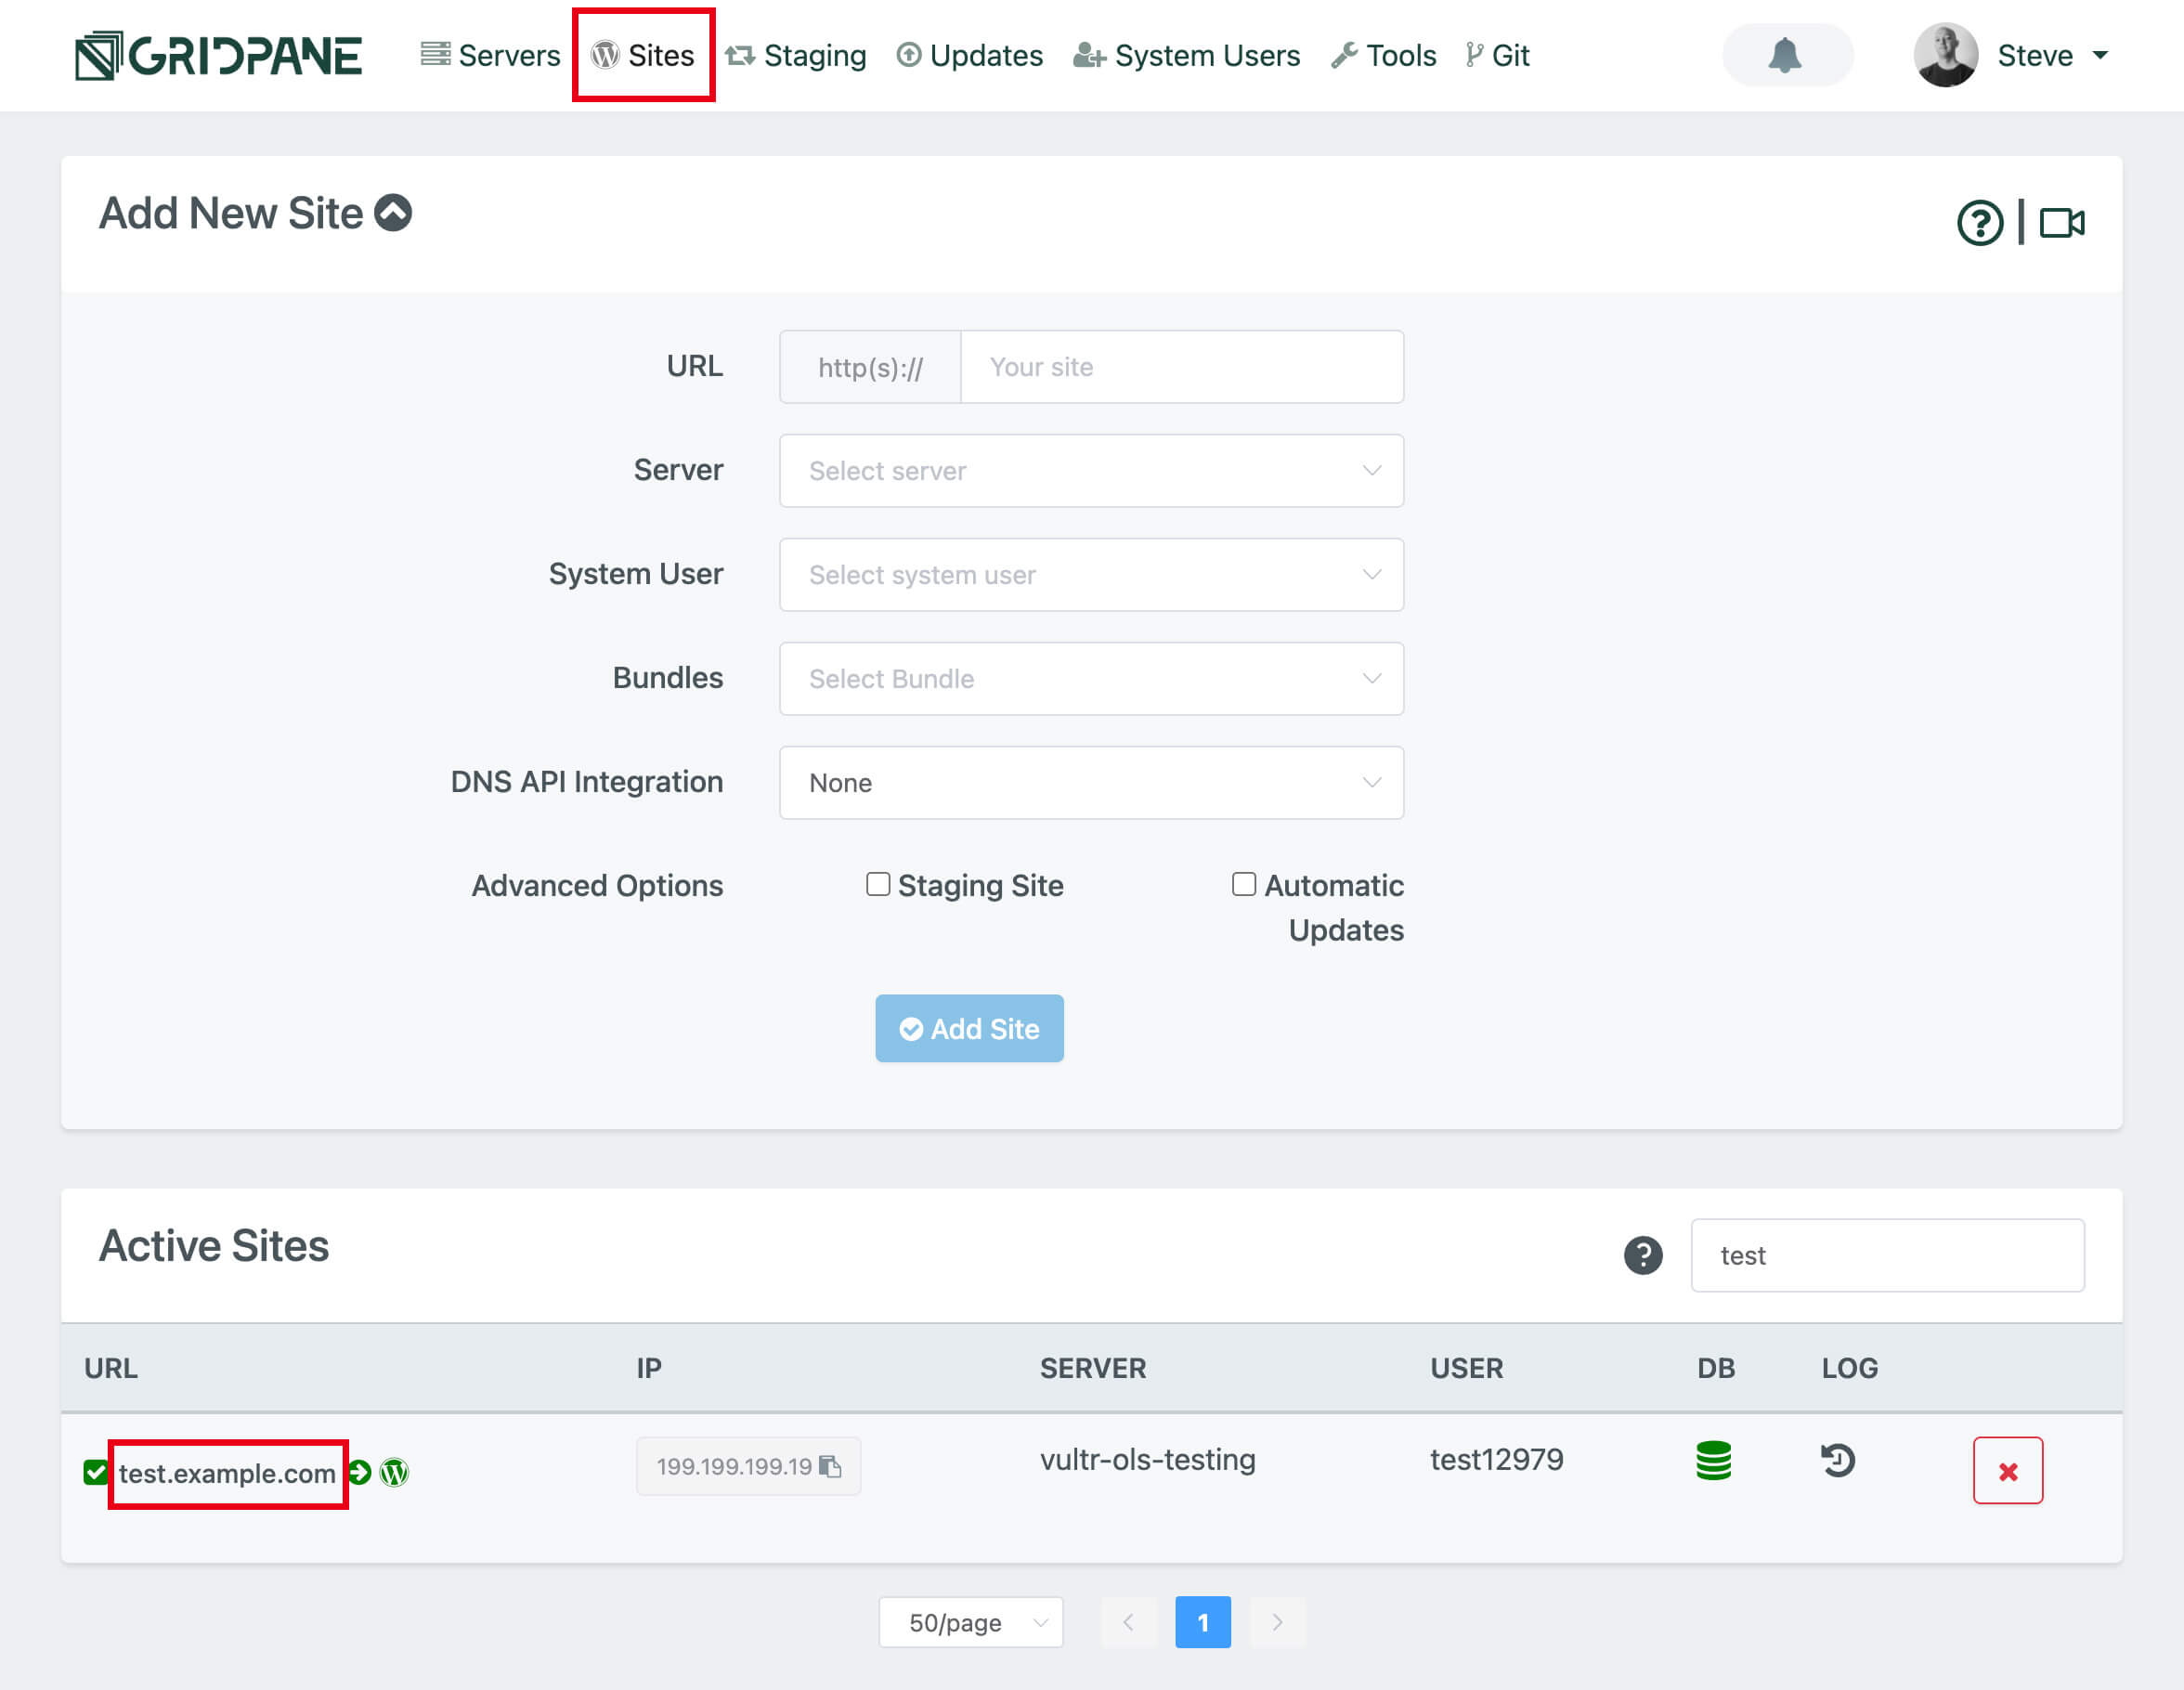
Head over to the Sites page inside your GridPane account and locate the site you want to connect to. Here you can copy your server IP address and open up the website customizer to view the wp-config.php file and view the website’s database credentials.
In the Active Sites panel, click on the website URL to open the Site Customizer:
Now, click the Display wp-config button:
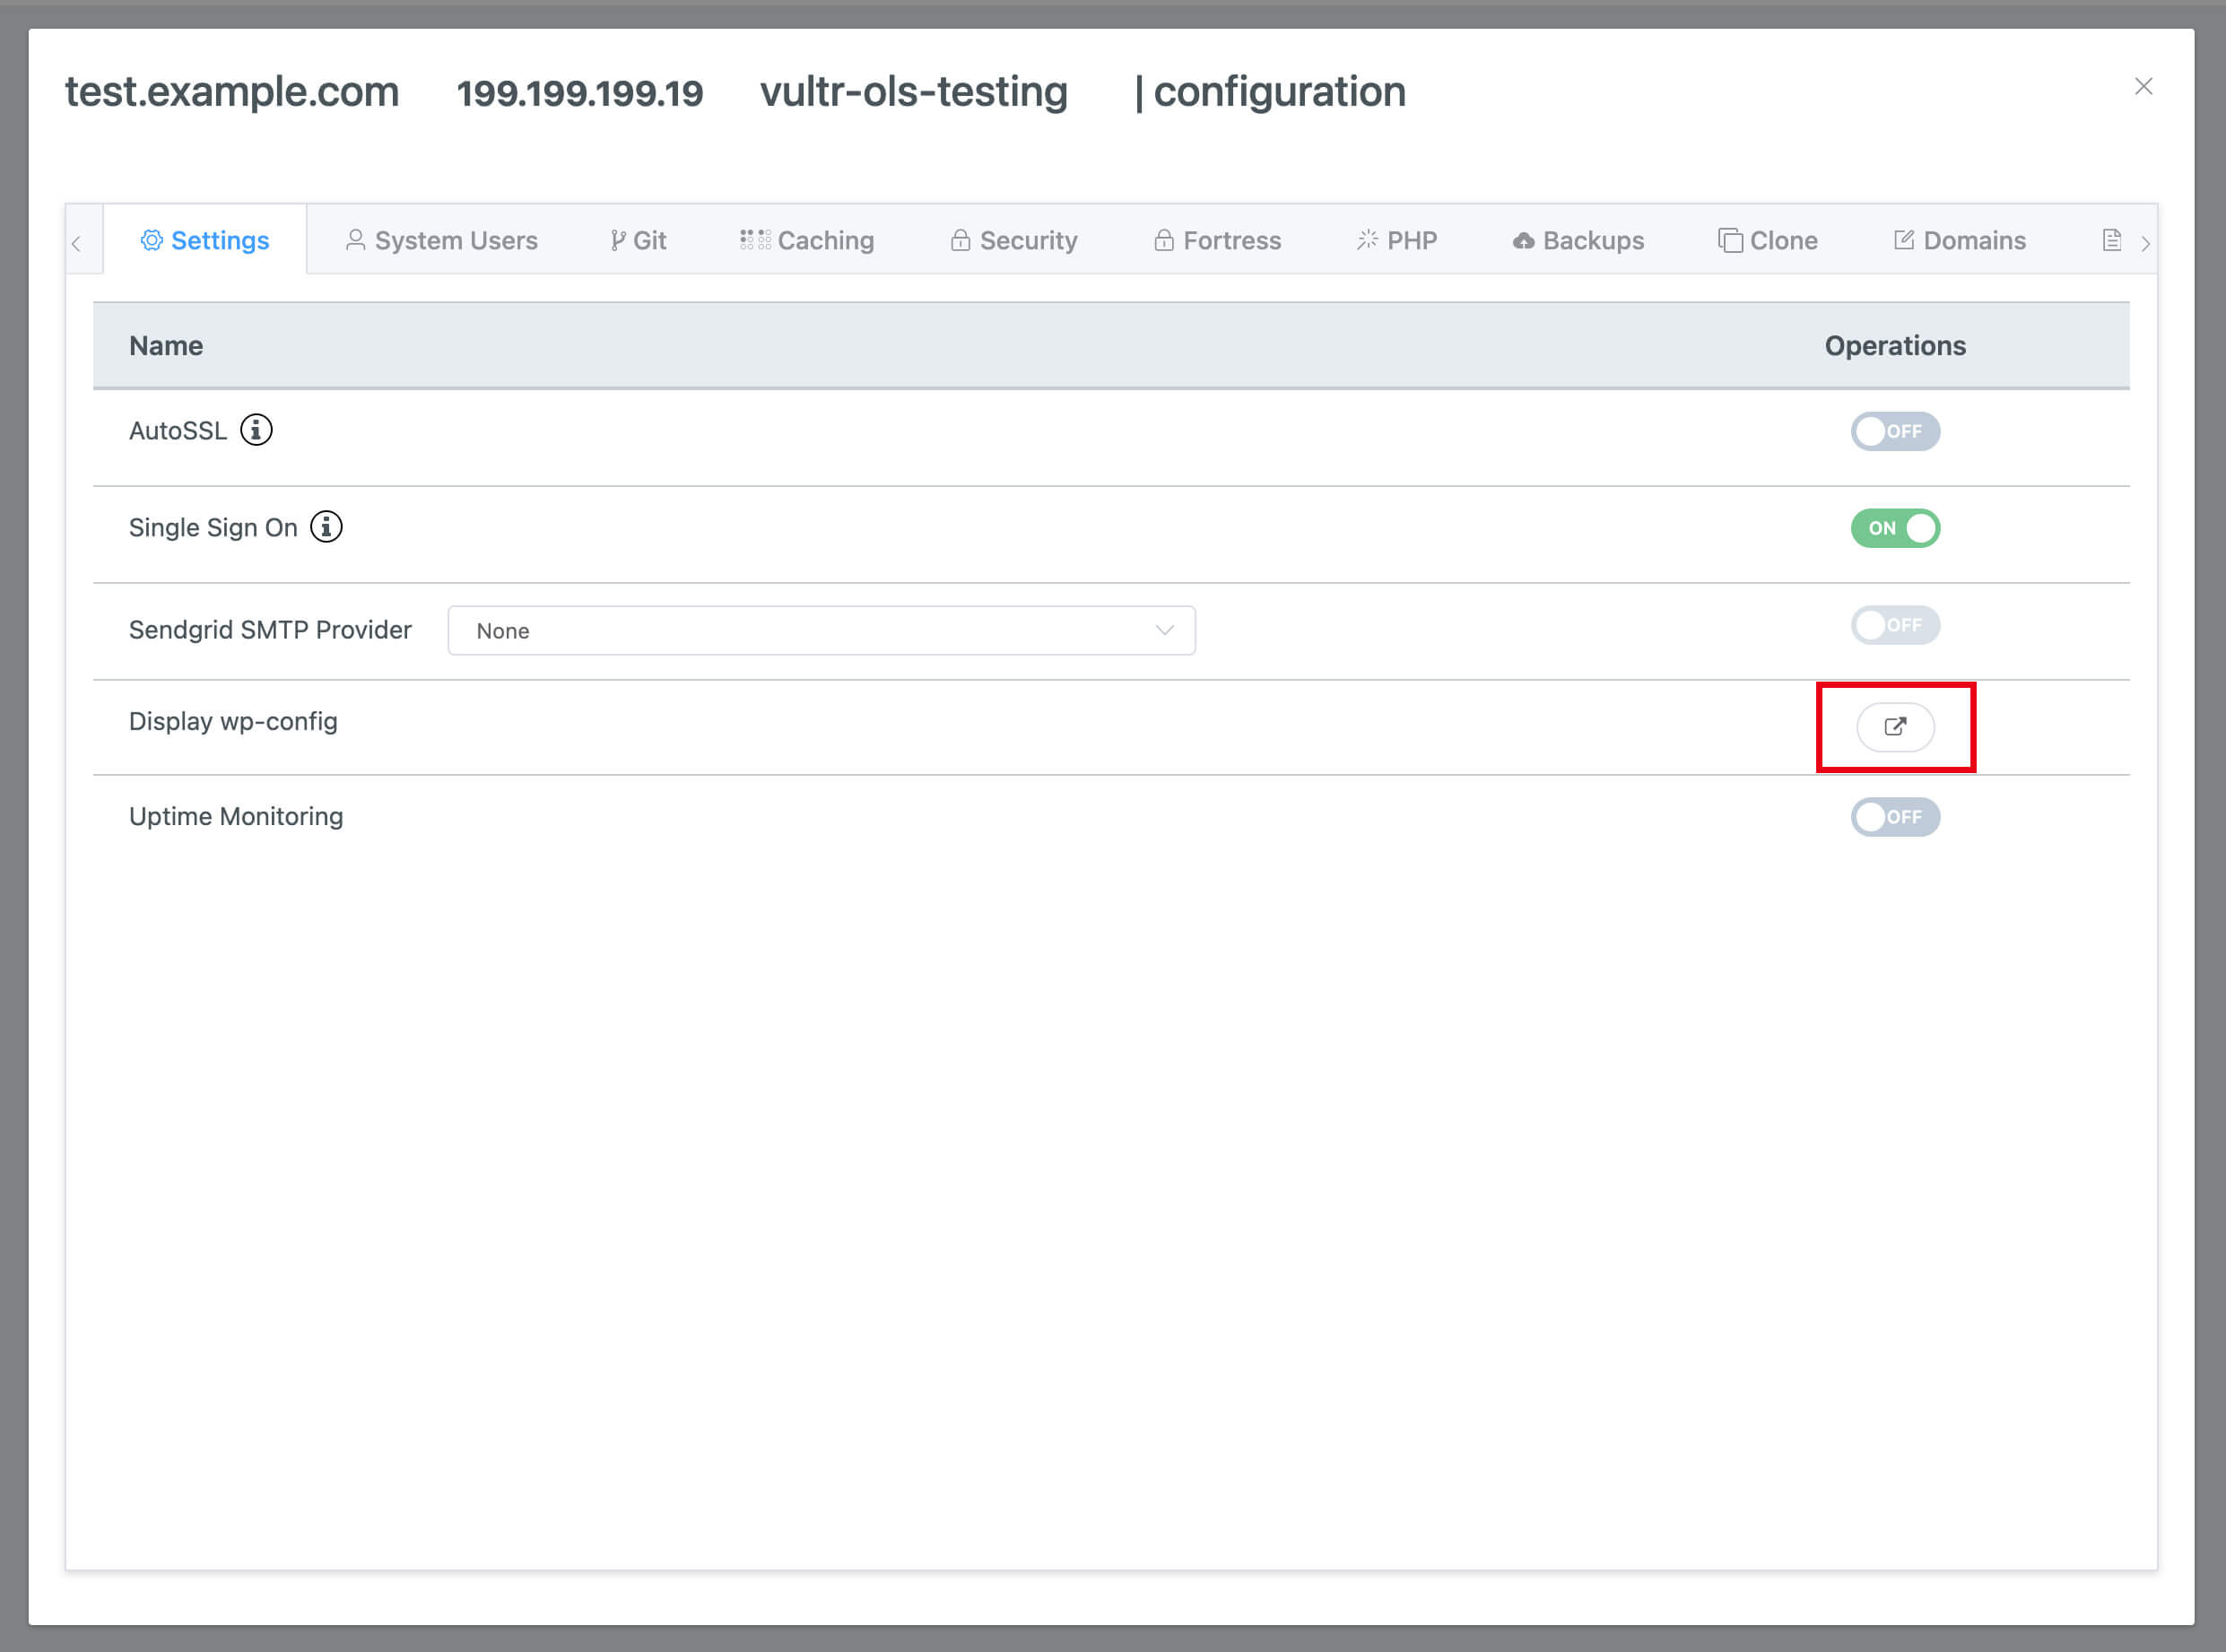
GridPane will retrieve your wp-config.php file and display its contents in a pop-up modal window. You will need to make note of your WordPress MySQL database settings as outlined below:
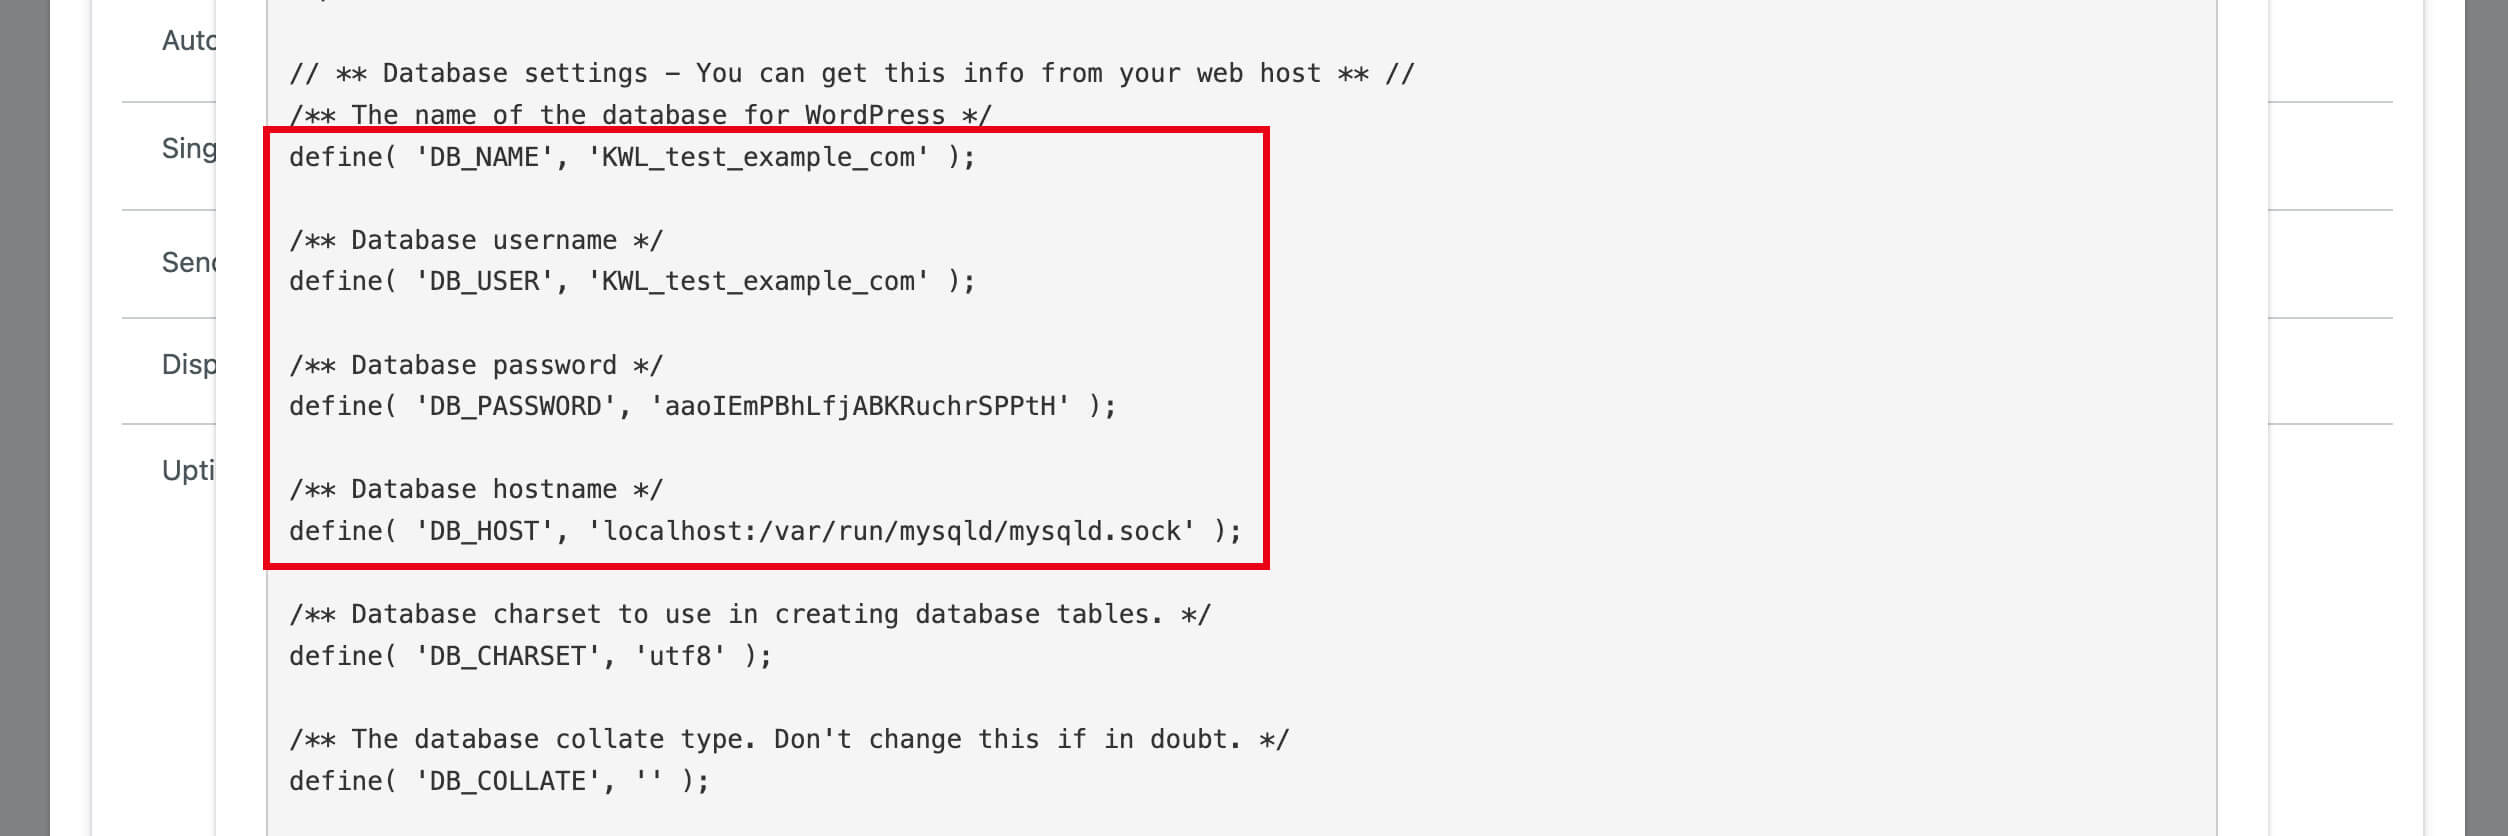
Take note of the following connection configuration details that the desktop MySQL client requires:
- DB_NAME = Database (Database Name)
- DB_USER = Username (Database Username)
- DB_PASSWORD = Password (Database Password)
- DB_HOST = MySQL Host
The DB_HOST is always as follows:
/var/run/mysqld/mysqld.sock
With this information and the server’s IP address, we can move on to step 2 below.
Step 2.1 Connect to Your Database as the Root User
This method is only appropriate for you as the account owner or your trusted team members who already have root access to your servers. For external teams/developers, you should never offer root access unless the server is solely for their use and you fully trust them with complete control over your server.
Connect to your Database
Open up your chosen database client and ensure you select SSH as the connection method – in TablePlus this is displayed as a blue button that states “Over SSH”. You may see a similar setting in other clients, or you may see a dropdown selection.
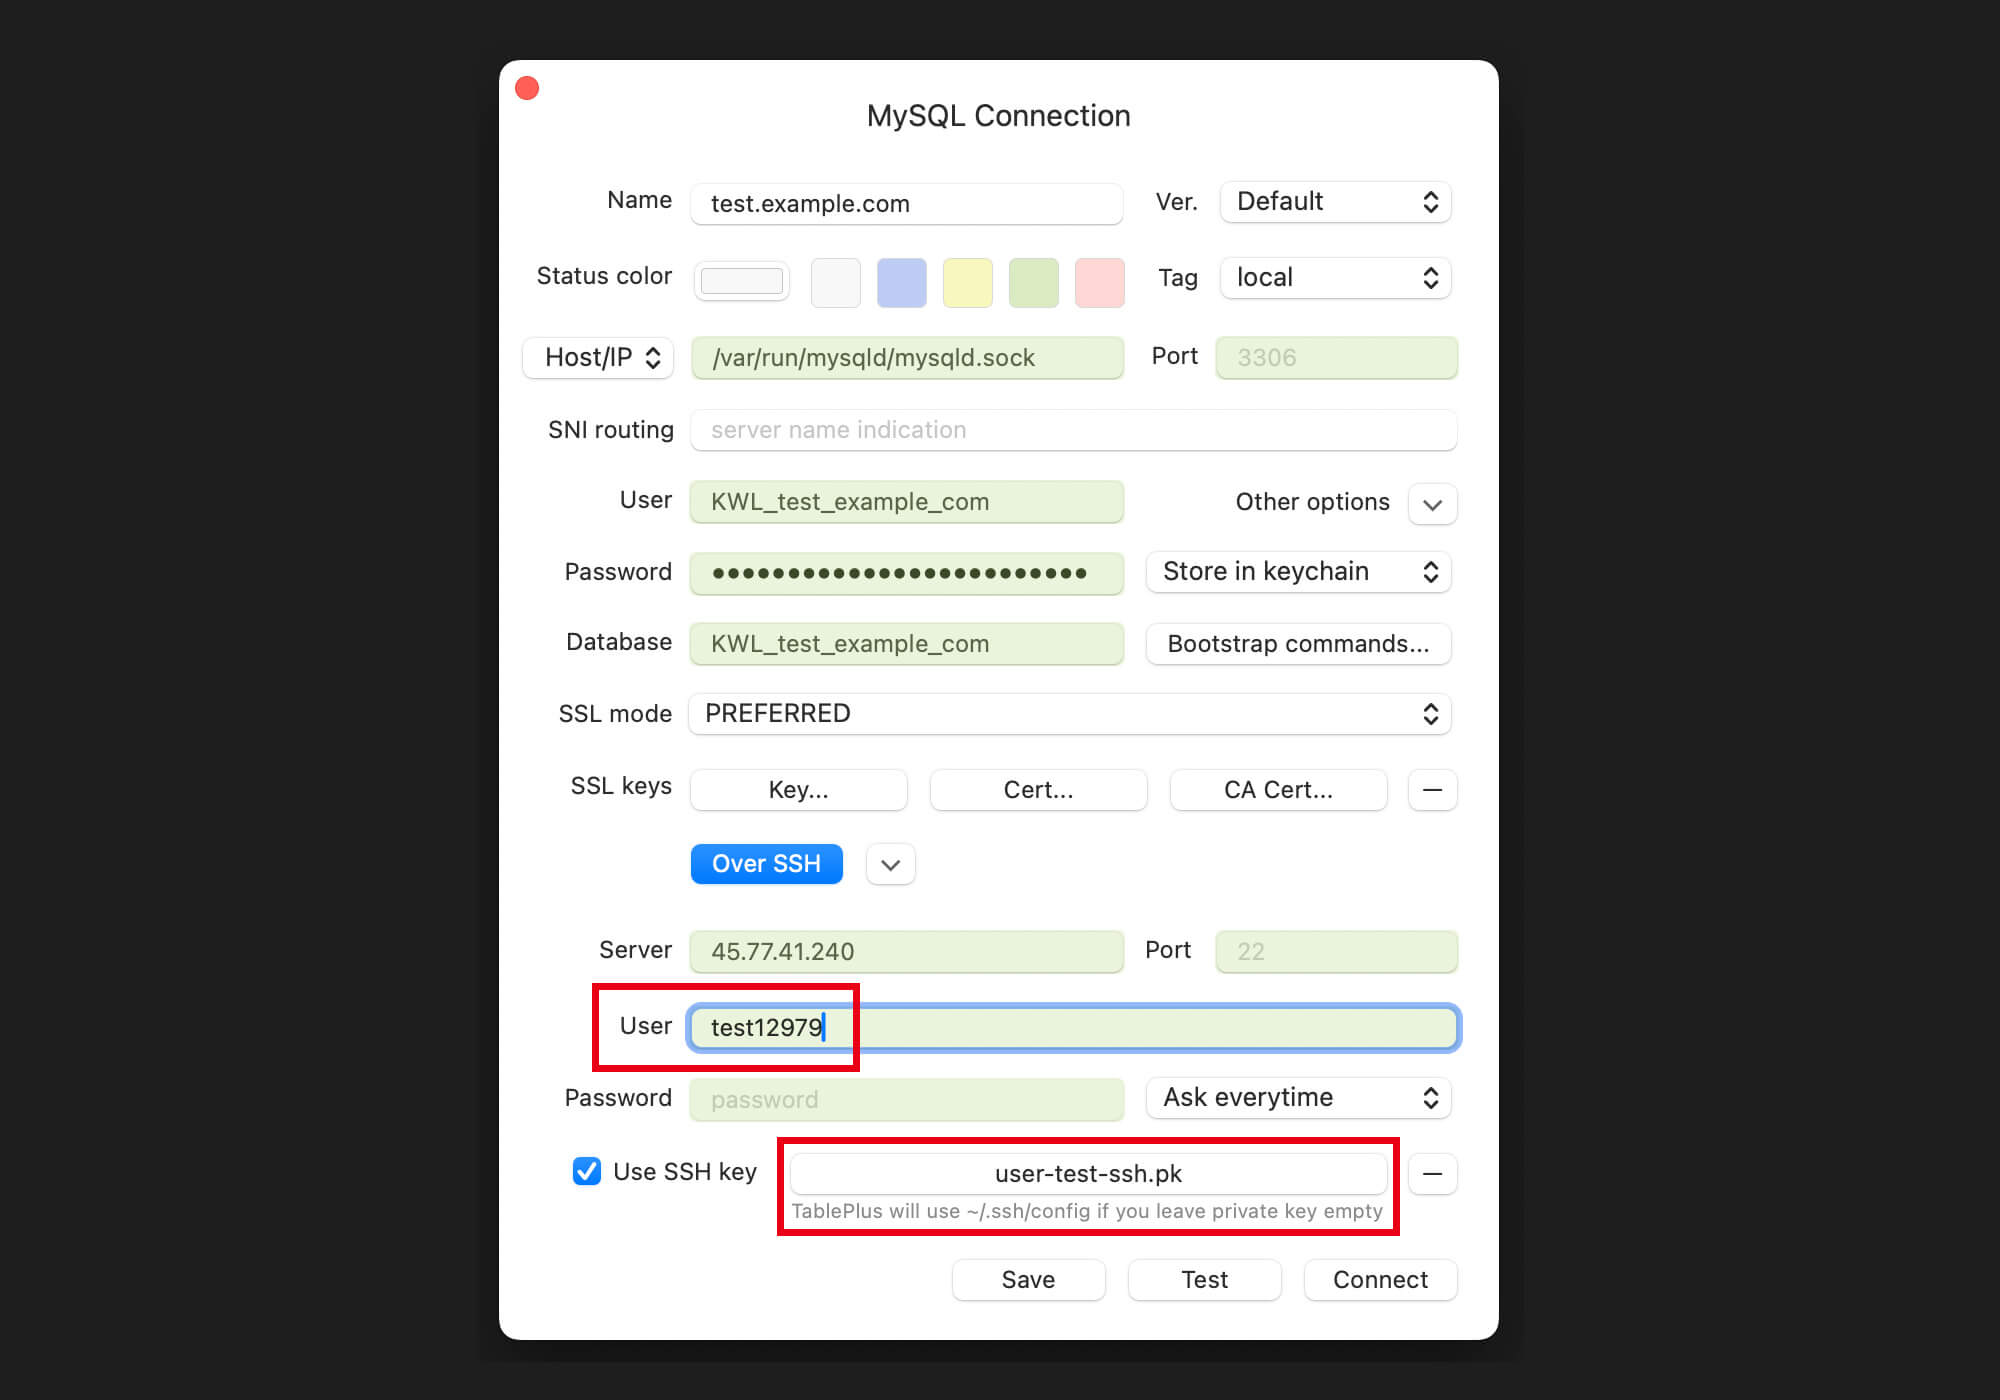
With the SSH setting selected as the connection method, you can now enter your database details and server IP (the Name setting at the top is for your reference only, not the database name):
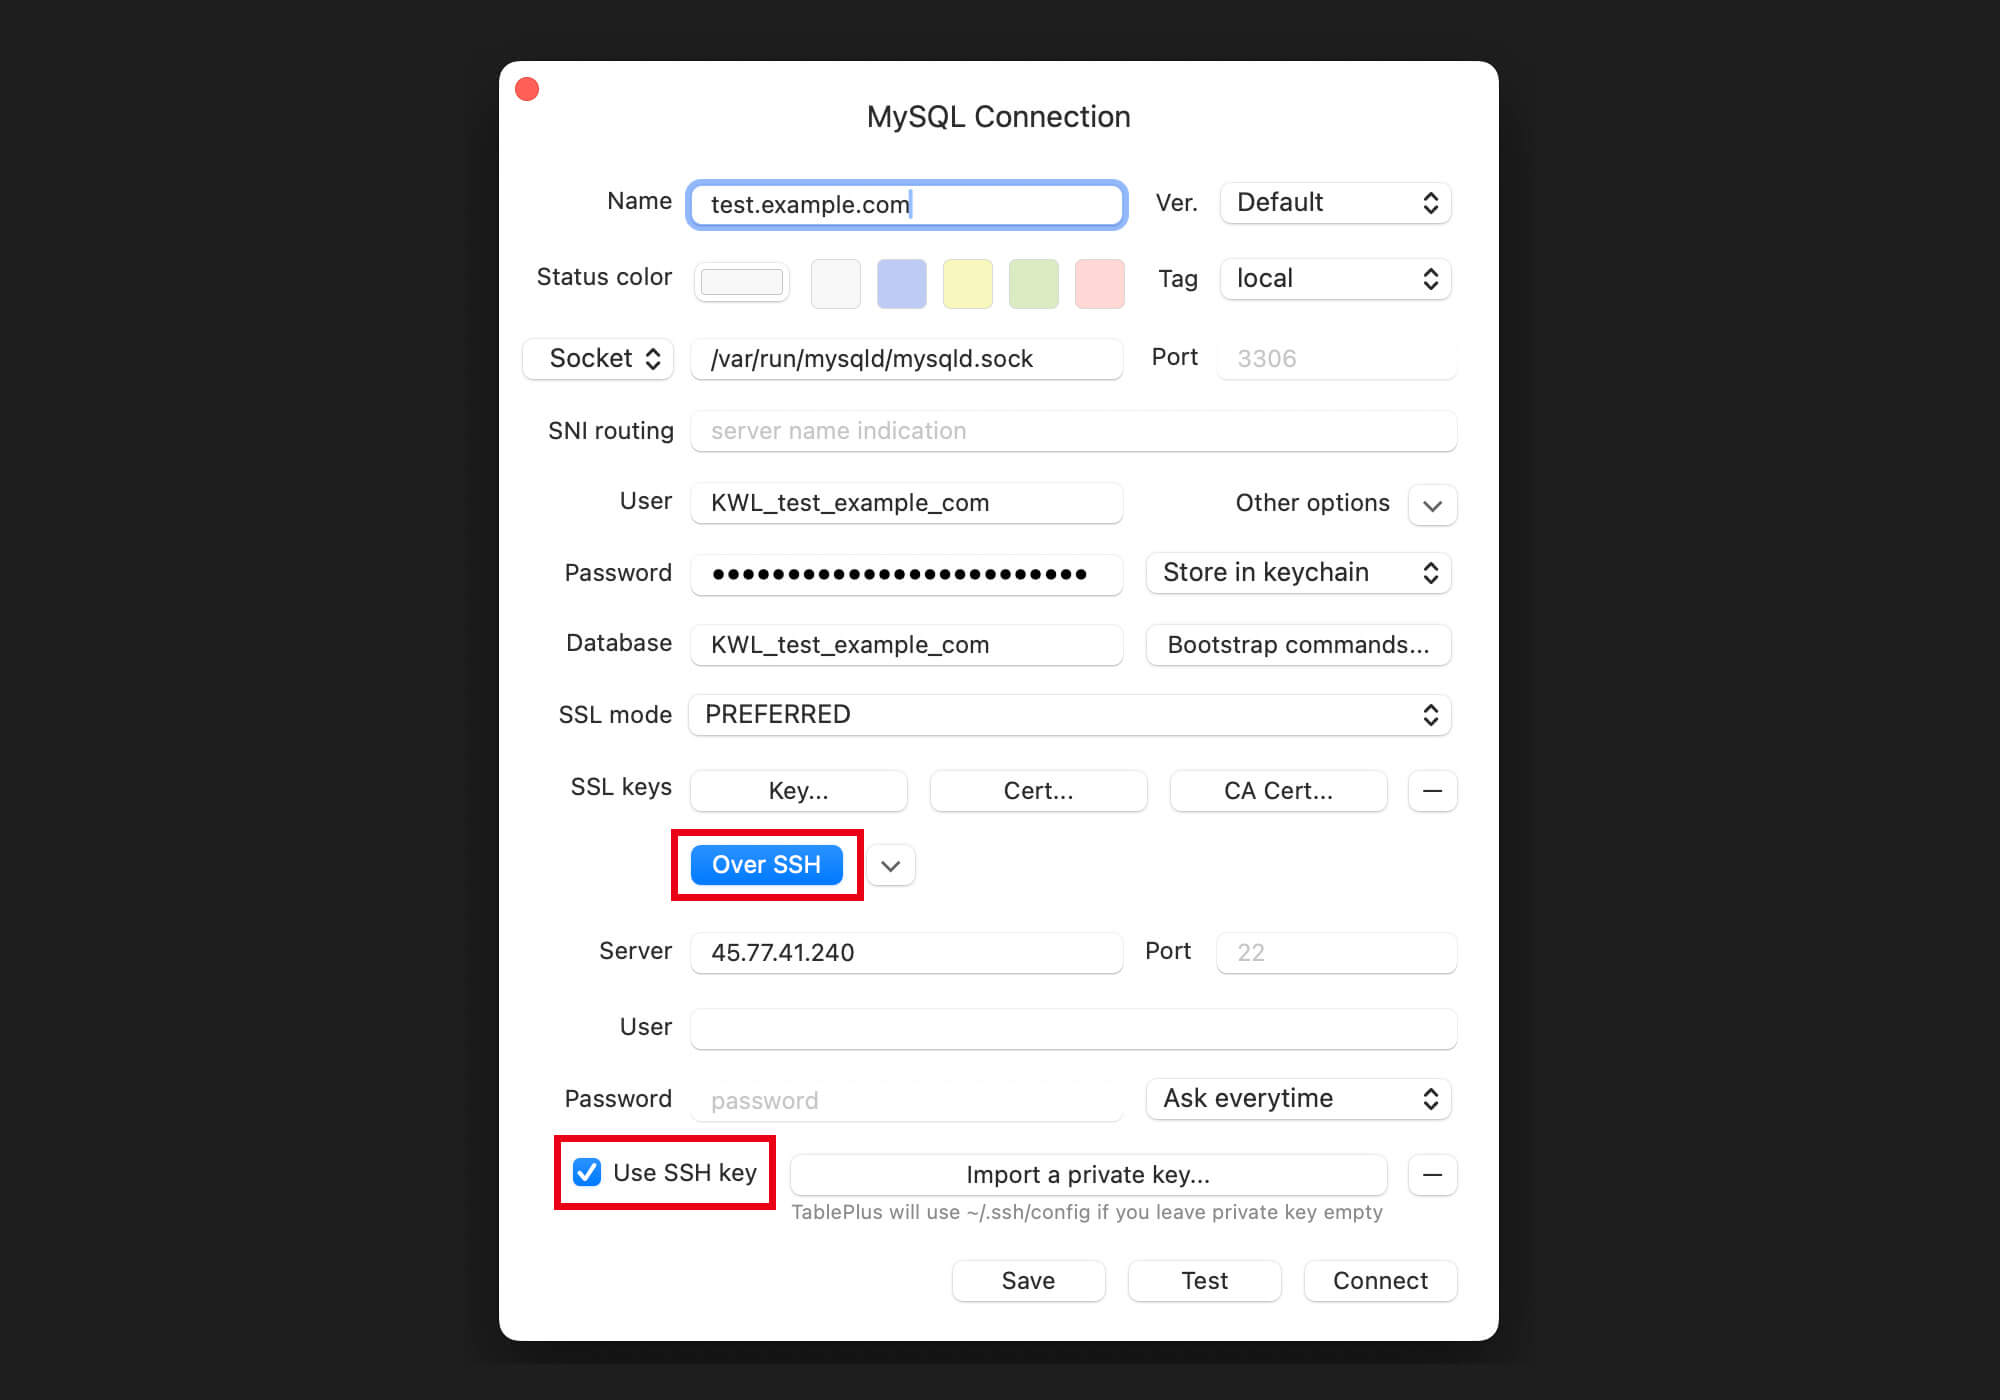
Next up is the server connection settings – your user is root , and you can select your private SSH key. Using an SSH key is necessary – password connections are not allowed for the root user.
Once set, you can test your connection to confirm everything has been set correctly:
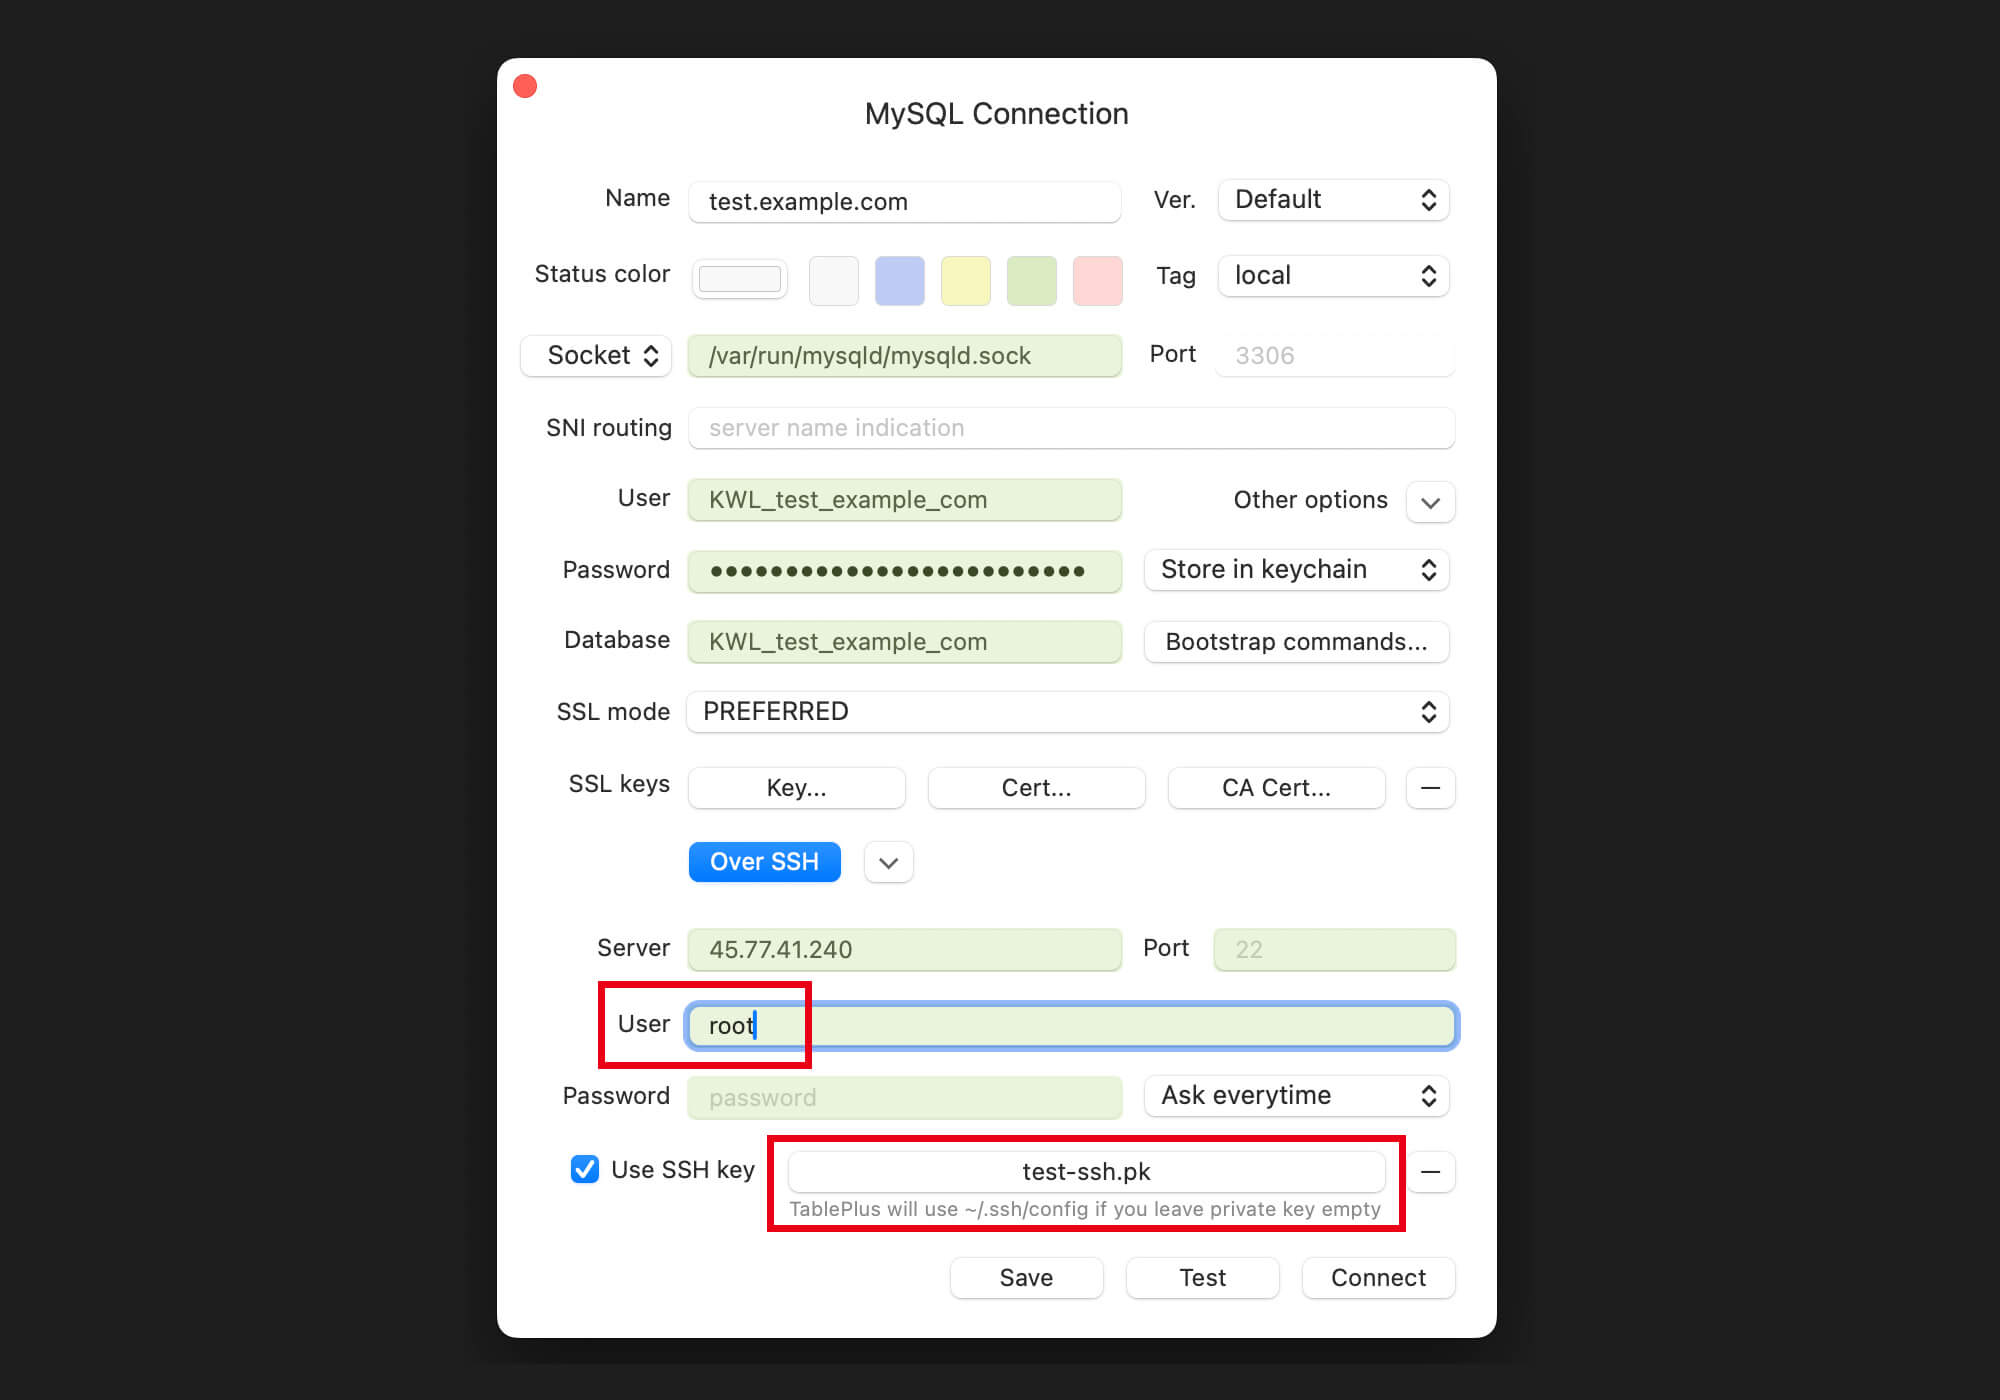
In TablePlus, everything will display as green as shown in the picture above, and you can click Connect to begin managing your database remotely.
Step 2.2 Connect to Your Database as the Website System User
If you try to follow the same procedure as detailed in Step 2.1 above, switching out the root user for the websites system user, you’re connection to MySQL will be denied, like in the image below:
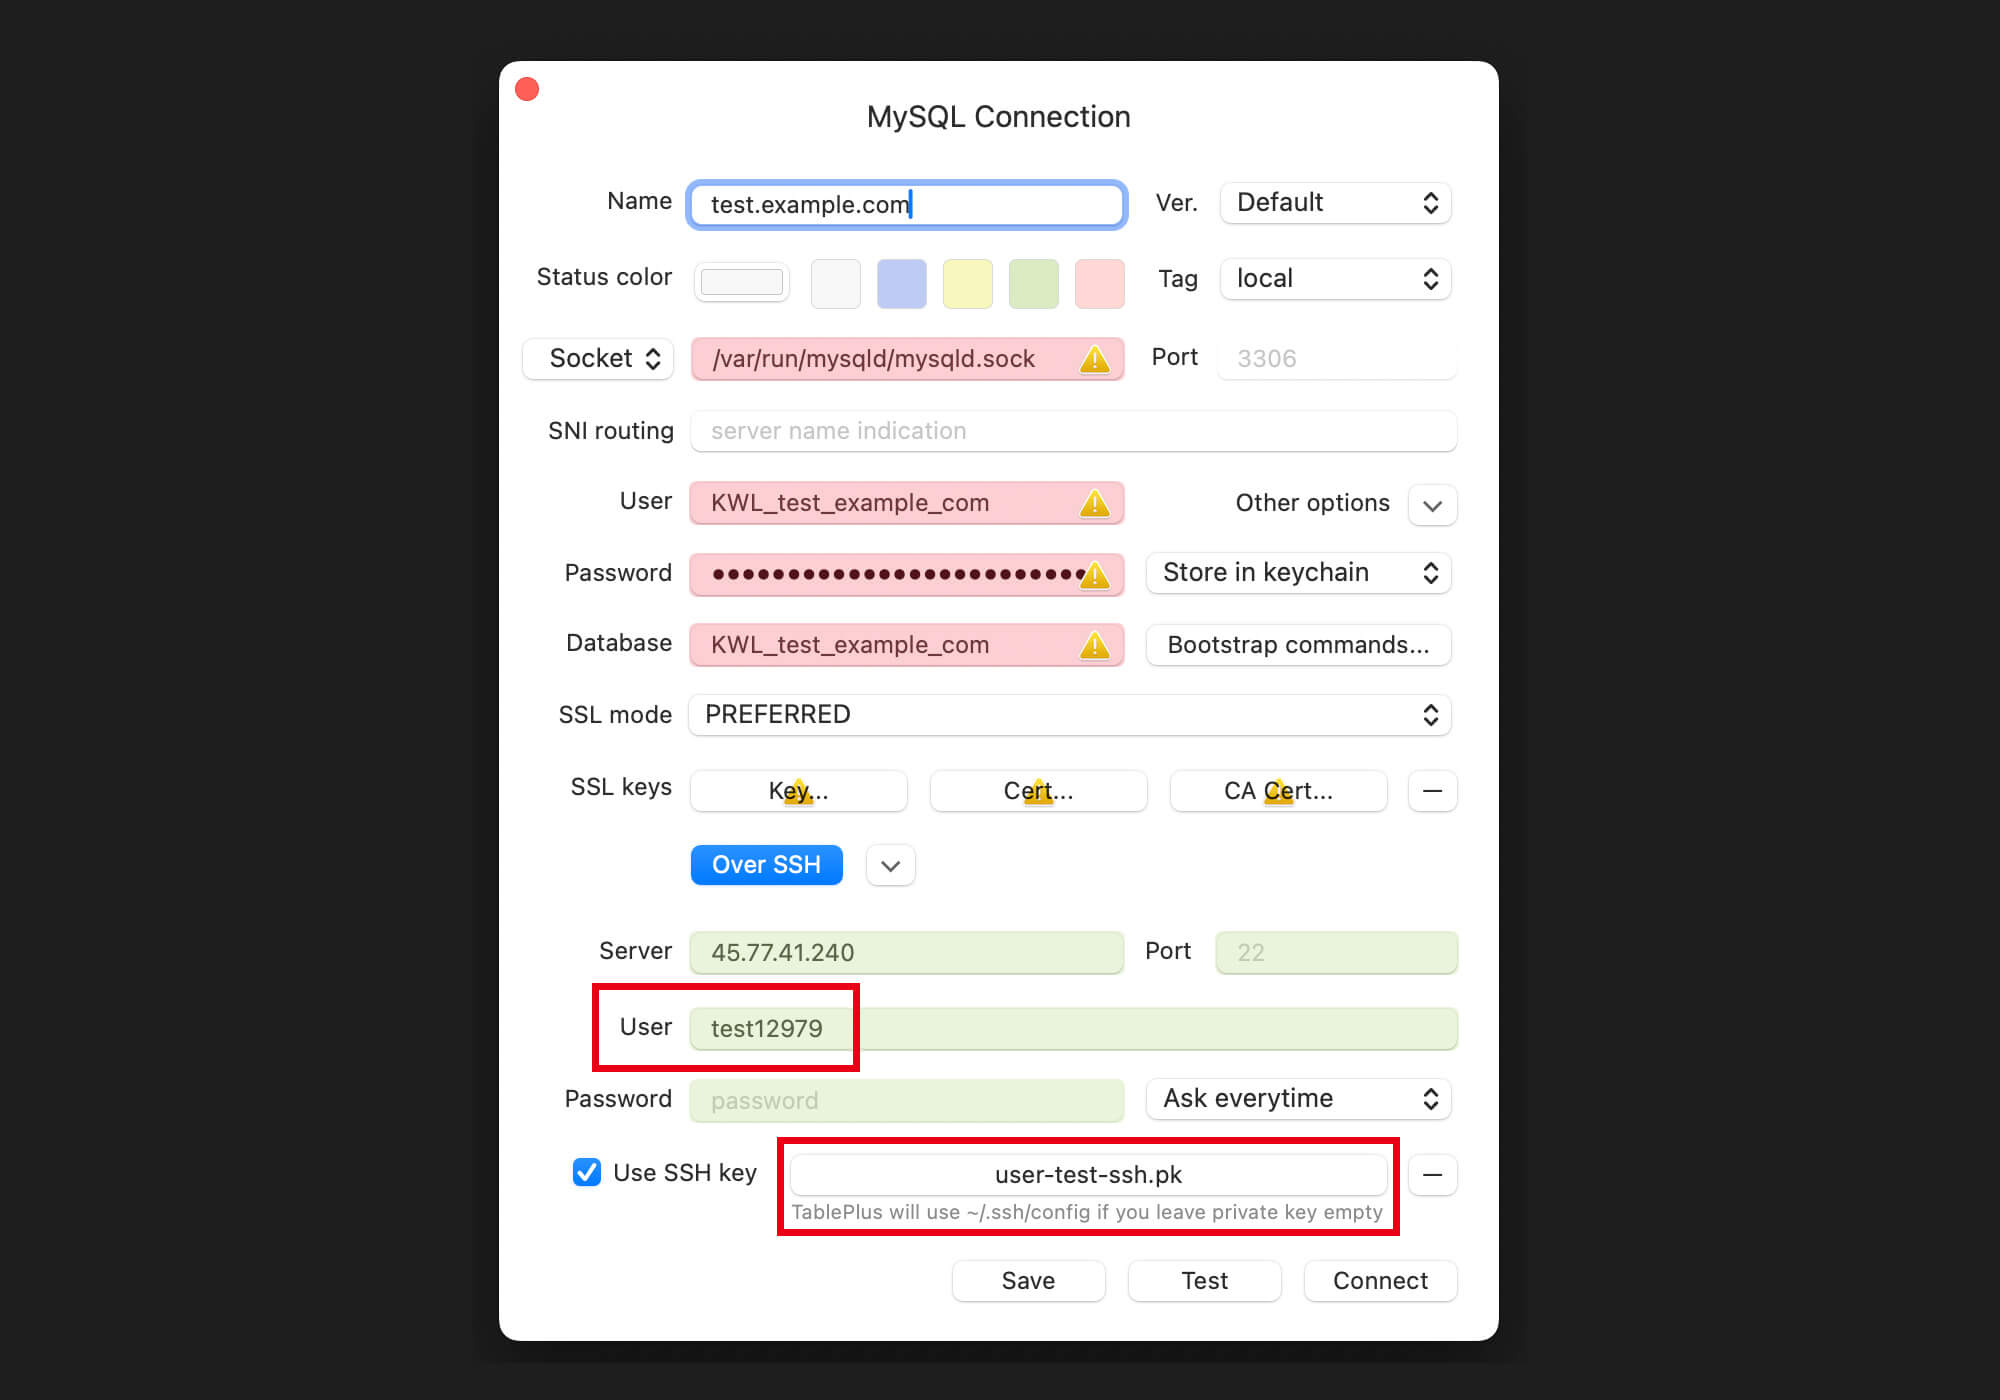
This is because the website’s system user doesn’t allow TCP forwarding for security reasons.
To make this work, you need to loosen the security for this specific user. While we don’t recommend this, it has been requested multiple times, so we’ll cover how to do this in the safest way possible below.
Security Settings
First, we recommend only using an SSH key, not the password setting. If you’re giving access to a team member or an external developer, force them to use an SSH key.
Next you’ll need to edit the servers ssh_config file and modify the system users permissions, and once set, you’ll be able to connect to your database.
1. Add an SSH Key to a System User
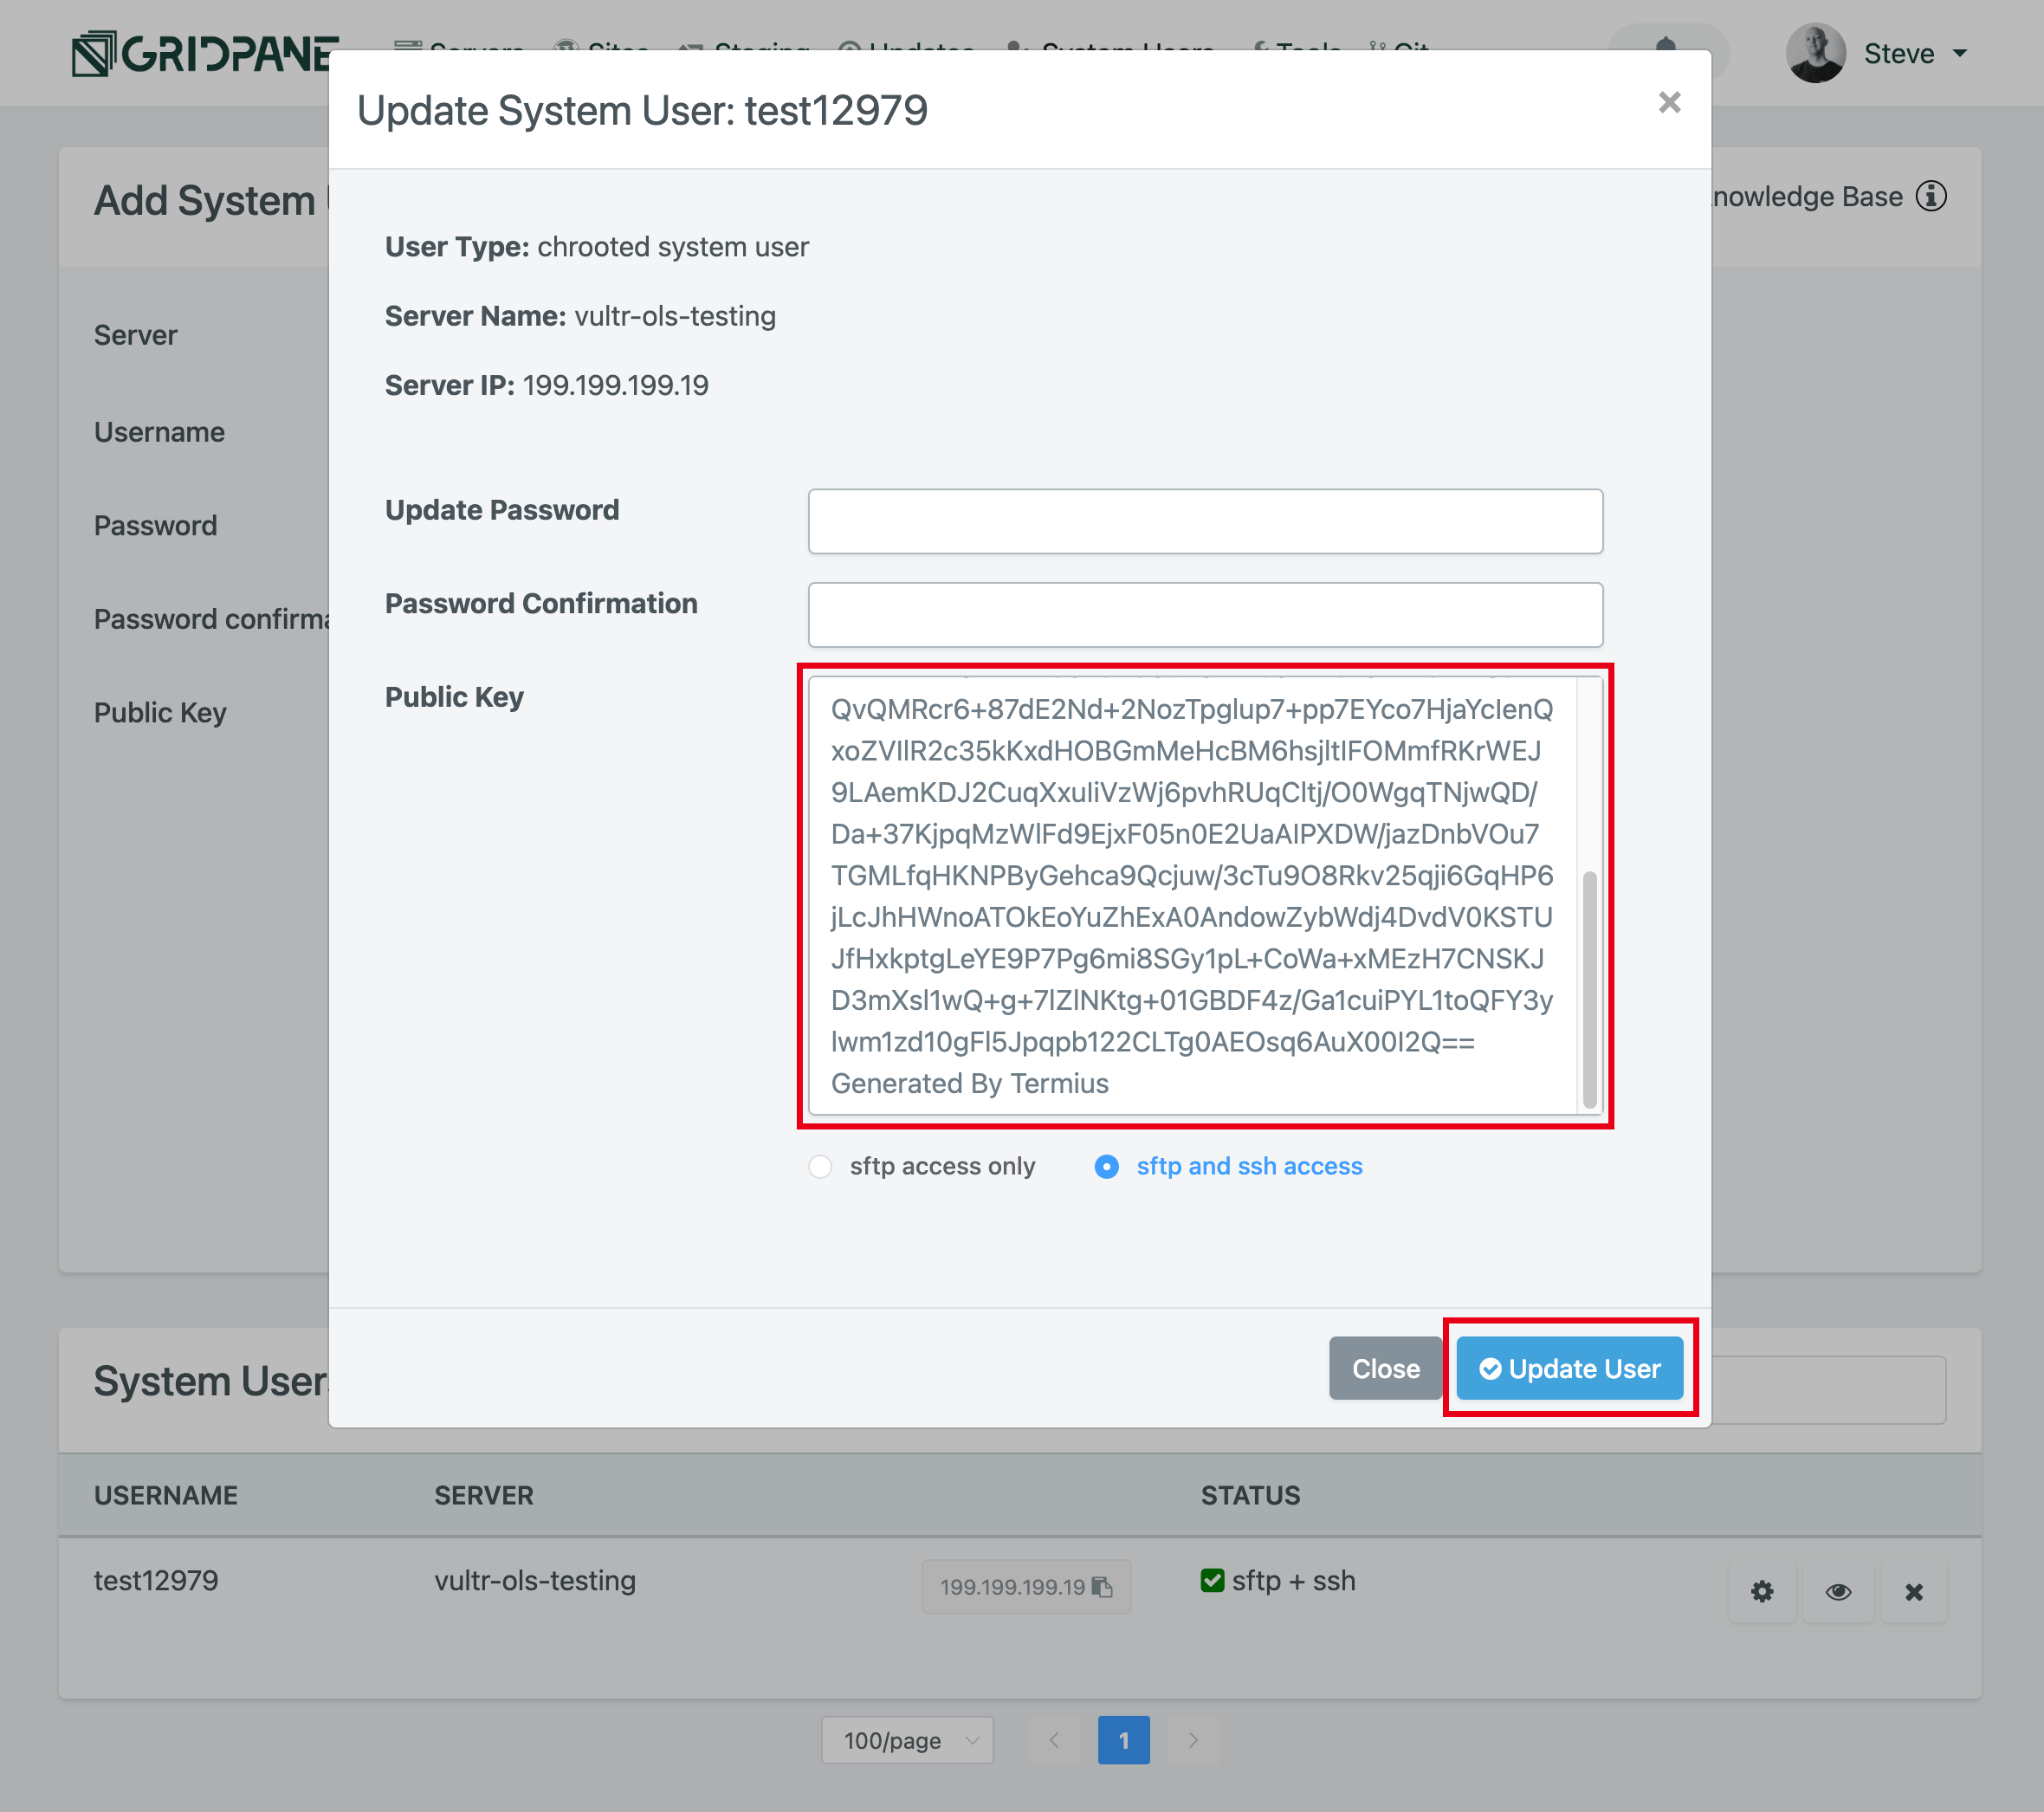
You can add a public SSH key to a system user by heading to the system users page, locating the website’s system user, and clicking the cog button:
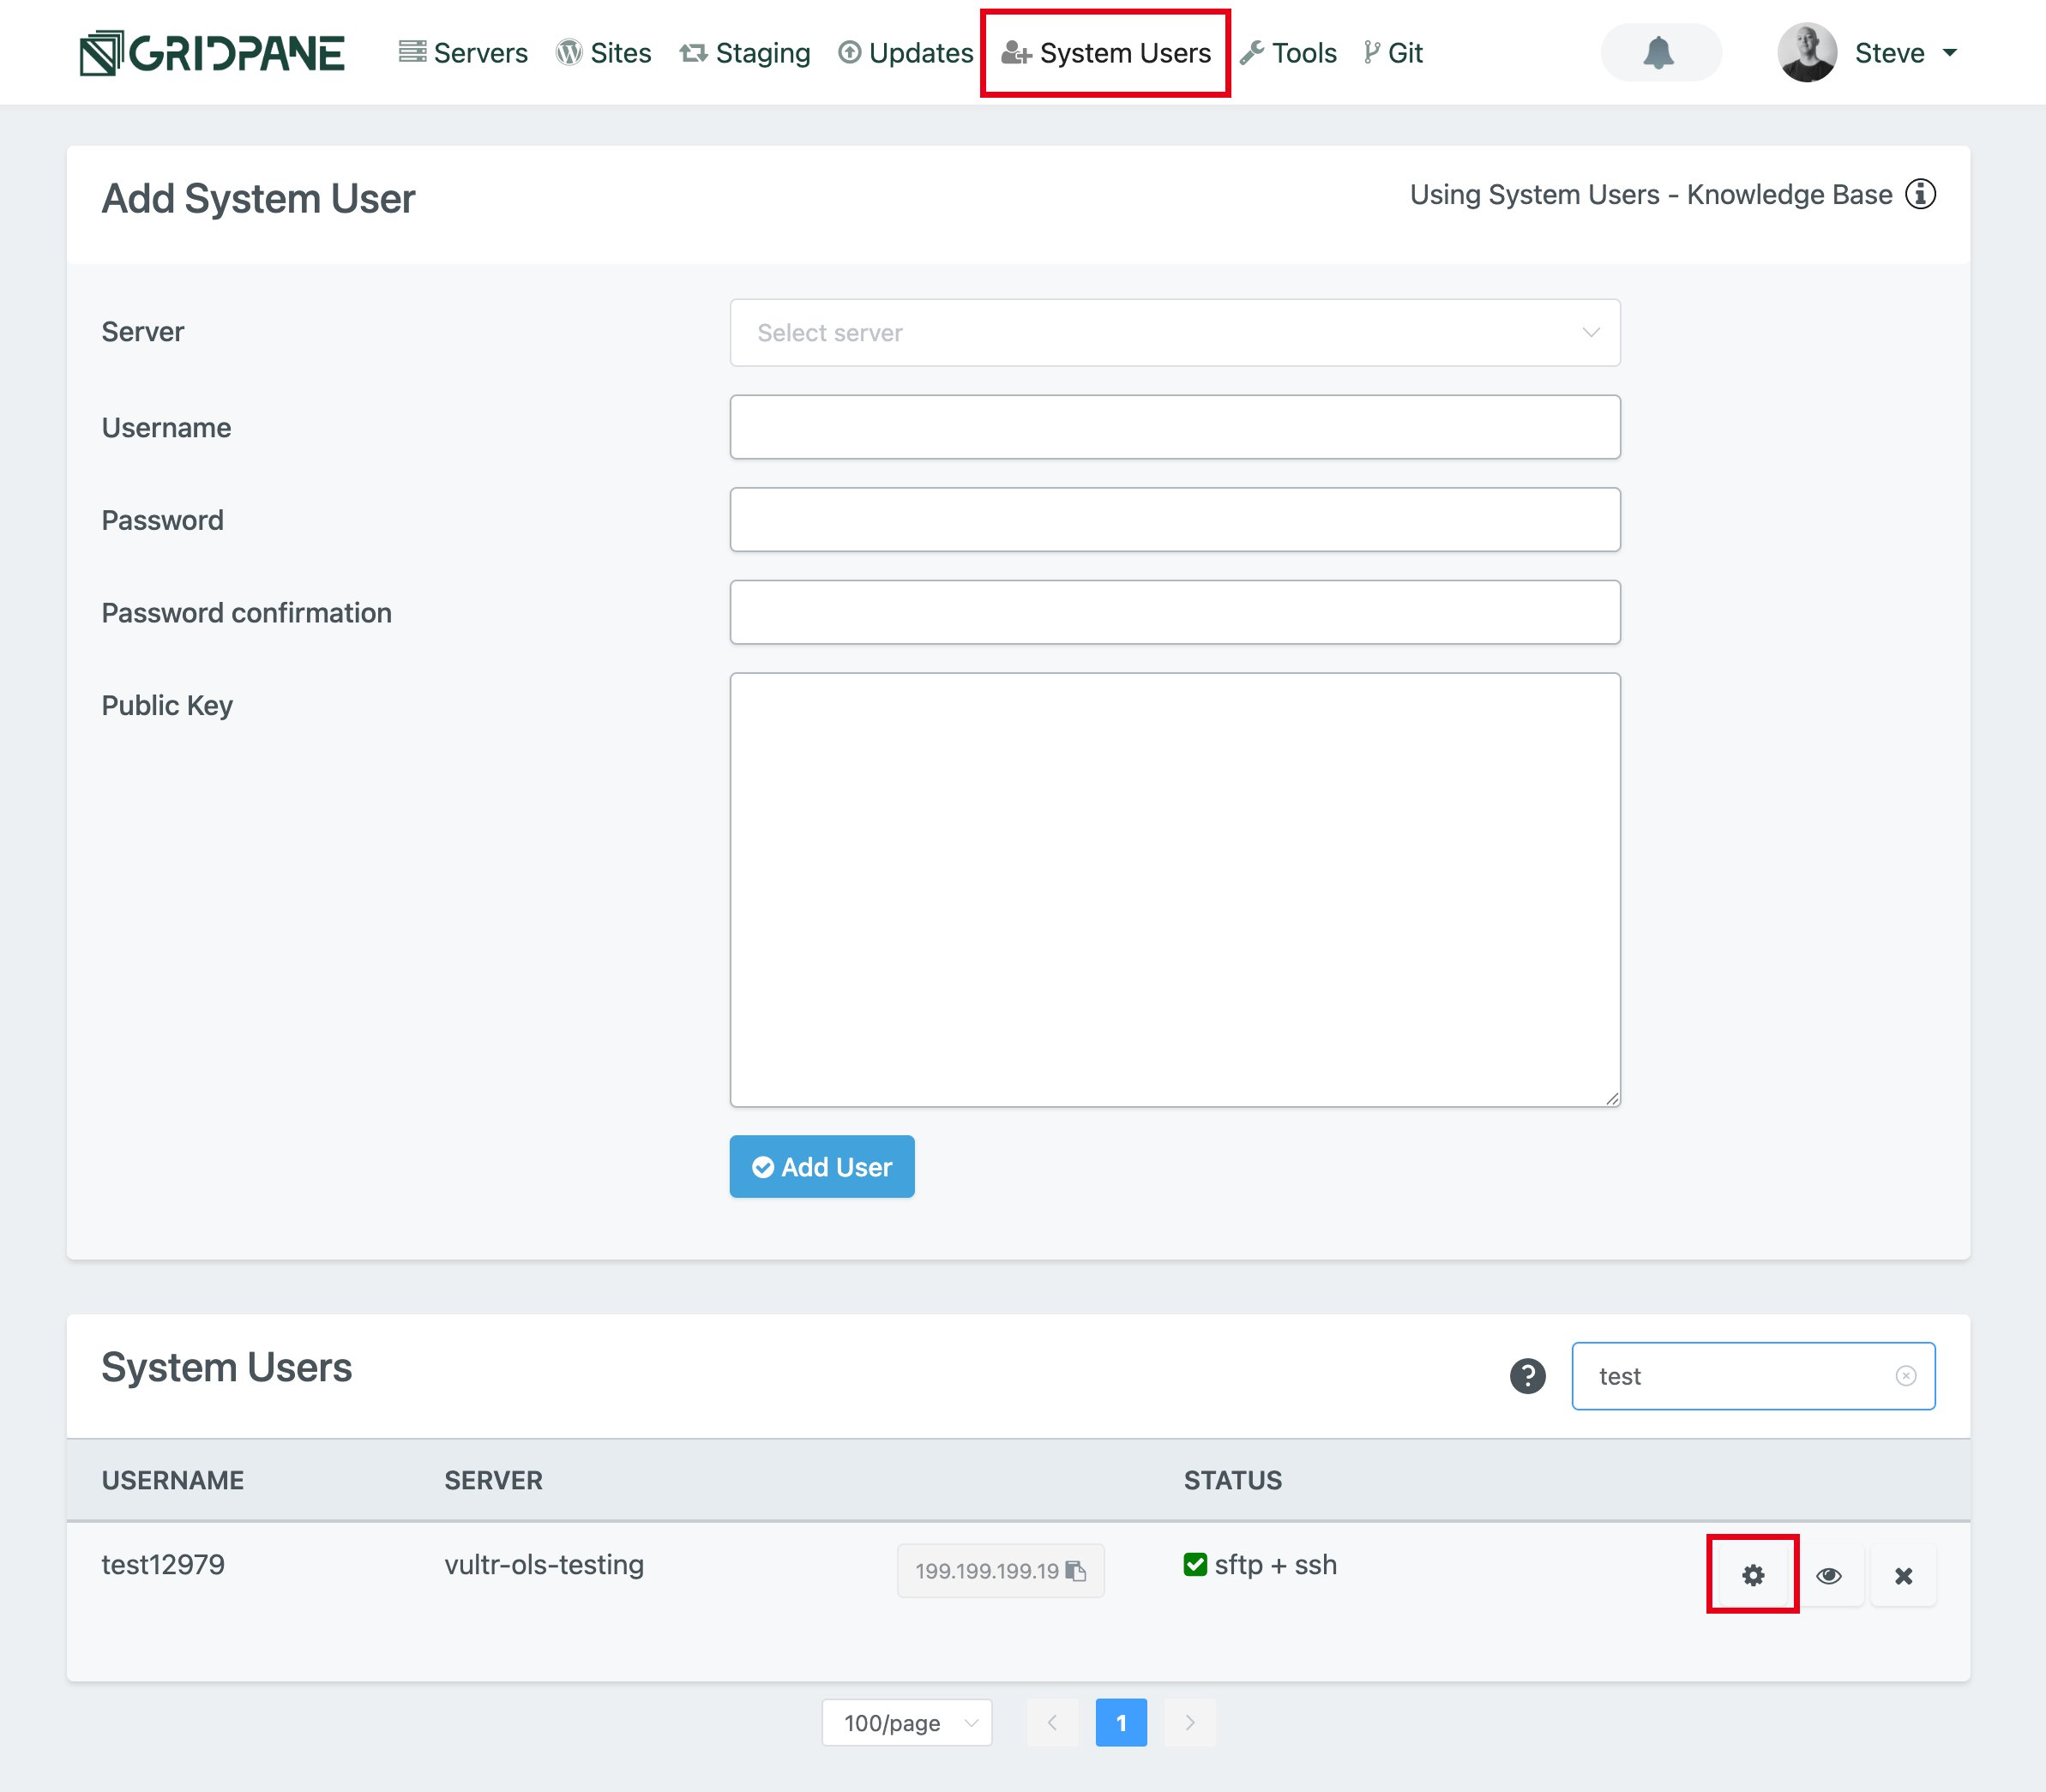
Here you can paste your public SSH Key, and make sure that SFTP and SSH access are enabled. Next, hit the Update User button to push it to the server.
Note: Make sure there isn’t an additional line break or unnecessary spacing at the end of the key.
2. Edit the SSHD_Config
Connect to your server and run the following command to open the sshd_config in the nano editor:
nano /etc/ssh/sshd_config
Scroll down until you find the system user you want to edit. You’ll see a block that looks like this:
#CONFIG FOR USER=test12979
    Match User test12979
    ChrootDirectory /home/test12979
    PasswordAuthentication yes
    X11Forwarding no
    AllowTcpForwarding no
#ENDCONFIG FOR USER=test12979
You’ll need to make the following edits:
#CONFIG FOR USER=test12979
    Match User test12979
    ChrootDirectory /home/test12979
    PasswordAuthentication no
    X11Forwarding no
    AllowTcpForwarding yes
    PermitOpen localhost:3306
#ENDCONFIG FOR USER=test12979
This allows TCP forwarding but restricts it to specifically allow connections only to port 3306 on localhost, and it makes SSH keys required.
Once you’ve made your edits hit Ctrl+O and then press Enter to save the file. Then Ctrl+X to exit nano.
Once you’ve finished your database work, you can edit the config again and change the settings back to the default settings.
3. Connect to your database
Now that you’ve configured your system user, you can now connect to your database:
In TablePlus, everything will display as green as shown in the picture above, and you can click Connect to begin managing your database remotely.