iThemes Security and Nginx
A few features of the iThemes Security plugin – mostly the security hardening measures – require writing to an Nginx configuration file.
You’ll be able to spot when these settings are activated as iThemes displays a message that says:
“The settings saved successfully.
You must restart your NGINX server for the changes to take effect.”

By default, iThemes will create this file and add it to your website’s htdocs folder. However, this is both in the wrong place, and it has the wrong name for the changes to take effect, even once Nginx has been reloaded.
This is bad practice on their part as it suggests that these features will work correctly once Nginx is reloaded, and that is likely not the case for most hosts.
iThemes Security Hardening and GridPane
Many of the features that iThemes offers are great for your average budget hosting provider, but with GridPane, the following security hardening features are ready to go out of the box:
- Disable Directory Browsing
- Disable PHP execution in the uploads directory
- Disable PHP execution in the themes directory
And, the following are preventable by either one of our integrated Web Application Firewalls (WAFs):
- Filter Request Methods – Filter out hits with the trace or track request methods
- Filter Suspicious Query Strings in the URL
Learn more about our WAF integrations here:
There are also lots of extra, cool features you enable on your GridPane servers via GP-CLI. See the following 2 articles on Fail2Ban integration and Nginx hardening here:
Activate your iThemes Settings
In this article we’ll look at how to change the filepath and name inside of iThemes so that the plugin can write your Nginx configurations to the correct file.
It’s important to note here that if you make any future changes in your iThemes settings, then you will need to SSH into your server, check your syntax is all correct, and then reload Nginx – quick and easy and detailed in step 3.
Step 1. SSH Into Your Server:
Please see the following articles to get started:
Step 1. Generate your SSH Key
Step 2. Add your SSH Key to GridPane (also see Add default SSH Keys)
Step 3. Connect to your server by SSH as Root user (we like and use Termius)
Step 2. Change the Nginx Configuration Name and Location
The config that iThemes creates and writes to by default gets placed inside your htdocs folder. This is the root directory of your website, and we don’t run Nginx config files from there.
We have a directory above root where we store local site Nginx configs, and in our main Nginx config there is a wildcard include: *-main-context.conf
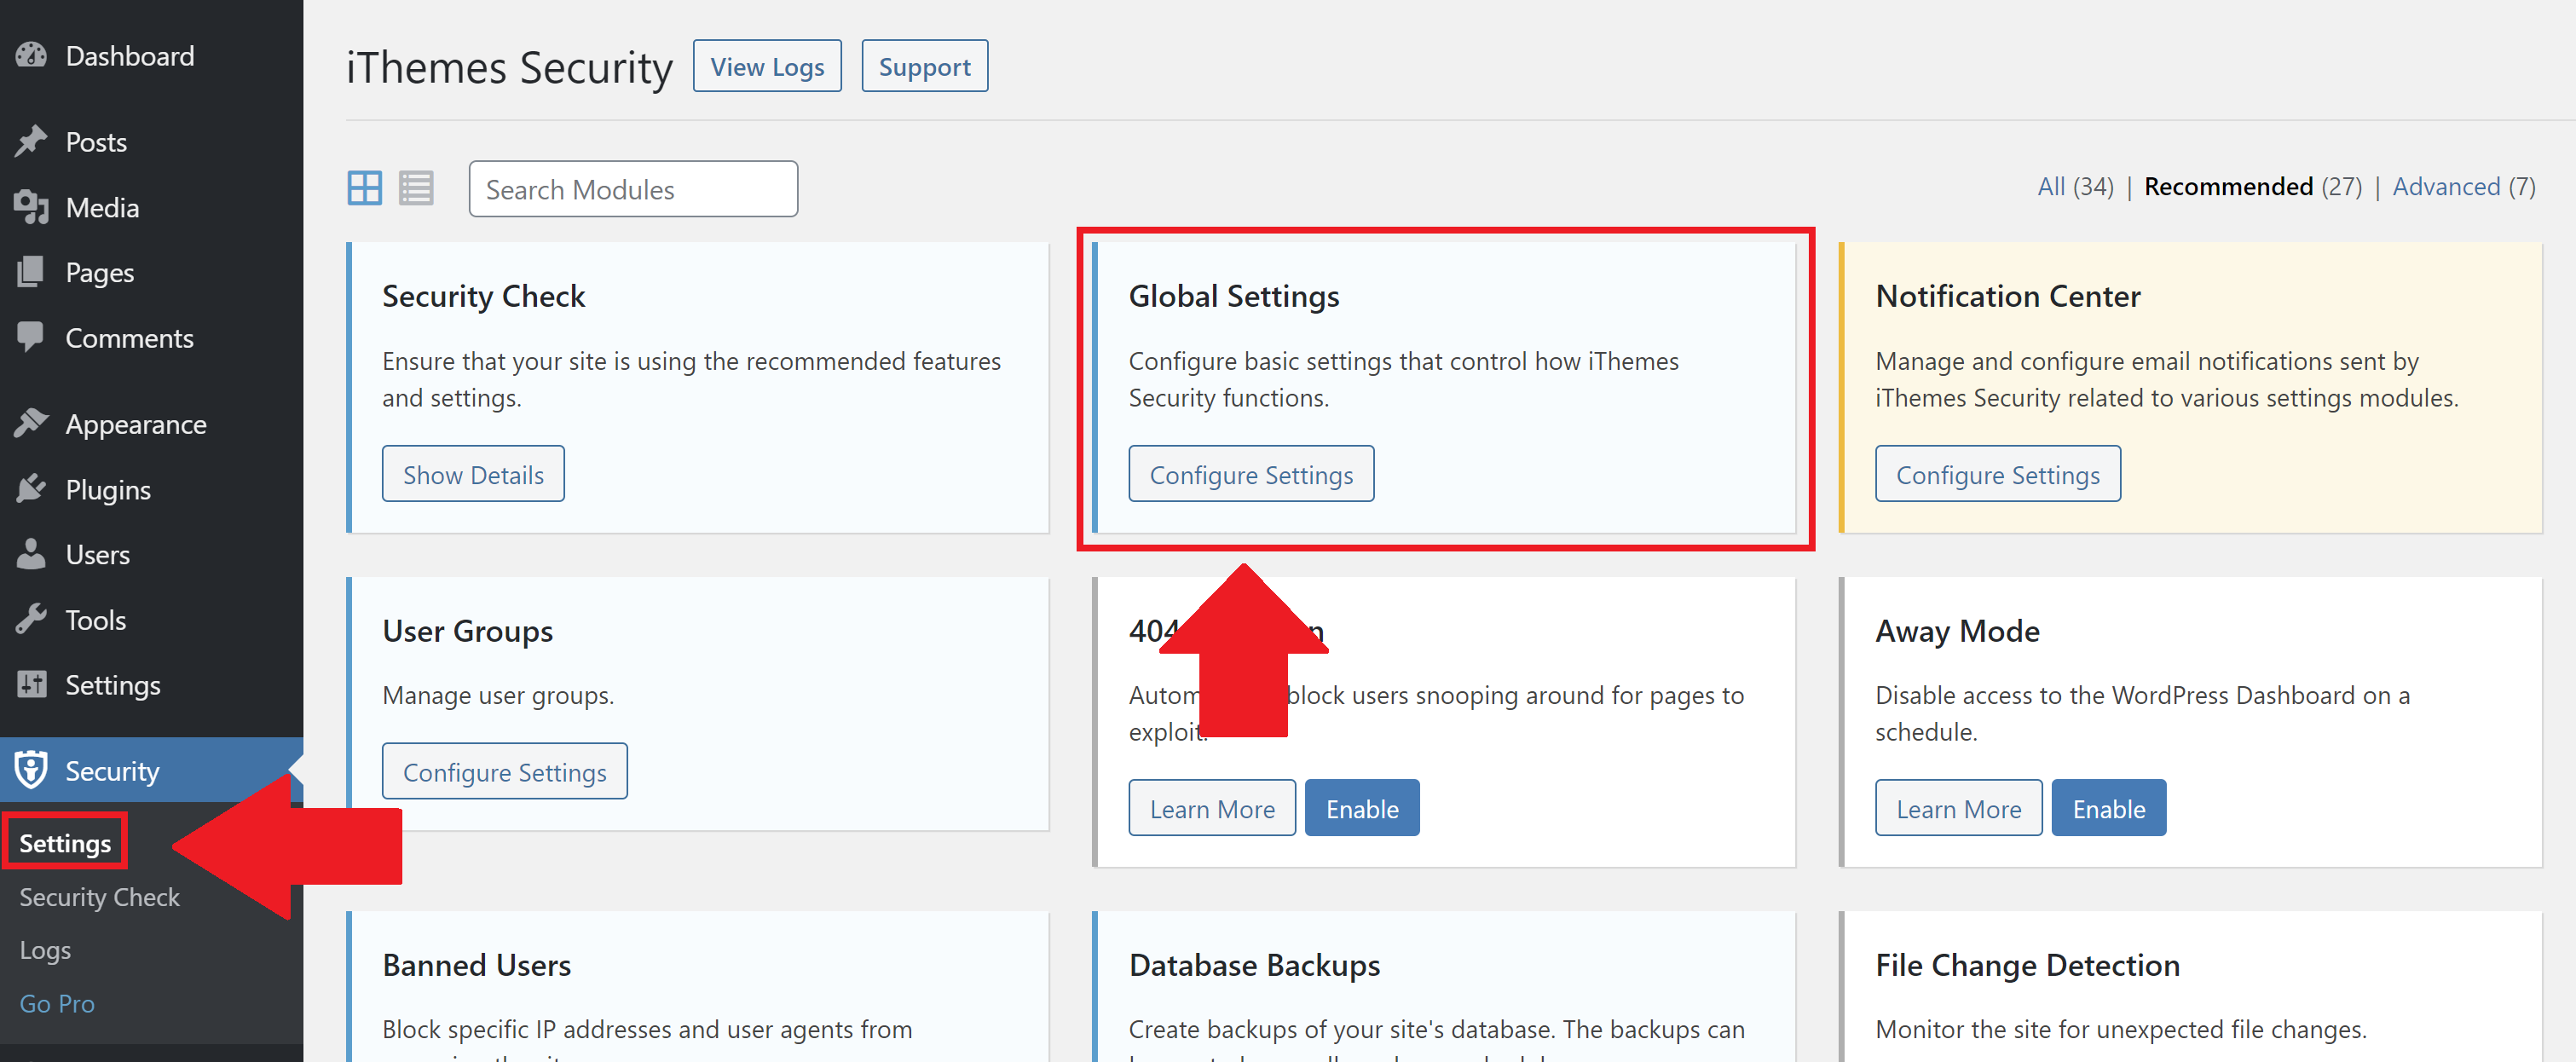
Anything that matches this in the /var/www/site.url/nginx/*-main-context.conf will be included into Nginx when it reloads. For the autogenerated iThemes config to work, we need to set the correct file path and name inside iThemes’ Global settings (dashboard > iThemes > Settings):

Change the Filepath and Name
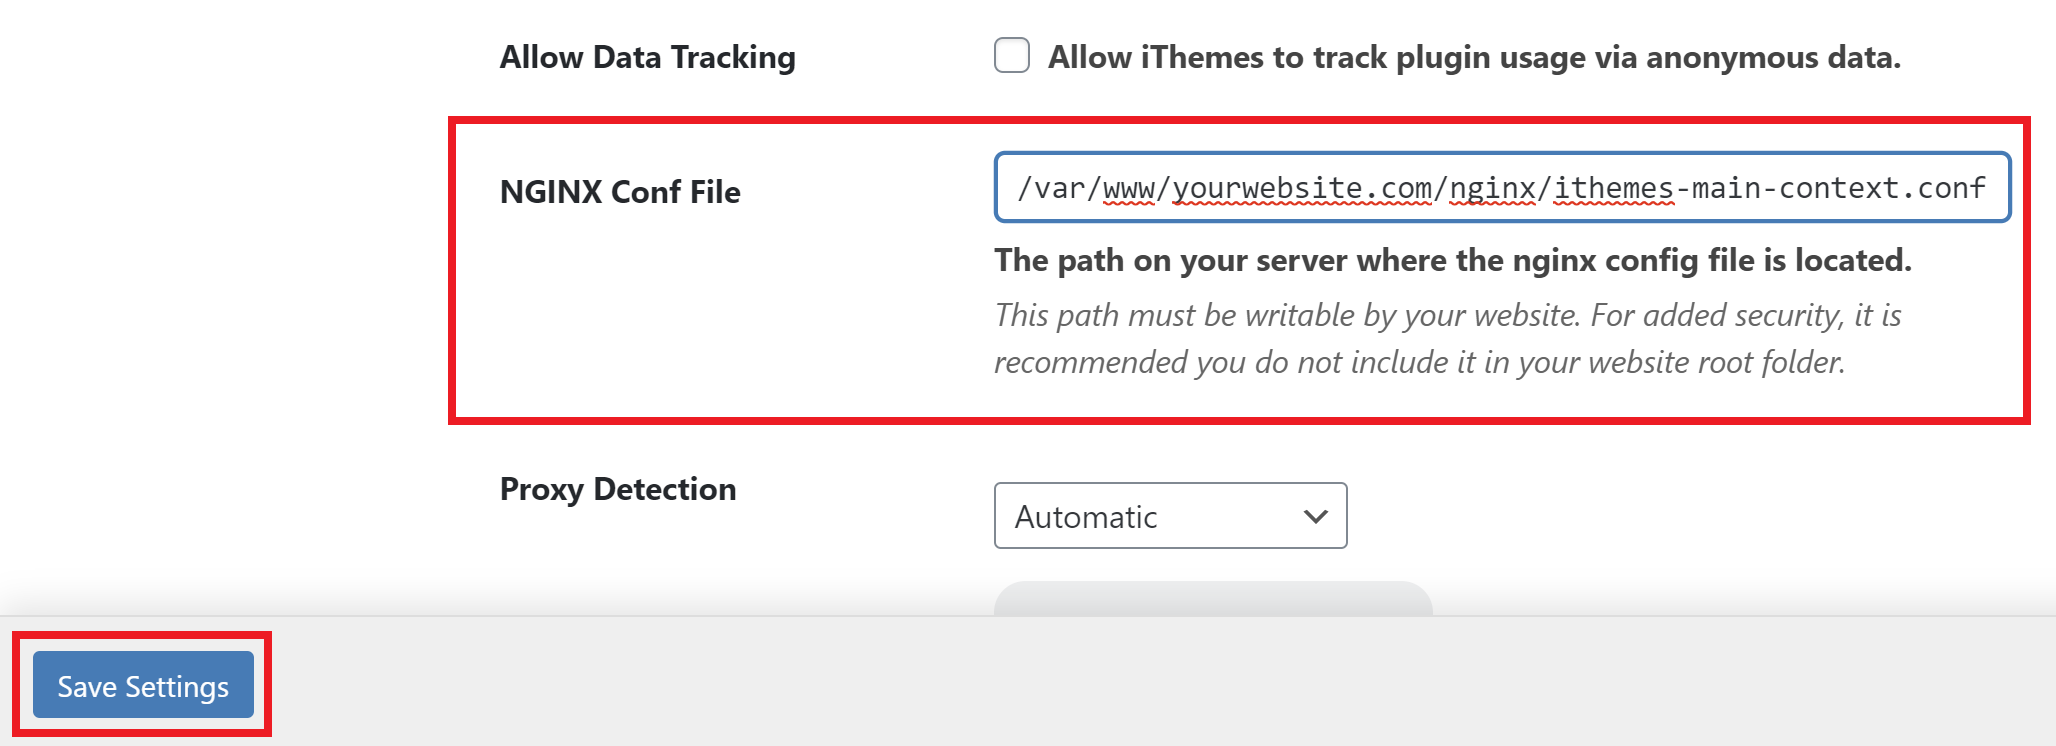
Open up the Global Settings options by clicking the Configure Settings button. The setting we need to change is called “NGINX Conf File” and it’s located a few setting up from the bottom:

Change this path to the following (switching out site.url for your domain name):
/var/www/site.url/nginx/ithemes-main-context.conf
For example:
/var/www/yourwebsite.com/nginx/ithemes-main-context.conf
Ignore the Error Messages
iThemes will try to tell you that it can’t write to this location, but this incorrect and and it writes just fine – you can confirm in your sites /var/www/site.url/nginx/ directory – details further down.
The one caveat here is that in my own testing, it behaved strangely if there was already an ithemes-main-context.conf on the server. So, if you followed our previous guide on iThemes, you may need to remove this and then retry saving the settings again inside your website.
You can remove this by connecting to your server and running the following command (replacing site.url with your domain name):
rm /var/www/site.url/nginx/ithemes-main-context.conf
Check your work
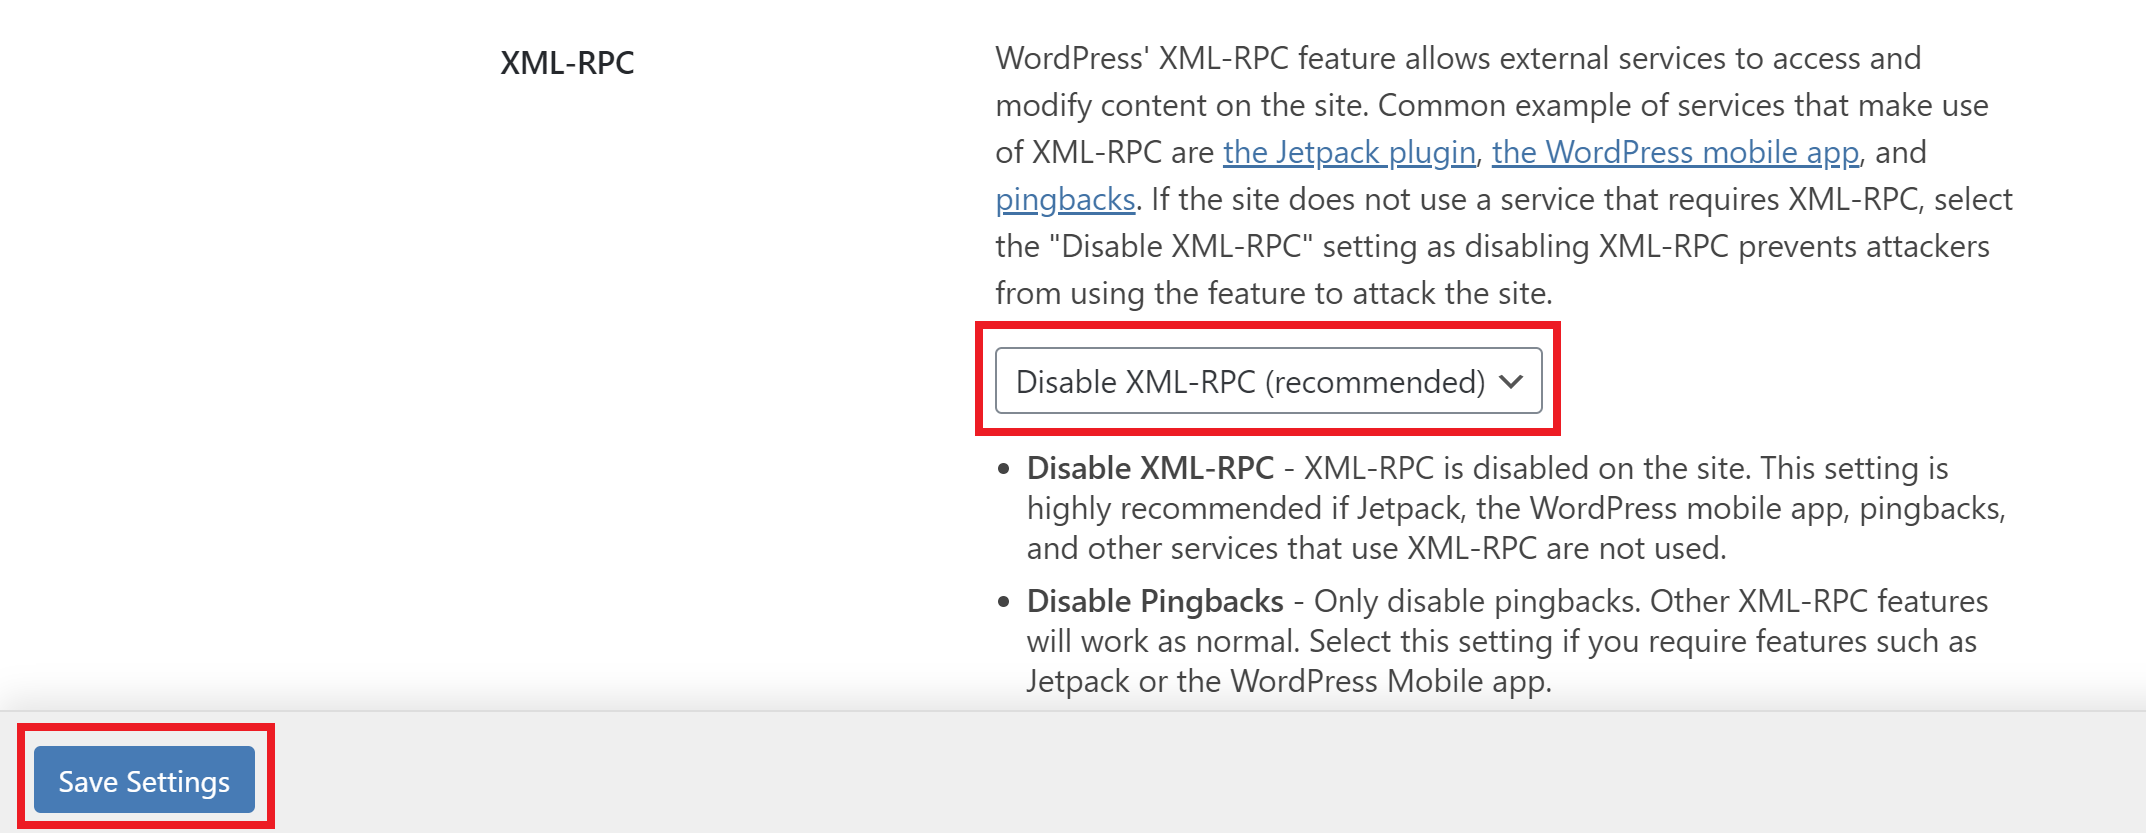
You can test that iThemes is writing correctly by turning on an Nginx-required feature. I tested this by turning XML-RPC on and off inside of the “WordPress Tweaks” settings.

You can check this has been written by viewing your configuration file with the following command (replacing site.url with your domain name):
cat /var/www/site.url/nginx/ithemes-main-context.conf
Usually, this is located at the bottom of the file:

You can then enable XML-RPC and recheck your ithemes-main-context.conf again with the same command and you will see that this is now no longer there.
To step 3!
Step 3. Check and Reload Nginx
We now need to test our Nginx syntax with:
nginx -t
If there are no errors present, reload Nginx with the following command:
gp ngx reload
Your iThemes settings have now been activated for your website.
Bonus Step
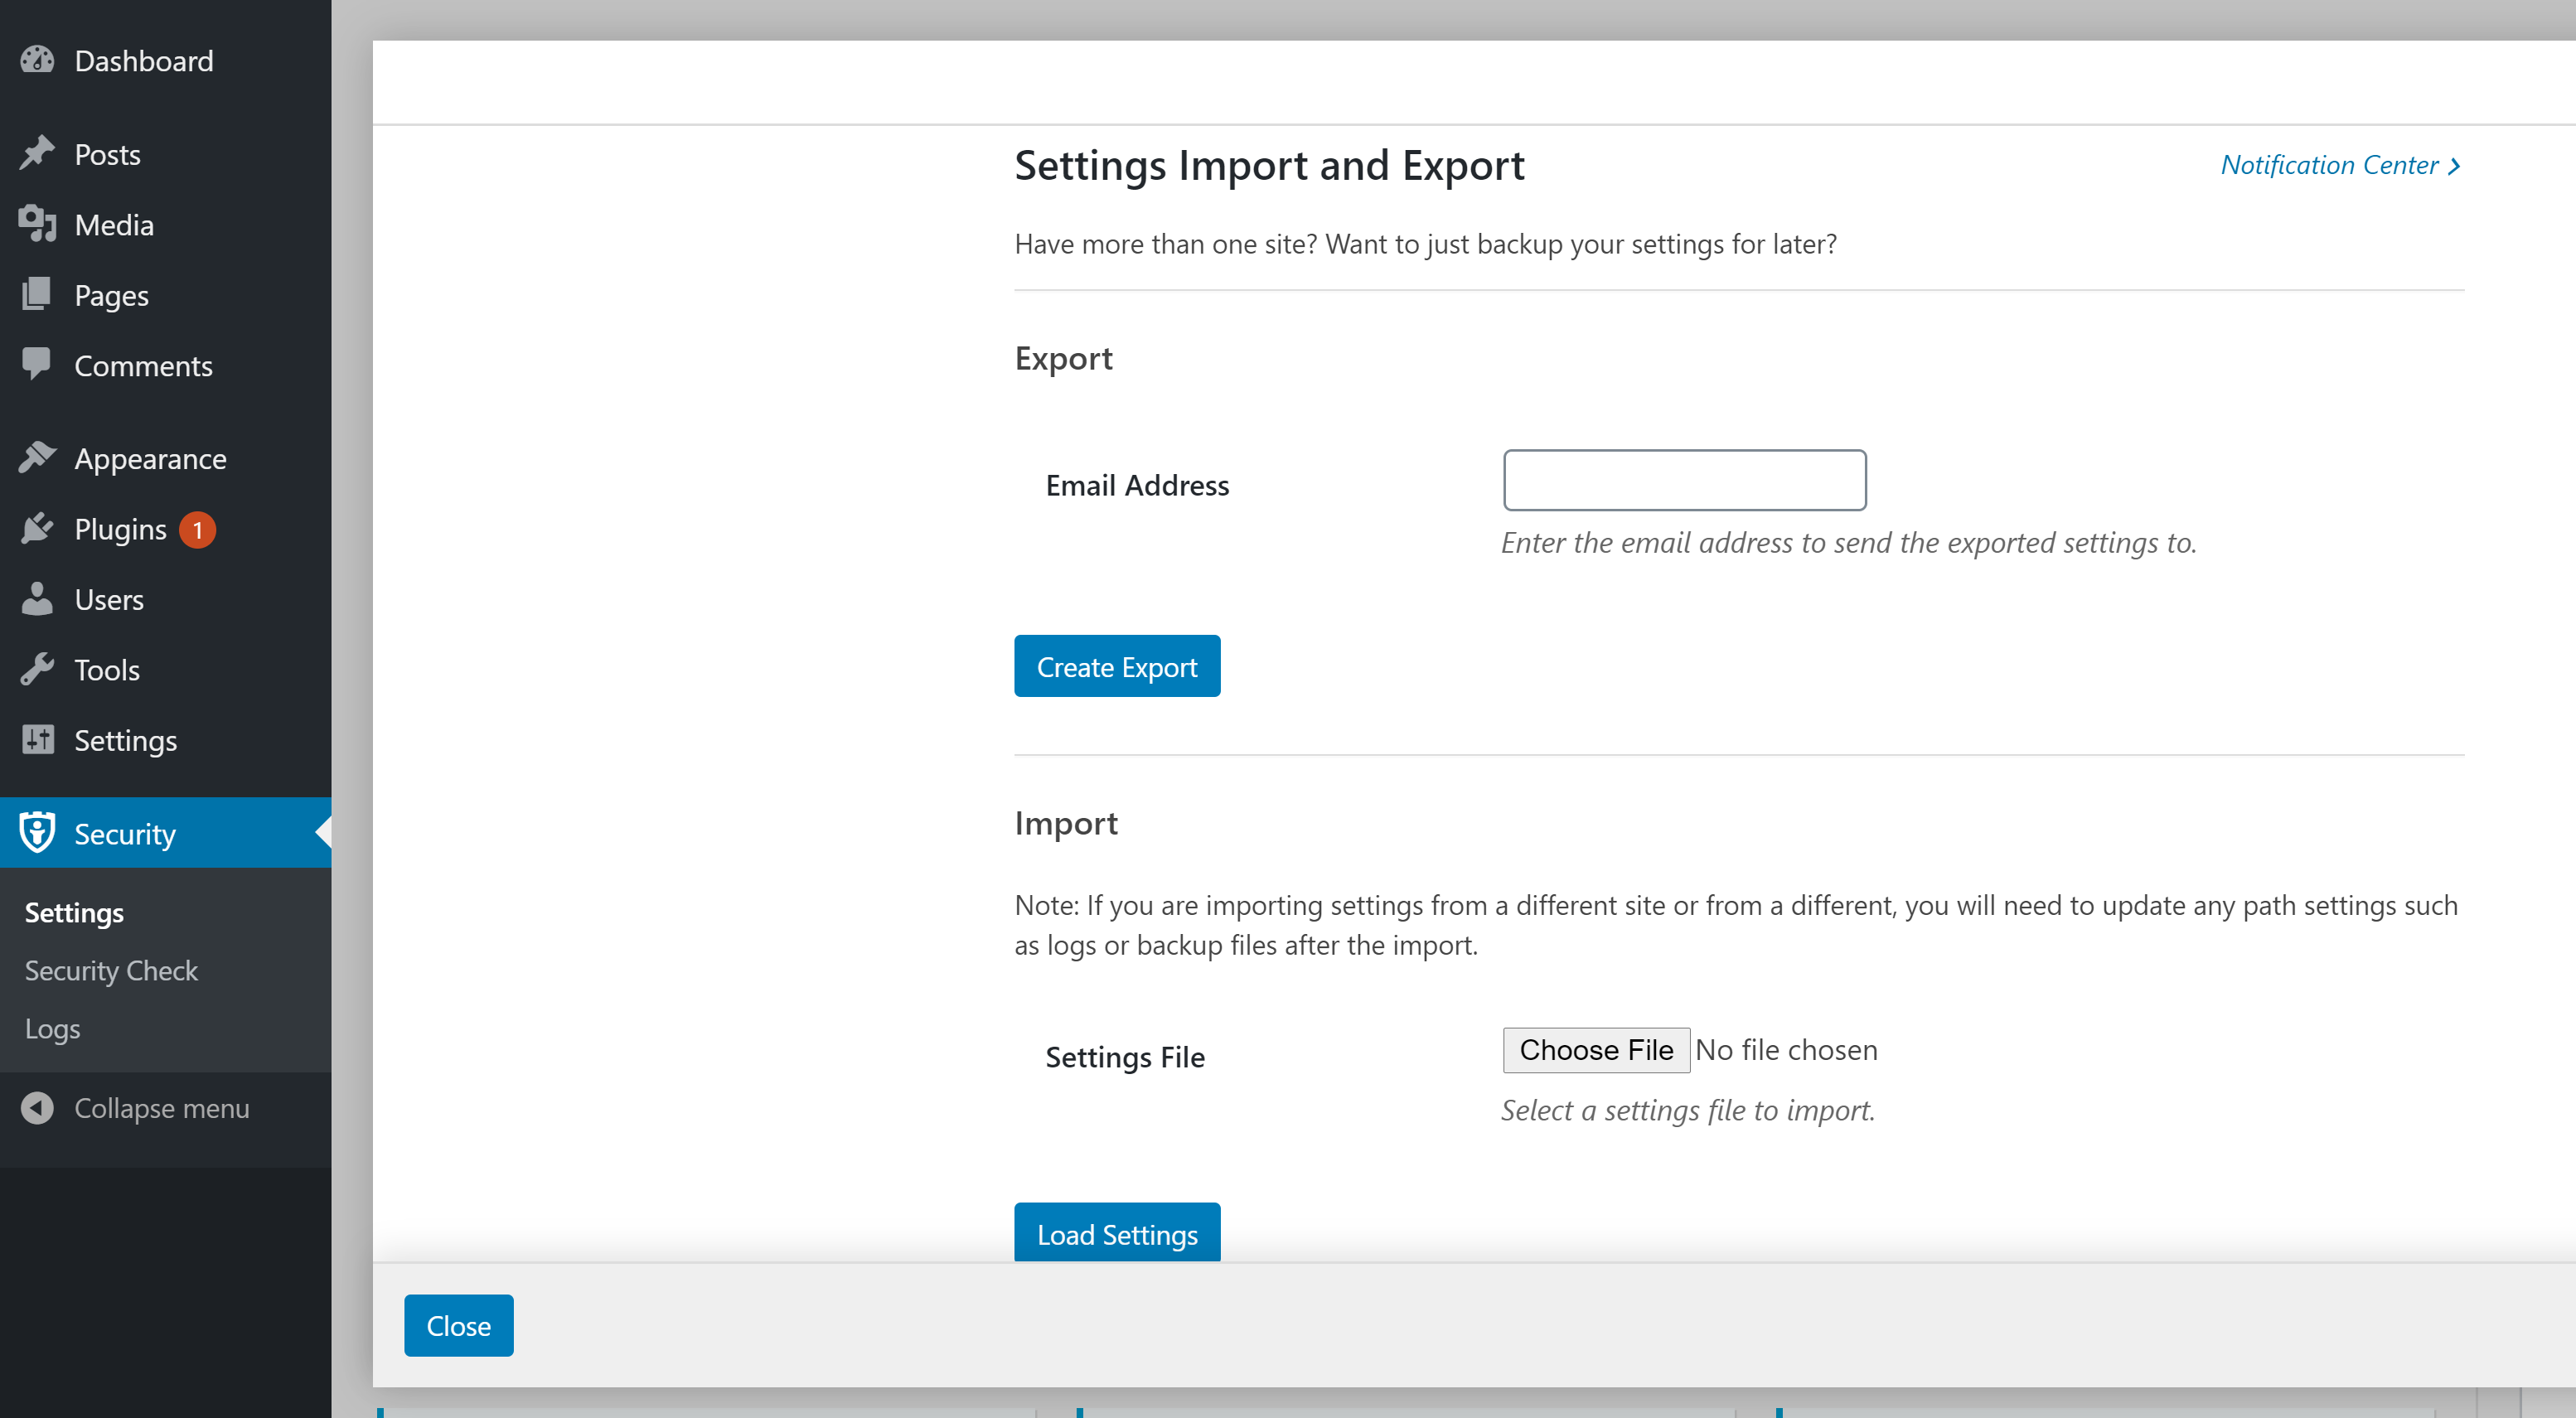
If you use the same settings for every website, you may wish to store a copy of these settings. You can also export your plugin settings inside your WordPress dashboard. This way, the next time you set up a website, you can simply install the plugin, import your plugin settings, and then SSH into your server, and head straight to step 3 above.
The export/import feature is located in Dashboard > iThemes Security > Settings > Notification Center. You’re looking for “Settings Export“.

You can check out how to do this with this article from iThemes themselves:
https://help.ithemes.com/hc/en-us/articles/229241368-iThemes-Security-Settings-Import-and-Export
