Introduction
Searching and replacing specific data inside your WordPress database can save a huge amount of time depending on the task, and it’s also fairly straight forward to do.
In this article, we’ll cover the three following ways to do this: –
- Using a plugin – the most common method
- Using WP-CLI
- Using interconnect/it’s “Database Search and Replace Script”
Before you get started, please back up your database and/or create a backup of your website. For database backups, check out this article for more information:
How to backup / export / import a WordPress database
You may wish to make your changes on a staging website first to ensure all goes smoothly.
As an additional note, our configs will automatically take care of updating your site from HTTP to HTTPS when you provision an SSL certificate. It will also change back from HTTPS to HTTP if you turn your SSL off for any reason.
1. Using a Plugin
This is the simplest option for most users, and there are a few excellent options available. At the time of writing, we have experience with and recommend the following two plugins:
You should note that the Velvet Blues plugin, while still very popular, has not been updated in some time.
Elementor page builder also includes functionality to update URLs, which has been reliable in my experience.
Better Search Replace
At the time of writing, this plugin has over 1 million active installations and is regularly updated. It’s an excellent option for running search and replace from within your WordPress dashboard. The free version offers the following features: –
- Serialization support for all tables
- The ability to select specific tables
- The ability to run a “dry run” to see how many fields will be updated
- No server requirements aside from a running installation of WordPress
- WordPress Multisite support
Step 1. Install, activate, and then navigate to the plugin settings page
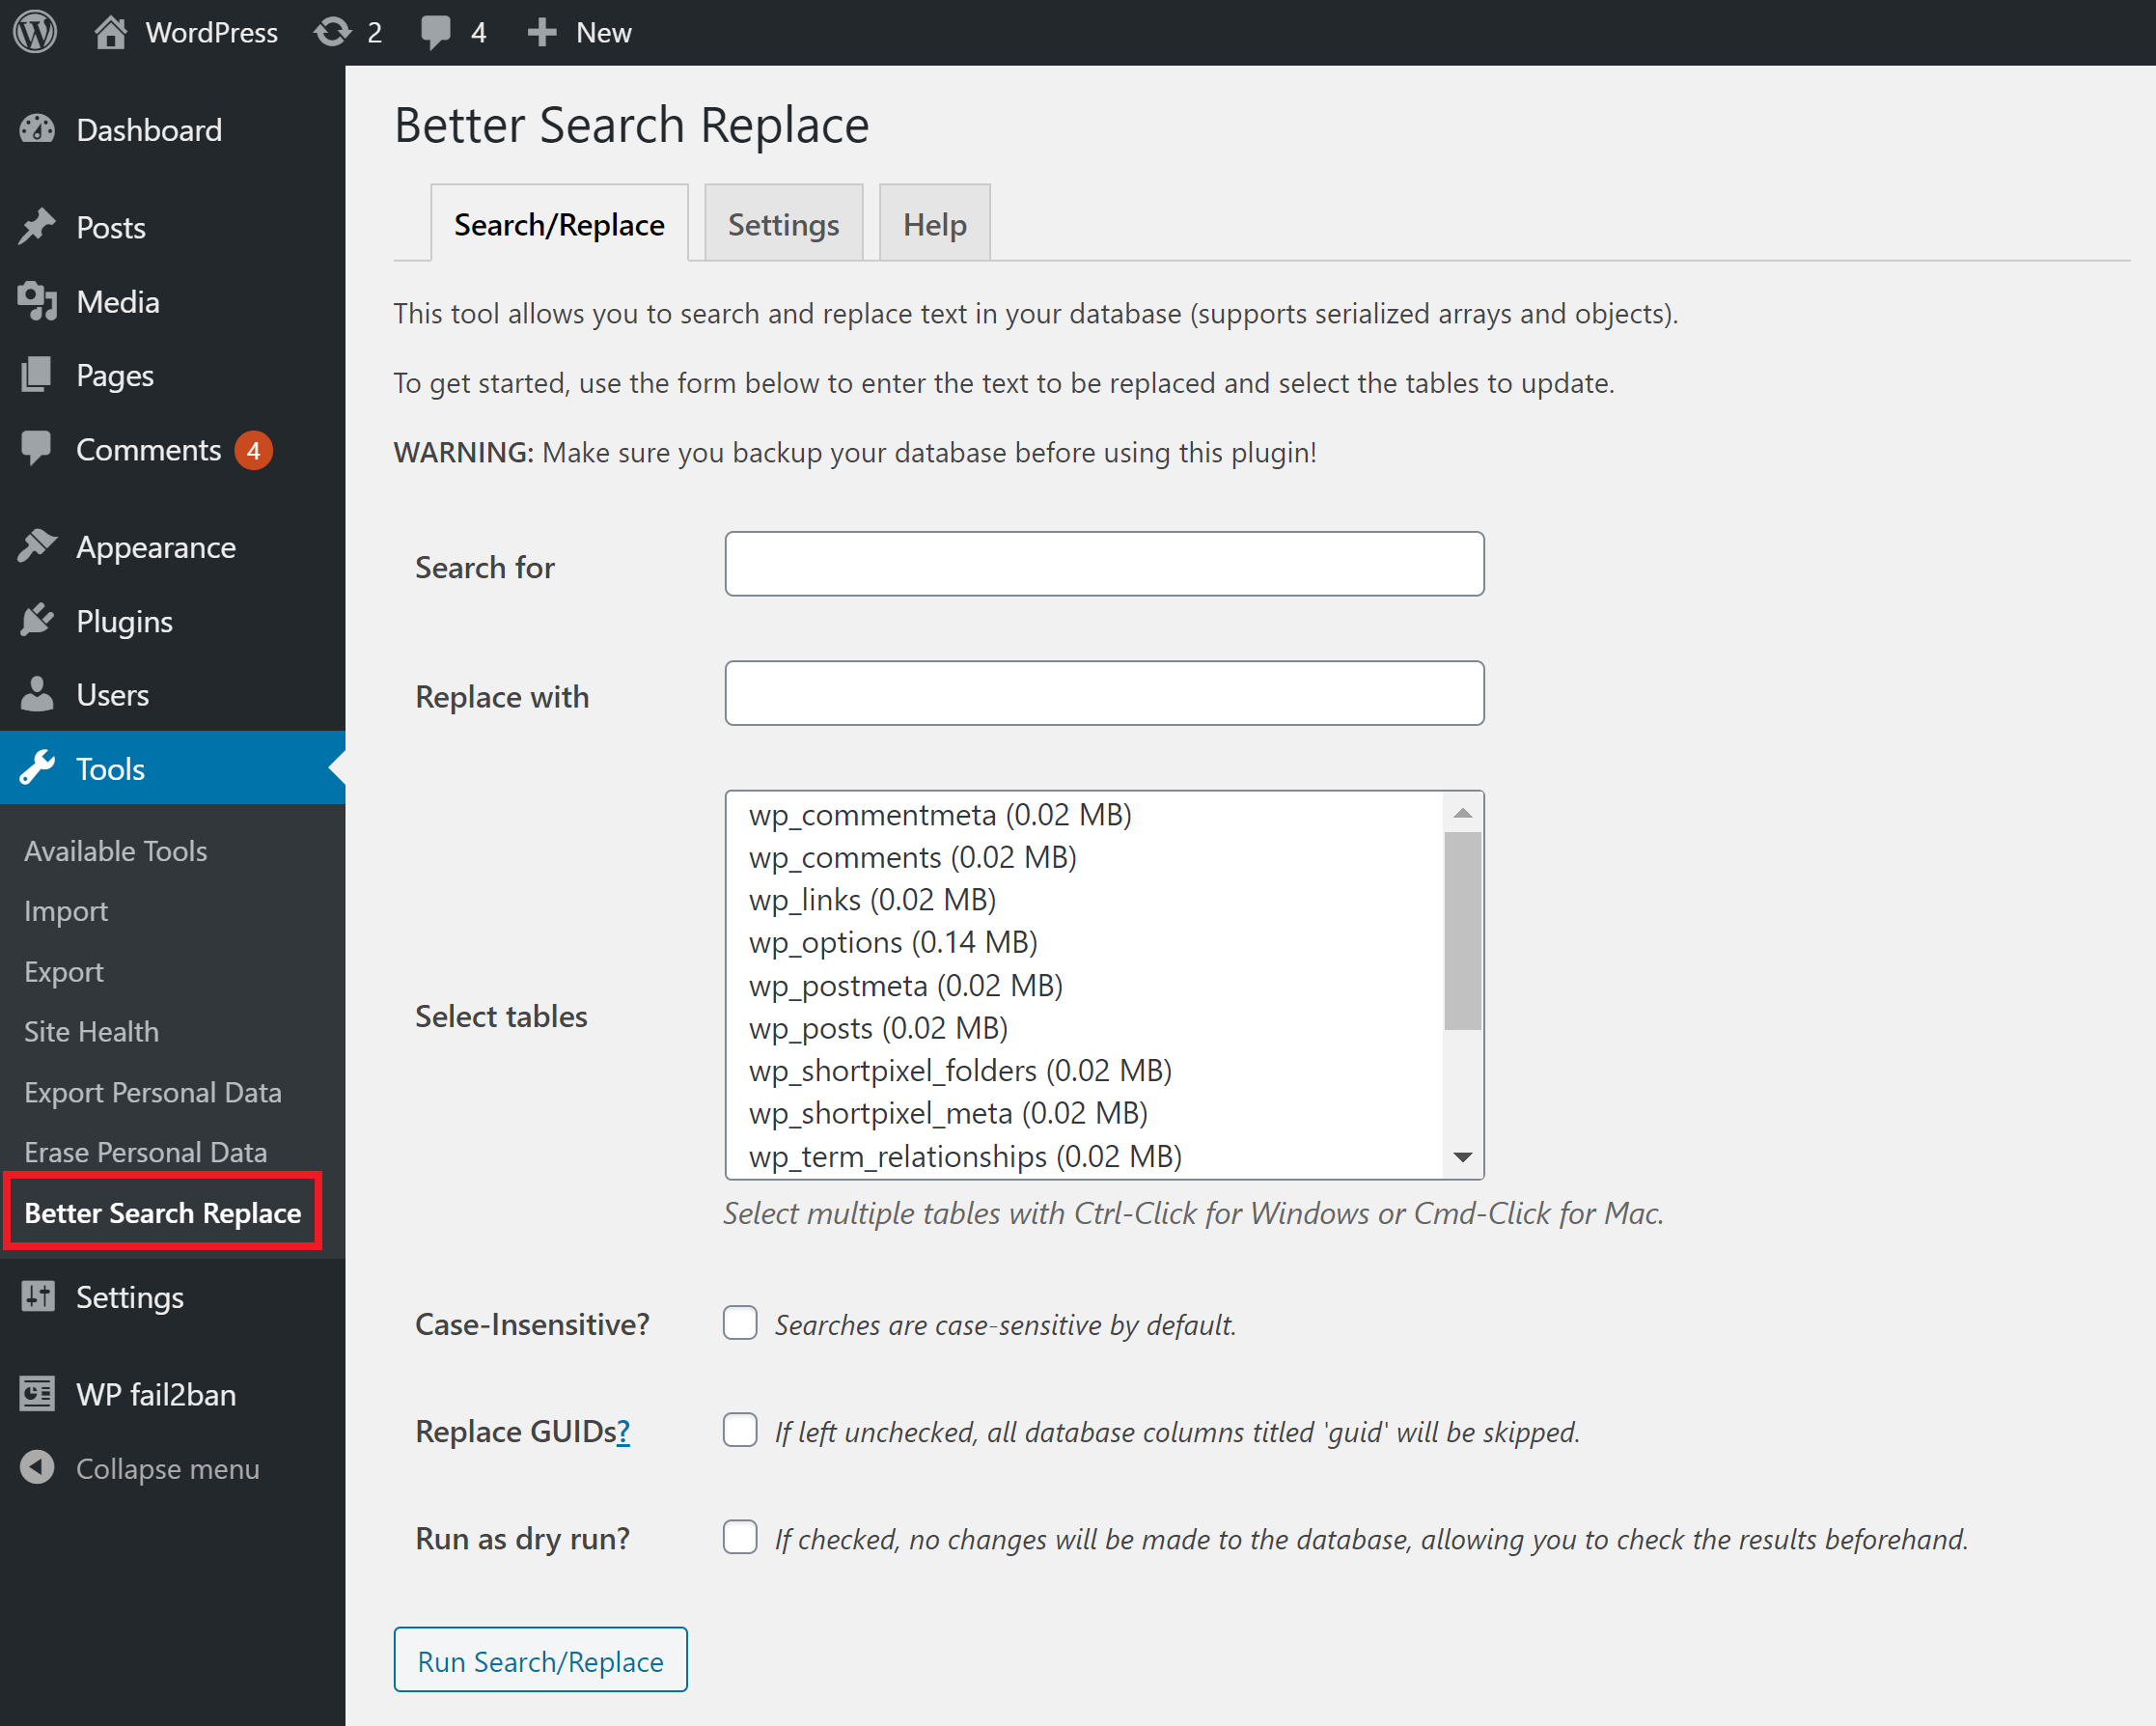
The plugin is available from the WordPress repository. Simply search for it via your plugins page inside the dashboard, install and activate it. Once activated, you can find the settings screen under Tools > Better Search Replace:
Step 2. Do a dry run
A dry run will return information about how many tables will be replaced without actually changing anything inside your database.
Step 3. Search and replace
If the dry run went well, you can run your search and replace.
You can check out their full documentation here:
https://bettersearchreplace.com/docs/
Velvet Blues
Velvet blues is an old favorite and still works great to this day. The only concern is that it appears to no longer be supported. That’s a shame, but it still has over 400,000 active installs at the time of writing. Still, approach with caution simply for that fact.
Step 1. Install, activate, and then navigate to the plugin settings page
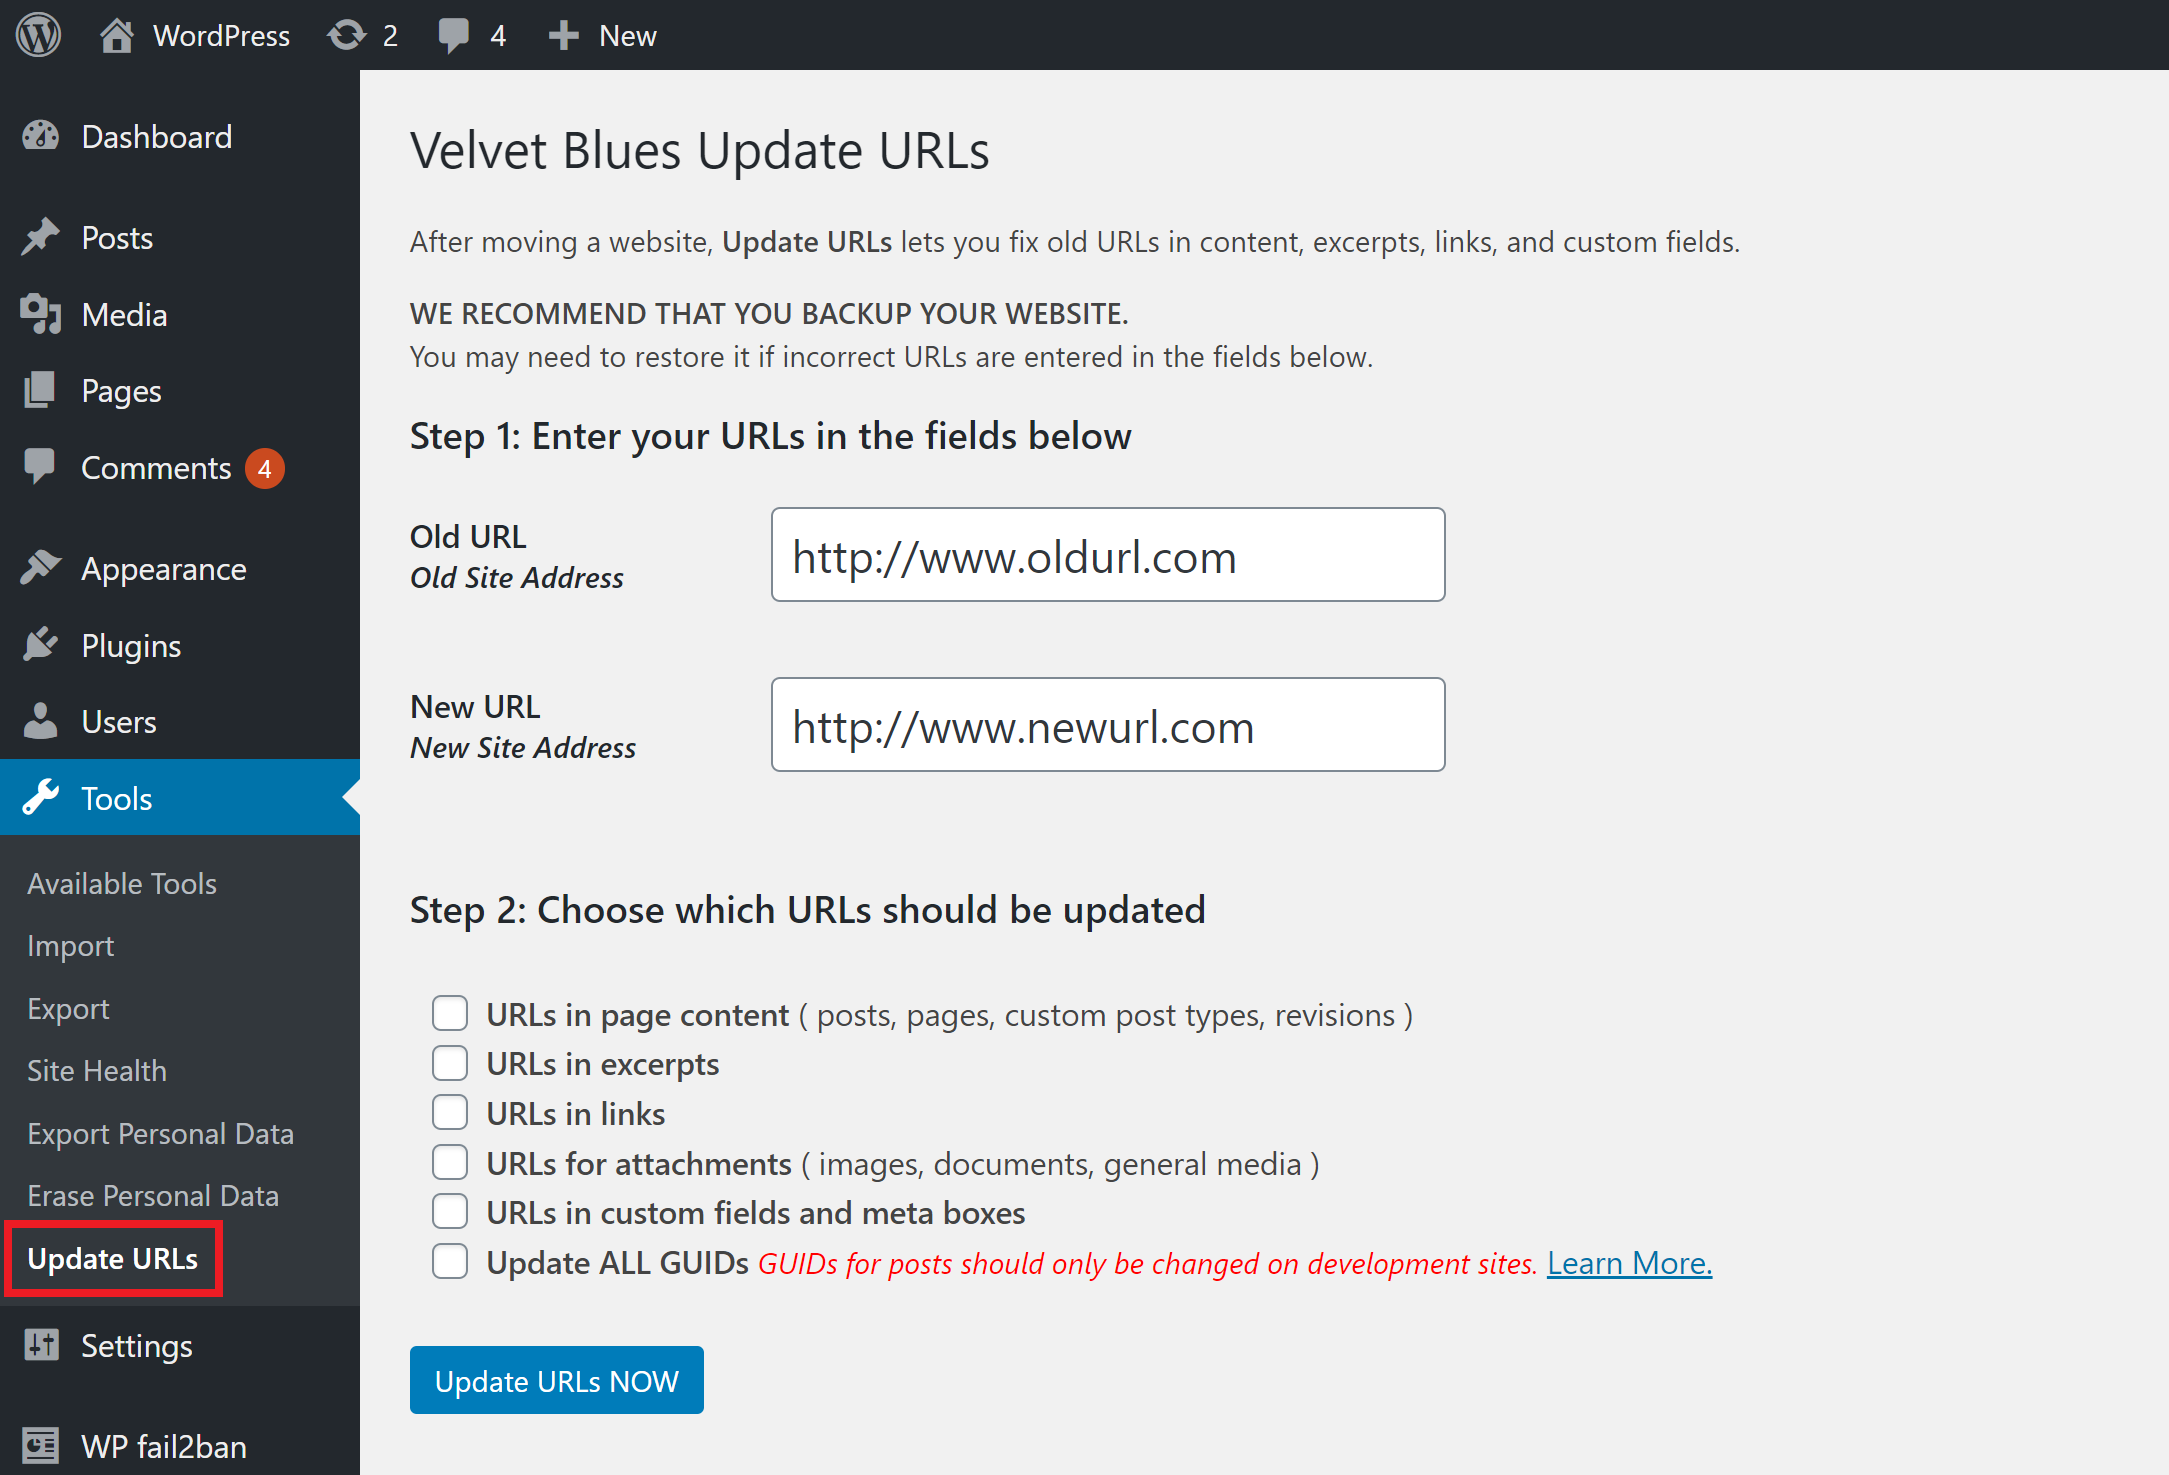
The plugin is available from the WordPress repository. Simply search for it via your plugins page inside the dashboard, and install and activate it. Once activated, you can find the settings screen under Tools > Update URLs:
Step 2. Run your search and replace
There’s no dry run available, it’s simply a matter of entering your details and choosing which URLs should be updated.
2. Using GP WP-CLI
To run commands using GP WP-CLI, you will need to SSH into your server.
Please see the following articles to get started:
Step 1. Generate your SSH Key
Step 2. Add your SSH Key to GridPane (also see Add default SSH Keys)
Step 3. Connect to your server by SSH as Root user (we like and use Termius)
Take a Backup
To begin, let’s run a quick database backup with (replacing site.url with your domain name):
gp wp site.url db export /var/www/site.url/htdocs/pre-search-replace-backup.sql --all-tablespaces --add-drop-table
NOTE: If the above gives you a permissions error, your website may require you to add additional privileges. This will look something like:
mysqldump: Error: Access denied; you need (at least one of) the SUPER or SET_USER_ID privilege(s) for this operation
Please see this guide for reference on how to grant extra privileges:
How to grant SUPER permissions for your website
Test with a Dry Run First
Before running your search and replace, we recommend doing a dry run first. You can do this with:
gp wp site.url search-replace '{old URL}' '{new URL}' --dry-run --skip-columns=guid
For example:
gp wp site.url search-replace 'oldwebsite.com' 'newwebsite.com' --dry-run --skip-columns=guid
You will be shown a table detailing the replacements that would be made:
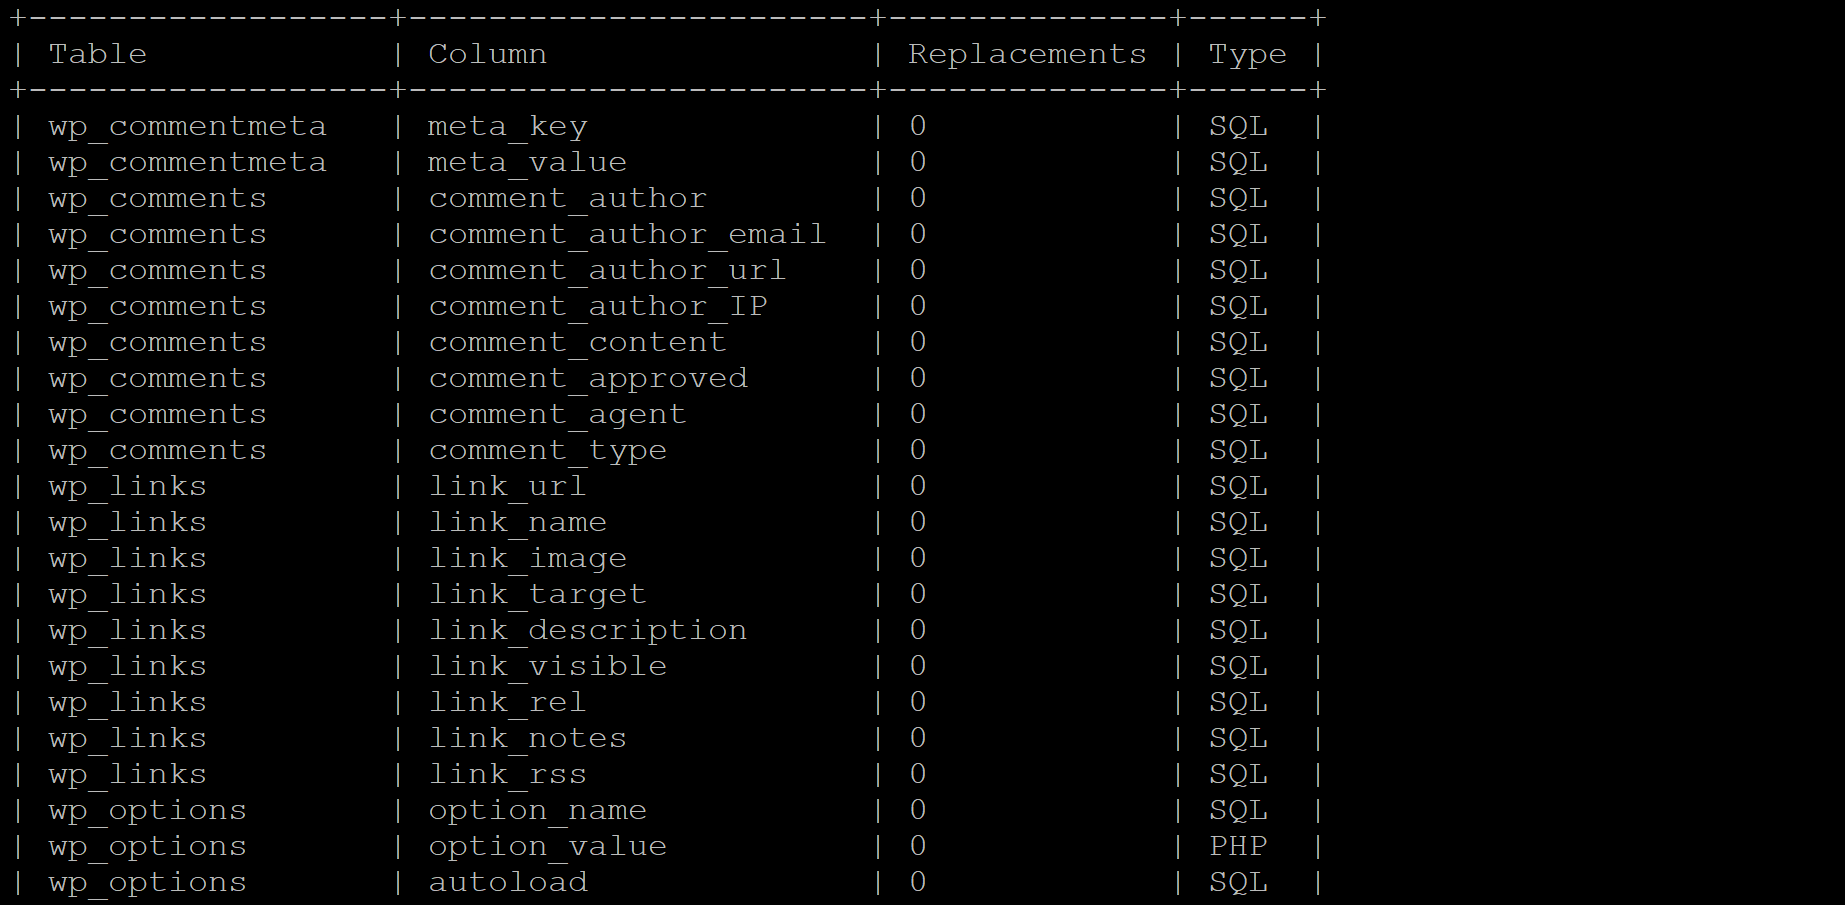
Followed by a notice will the total number of replacements: Success: 'X' replacements to be made.
We can now run our search and replace as follows:
gp wp site.url search-replace '{old URL}' '{new URL}' --precise --recurse-objects --all-tables
Example:
gp wp site.url search-replace 'http://oldwebsite.com' 'https://newwebsite.com' --precise --recurse-objects --all-tables
3. Using interconnect/it’s “Database Search and Replace Script”
interconnect/it is a well-respected company in the WordPress space, and their free PHP script called Search Replace DB is a highly effective search and replace tool. It’s also 100% free, which is pretty awesome.
They actively keep it up-to-date, and in our testing, this has actually been the most reliable of all of the methods outlined here. Search Replace DB has been able to catch things that other methods have missed.
The problem is that it’s inherently insecure, in fact, you’ll receive this message in the download email:
—
Important: Search Replace DB is a professional developer tool, usually for helping with migrations where command line tools are not available. If you do not understand that this tool can easily damage your database then please do not use it and hire a professional. You should ensure that the script is placed in an obfuscated subdirectory that cannot easily be reached from the front end. If you wish to keep the script online permanently for some reason, make sure that as a bare minimum you set up http authentication for the folder in which it resides, otherwise, you will leave your site open to hackers. And we don’t want that, do we?
—
So we’re also going to look at remedying that before we add it to our server. To do this, we’ll do exactly what they suggest and add HTTP authentication to what will be the script’s URL.
Once we’ve run our search and replace, we’ll then delete the folder and its contents from our server.
Step 1. Secure Search Replace DB with HTTP Authentication
First, we’ll need to SSH into our server. See the links above to get started.
Once inside, we’ll create an Nginx configuration using the *-main-context.conf.
We’ll call it srdb-main-context.conf.
Create the file with the following command (switch out “site.url” with your websites domain name):
nano /var/www/site.url/nginx/srdb-main-context.conf
For example:
nano /var/www/gridpane.com/nginx/srdb-main-context.conf
Here, we need to customize the following code block:
location /{custom location here} {
satisfy any;
auth_basic "Restricted Area";
auth_basic_user_file /etc/nginx/.htpasswd;
# Allowed IP Address List
allow 127.0.0.1;
deny all;
}
To customize this, we need to change the top line to a real location. I’m going to upload the scripts on my website to a folder called “super-secret-folder”, so my code looks as follows:
location /super-secret-folder {
satisfy any;
auth_basic "Restricted Area";
auth_basic_user_file /etc/nginx/.htpasswd;
# Allowed IP Address List
allow 127.0.0.1;
deny all;
}
Now we just need to save the file. Writing to and saving a file in nano is a three-step process:
- Hit CTRL-O to write to the file
- Hit Enter to confirm
- Hit CTRL-X to exit the file
Step 2: Test your Nginx configuration
Next, you must test the Nginx config and reload if there are no errors. Do NOT proceed to step 4 if any errors are present, and reach out to support.
nginx -t
Step 3: Reload Nginx then test your HTTP auth is working
gp ngx reload
You should now check your HTTP auth is working. Navigate to the page – this is your website.url/folder-name
For example:
You should see a HTTP auth box:

Step 4. Download the files from interconnect/it and upload them to your server
Head on over to the interconnect/it website and download the files:
https://interconnectit.com/products/search-and-replace-for-wordpress-databases/
Step 5. Connect to your server over SFTP
Now we’ve downloaded the files, we need to upload them to our server. To do this we need to connect via SFTP:
Connect to a GridPane Server by SFTP as Root user
Connect to a GridPane Server by SFTP as System User
Step 6. Upload the files
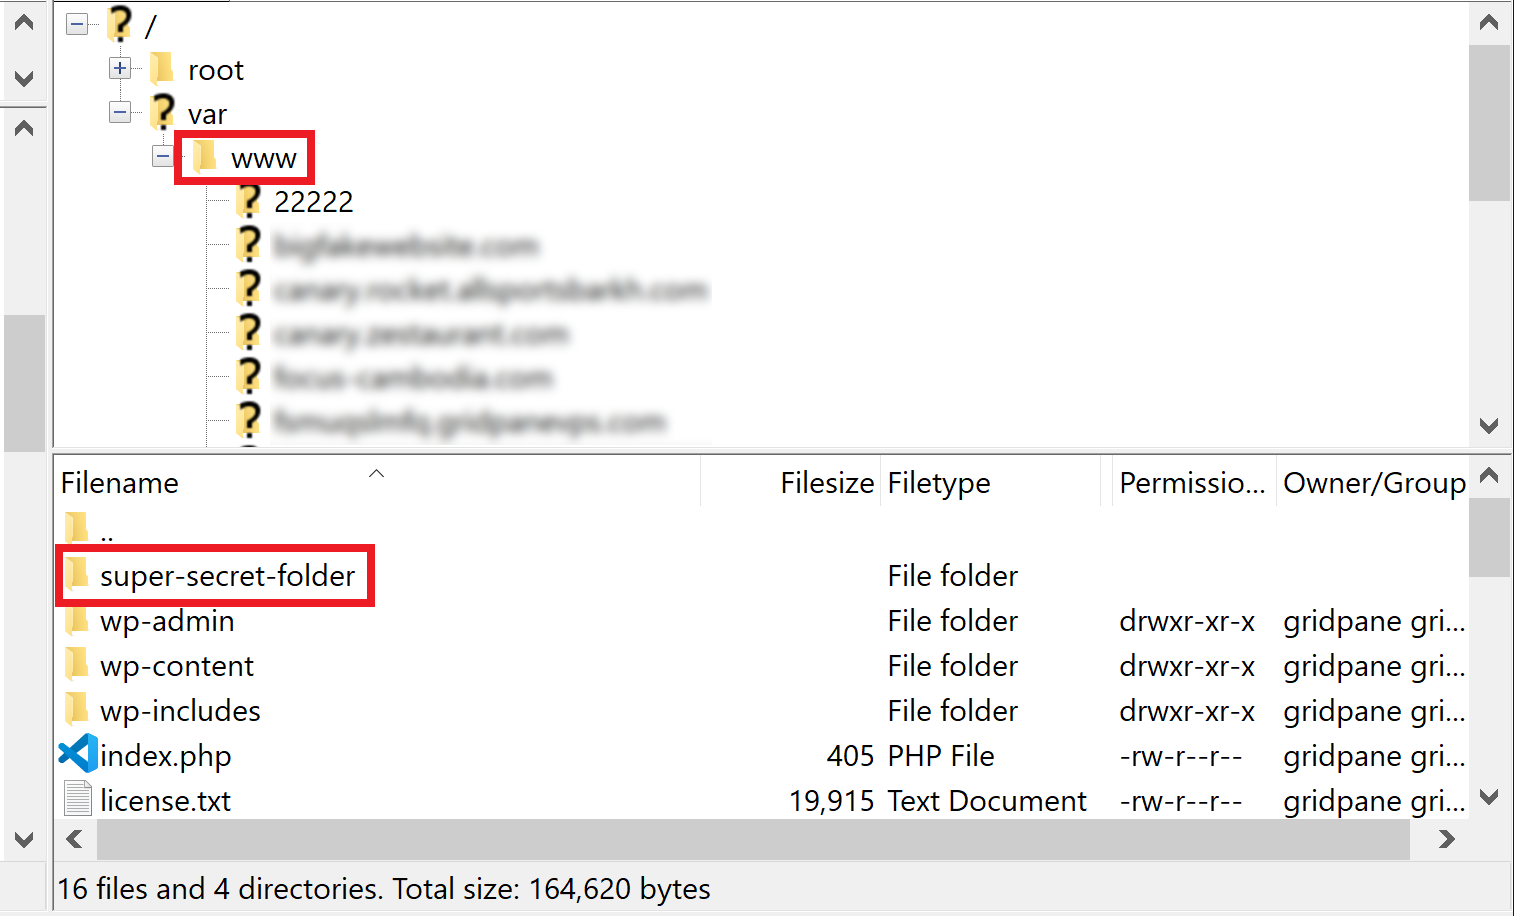
Extract the zip files and rename the folder to whatever location you added in step 1. I named my folder “super-secret-folder”.
Upload your folder in: www > site.url > htdocs
You’ll see your wp-admin, wp-content, and wp-includes directories in this location.
Step 7. Login through HTTP auth
We’re now ready to use the tool. First, navigate to the page – this is your website.url/folder-name
For example:
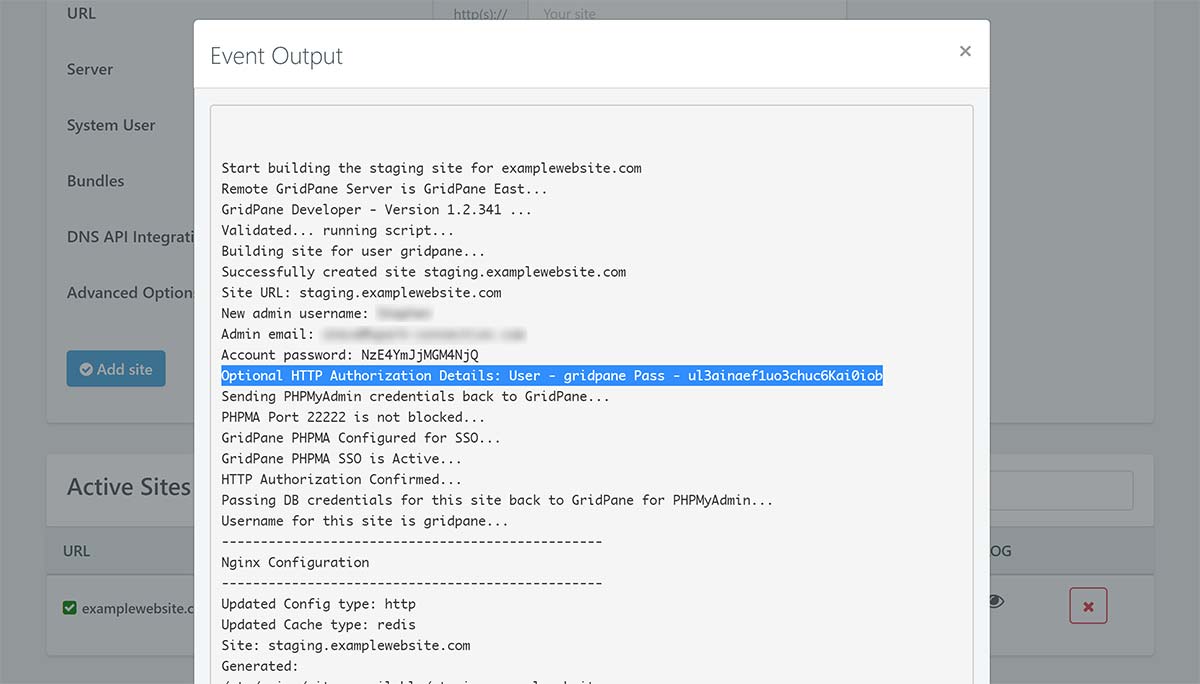
Here you’ll need your HTTP auth login details. To locate them, head over to the sites page inside your GridPane account, and click the log icon:

The username is always “gridpane” and you’ll see a line like below to find your password:
Step 8. Run your search and replace
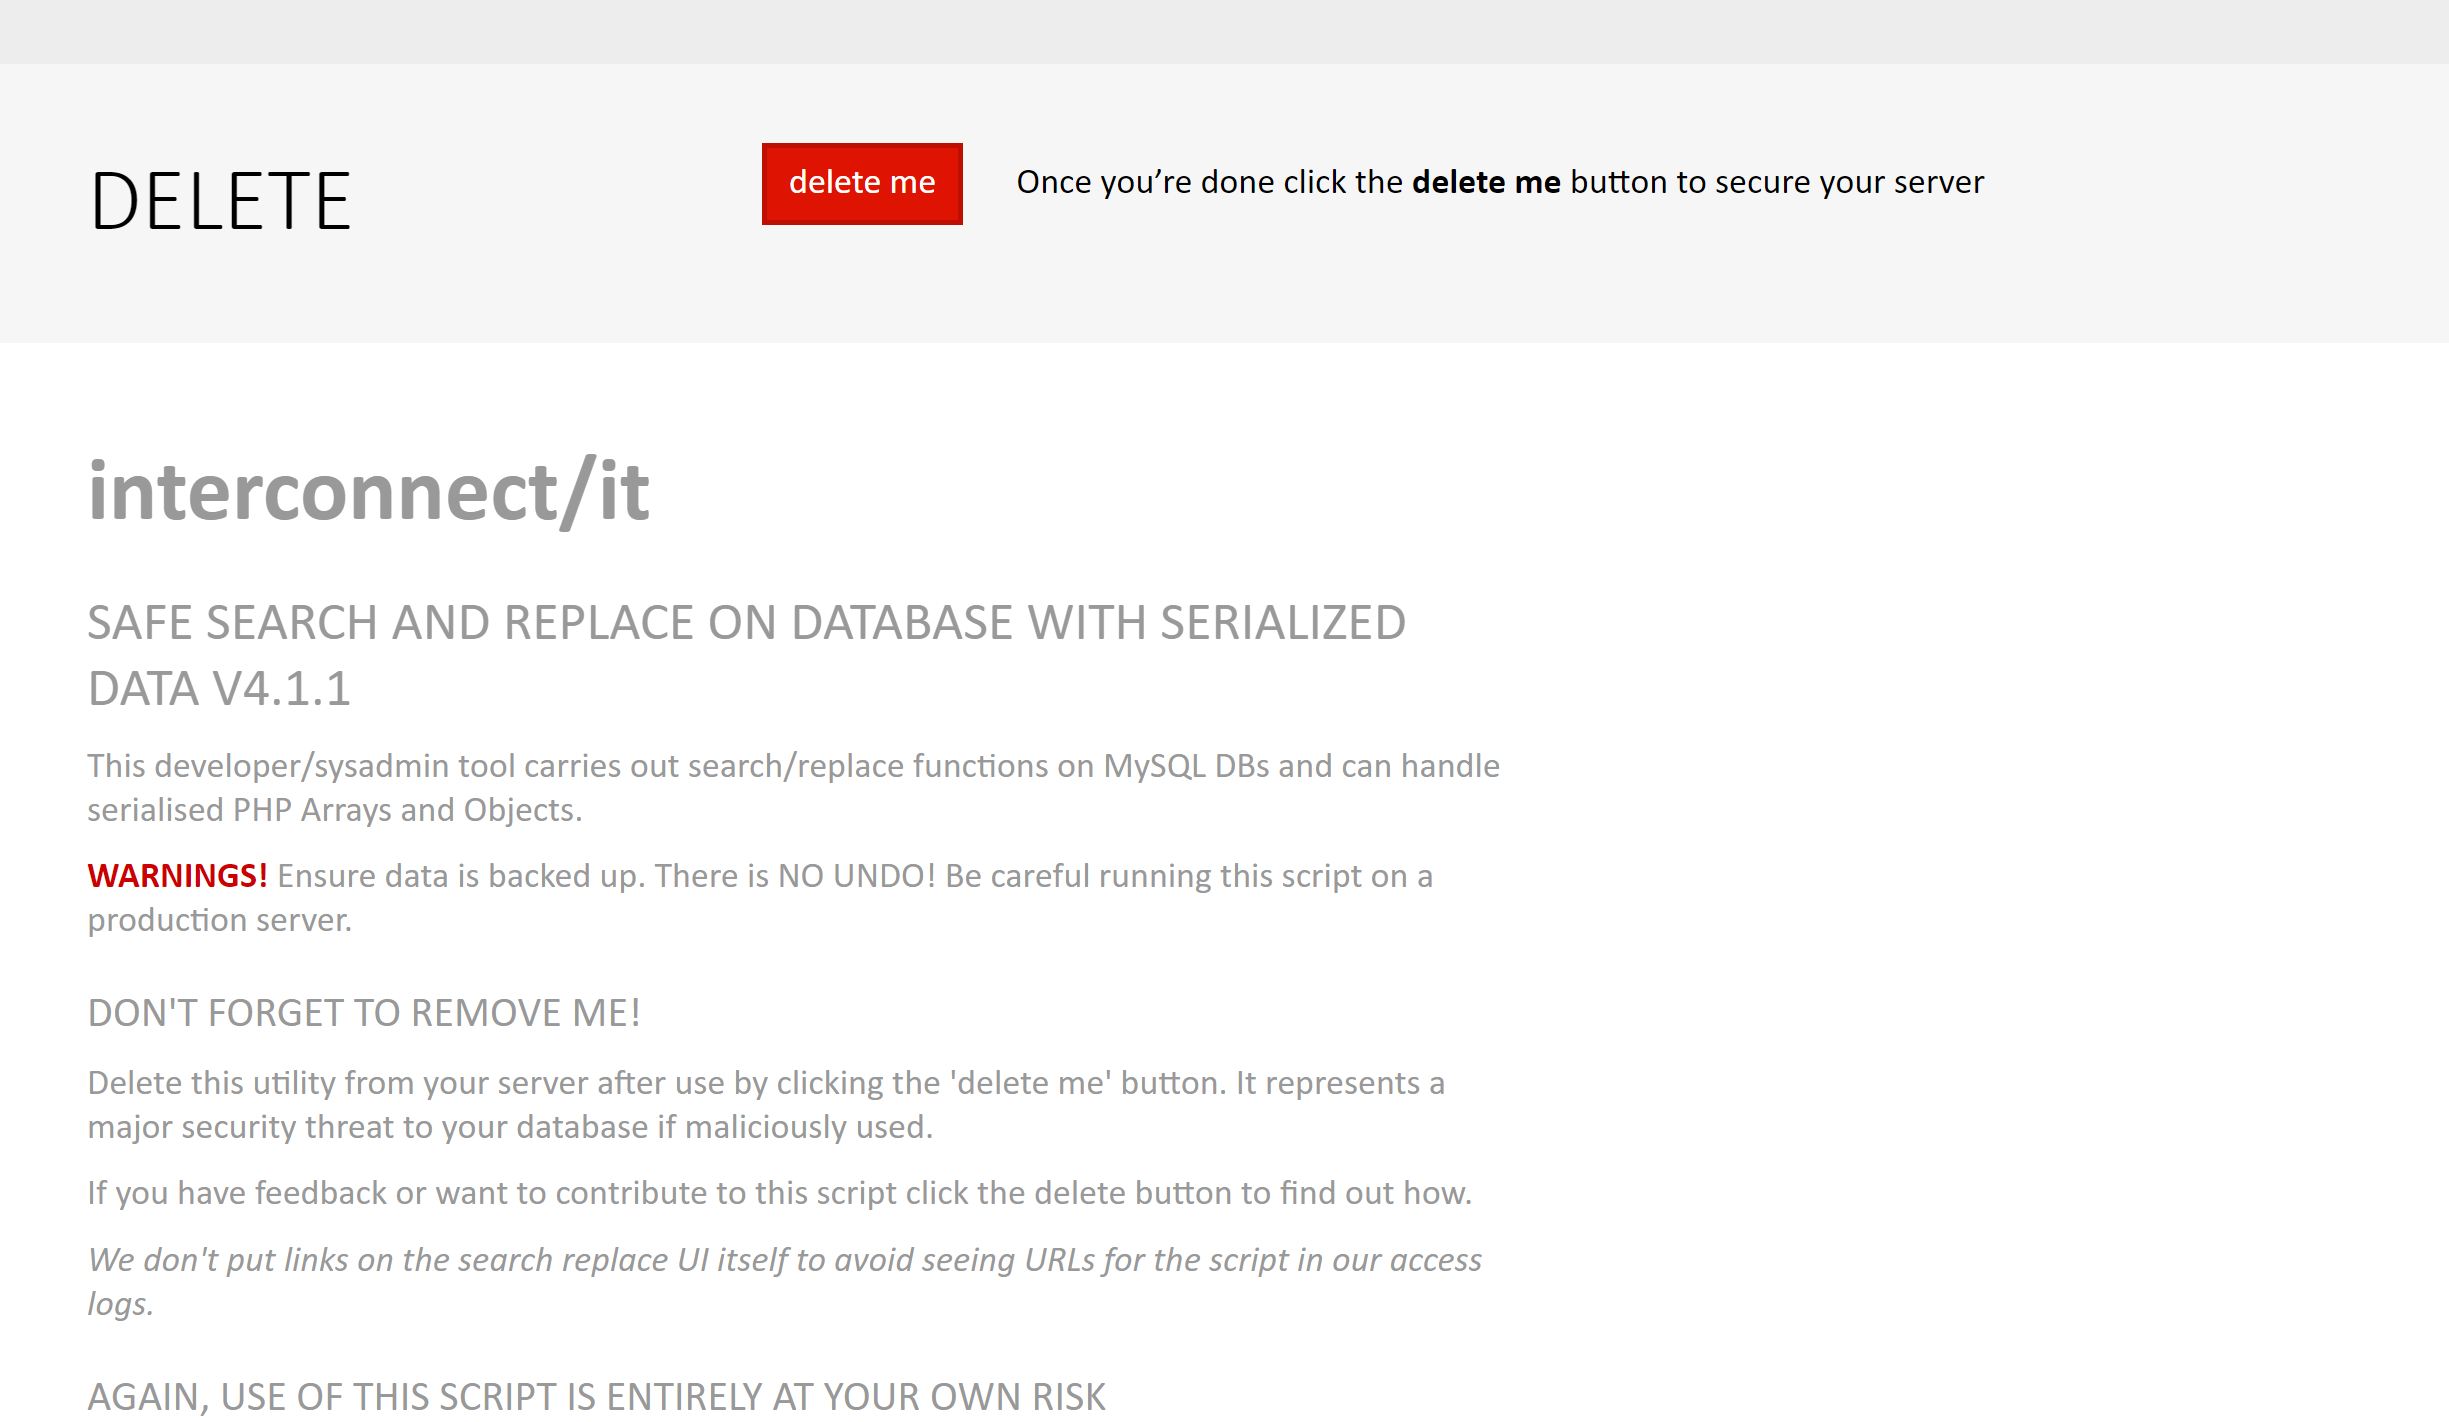
The script interface looks like this:
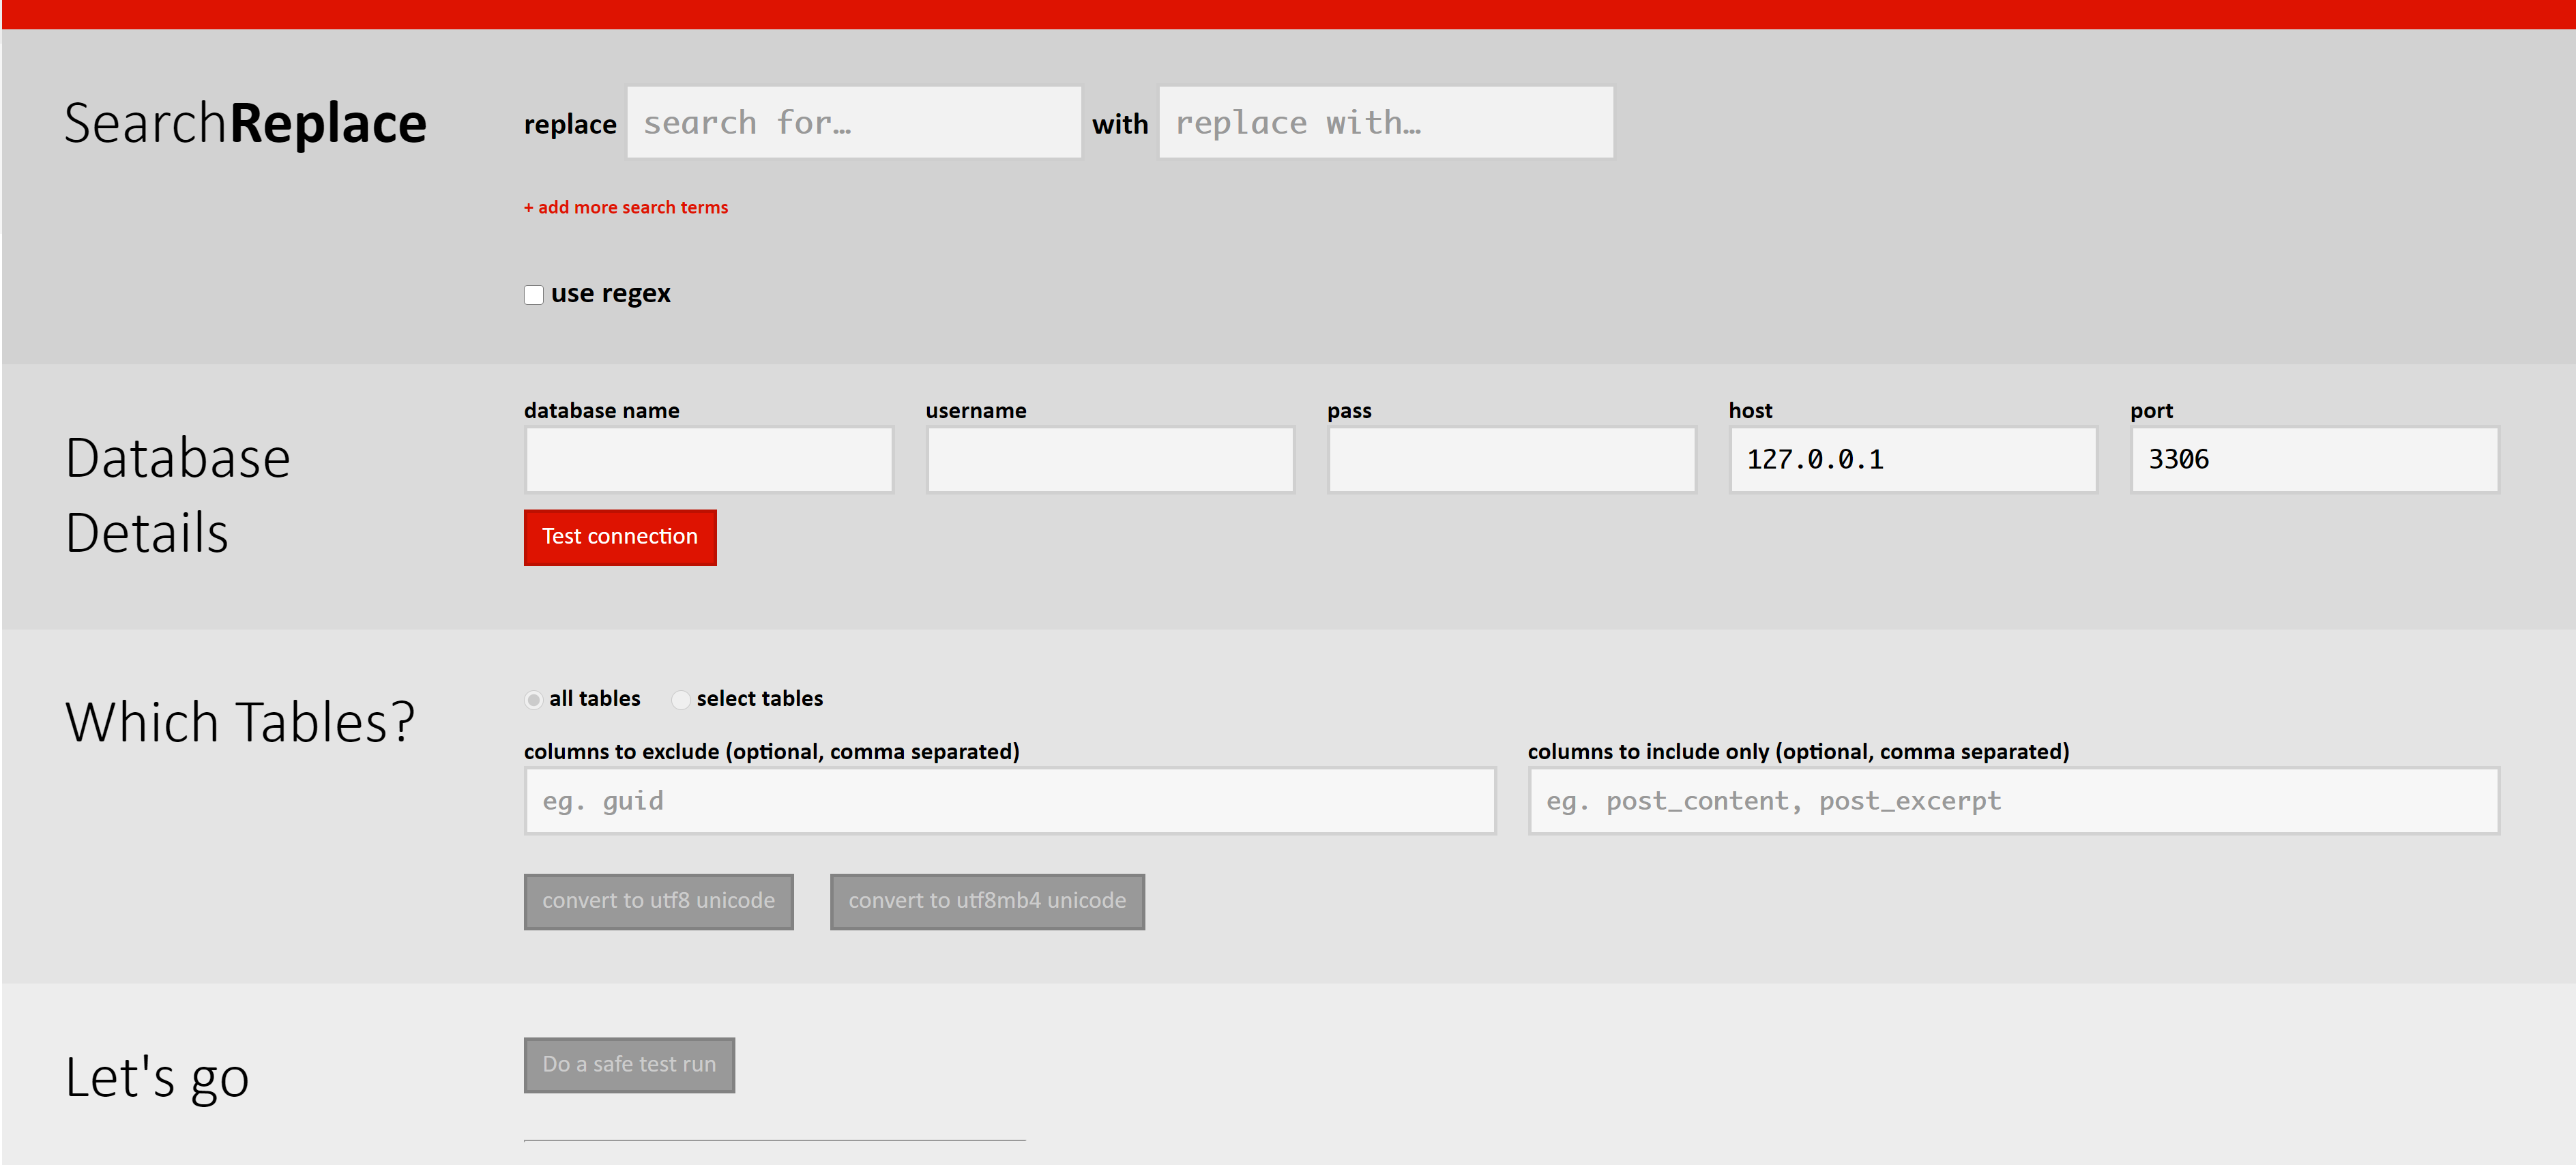
Enter your database credentials. You can find these inside your wp-config.php file.
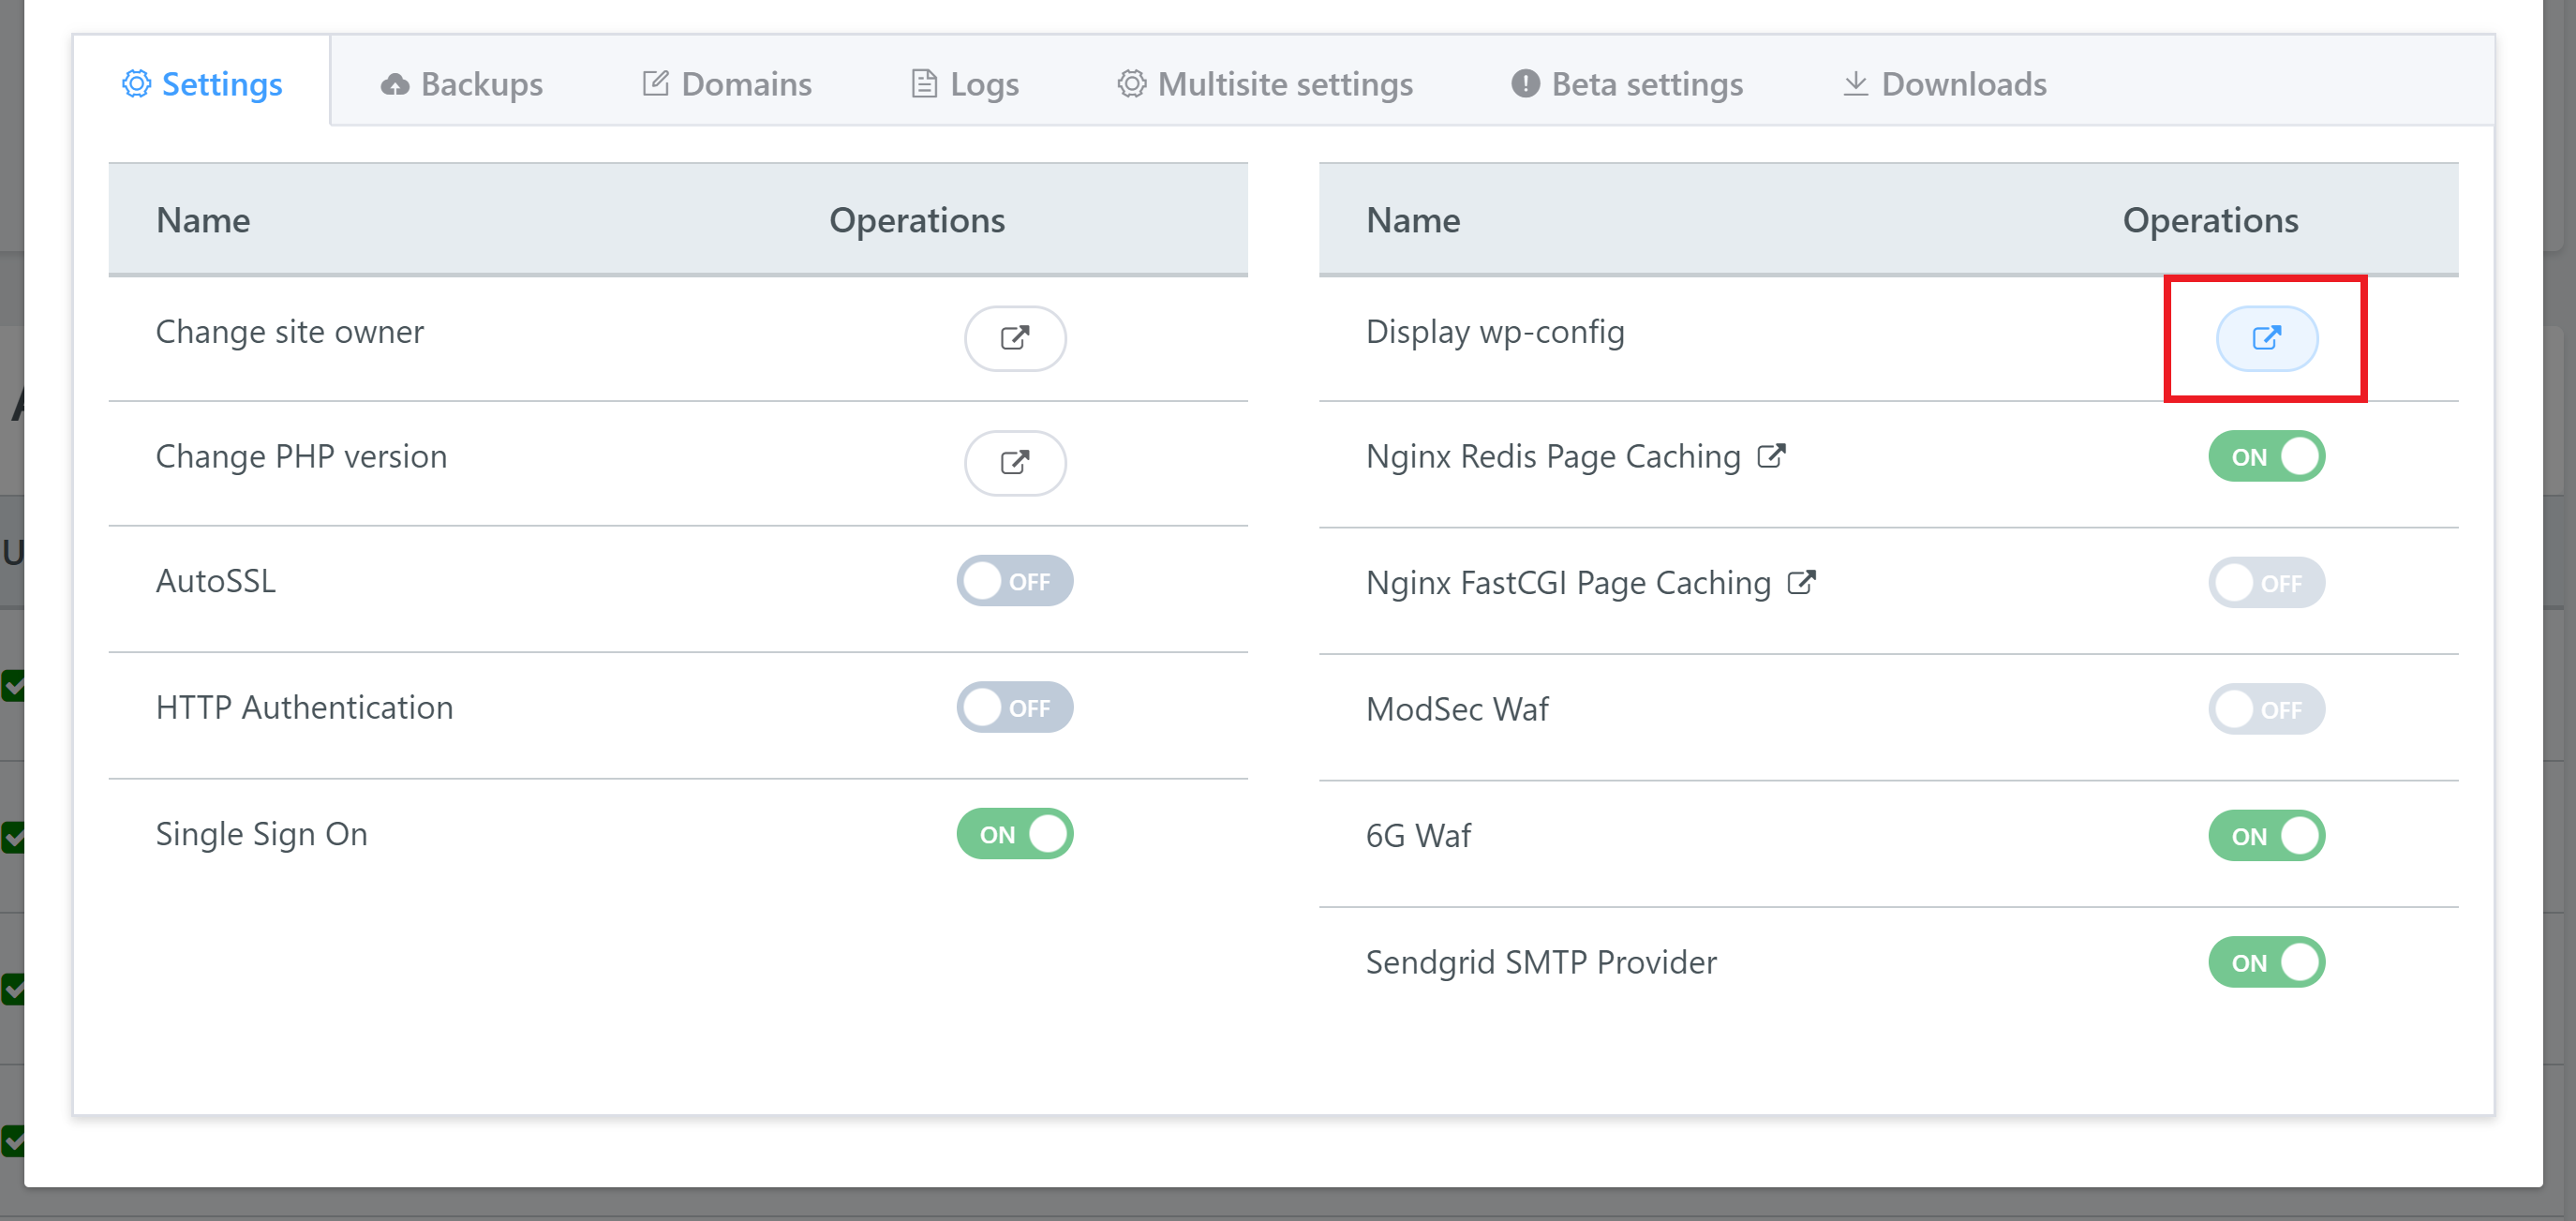
Back inside your GridPane account, open up your wp-config.php file by opening up your website’s configuration modal and clicking “Display wp-config” button:
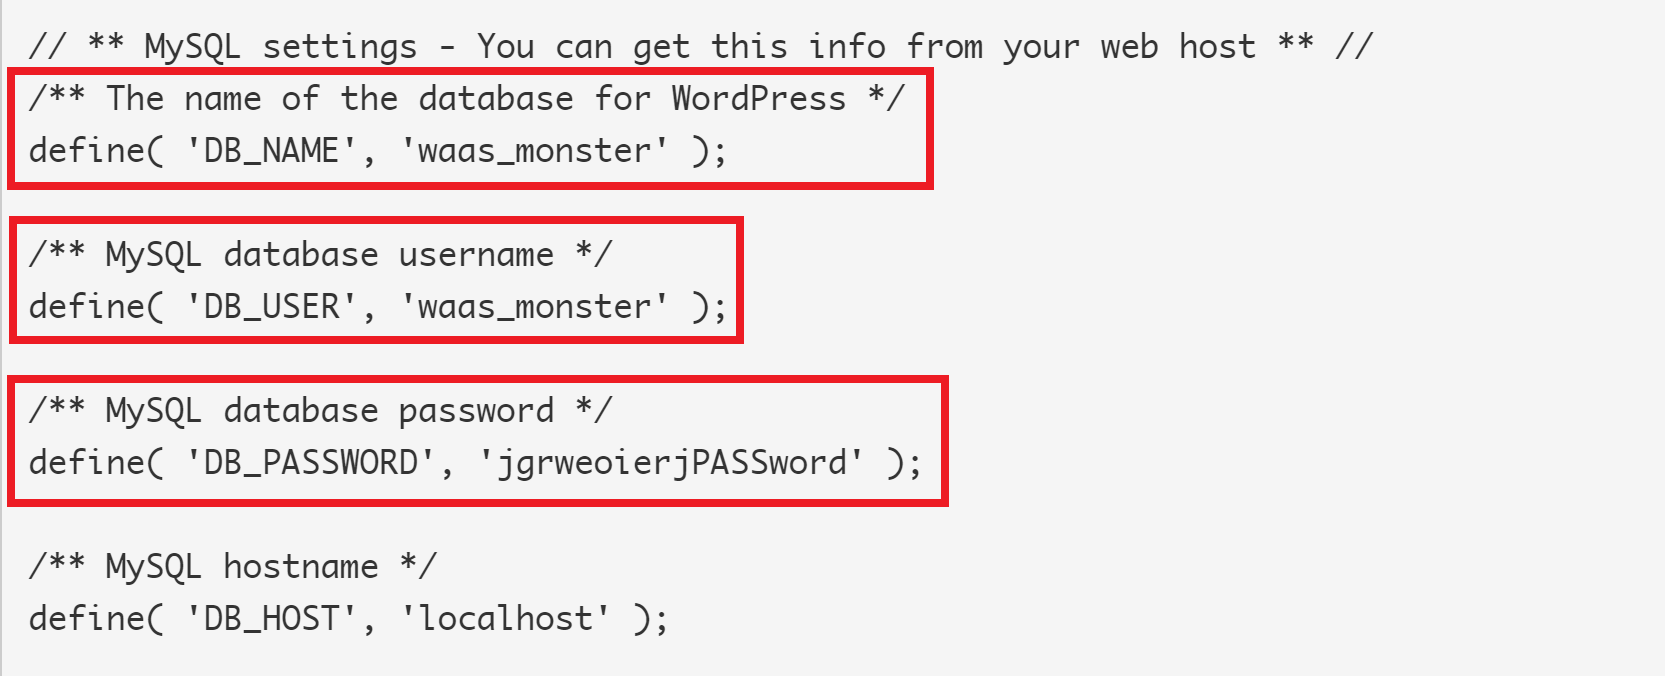
Now test your connection.
If all is well, you can do a search and replace dry run.
Now you can run the full one.
Step 9. Delete the Search Replace DB scripts from your server
Please delete the scripts once you’re finished. Leaving them here is an unnecessary security risk. You can always re-upload them again in the future if needed.
You can click the handy “delete me” button to delete the scripts. I’d highly recommend making sure the files are no longer on your server.
