WordPress Vulnerability Scanning and Notifications

6 min read

Information

WordPress vulnerability scanning is available on our Developer Plus and Agency plans.

Table of Contents

  1. Introduction
  2. Scanning Notifications
  3. Vulnerability Information
  4. Repeat a Scan
  5. Exclude a Website or Server from Scanning
  6. Whitelist a Vulnerability

Introduction

If you’re on our Developer Plus or Agency plans, our WordPress vulnerability scanning feature will perform a daily scan across all of the websites on your servers.

If a known vulnerability is found in WordPress core, or a theme or plugin installed on your website, we will send you a notification, and the vulnerability details will be stored and available to view inside your website customizer in the security tab.

This article will show you where all of this functionality lives inside your GridPane account. 

Scanning Notifications

When your servers daily scan finds vulnerabilities in WordPress core, themes, and plugins our systems will:

  1. Email you via our support ticketing system
  2. Replace the green check box next to your website URL with an orange box
  3. Optional: Send a notification to your Slack account

Each vulnerability will only send one notification. For example, if “Plugin X” has a vulnerability in version 1.3, no further notifications will be sent for this version of the plugin. If you update “Plugin X” to version 1.4 and the plugin has the same vulnerability

Email Notifications

These notifications will create a support ticket, which will alert you to the issue via email. This support ticket will then automatically be closed.

Emails will be sent to the account owner’s email address.

Orange Check Mark Indicator

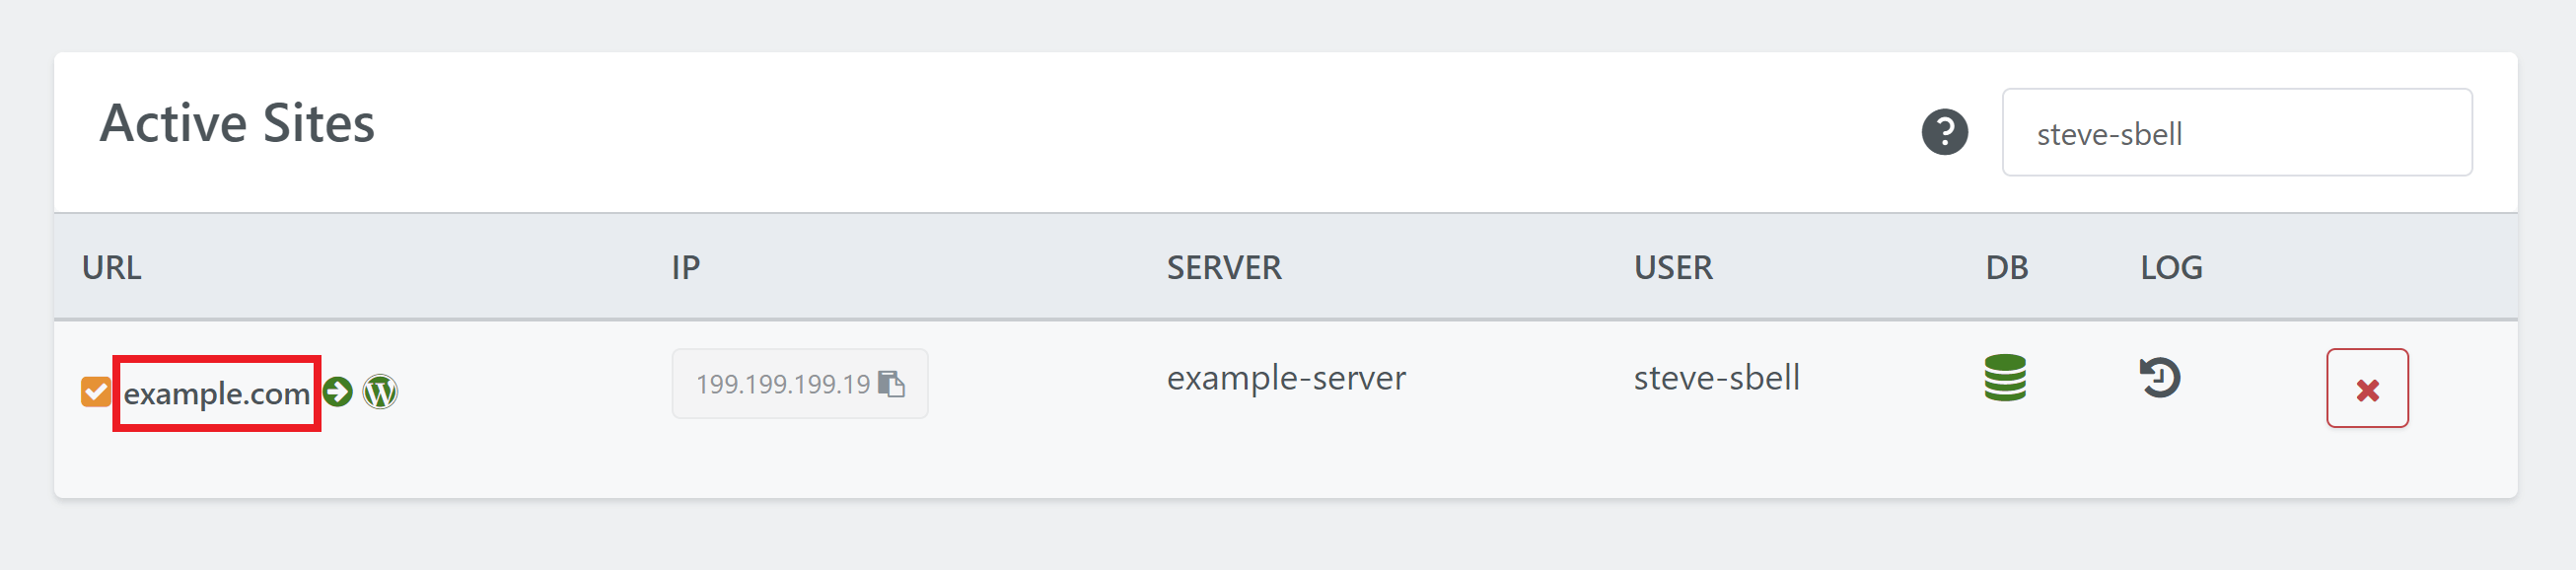
Inside the Sites page in your GridPane account, there is a checkmark before each of your website URLs in the Active Sites table, which is green by default. When a vulnerability is found for a website, the green check will turn orange until the issue is resolved:

Slack Notifications

If you’ve set up Slack notifications for your account, you can turn on notifications for vulnerability monitoring (note that this is not activated by default).

Click through to your settings page and then click on Slack on the left-hand side:

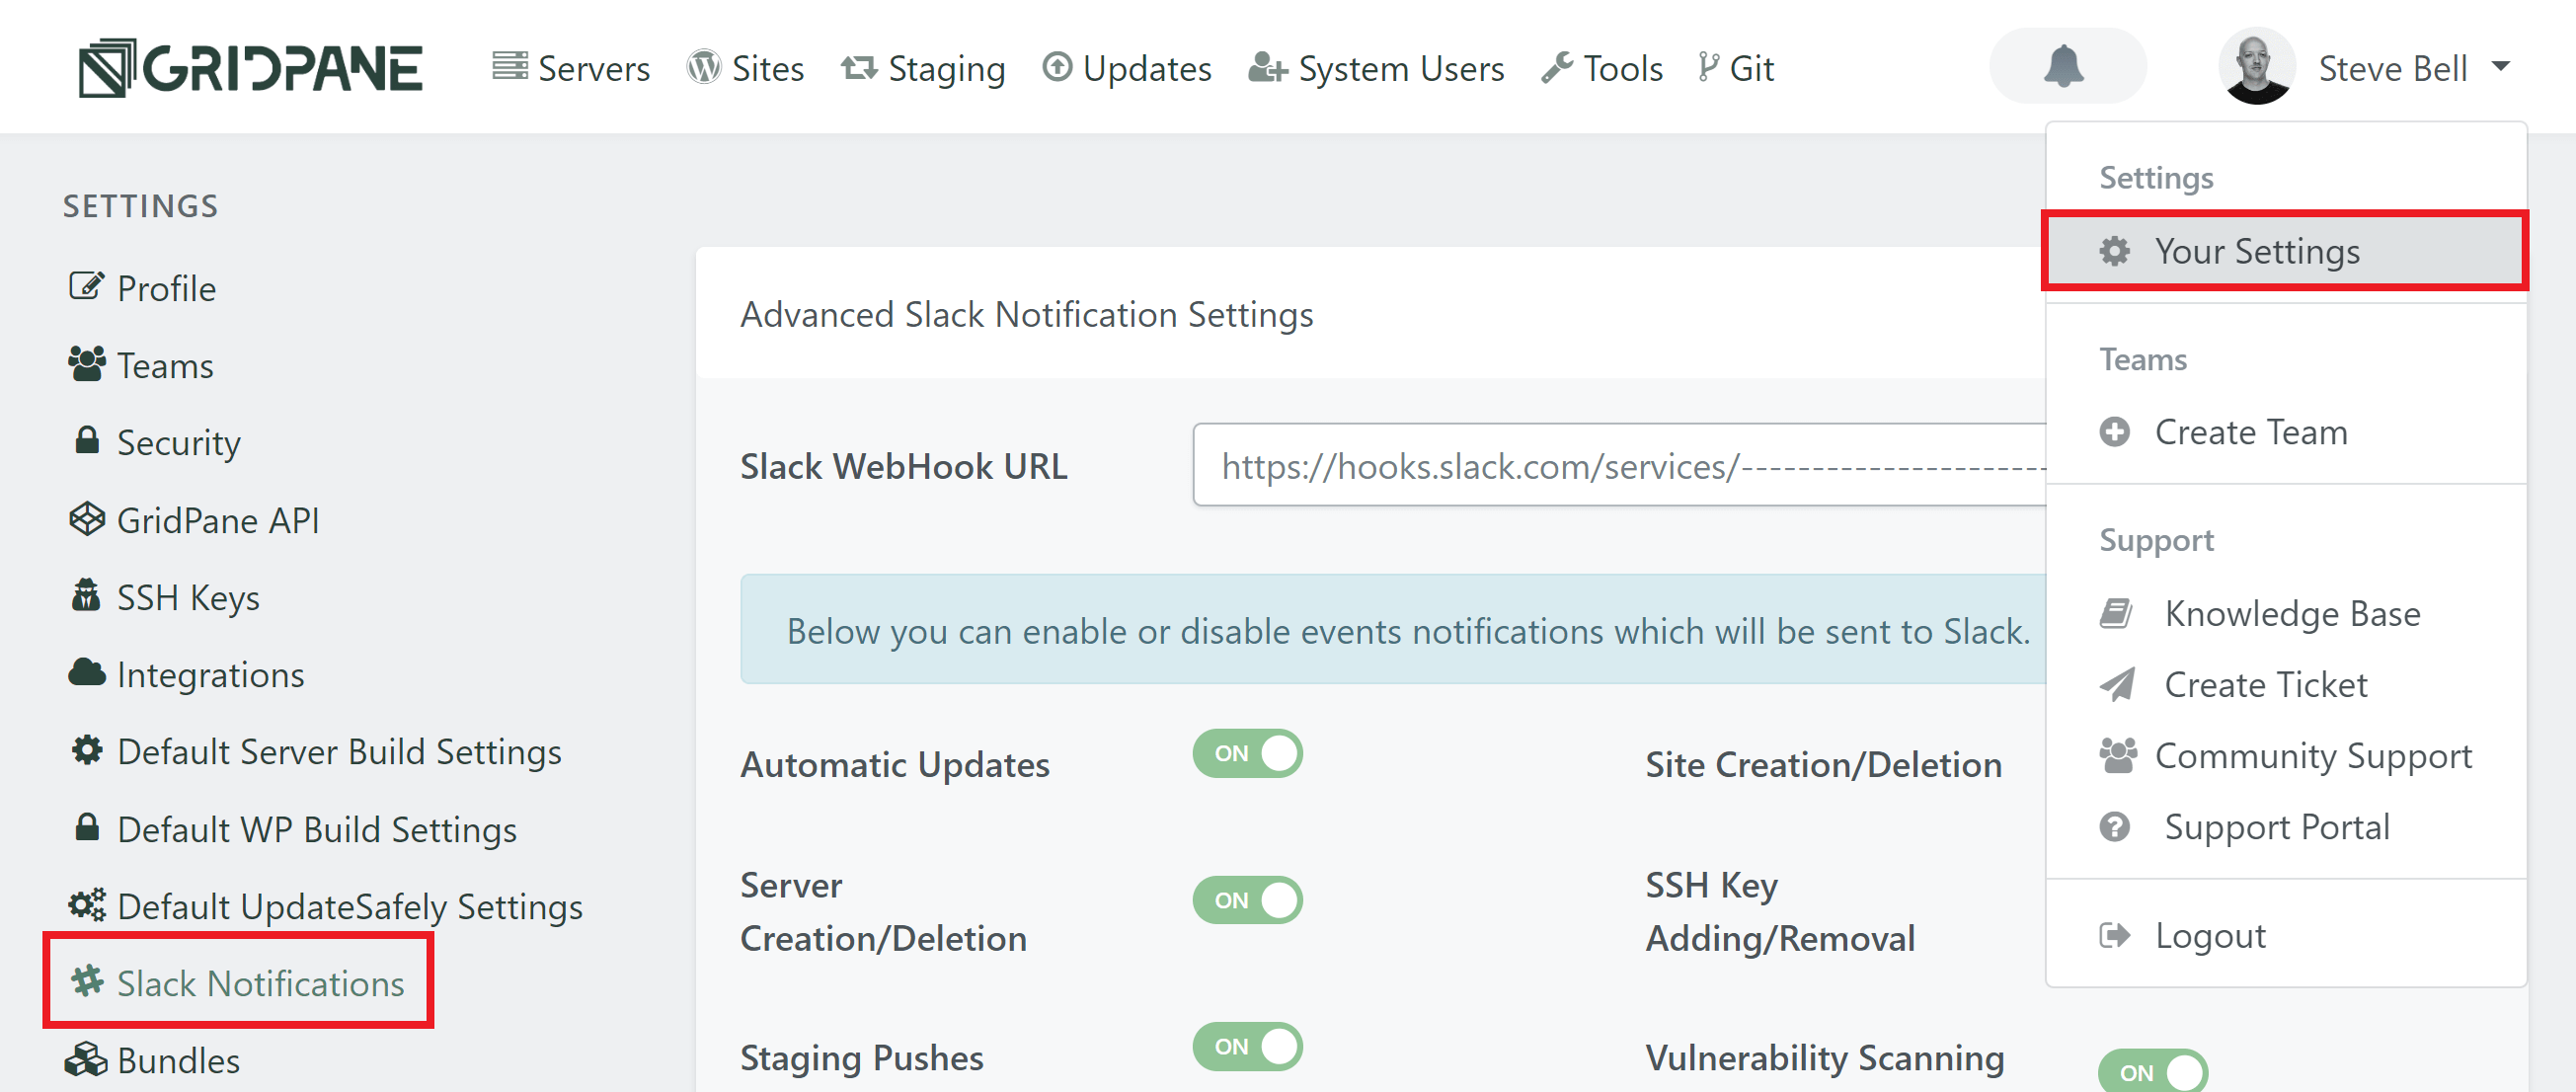
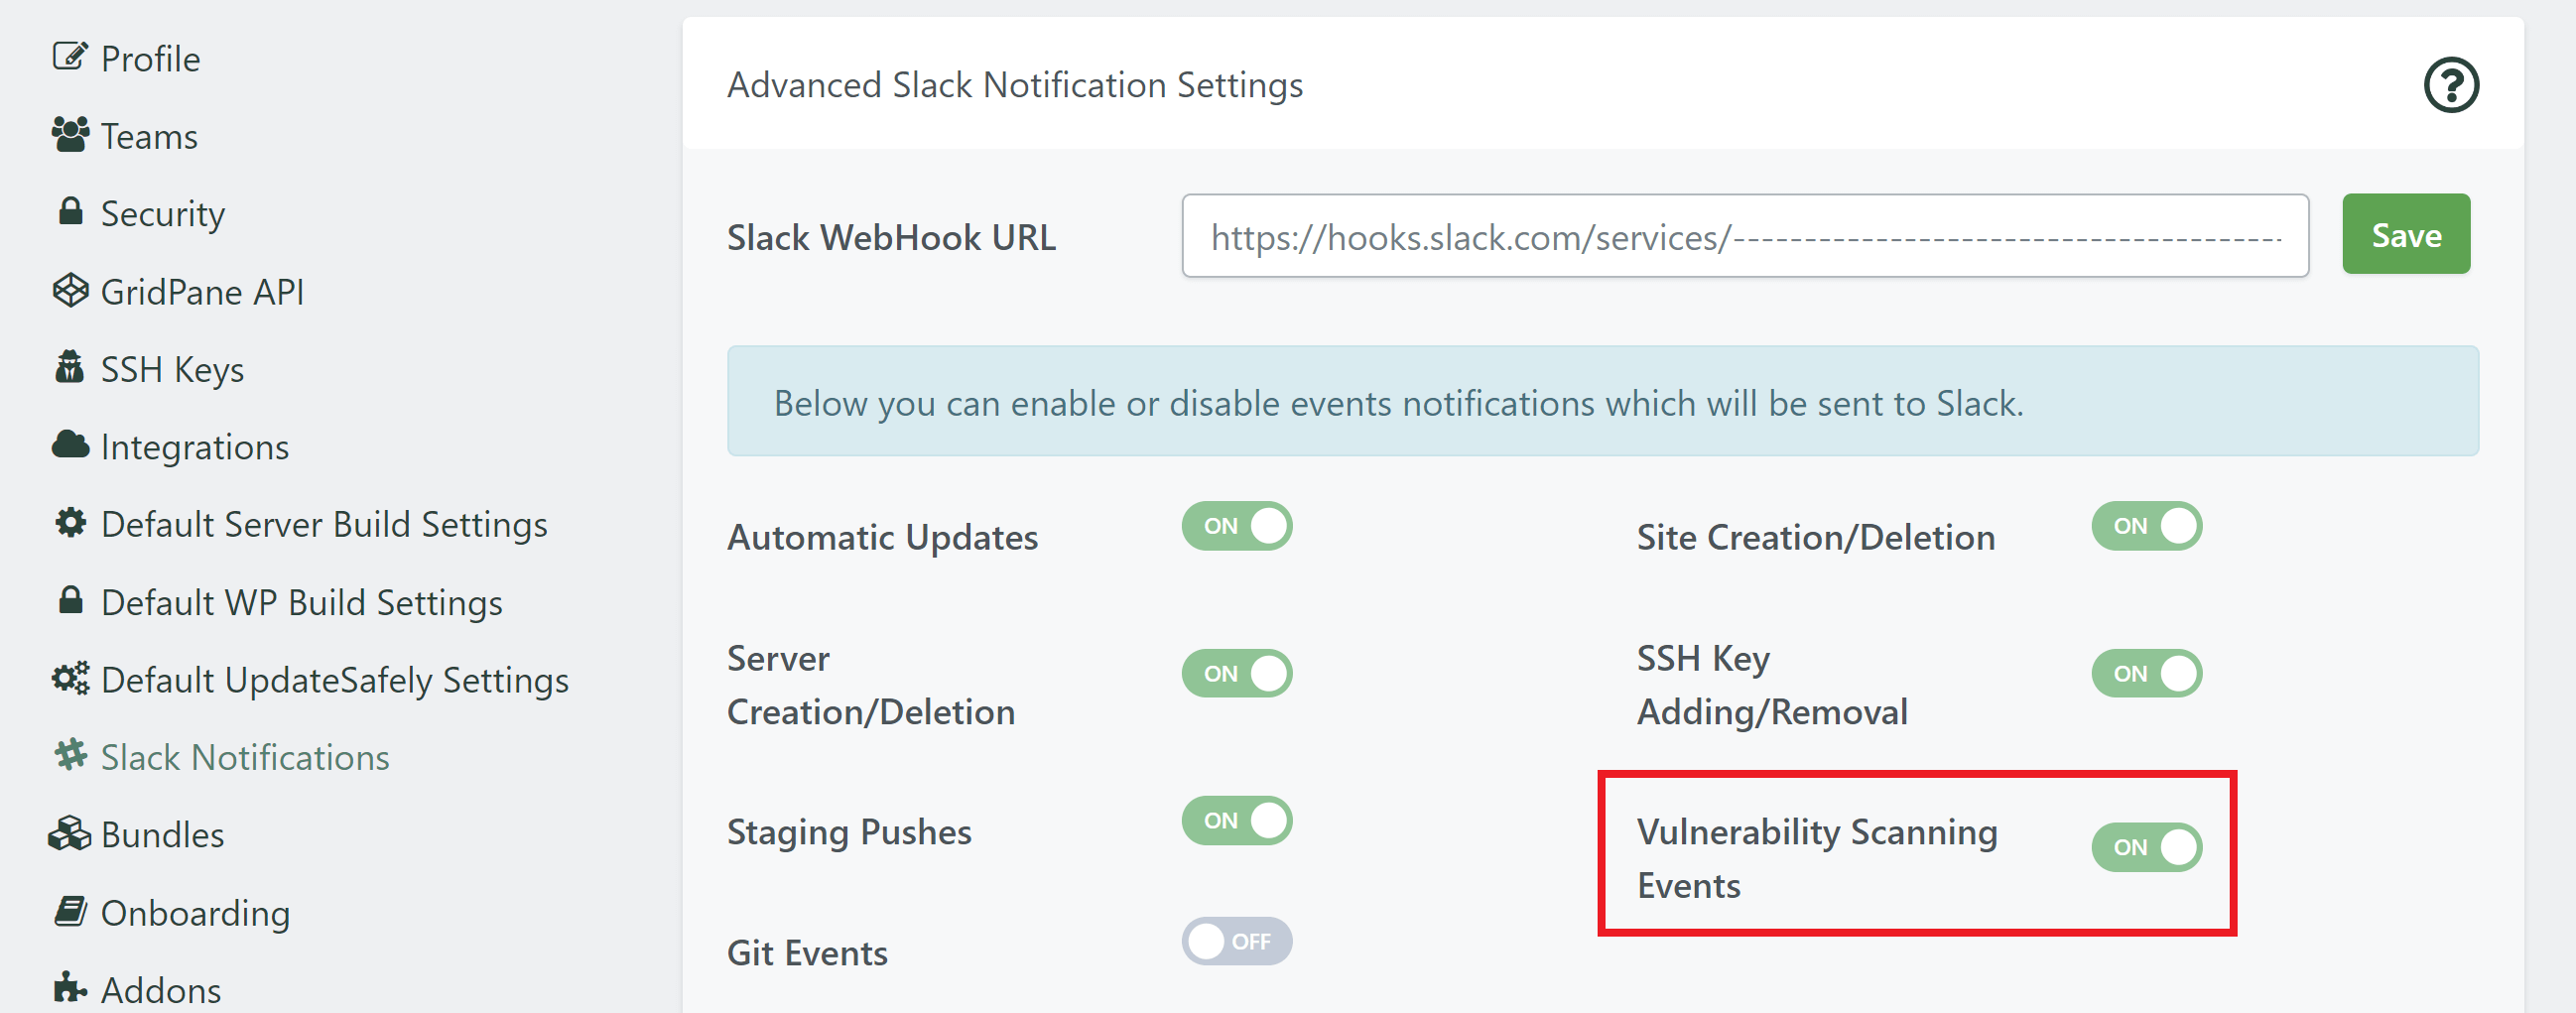
Here you can toggle vulnerability notifications ON and OFF:

Vulnerability Information

Detailed information for any vulnerabilities found on your websites can be viewed inside your website customizer.

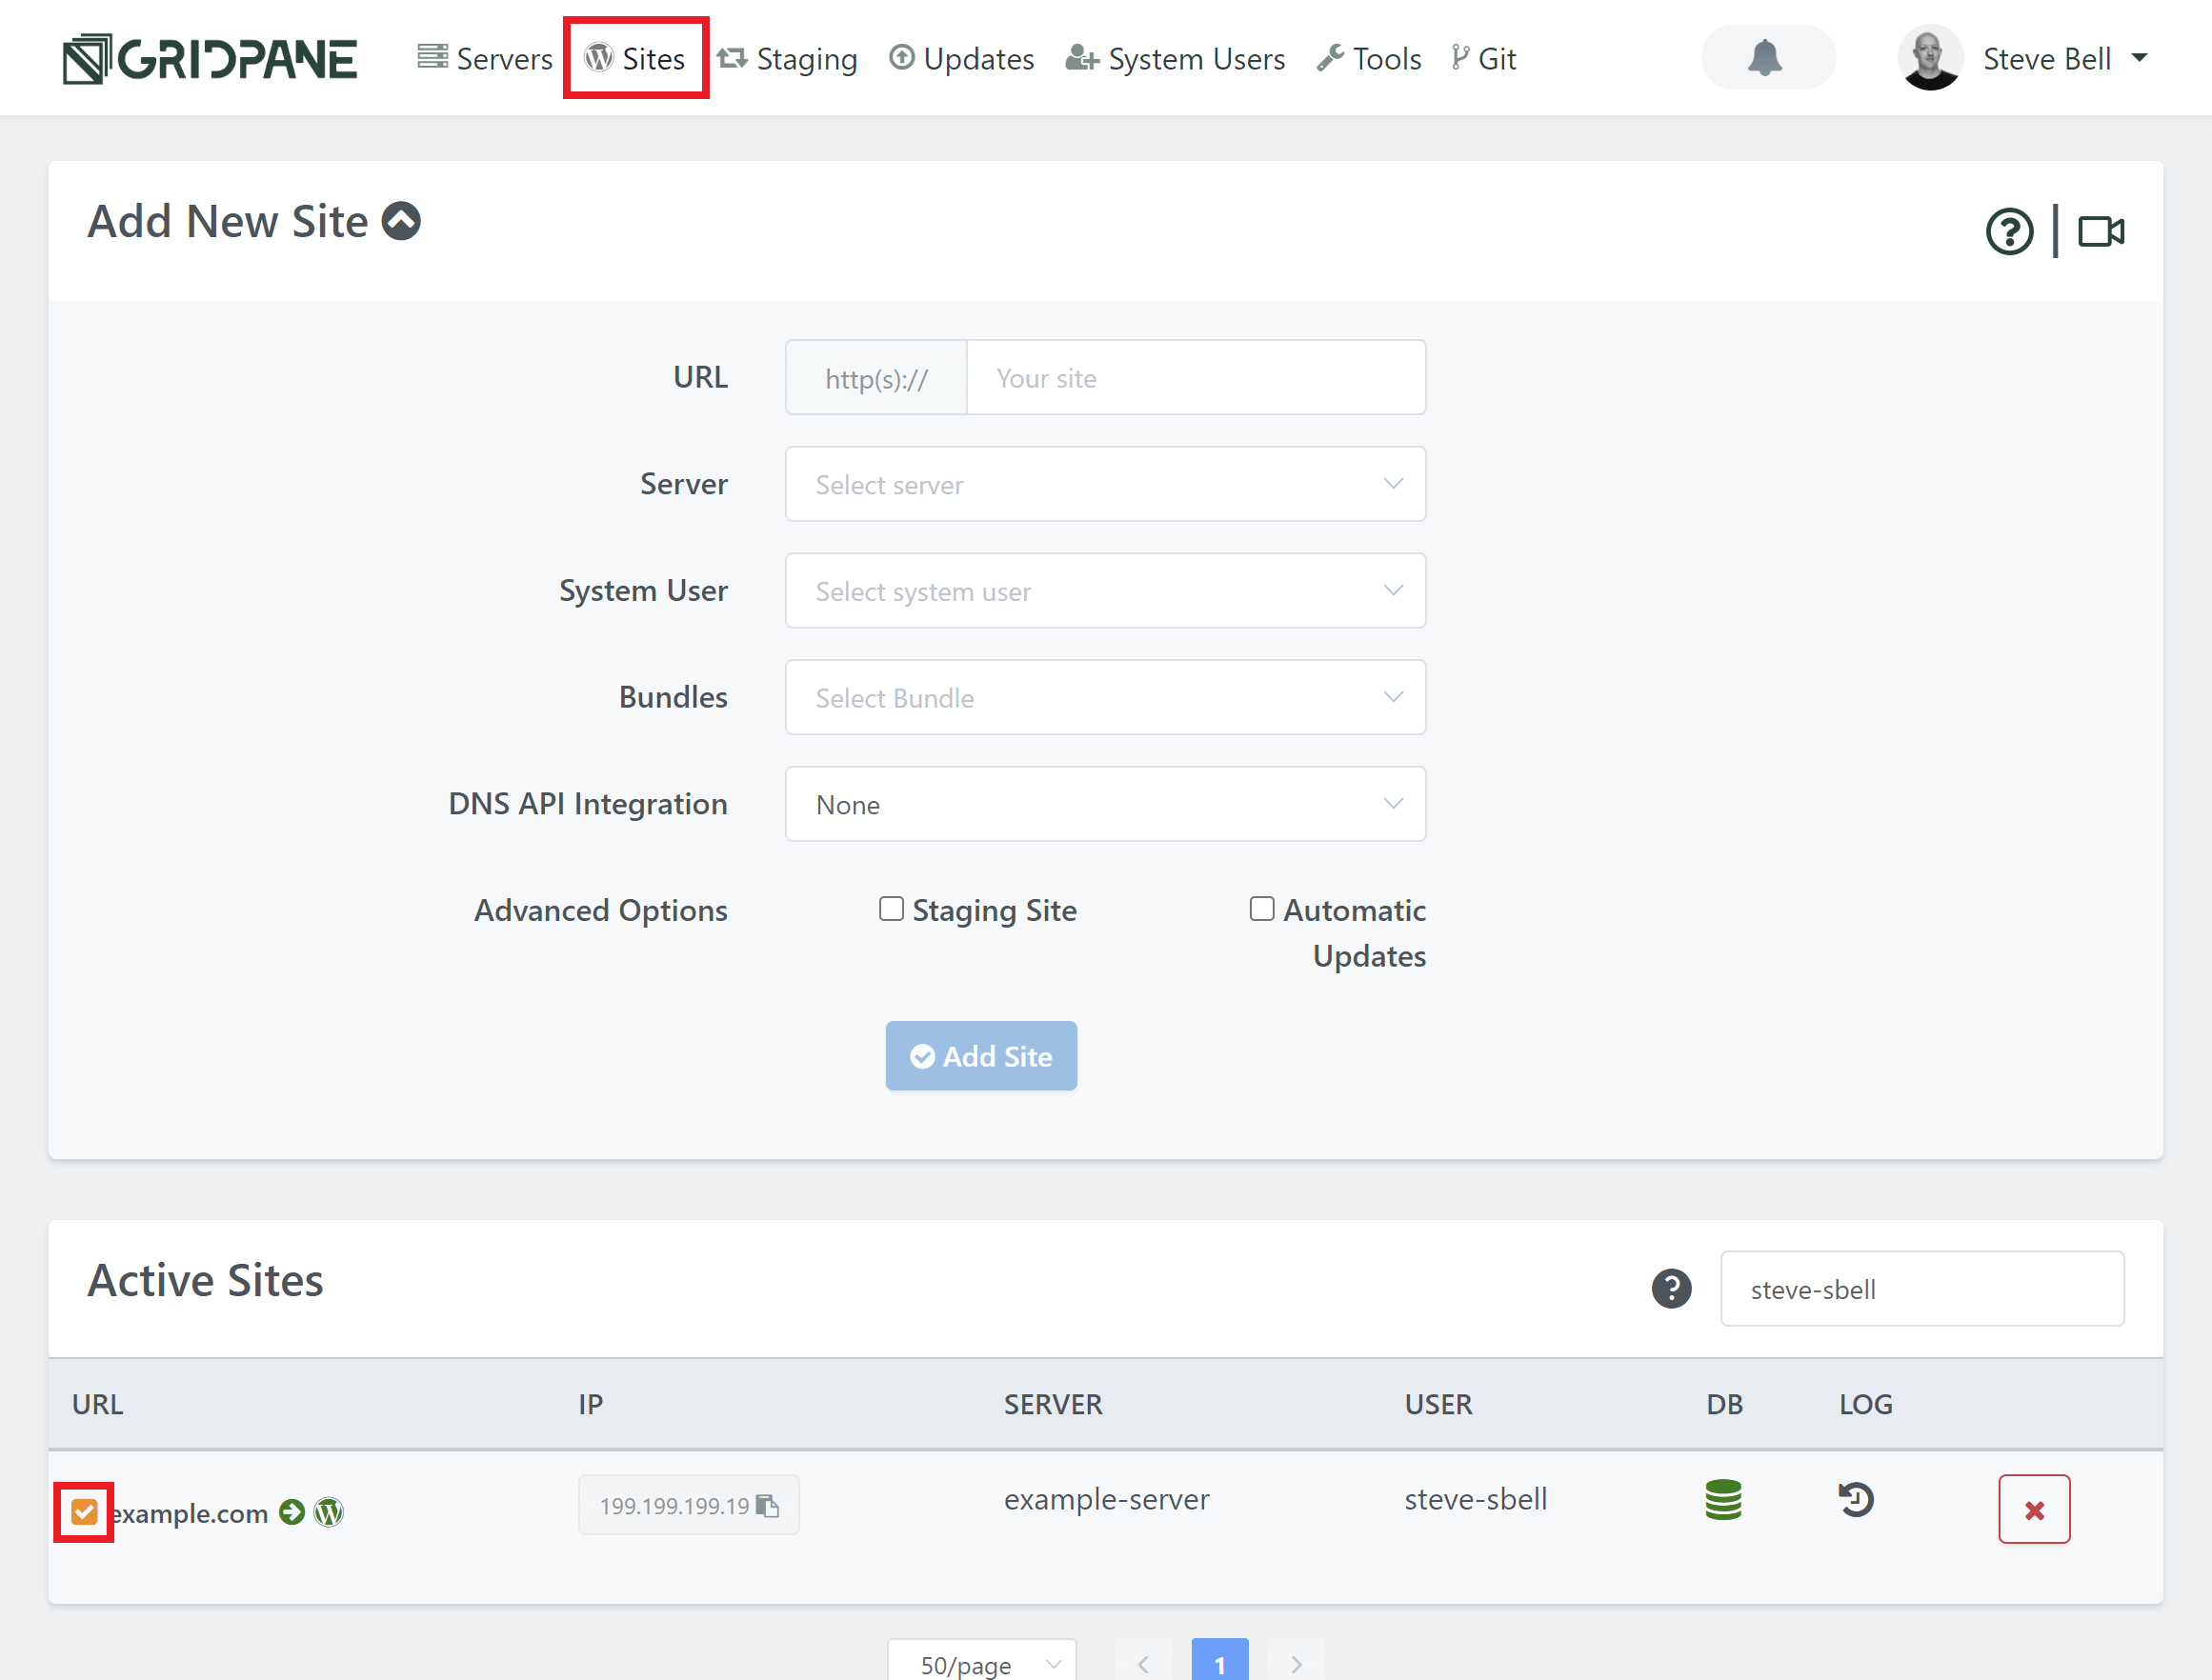
Click on your website URL on the Sites page in your account to open up the customizer:

If a vulnerability has been found, the Security tab will display a red exclamation. 

Click through to the Security tab > Vulnerability Scanning.

These are color-coded, with red indicating a severe vulnerability that should be resolved as quickly as possible.

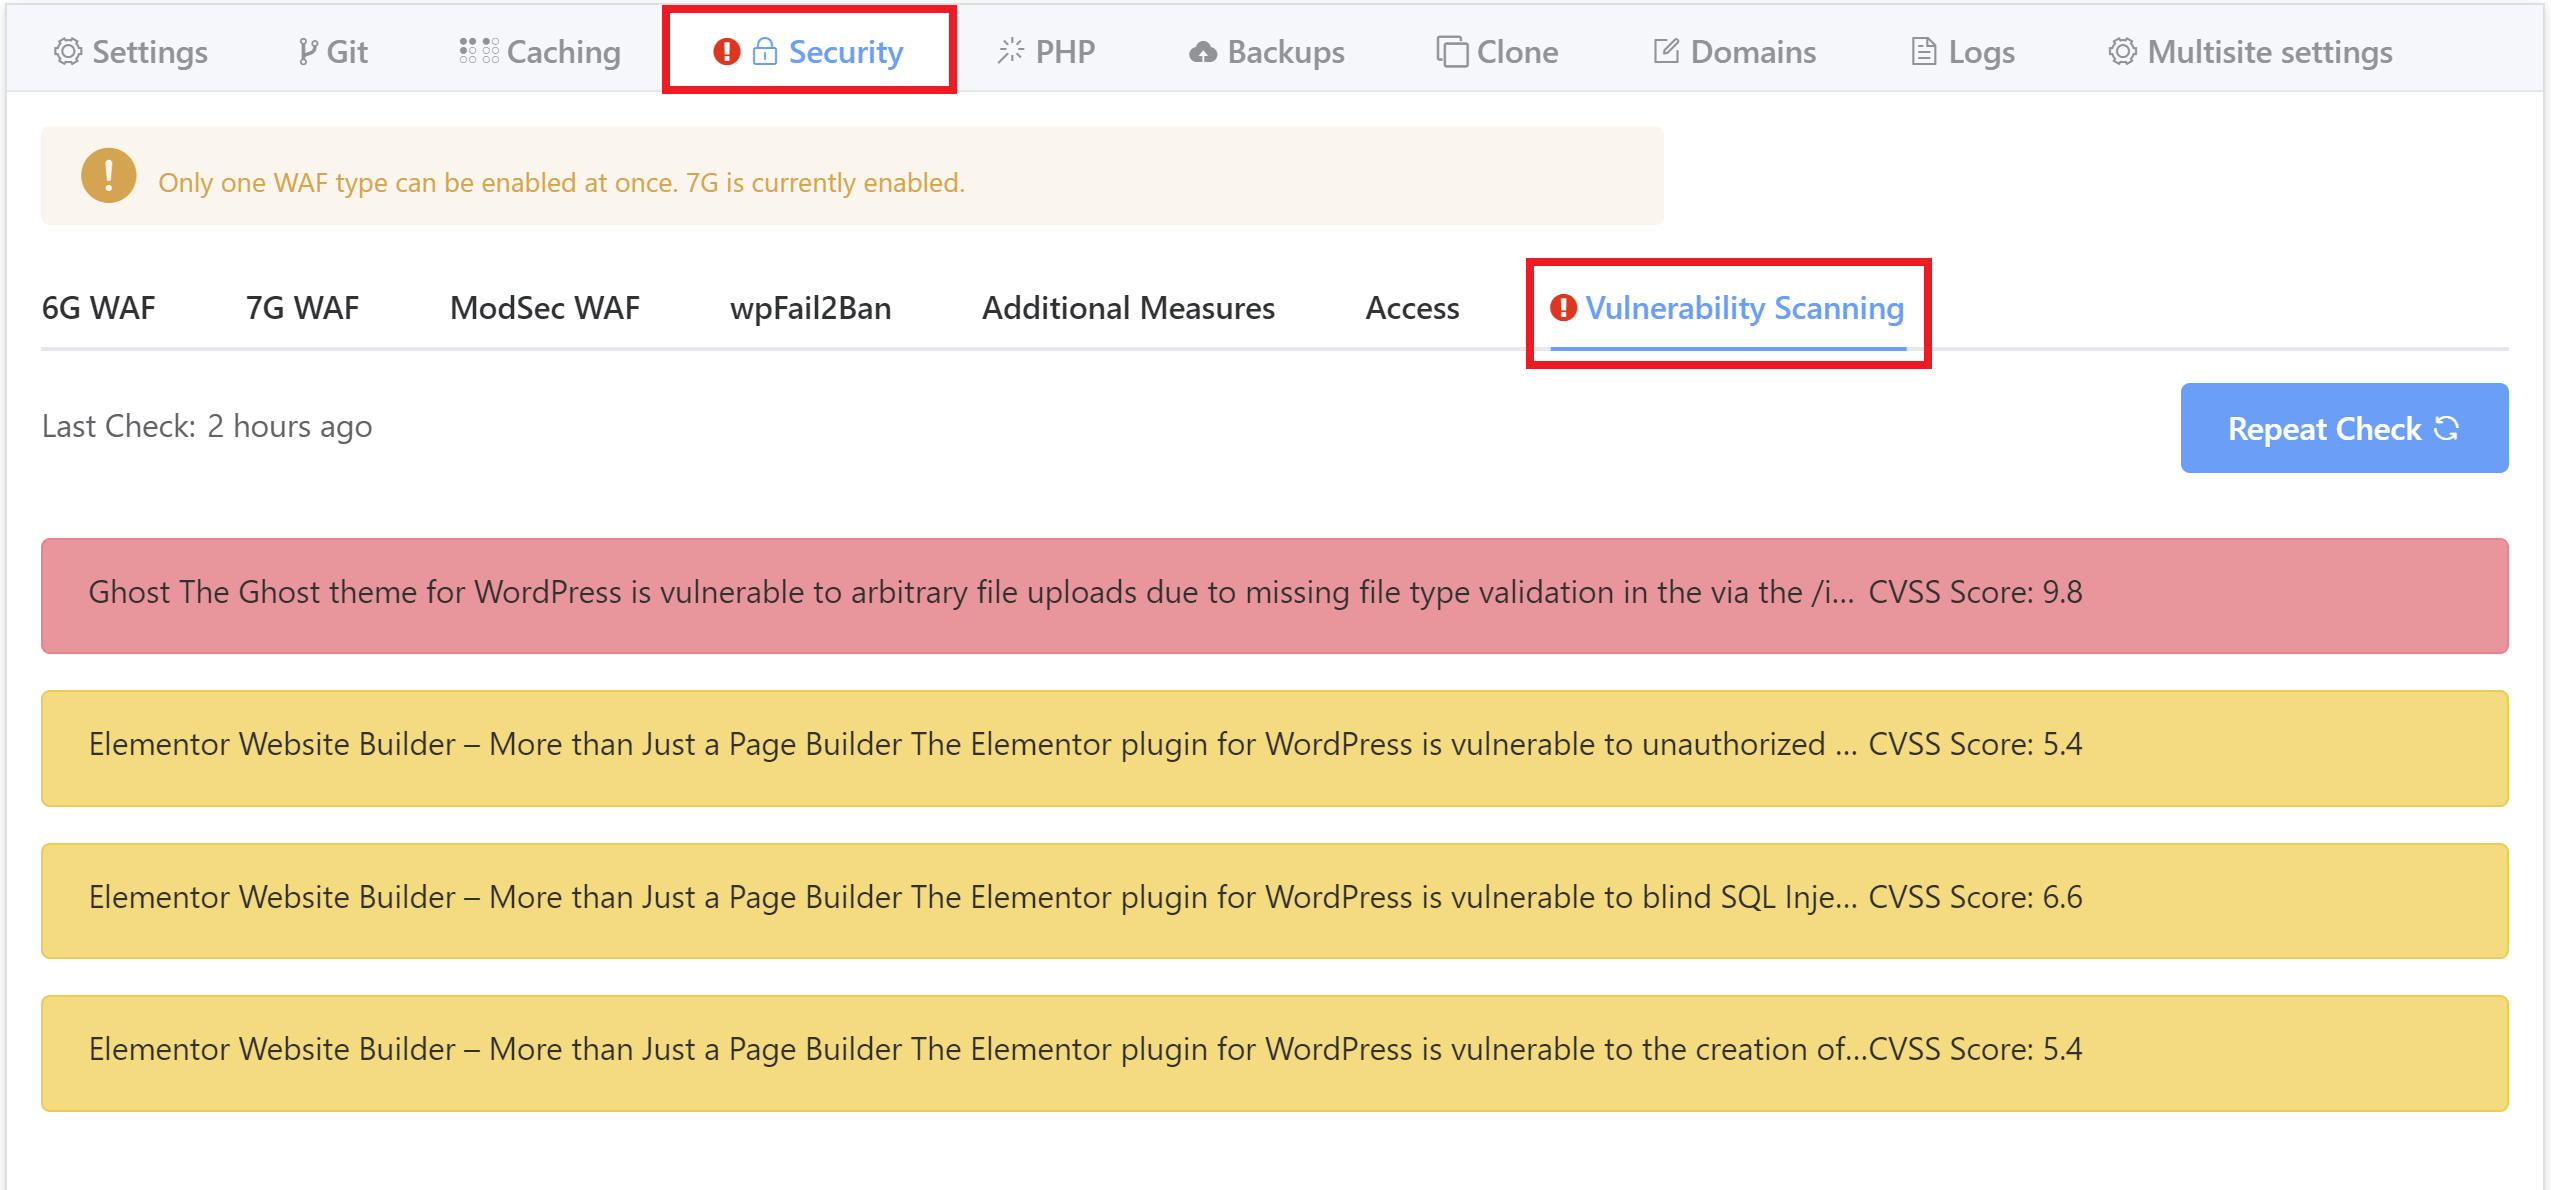
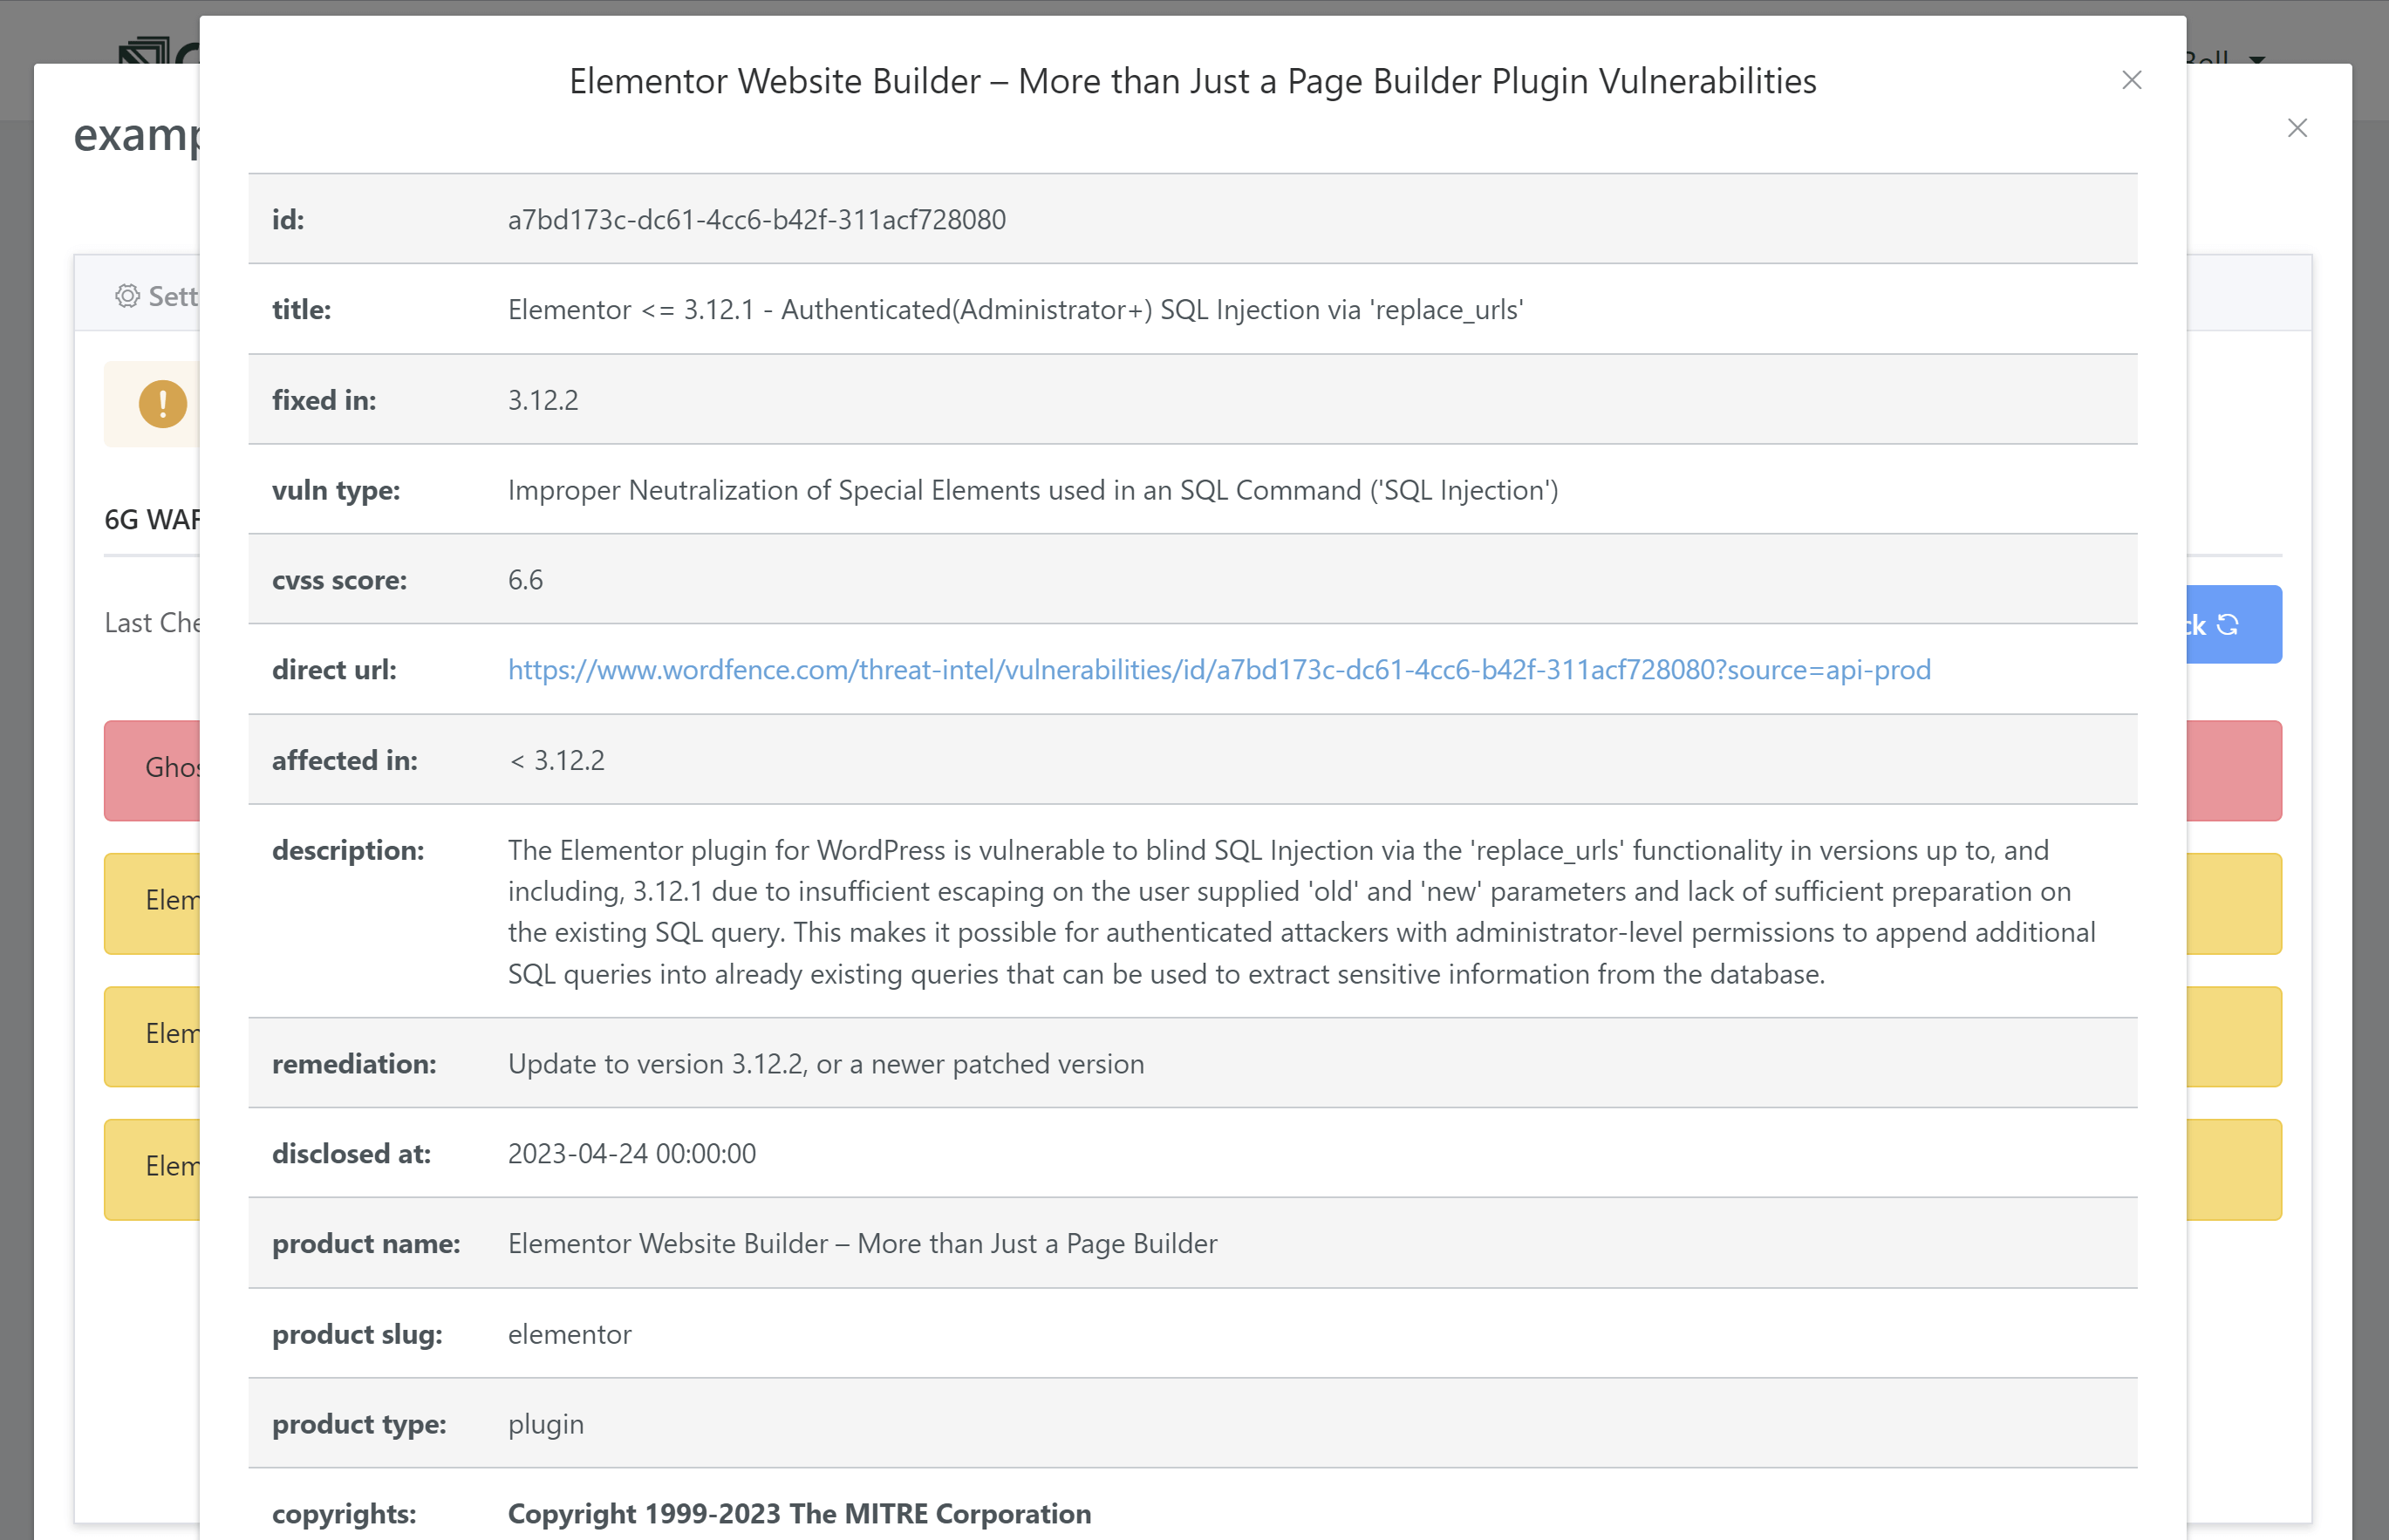
To display a breakdown of the specifics, simply click on the vulnerability:

Repeat a Scan

You can repeat a scan for an individual website inside the Security > Vulnerabilities tab in the website customizer by clicking the Repeat Check button:

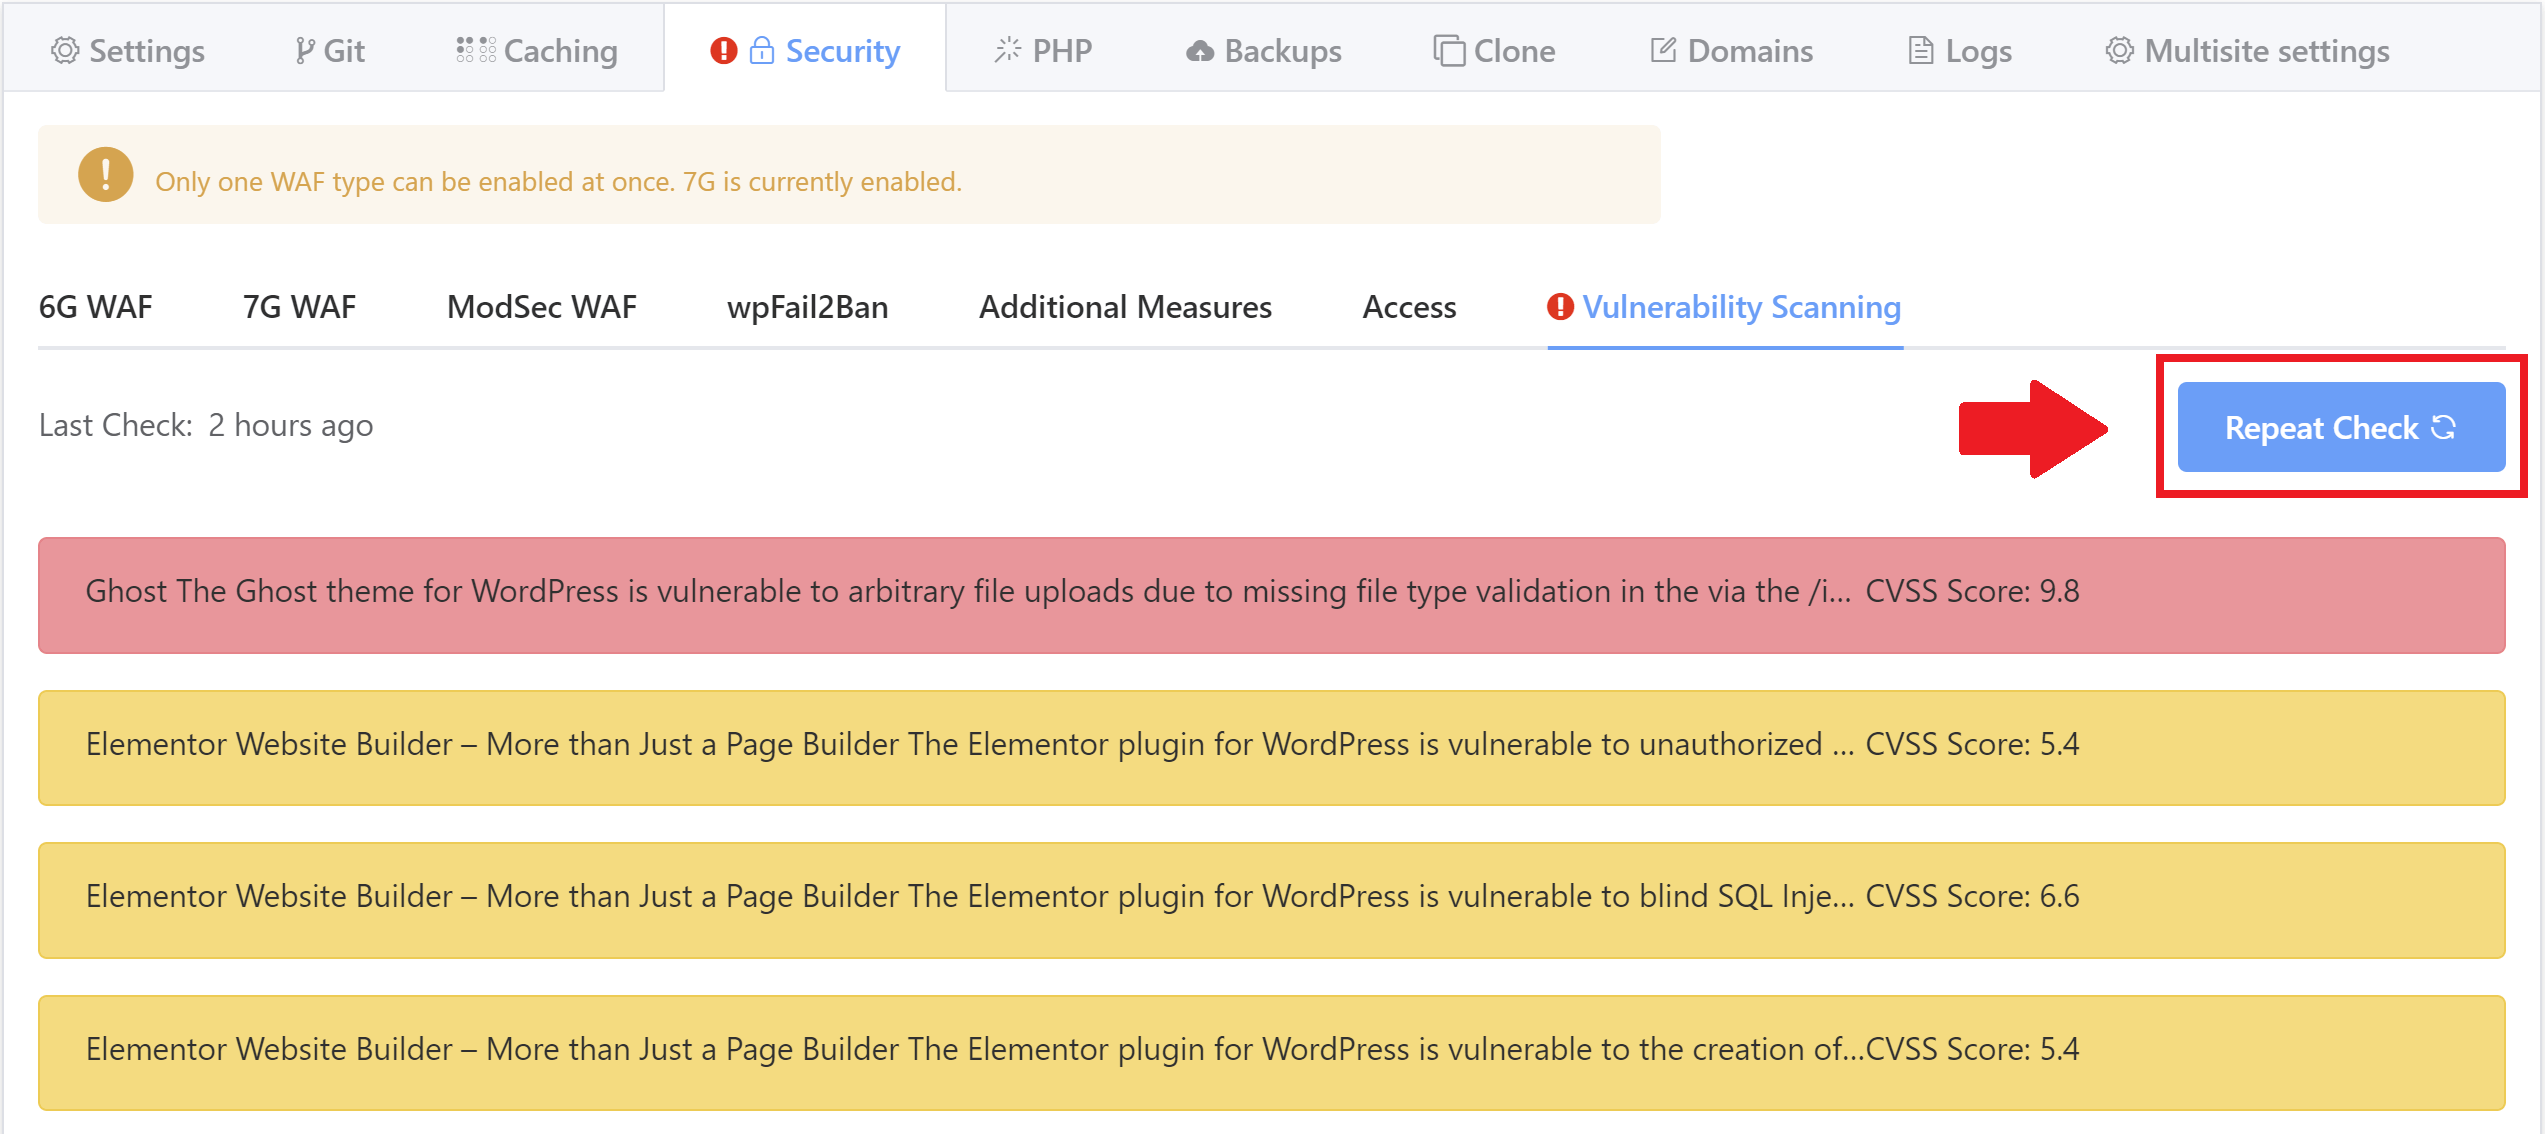
This will rescan the website and will let you know if reported issues have been resolved or if new issues have been found.

Exclude a Website or Server from Scanning

You can exclude individual websites or entire servers by creating a token file.

To create a token file, you will need to connect to your server via SSH. If this is your first time connecting to a server, please see the following guides to get started:

Exclude an Entire Server

Our vulnerability scanning functionality will check for the existence of a server-level token file before the scan commences, and will abort if found.

You can copy and paste the following command to exclude your entire server from vulnerability scanning:

touch /root/skip.server.gp.scan

Exclude an Individual Website

Before running a scan on each individual website our scanning functionality will check if a token file exists for that website. If found, it will skip the site and continue scanning any remaining sites on your server.

You can copy and paste the following command (replacing site.url with your website URL) to exclude an individual site from vulnerability scanning:

touch /var/www/site.url/skip.gp.scan

For example:

touch /var/www/yourwebsite.com/skip.gp.scan

Whitelist a Vulnerability

If there’s ever a time when you need to whitelist a specific vulnerability so that you can improve visibility on the sites that need attention within your dashboard, this can be done on a per-website or per-server basis.

Below, we’ll walk you through both options. 

Vulnerabilities Whitelisted by Default

Whitelisting vulnerabilities is not a decision we take lightly. However, since these are in WordPress core and no fix is available or coming (at the time of writing), we now exclude three specific vulnerabilities across all servers by default.

Wordfence created the following CVE’s for WordPress Core:

  1. CVE-2012-6707
  2. CVE-2017-14990
  3. CVE-2018-14028

These vulnerabilities listed every single website in every GridPane account as having a vulnerability, making it impossible to distinguish sites that actually require your attention.

Step 1: Copy the Vulnerability ID

Each vulnerability in the Wordfence database is given a unique ID number. This is what we’ll use to whitelist this specific vulnerability. To copy it down, head over to the Sites page within your GridPane account and:

  1. Click on the website where the vulnerability you want to whitelist is present to open up the website customizer:
  2. Click through to the security tab and locate the vulnerability
  3. Click on this to display all of the vulnerability information

At the very top, you’ll find the vulnerability ID:
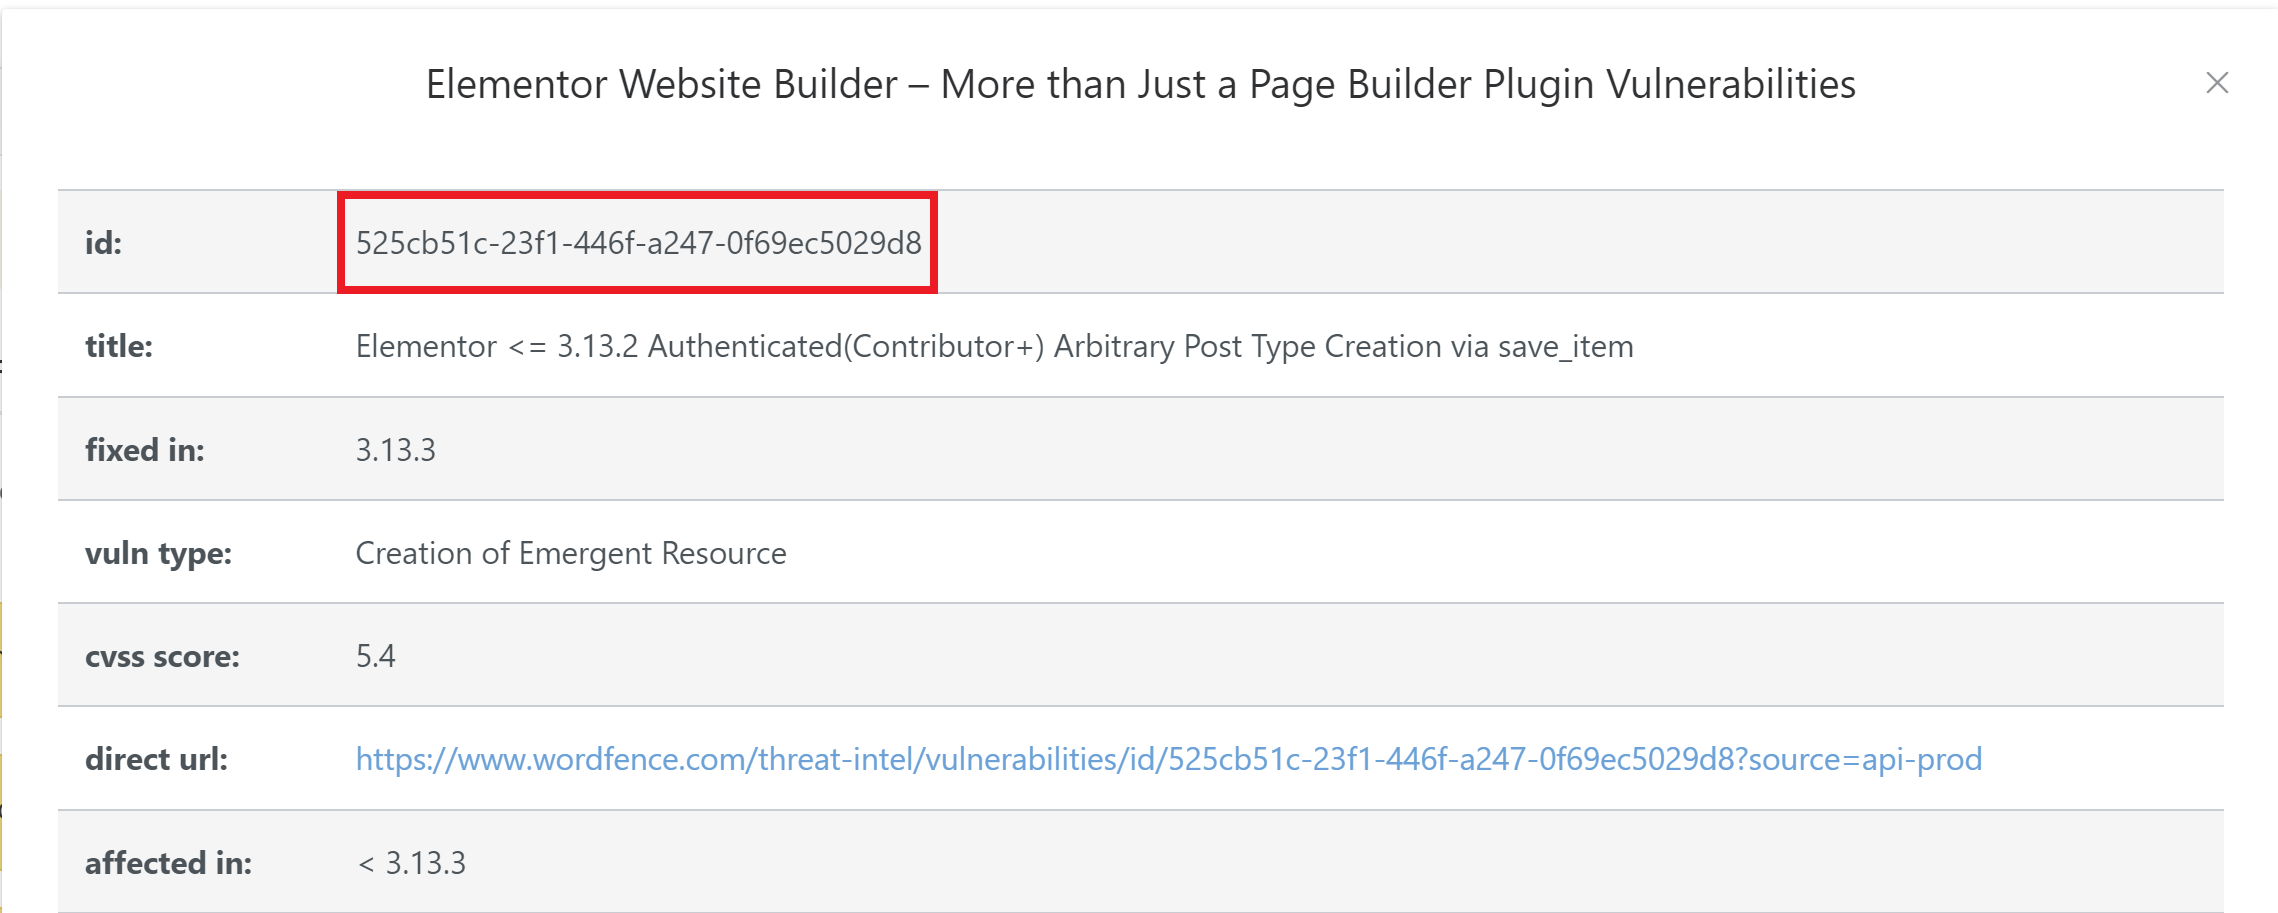
Copy this ID.

Step 2.1: Whitelist a Vulnerability for All Websites on a Server

Connect to your server and copy and paste the following command (then hit enter) to open up the server vulnerability whitelisting file:

nano /opt/gridpane/server.vulnerability.scanner.id.whitelist

Here, you will see the three CVEs we whitelist by default. On a new line, you can paste the ID of the vulnerability you want to whitelist. 

Once done, save the file with CTRL+O followed by Enter. Exit nano with CTRL+X.

Step 2.2: Whitelist a Vulnerability For a Specific Website

Connect to your server and copy and paste the following command (then hit enter) to open up the server vulnerability whitelisting file (switching out “site.url” for your website’s domain):

nano /var/www/site.url/vulnerability.scanner.id.whitelist

Here, you can paste the ID of the vulnerability you want to whitelist. To add more than one vulnerability, add one ID per line.

Once done, save the file with CTRL+O followed by Enter. Exit nano with CTRL+X.

Step 3 (Optional): Repeat Check

You’re now all set. Our platform will automatically take note of the change within the next 24 hours, or you can manually refresh your websites via the Repeat Check button inside the vulnerability scanning tab in the site customizer.