Table of Contents
- Introduction
- Part 1. Troubleshooting Backup Failure Notifications
– About Backup Failure Notifications
– The Automated Backups Monitoring Log
– Reviewing the Log
– What Causes Backup Failures? - Part 2. Troubleshooting Restores/Purging
– Backup Buttons Are Constantly Spinning and Unusable
– Fixing Missing Revisions - Part 3. Backups Are Taking Up A LOT of Space
– Backups and Disk Space
– Cleaning Up Old Backups and Chunks to Free Up Space
– Cleaning Up Old Website Backups When the Site/s No Longer Exist
– Delete All Backups for a Specific Website
Introduction
This article is composed of 3 parts for troubleshooting your V2 GridPane backups. We’ll take a look at the most common ticket we see – Monit has reported a backup has failed to take place on a server – and also how to troubleshoot features not working as expected inside the UI, and cleaning up disk space in the rare issues that you may see that backups are taking up a lot more disk space than you were expecting to see.
We’ll also address the questions you’ll likely have about why these things may occur as we go.
Connecting to Your Servers
Some of the following requires connecting to your servers. If this is the first time connecting to your server over SSH, please see the following articles to get started:
Step 1. Generate your SSH Key
Step 2. Add your SSH Key to GridPane (also see Add default SSH Keys)
Step 3. Connect to your server by SSH as Root user (we like and use Termius)
Part 1. Troubleshooting Backup Failure Notifications
About Backup Failure Notifications
If an automated backup fails, it will be logged inside the Automated Backups Monitoring log. Monit checks this log once a day and if any failures have been logged it will send you a notification.
It’s important to note that far more often than not this is a one-off event, and it does not necessarily mean that all of your backups are failing. This is easy to check and confirm, and if it is a one-off failure, the notice inside Monit will disappear the next time it checks the log.
The Automated Backups Monitoring Log
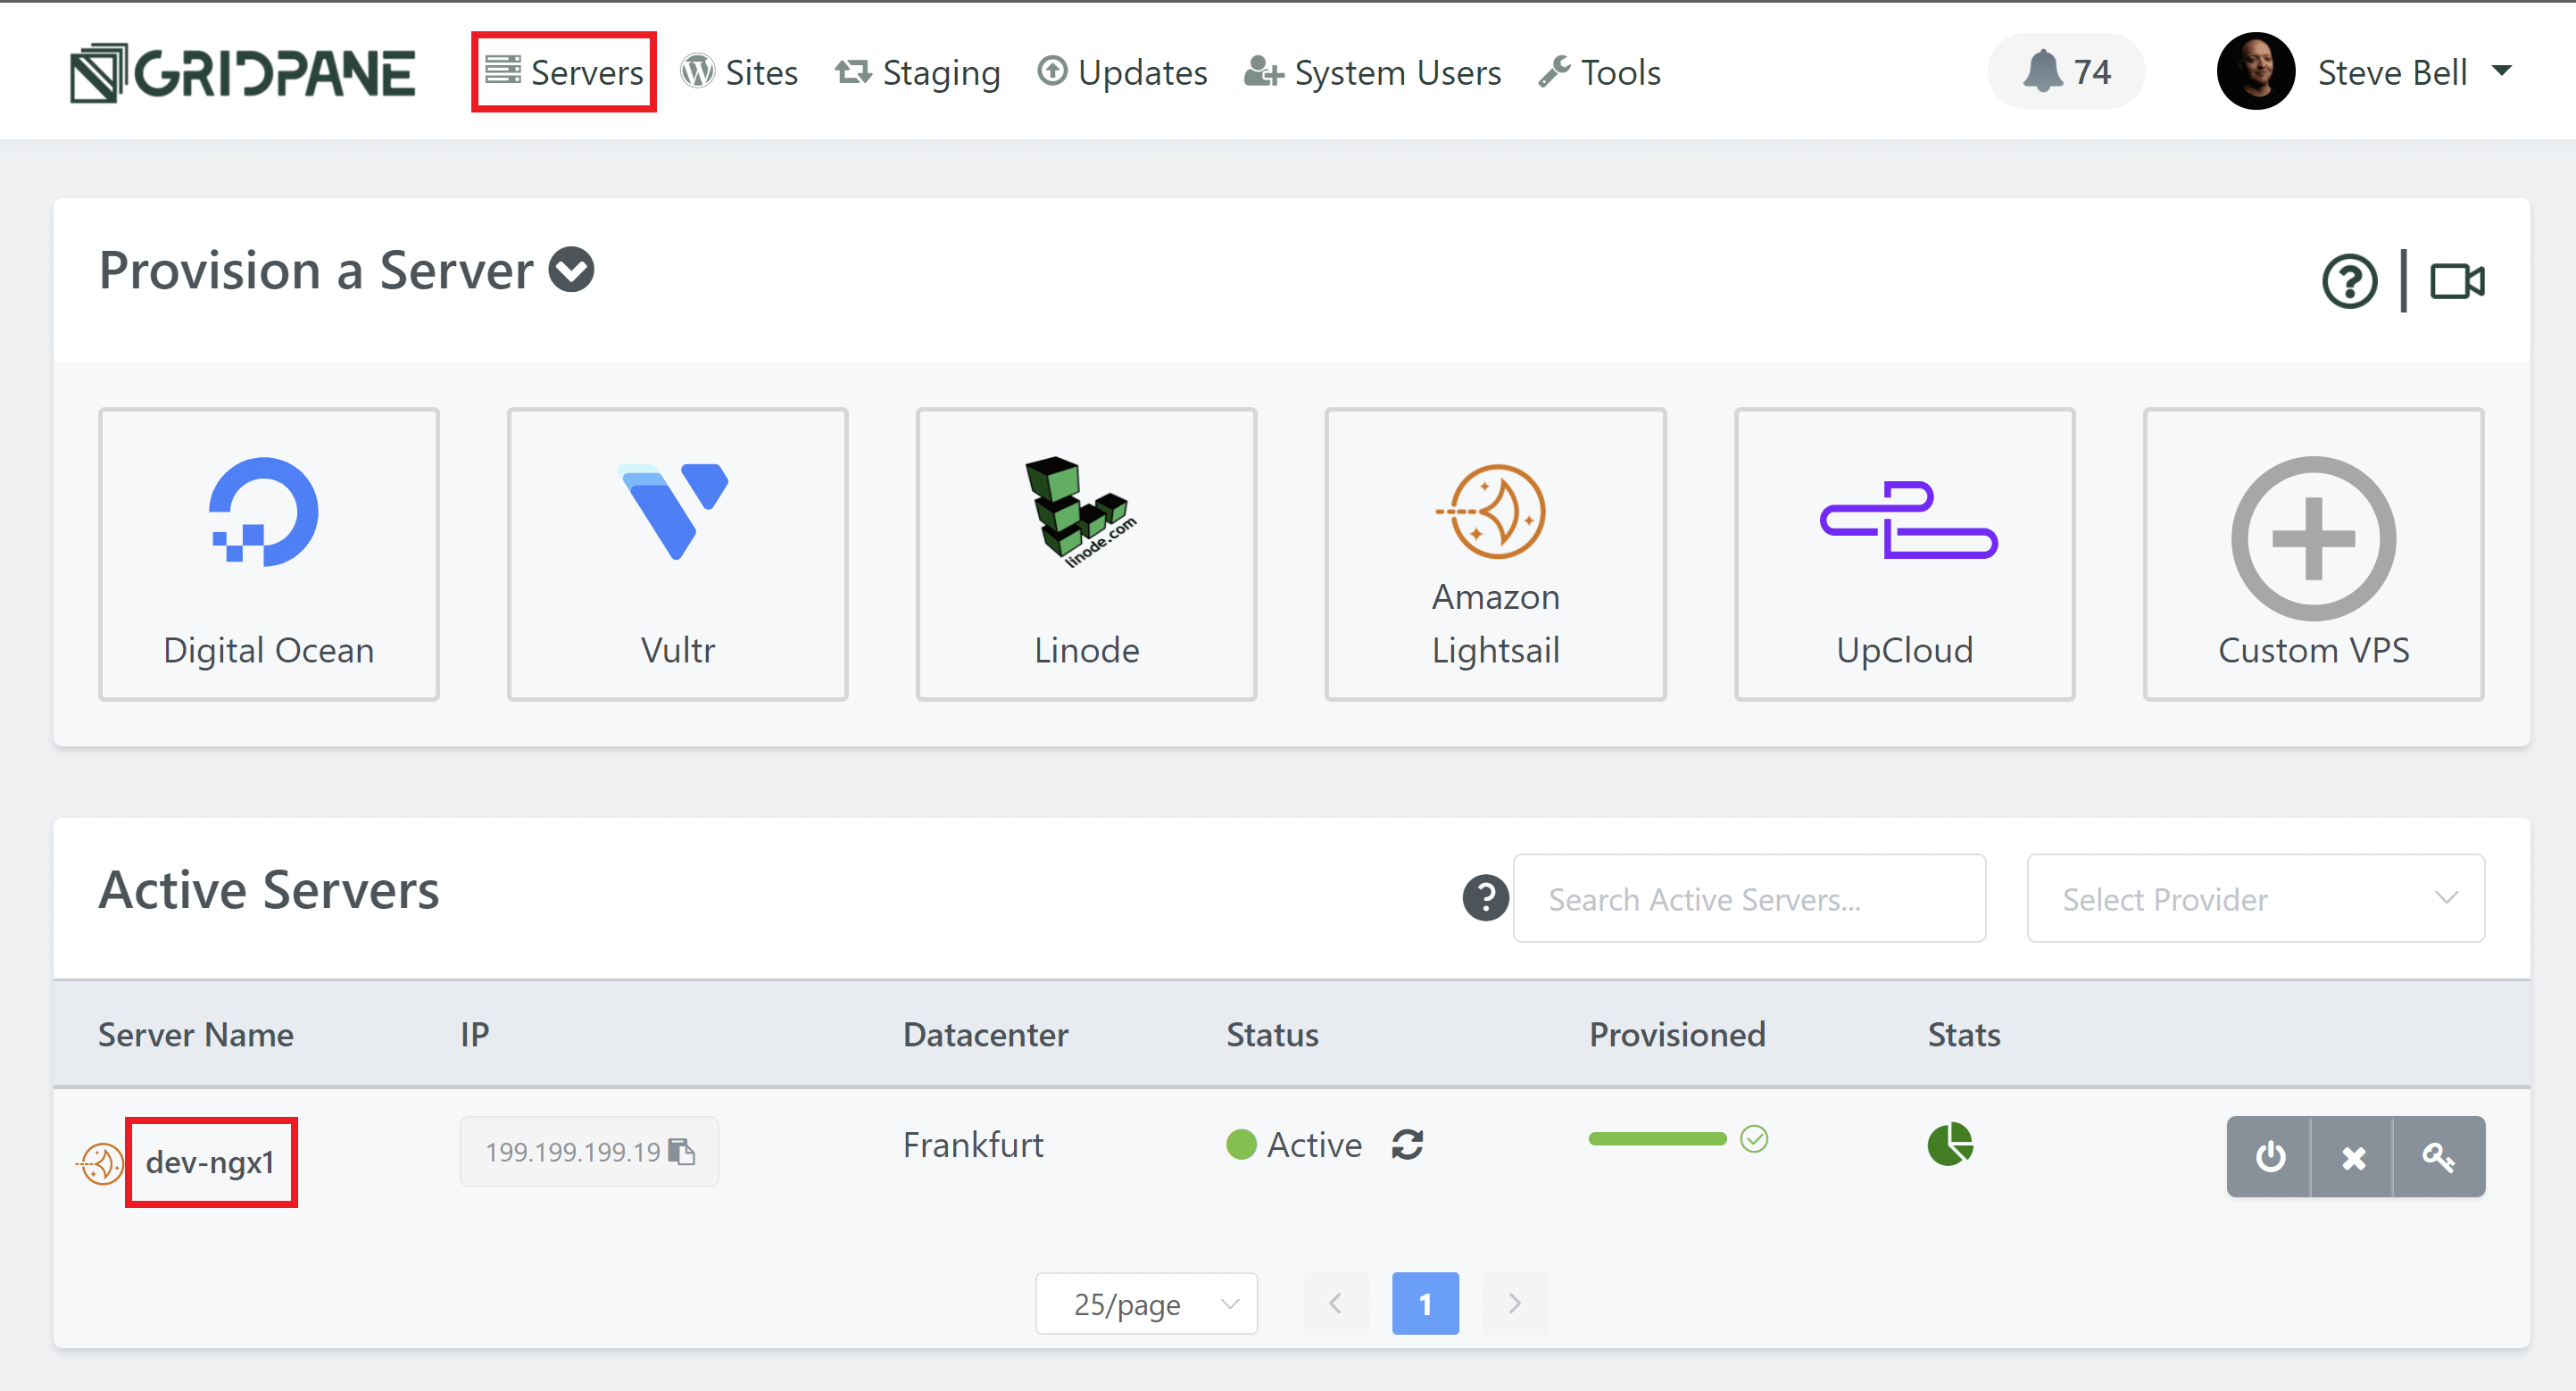
The Automated Backups Log can be found inside your server customizer.
Head over to the Servers page inside your account and click on the name of the server you wish to check. This will open up the customizer:
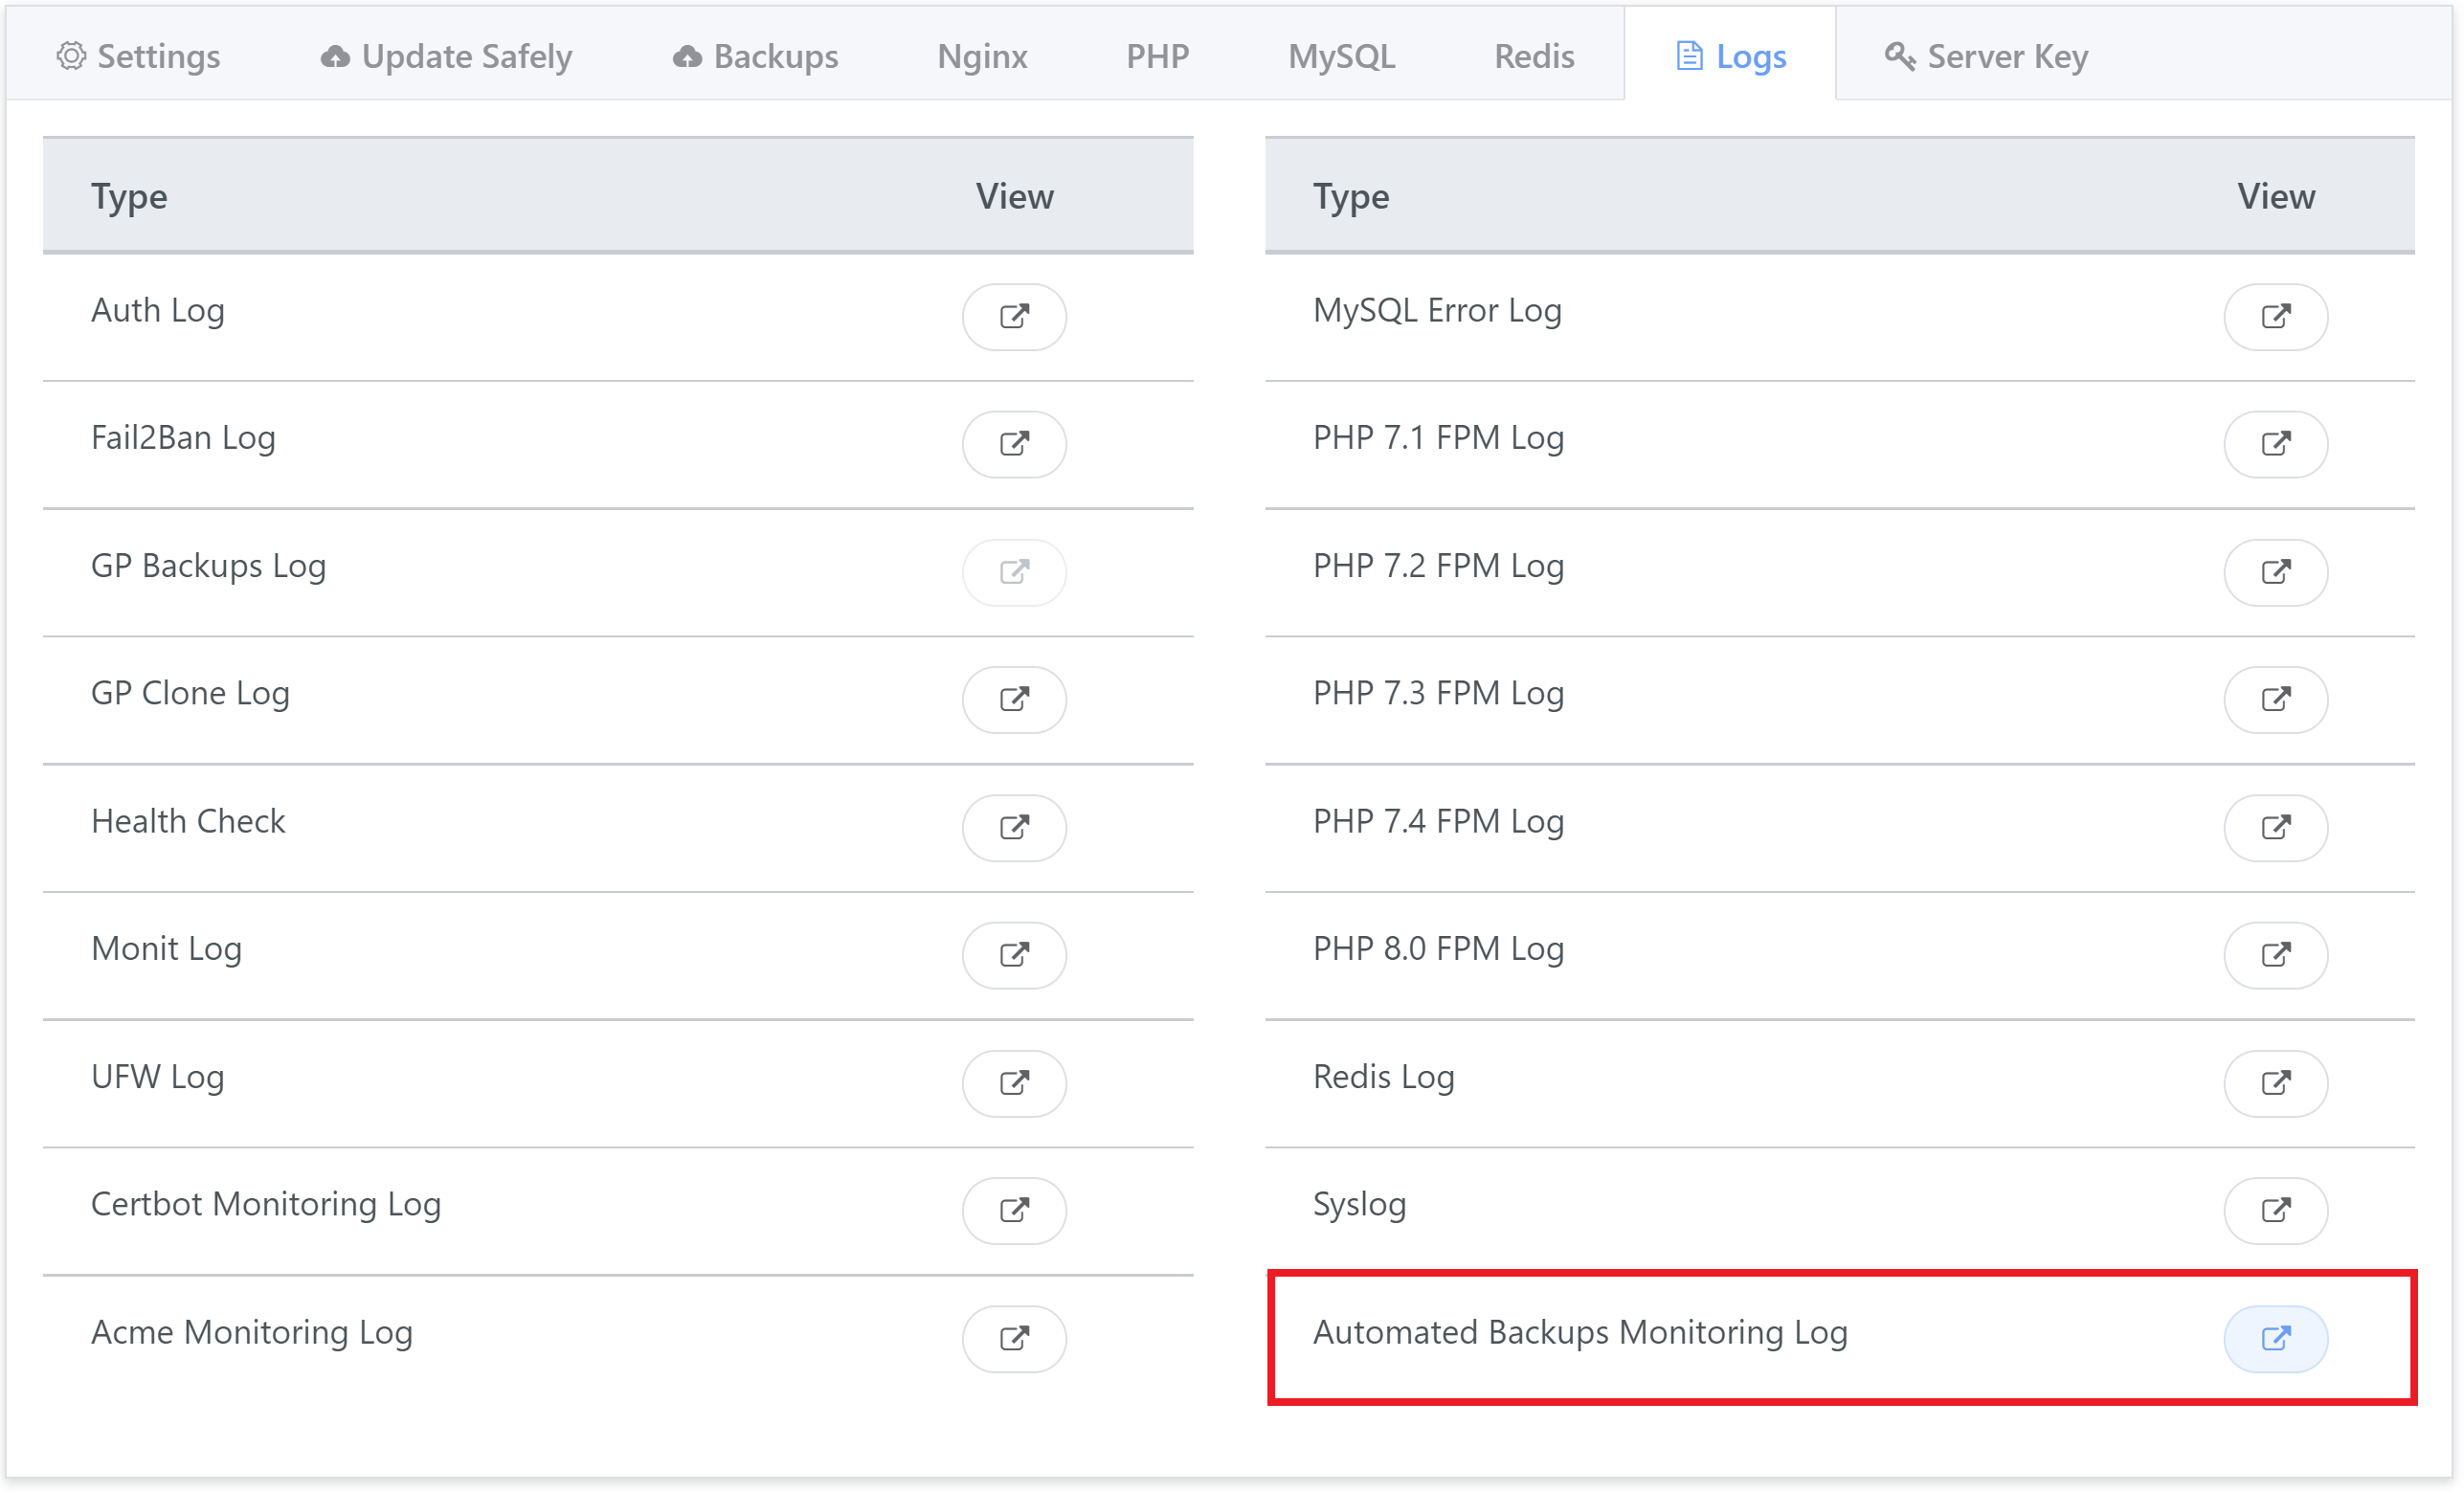
The log is located inside the Logs tab.
Click the icon to open up the log. Logs are for 24 hours and at the bottom, you can also navigate between previous days if you wish to do so.
On the server the log is located here:
/opt/gridpane/backups.monitoring.log
You can learn more about site and server logs and where they live in this article:
Reviewing the Log
If reviewing the log in your browser, once the log is open you can use CTRL+F to open up a search and type the word “Fail“. This will make it easy to locate any failures without scanning the entire log line by line.
If no failures exist today, then this was likely a one-off event and Monit will report all is well the next time it checks the log.
Quickly Check for Failures Over SSH
To quickly and easily review the log for failures, you can run one of the following commands on your server (depending on whether you’re using the new V2 backups system (Duplicacy), or the previous V1 backups system (Borg).
Checking V2 Backups
Run the following command to check today’s log for failures:
grep -A 4 ".*Duplicacy.*{1}" /opt/gridpane/backups.monitoring.logChecking V1 Backups
grep -A 4 ".*Borg.*{1}" /opt/gridpane/backups.monitoring.logWhat These Commands do
For both backup systems, the {1} indicates a failure has occurred. Specifically:
-A 4means show four lines after.*is a wildcard{1}is a fail response.
If nothing is returned, no failures have occurred today. If a failure has occurred it will output the failure line as well as the following four lines that will offer insight into what went wrong.
For example:
Thu-Jul--1-01:00:11-EDT-2021 | example.com | Duplicacy Fail {1}
Unable to push full manual backup to Local... storage threshold exceeded...
Automated Local Backup Failed!
Initiating full automated backup to Local...
What Causes Backup Failures?
Failures can occur for a variety of reasons including:
- High CPU load at the time the backup is attempted
- MySQL is too busy or has long-running queries at the time the backup is attempted and the database cannot be exported
- MySQL is experiencing prolonged table locking
- Critical errors within the website
- Database corruption
- The allocated disk space has been exceeded
- A backup already exists for that time period
- There’s an actual issue with the backups system on the server
More often than not the reason for the failure will be obvious inside the log.
No backups system can be 100% perfect all the time, so an odd failure from time to time is possible. If you believe that your backups system is broken, please contact support.
Part 2. Troubleshooting Restores/Purging
Backup Buttons Are Constantly Spinning and Unusable
If you’re unable to take a backup or run a restore (or anything else) due to the backup buttons constantly spinning and never returning back to normal, the fix is usually a simple one.
What has likely happened is that a backup or restore was interrupted at some point, and it never returned the update to the application. This has left the backups out of sync, and the app still thinks a backup function is still running.
The Fix
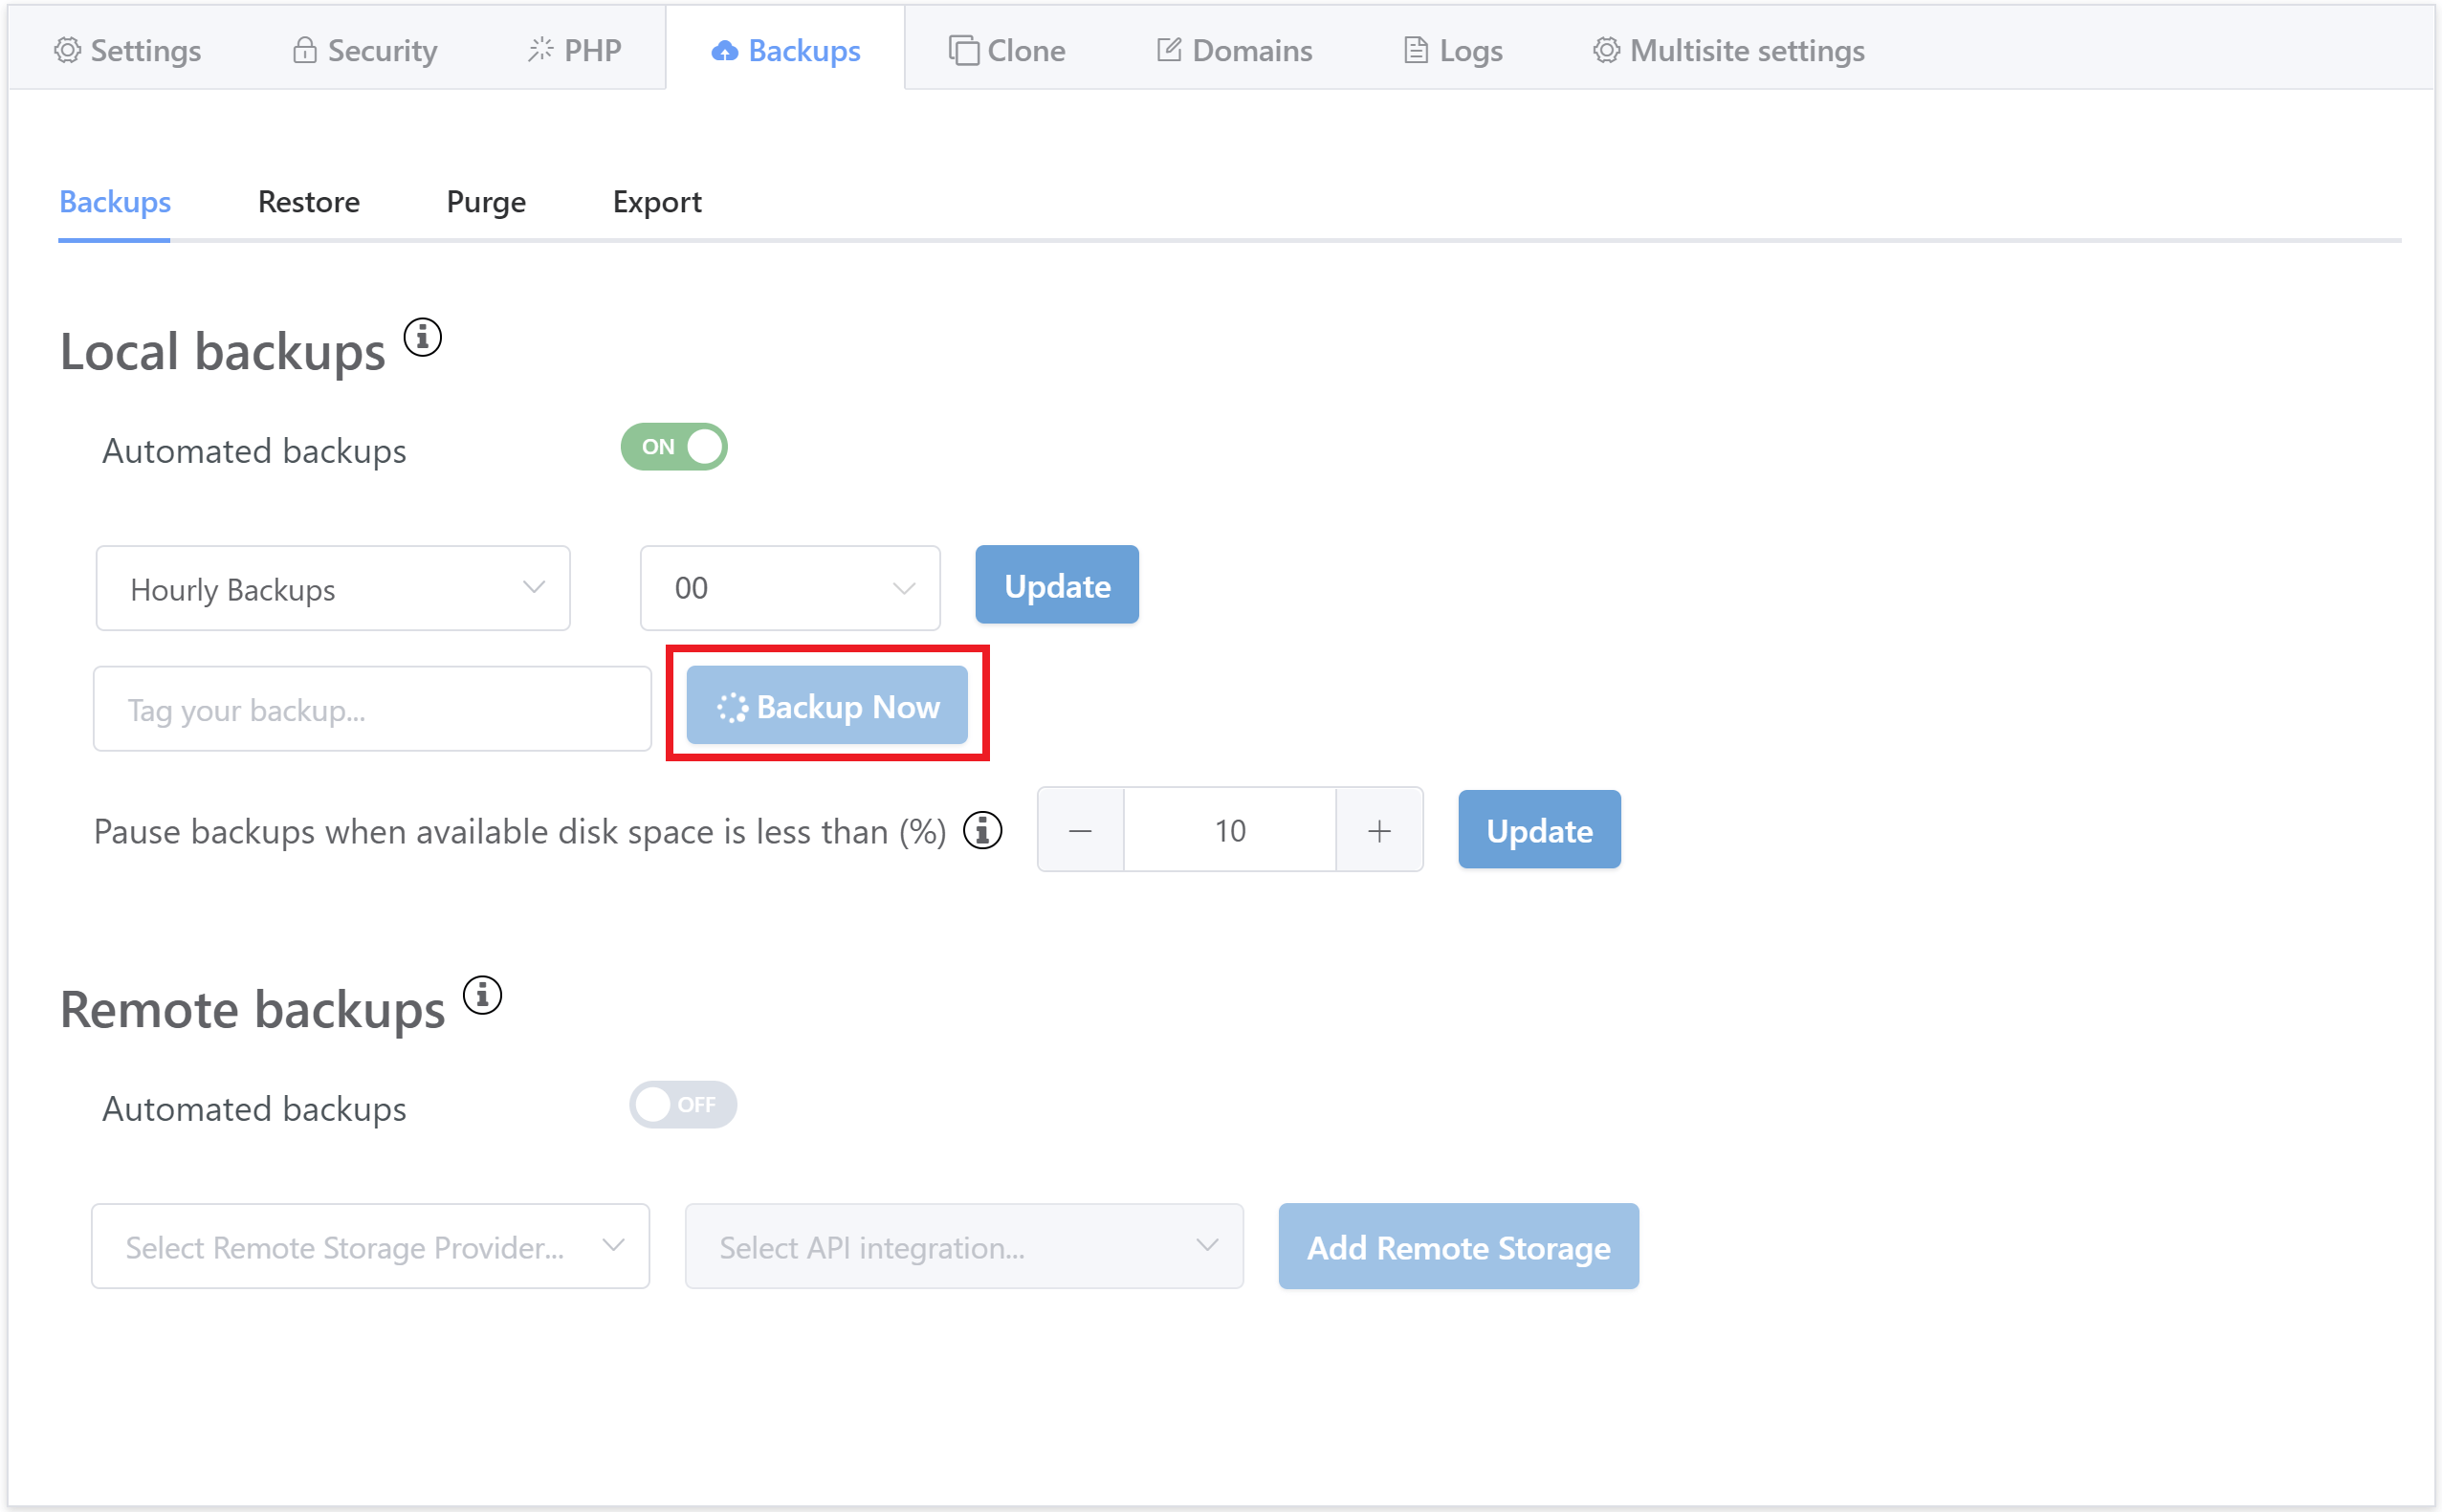
Connect to your server and run a manual backup for your website with the following command (replacing “site.url” with your website URL):
gp backup site.url -local-single-site
Once the backup completes the functions inside the UI will be available to use again.
If the manual backup fails
If the backup fails to run, it will let you know directly in the command line output. Details of the failure will also be recorded in the Manual Backups log which you can view in your website customizer.
Even with the failure though, the spinning buttons issue should still be fixed.
Fixing Missing Revisions
If one of your websites has missing revisions, it can cause a variety of errors, including backup failures, failure to run purges, and failure to restore sites. If you’re seeing excessive backup disk space usage, there’s a [small] possibility, that this could be the cause too.
In the backup or staging logs you may see something similar to this:
[20:04:06.367 2022-06-09] Chunk 7c0743e59062458c089e2145fafd1aefk02wtghj3fweqwef38a57e65e6c can't be found
[20:04:06.383 2022-06-09] Manual Local Backup Failed!
...
[20:04:07.955 2022-06-09] ########################## Backup of example.com Done! ##########################
Backup output is missing a revision number. Staging process exiting, please check logs.
Fixing the missing revisions should solve the issue.
Check Your Backups
You can check for unreferenced chunks/revisions with the Duplicacy check command. This checks, for each specified snapshot, that all referenced chunks exist in the storage.
This can be done on a per website basis. First, navigate to your website’s directory with the following (replace “site.url” with your website URL):
cd /var/www/site.url
Next, run:
duplicacy check -a
This will let you know if any chunks are missing.
You can also view more detailed statistics about your backups with the following command if you’d like to do so:
duplicacy check -tabular
Commands to Fix Missing Revisions
The following internal functions will fix chunks for their respective service (“local” of course means on the server itself). Run the appropriate command for the backup service you’re having an issue with. Here’s the local backups command:
gpbup -ft gpbup::fix_missing_chunks_local
Here are the remote backup specific commands:
gpbup -ft gpbup::fix_missing_chunks_wasabi
gpbup -ft gpbup::fix_missing_chunks_b2
gpbup -ft gpbup::fix_missing_chunks_aws
Why Missing Revisions Can Occur
Missing chunks could appear if a backup is created while a purge is running in exclusive and exhaustive mode. As chunks can be shared by several backup revisions, during a purge one of the chunks could be deleted while the newly started backup is still referencing it. Purges will typically take a short time, so backups overlapping with purges are very rare.
However, in some cases when the repository is large with a lot of revisions, it takes a lot more time to prune the backups which increases the chances of a backup colliding with a purge.
This requires checking for the missing chunk and then carefully removing it, which is what the above commands take care of.
Part 3. Backups Are Taking Up A LOT of Space
Backups and Disk Space
If your backups disk space seems disproportionally large when compared to your /www directory and MySQL size, then it may be due to the following:
- Pruning is unable to take place
- The Duplicacy cache has grown large but has not yet been auto cleaned by Duplicacy
- Websites that are no longer on the server still have their old backups on the server
- One or more of your websites was much larger at one point in the past, and the backups reflect this
Below is how to troubleshoot points 2-4 above. It’s extremely rare that pruning will fail to take place, though it’s possible that missing chunks could be the issue if this is the case. You can check and fix missing revisions by following the instructions in this section above.
Cleaning Up Old Backups and Chunks to Free Up Space
You can clean up backups directly inside the UI for any sites that exist. For other cases, below are some commands you can run via the command line.
Please note that as Duplicacy encourages multiple repositories backing up to the same storage (so that deduplication will be efficient), pruning from each website directory is not necessary, and it was designed on the assumption that only one instance would run the prune command (using the -all / -a flag).
This means you can run these commands from inside the directory of any website that is using Duplicacy and it will run across all your backups.
Clean Up Old Backups and Unreferenced Chunks
Important
Only run -exclusive when you are sure that no other backup is running, on any other device or repository. You can check for active gpbup/gpbup2 Duplicacy processes using htop. Details below.
Once you’ve confirmed there are no backups running, make sure you begin by temporarily renaming the gpbup script with:
mv /usr/local/bin/gpbup /usr/local/bin/gpbup_
Next, navigate to your website directory with the following (replacing “site.url” with your website URL):
cd /var/www/site.url
Then clean up older backups and unreferenced chunks (fossils) with:
duplicacy prune -all -keep 0:360 -exhaustive -exclusiveOnce the above has completed, you can restore the server gpbup script by renaming it correctly again with:
mv /usr/local/bin/gpbup_ /usr/local/bin/gpbup
Thread and tag flags
You can also add these two flags:
- –
t ""This will skip any backups that you have manually tagged -threadsAdd the number of threads (vCPU cores on a VPS) you want to allocate to pruning after the flag – the more threads the quicker it will run
Here’s an example with the above flags and running four threads:
duplicacy prune -all -t "" -keep 0:360 -threads 4 -exclusive -exhaustive
Clearing Duplicacy Caches
Sometimes the Duplicacy cache folder can grow to a very large size. This typically happens when you have a lot of websites that all have a lot of backups. This accumulation will be automatically cleared on its own, however, if you’d like to manually take care of the issue instead of waiting, you can run the following command from any of your website directories that have backups activated.
You can remove the cache on a per-site basis with the following command (replacing “site.url” with your website URL:
rm -r /var/www/site.url/.duplicacy/cache/*
Cleaning Up Old Website Backups When the Site/s No Longer Exist
When you delete a site from a server its backup data will not be automatically purged. This is due to a variety of reasons, but the main one is that you can easily recover a site even after deletion if you or a member of your team has made a mistake.
Check for Deleted Website Backup Data
To view a list of all the websites that have backups stored on your server, run the following command:
find /opt/gridpane/backups/duplications/snapshots -type f | awk -F'/' '{print $7}' | sort | uniq | sed "s/gridpane-$(cat /root/gridcreds/gridpane.uuid)-//g" | sed "s/-/./g"From here, you can remove sites that no longer exist (you’ll need to determine this yourself) with either of the following two options.
Option 1. Recreate the Site/s in the UI
To clean up backups for one or a few sites, it’s often easiest to just create a new site with the same URL, then from the backups tab inside the website customizer, purge its backup data.
Option 2. Delete from the Command Line
This option will make it easier and quicker if you’ve had a lot of websites on this server in the past.
Important
As noted in the previous section, only run -exclusive when you are sure that no other backup is running, on any other device or repository. You can check for active gpbup/gpbup2 Duplicacy processes using htop. Details below.
Once you’ve confirmed there are no backups running, make sure you begin by temporarily renaming the gpbup script with:
mv /usr/local/bin/gpbup /usr/local/bin/gpbup_
Formatting
This is the command format:
duplicacy prune -id gridpane-${uuid}-${site.url} -keep 0:1 -exhaustive -exclusive
The ${uuid} can be found using:
cat /root/gridcreds/gridpane.uuid
${site.url} is the name of the site you want to purge.
Here’s an example of this when put together:
duplicacy prune -id gridpane-a566e7aa-ff42-4c8b-9d0d-b407aec5e85e-example.com -keep 0:1 -exhaustive -exclusive
Cleaning Up
Now that you have your command, you need to run it from inside the home directory of any active website (Duplicacy requires this location, but does not need it to be a specific site). For example:
/var/www/gridpane.com
Run your formatted command for each deleted site you want to clean up.
Restore gpbup script
Once you’ve completed your cleanup, you can restore the server gpbup script by renaming it correctly again with:
mv /usr/local/bin/gpbup_ /usr/local/bin/gpbup
Delete All Backups for a Specific Website
If you’d like to delete all backups for a specific website that still exists on your server, you can first delete them all directly within the UI, then follow step 3 below. Or, you can follow steps 1-3 below if you prefer to work directly on the command line.
Step 1. Copy your snapshot ID
You can view a list of all your snapshots by navigating to listing them with the following command:
ls -l /opt/gridpane/backups/duplications/snapshots
Each ID is appended with your website URLs.
Step 2. Delete the snapshot
Copy the ID, and then delete it with the following, replacing {snapshot-ID} with your website’s snapshot ID:
rm /opt/gridpane/backups/duplications/snapshots/{snapshot_id}For example:
rm /opt/gridpane/backups/duplications/snapshots/gridpane-a566e7aa-ff42-4c8b-9d0d-b407aec5e85e-example.com
Step 3. Clear unreferenced chunks
To clear unreferenced chunks left behind after deleting the snapshot, follow these steps above.