Step 1. Create Your Lightsail VPS Instance
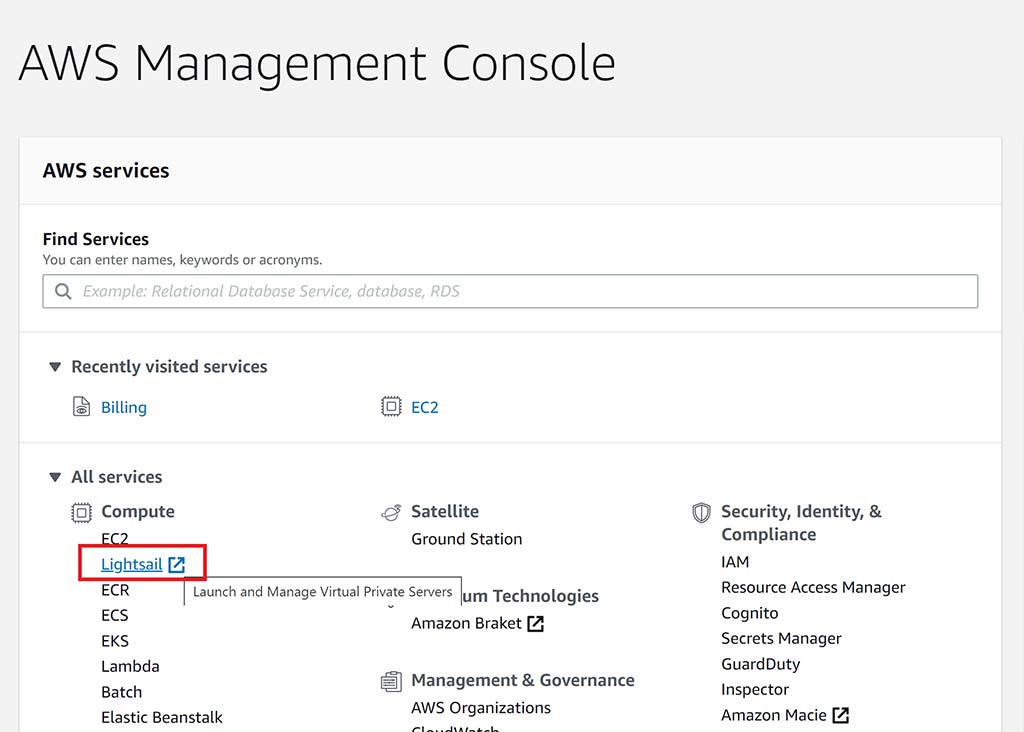
Lightsail can be located in the “Compute” service list as shown below
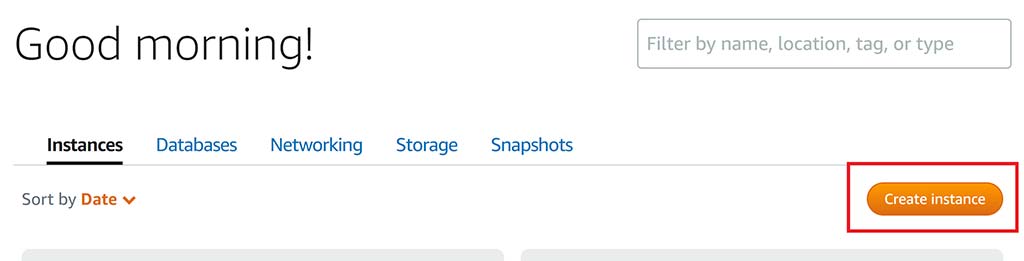
Inside the Lightsail page, click the orange “Create instance” button.
All of the following screenshots for this step are now from the same page, in the order that Amazon has laid the options out. Simply follow along as below.
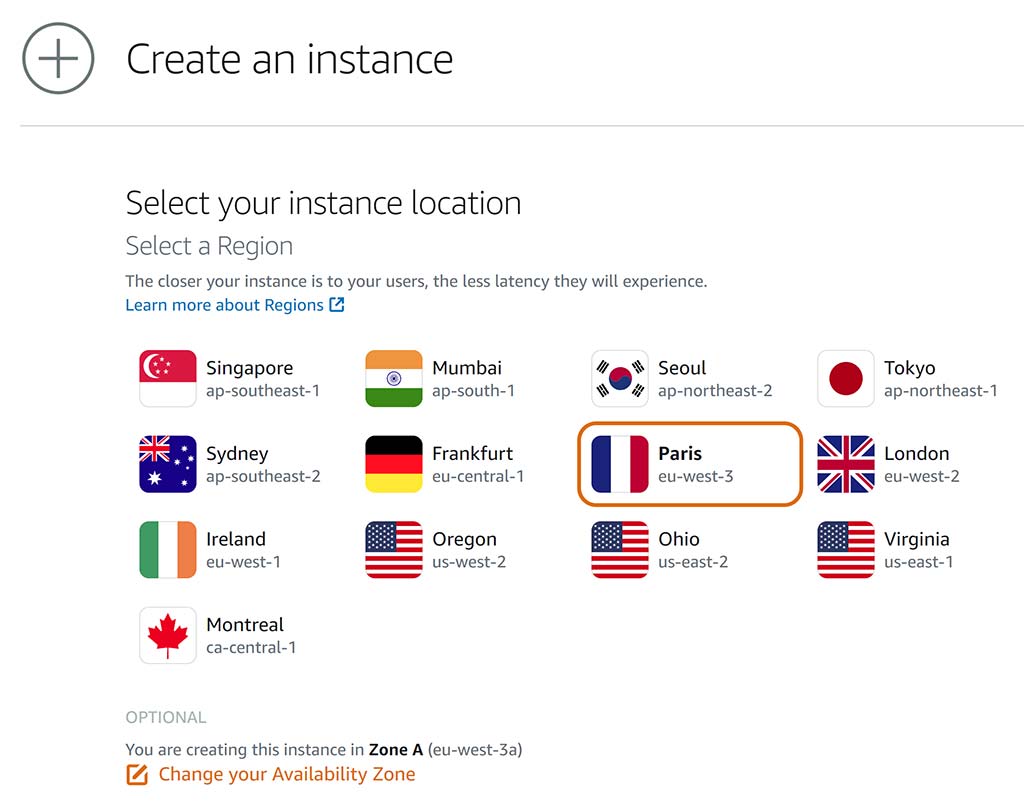
First, select your datacentre location (and availability zone if you wish). Choosing a location closest to most of your end users is generally best. For this example, we’ve chosen Paris, France.
Next, we need to select the “Instance Image”. For GridPane Prometheus, you’ll need to select:
- Linux/Unix
- OS Only
- Ubuntu Version: We recommend that you always choose the latest available Ubuntu OS version (unless it’s in beta). Learn more here.

Next up you can ignore the “Add Launch Script” and “Change SSH Key Pair” options, but we highly recommend enabling “Automatic Snapshots” (aka server backups).
As we’ve chosen Paris, France as our server location for this example, we’ve chosen to set snapshot times at 3 AM Central European time. This means server snapshots (backups) will take place at 3 AM France time. As most website updates/changes on this server will likely be done during regular daytime/evening hours, this seems like a good time.
You may wish to set a specific time that makes sense for you.

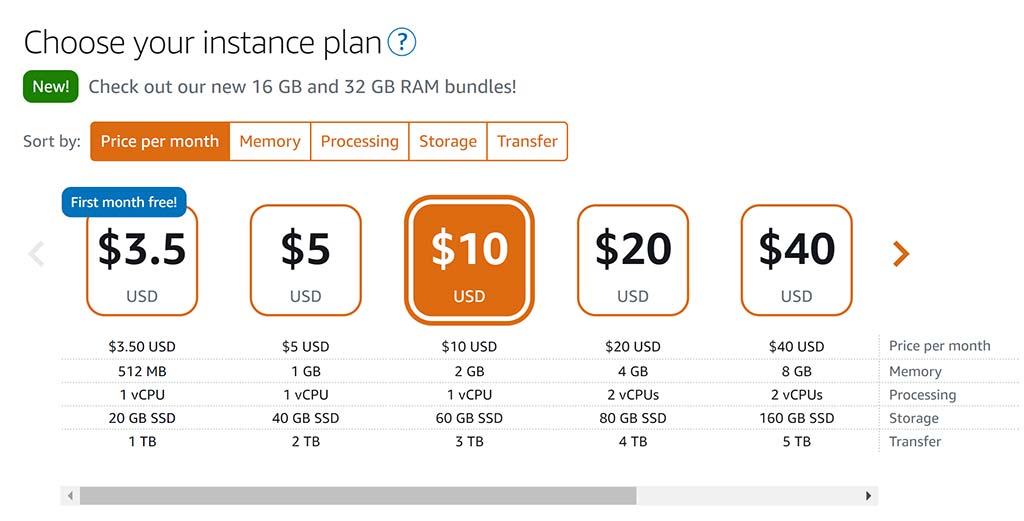
Next, select your instance size.
(Note: While the $5 option will work with GridPane, we recommend at least 2GB of RAM.)
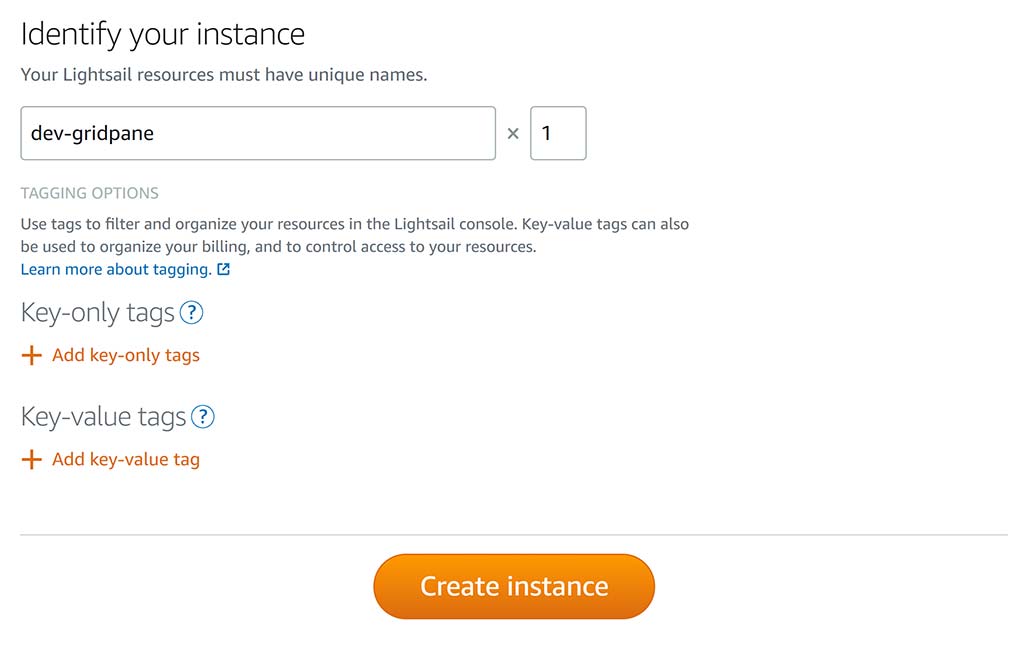
And finally, we’re going to give our new instance a name, and then click the “Create Instance” button. We’re calling this server “dev-gridpane”, but you should choose a name that makes sense for you.
Step 2. Setup a Static IP
Now that we’ve created our instance, we need to give it a Static IP. This is VERY IMPORTANT as GridPane cannot manage your server without having a Static IP Address to reference.
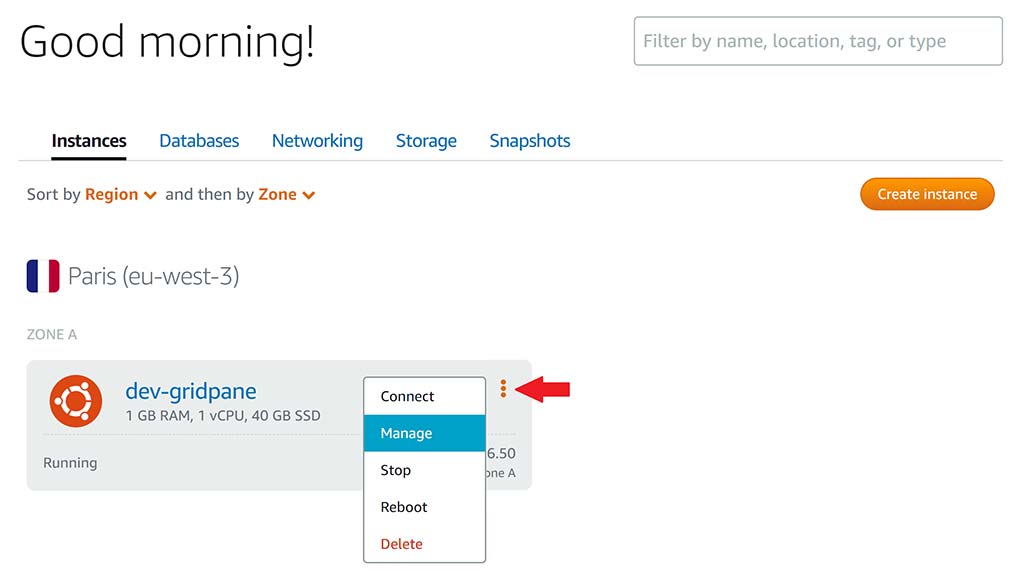
On the Lightsail homepage in your account, click on the three dots in the right-hand corner of your instance and select “Manage” from the dropdown.
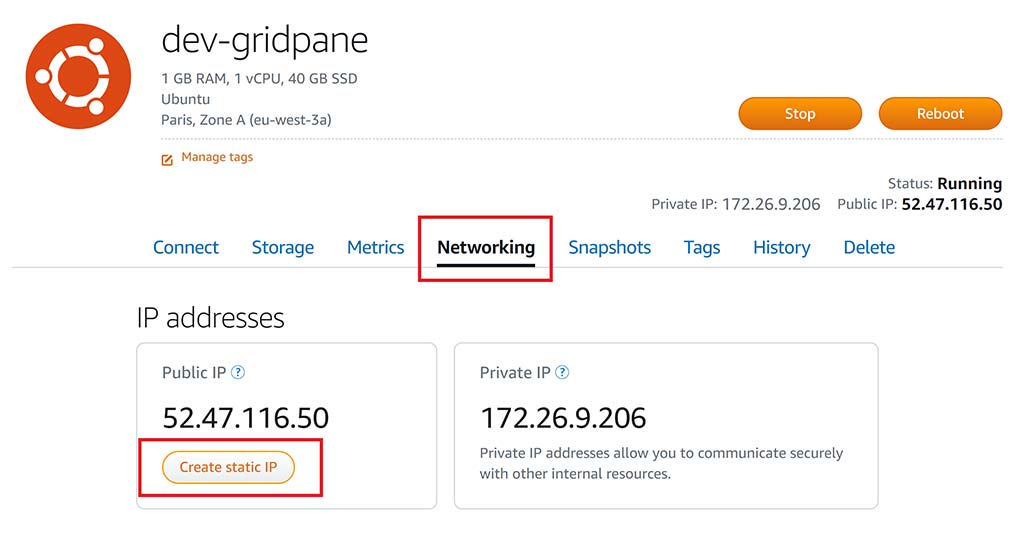
Now select the “Networking” tab and click the “Create Static IP” button.
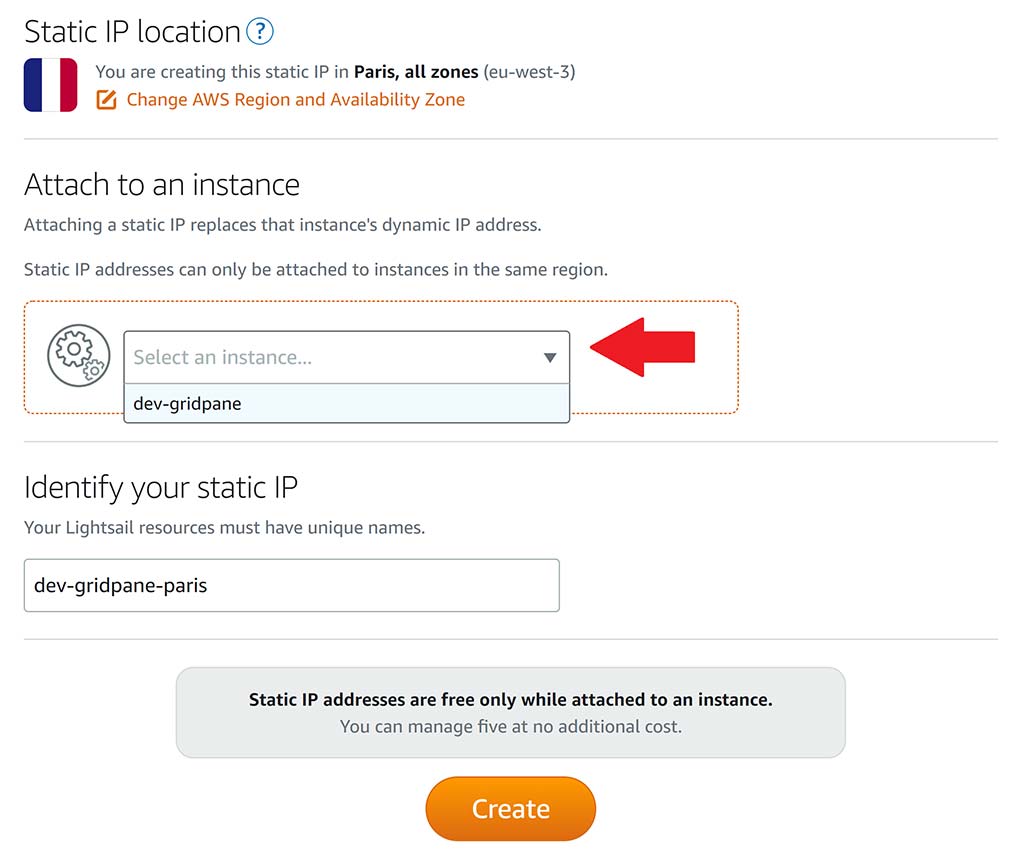
Ensure the region is correct and select your instance from the dropdown menu. Give the IP a unique name and click “Create”.
You have now set up a Static IP address for your VPS.
Step 3. Setup Firewall Rules
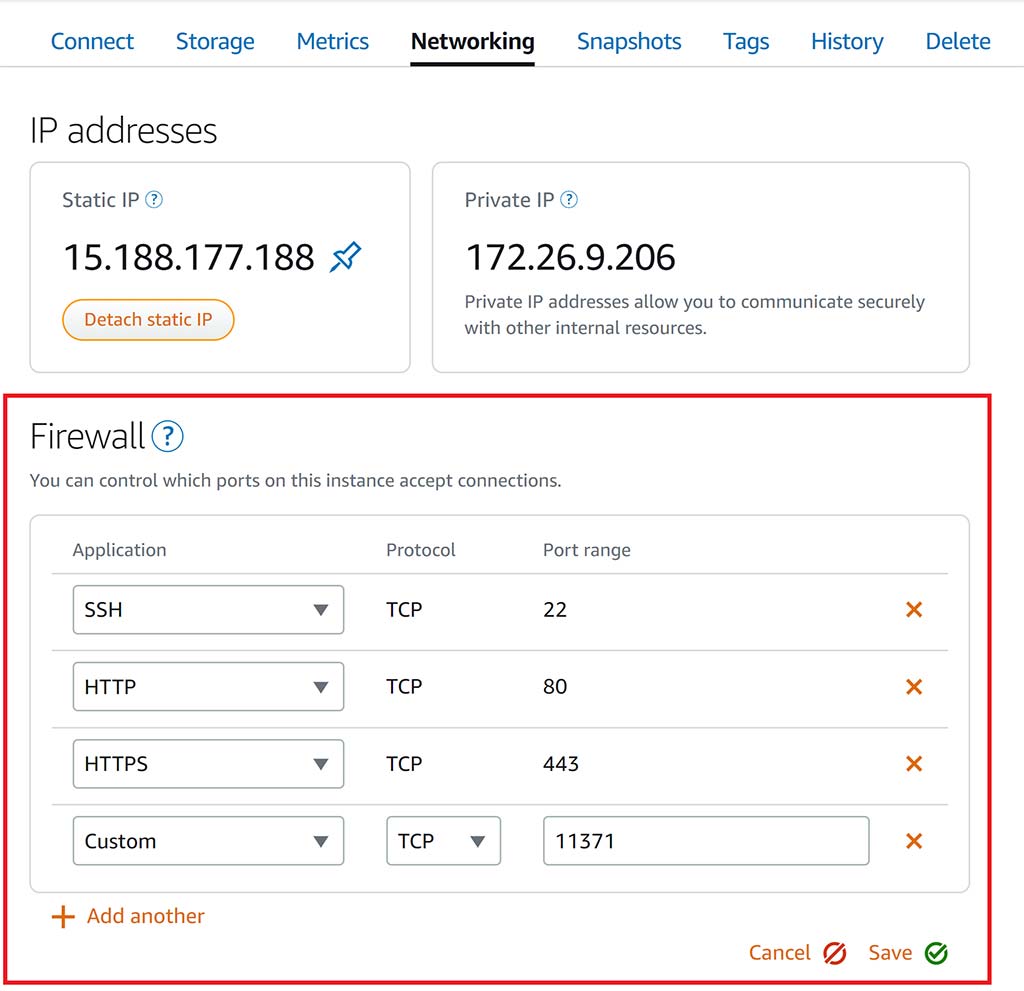
Navigate back to your instance “Networking” tab like in step 3.
Here we now need to set up 2 extra firewall rules. We need to set HTTPS, and then a custom rule.
HTTPS will automatically set the port range to 443 once selected.
For the custom rule, set the port to 11371.
This custom Firewall rule will allow all incoming traffic from any IP address to your server’s TCP port 11371. GridPane’s security will lock down and protect this port from any traffic originating from any location other than GridPane, directly on the instance via UFW.
Your rules should look the same as below. Now click save.
We’ve now completed the necessary setup and are ready to connect the VPS to GridPane.
Step 4. Connect Your Server to GridPane
Back in your GridPane dashboard, navigate to the Servers page and click on Custom VPS:
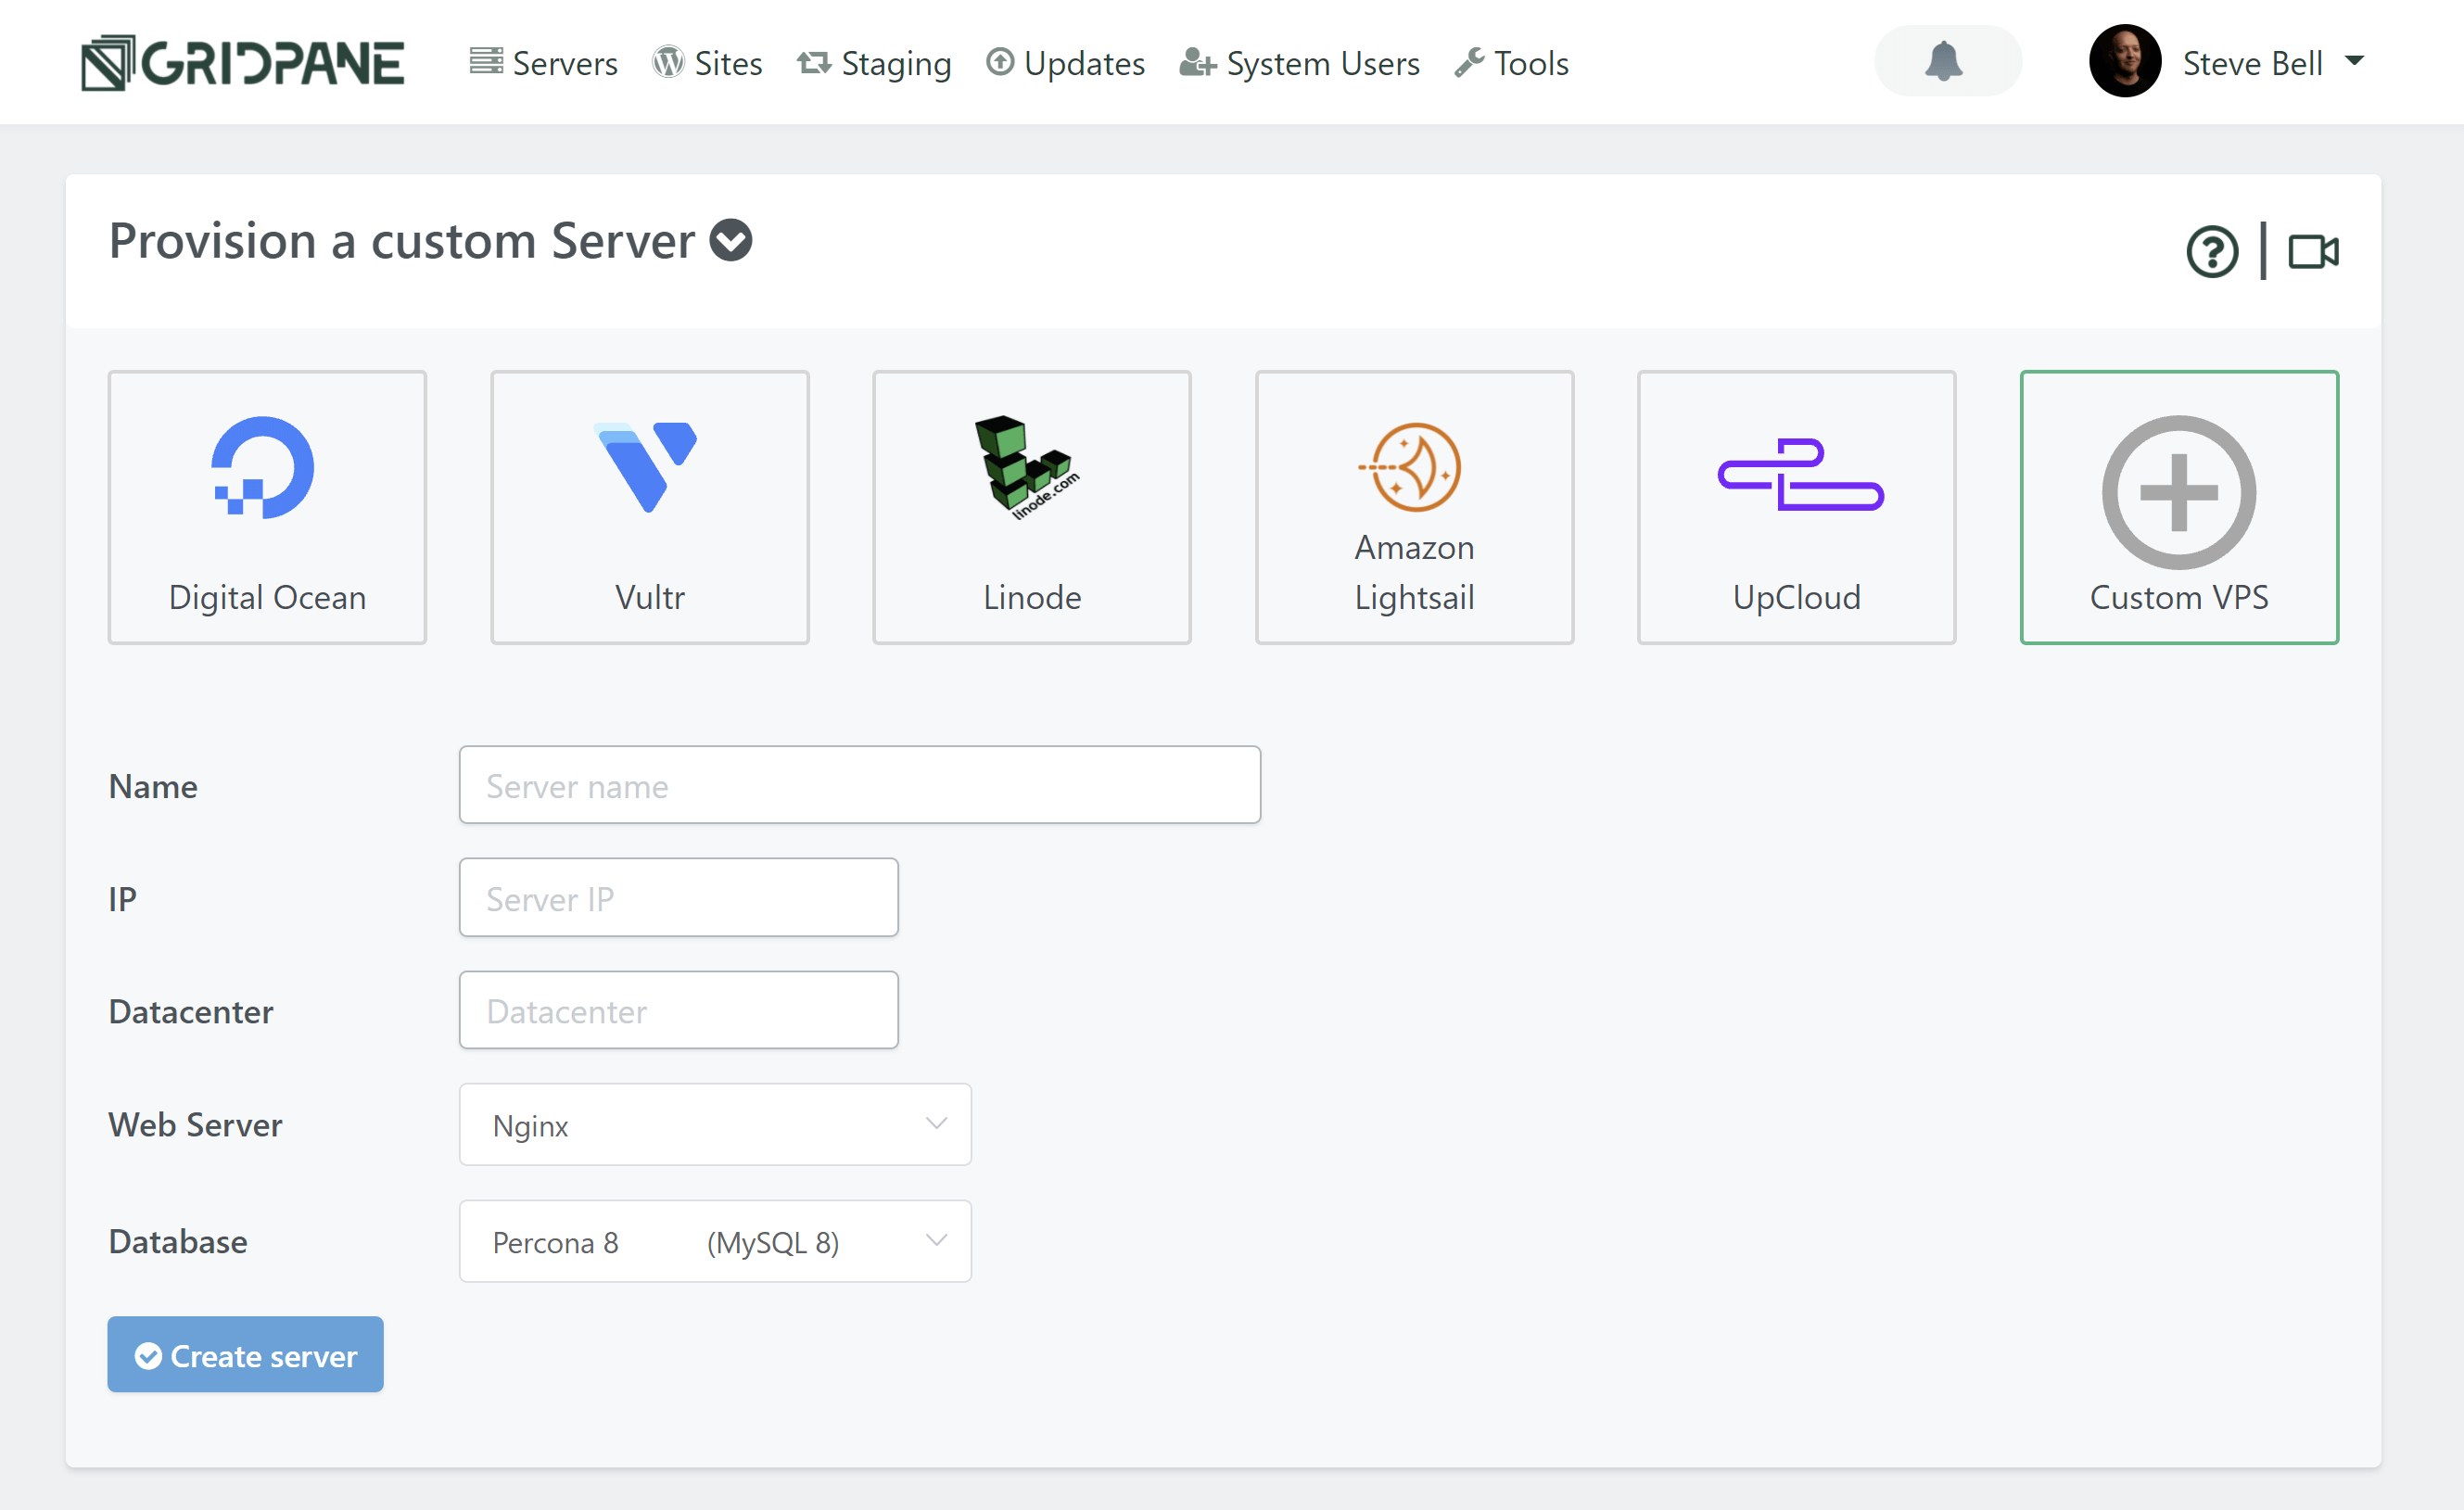
Configure Your Server
Enter the name, IP (the external Static IP Address we set in step 3), and the Datacenter name you wish to use.
Note: The Datacenter name is for your reference only, so feel free to give it a name that makes the most sense for you. As this example’s server is in Paris, France, we’ll go ahead and enter this.
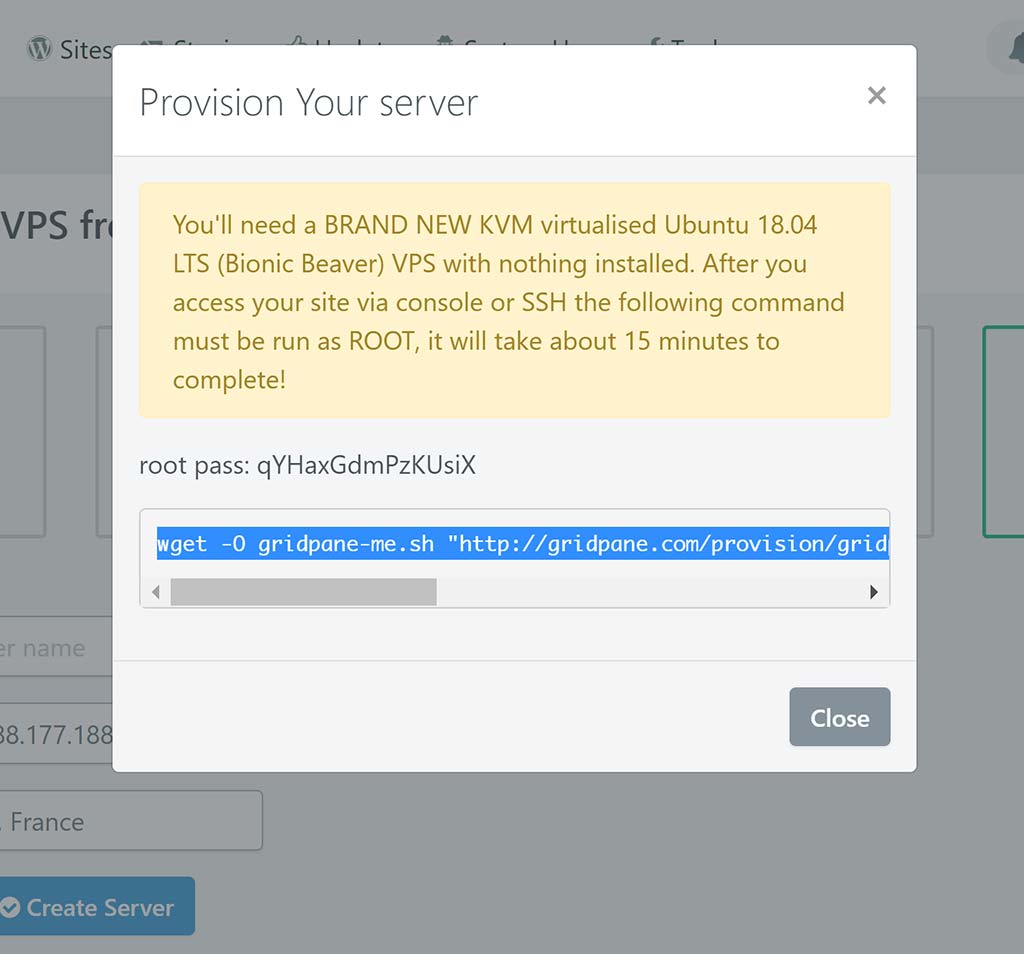
Once you click Create Server, a popup modal will contain your root password and a command line string. Copy that string – you’ll need it in a moment.
Step 5. Run the Provision Command
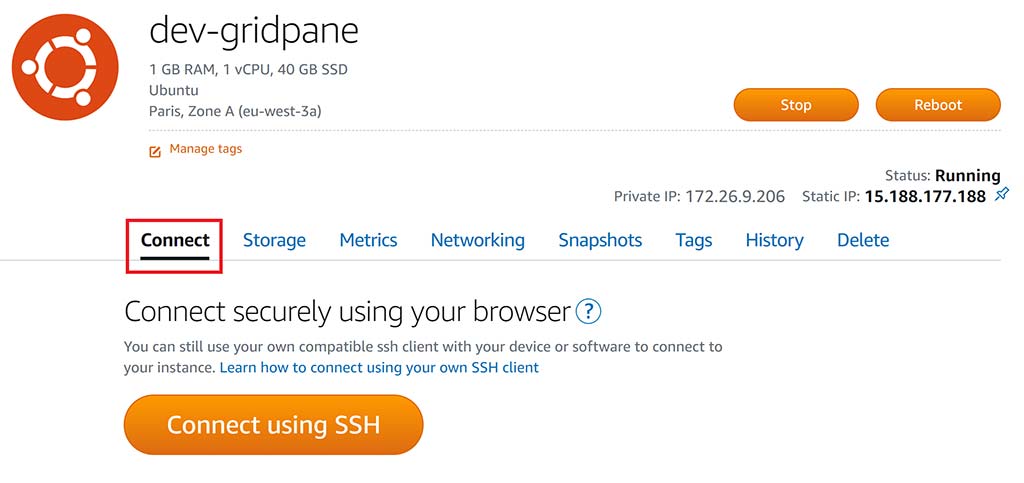
Now back in Lightsail in the “Connect” tab, we can log into the new server by clicking the big orange “Connect using SSH” button.
Type the following command to allow for root level commands to be run:
sudo -s
We’re now ready to enter the string copied from the popup modal to install GridPane:
This will initiate Stage 1 of installation.
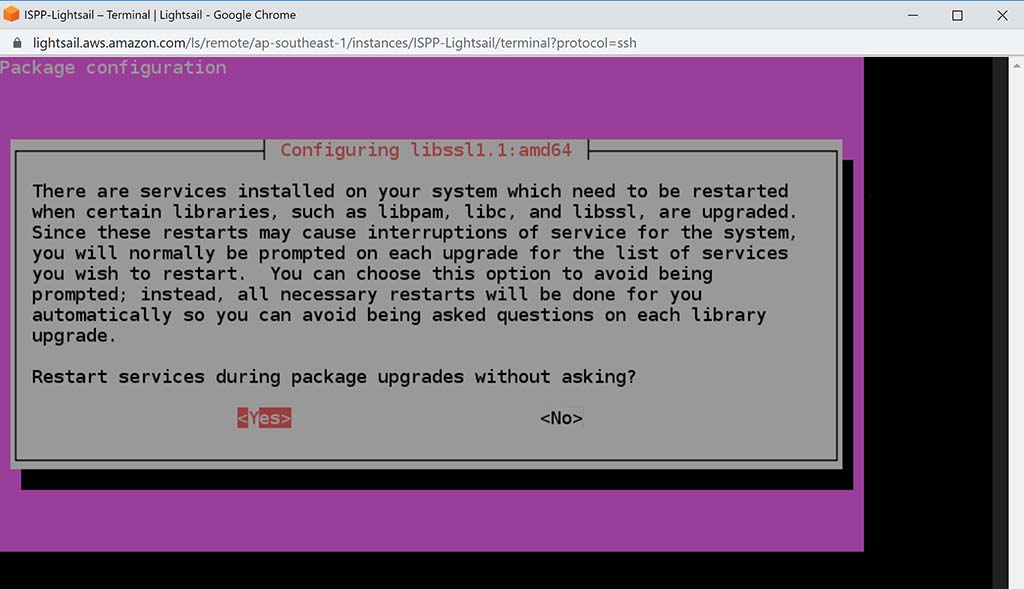
There are now two configuration notices that will appear as GridPane begins to install. For window 1 select yes:
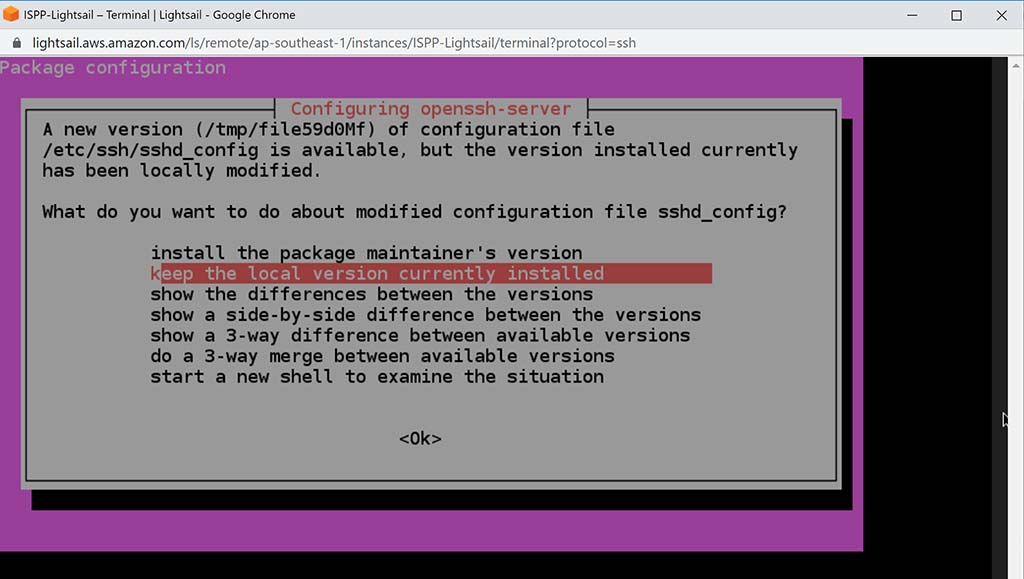
For window 2 simply press enter:
A few moments later when the message below displays, we’re all done, and you can exit this window.
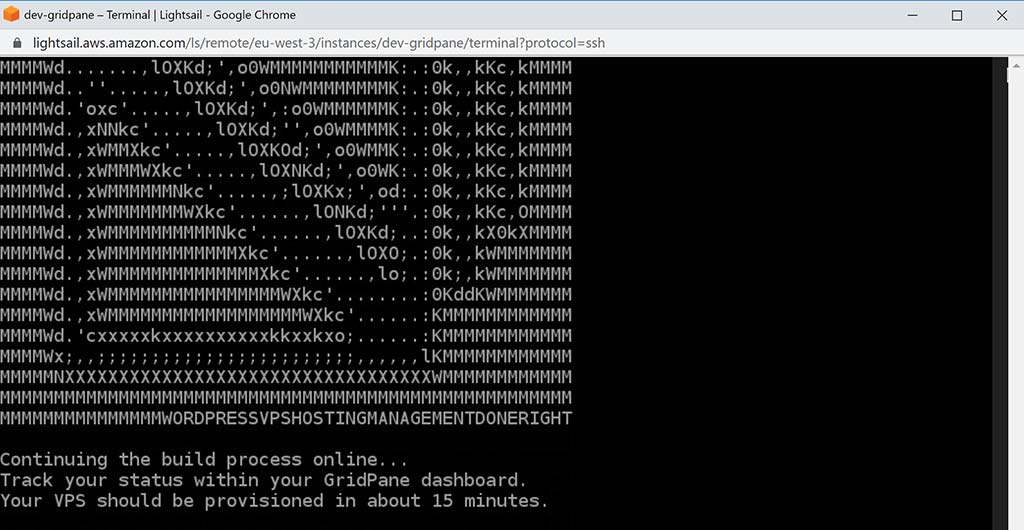
Approximately 15 minutes later, your new server will be complete, available on the GridPane dashboard, and ready to build WordPress sites.

Congratulations! Next Steps
Now that your server is live, you’re ready to start creating and configuring new WordPress websites.
To deploy a site click on the Sites link in the GridPane main menu to begin the process. We have a separate article that details the steps in detail for you.
