Step 1. Create a Lightsail Policy for GridPane
To get started, log in to your IAM console here.
Once inside the console, choose Policies in the left navigation pane:
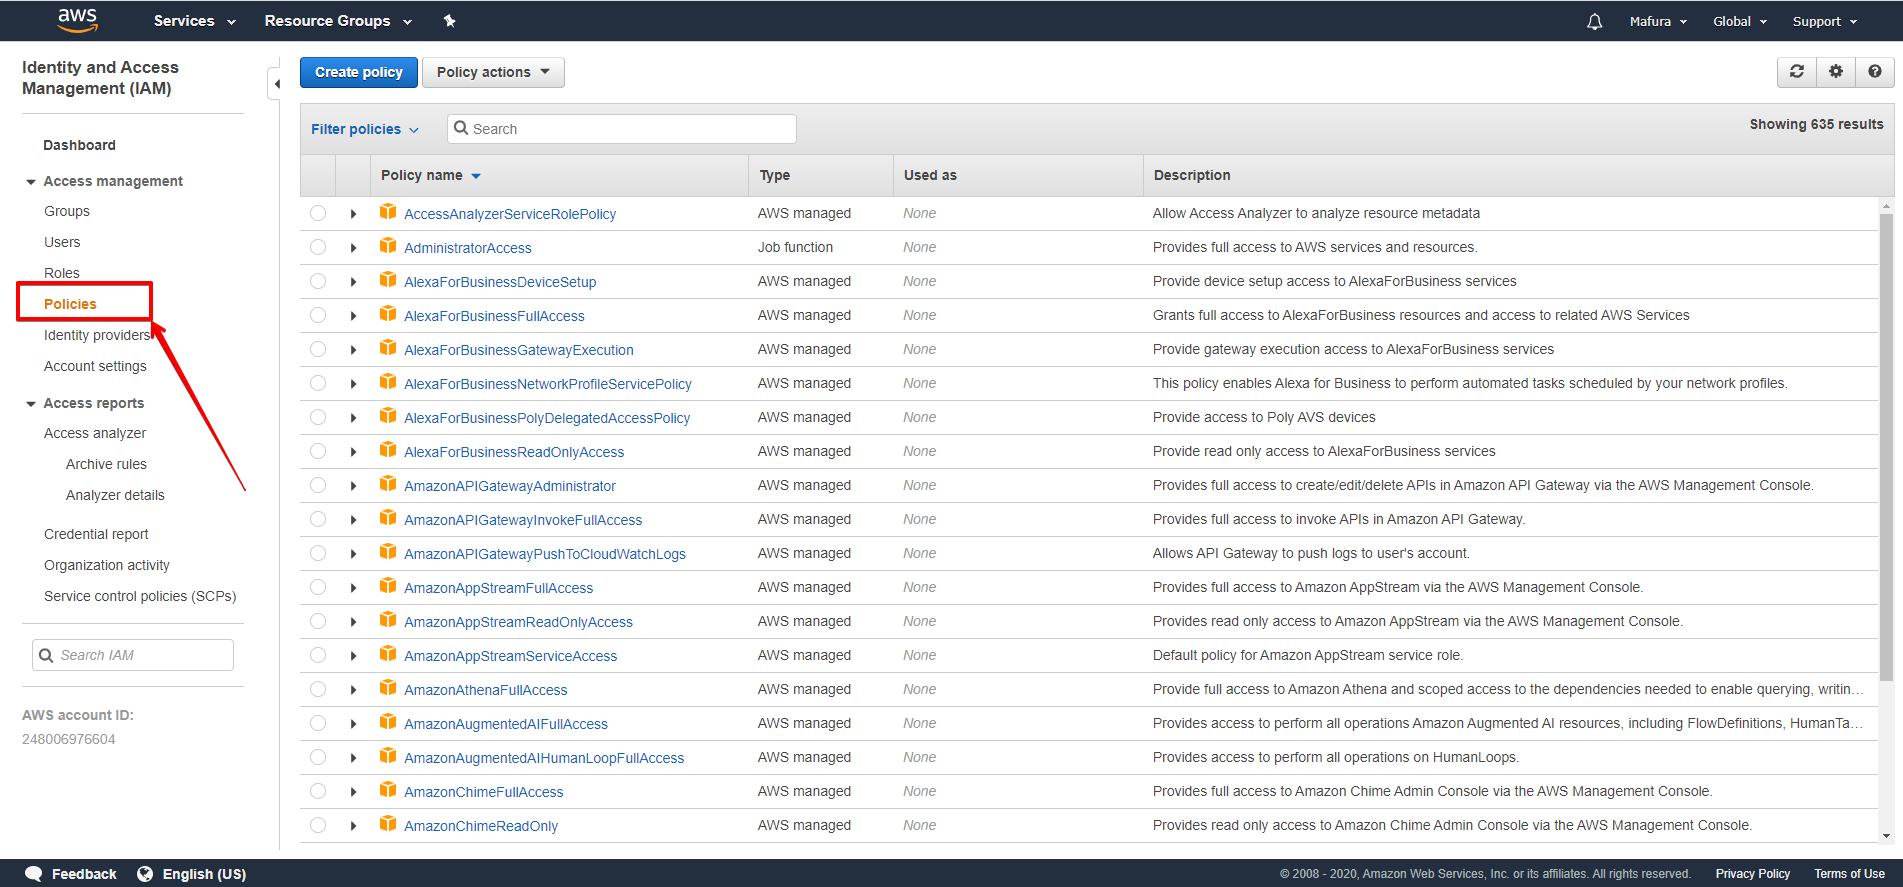
In the Policies, panel click create:
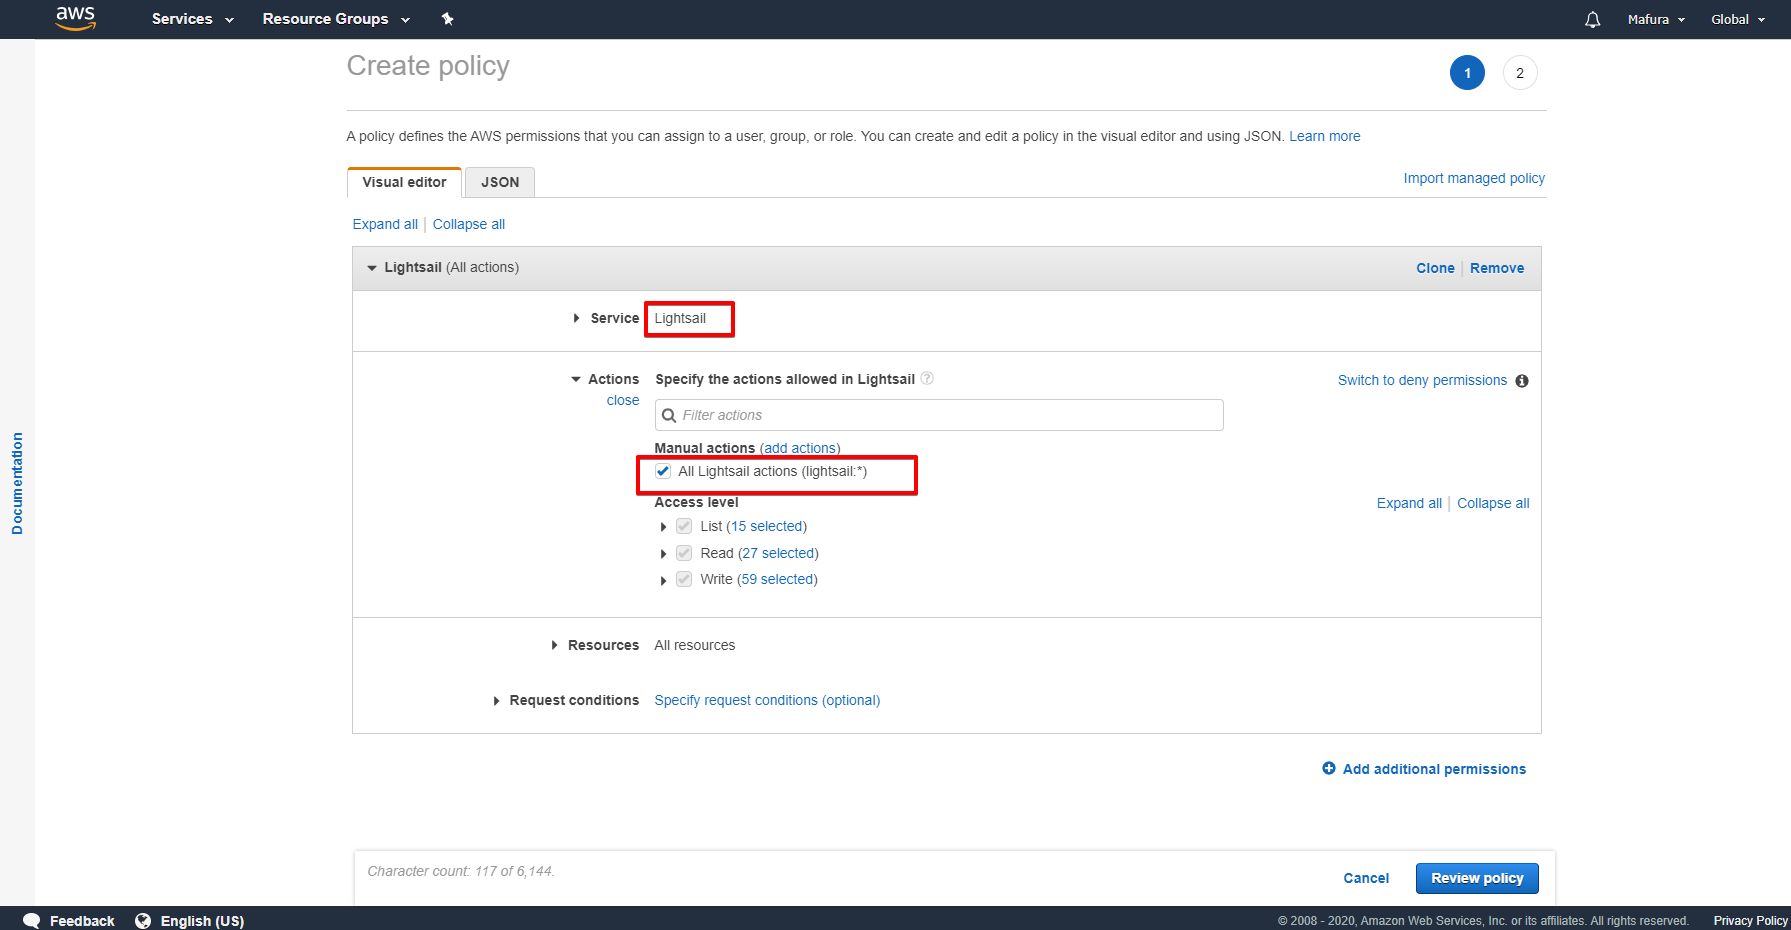
Clicking create will fire up a wizard as shown above. Choose Lightsail Sevice and in action option, choose All Lightsail Actions in Manual Action.
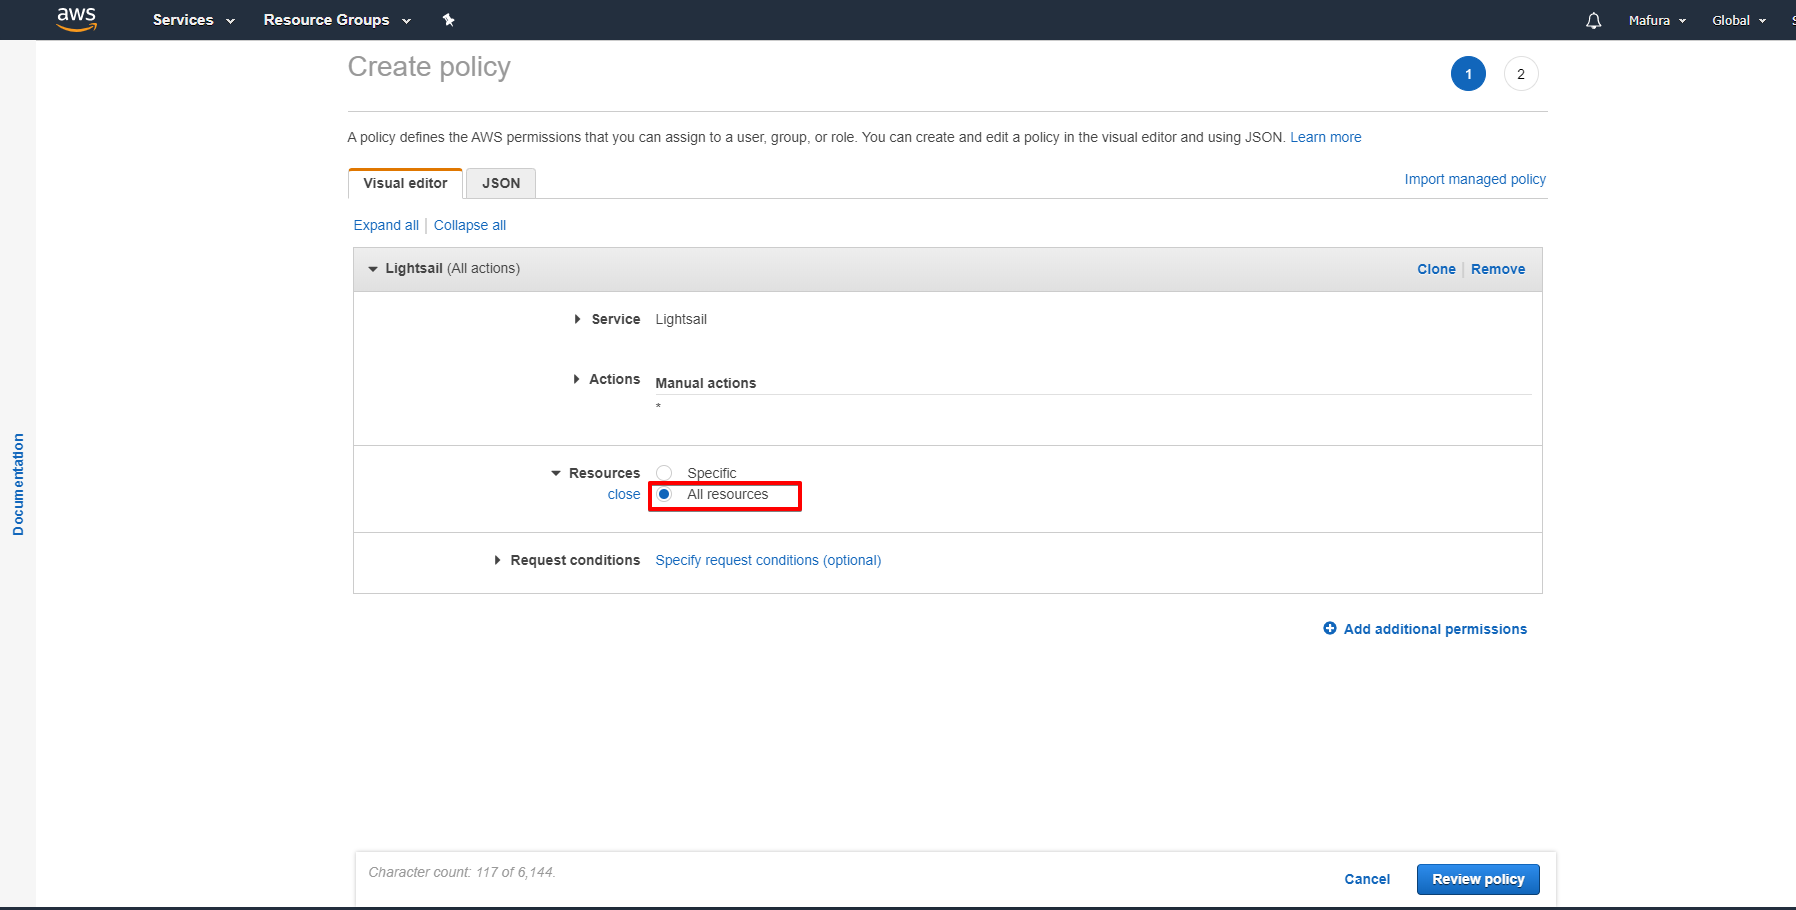
Under Resources choose All Resources. Please check the image below)
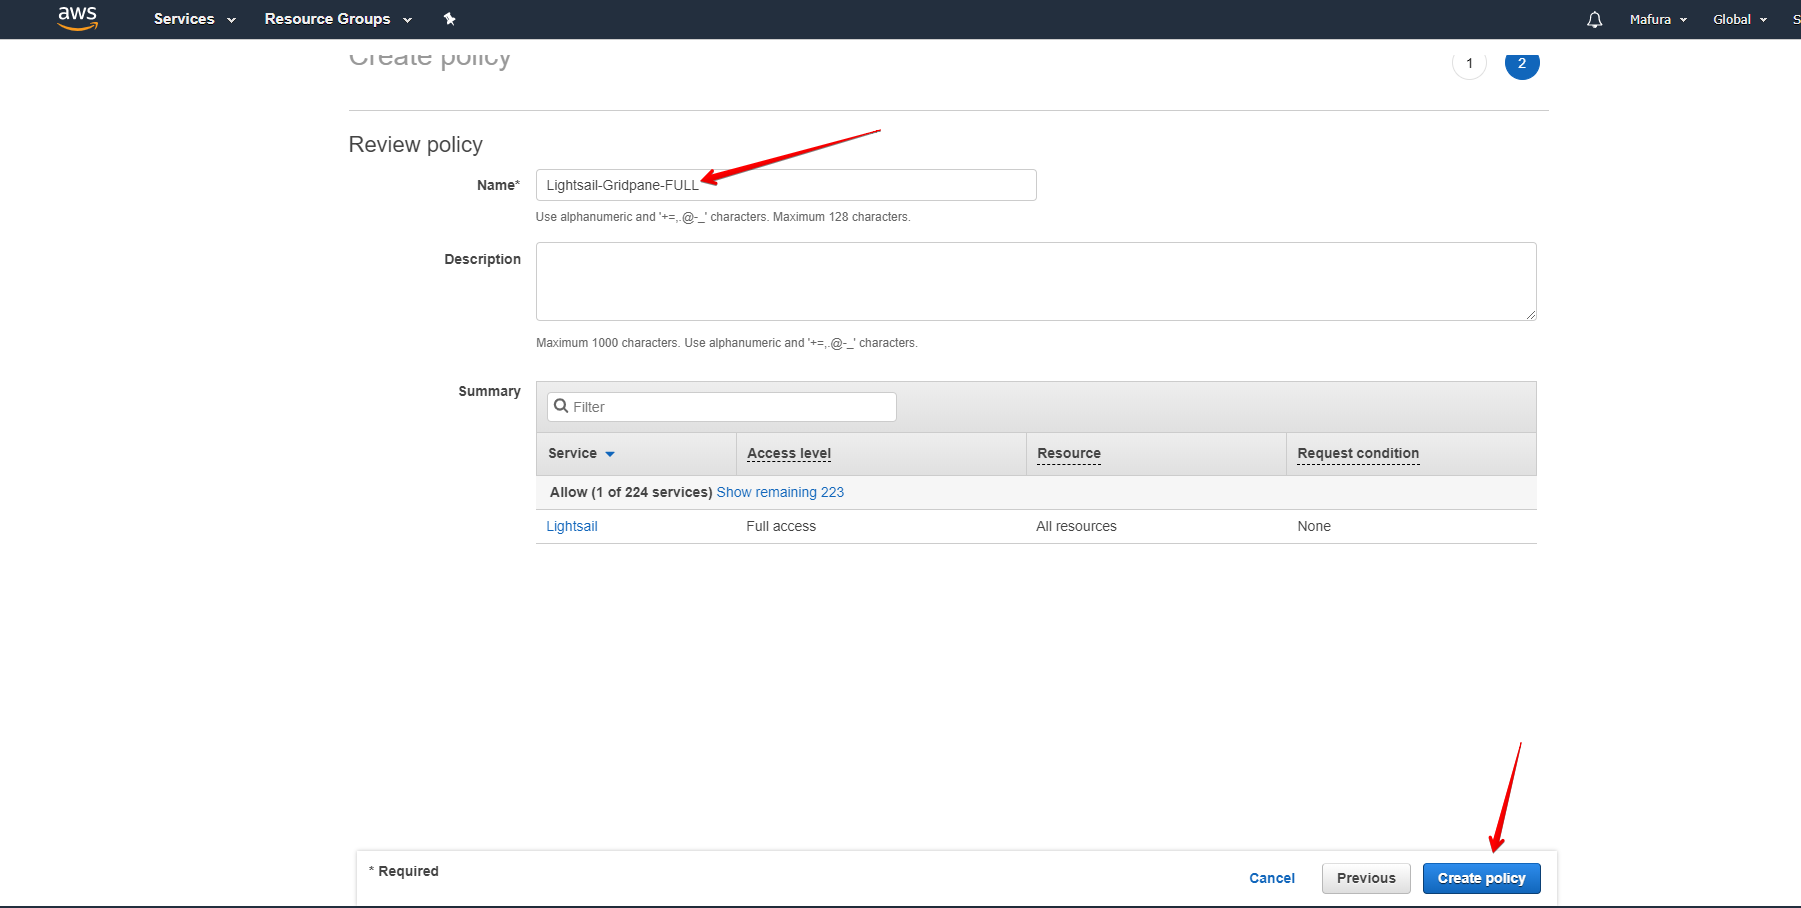
Click Review Policy. The next wizard window pops up, set the name of policy to Lightsail-Gridpane-FULL then click Create policy.
Step 2. Create a Key and Secret
Still, in the IAM console, choose users on the left-hand navigation screen. Click on Create User
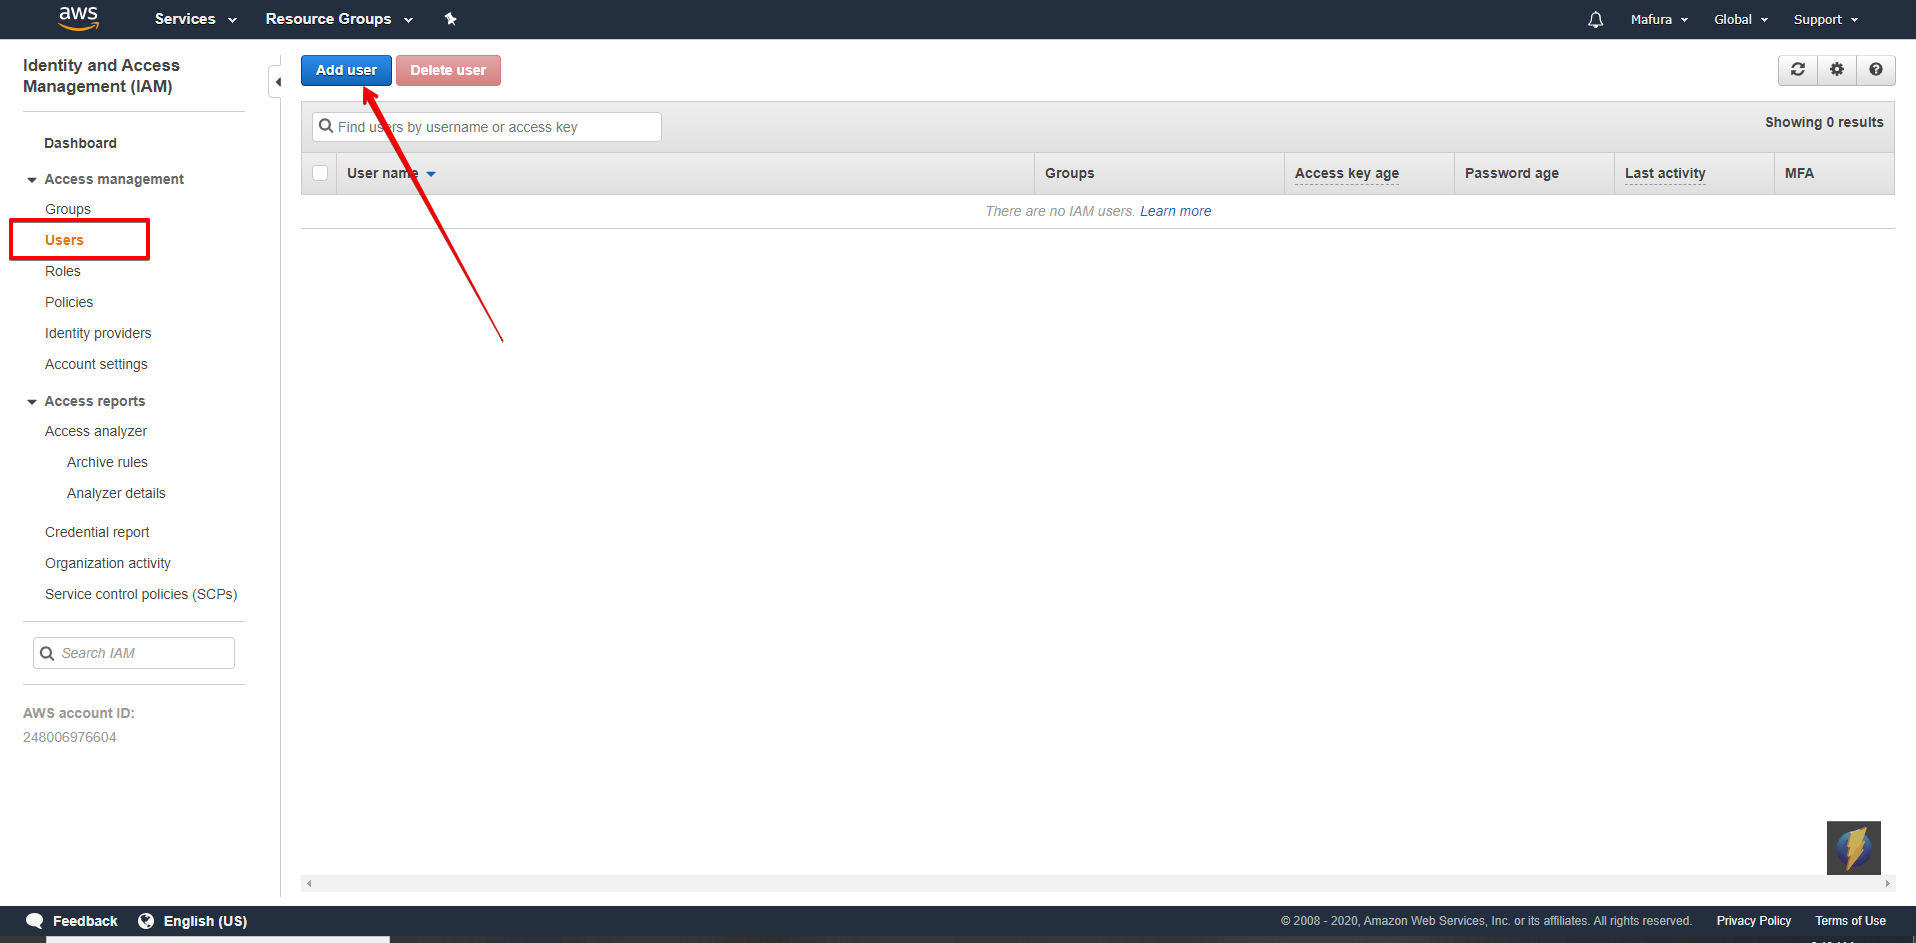
The Add user wizard activates. Choose a suitable name for your user and put a tick programmatic access checkbox.
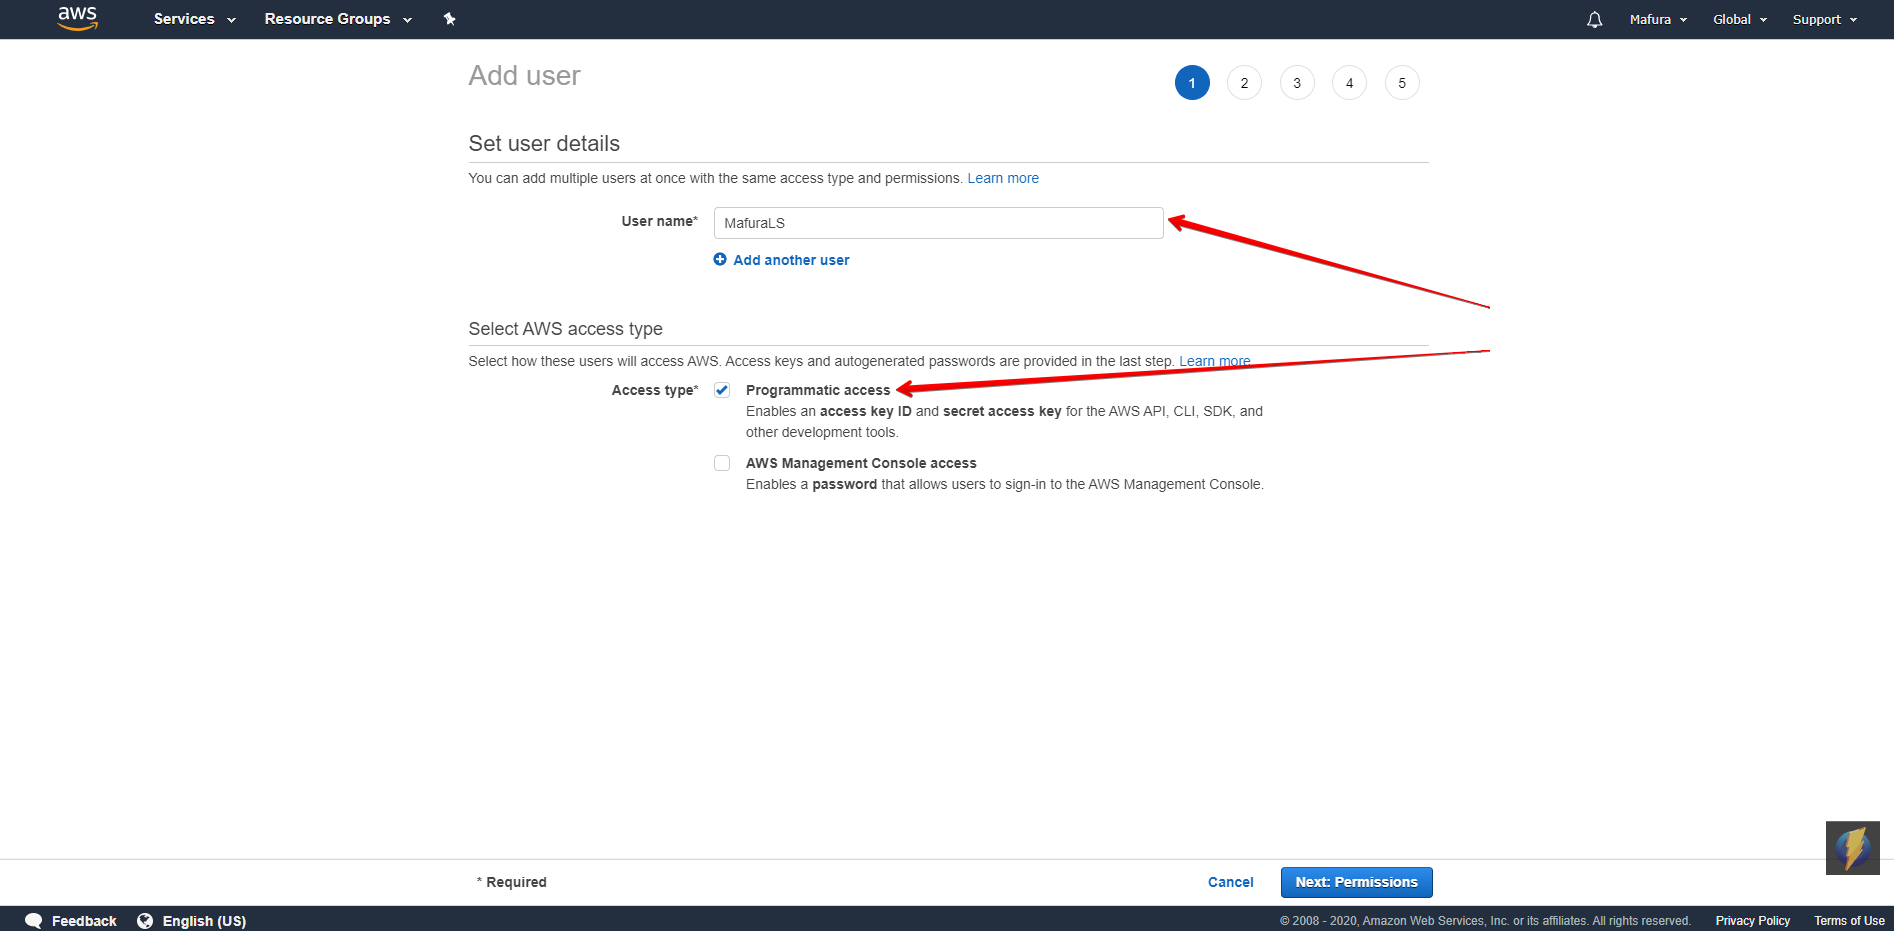
Choose Next: Permissions. Click Attach Existing Policy Option then choose the Lightsail-Gridpane-Full policy we created in step 2.

Click Next to the tags Panel, leave everything default here and click User Review to and cross-check the user name and chosen security policy.
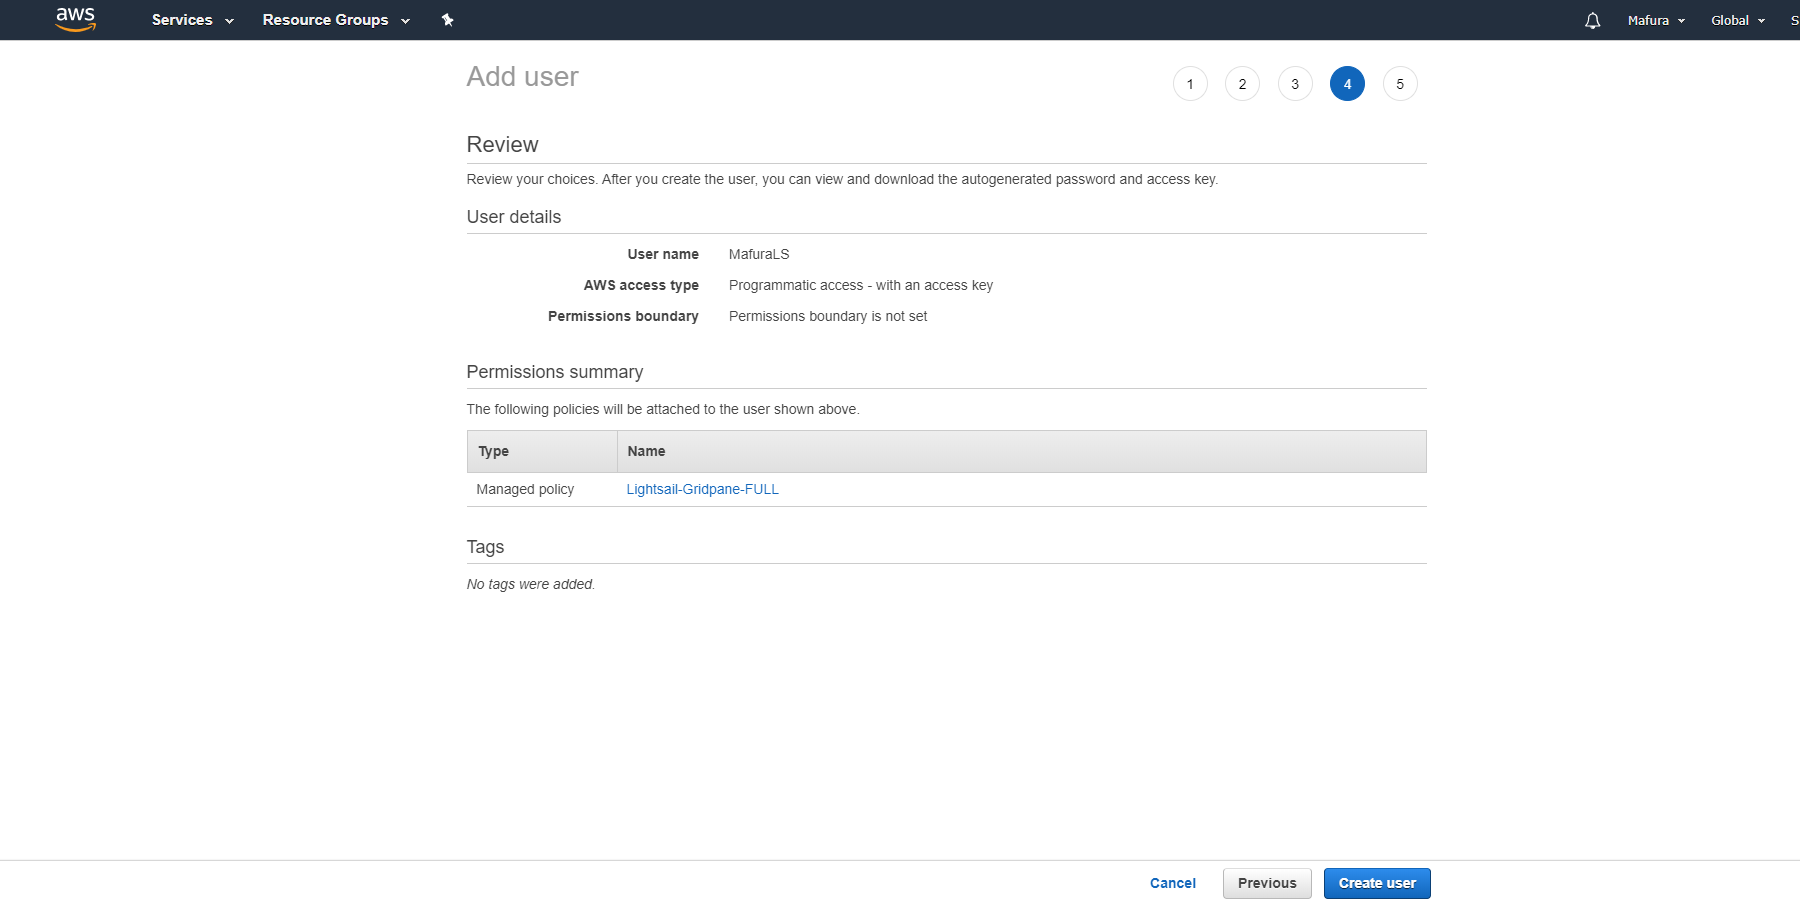
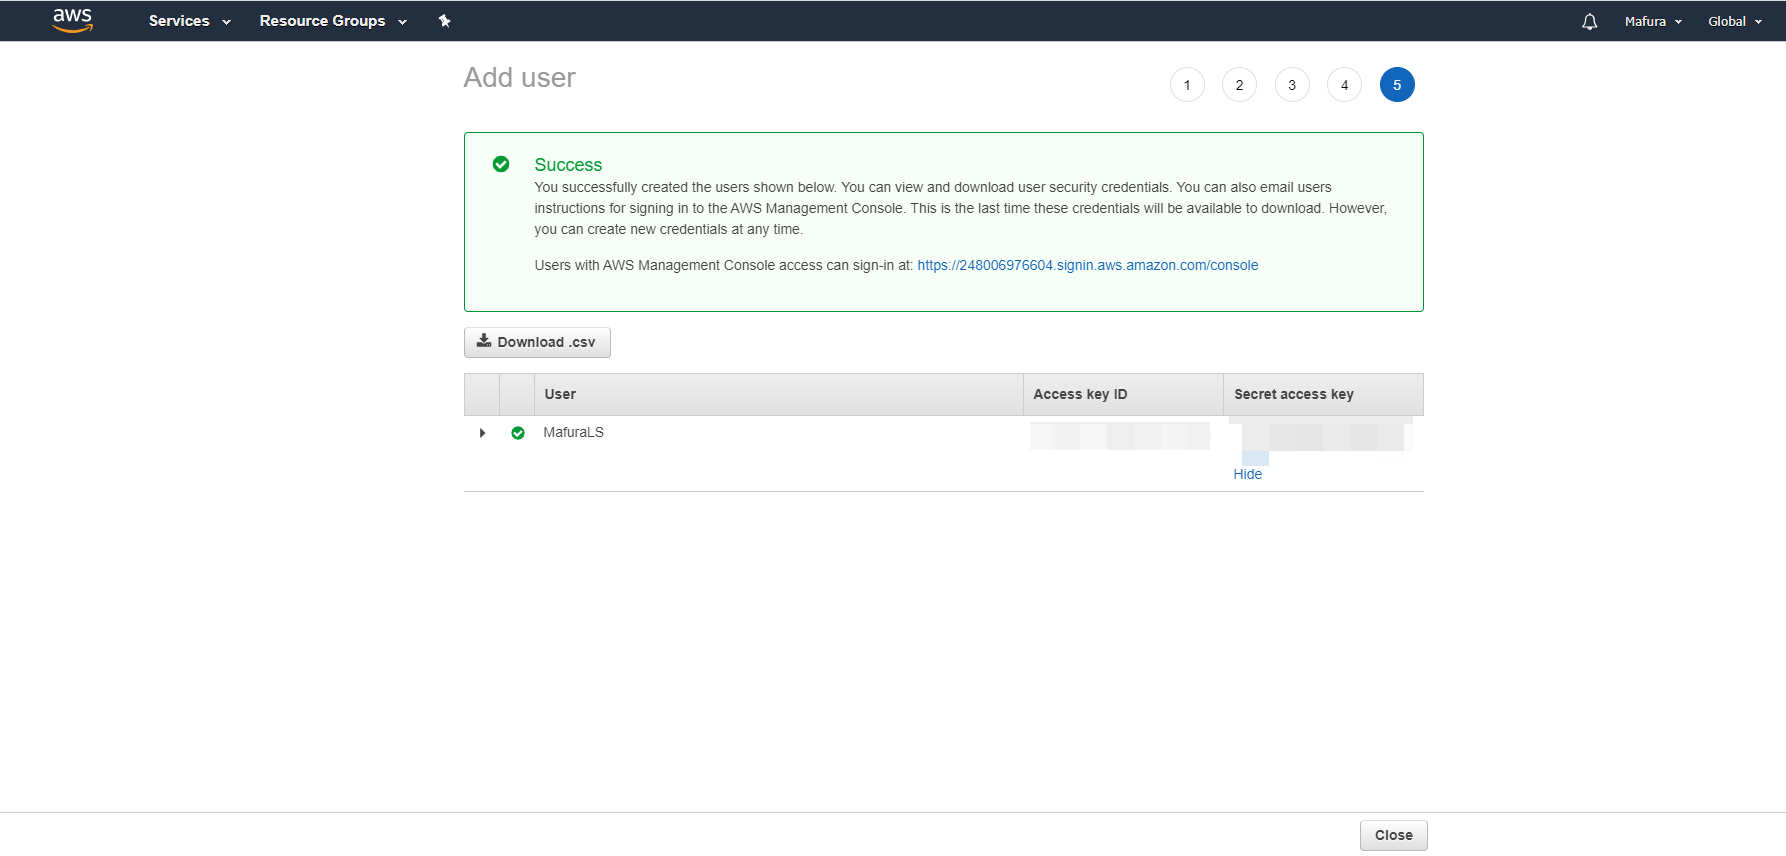
If all is correct click Create User. The next panel will have the Key and Secret for your user. Please note these values somewhere since they will NEVER be shown again. You can download these credentials as a CSV file.
Step 3. Add Your Amazon Lightsail Key and Secret to GridPane
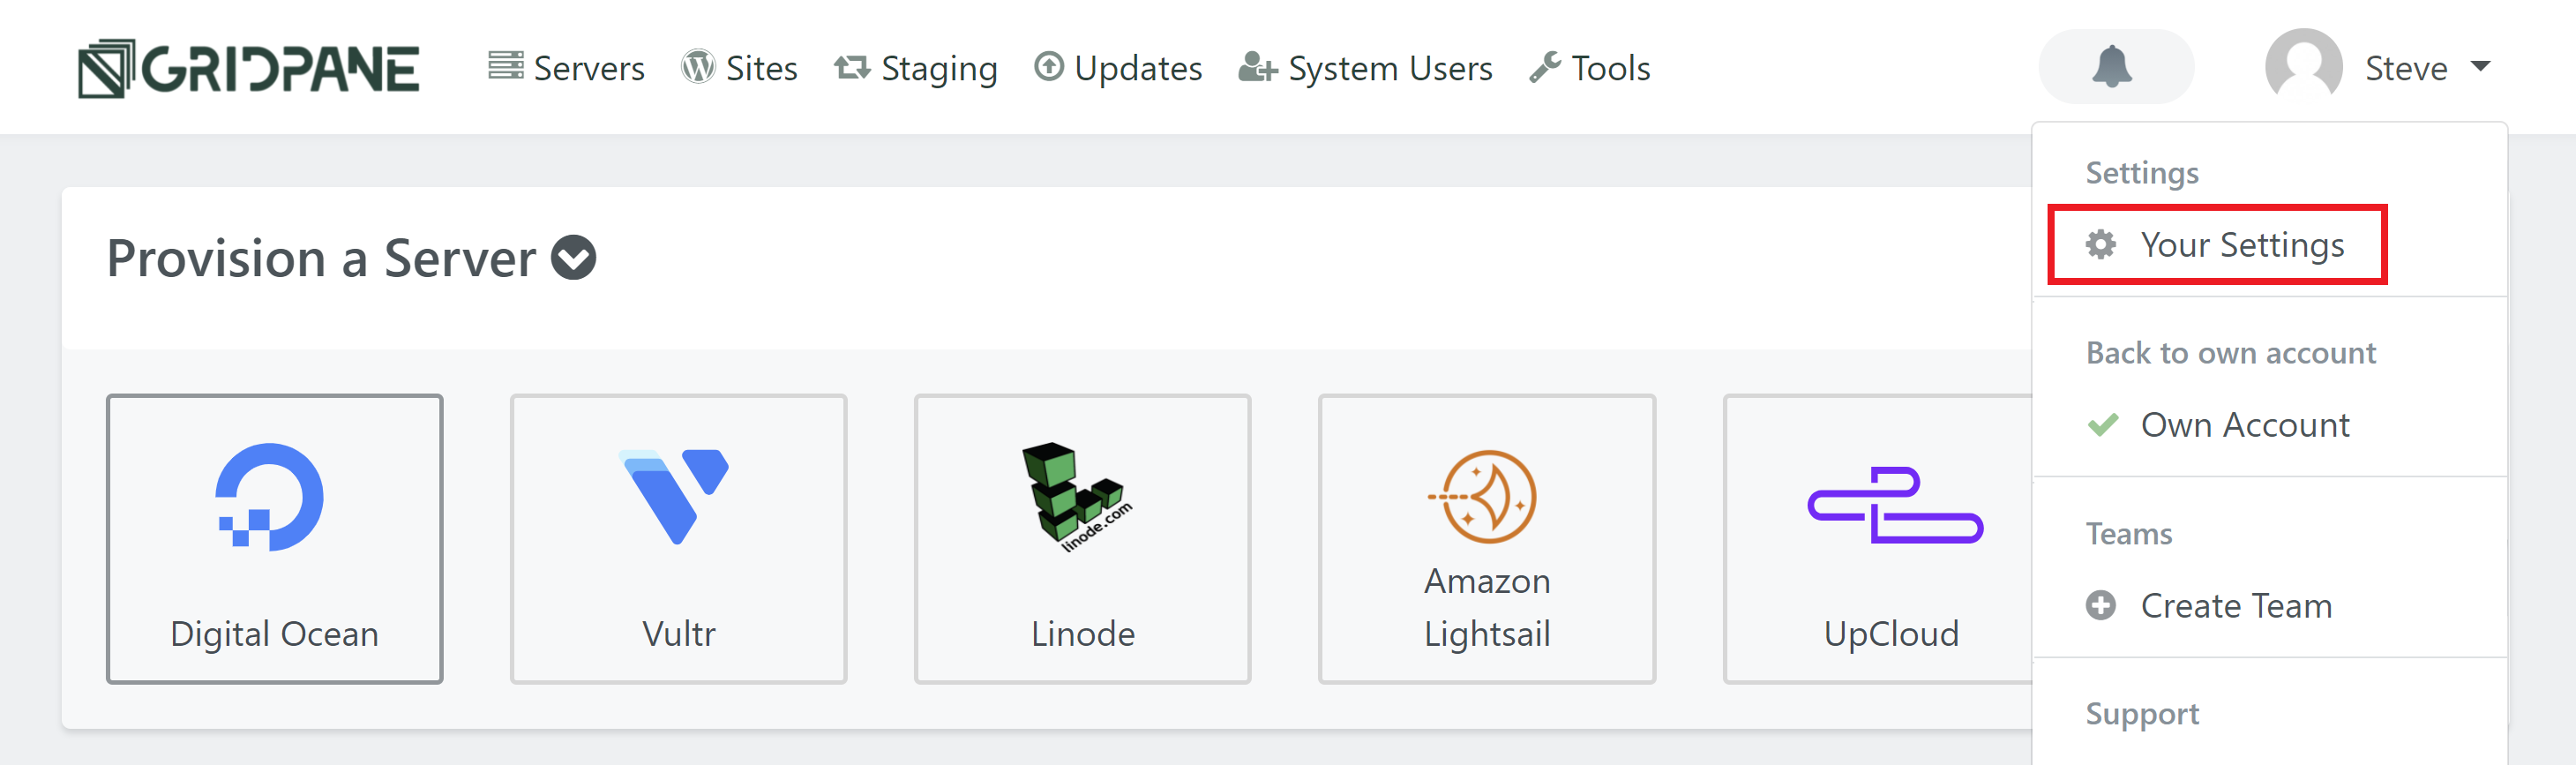
Log in to your GridPane account and click the Your Settings menu item in the dropdown menu accessible by clicking on your username and icon.
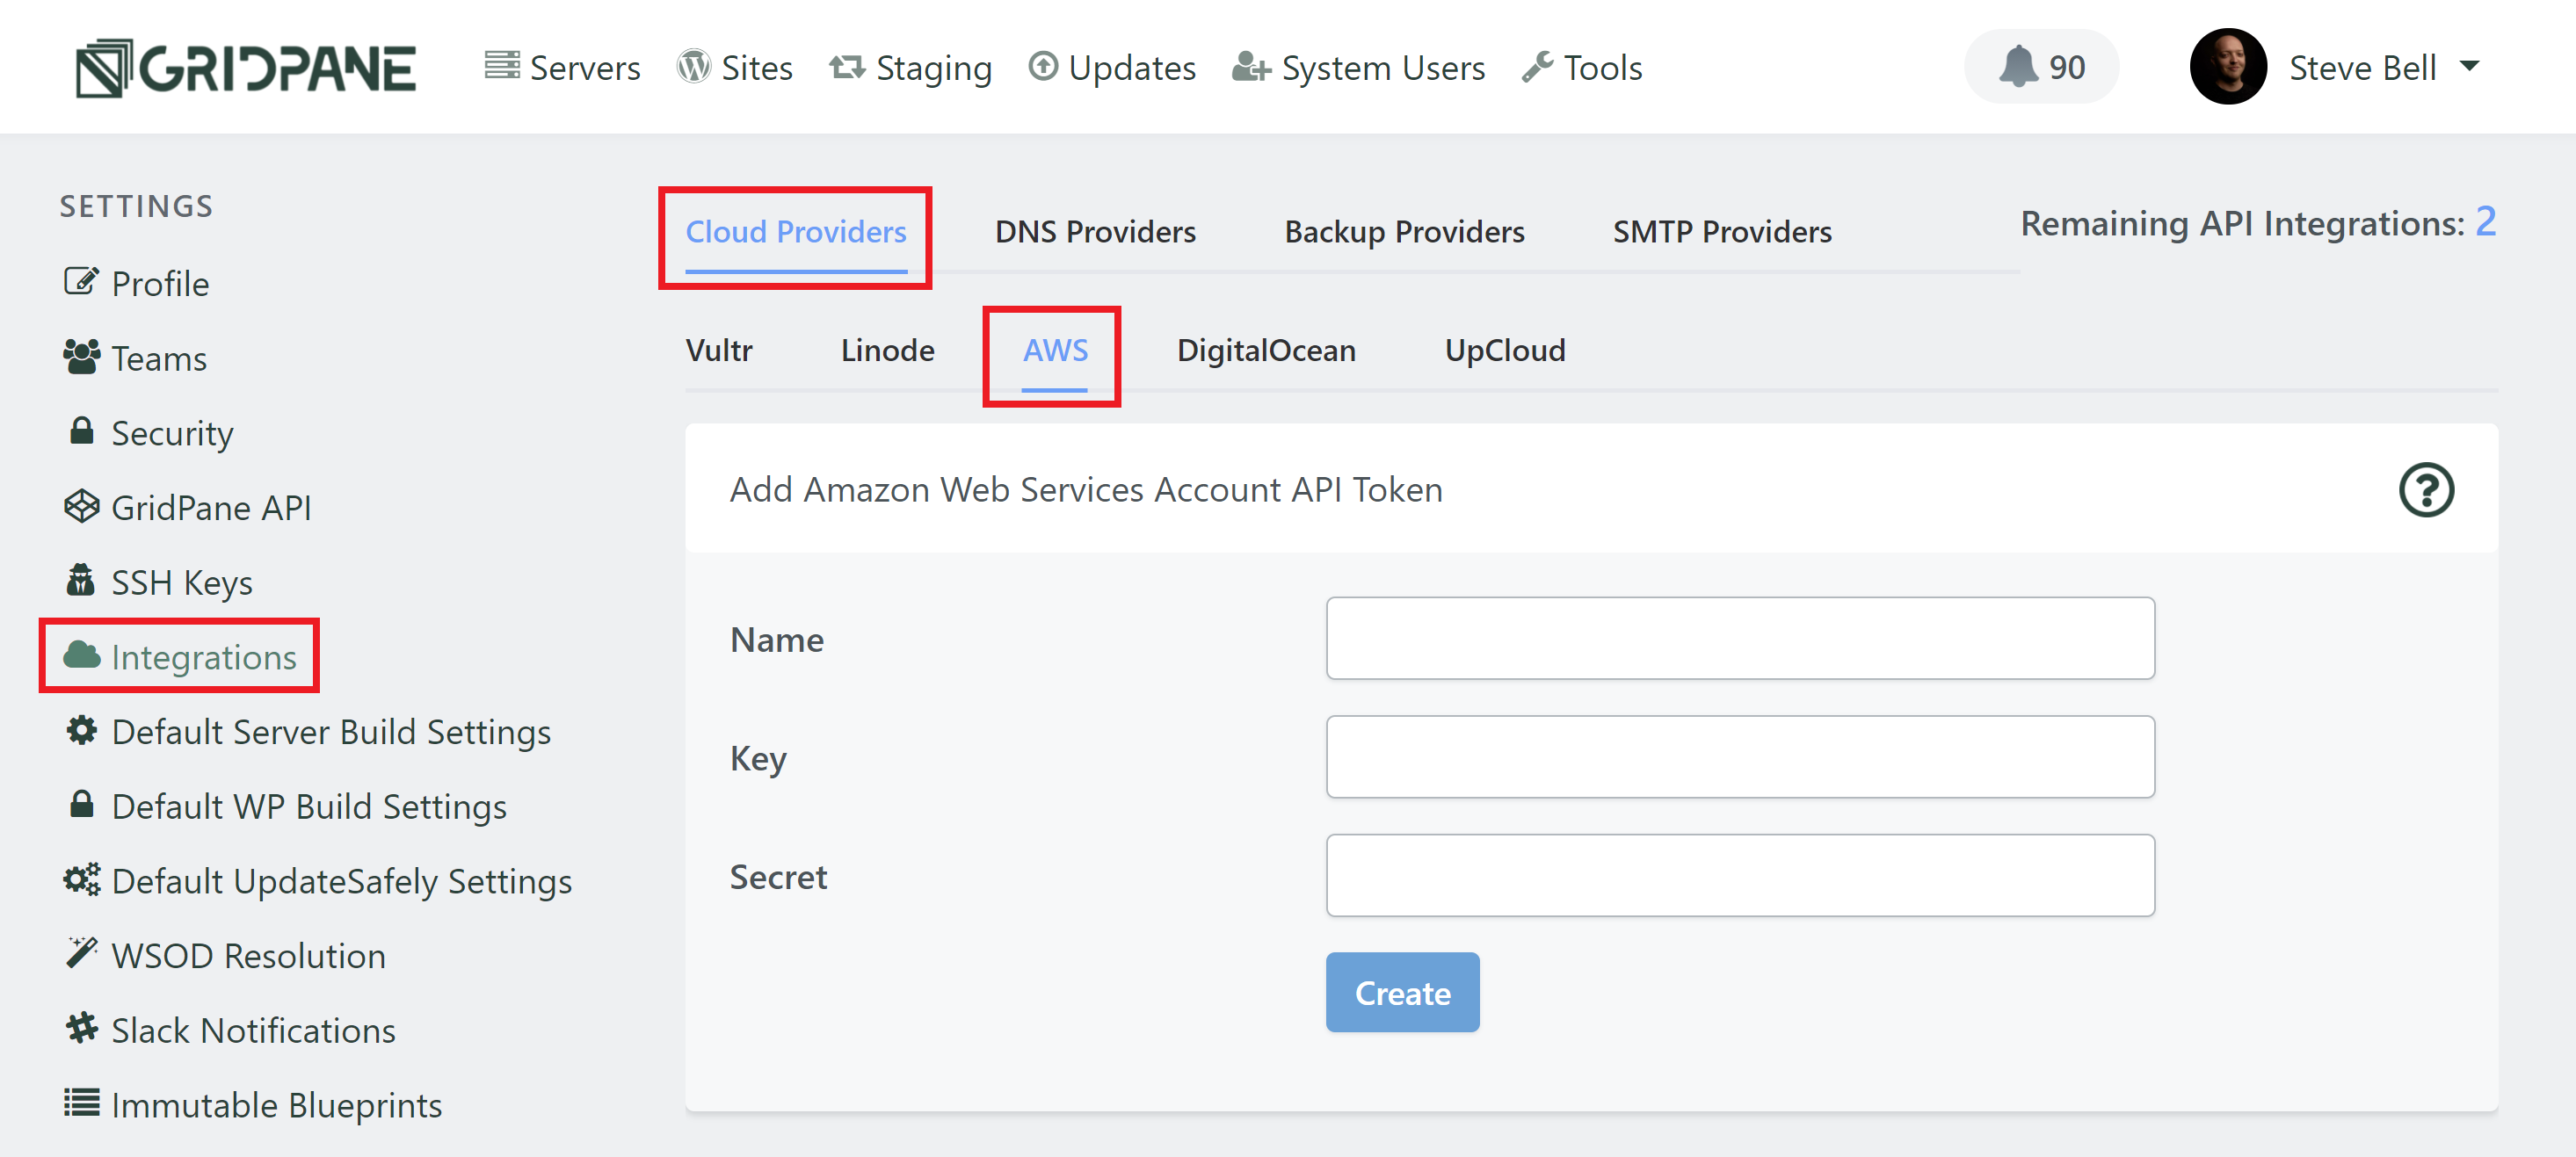
Locate and click the Integrations option in the left horizontal menu, and then enter the AWS Personal Access Token you copied in Step.3 above into the Key and Secret fields, give your key a name, and then click Create.
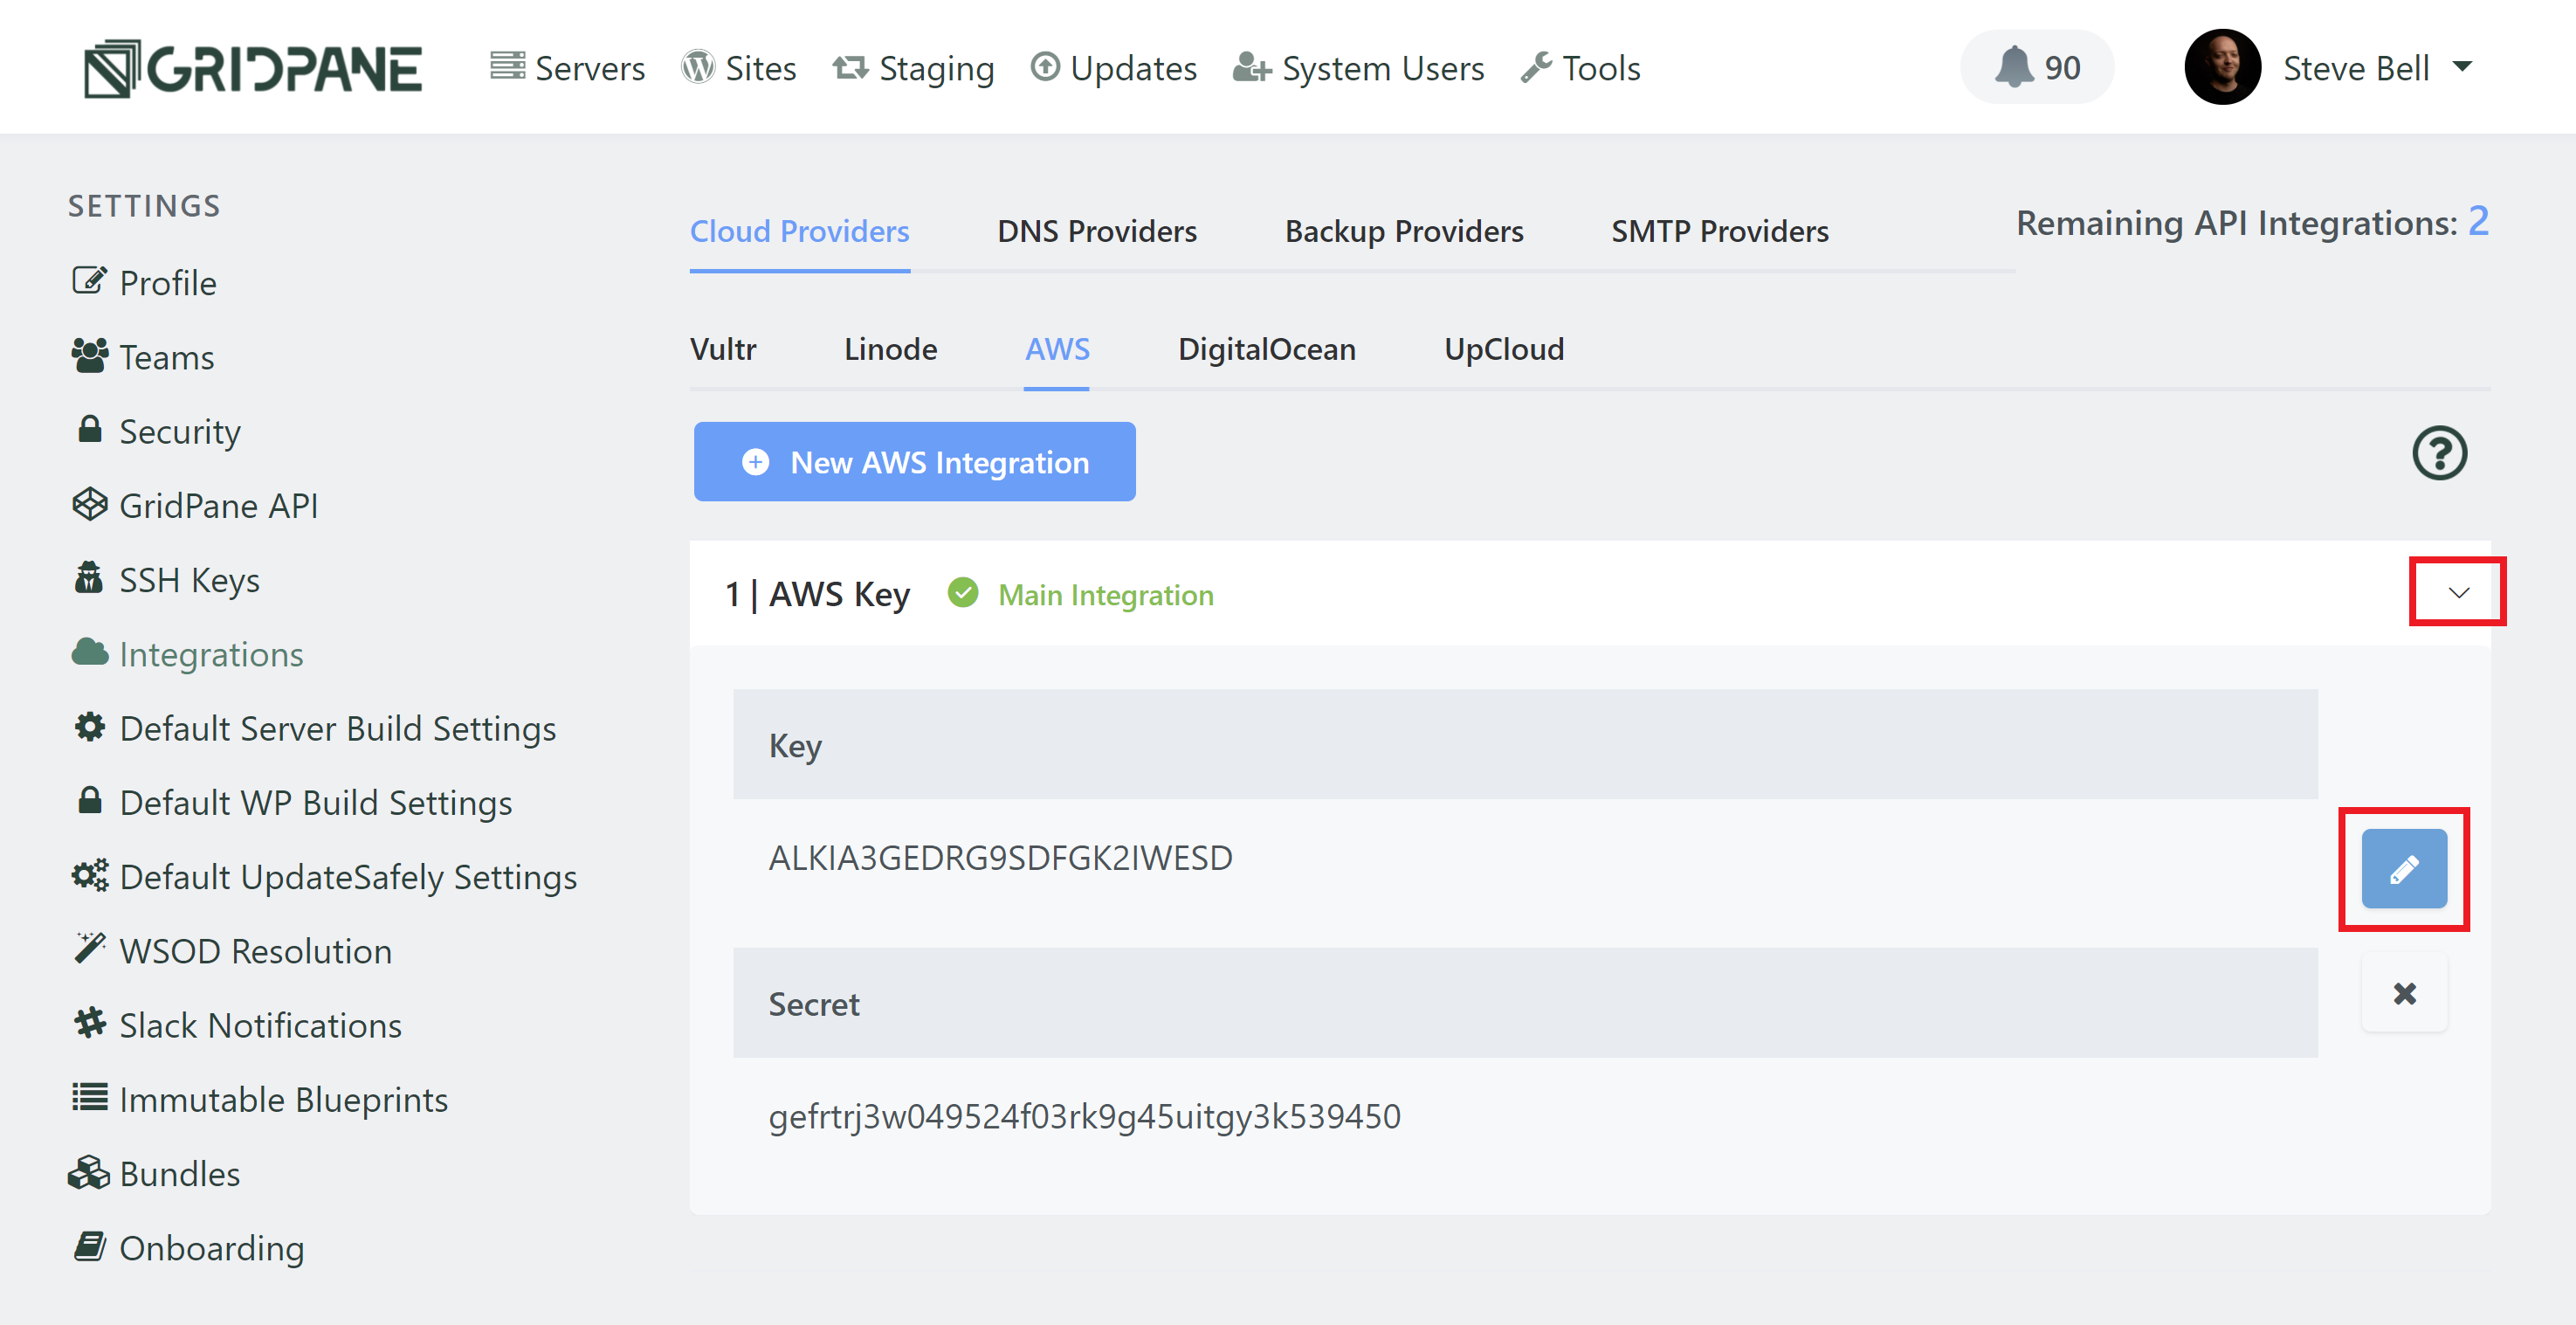
View/Edit your Amazon Lightsail API Token
Your AWS API Token will now be available from this settings panel. If you wish to edit or change your API Token, you may do this by clicking the down arrow followed by the edit button with the blue pencil icon.
A popup modal will appear and you can easily change your AWS Personal Access Token and click Update.
Step 4. Provision a Lightsail Server
Now we have our Amazon Lightsail Key and Secret saved in our GridPane settings we are able to provision Instances with it from within GridPane. First, navigate to the Servers page in your account:

Configure your Amazon LightSail Server
Select Amazon Lightsail from the choice of Cloud VPS providers and a configuration panel will open.
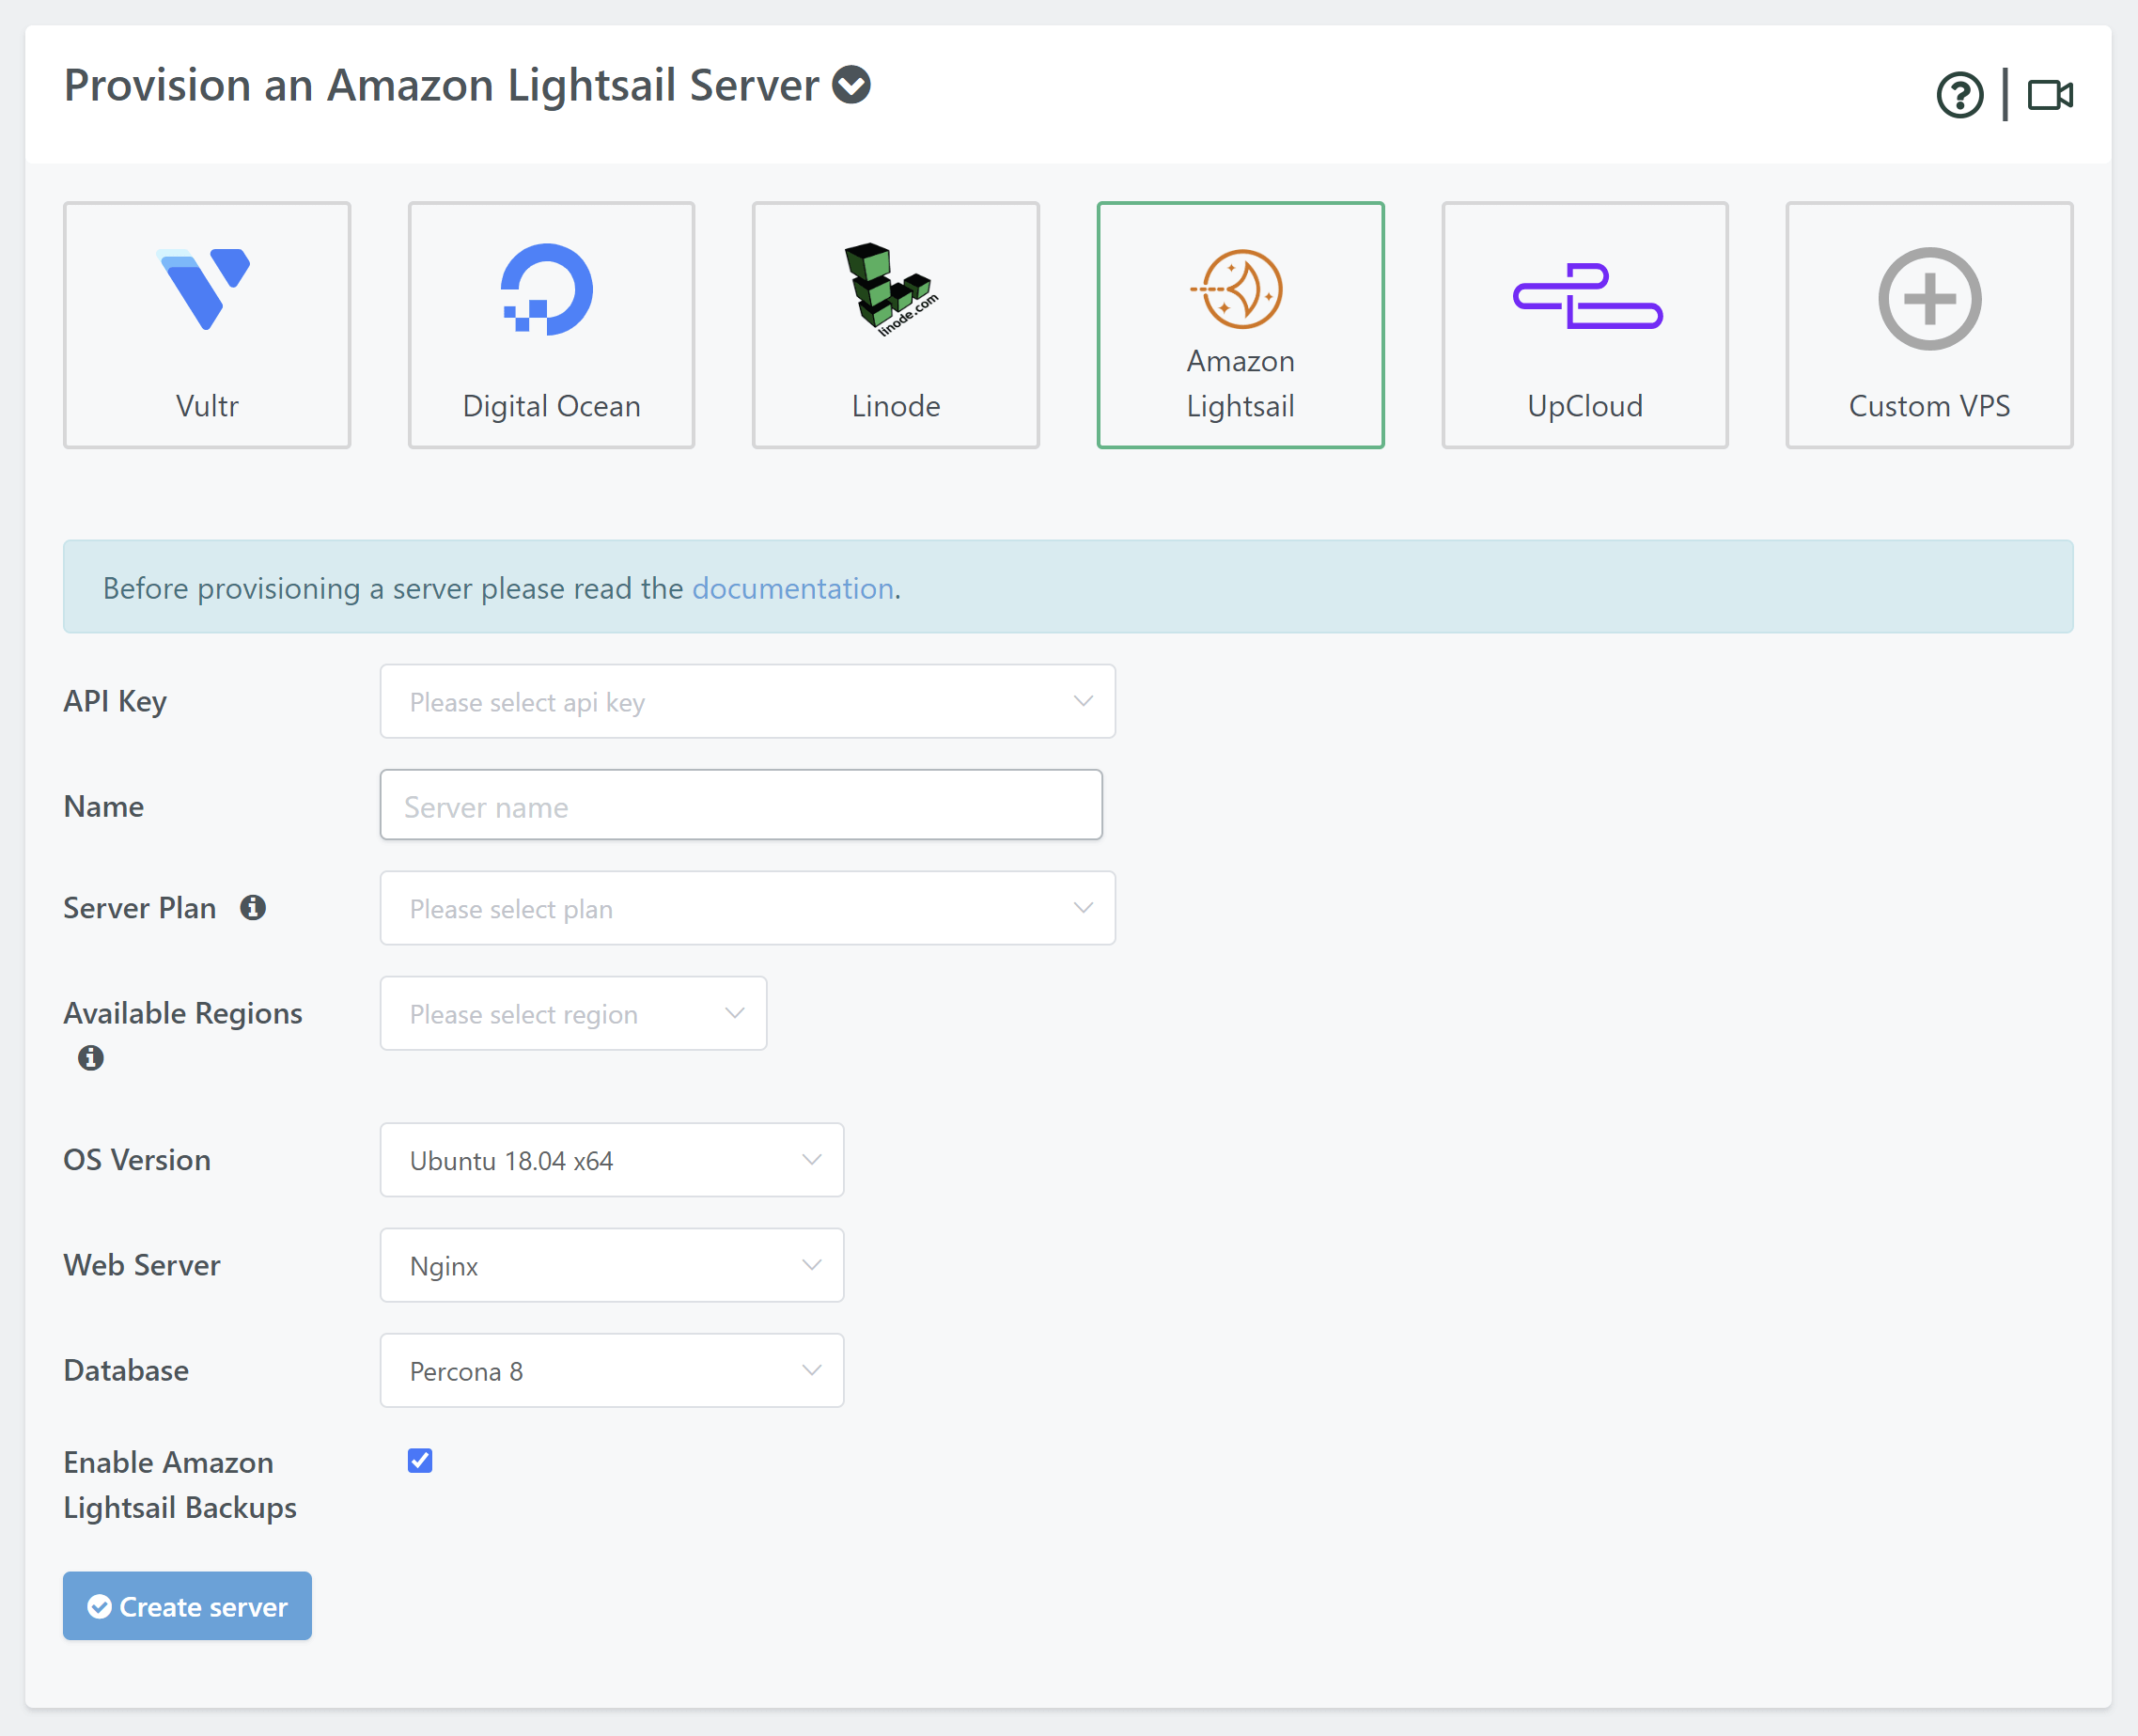
Enter an appropriate name for your Lightsail server, and then choose a server plan and region from the dropdown selectors, before choosing whether or not you wish for Lightsail Backups to be enabled.
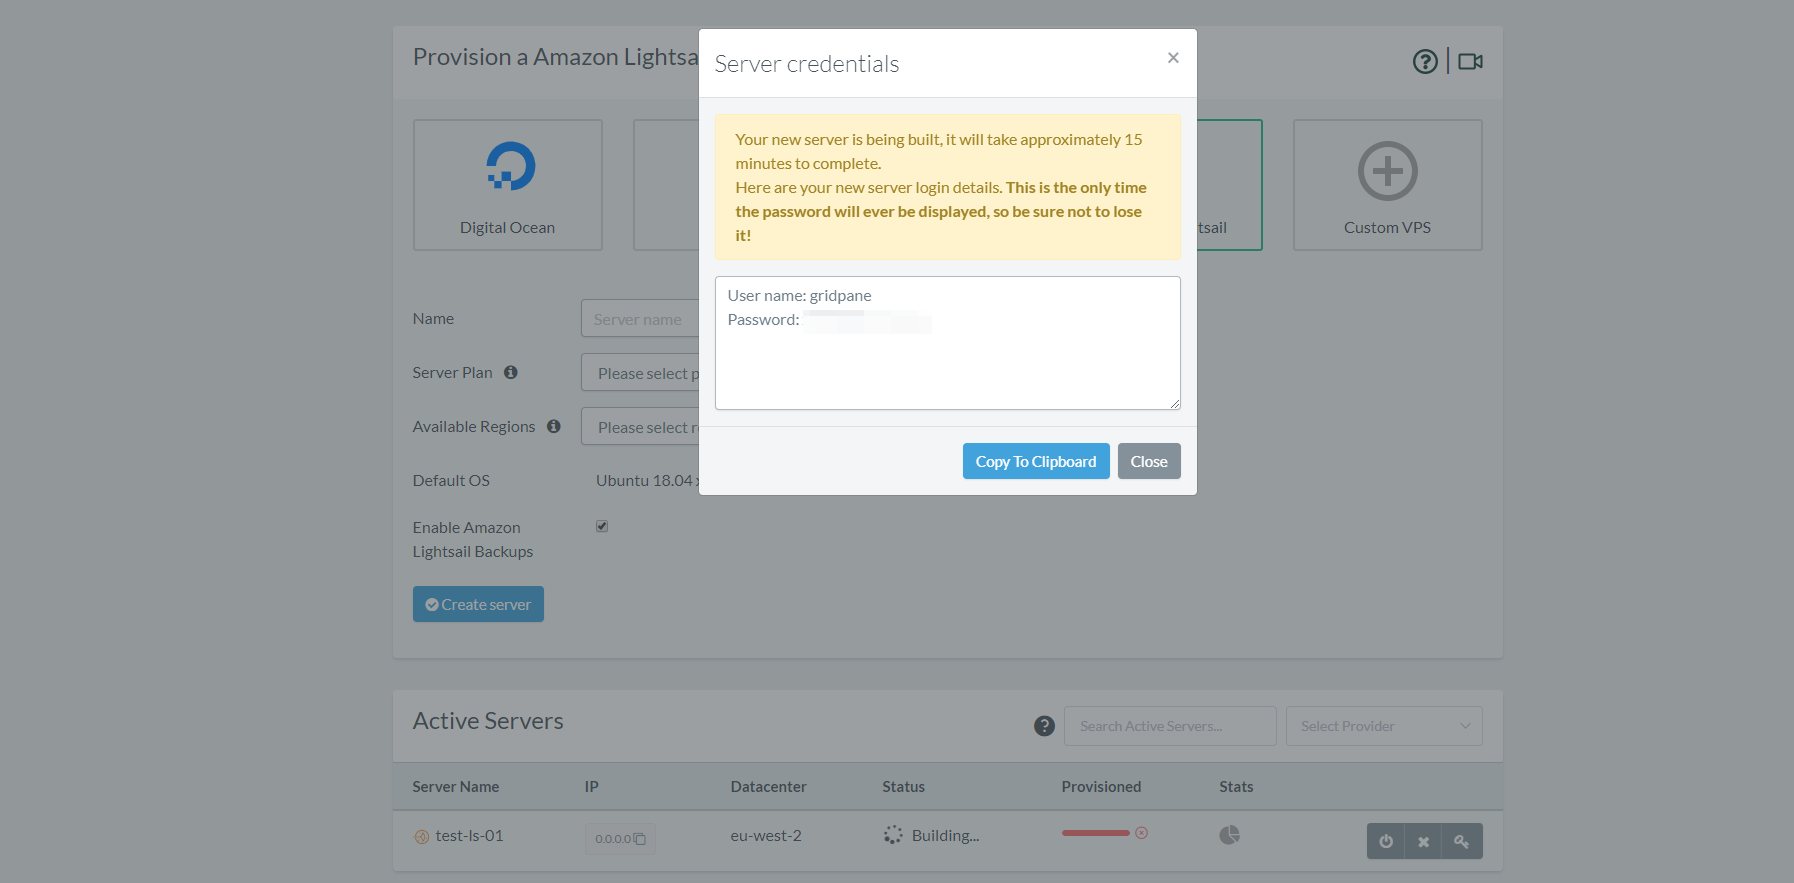
Step 5. Copy your Server Credentials and Keep Them Safe
GridPane will display your Lightsail login details, this is the only time the password will ever be displayed, so be sure not to lose it and keep it secure.
Step 6. Wait 10-15 Minutes
GridPane will begin provisioning your instance. You will now be able to see your instance in the Active Servers list.
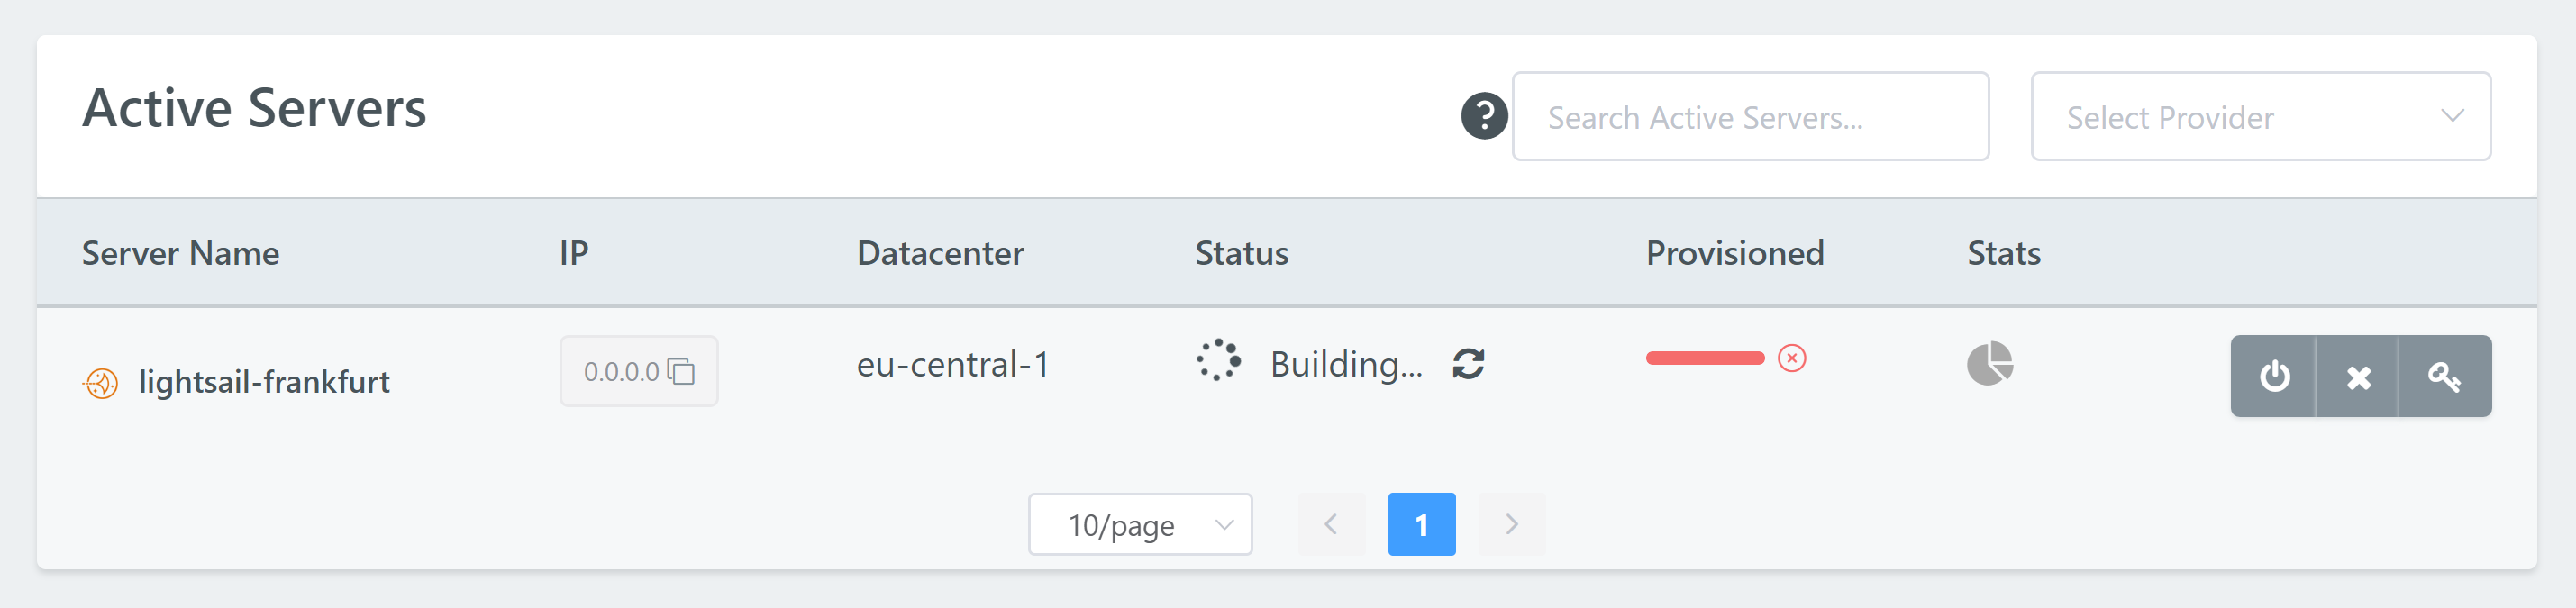
At any time during the provisioning process, you may check what stage the process is at by rolling over the progress bar, a pop-up window will display the current job being completed.
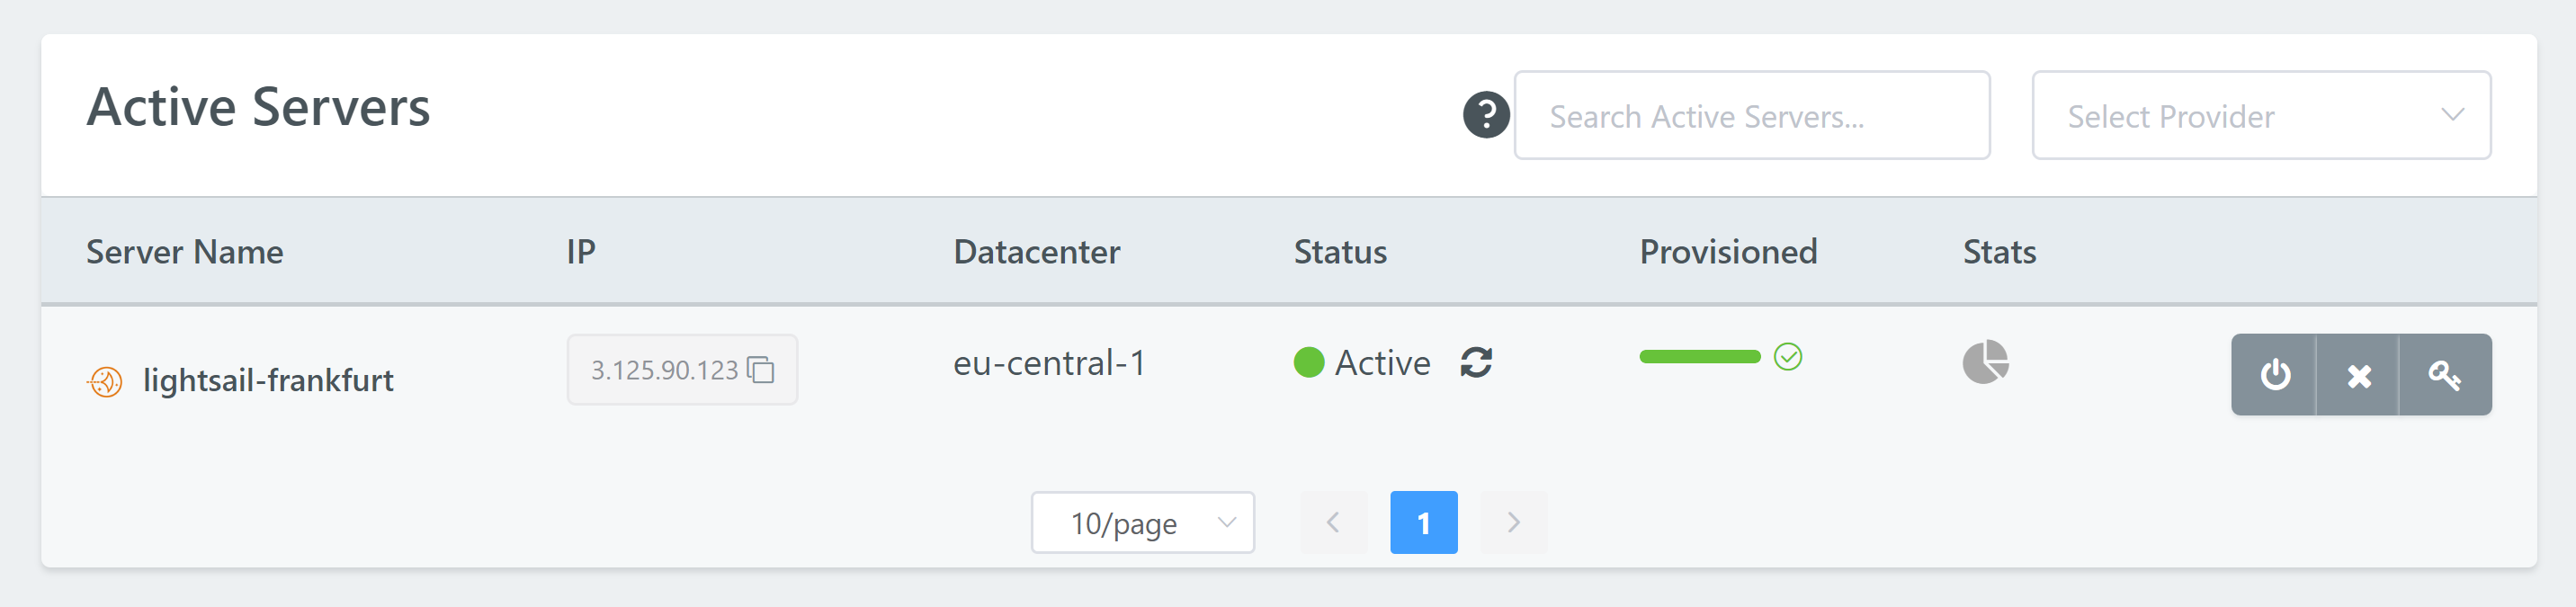
Once GridPane has finished provisioning your Lightsail server the progress bar will turn green, and you will be able to deploy some Serious WordPress Sites on it.
Congratulations! Next Steps
Now that your server is live, you’re ready to start creating and configuring new WordPress websites.
To deploy a site click on the Sites link in the GridPane main menu to begin the process. We have a separate article that details the steps in detail for you.
