WPvivid Tutorial: How to Migrate a WordPress Website with the WPvivid Plugin

4 min read

Introduction

Without a doubt, the most widely used plugins to migrate websites over to GridPane are All in One WP Migration and Migrate Guru, and these continue to be our top 2 recommendations due to their track record.

WPvivid, however, is another great plugin that gained a lot of popularity among our clients at the end of 2020 due to their LTD (which is still available and very affordable at the time of writing), and they now have over 100,000 installs and well over 500 5 star reviews. It’s fully compatible with GridPane and has both free and paid versions – both of which work equally well.

In this article, we’ll look at how to use WPvivid to migrate your WordPress websites from start to finish with the free version of the plugin.

Table of Contents

You may also want to read our article on migrating with zero downtime before you get started: 
How to Migrate to GridPane with Zero Downtime

WPvivid Free vs Pro

This article focuses on the options available in the free plugin.

The Pro version has a lot of interesting additional features that you may want to check out. This includes options for Google Drive, Dropbox, OneDrive, Amazon S3, s3-Compatible storage, FTP, SFTP, Wasabi, pCloud, and Backblaze. 

Multisite options are also available on the Pro plan.

Step 1. Set up Your Destination Server and Site 

In your GridPane account, if you haven’t already provisioned a server to host the site your migrating, do so now. We have easy to follow guides with step by step instructions here.

Then create your site: How to deploy a site on Gridpane. 

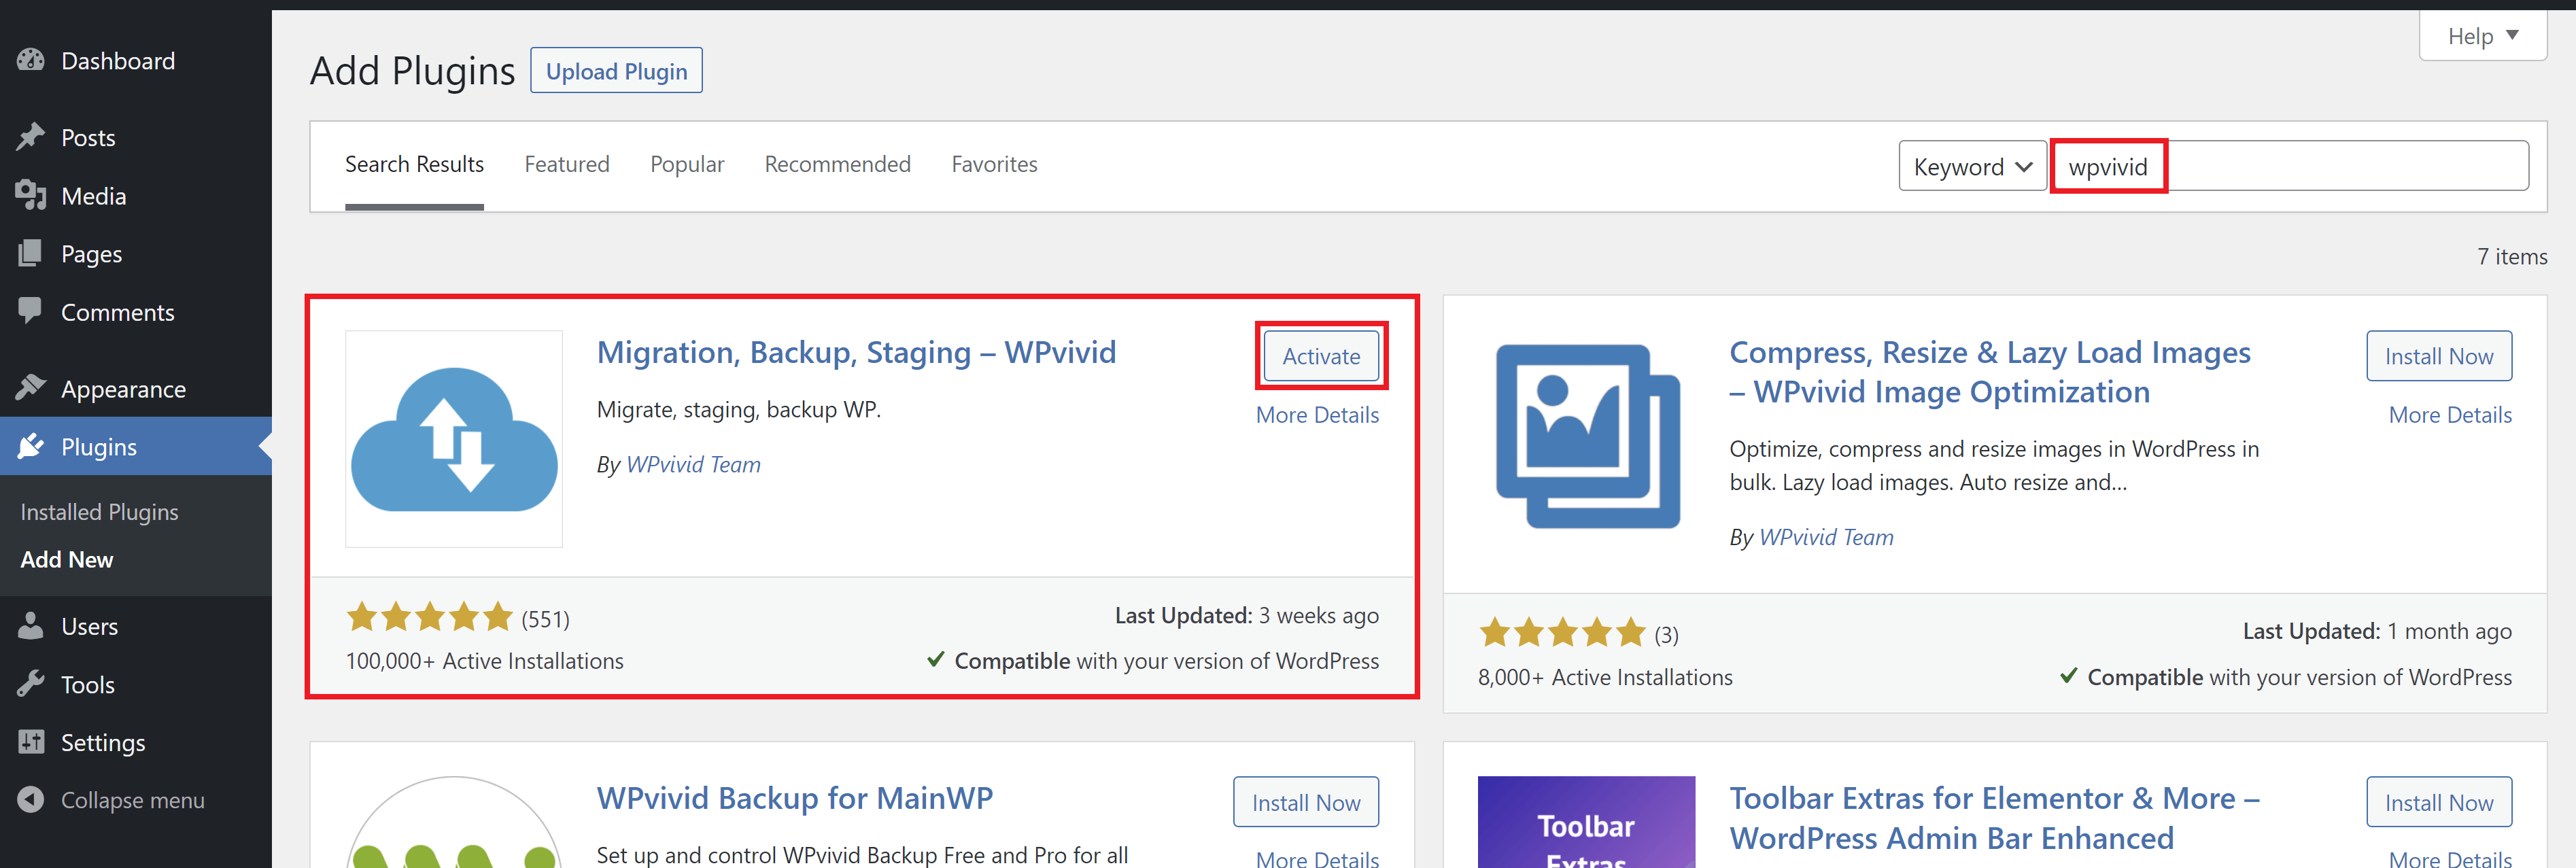
Step 2. Install WPvivid on Both Websites

The plugin is available in the WordPress repository. Head to your Dashboard > Plugins > Add New and install and active the plugin on both the origin website and the destination website.

Info: Before Your PRoceed

Before you begin, we recommend disabling all caching on your origin and destination server before proceeding. This includes any server-based page and object caching systems that might be in place, and any application-level plugin-based caching. WPvivid also recommend deactivating any redirect and security plugins as well.

Step 3. Get Your Auto-Migration Site Key

Over on the destination website:

  1. Visit Key tab page of the WPvivid backup plugin of the destination site.
  2. Generate your key by clicking Generate button and copy it

Step 4. Add Your Key to the Origin Site

The next steps of the process takes place inside the origin site, inside the Auto-Migrations tab:

Paste your key into the box and click Save.

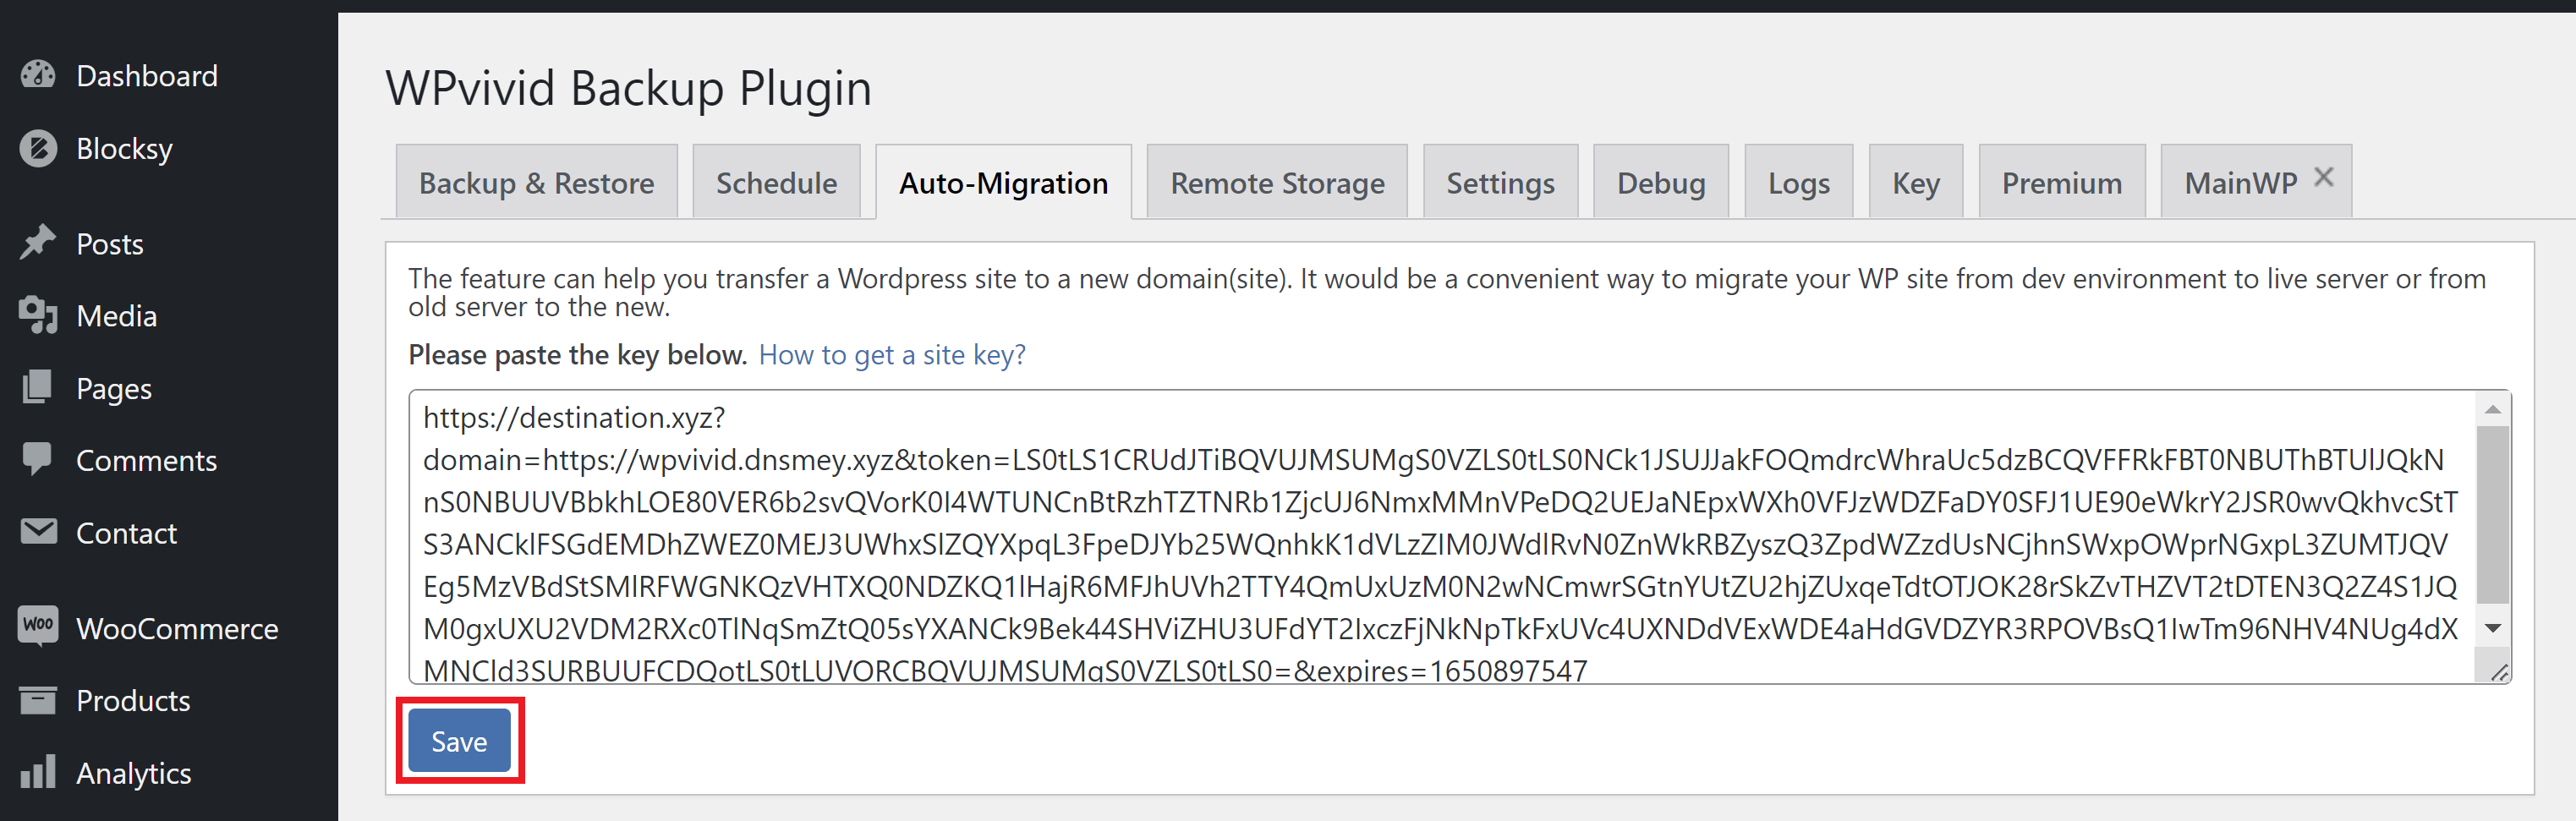
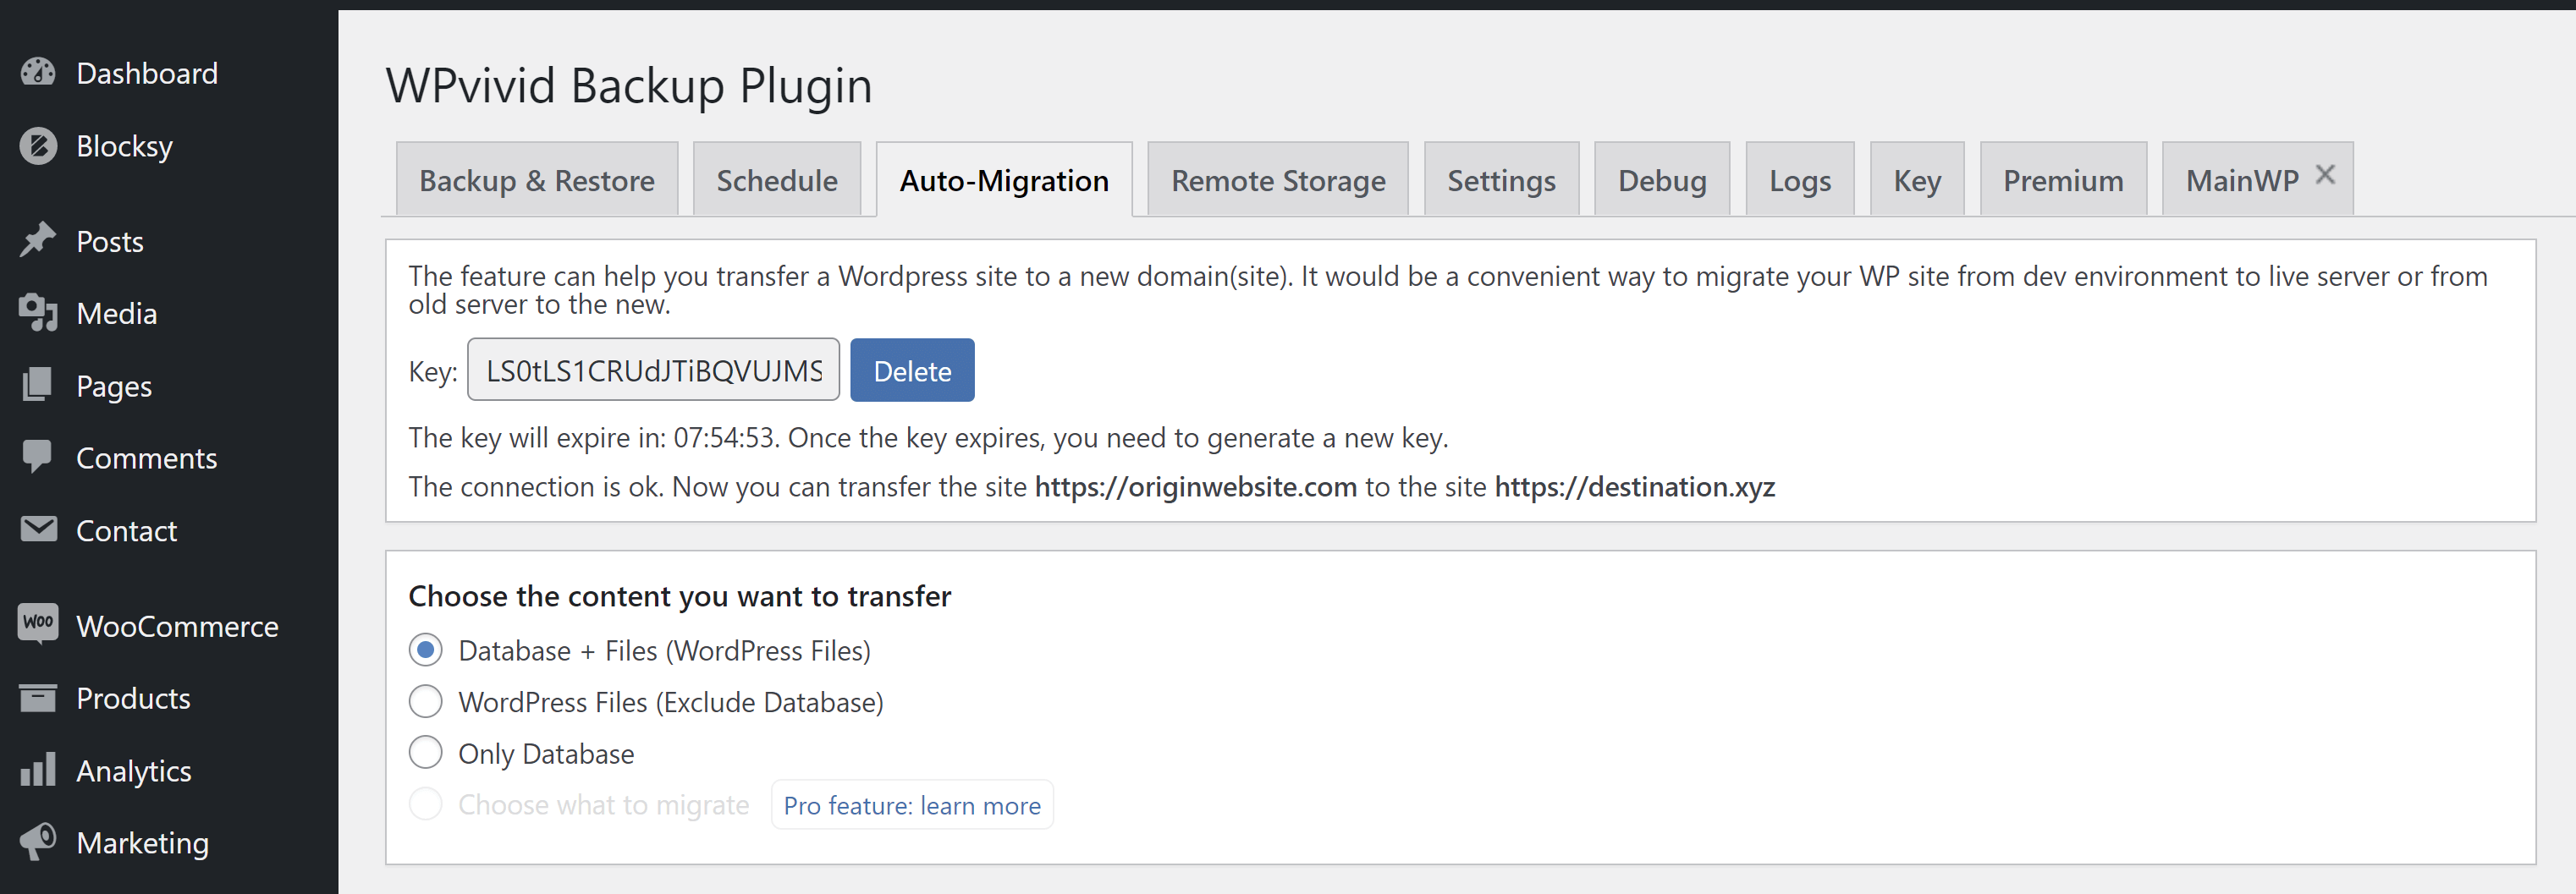
You’ll see confirmation that the sites have connected OK and the time limit remaining before the key expires.

Step 5. Start Your Migration

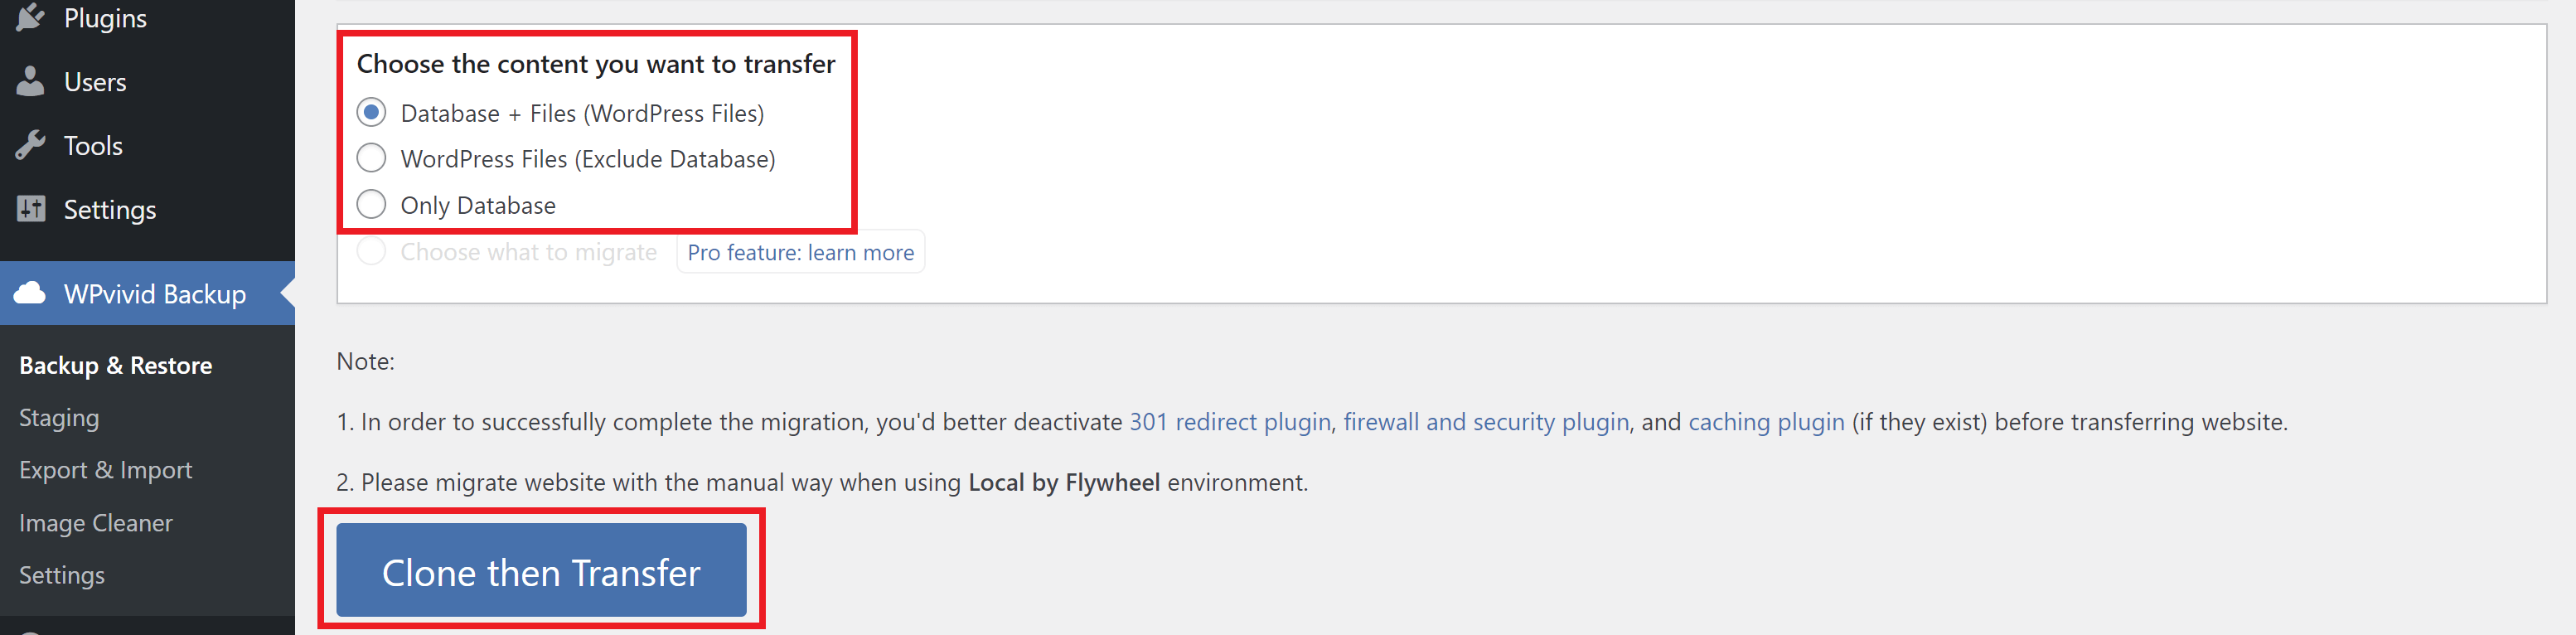
You have 3 options for your migration:

  • Database + Files (WordPress Files)
  • WordPress Files (Exclude Database)
  • Only Database

Choose the option you want to use and then click the large blue Clone then Transfer button to begin the migration:

You’ll see a progress update as the transfer takes place:

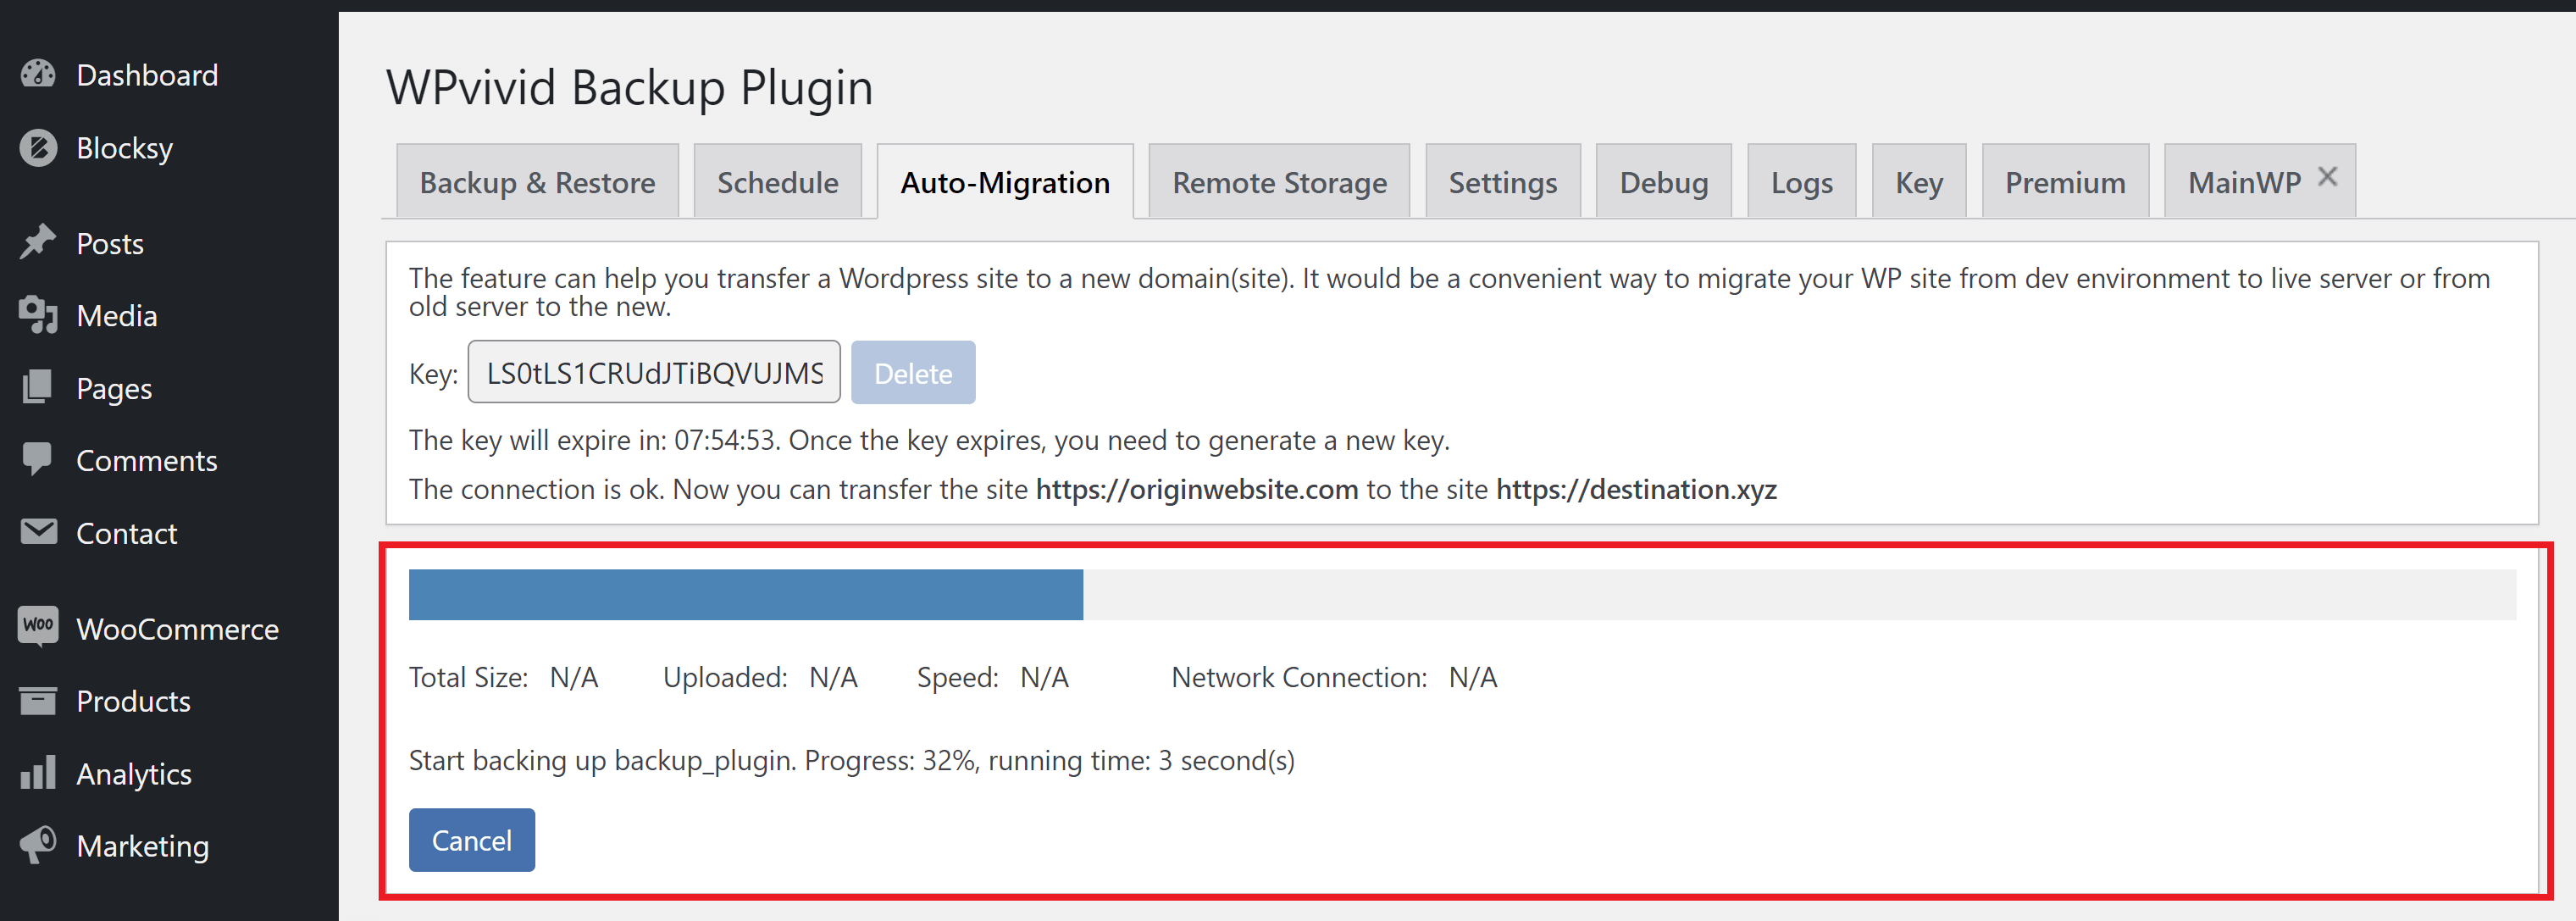
And then you’ll see a notification that reads:

“Transfer succeeded. Please scan the backup list on the destination site to display the backup, then restore the backup.”

Click OK and head back over to the destination website to complete the process.

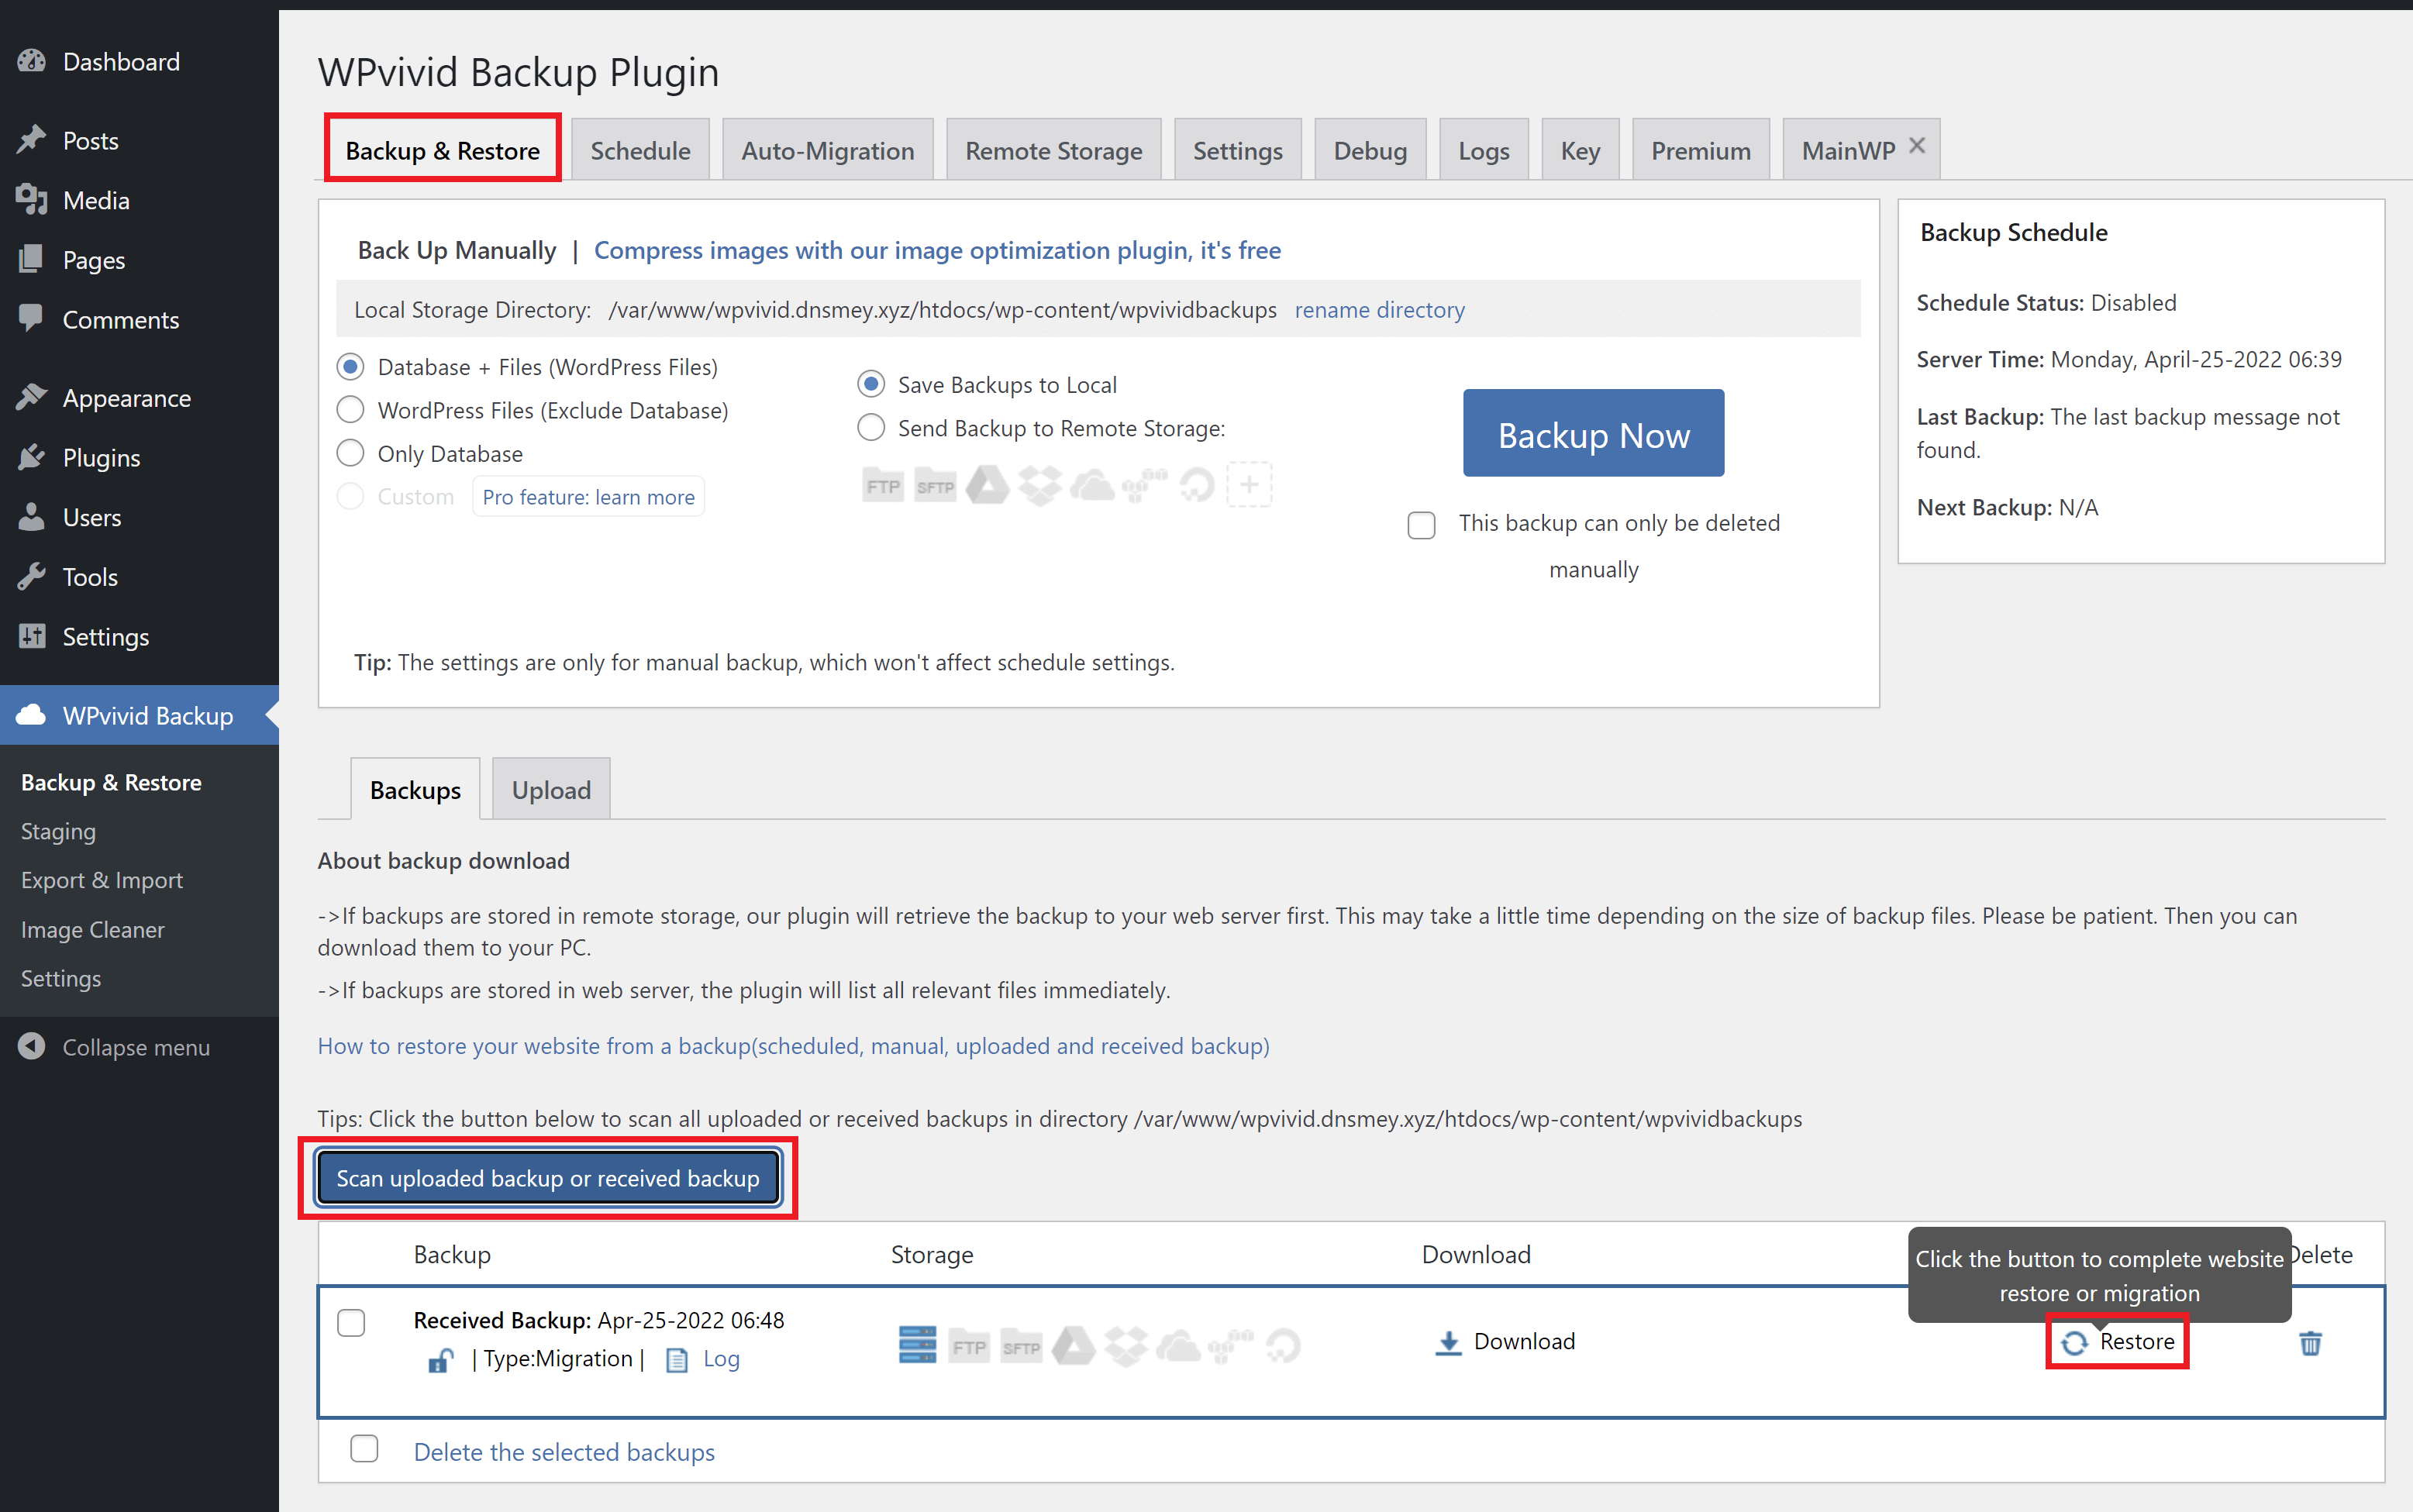
Step 6. Complete Your Migration

Inside your destination website, click through to the Backups & Restore tab, and scroll down to the bottom.

Here, click the “Scan uploaded backup or received backup” button to display the transferred backup, and then click Restore on the right-hand side:

This will open up the Restore tab, and here you can click the Restore button to complete the process. 

As noted on the page: Please do not close the page or switch to other pages when a restore task is running, as it could trigger some unexpected errors.

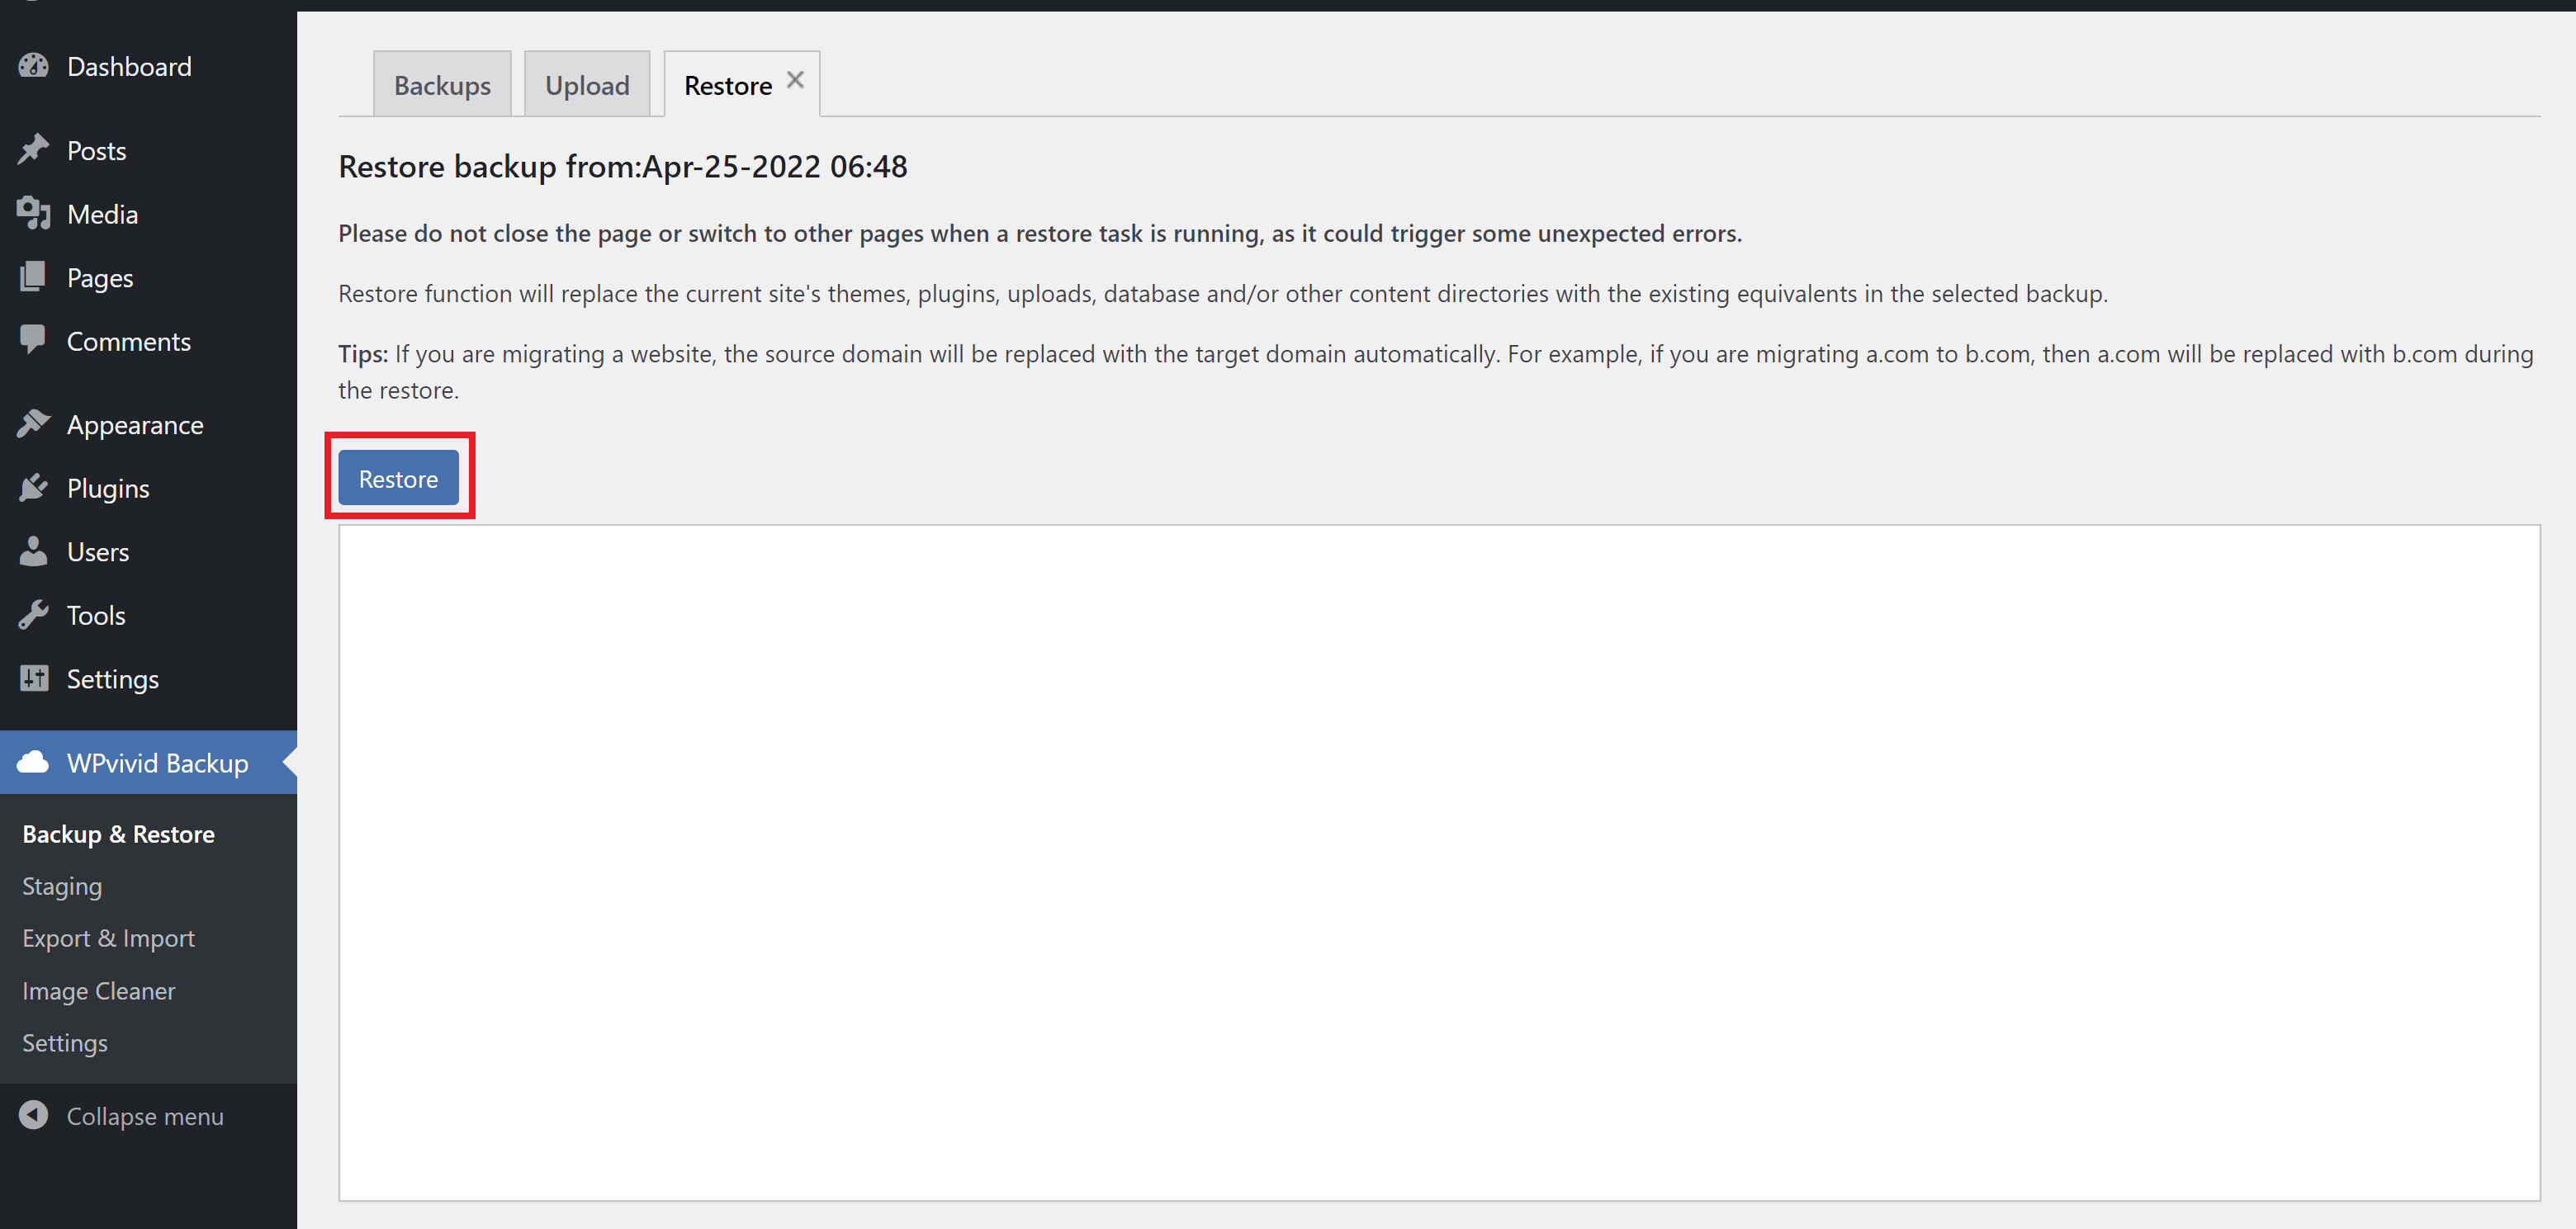
The restore process will begin and you can follow along with the output in the box below the button.

Once completed the site will notify with this message: “Restore completed successfully.

Restore Failures

If your website has failed to restore correctly or failed partway through the process, check your website's error log. There's likely a critical/fatal error due to a plugin or non-standard file in your WordPress codebase. Oftentimes, hosts will add their own must-use plugins, or in the case of Flywheel, modify your website's core codebase. This can cause fatal errors when migrated out of their hosting environment.
GridPane Logs – How to Find Them and When to Use Them

Step 7. Check Your Website

With the restore now complete, you’ll need to log in to your website.

Check over your website to ensure that everything is working as expected. Turn your disabled plugins back on, and then enable caching when you’re satisfied that the migration has been a success.

That’s a wrap!