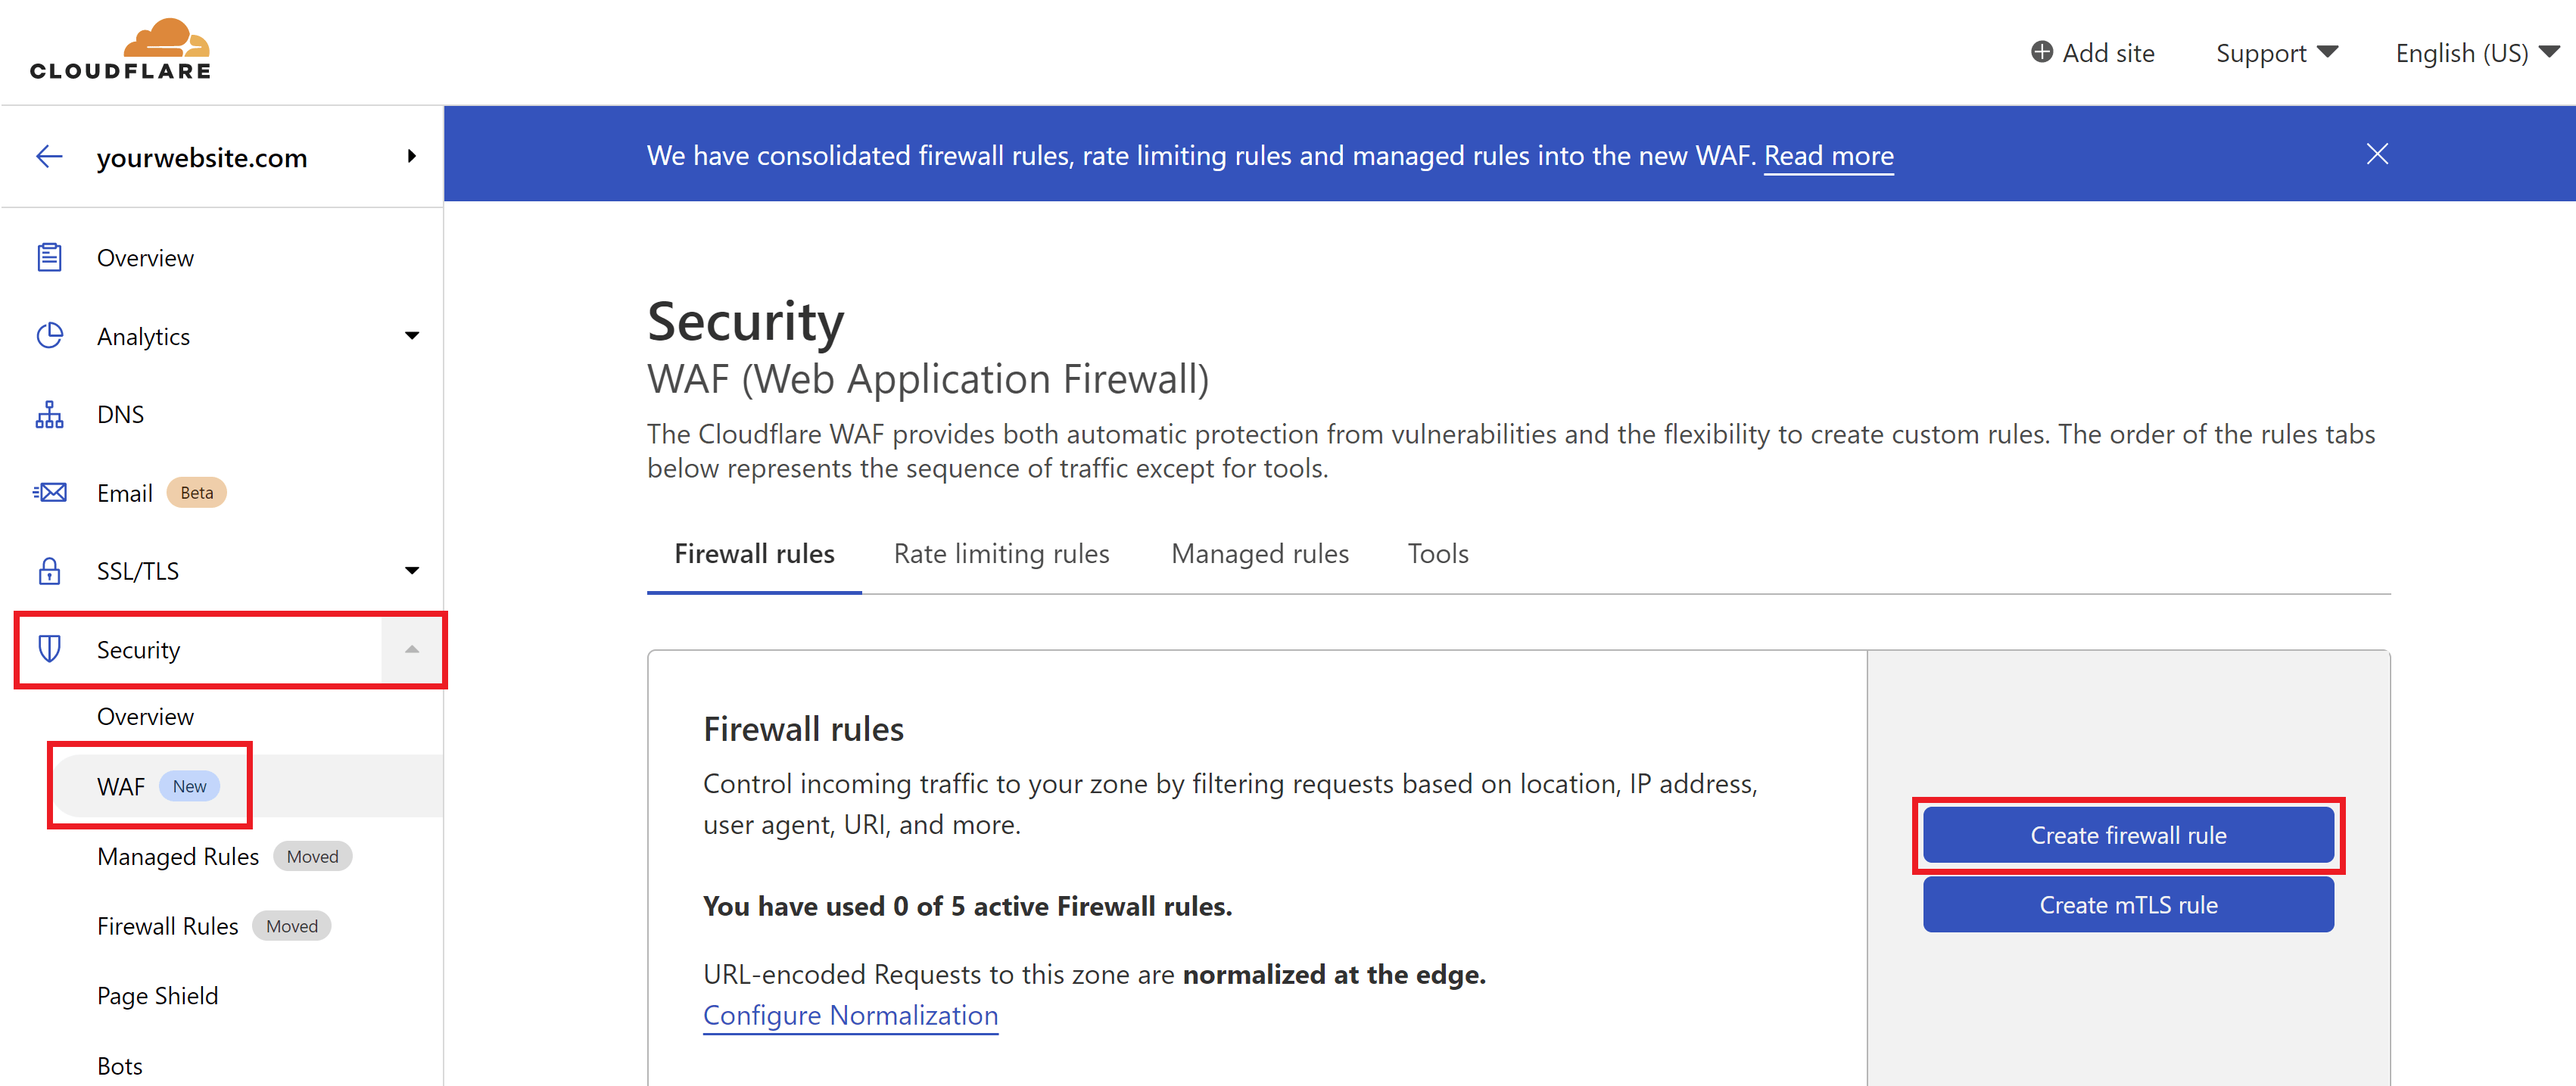
Step 1. Create a Cloudflare Firewall Rule
Inside your Cloudflare account choose your website and then click through to the Security > WAF page. Here click the Create a Firewall Rule button.
2. Configure Your Firewall Rule Expressions
First, give your rule a name that’s easy to identify.
Here is what the rule looks like (note that you can change “45jpfAY9RcNeFP” to something different):
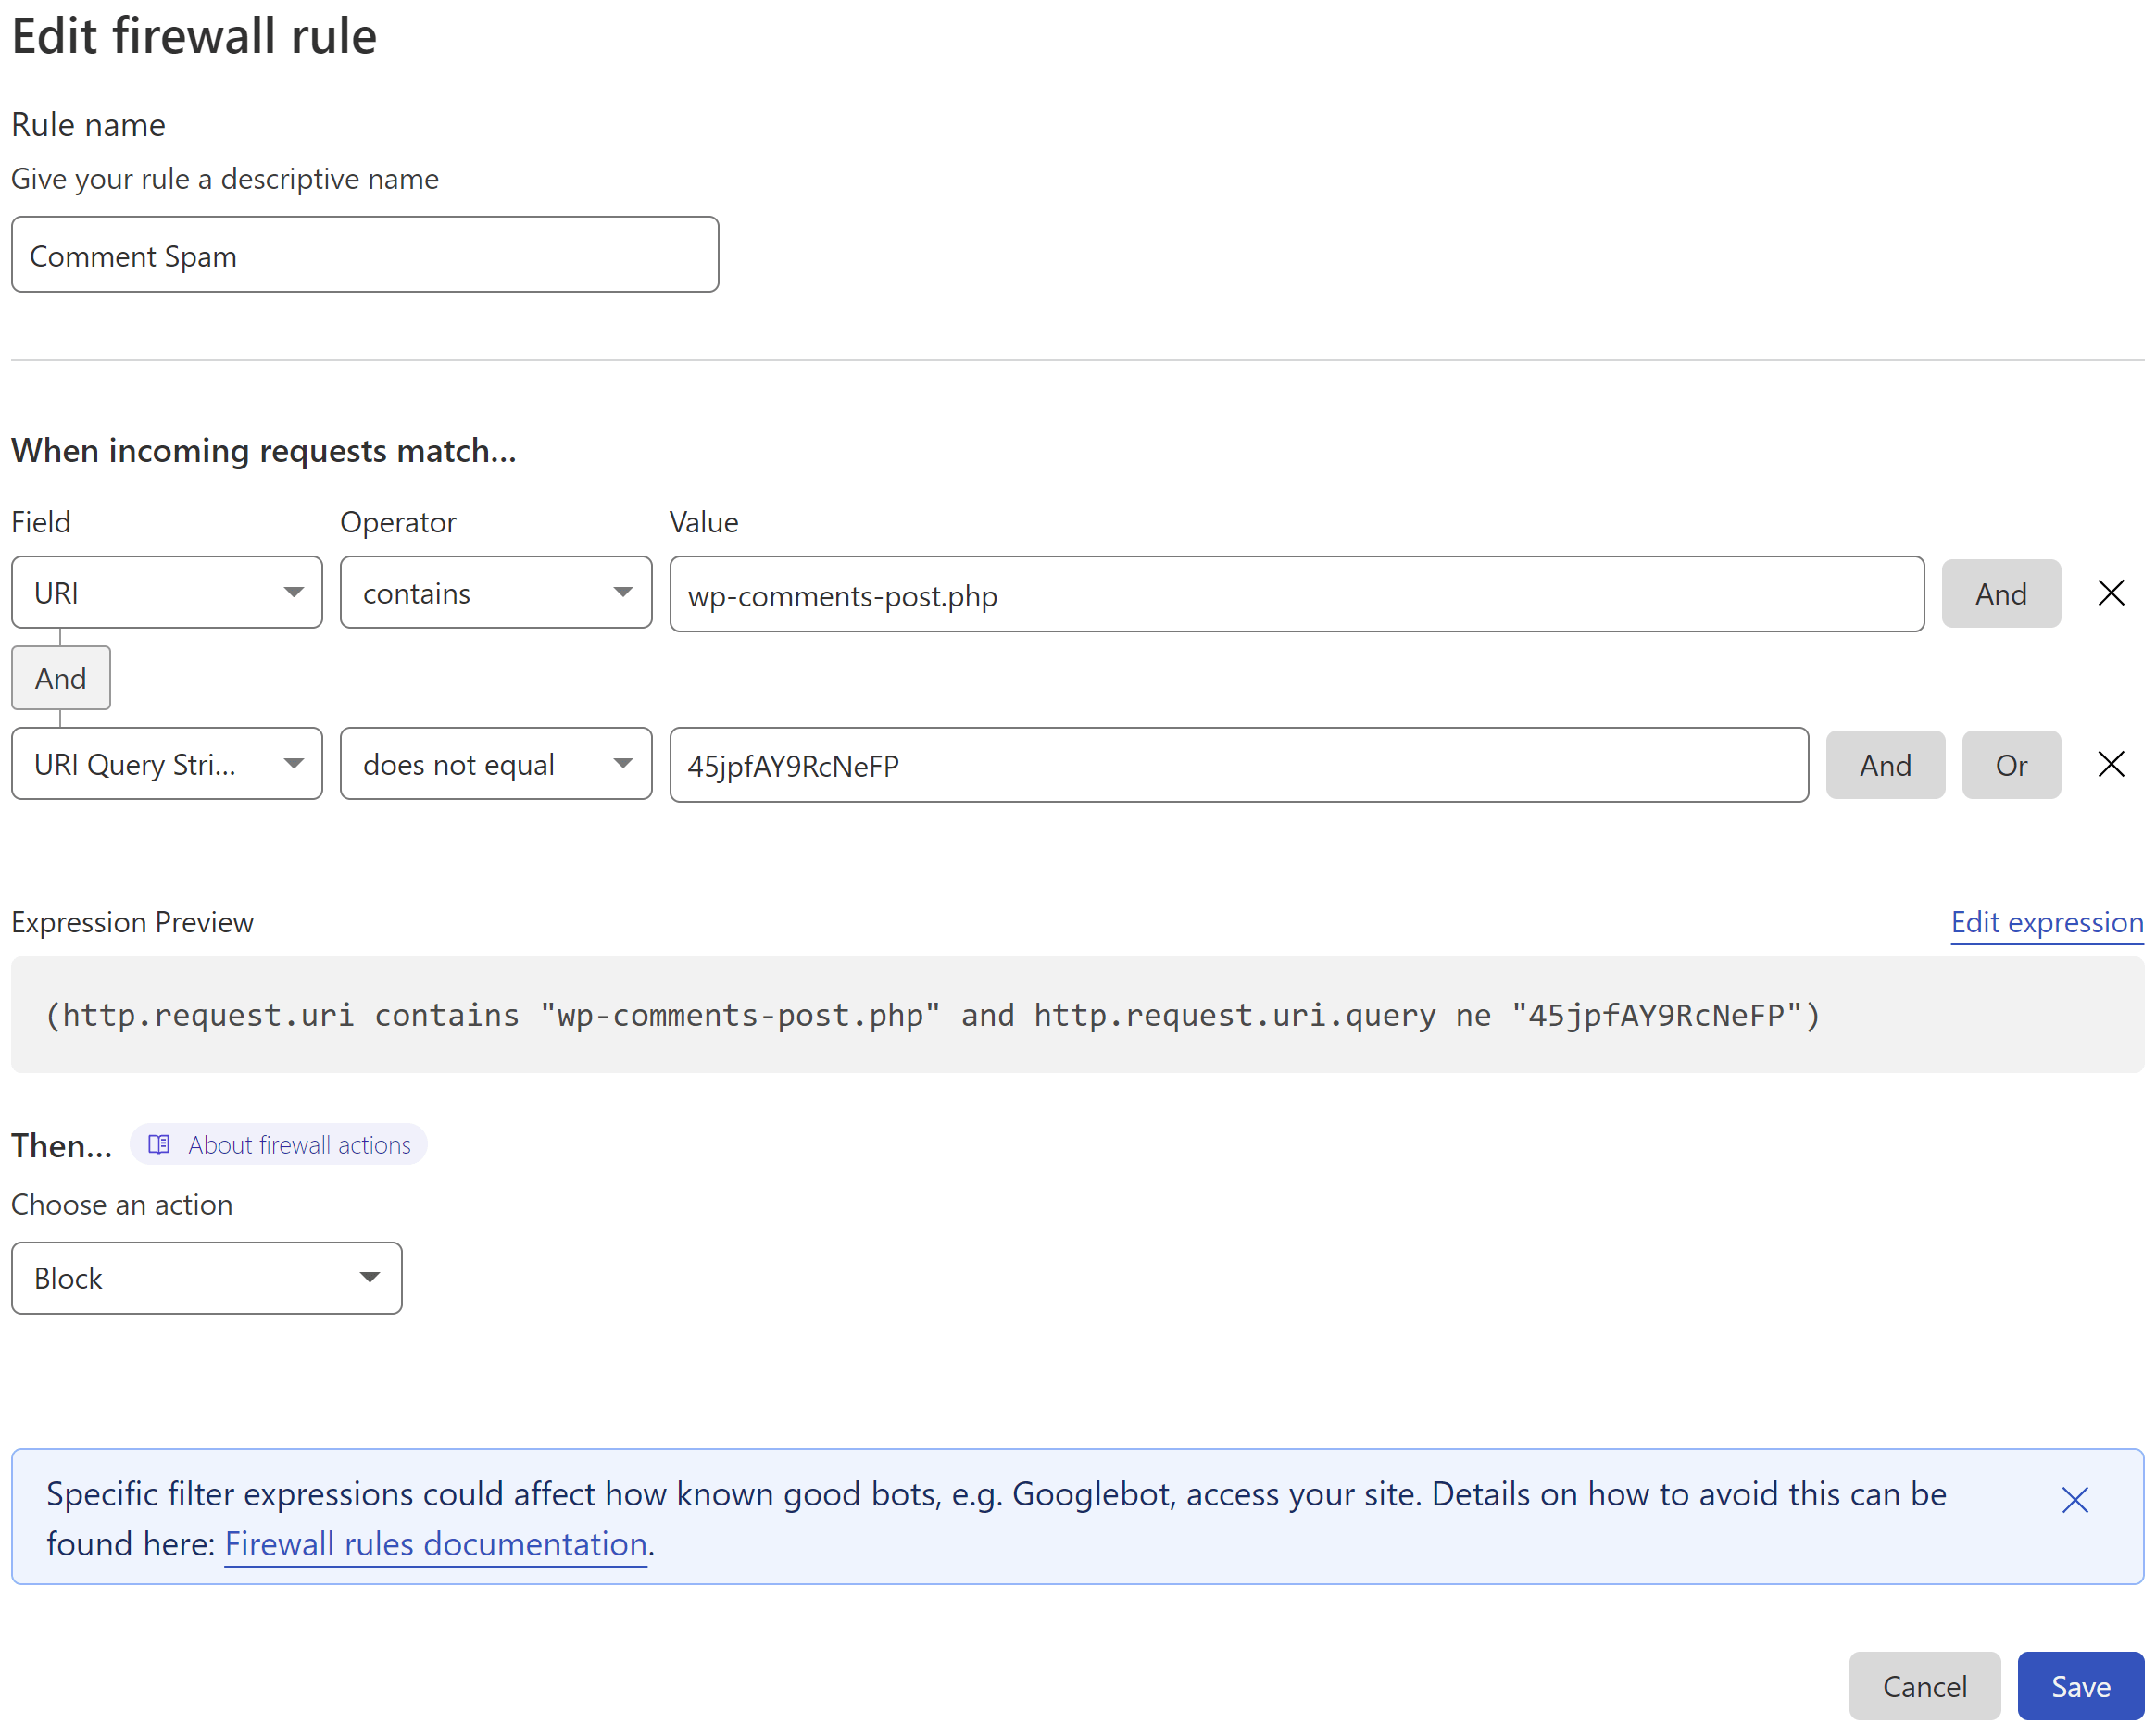
This states that if:
- the URI contains /wp-comments-post.php
- but the query string isn’t appended
- then perform ACTION (in this case Block)
3. Set the Action
Cloudflare can block all requests that break the rule outright.
4. Deploy Your Rule
When ready, click the Deploy button to set your new firewall rule live.
Also, ensure that you have orange clouds active on your A and CNAME records so that traffic to your site is passing through Cloudflare’s system.
Cloudflare will now block a ton of comment spam for you, and you can also include this in the block contact form rule in this article if you’ve already created it.
![]()
Step 1. Create a Cloudflare Firewall Rule
Inside your Cloudflare account choose your website and then click through to the Security > WAF page. Here click the Create a Firewall Rule button.
2. Configure Your Firewall Rule Expressions
First, give your rule a name that’s easy to identify.
Here is what my rule looks like:
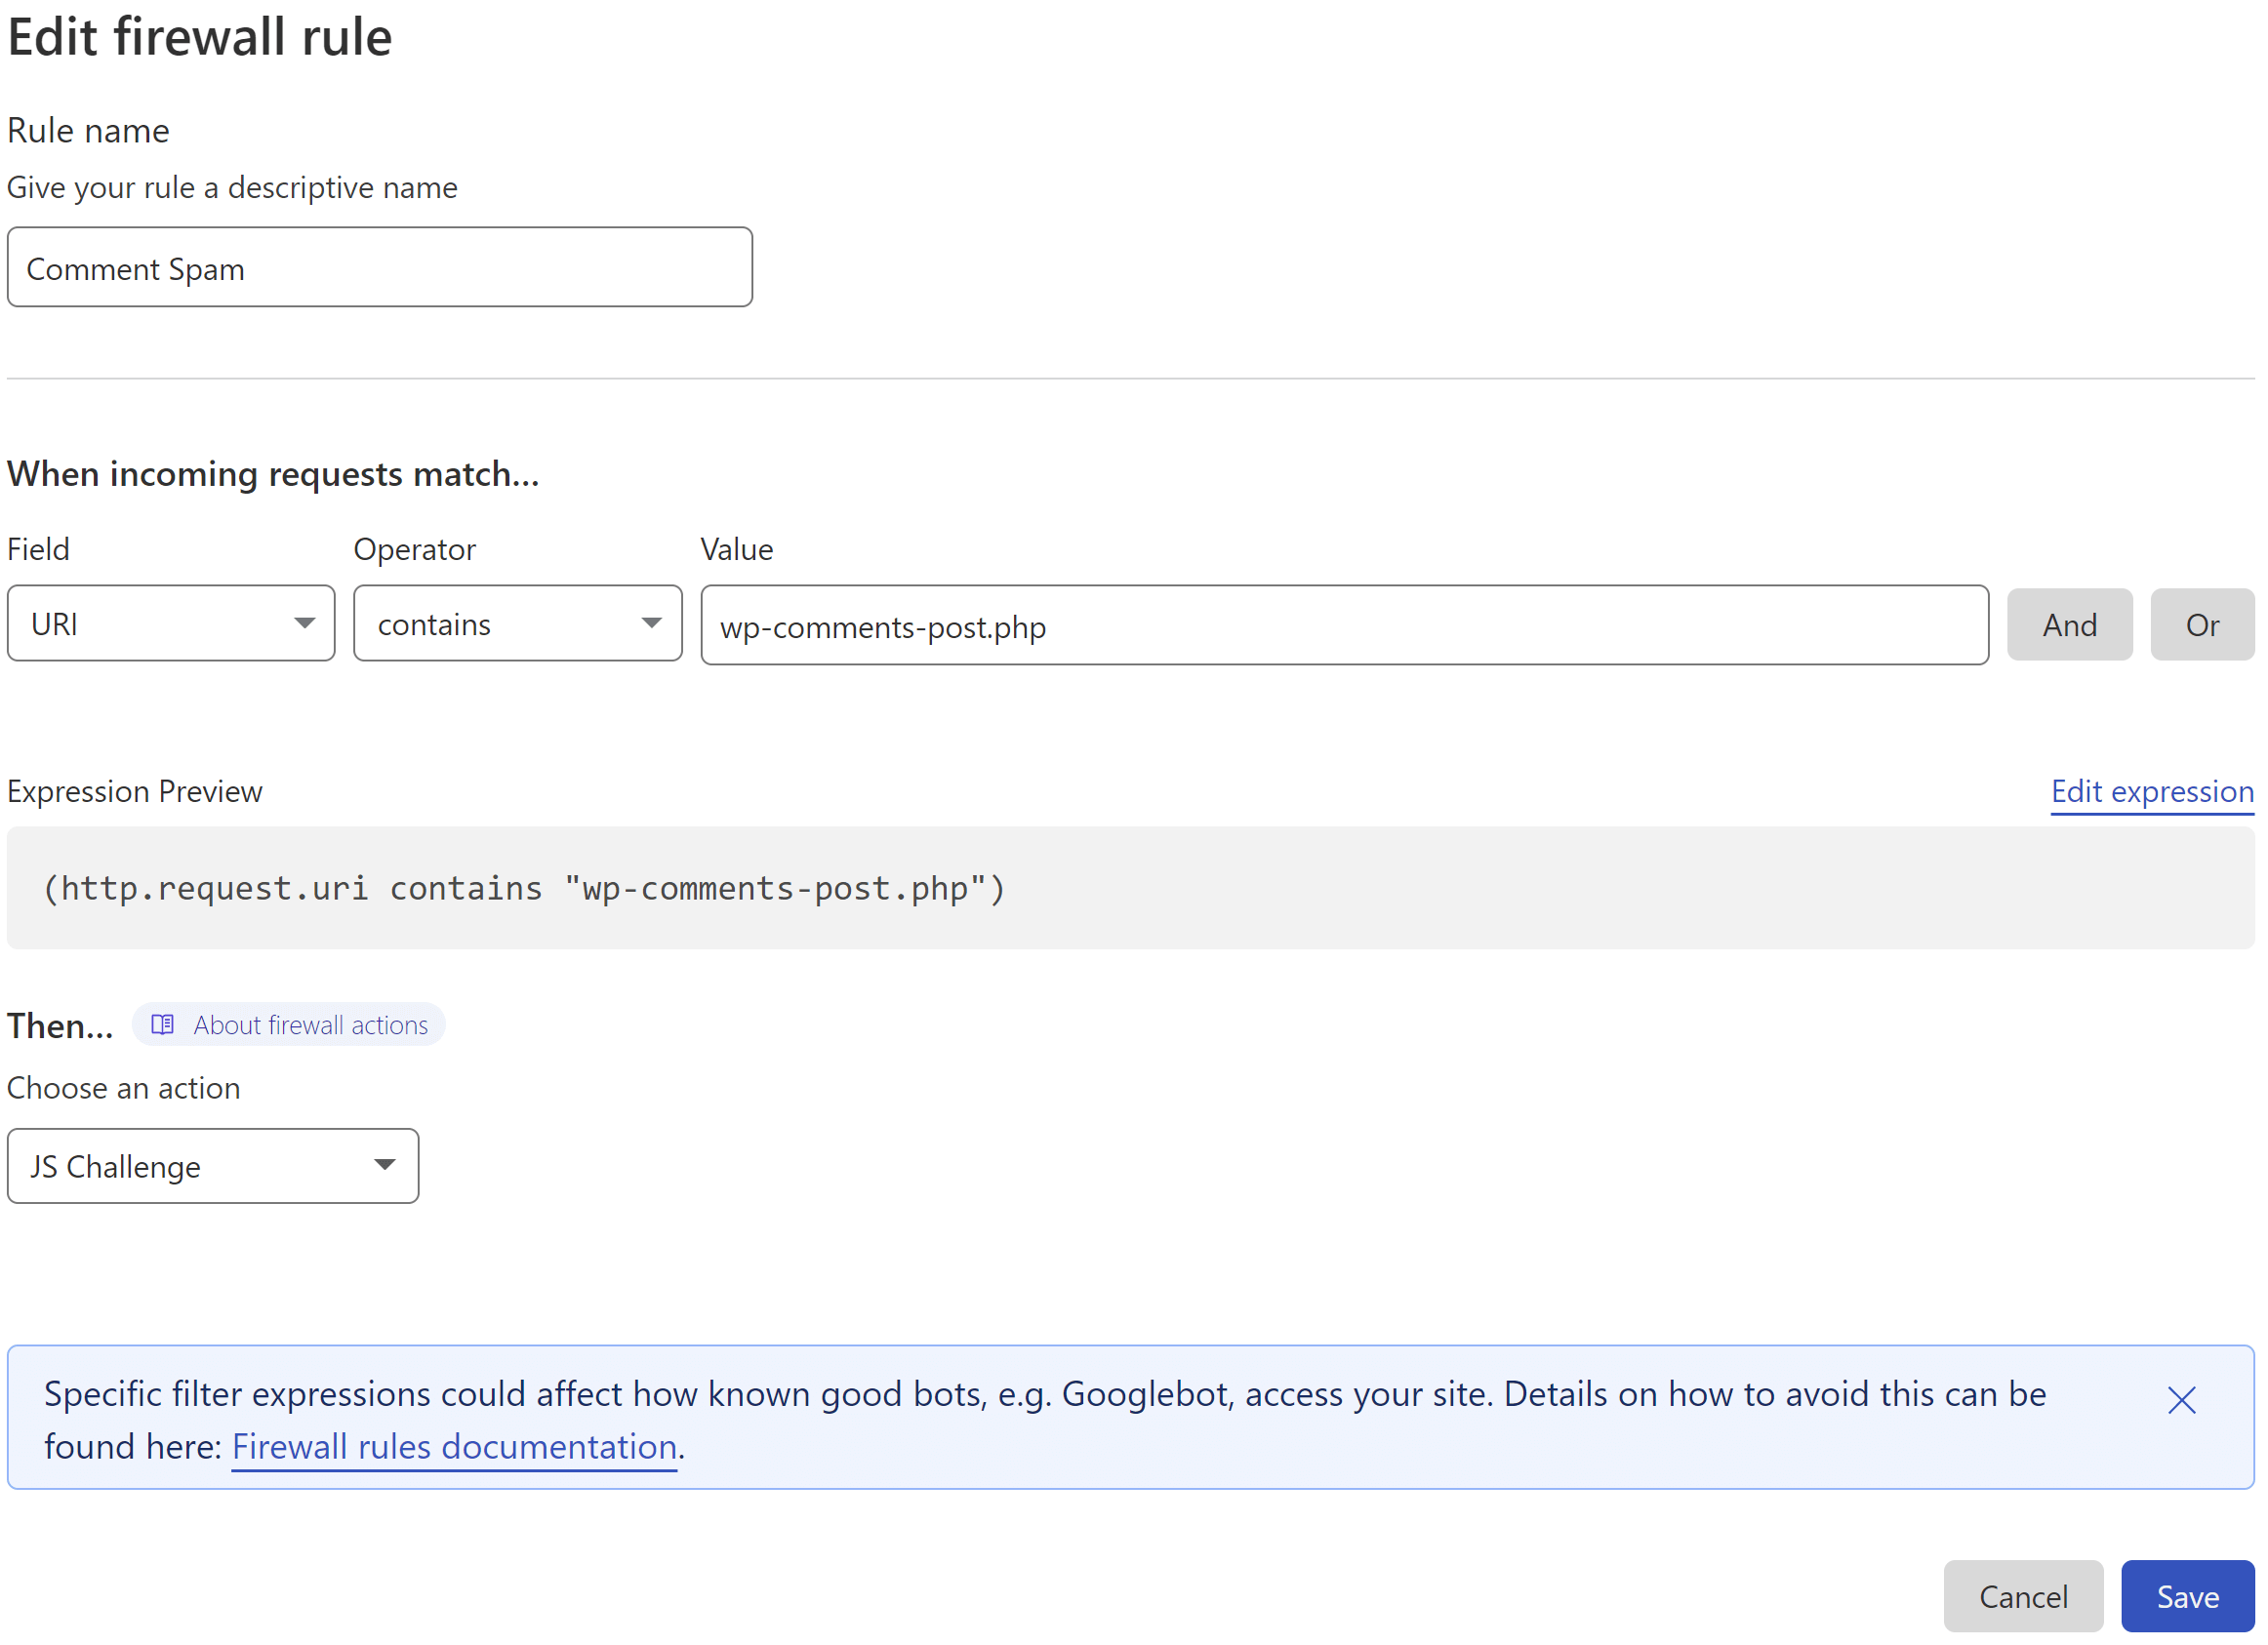
This states that if:
- the URI contains /wp-comments-post.php
- then perform ACTION (see below)
3. Set the Action
Cloudflare offers two methods that could be utilized here. One is their “Managed Challenge” and the other is their JS challenge. As the JS challenge only takes place after a visitor has browsed the page and submitted their comment, the very brief Cloudflare challenge page that pops up doesn’t interfere with the users actions beforehand.
4. Deploy Your Rule
When ready, click the Deploy button to set your new firewall rule live.
Also, ensure that you have orange clouds active on your A and CNAME records so that traffic to your site is passing through Cloudflare’s system.
Cloudflare will now block a ton of comment spam for you, and you can also include this in the block contact form rule in this article if you’ve already created it.
Step 1. Create a Cloudflare Firewall Rule
Navigate to the Security > WAF page, and click the Create Firewall Rule button.
Step 2. Configure Your Firewall Rule Expression
First, give your rule an easy to identify name.
Here’s what the rule looks like:

This states that if:
- The URI contains either /wp-admin/admin-ajax.php or /wp-comments-post.php
- and the request method is POST
- and the referrer does not contain your website URL
- then perform ACTION (block in this case)
(http.request.uri contains "/wp-admin/admin-ajax.php" and http.request.method eq "POST" and not http.referer contains "yourwebsitehere.com") or (http.request.uri contains "/wp-comments-post.php" and http.request.method eq "POST" and not http.referer contains "yourwebsitehere.com")
Next, inside your Firewall rule, click “Edit Expression” and paste the above.

Step 3. Set the Action and Deploy Your Rule
Cloudflare can block all requests that break the rule outright.
When ready, click the Deploy button.
Make use of the Comment Blacklist
WordPress natively includes functionality that will allow you to add your own blacklist to prevent all types of spam. An excellent resource to get started with this is the Splorp WordPress Comment Blacklist:
https://github.com/splorp/wordpress-comment-blacklist
The GitHub page linked above contains further info on how it was created and considerations to take into account. It is well worth the read, and the list can be used as an excellent foundation for your own list if you want to tweak it.
Adding the Blacklist to Your Website
To add the blacklist to your website, head to your Dashboard > Settings > Discussion. Here you’ll find a section called “Disallowed Comment Keys“.
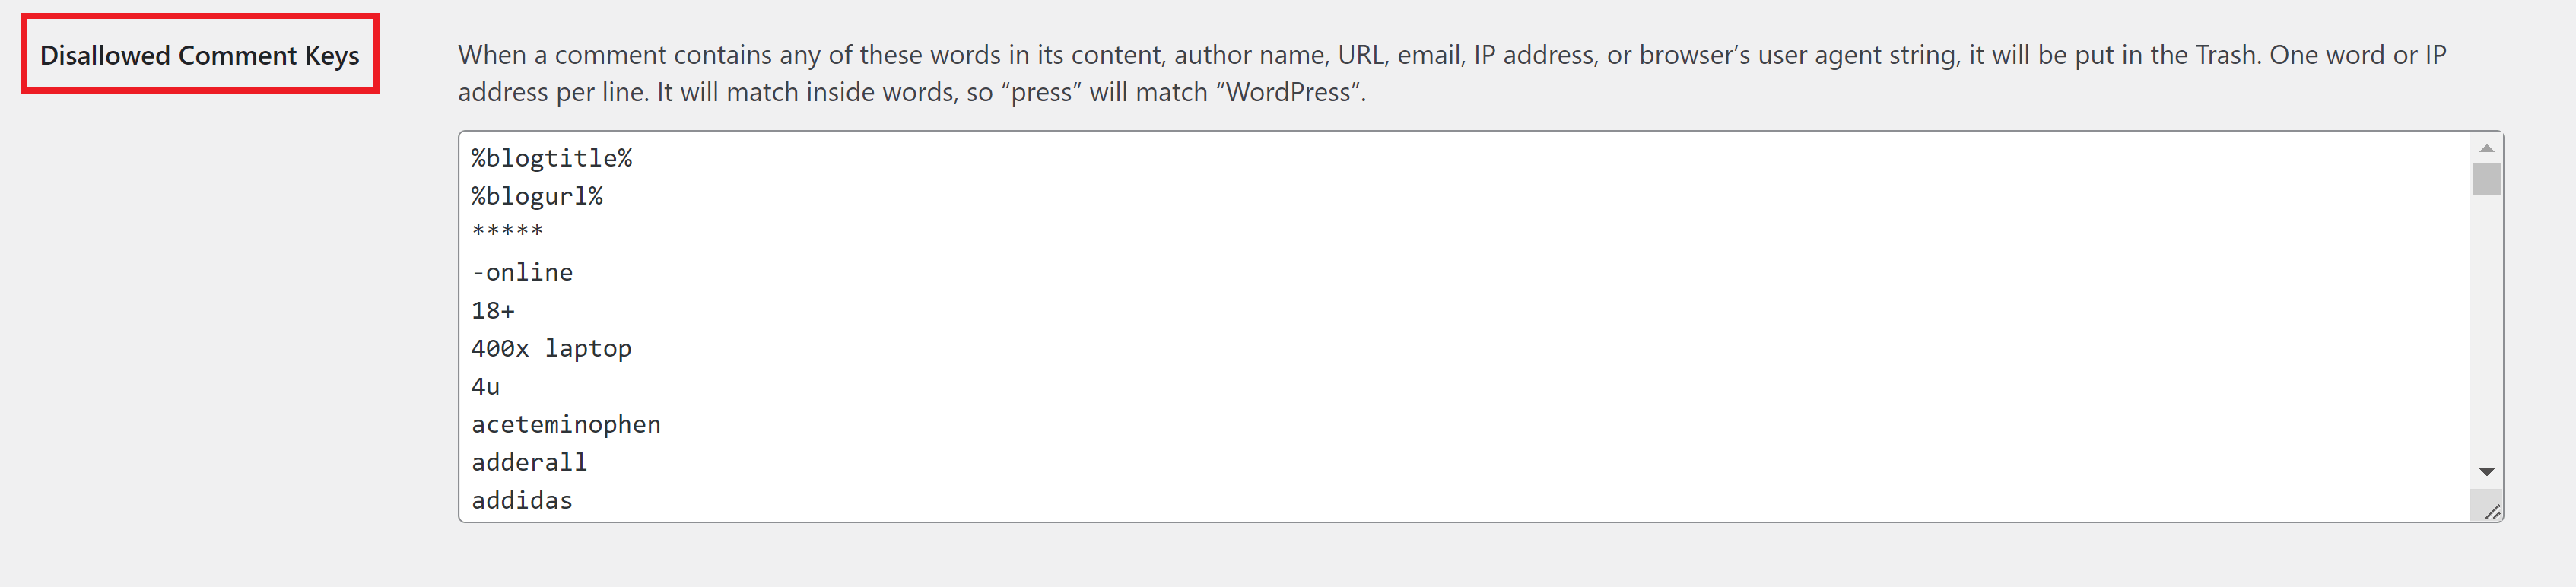
Paste your blacklist here, scroll down to the bottom of the page, and click the Save Changes button.
Combine this method 1 above and you will immediately reduce spam comments by a significant amount.