Introduction
This article will walk you through how to setup Smush to serve webp files on specific websites on your GridPane servers.
You can also checkout the official Smush documentation here:
https://wpmudev.com/blog/local-webp-support-smush/#NGINX
Table of Contents
Step 1. SSH into your server
Please see the following articles to get started:
Step 1. Generate your SSH Key
Step 2. Add your SSH Key to GridPane (also see Add default SSH Keys)
Step 3. Connect to your server by SSH as Root user (we like and use Termius)
Step 2: Create webp-mappings.conf
We first need to create an Nginx configuration (aka config / .conf) file so that our server can serve WebP files. This first config makes use of the HTTP Context which applies server-wide.
HTTP Context includes the following:
http {
  include /etc/nginx/common/basics.conf;
  #include /etc/nginx/common/geoip.conf;
  include /etc/nginx/common/limits.conf;
  include /etc/nginx/mime.types;
  include /etc/nginx/common/ssl.conf;
  include /etc/nginx/common/logging.conf;
  include /etc/nginx/common/6g-mappings.conf;
  include /etc/nginx/conf.d/*.conf;
  include /etc/nginx/extra.d/http-context.conf;
  include /etc/nginx/sites-enabled/*;
}
We’ll make use of the include highlighted in red to create our new config, which ensures that any .conf file added to the /etc/nginx/conf.d/ directory applies server-wide.
This step will only need to be set up once per server. If you’re adding Smush to more than one site, you can skip this step for your 2nd site onwards.
So, to summarise, we’ll create a file called webp-mappings.conf in the /etc/nginx/conf.d/ directory.
Create webp-mappings.conf
Create the file with the following command:
nano /etc/nginx/conf.d/webp-mappings.conf
Paste the following block of code:
map $http_accept $webp_suffix {
default "";
"~*webp" ".webp";
}
Now, press Ctrl+O and then Enter to save the file. Then Ctrl+X to exit nano.
Step 3: Create webp-main-context.conf
We now have two options for how to proceed. We can apply our WebP settings server-wide or just on one specific site. If you’re using Smush on more than one website, it may be easier and more convenient to simply apply the changes server-wide. We’ll look at both options below.
Option 1. Create a Server-Wide Configuration
The code supplied by Smush only works on individual sites. We’ve modified it so that you can set it live for all your sites in one go and never need to worry about it again.
To set this up, we need to create a file called smush-webp-main-context.conf in the /etc/nginx/extra.d/ directory.
Create the file with the following command:
nano /etc/nginx/extra.d/smush-webp-main-context.conf
Paste the following block of code:
location ~* "wp-content\/(uploads\/)(.*.(?:png|jpe?g))" {
add_header Vary Accept;
set $image_path $2;
if (-f "/var/www/$host/htdocs/wp-content/smush-webp/disable_smush_webp") {
break;
}
if ($http_accept !~* "webp") {
break;
}
try_files /wp-content/smush-webp/$image_path.webp $uri =404;
}
Now Ctrl+O and then press Enter to save the file. Then Ctrl+X to exit nano. You can now proceed to step 4.
Option 2. Create a Site-Specific Configuration
For a singular website, we need to create a file called smush-webp-main-context.conf in /var/www/site.url/nginx.
Create the file with the following, switching out “site.url” with your website’s domain:
nano /var/www/site.url/nginx/smush-webp-main-context.conf
Paste the following block of code, again switching out “site.url” with your website’s domain:
# BEGIN SMUSH-WEBP
location ~* "wp-content\/(uploads\/)(.*.(?:png|jpe?g))" {
add_header Vary Accept;
set $image_path $2;
if (-f "/var/www/site.url/htdocs/wp-content/smush-webp/disable_smush_webp") {
break;
}
if ($http_accept !~* "webp") {
break;
}
try_files /wp-content/smush-webp/$image_path.webp $uri =404;
}
# END SMUSH-WEBP
Now, press Ctrl+O and then Enter to save the file. Then Ctrl+X to exit nano.
Staging Push Note
When pushing from live to staging or vice versa, the site.url in the site-specific config will need to be edited to the correct website (e.g. staging.site.url), otherwise the $root will be incorrect and WebP files will cease to work.
Step 4: Check and reload Nginx
Finally, we need to check if the conf files are correct then reload Nginx.
Test your Nginx syntax with:
nginx -t
If there are no errors present, reload nginx with the following command:
gp ngx reload
PHP Notice
If WebP images still aren't being served as you expected, please double check your PHP version. If you're still on 7.2 or 7.3, upgrading to 7.4 is both a good idea and may help resolve this issue for you.
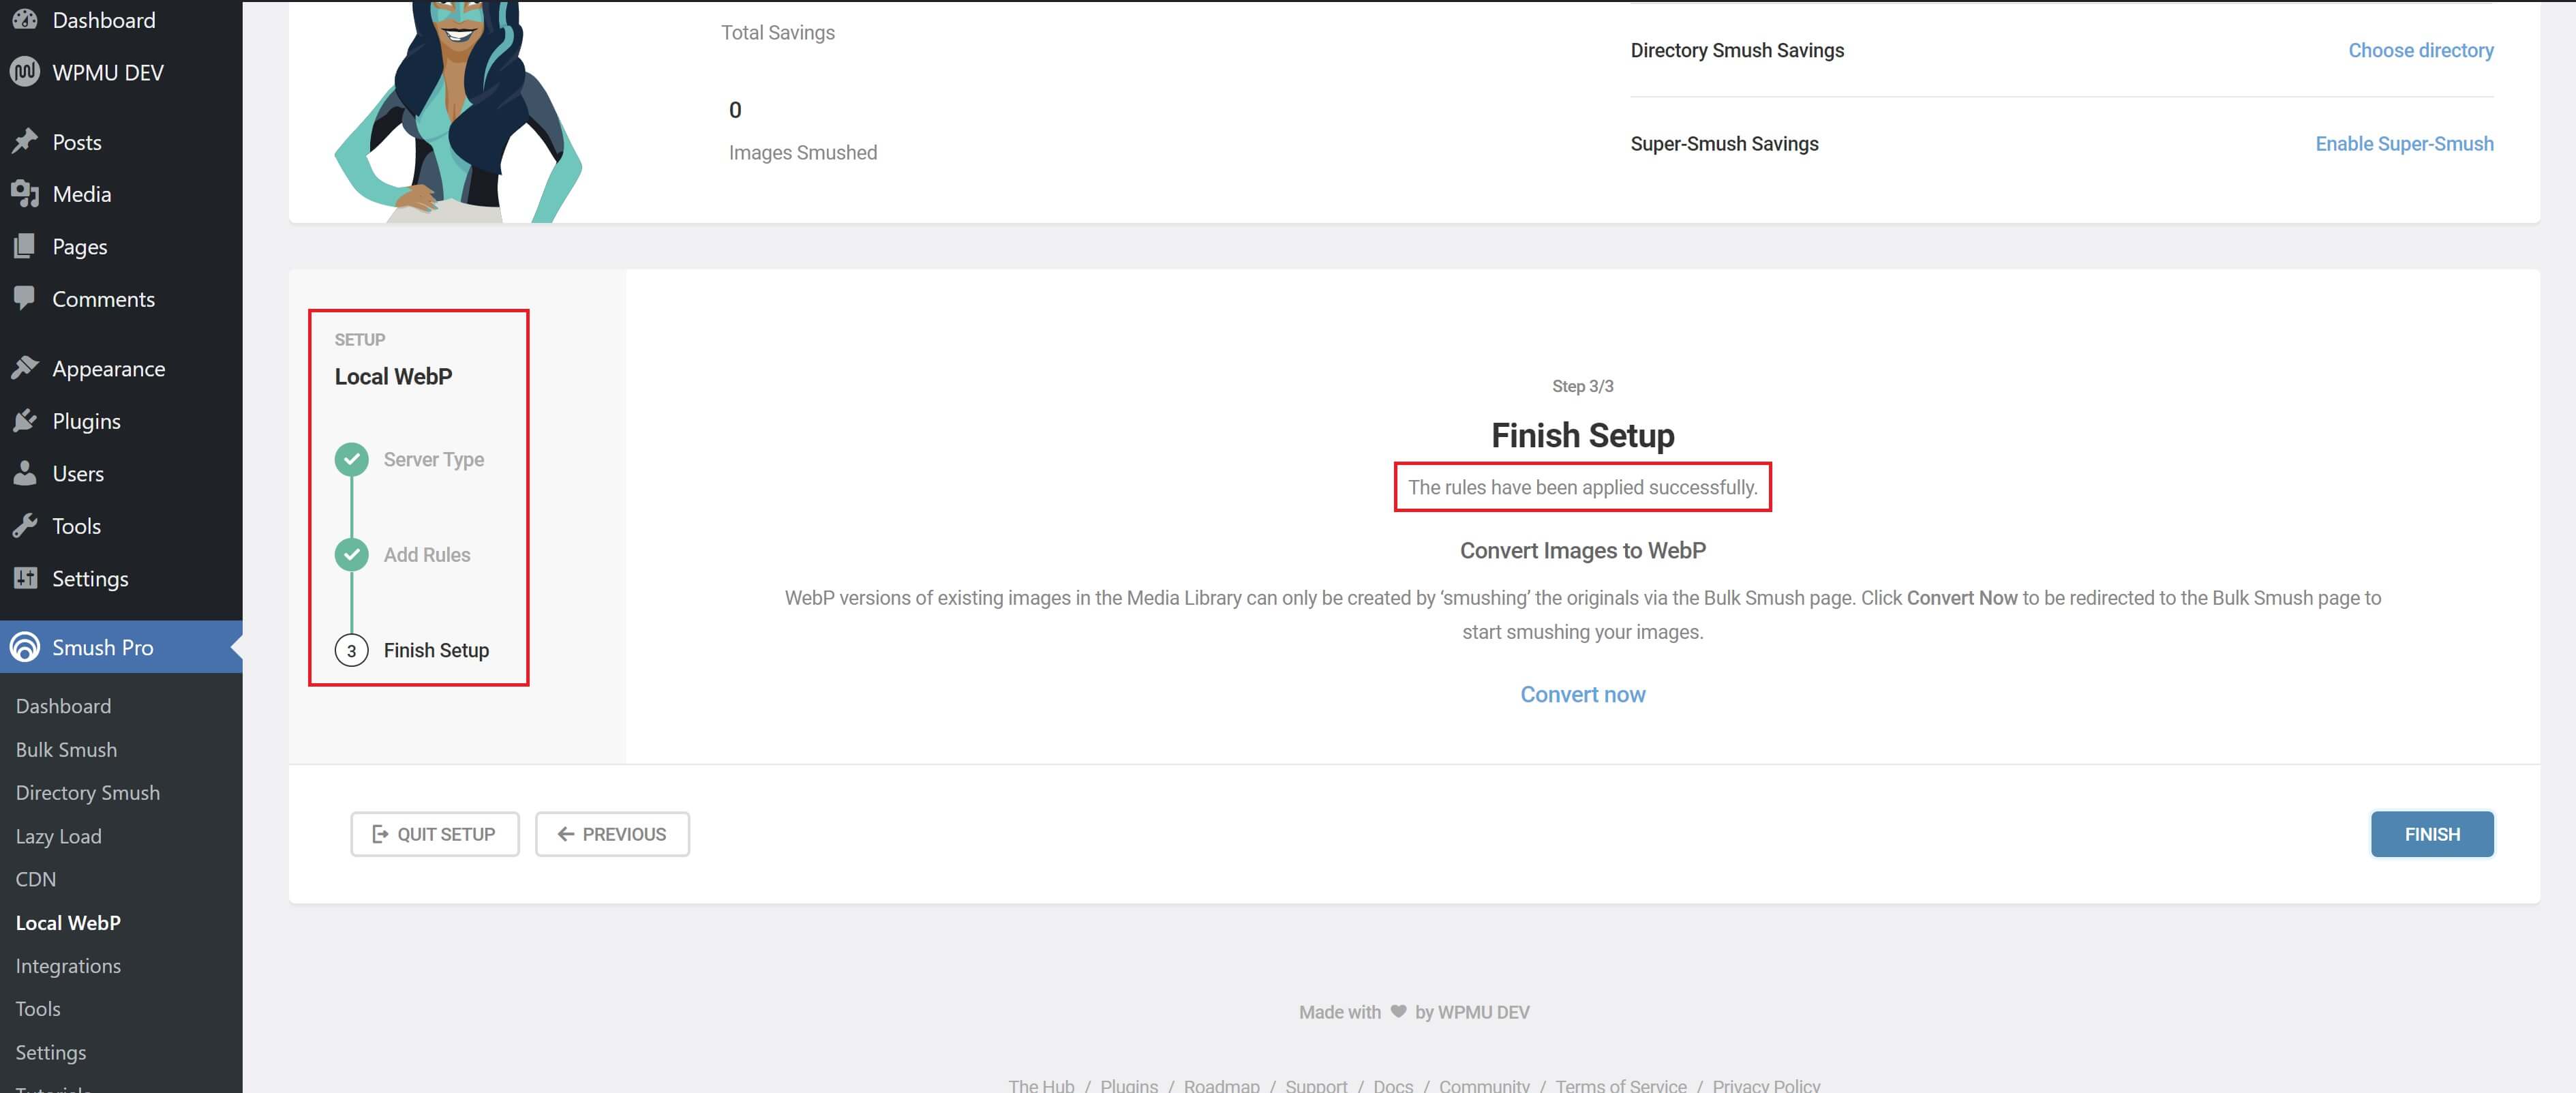
Step 5: Check Your Work
Back inside your website in the Local WebP section of Smush, you can confirm your connection is set up. You’ll see the following:
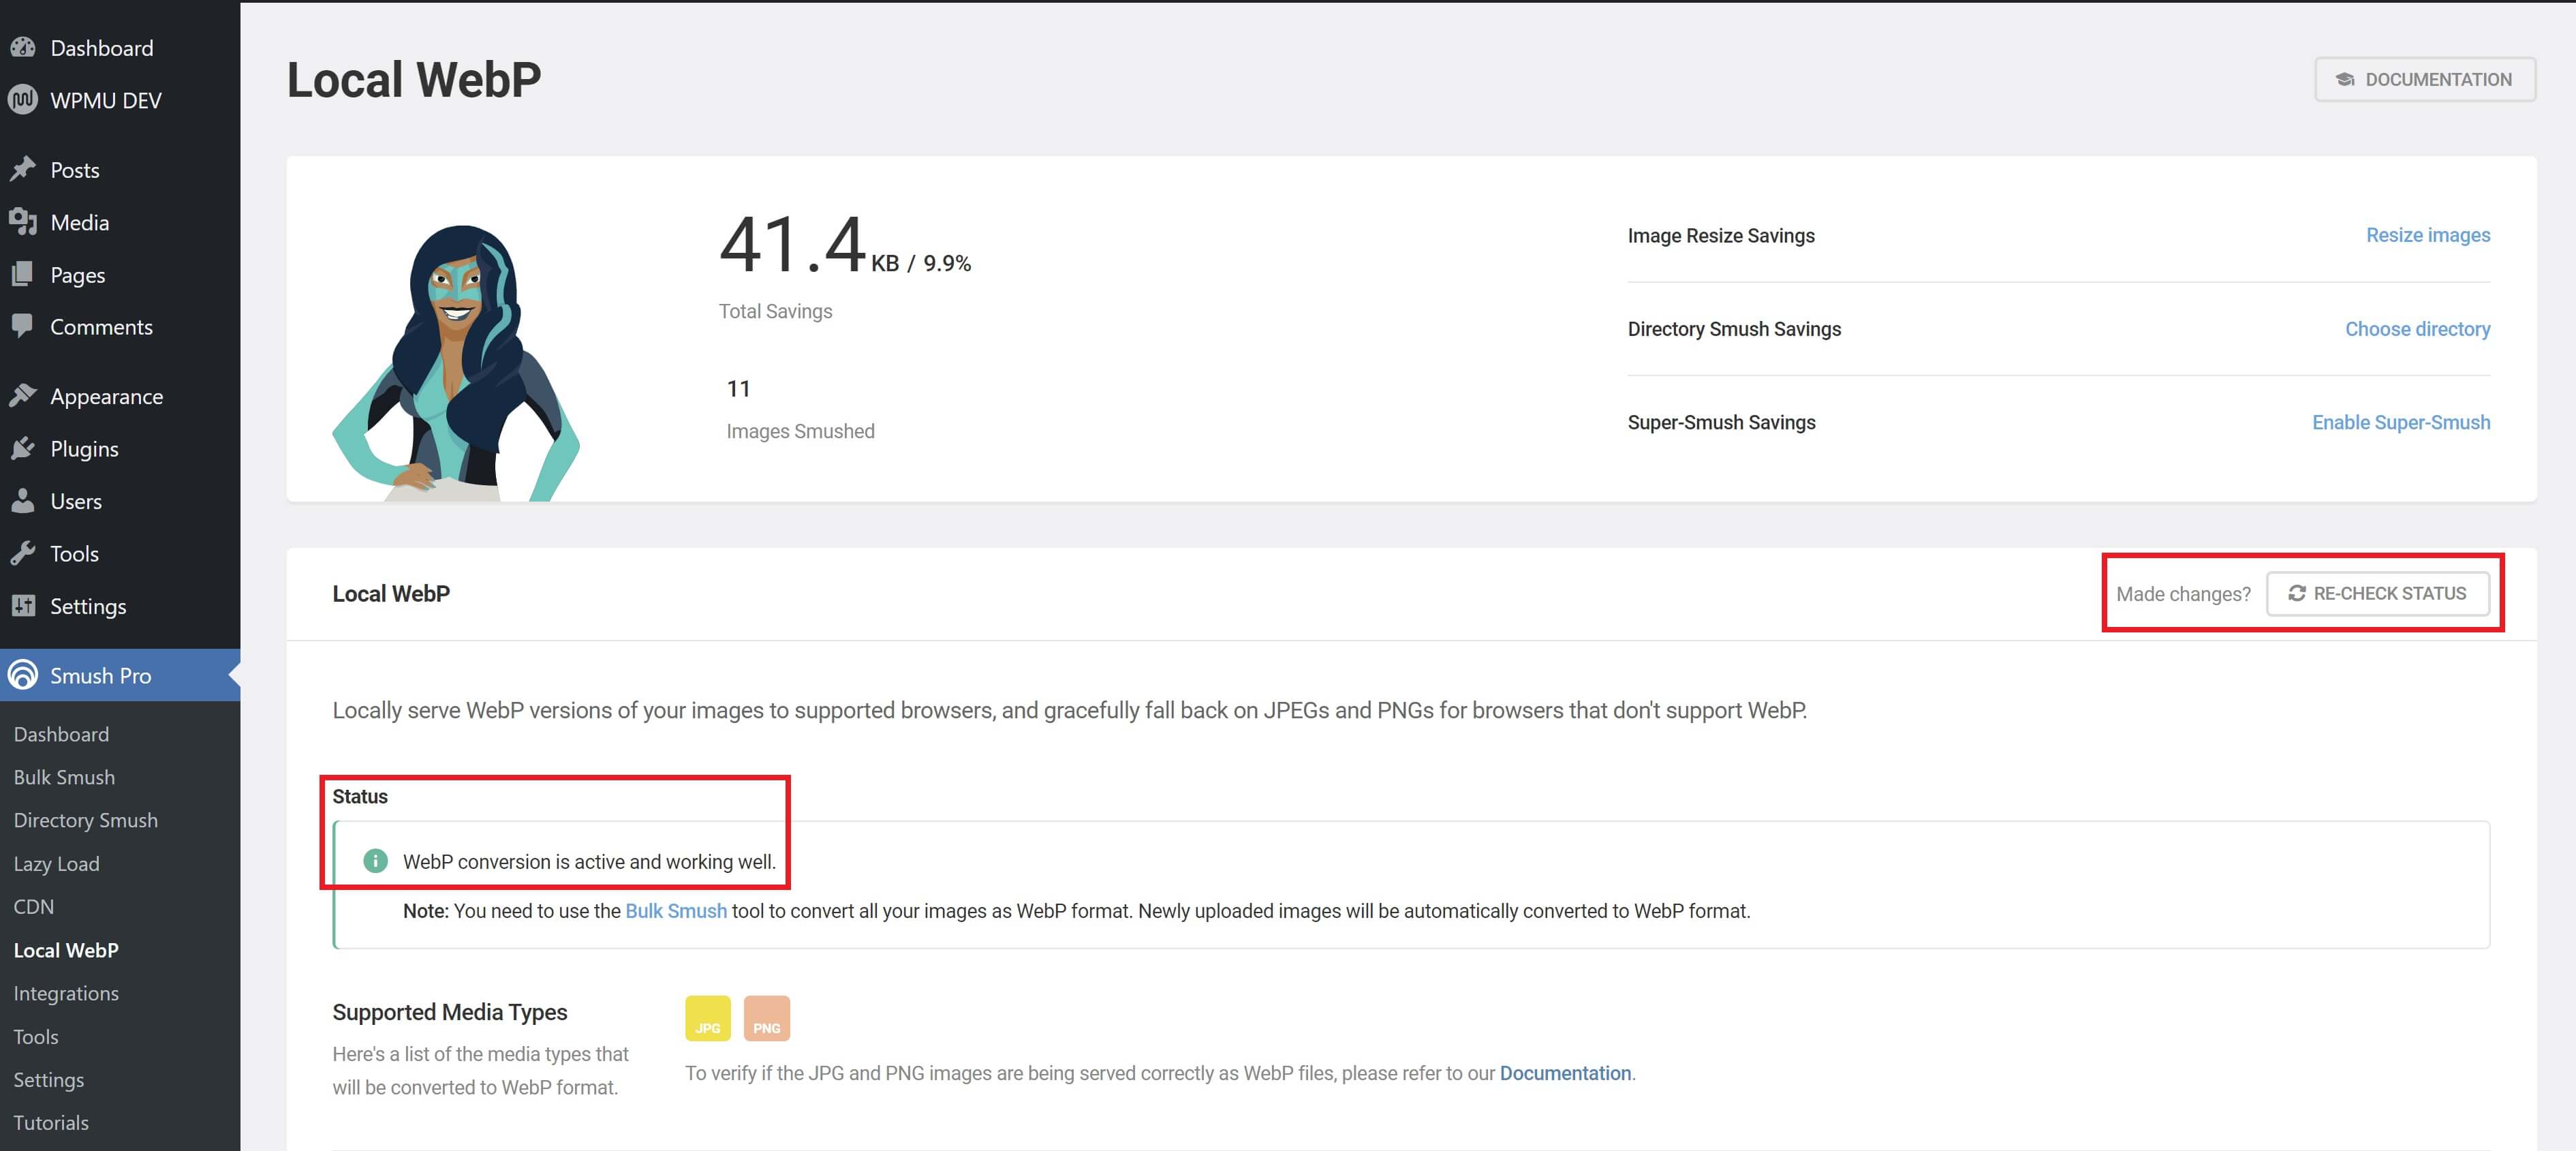
After you’ve completed the set up you can recheck the status anytime on the same page:
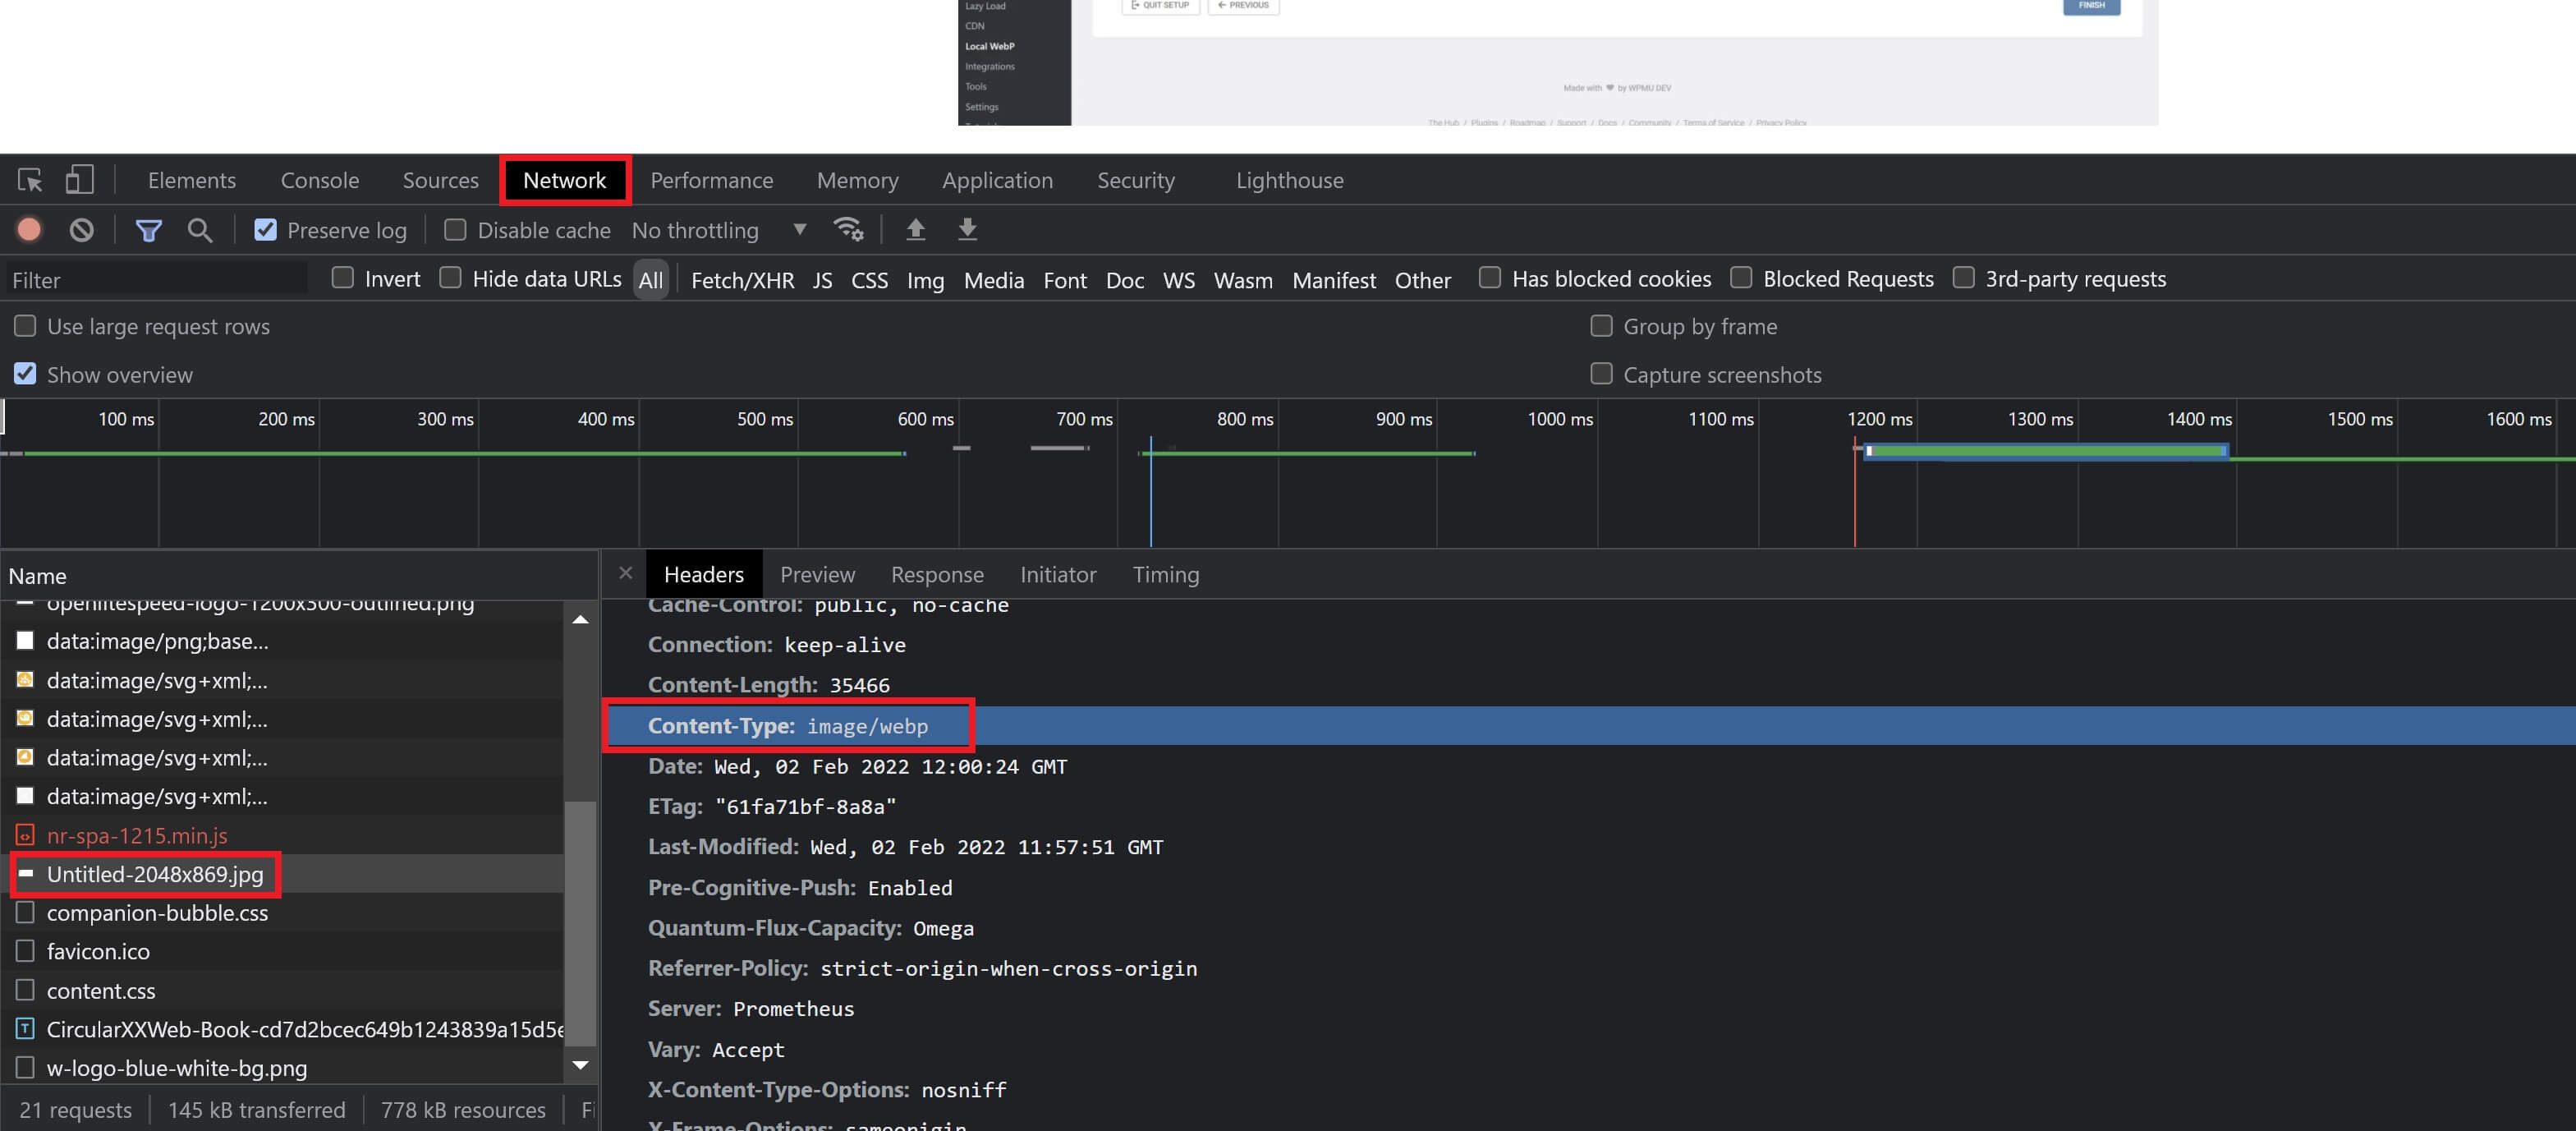
Check WebP’s are Being Served
Verifying that images are being served as webp with Smush is detailed here in their docs:
Smush: Verifying WebP Output Documentation
It’s a little different to most other plugins where you can verify the HTML output. Instead, you can check the image in the network tab like so: