Step 1. Locate the system user you wish to delete
To get started, head to your system users page:

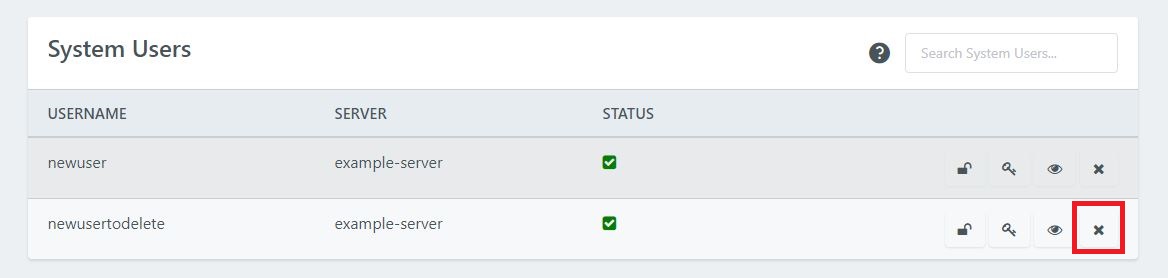
Then scroll down to the bottom and find the user that you wish to delete. If you have many system users, you can use the search bar to search to narrow down the results.

Step 2. [Optional] Reassign sites to a different user
Now that you’ve located your user, hit the X button located on the right hand side.
This will bring up the following modal. If your user has any sites assigned to them you need to decide whether you wish to delete these sites or assign them to a different system user.
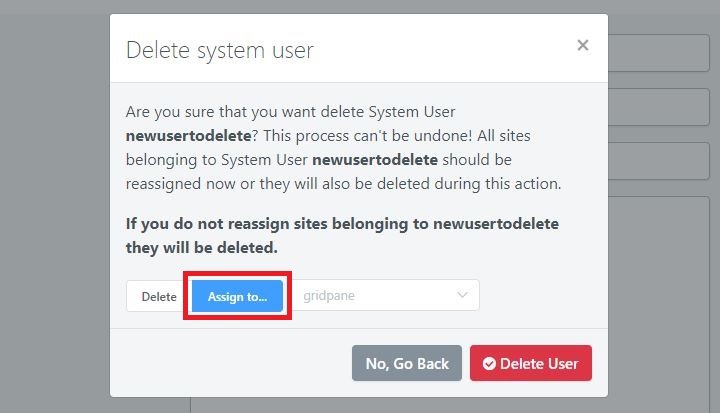
If you don’t want to delete them, you can choose to assign them an existing user, or hit the “No, go back” button. You can then scroll back up to the top of the page and create a new one. Then repeat the process to get back to this modal.
NOTE: We recommend that each of your websites has their own system user to keep them isolated from one another. That way if any of your websites were to be compromised, it wouldn’t be able to affect any of your other websites.
Now you can reassign your site to prevent it from getting deleted.
Step 3. Delete your system user
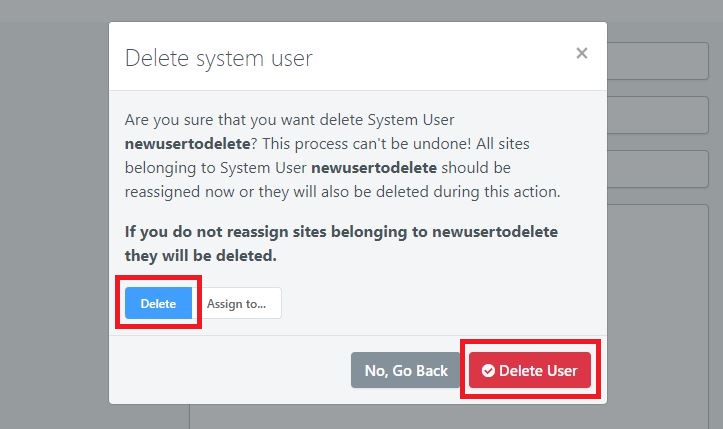
If your system user doesn’t have any websites assigned to it, you can simply hit the Delete button.
If you’re keeping your sites and have chosen a new system user, you can now hit the Delete button.
 <
<
You’ve now successfully deleted your system user.