How to Block Bad Bots from Your Sites/Servers

4 min read

Table of Contents

  1. Introduction
  2. Option 1. Block Bad Bots with the 7G WAF
  3. Option 2. Block with a Server Config
    Option 2.1 Block Bad Bots on Nginx
    Option 2.2 Block Bad Bots on OpenLiteSpeed
  4. Option 3. Block Bad Bots with Cloudflare

Introduction

Bad bot traffic can be a huge resource hog on your servers, and some are outright malicious. They offer no value to you or your clients and can sometimes result in such high resource usage that it becomes the equivalent of a DoS attack.

Fortunately, if you’ve identified a bot (by its user agent) that’s hounding one or more of your websites, blocking them is a simple process. We’ll look at how to do this on both Nginx and OpenLiteSpeed servers in this article.

Option 1. Block Bad Bots with the 7G WAF

By default, 7G blocks a lot of bad bots, but you can also configure it to block additional bots for your websites as well.

7G is easy to customize on both Nginx and OpenLiteSpeed servers, and we have detailed documentation on how to do so. We also have step-by-step examples that demonstrate how to block bad bots in both articles here:

Option 2. Block with a Server Config

Both Nginx and OpenLiteSpeed have includes that make it easy to add additional rules to your websites (and server-wide rules on Nginx).

We’re sometimes asked if blocking an IP (or IP range) is the best solution, but bots use multiple IPs to spread the attack vector and sometimes even purposely run below the banning thresholds of plugins like Fail2Ban. Also, for those that are truly malicious, they may be running on IPs that they’ve hijacked from a legitimate service provider.

Getting Started

On both Nginx and OpenLiteSpeed, you will need to connect to your server. See the following guides to get started:

Option 2.1 Block Bad Bots on Nginx

On Nginx we’ll make use of the *-main-context.conf include.

1. Create a custom Nginx Config

On Nginx you can create a server-wide config that will apply to all sites, or a site-specific config.

To create a server-wide config, run the following command:

/etc/nginx/extra.d/useragentblock-main-context.conf

To create a site-specific config, run this command (replace site.url with your site’s domain name):

nano /var/www/site.url/nginx/useragentblock-main-context.conf

2. Add Your Bot Rule

To block a bot, target, paste the following, replacing “BadBotName” with the bad bot user agent:

if ($http_user_agent ~* (BadBotName) ) {
return 403;
}

For example:

if ($http_user_agent ~* (LinkPadBot) ) {
return 403;
}

And you can block multiple bots like this:

if ($http_user_agent ~* (LinkPadBot|mauibot) ) { 
return 403;
}

Save the file with CTRL+O followed by Enter, and then CTRL+X to exit nano.

3. Check and Reload Nginx

Check the Nginx configuration file with:

nginx -t

If no errors are returned, reload Nginx with:

gp ngx reload

Option 2.2 Block Bad Bots on OpenLiteSpeed

To block the bot on OpenLiteSpeed, we’ll use your website’s rewrites.conf config.

1. Open your sites rewrites.conf in nano

Run the following command (replace site.url with your site’s domain name):

nano /var/www/site.url/ols/useragentblock-main-context.conf

2. Add Your Bot Rule

To block a bot, target, paste the following, replacing “BadBotName” with the bad bot user agent:

RewriteCond %{HTTP_USER_AGENT} "BadBotName"
RewriteRule /(.*)$ - [L,F]

To block multiple bots, you can do the following:

RewriteCond %{HTTP_USER_AGENT} "BadBot1|BadBot2"
RewriteRule /(.*)$ - [L,F]

Here the [F] flag stands for Forbidden and returns a 403 error.

Save the file with CTRL+O followed by Enter, and then CTRL+X to exit nano.

3. Rebuild Your Website’s vhconf

As the rewrites.conf file has been modified, a specific OpenLiteSpeed command has to be executed in order for the changes to take effect (replace “site.url” with your domain name):

gpols site site.url

Option 3. Block Bad Bots with Cloudflare

If you’d prefer to block bad bots outside of GridPane, Cloudflare makes it easy to block bots based on their user agent. 

Step 1. Create a Cloudflare Firewall

Login to your Cloudflare account and navigate to the Security > WAF page, and click the Create Firewall Rule button.

Step 2. Configure Your Firewall Rule Expression

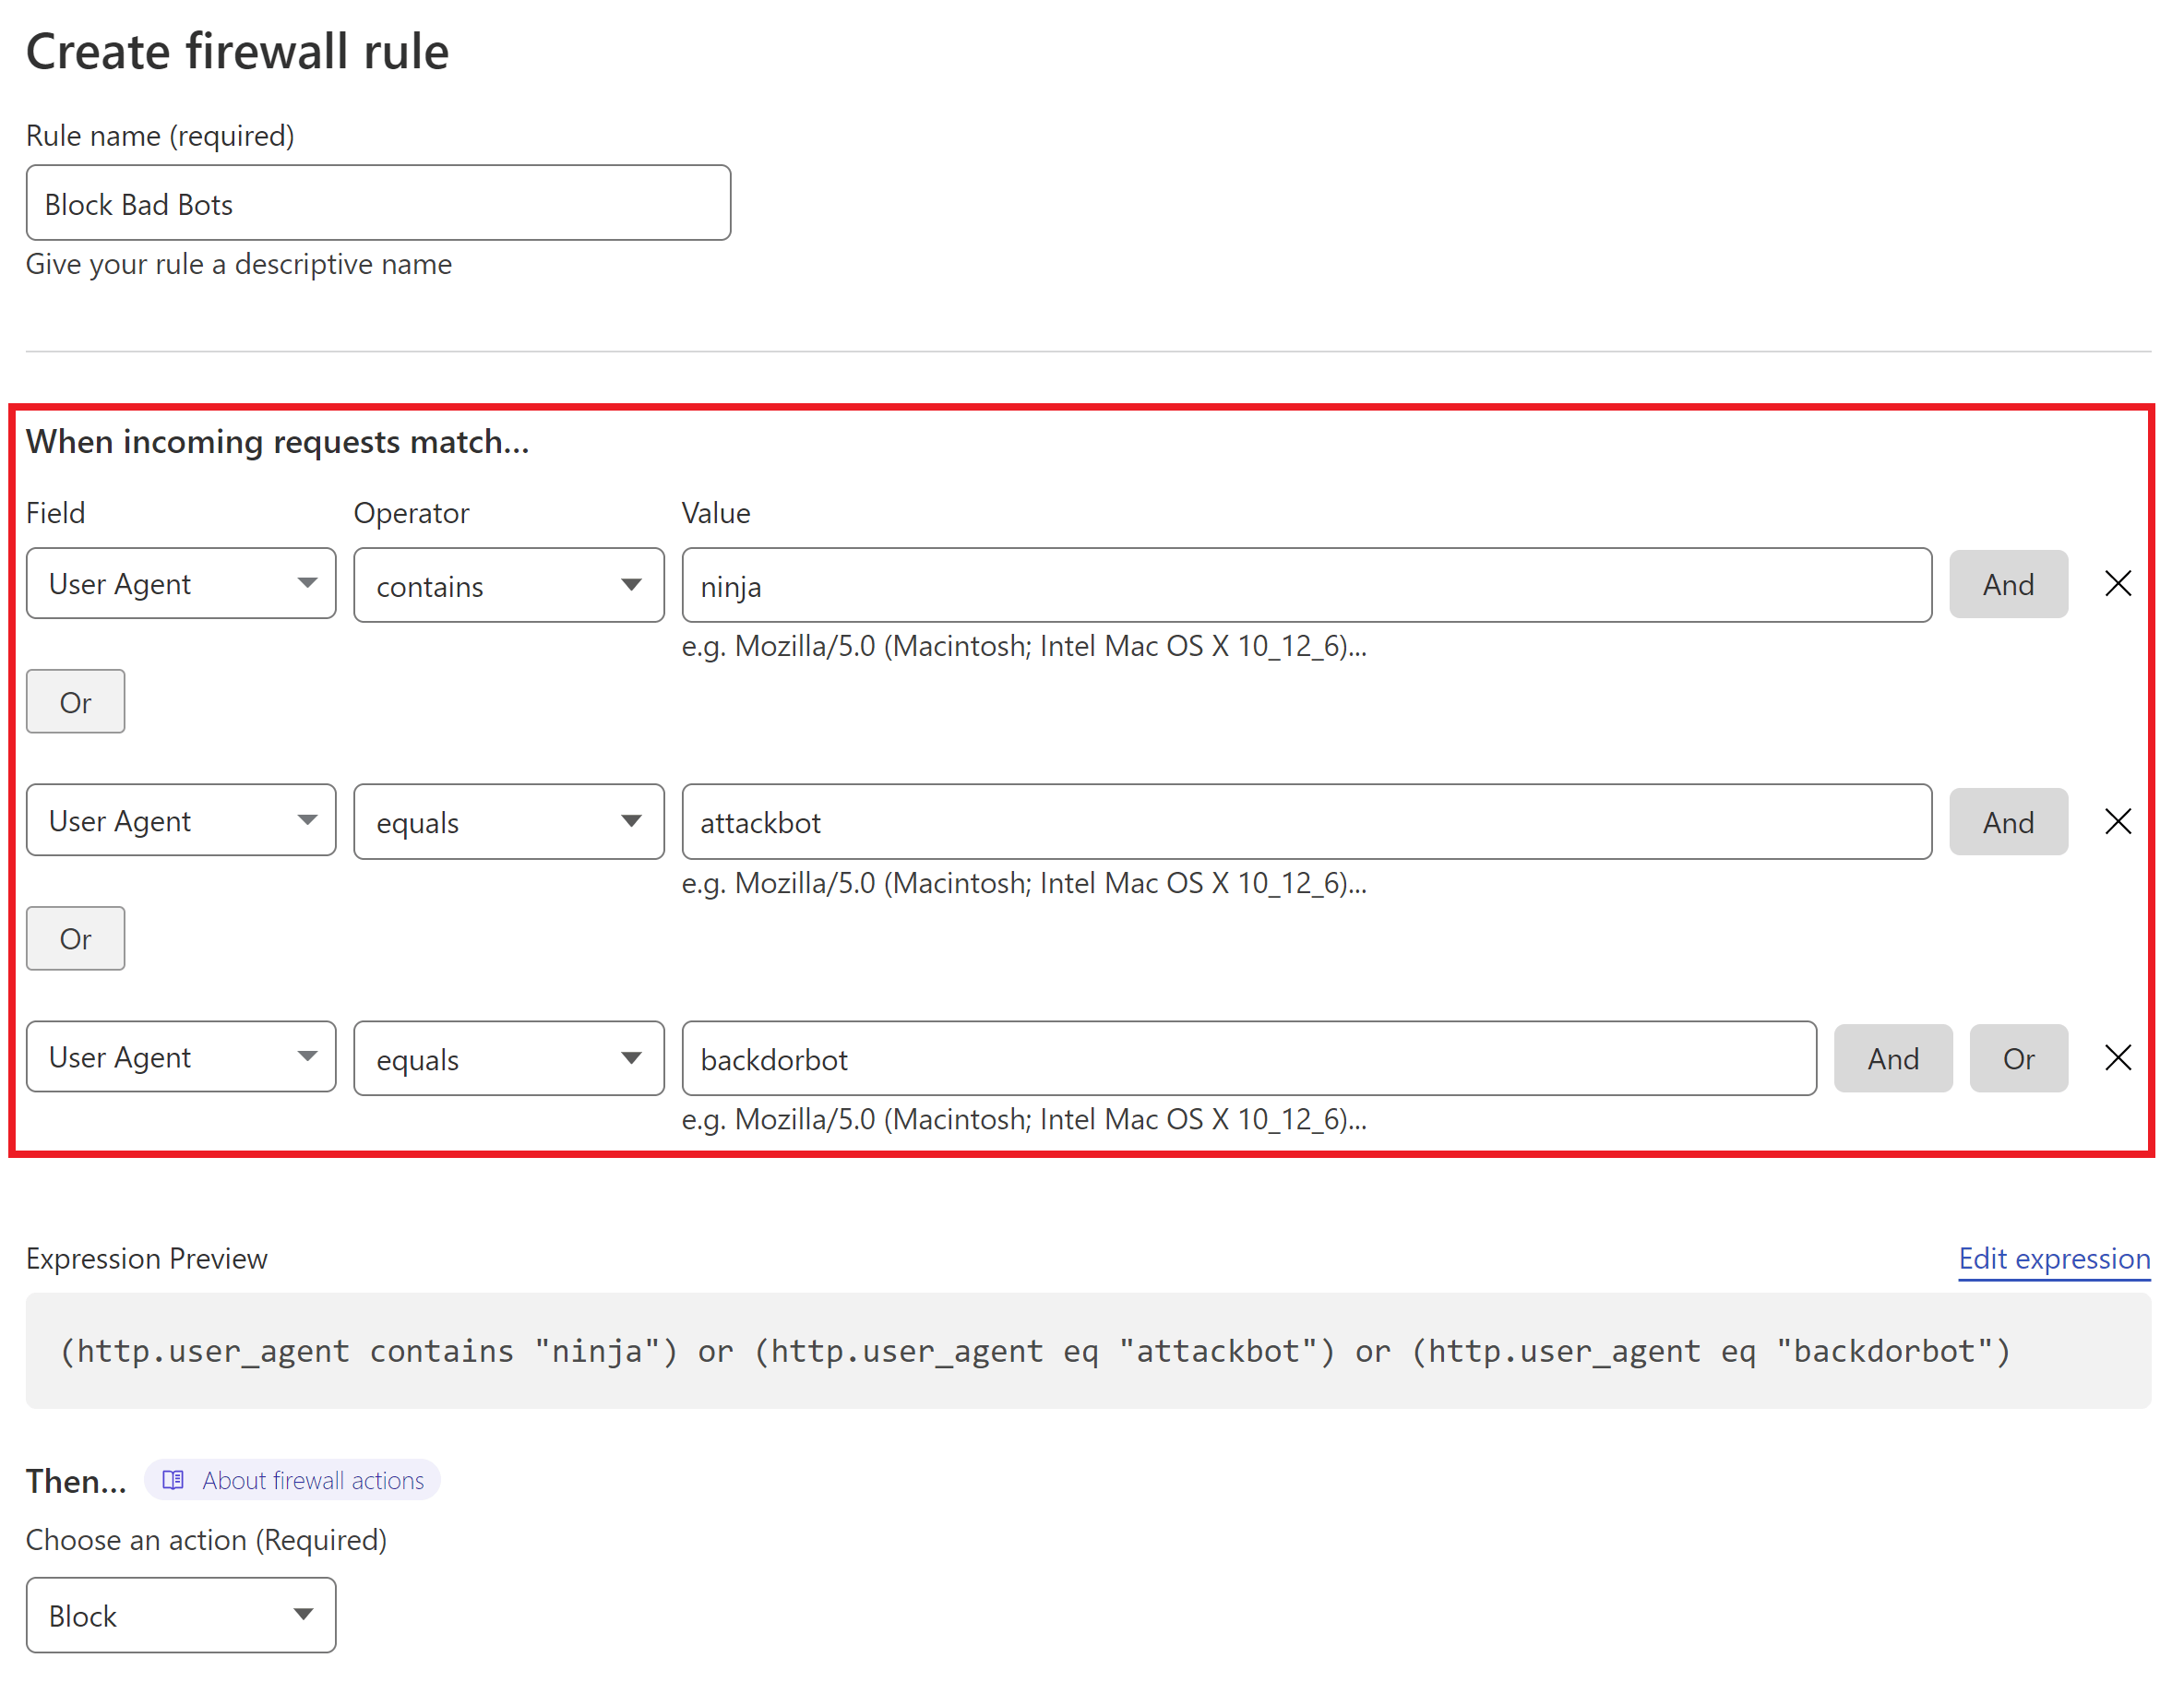
First, give your rule an easy to identify name.

Next, set the following:

  • Field: User Agent
  • Operator: “Equals” or “Contains
  • Value: Add the name of the bad user agent

Add additional bots with the “OR” option on the right-hand side.

Here’s an example of blocking multiple bots (and while these are bad bots, it’s only an example of how the rule can be used, not a comprehensive recommendation):

Step 3. Set the Action and Deploy Your Rule

Cloudflare can block all requests that break the rule outright. When ready, click the Deploy button.

You can learn more about using the Cloudflare firewall to protect your websites here:

Cloudflare Firewall Rules for Securing WordPress Websites