Getting Started: Recommended Steps
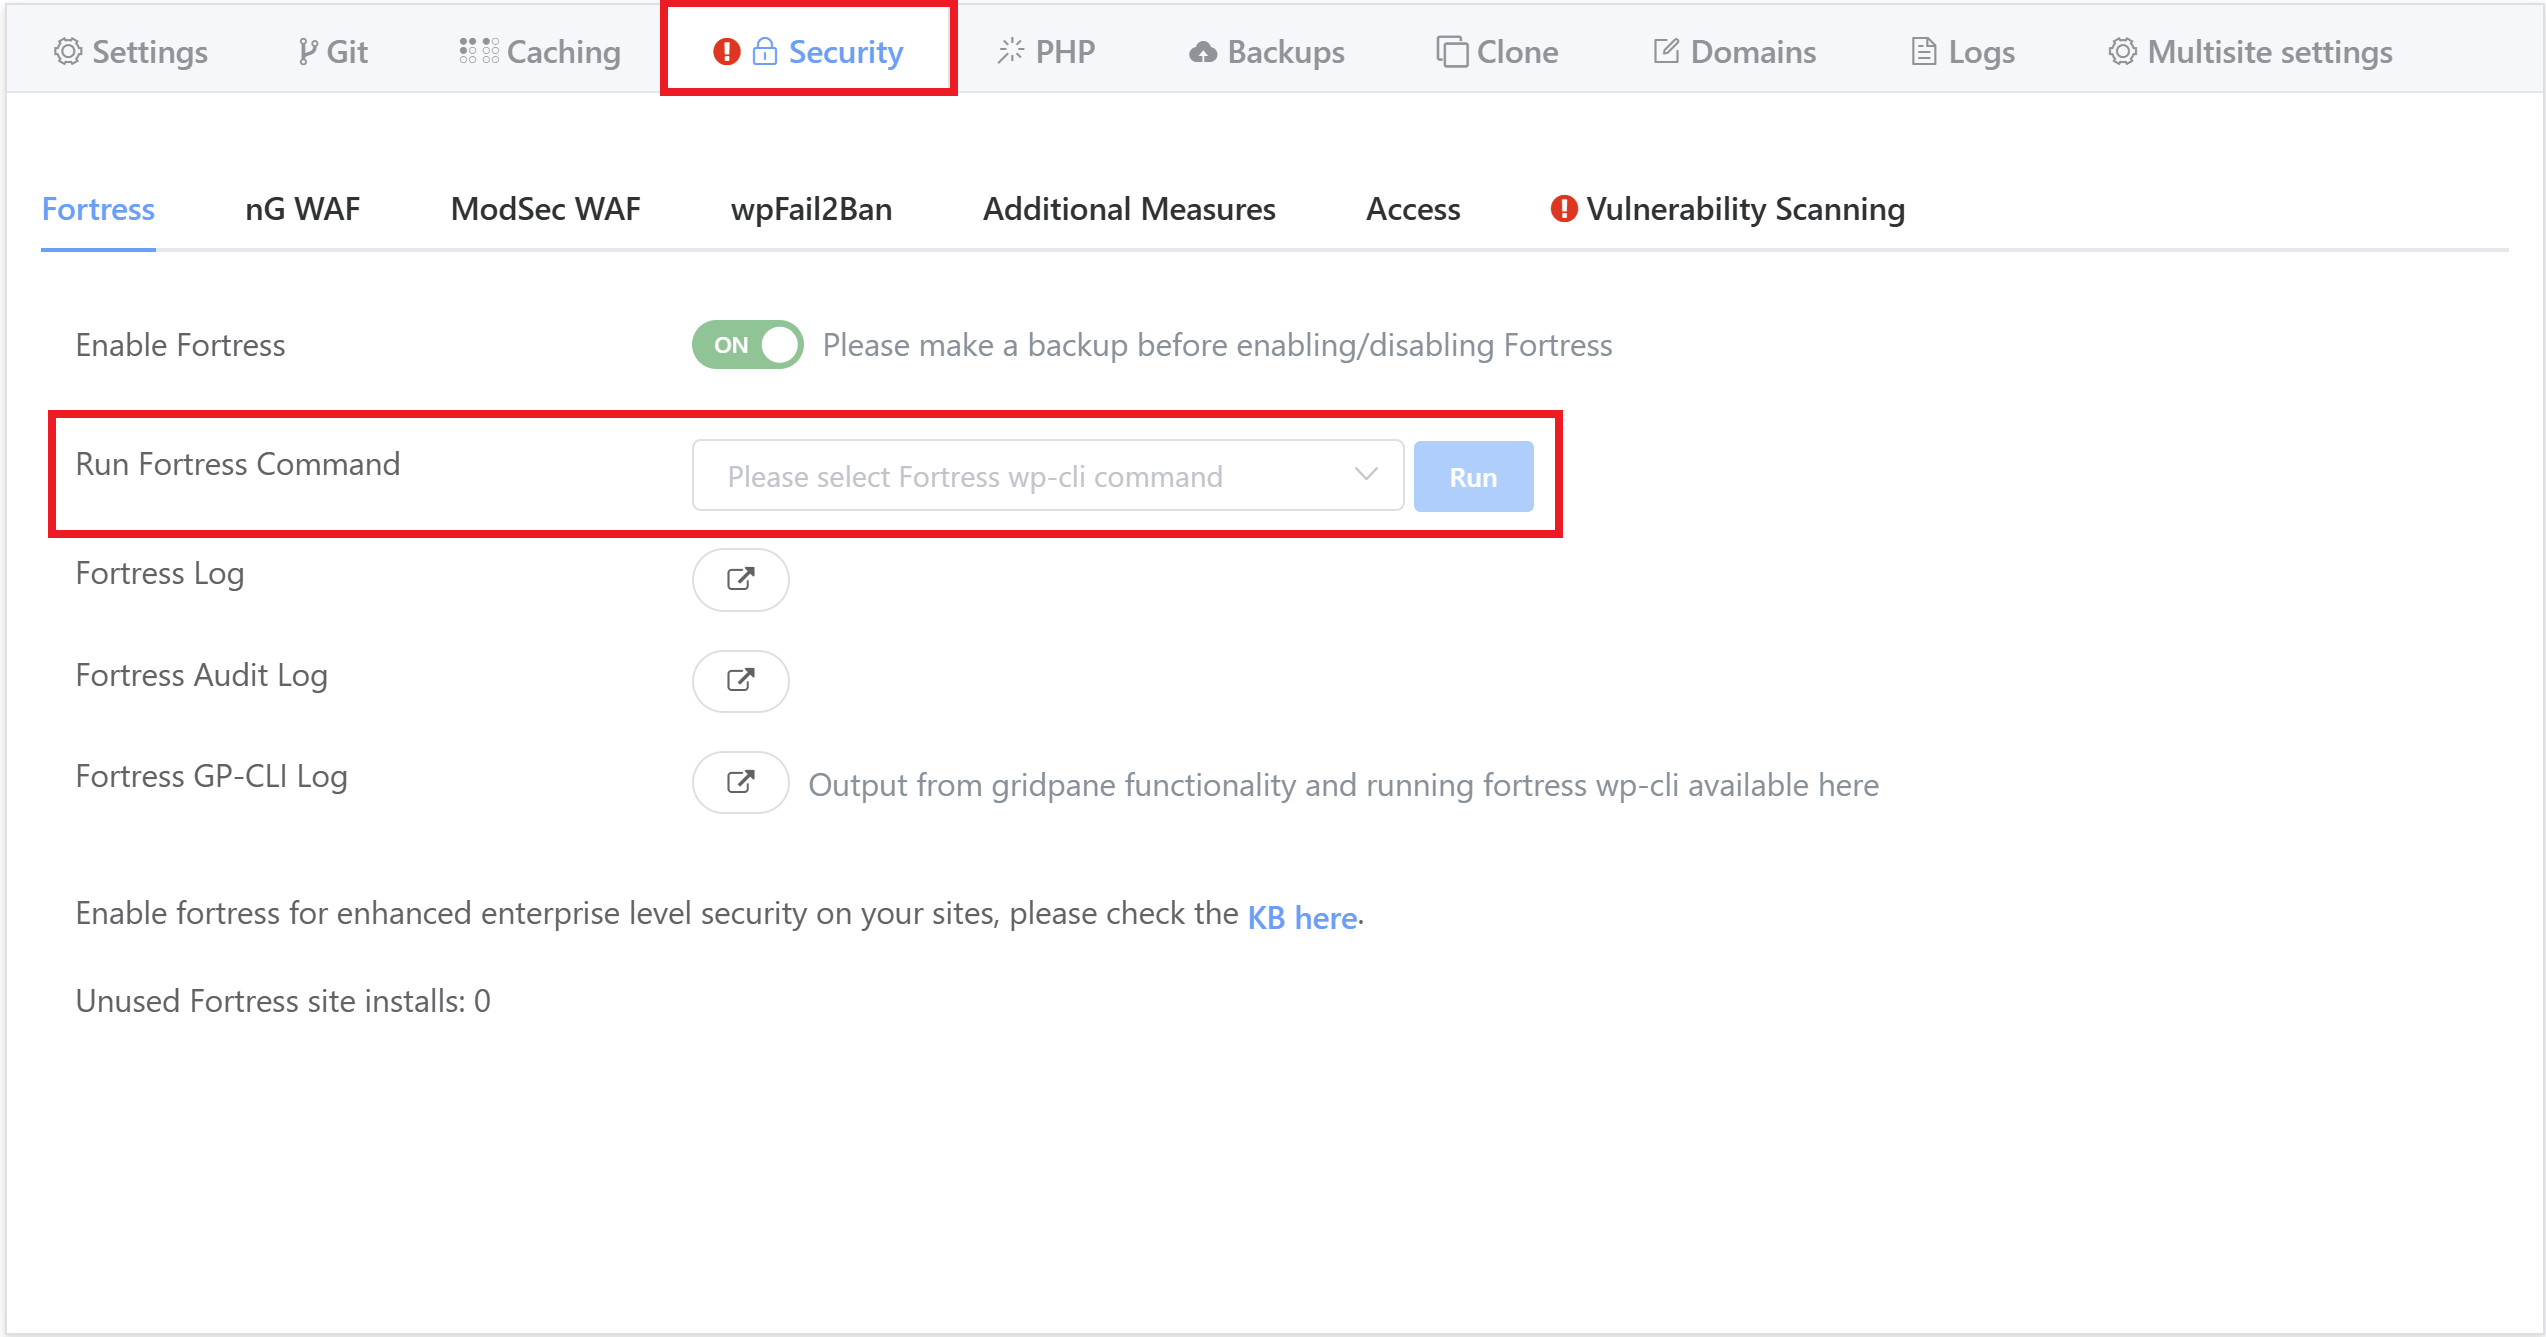
Onboarding is now a few clicks via the UI, which you can find by opening your website customizer and navigating through to the Security tab:
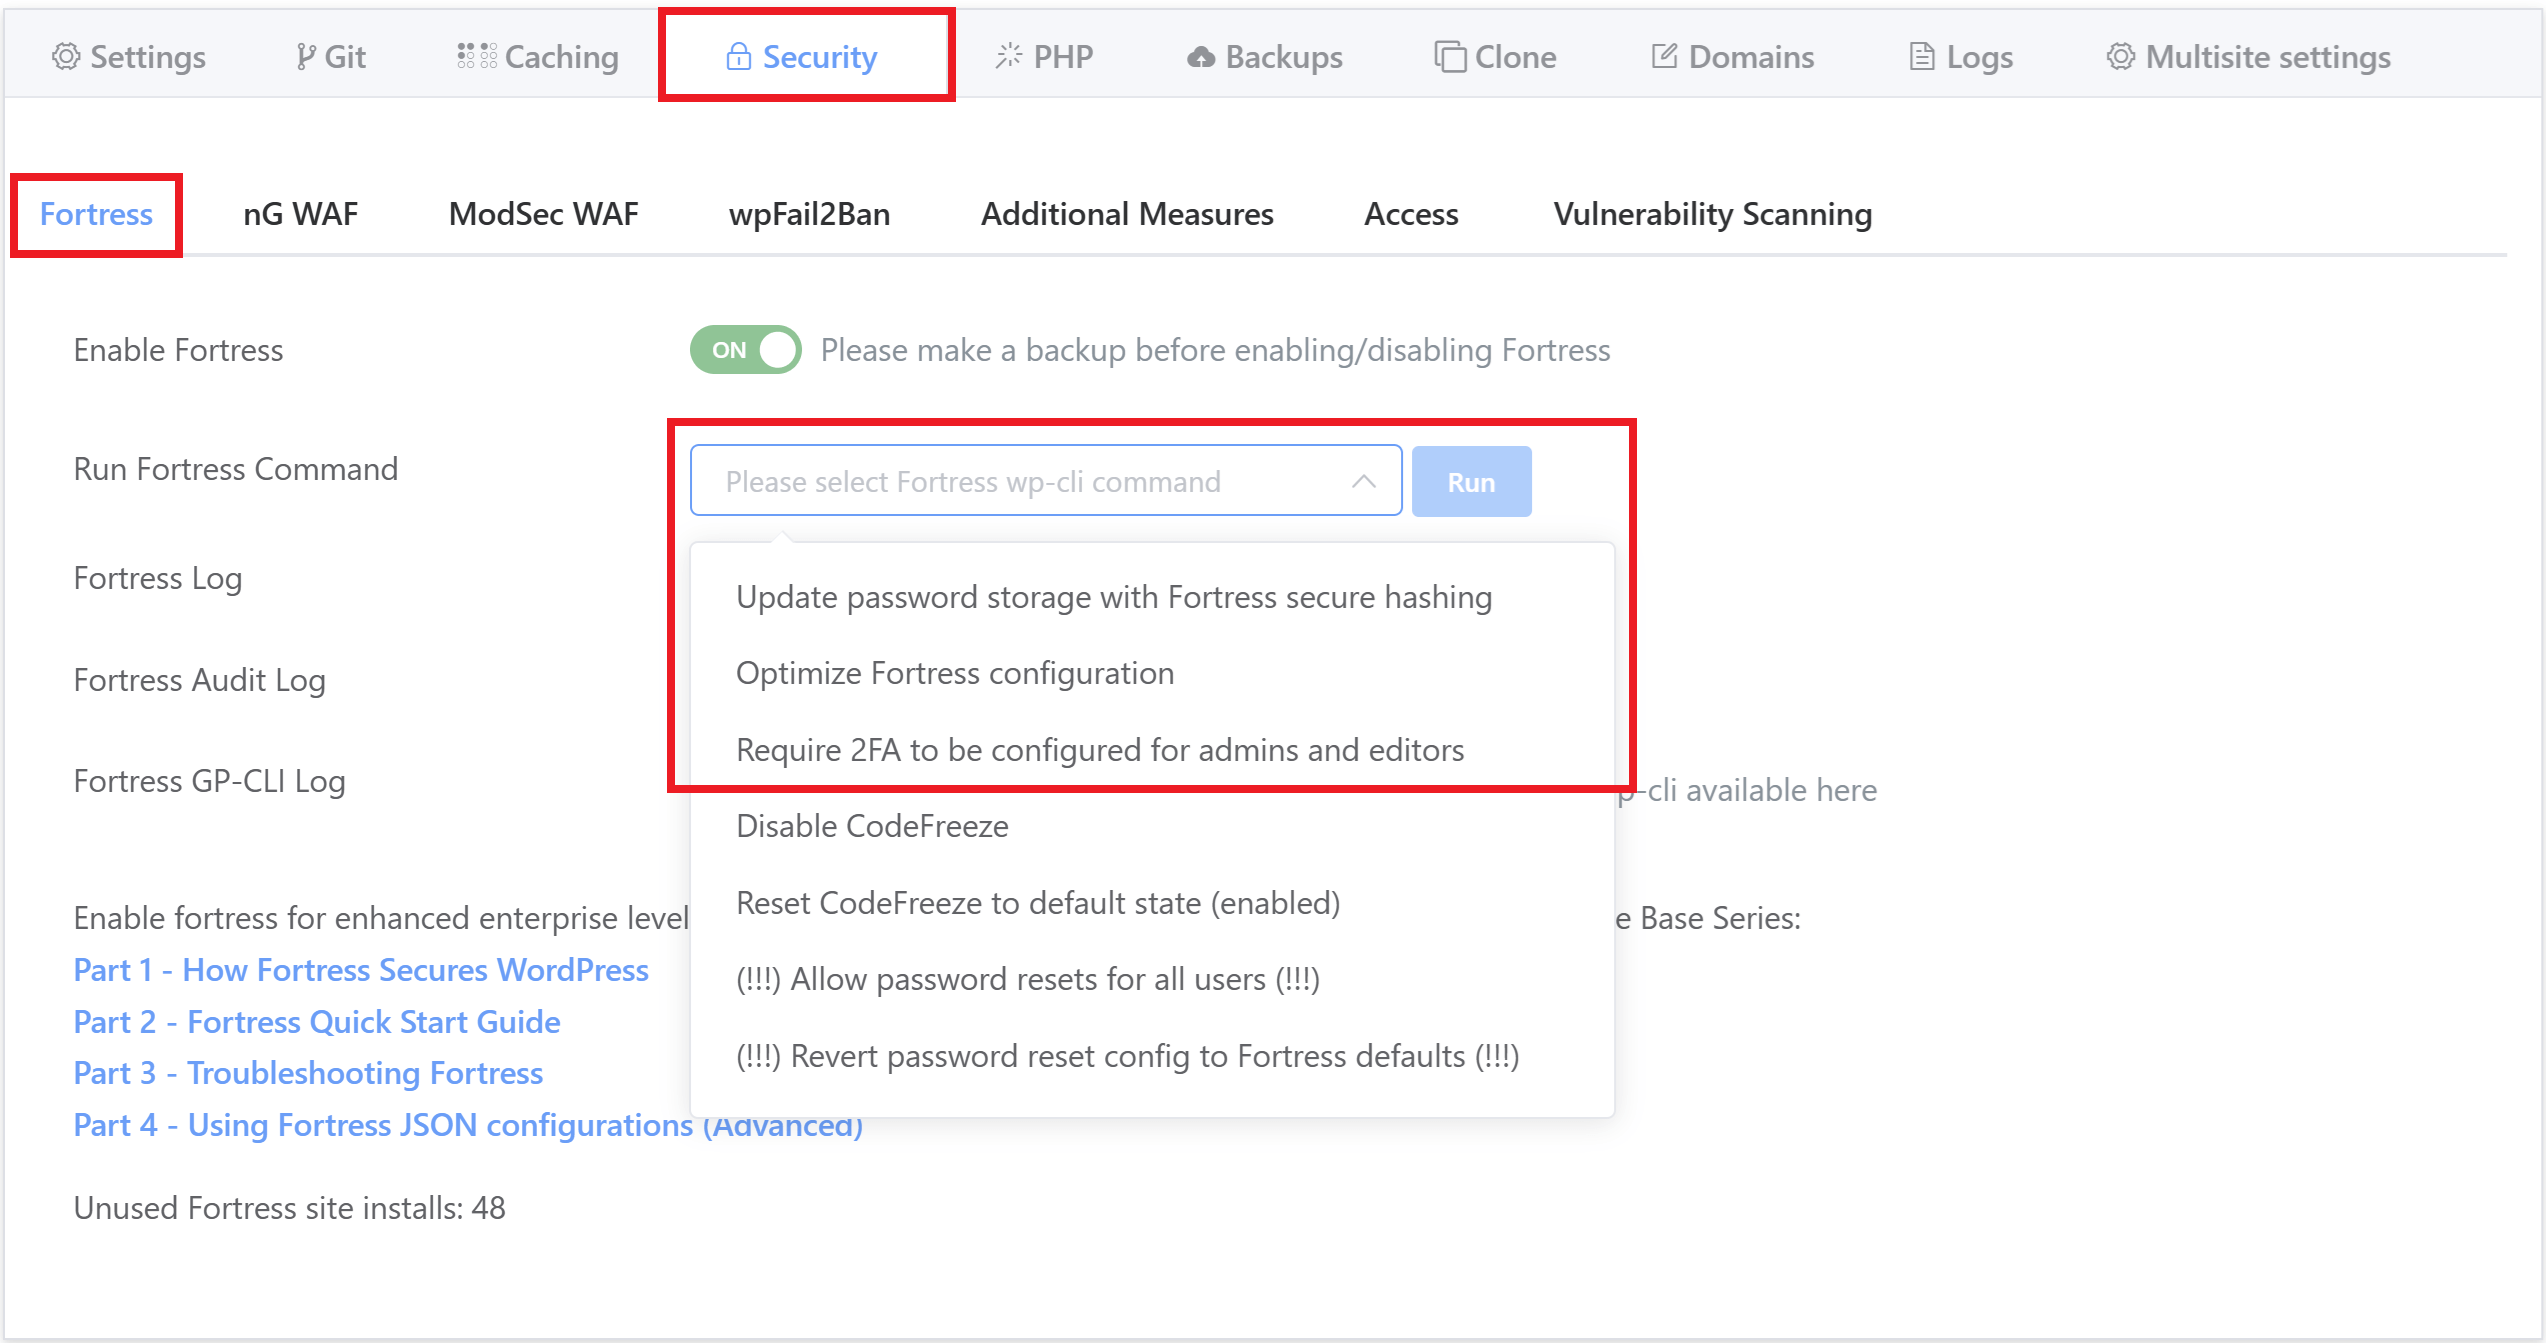
The commands in the “Run Fortress Command” dropdown are already ordered in the recommended order for you to run them, and here are the recommended steps you should take for each website:
- Take a backup of your website
- Enable Fortress
- Run upgrade password hashes
- Run optimize configuration
- Inside WordPress: Set up 2FA for your account / all admins and editors (instructions here)
- Run “Require 2FA for admins”
You can safely run step 6 even if you’re not sure if everything else is set up. If one or more Administrator users have not set up 2FA for their account, the command will error and write to the log output.
That’s all there is to it! You can find further details below on activating Fortress and setting up 2FA.
Install and Uninstall Fortress
Fortress can be installed and uninstalled directly within your GridPane account. Once our billing component is completed, this will be available for all plans.
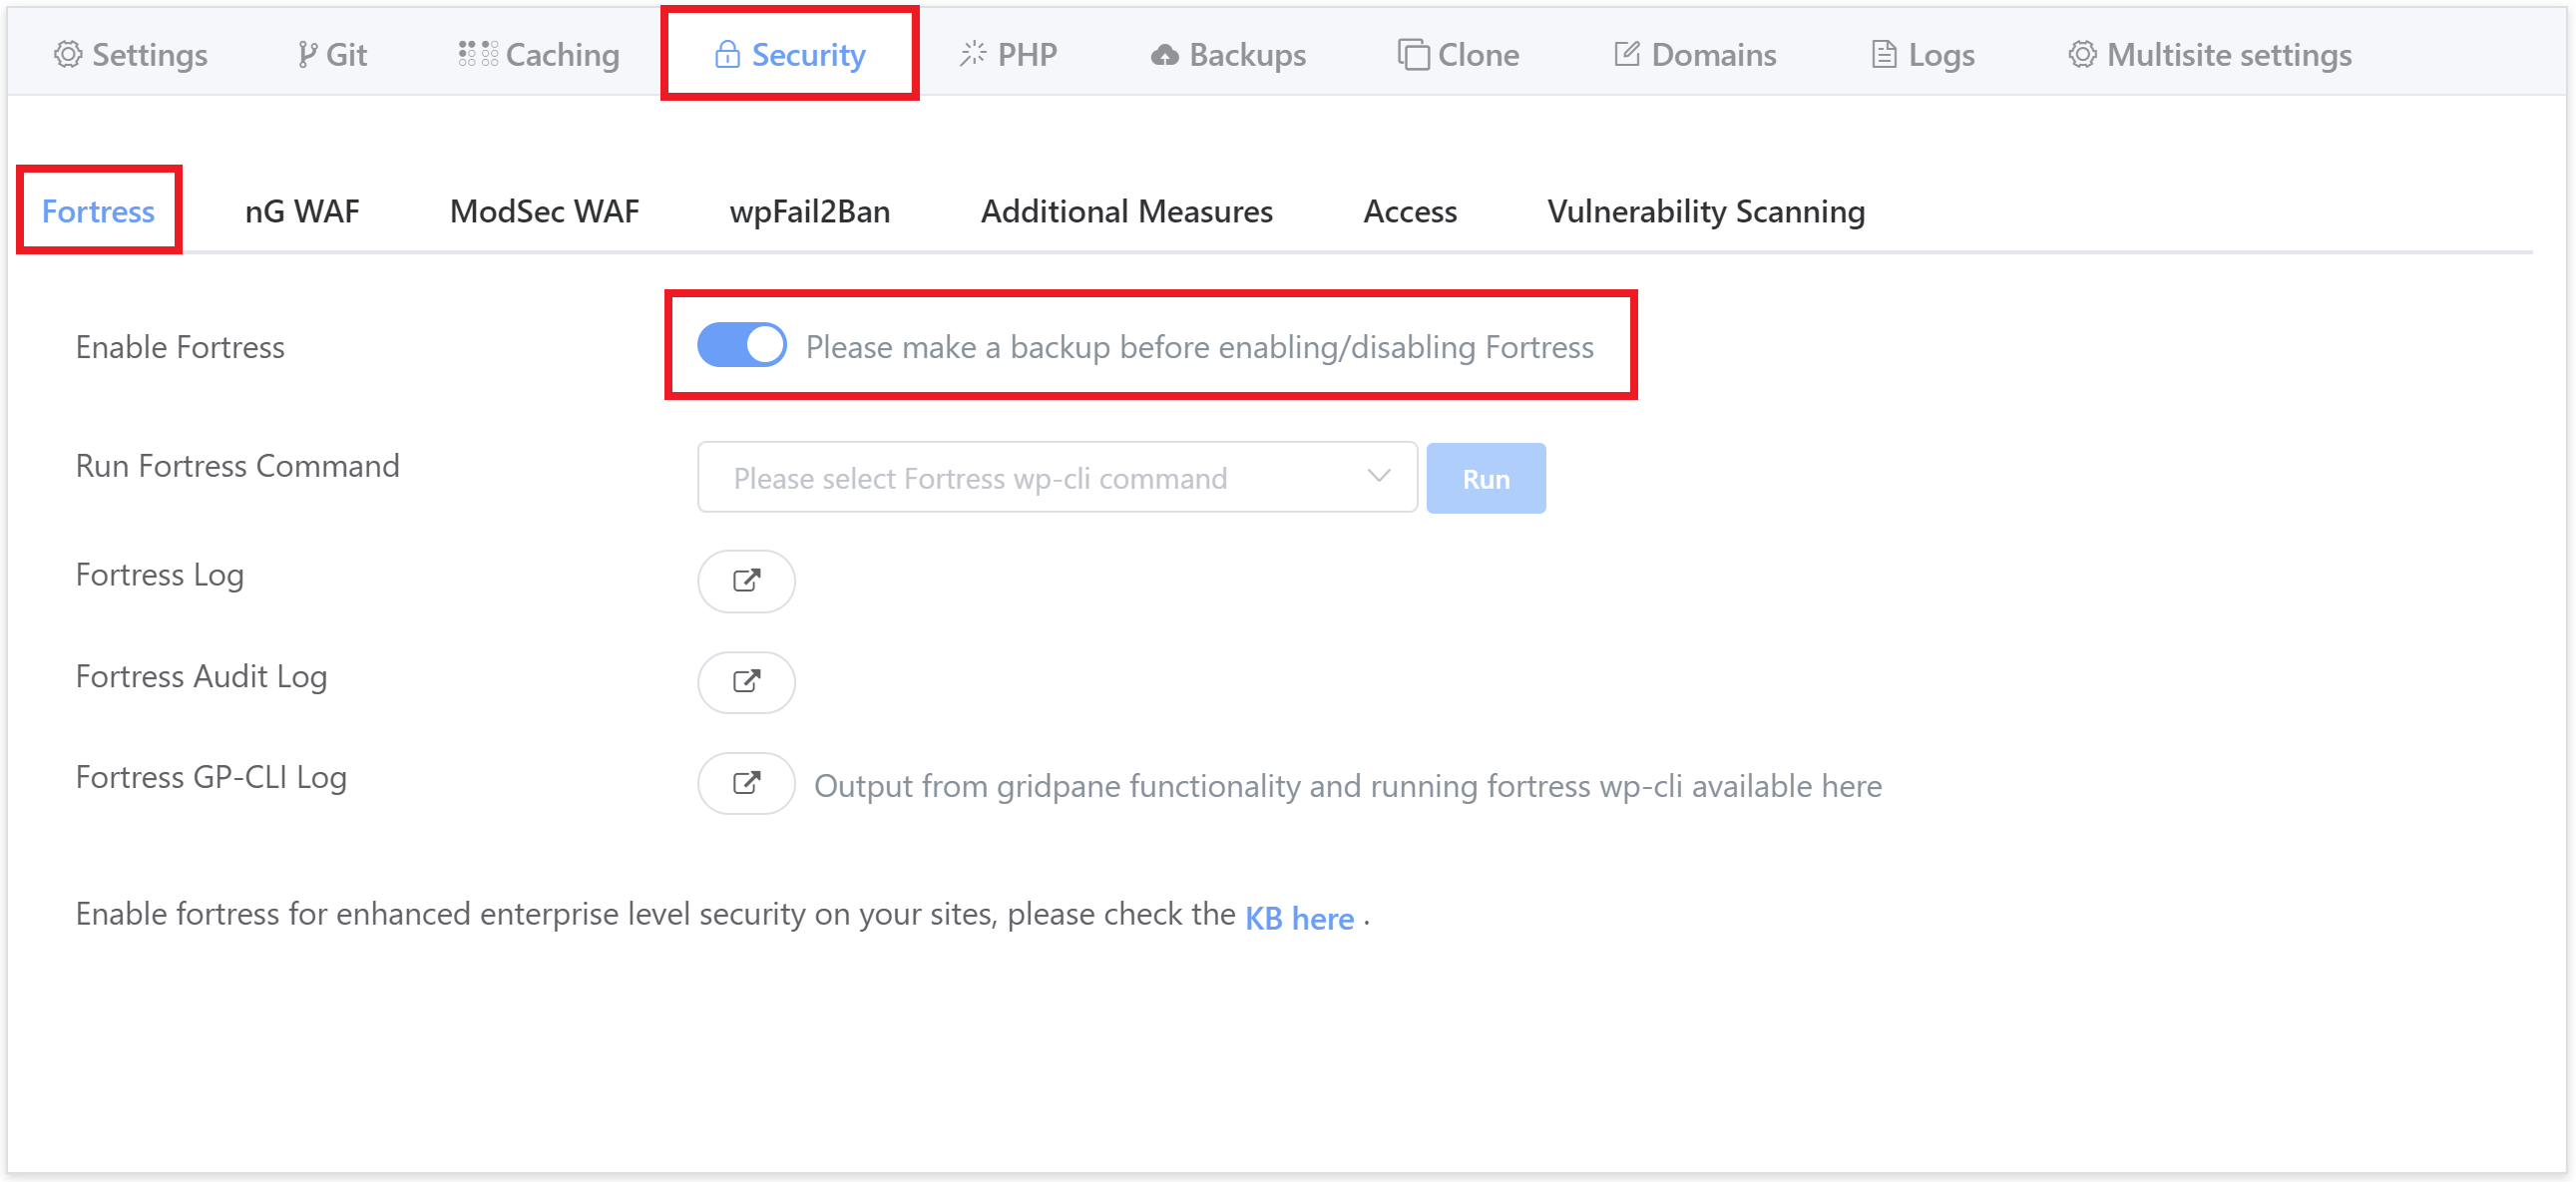
To get started, head over to the Sites page inside your GridPane account and click on the name of the site you want to configure Fortress on to open up the website customizer.
Note: We recommend taking a backup before you proceed.
Next, click through to the Security tab, and here you will see the option to toggle Fortress ON and OFF:
Fortress Installation
GridPane installs Fortress as a must-use plugin. This is necessary to ensure that malicious code can’t simply deactivate it—a major flaw in installing any security plugin as a regular plugin.
Setting Two-Factor Authentication for Your Own Account
Once Fortress has been installed, the only thing necessary to do is set up two-factor authentication for your account and any other administrators and/or editors.
Setting up 2FA
After a user whose role mandates TOTP-2FA logs in (administrator and editor by default), they will be intercepted and redirected to the TOTP setup page:
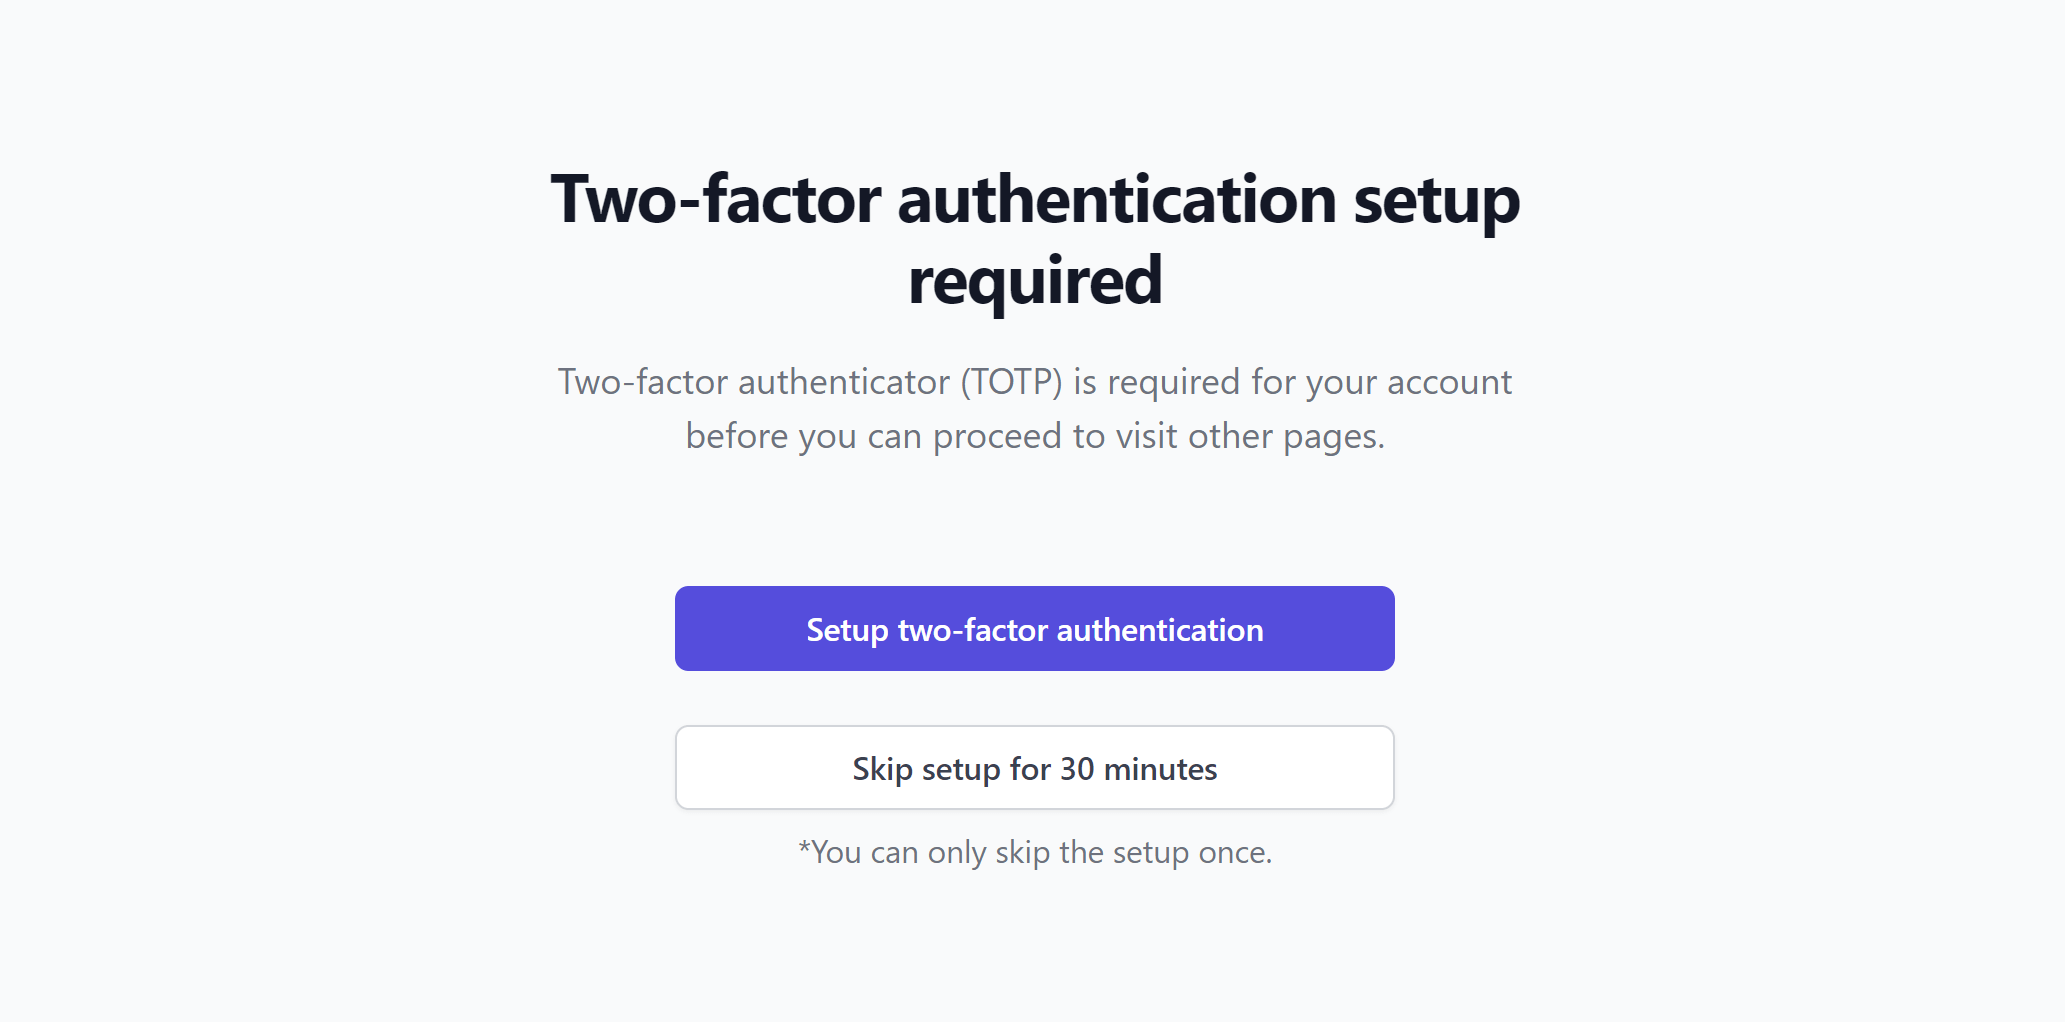
You can skip it initially, but only once.
After clicking the “Setup two-factor authentication” button, Fortress will generate and persist a new set of TOTP credentials for the user.
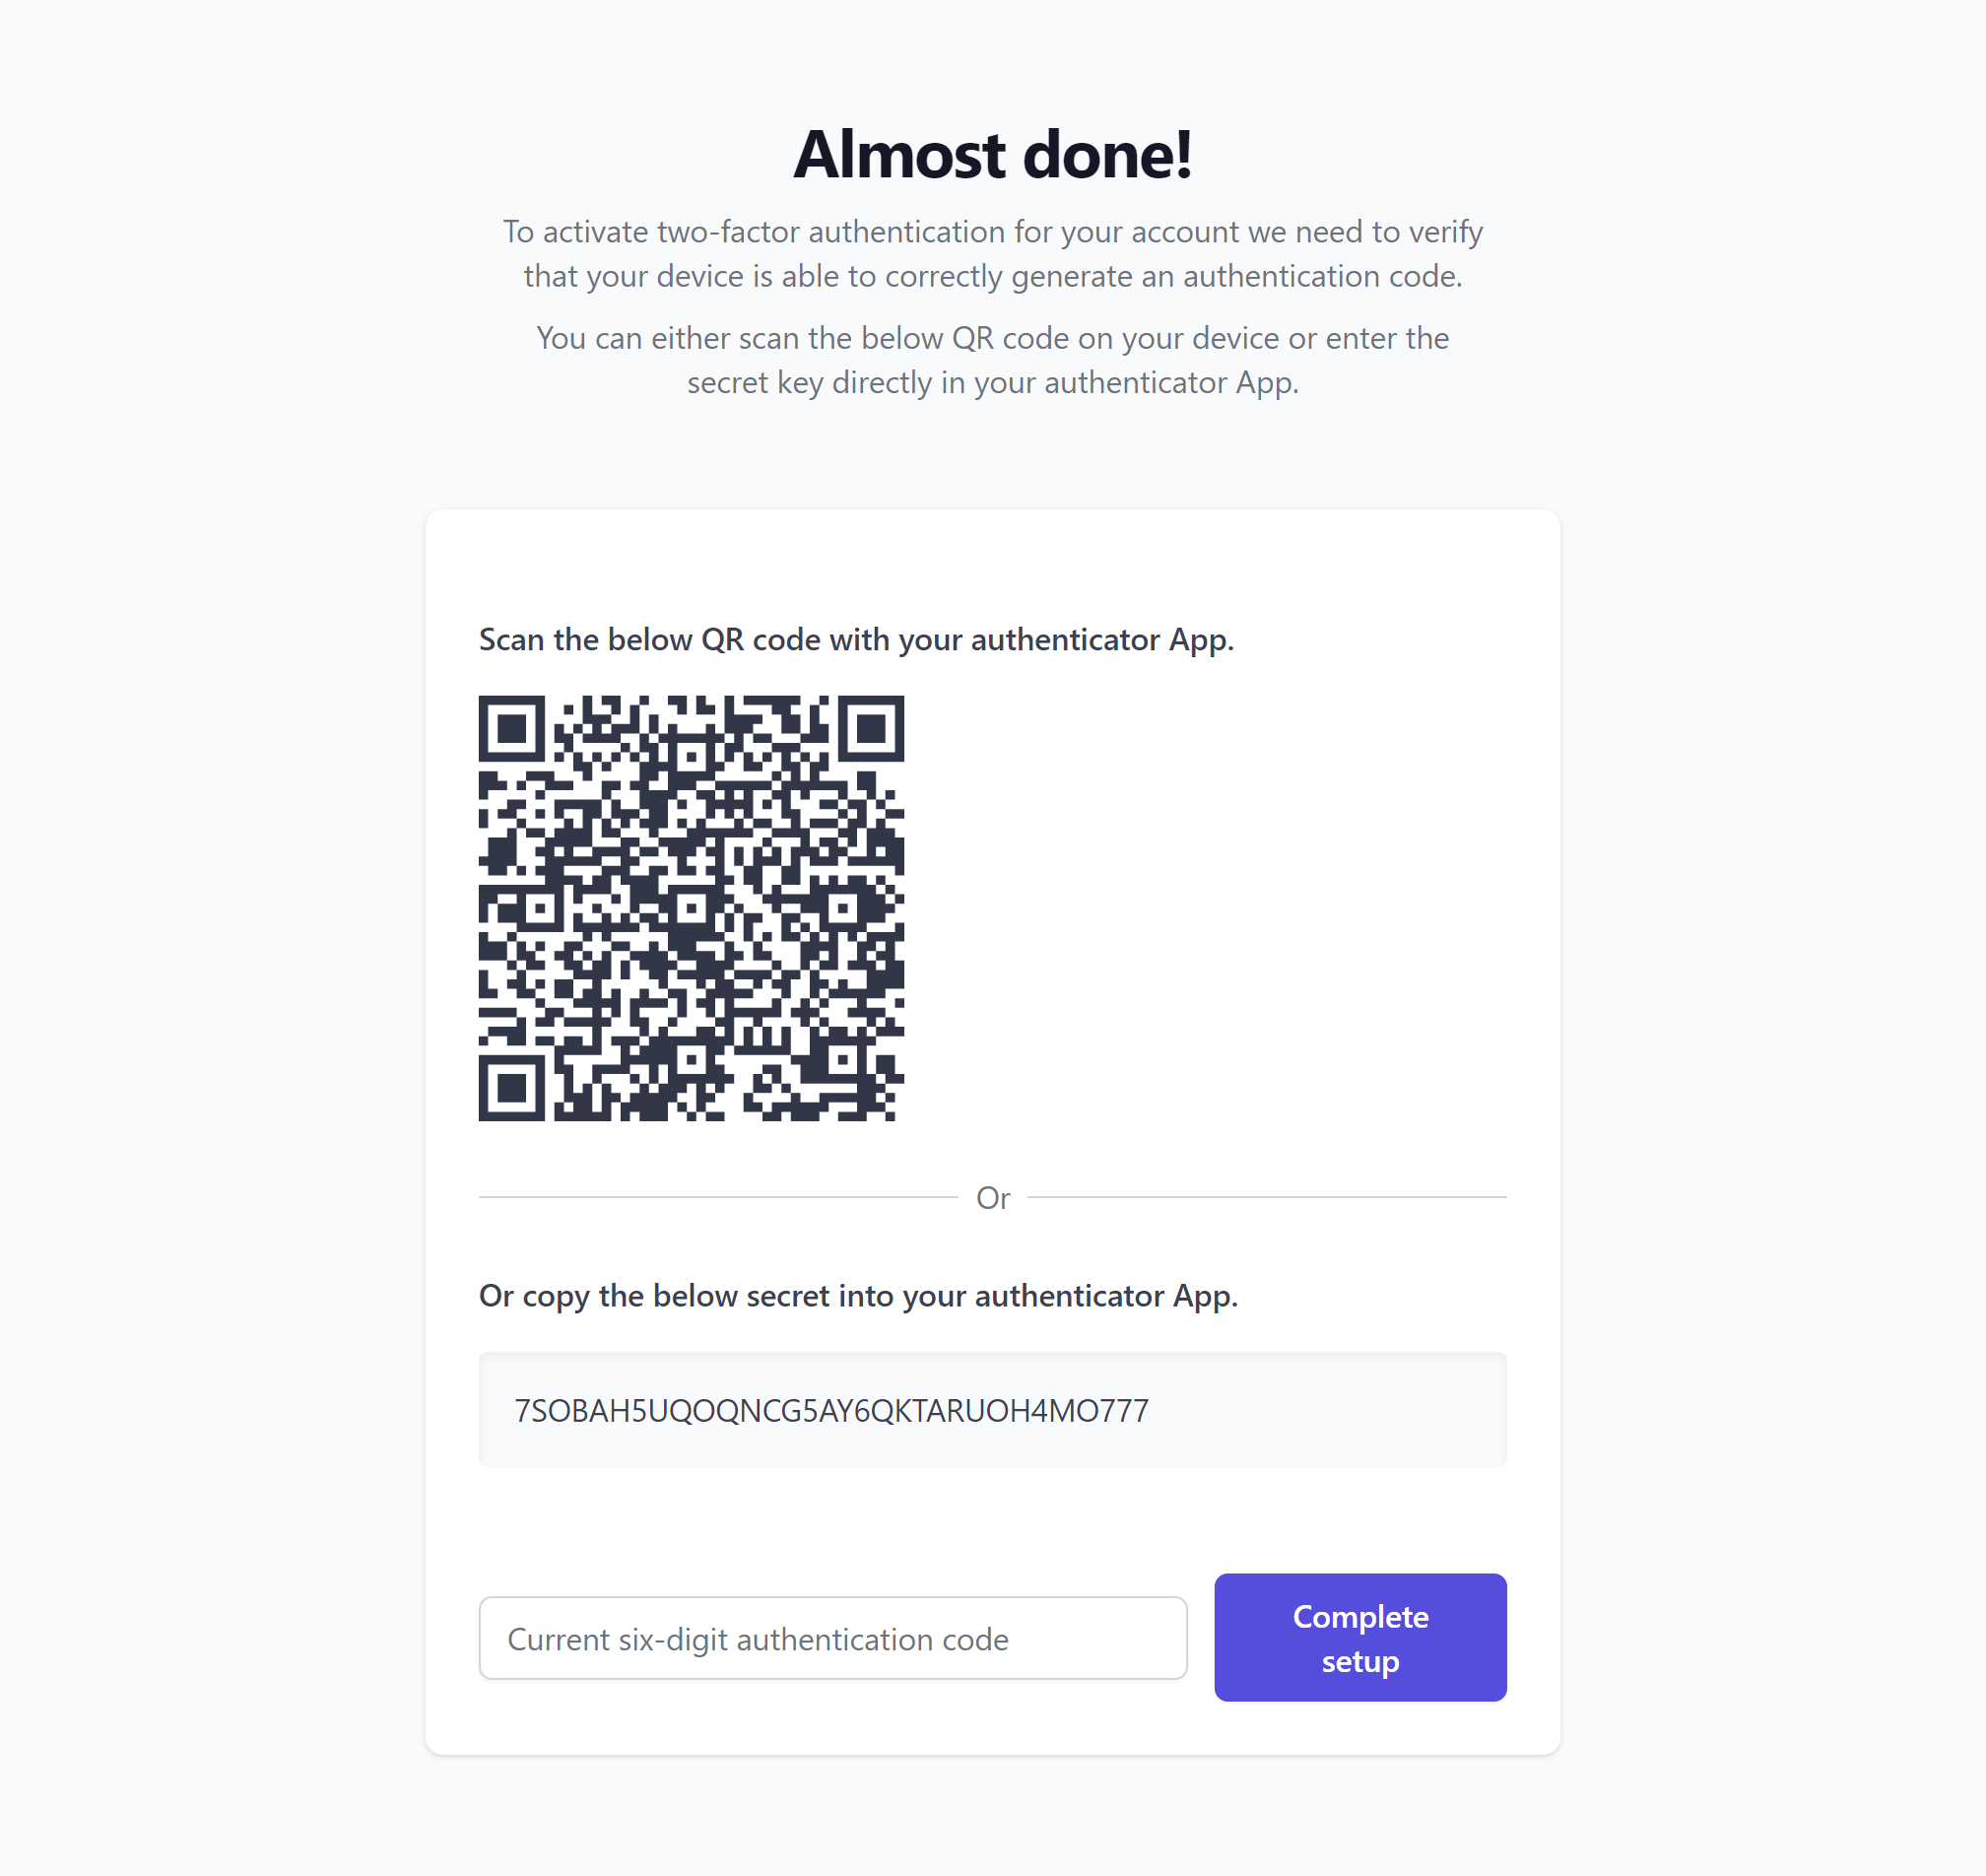
Scan the displayed QR code or copy the revealed secret.
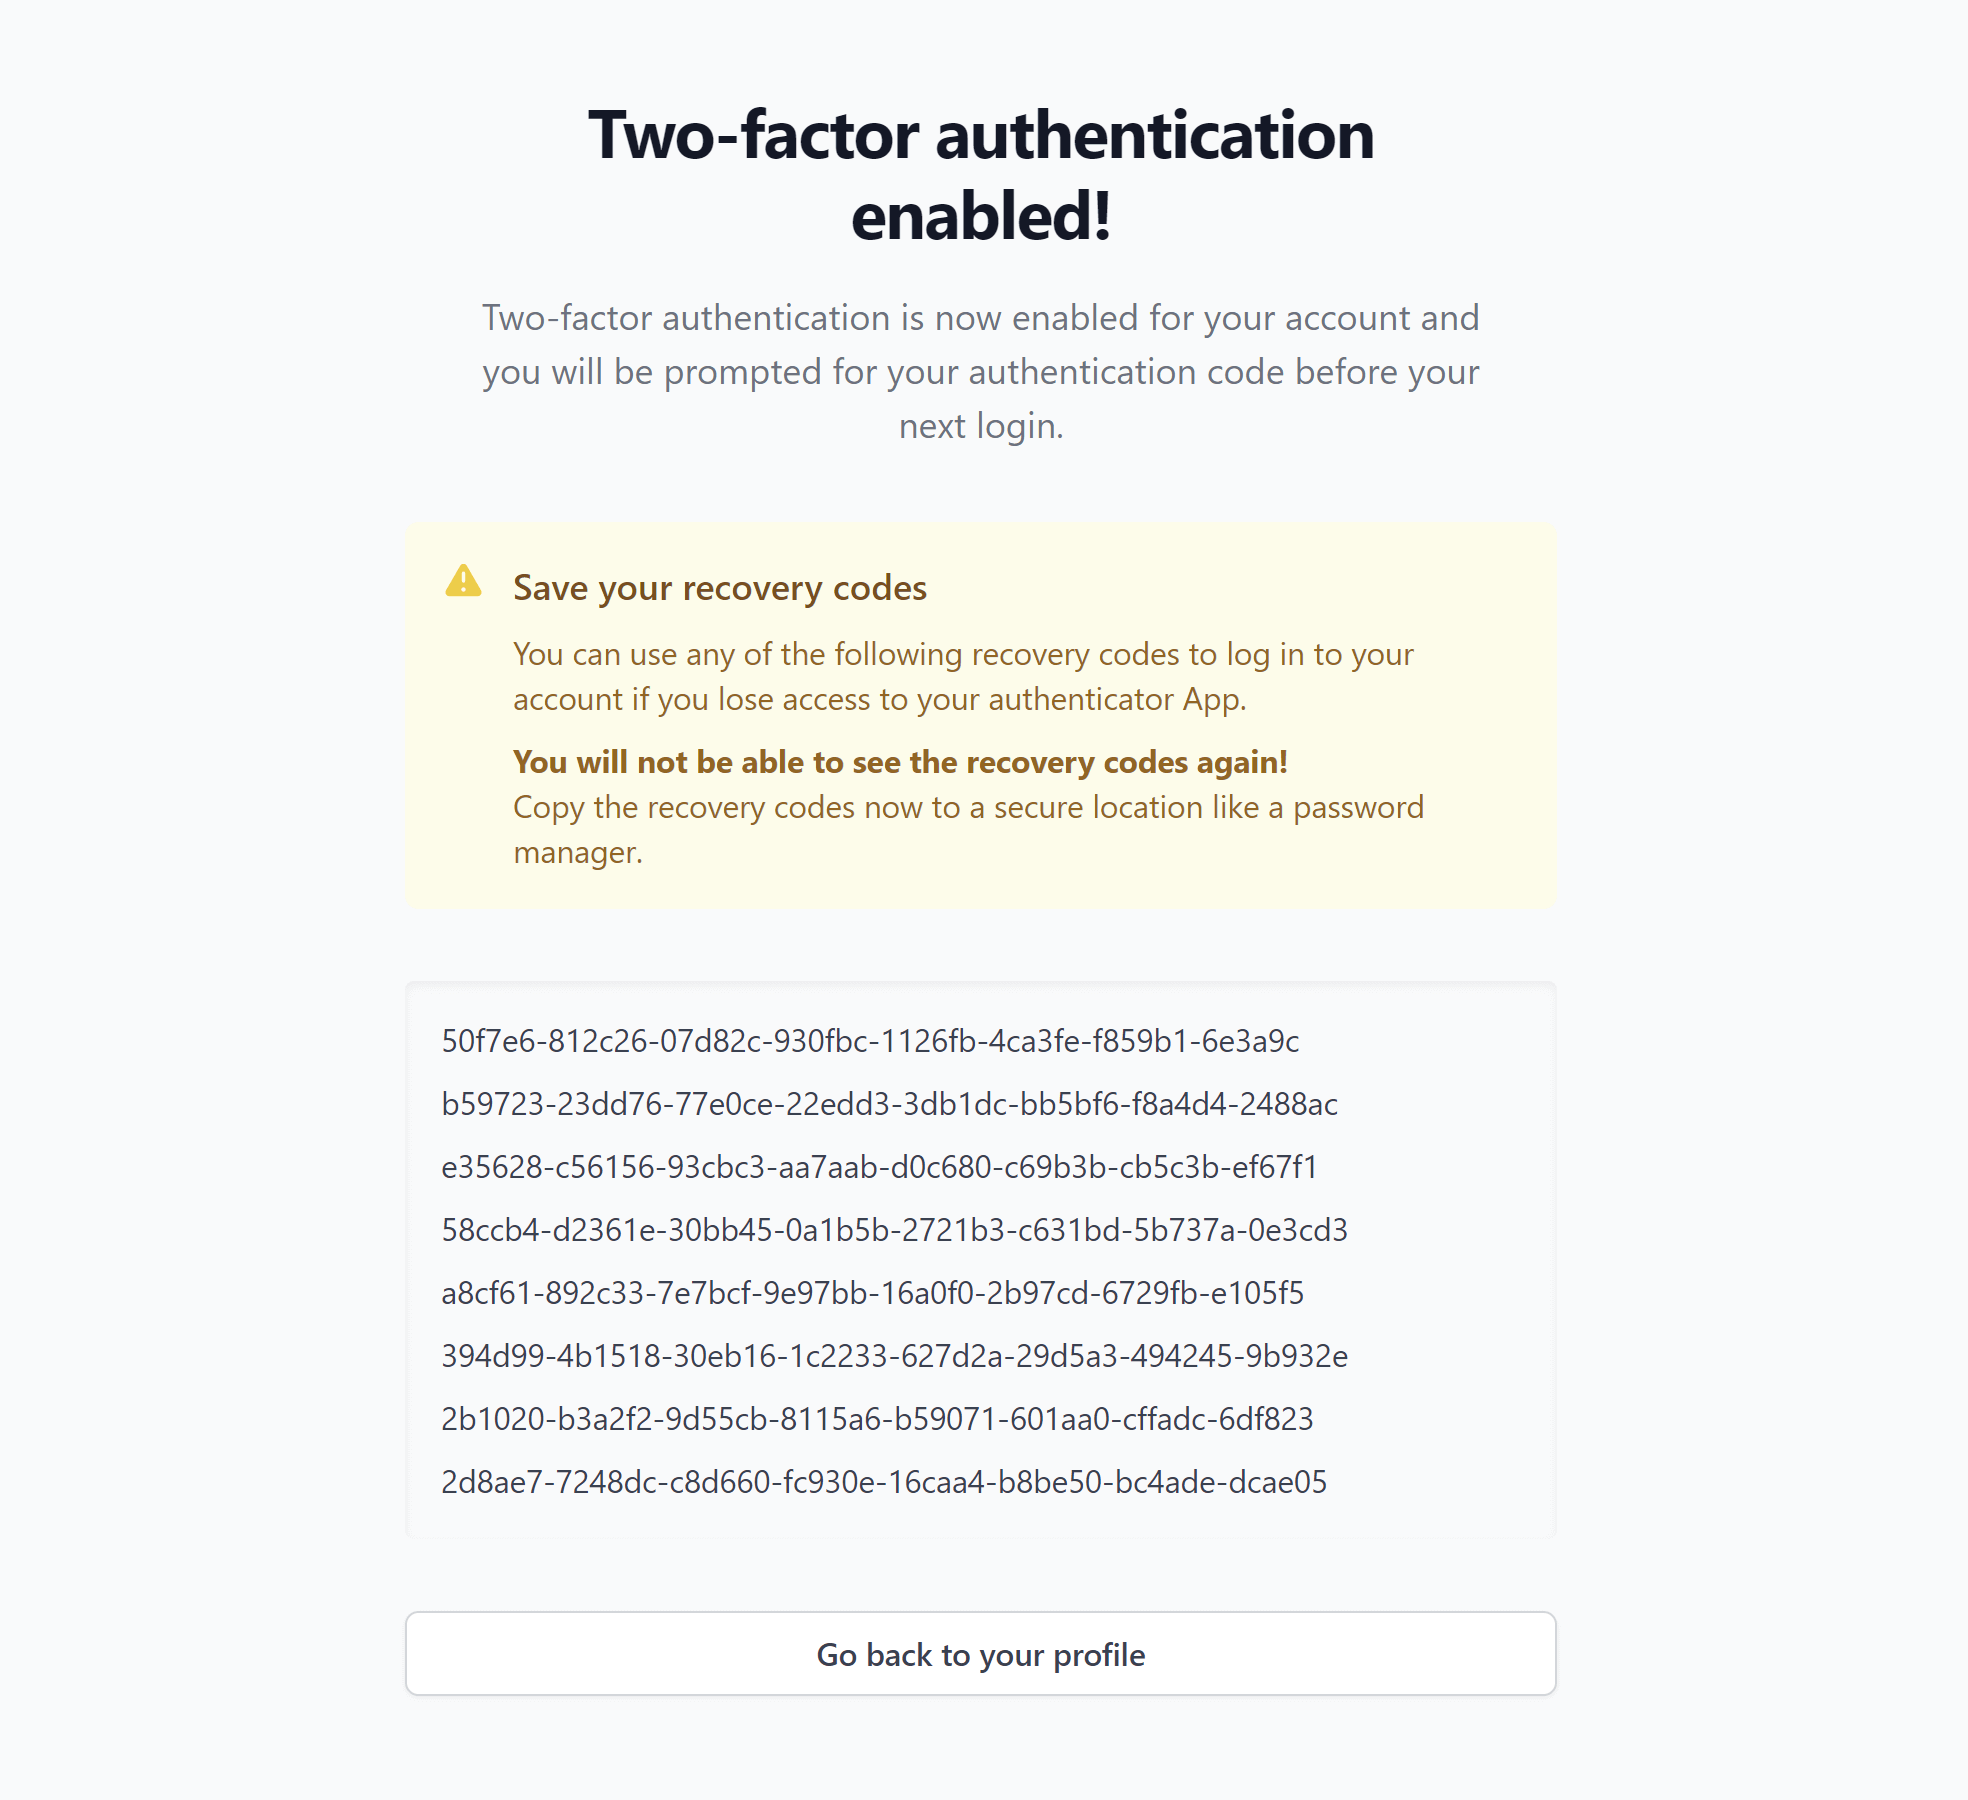
To prevent account lockout due to a mismatch between Fortress and the authenticator app, Fortress will not activate TOTP-2FA until the user provides a valid OTP.
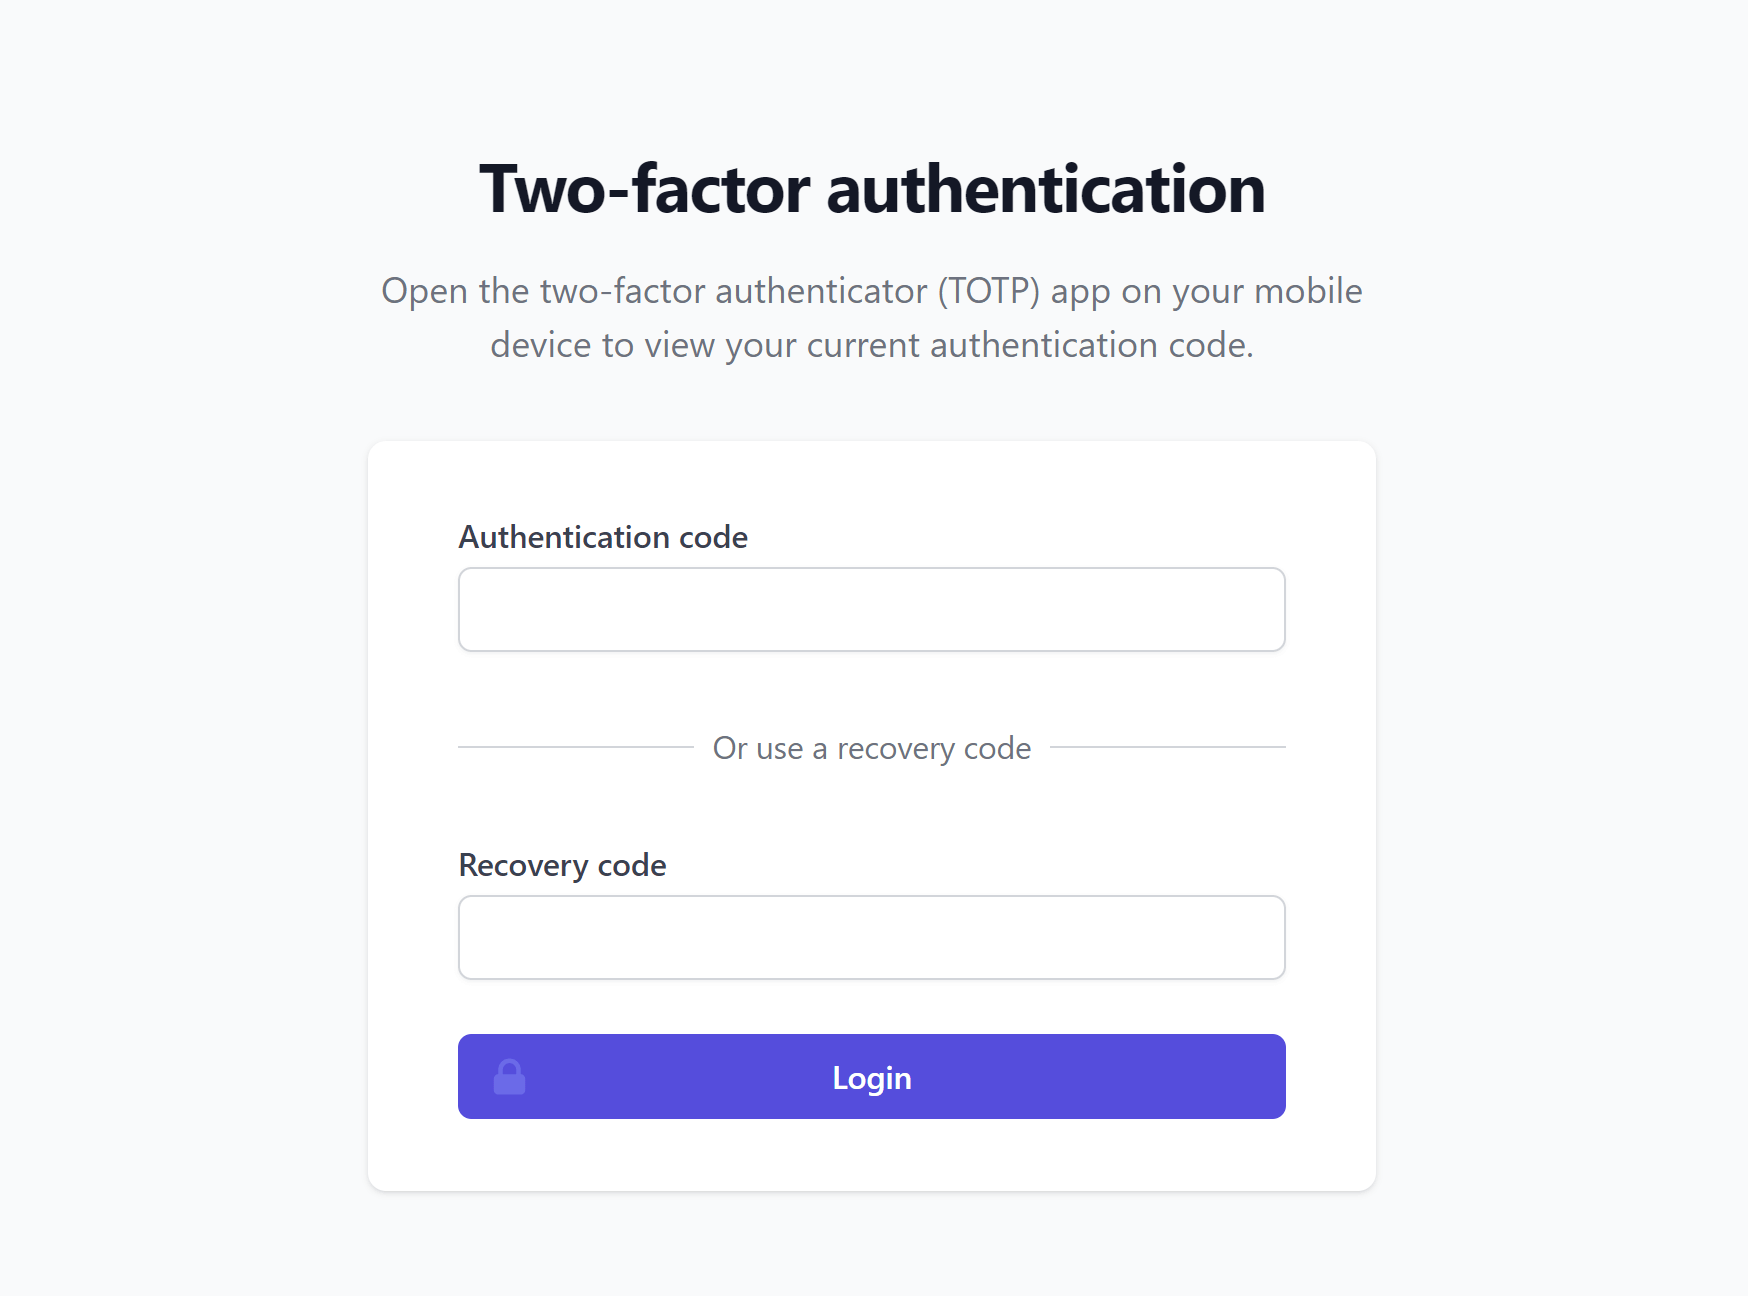
Once set, the next time you log in, you will be required to enter your 2FA authentication code or recovery code:
Configuring Fortress
With the exception of setting up 2FA, which is done inside of your WordPress admin, there are two ways that Fortress can be configured:
- WP-CLI (via GPFort CLI)
- The server and site configuration JSON files
A selection of the most commonly used Fortress WP-CLI can also be run directly from your GridPane dashboard via the website customizer > Fortress tab:
WP-CLI via GPFort CLI
Fortress is built with a CLI-first approach to allow maximum automation in your workflow. Full developer documentation can be found here.
At GridPane, we have our custom gpfort CLI, which, similar to GP WP-CLI, allows you to run Fortress WP-CLI commands as the root user (more details in this section below).
Fortress Configuration JSON Files
Fortress has 3 JSON files which are used to configure the majority of settings, including custom settings such as encrypting sensitive information such as Stripe API keys. These are:
- Baseline configuration (ships by default)
server-config.json(server level)config.json(website level)
Baseline (default) configuration
The baseline configuration is what Fortress ships out of the box and has been designed to work for 95% of all use cases (meaning most brochure websites). To view the most up-to-date Fortress baseline configuration, please check the official developer documentation here: Fortress Baseline Configuration
Server level configuration
The server-config.json can be used to customize your own settings and apply them to ALL websites on a server. These settings override the baseline configuration.
Website level configuration
The config.json is the site-level config file. This can be configured on a per-site basis, and any settings here will override the settings in the baseline and server-config.json files.
The complete configuration reference can be found here.
Forcing 2FA for Privileged Users
Once all of your website’s privileged users have 2FA configured, you can now enforce that each user must have TOTP-2FA configured BEFORE they are allowed to log in.
This can be enforced by adding your websites privileged_user_roles to the require_2fa_for_roles_before_login setting inside the configuration file.
Protection
Forcing 2FA will protect your website against the following attack vectors:
- An attack with WRITE access to the database can’t delete TOTP credentials to bypass 2FA.
- An attacker with WRITE access to the database can’t insert new admin users since they can’t create TOTP credentials without the secret key stored in the filesystem.
- An attacker with a stolen auth cookie can not create sleeper admin users.
- A non-targeted malware can not insert new admin users using <codewp_insert_user.
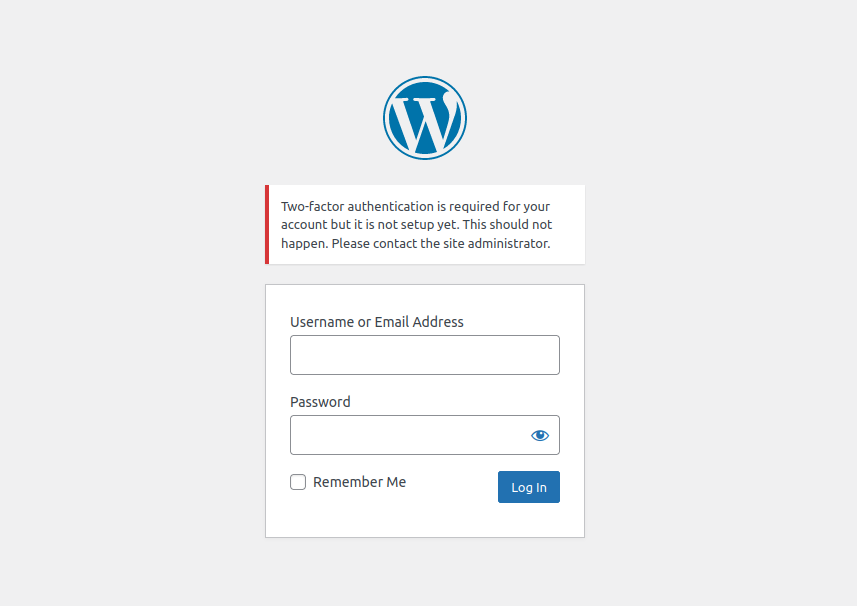
Once configured, any privileged user without TOTP-2FA configured will see the following message when they attempt to log in:
JSON Settings
Only do this AFTER all of your website’s privileged users have 2FA configured for their accounts.
It’s best to set this inside the website configuration file instead of the server configuration, as it will make adding Fortress to new sites easier.
You can adjust the following and your settings to your site configuration file (replace site.url with your website URL):
gpfort site.url -cli fort config update auth.require_2fa_for_roles_before_login='["administrator","editor"]'
Additional Notes
- You can read the official developer documentation here.
- The default privileged users are Administrators and Editors.
Running Fortress WP-CLI Commands from Your GridPane Account
Fortress includes its own WP-CLI, and the GridPane UI allows you to turn the commands that follow in the sections below directly from your GridPane account.
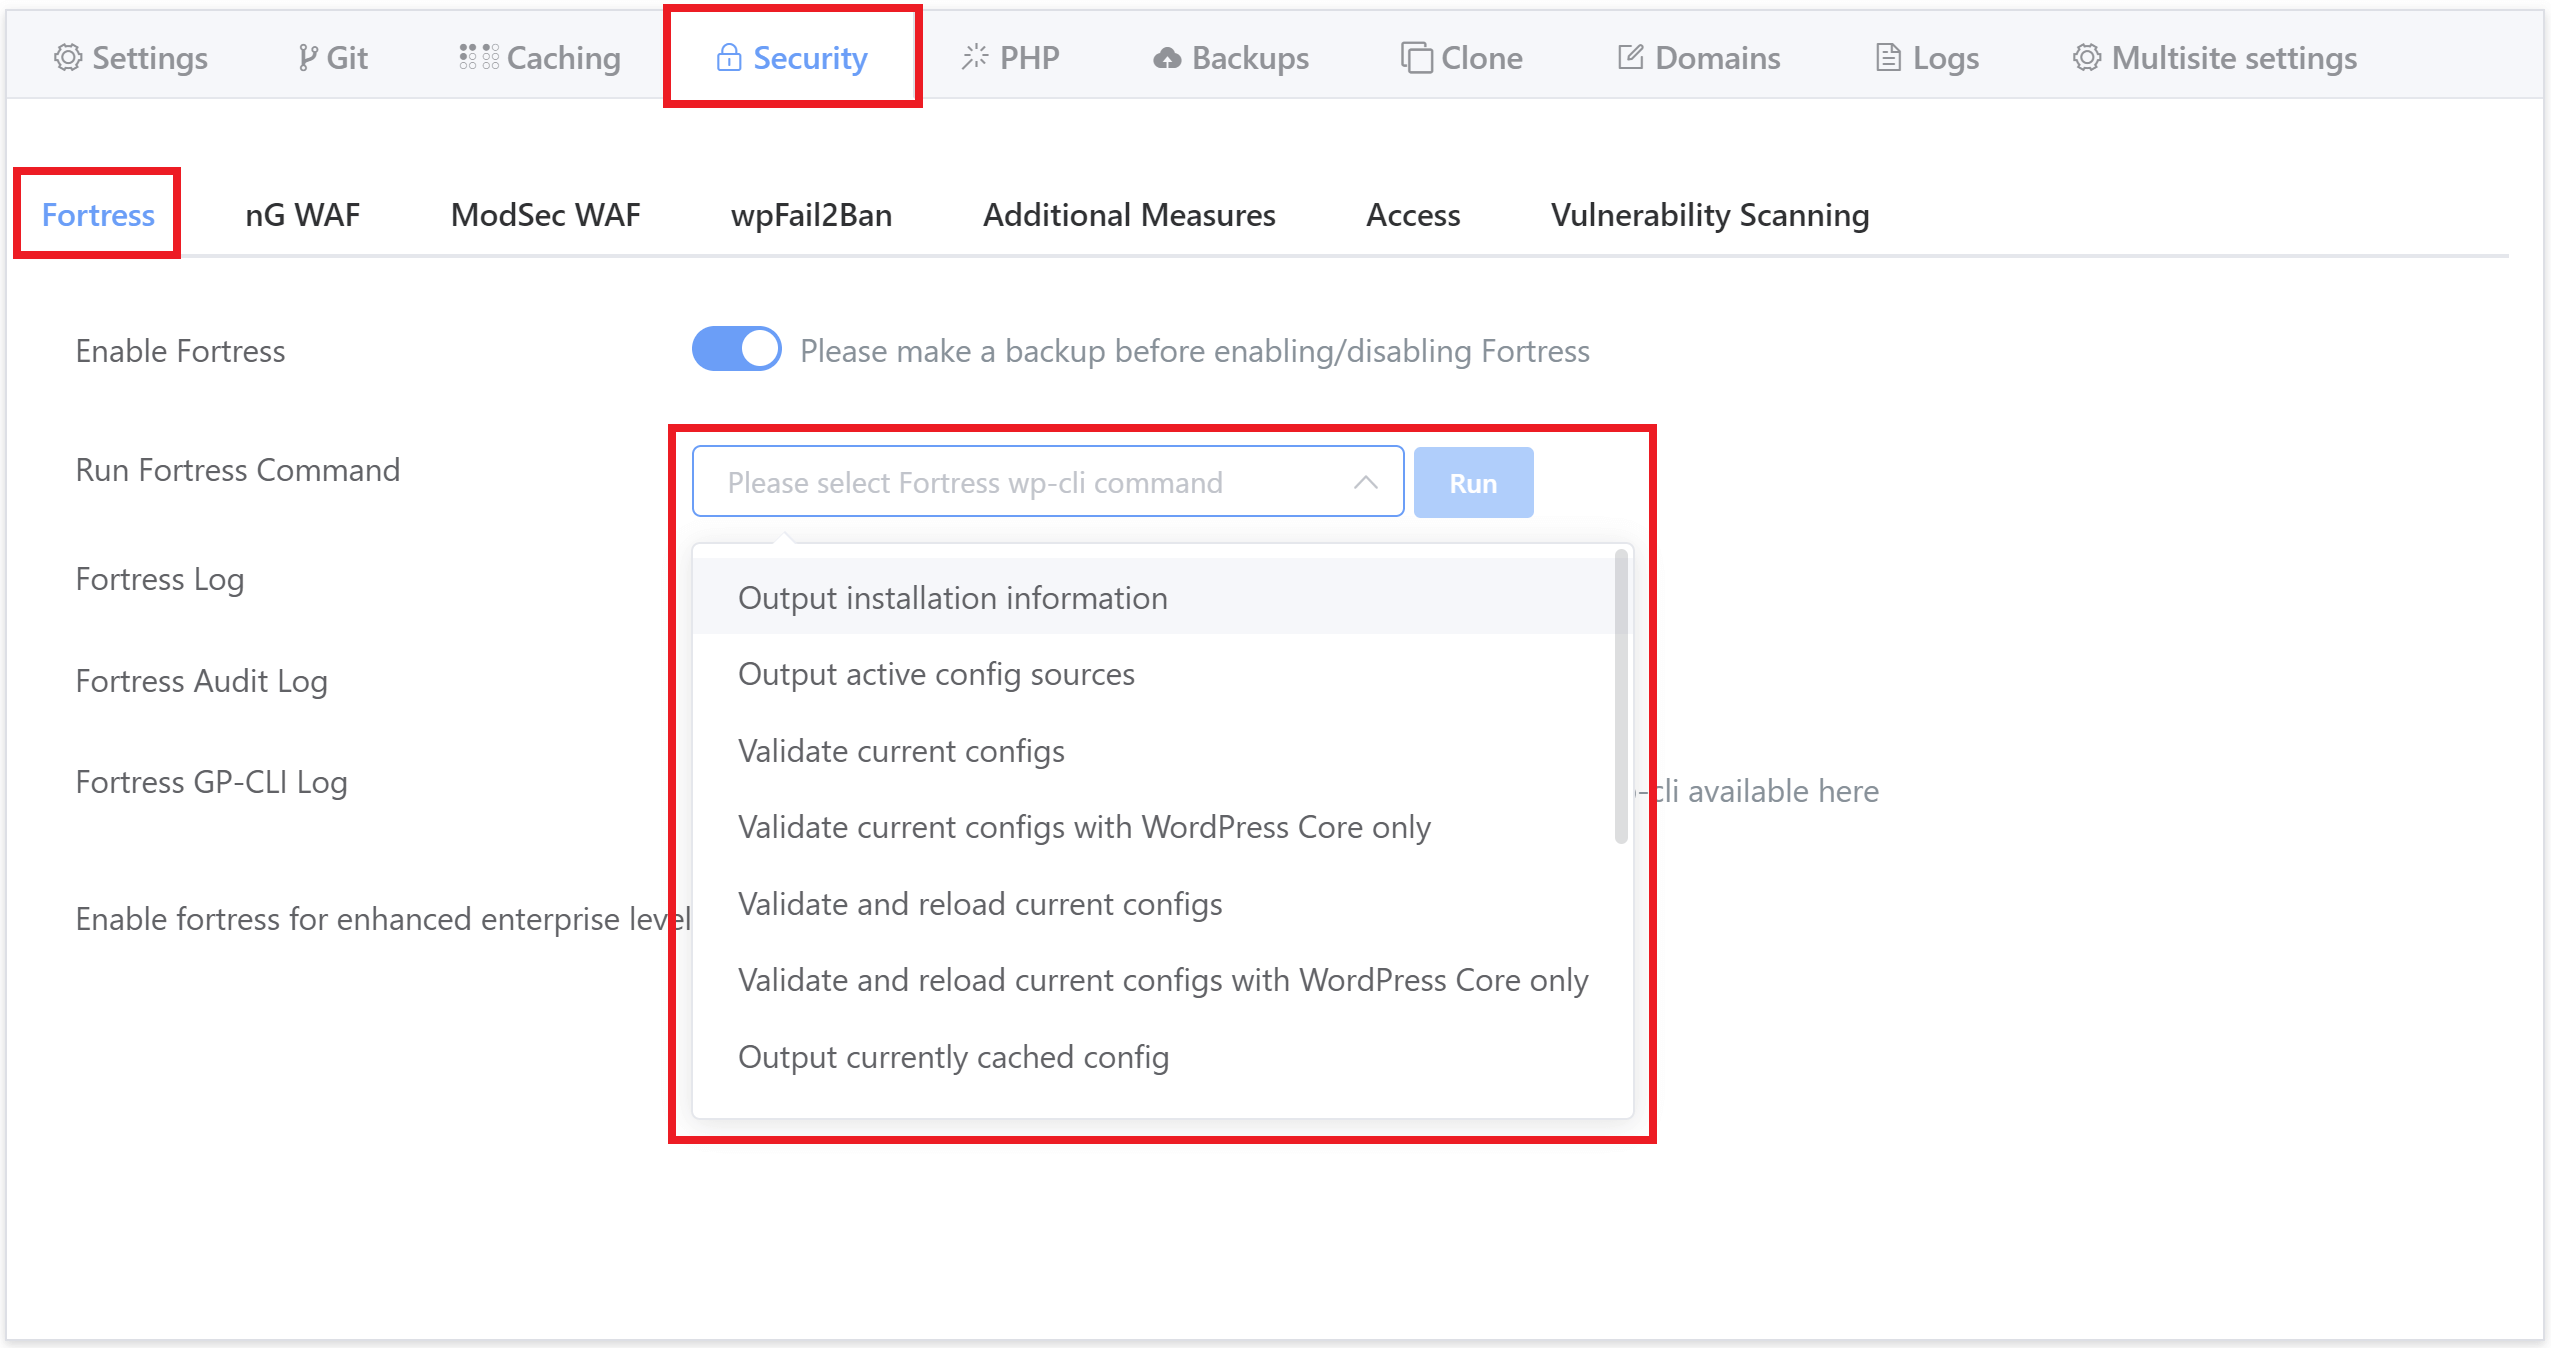
These specific commands allow you to easily run the most common tasks you may need. Simply choose the command you wish to run from the dropdown and hit the Run button.
Further Commands and Info
You can view all of the available Fortress WP-CLI commands in the official Developer Documentation here:
Developer Docs: Fortress WP-CLI Integration
And this section details how to run Fortress WP-CLI for your GridPane websites:
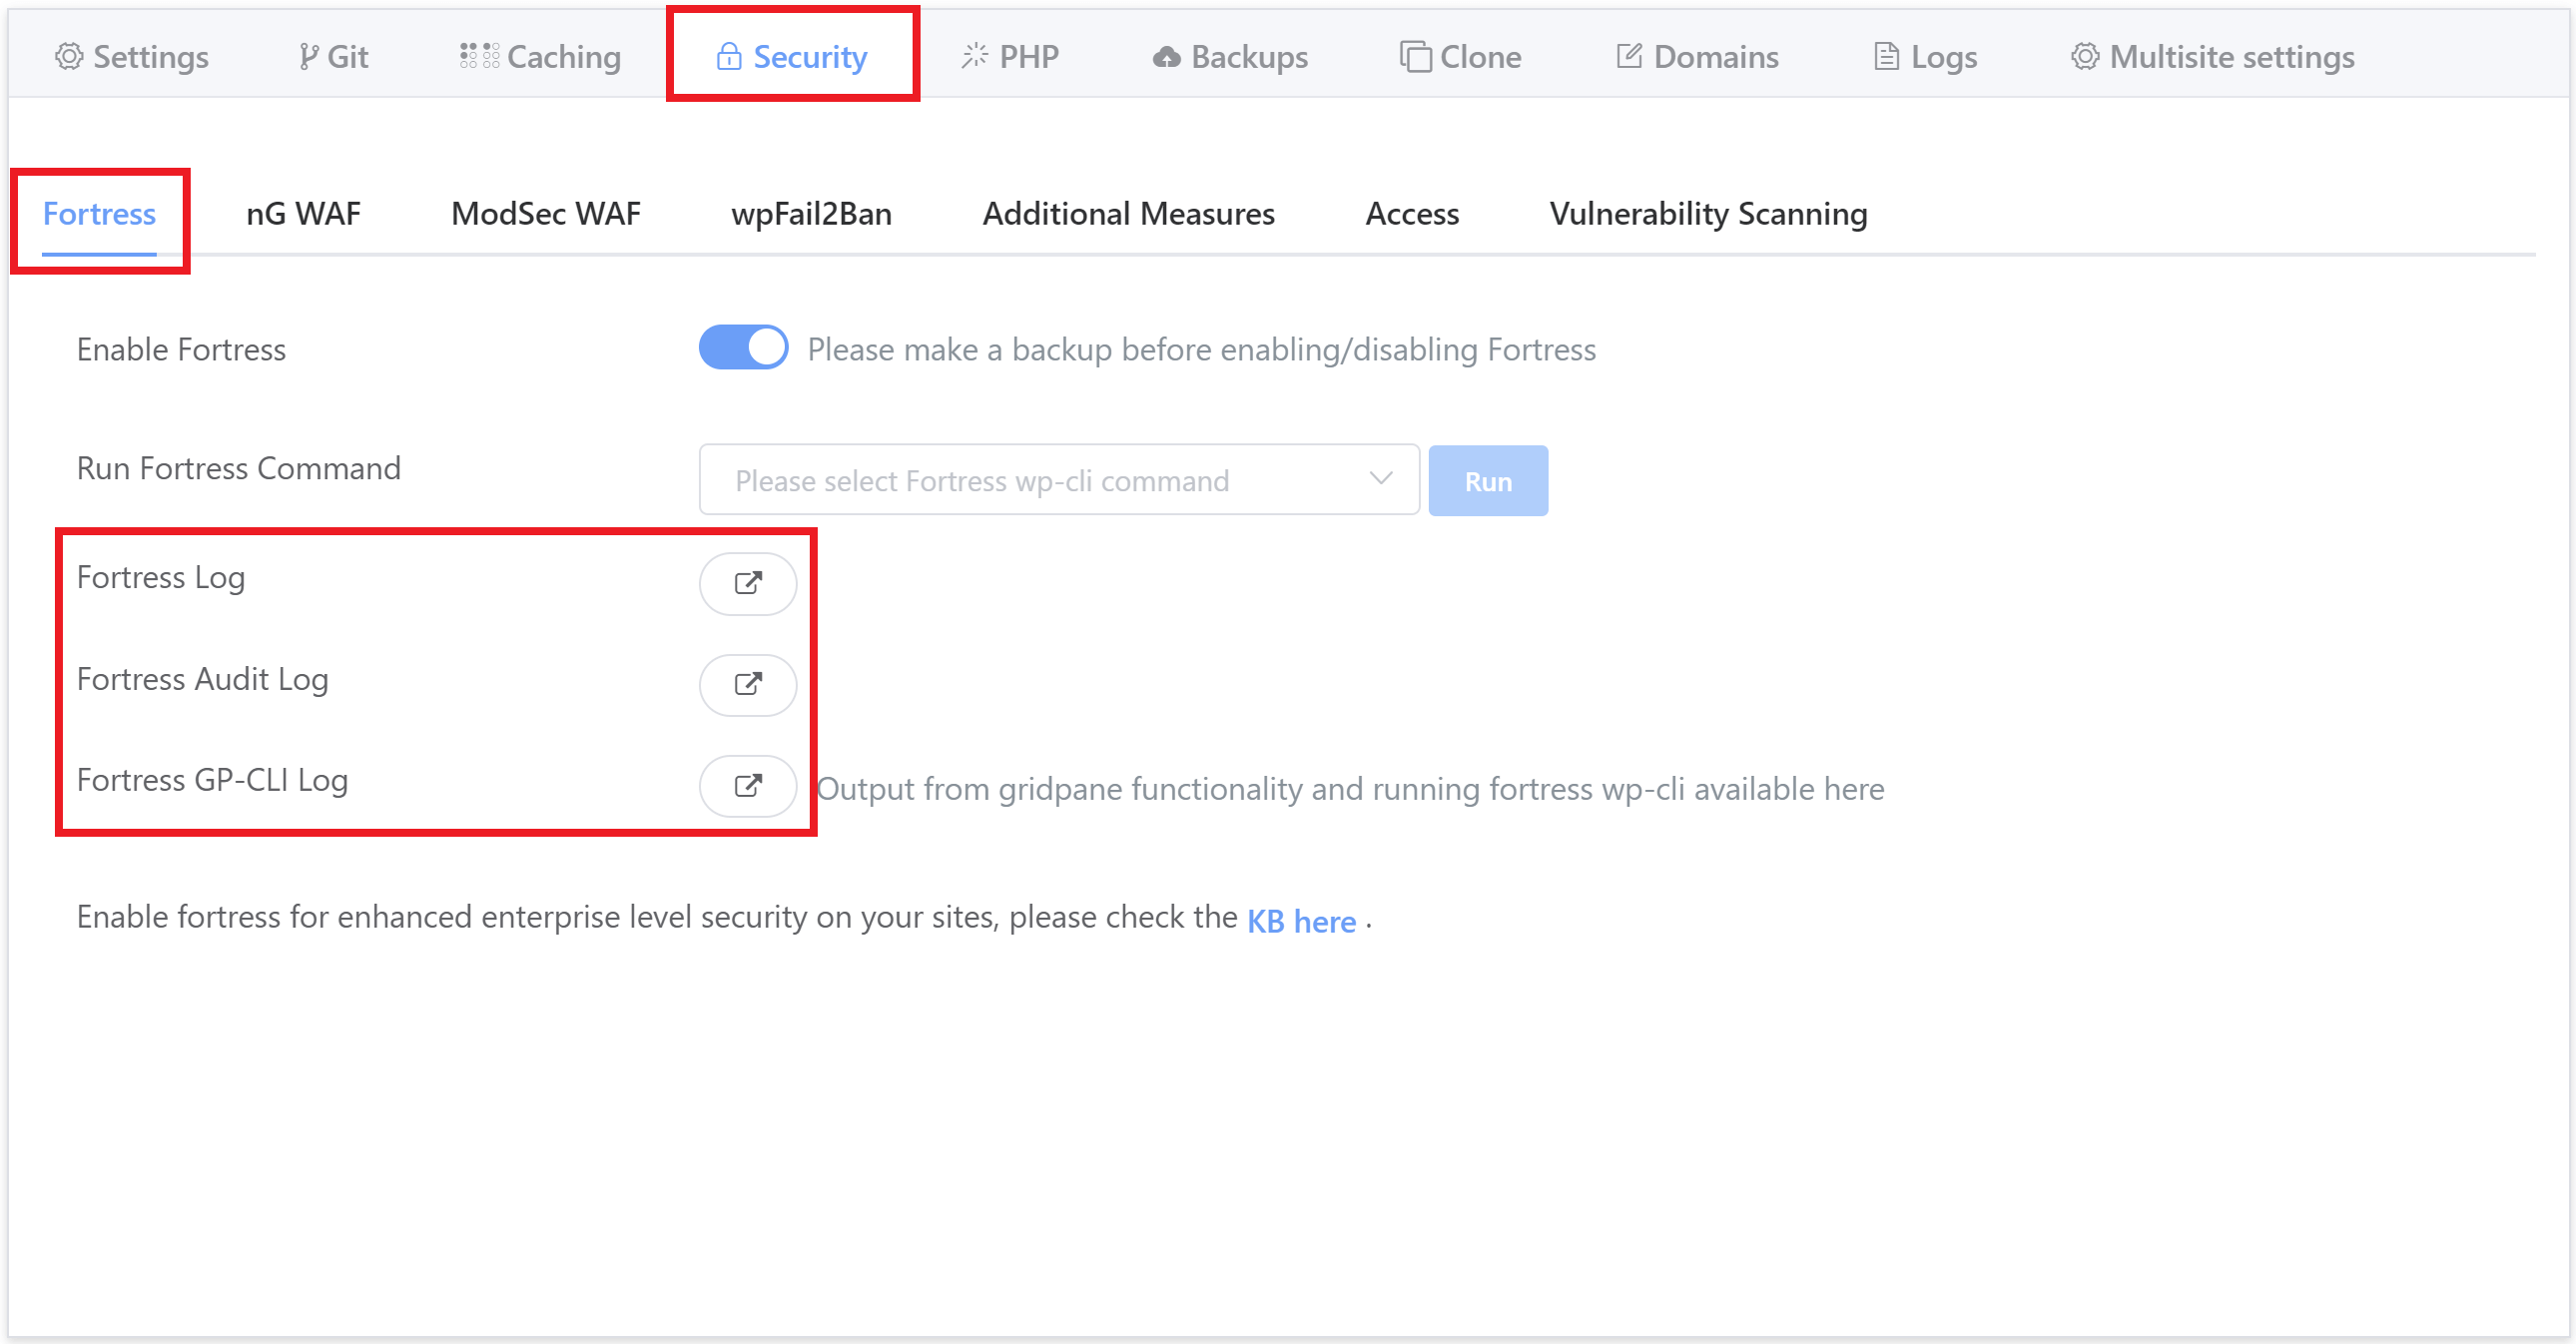
GridPane UI: Viewing the Fortress Logs
Inside your GridPane account, you can now view the following three logs:
- Fortress Log
- Fortress Audit Log
- Fortress GP-CLI Log
These can be found inside the website customizer in the security tab:
Fortress Log & Audit Log
These logs detail Fortress events and are useful for troubleshooting purposes.
- The Fortress log will detail errors and/or exceptions.
- The Audit log details what Fortress has done ( logins, 2FA activated, etc).
Fortress GP-CLI Log
All output from GridPane functionality and running Fortress WP-CLI can be viewed directly inside this log. This includes all of the output from the WP-CLI commands found in the same tab in the “Run Fortress Command” dropdown.