Converting via phpMyAdmin
If your website has a fairly small database or only a few tables that need converting, phpMyAdmin makes this quick and easy.
Step 1. Open up phpMyAdmin
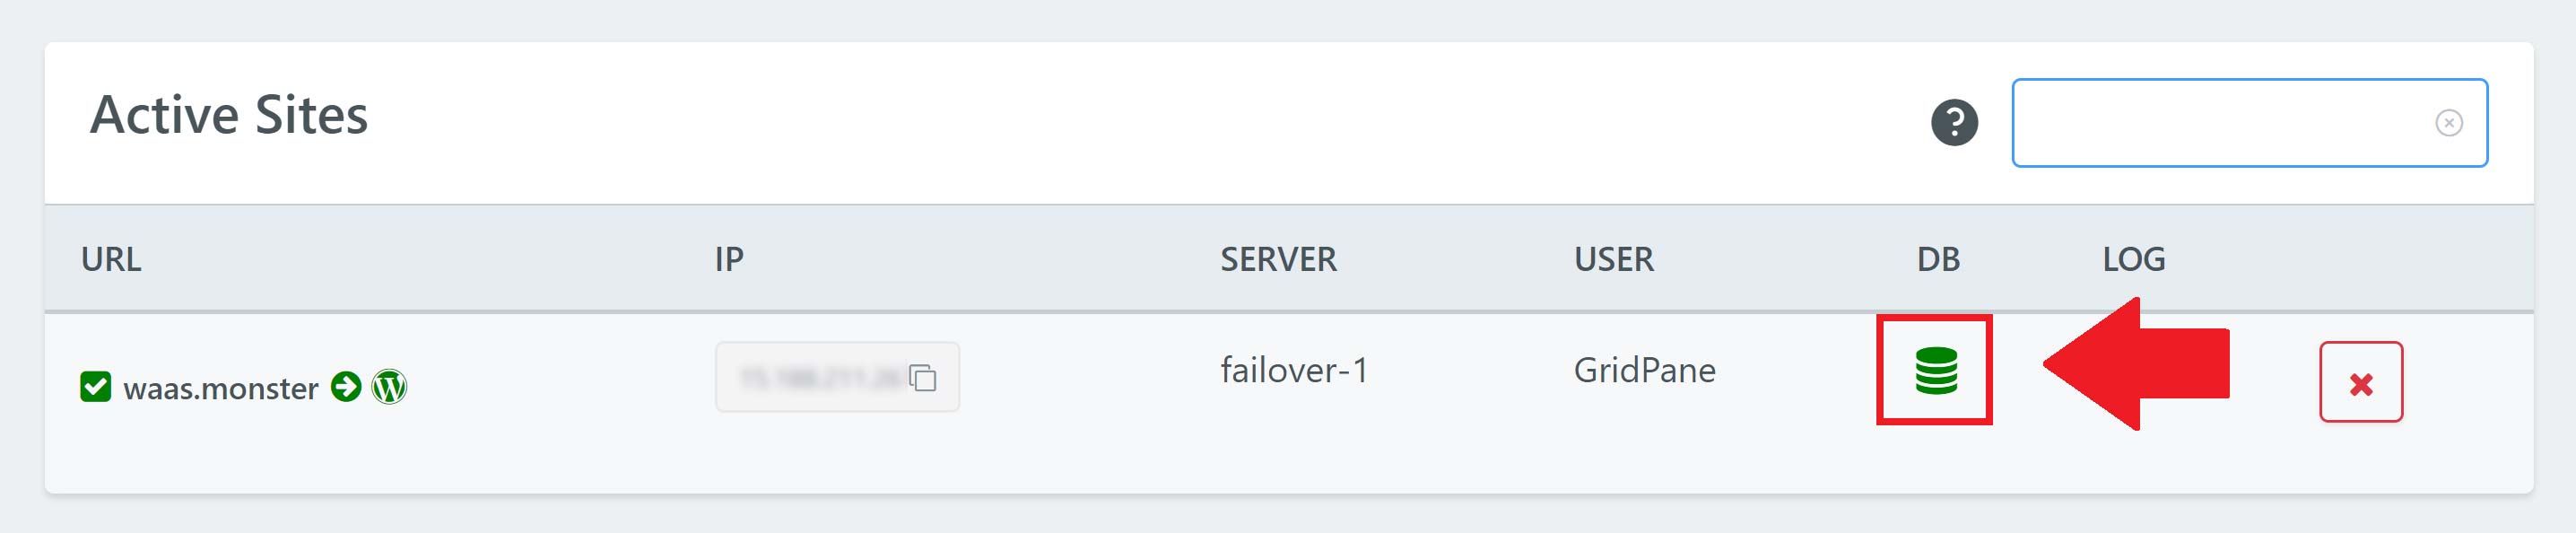
In your account, open up phpMyAdmin by clicking the database icon next to your website.
Step 2. Click through to your database and check for MyISAM tables
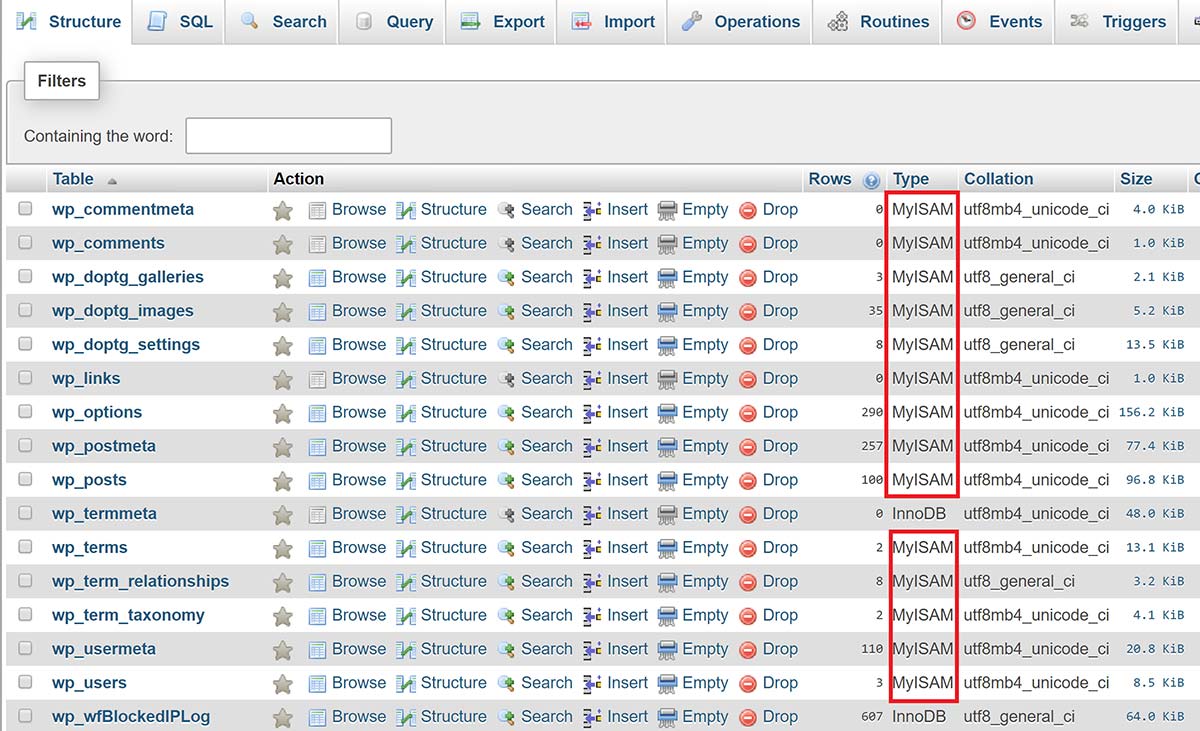
The website in this example has a mix of both MyISAM and InnoDB as you can see below:
Step 3. Convert your tables into InnoDB
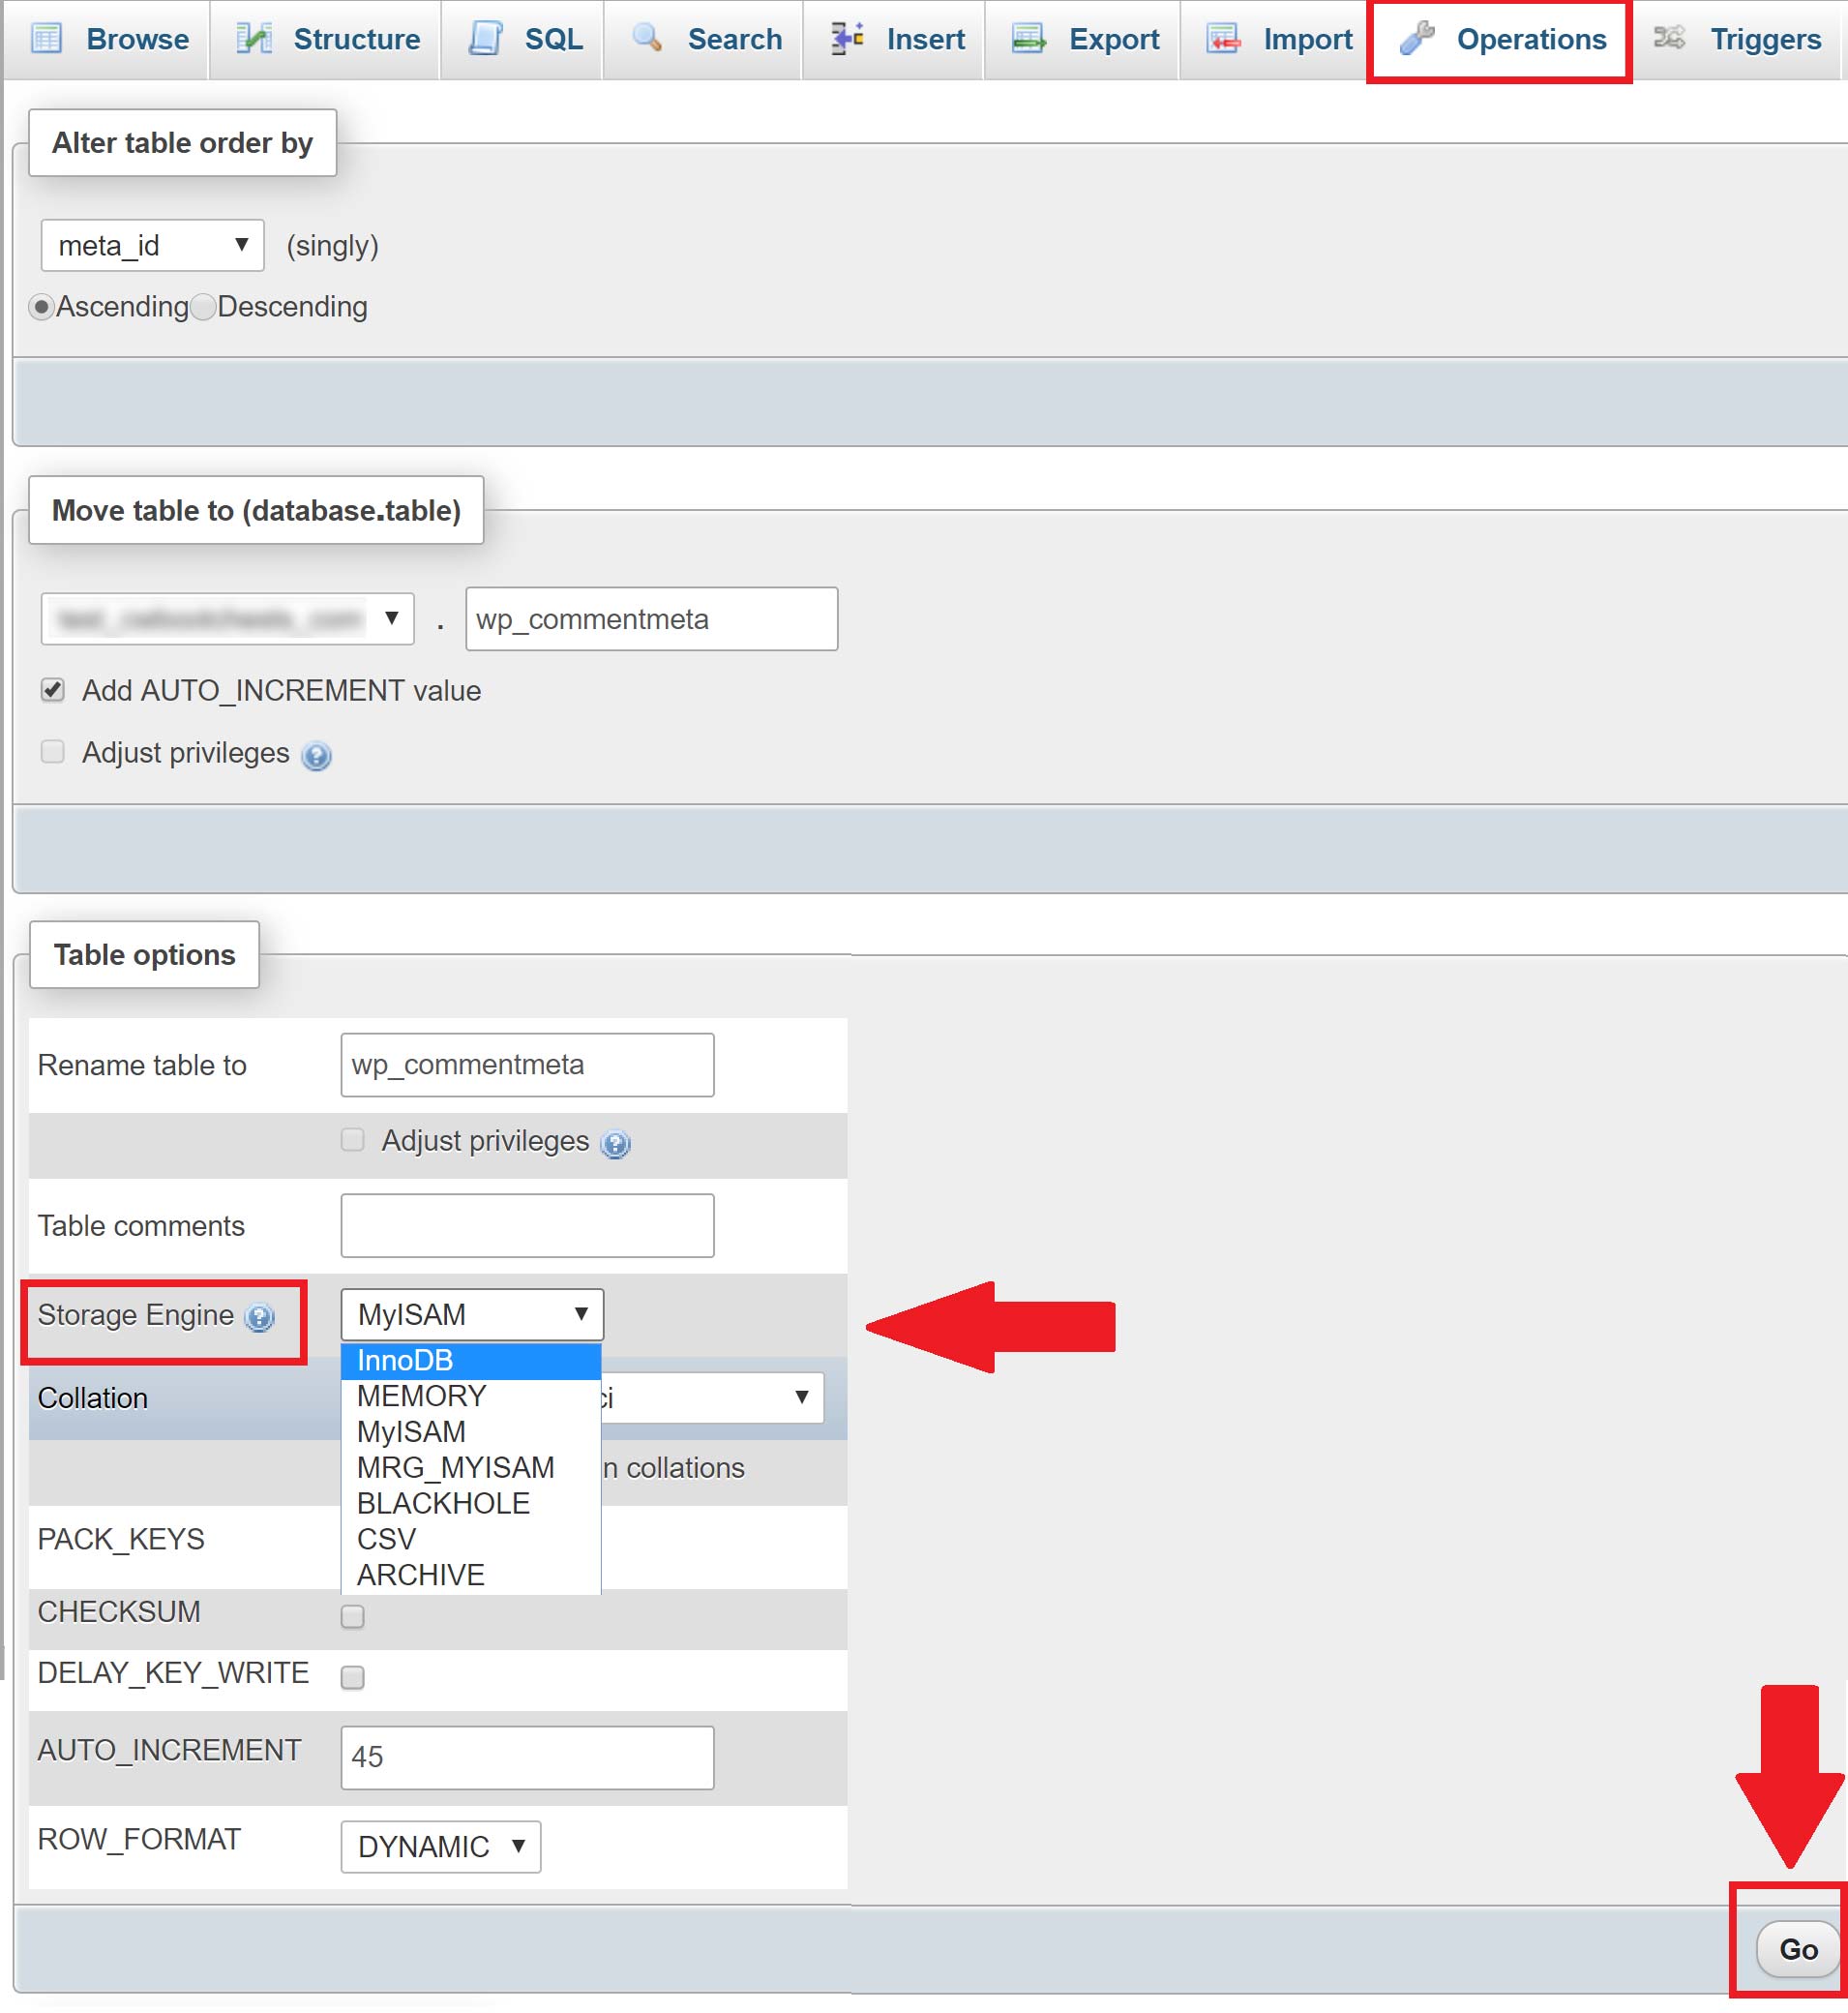
Click on the table you wish to alter and then click through to the operations tab at the top.
You’ll see the following layout, and under storage engine you can select “InnoDB” from the dropdown and click “Go”.
You’ll see a success message as shown below, and you can repeat the same process for your remaining tables. Click your database name in left hand column to return to your table overview.

Step 2. Check for MyISAM tables
First navigate to your websites htdocs directory with the following command (switching out “site.url” for your domain name):
cd /var/www/site.url/htdocs
Our GP WP-CLI wrapper won’t work for this use case so we’re instead going to use regular WP-CLI.
Next, run the following command to run the search (replace mysystemuser with your websites actual system user):
sudo -u mysystemuser wp db query "SHOW TABLE STATUS WHERE Engine = 'MyISAM'"
In my case, we can see I have quite a few tables that need converting:

Step 3. Convert MyISAM to InnoDB
Be sure that you’ve backed up your database before proceeding! You can create a backup with this command:
gp wp site.url db export /var/www/site.url/htdocs/name_of_backup.sql --all-tablespaces --add-drop-table
The following command will convert all MyISAM to InnoDB. Run the conversion with the following command (again replacing mysystemuser with your websites system user like above):
sudo -u mysystemuser wp db query "$(wp db query "SELECT CONCAT('ALTER TABLE ',table_name,' engine=InnoDB;') FROM information_schema.tables WHERE engine = 'MyISAM' AND table_schema = '$(wp db size --format=csv --allow-root | awk -F, '{print $1}' | tail -1)'" --allow-root --silent --skip-column-names)"Big thank you to Cloud Keeper for the above code.
You’re now all set!