Table of Contents
- Introduction
- Part 1. A Quick Introduction to Git
– What Exactly is Git?
– What are the Benefits of Using Git?
– What is a Git Repository? - Part 2. Using Git Fundamentals
– 1. Install Git
– 2. Running Git Commands
– 3. Configure Your Git Name and Email
– 4. Create Your GitHub Account
– 5. The .gitignore file
– 6. Creating a Git Repository
– 7. Git Status
– 8. Stage Changes to a Repository
– 9. Committing Changes to a Repository
– 10. Pushing to GitHub - Part 3. Further Learning
– Git Resources
– Getting Started with GridPane Git
Introduction
The goal of this article is to provide a simple, quick-start guide for anyone who is brand new to using Git and wants to begin learning. We’ll be covering the absolute basics necessary to get up and running, which means creating repositories and pushing them to GitHub.
This is the bare minimum you need to know, and this article skips as much of the command line work as possible to make it as accessible as possible. This will not cover working with multiple branches, or any advanced topics, but we’ve also included a section on resources for learning more, as well as the next steps in your GridPane-Git journey.
We’ll be using GitHub in our examples, but alternatives like Bitbucket and GitLab are available, too.
Part 1: A Quick Introduction to Git
What Exactly is Git?
Git is a version control system (VCS). In a nutshell, it’s software that [in our case] can be used to track and manage code changes on our WordPress website files over time.
Git is one of many different programs for a version control system, but it is by far the most popular and the obvious choice for managing WordPress, and it’s the most popular VCS among all developers.
What are the Benefits of Using Git?
Git will allow you to develop your websites in a safe and secure manner, and it offers a multitude of additional benefits that include:
- You have full backups of all codebase changes that you can easily revert to if you ever need to do so.
- You can track the changes you make over time and compare different versions of a project.
- You can work across multiple branches which allows you to fix bugs, experiment with changes, develop new features, etc all at the same time without pushing all of those changes live at once.
- You can collaborate on projects with your team and other developers and combine your changes together.
Git is particularly useful for complex projects that are in a constant state of development and iteration.
What is a Git Repository?
A Git repository (commonly referred to as a “repo”) is a Git workspace used to manage a set of folders and files, and that has its own recorded history.
Typically, each of your WordPress websites will have it’s own repo, but you can also use one repo for multiple sites. For example, multitenancy can be used to build an entire SaaS business similar to SquareSpace, Wix, etc, running a singular, immutable codebase that all websites use.
Part 2: Using Git Fundamentals
1. Install Git
Installing Git is straightforward. You can download for MacOS, Windows, and/or Linux/Unix here:
You can follow along with most of the basic install recommendations, however, when the option for choosing the default text editor for Git, you may want to choose something like Visual Studio Code instead of the default Vim editor.
The options you’re presented with will change over time, so if you’re unsure about anything, a quick Google search or YouTube video should help you find the info you need.
Git for Windows
Windows cmd.exe and PowerShell are not compatible with Unix-shell scripts, so a program called “Git Bash” will be installed. This is what you’ll use to run your Git commands in part 2 below.
Git for Mac
MacOS has native bash installed by default, so no additional shell is required and you simply use the default Terminal to run your Git commands.
2. Running Git Commands
To use Git, you’ll need to learn some basic Git commands. Don’t worry, this is just as simple as using the commands throughout the rest of our knowledge base for managing your sites and servers (it’s mostly just copy and paste).
To run your commands, you need to open up Git Bash on Windows, or the Terminal on MacOS.
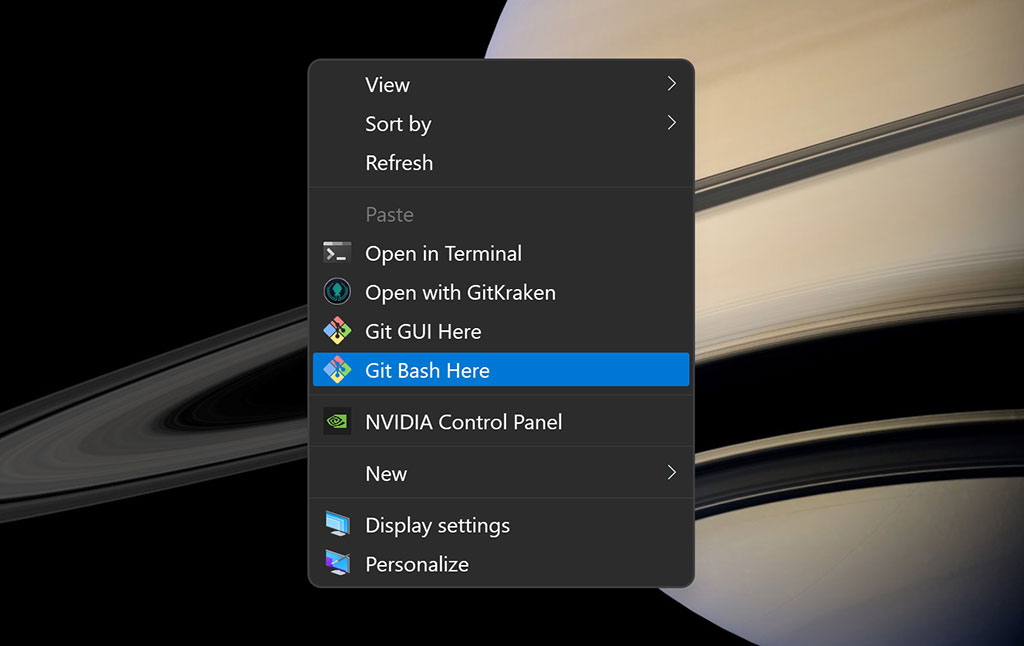
Open Git Bash on Windows
Right-click either on your desktop or on a specific folder that you’d like to manage with Git and select Git Bash Here.
Open the Terminal on Mac
You may need to enable Right Click > Terminal Here on your Mac. To do this:
- Click on the Apple Logo and select System Preferences
- Select the Keyboard
- Here navigate to Shortcuts > Services and check “New Terminal at Folder“.
Apple is updating their UI so I don’t have screenshots of the whole process available, however, the steps are still the same whether you’re using their latest version or a previous version of MacOS. Here’s the box to be checked:
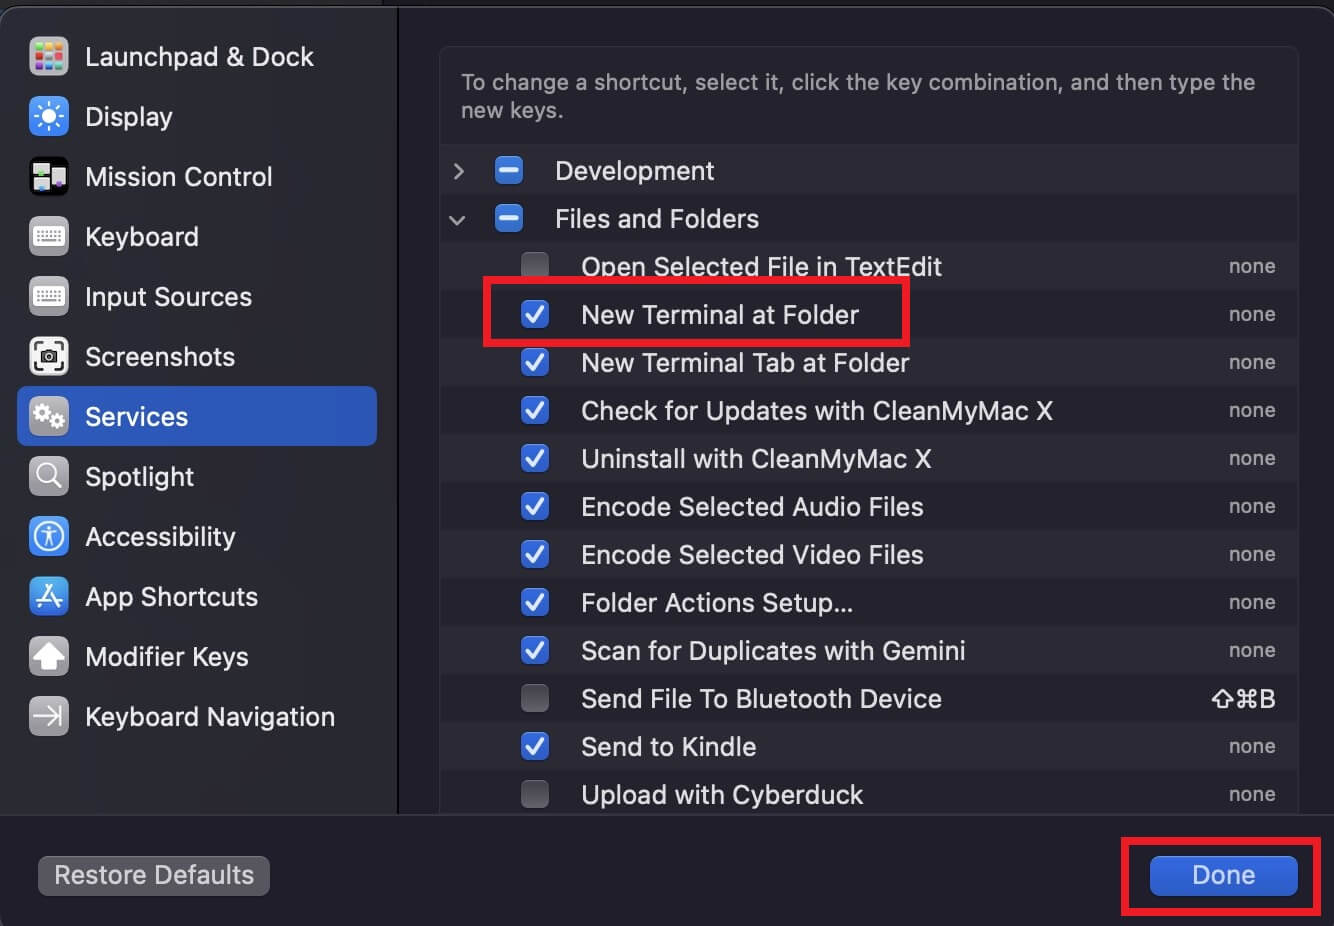
Now, when you right-click on a folder, you can choose Services > New Terminal at Folder to open up a terminal and begin using Git.
3. Configure Your Git Name and Email
This isn’t linked to your Git host, but it is recommended that you use the same name and email address for both (though you can easily change it at any time with the same commands below). Your name should be the name you want to be known by as a Developer.
This is the name and email address that will be logged inside Git when you make changes to your repo. If you’re working with multiple developers on a project, Git will record who made specific changes
To set your name and email open up the terminal as outlined in the previous step.
Set Your Name
Set your name with:
git config --global user.name "Your Name Here"
Set Your Email
Set your email with:
git config --global user.email "[email protected]"
Confirm Your Name and Email
Next, you can confirm your Git name and email have been set with:
git config user.name
git config user.email
4. Create Your GitHub Account
Head over to github.com and create your free account if you don’t already have one. We recommend that you use the same details as in the previous section when setting up your account.
Once created, download and install the GitHub desktop application:
Once installed, open up the app and sign in to your GitHub account.
If you would prefer to use the command line instead of a GUI, you can check out this article:
5. The .gitignore File
I’m covering the .gitignore file first before you create a repo because you may want to set this up beforehand.
.gitignore is a file that Git will look for, and it allows you to specify files that you don’t want to track as a part of your repository. This can be particularly useful for excluding files that are present when developing locally (for example, the wp-config.php file), but aren’t necessary for your live website when pushed to GridPane.
It can also be useful for excluding any files that contain sensitive information should they exist.
Using the .gitignore file
This file won’t exist by default, and as it begins with a dot, it’s also a hidden file.
On MacOS you should be able to create the file and name it like you would a regular txt file.
Windows won’t let you create a file without an extension, so to get around this, you can create a new Txt file and name it “.gitignore.”. The extra . at the end will automatically be removed, and set the name correctly once you save the file.
Adding to the .gitignore file
Open up the file with a text editor and here you can add your files, one per line. When adding files inside a directory within your repo, these should be relative to your Git directory. So, for example, if you were adding a file inside the /wp-content directory, the relative path would be:
wp-content/filetoignore.log
You can wildcard ignore using an asterisk, for example, you can ignore all log files with:
*.log
And you can ignore an entire directory simply by placing the relative file path followed by a backslash, for example:
mycustomfolder/customstuff/
This will still track everything inside the mycustomfolder directory that isn’t inside the customstuff directory.
A Simple .gitignore example
Here’s an example of a starter .gitignore file:
.DS_Store
wp-config.php
wp-config-sample.php
The .DS_Store files are specific to MacOS and have no relevance to your repo.
6. Creating a Git Repository
To begin using Git for a project, we first need to tell Git that we want to do so.
To create a Git repo for a WordPress website, navigate to the folder on your computer containing your WordPress core files (the equivalent directory to your /htdocs directory on GridPane). This directory will, by default, contain your wp-config.php file. I’d recommend adding this to your .gitignore file before you convert this directory into a Git repo.
Next, right-click on the folder that contains your WordPress installation and open up the Terminal.
Git Init
To create your repo run the following:
git init -b main
Note that “main” is the name of the branch, which you can change if you wish to do so (though “main” is becoming the norm for the master branch).
You can also just run:
git init
And Git will name it as per your default.
You’ve now created your first Git repo.
7. Git Status
The Git status command is as follows:
git status
This is probably the command that you’ll use most when using Git. The output will let you see what changes have been tracked by Git but not yet committed, and what their status is. This means any new files you may have added and any edits to existing files that you’ve made.
If your directory isn’t a repo yet, this command will also let you know.
8. Stage Changes to a Git Repository
With Git you can first stage changes before committing them. This allows you to selectively commit changes that you’ve made instead of just lumping all changes into one big commit.
For example, say you’ve been working on a custom plugin but you also need to update some of your other existing plugins. By using staging, you can select only the plugin updates that need to be made and stage those changes, but leave your other custom work alone.
This allows you to commit those updates and continue on developing your other project without adding that to your repo before you’re ready to do so. Later, when this is complete, you can stage and commit these changes separately as well. All of this is then tracked as a part of your repo history.
Using git add commands
To stage a single file you can use the following:
git add file.php
You can stage multiple files with the same command, separating files with a space:
git add file.php file.txt file.js
You can stage a directory and all its files with:
git add directoryname/
You can stage ALL changes with:
git add .
View Changes to be Committed
Now if you run:
git status
It will list your “Changes to be committed:“
9. Committing Changes to a Git Repository
This step is where you commit your changes to your repo. You can commit the changes that you’ve staged with:
git commit -m "Your Commit Message"
For your initial commit, you may want to simply have your message say “Initial commit“. After your initial commit, your messages should help you review your history and understand what these commits actually did at a glance.
Stage and Commit Your Changes Together
You can also skip the staging process and straight commit ALL changes with:
git add . && git commit -m "Your commit message"
Confirm Your Changes Have Been Committed
You can confirm your new status with:
git status
This will let you know of any files that have yet to be added/committed. If you’ve committed all changes it will say “nothing to commit, working tree clean”.
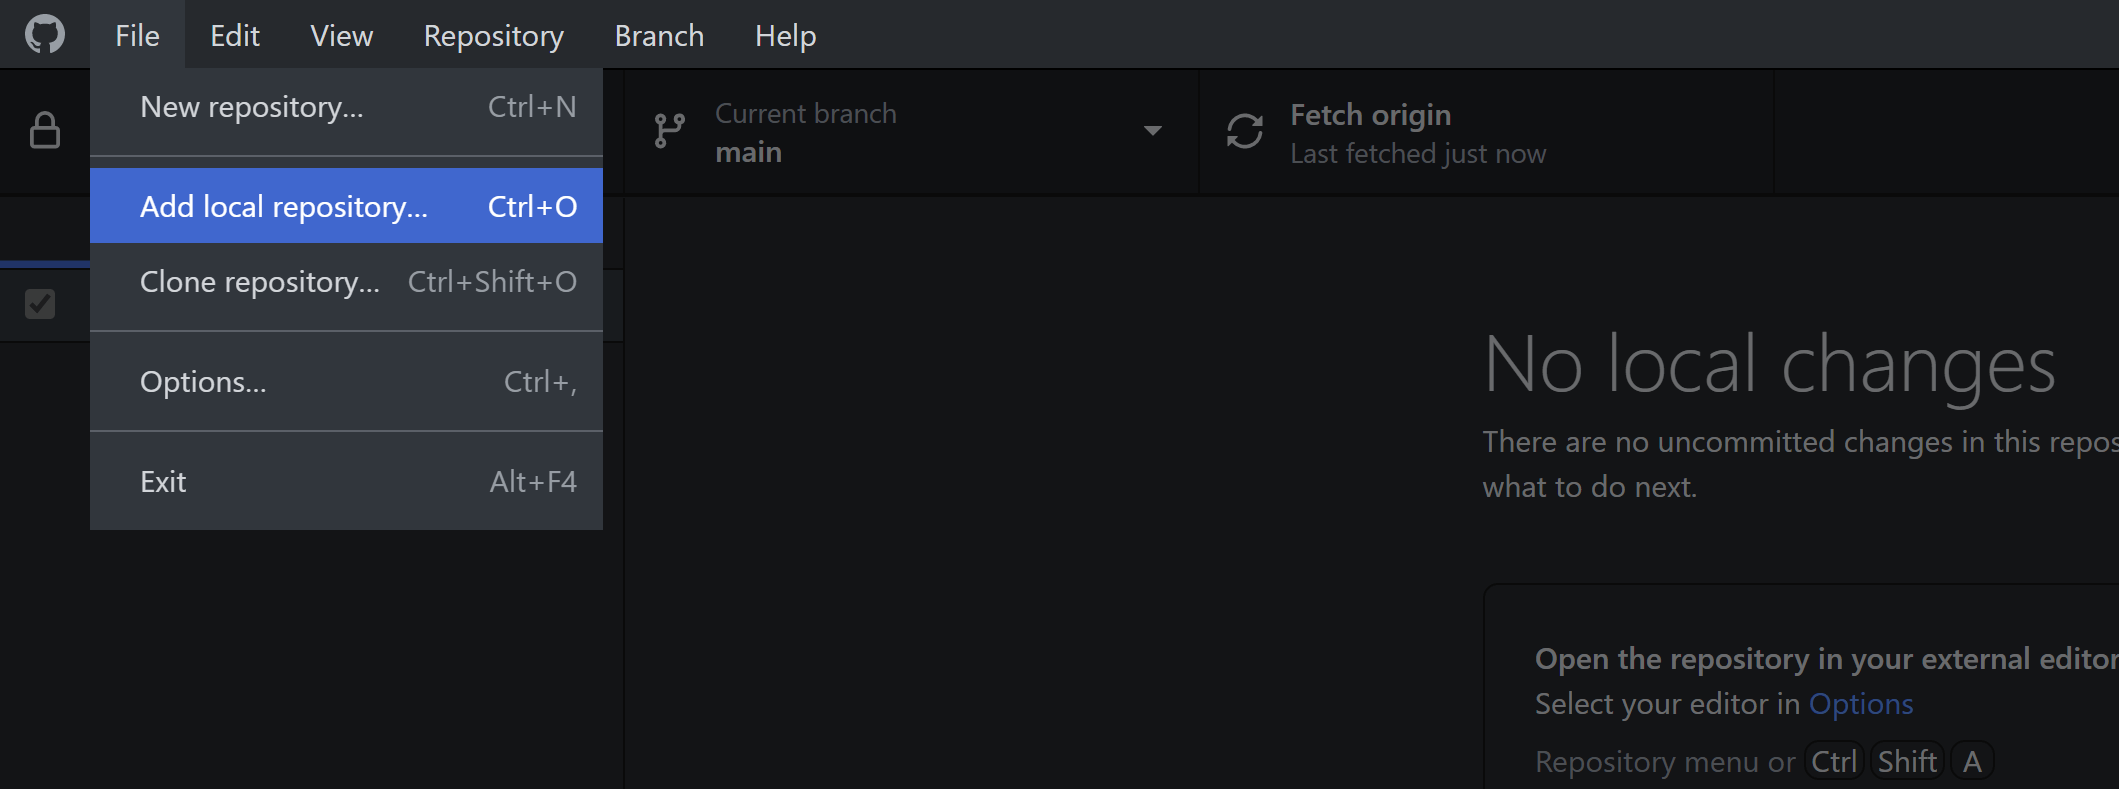
10. Pushing to GitHub
Now that you’ve committed your changes you’re ready to push your repo to GitHub. Inside GitHub Desktop, select File > Add local repository:
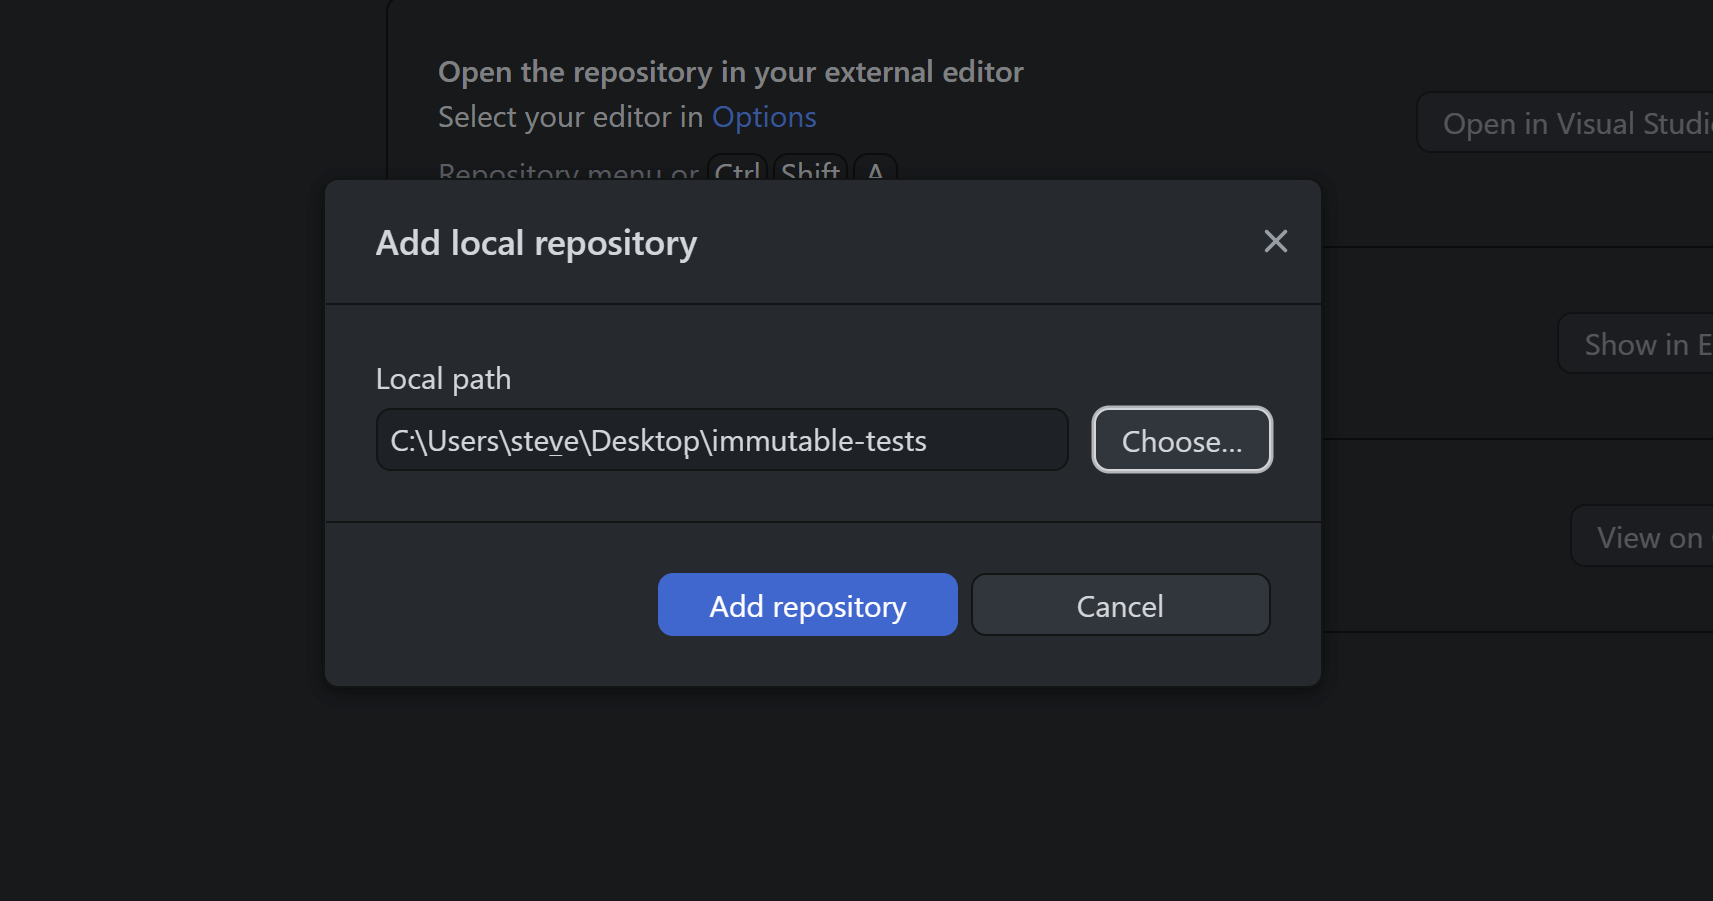
Select the path to your repo and click the Add repository button:
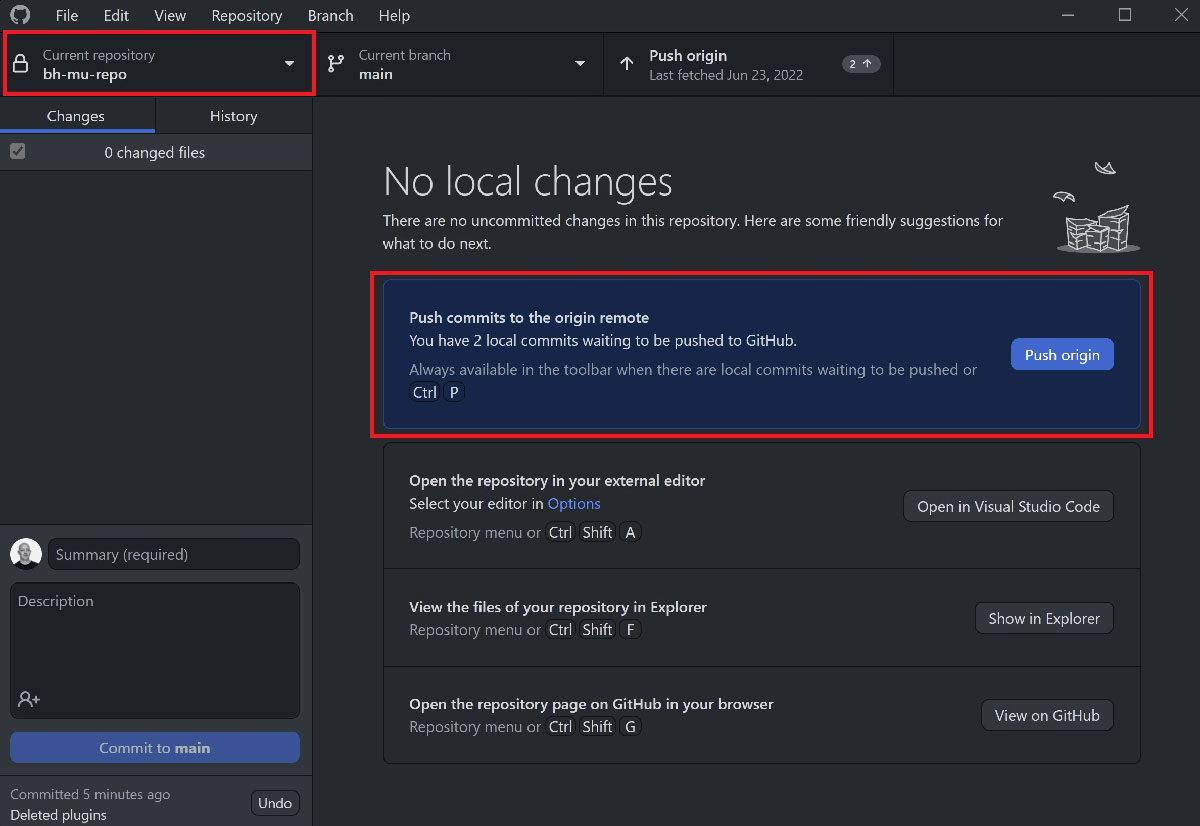
Pushing New Commits to GitHub
Once you’ve committed new changes to a repo, GitHub Desktop will automatically detect these commits, and you can easily push them to your repo.
First, select your repo in the top left, and then you can push your changes with the Push Origin button:
Part 3: Further Learning
Git Resources
The sections above provide a very basic introduction to Git and how to begin using it. If Git is something that you’re interested in using with GridPane then we would strongly encourage investing some time into further learning. You can learn a lot in a very short space of time and it will ultimately make you (and your team) better developers.
Git Training
For all things Linux and development-related, there are some fantastic courses available on Udemy. You can check out the Git courses here: Udemy: Git Courses
You may also want to check out these excellent free resources on Youtube:
- Colt Steele: Learn Git in 15 Minutes (Colt has a pretty great course on Udemy).
- Brad Traversy: 30 Minute Git & GitHub Crash Course For Beginners
There are plenty of other completely free resources available, including many other videos directly on YouTube. Following a structured course with exercises is often the best path.
Git Tools
Below are some resources for getting started in your Git journey.
- Install Git on your local machine: https://git-scm.com/downloads
- Create a GitHub account: https://github.com/
- Install GitHub Desktop: https://desktop.github.com/
- Install a free Git GUI: https://www.gitkraken.com/
Getting Started with the GridPane Git Integration
Now that you know the fundamentals, it’s time to put it into practice and get started using Git with GridPane. Next up, go through the following articles in order and follow along with the steps: