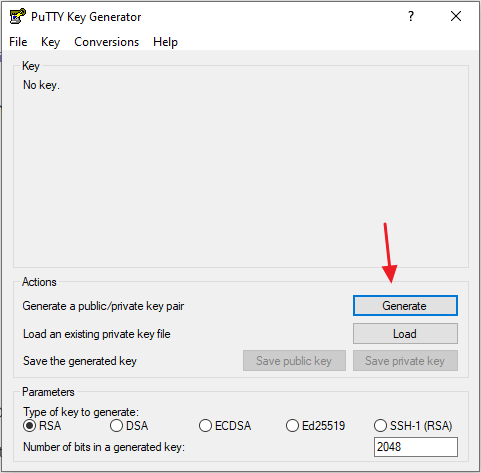
Step 1: Launch PuttyGen and Generate Key
Once you download PuttyGen, launch it and click Generate:
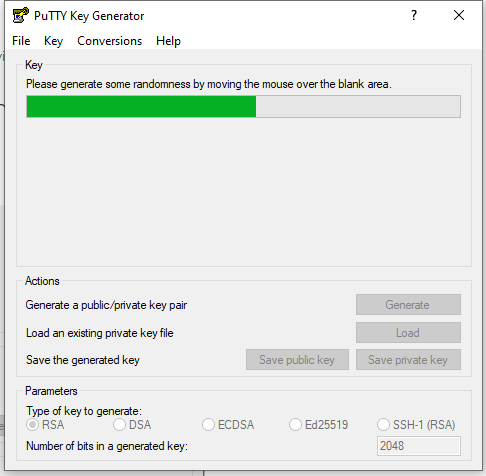
It will ask you to move your mouse around to generate the key.
Step 2: Save the Generated Key
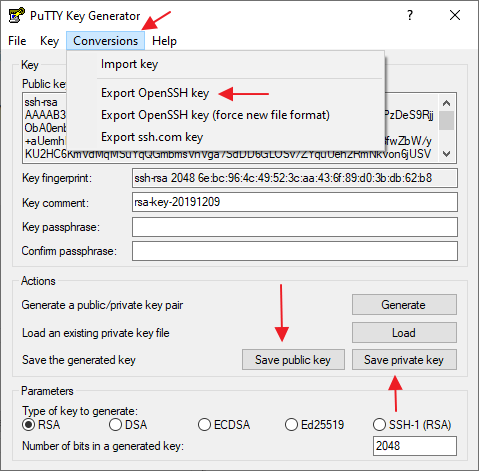
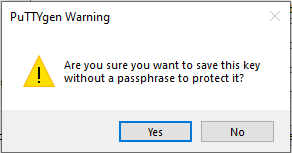
You’ll need to save three files once your key has been generated, it will also prompt about the passphrase. If you choose to do a passphrase, the server will prompt for that passphrase. If you don’t do a passphrase, it’ll log you right in with no prompt.
Screenshots follow after the steps.
Step 2.1 Convert to OpenSSH
First, you want to click Conversions and select Export OpenSSH key, this is a private key. The OpenSSH key can be used on Linux workstations. More than likely, you won’t need it, but it’s worth exporting it now. Save it to a folder of your choice and call it privateopenssh.key or a name of your choice.
The private key is sensitive, never share it with anyone, and guard it on your machine.
Step 2.2 Save the public key
Next, click save public key button and save it to a folder of your choice, and name it accordingly, OR copy and paste it into notepad from the box at the top – it begins with “ssh-rsa”.
NOTE: If changing the key comment, do not include spaces or special characters.
The public key is what you’ll upload to GridPane, and doesn’t need to be guarded.
Step 2.3 Save the private key
Last, click the Save private key button, and save that to a folder of your choice. The private key is sensitive, never share it with anyone, and guard it on your machine. This one will save as a .ppk file which is used in Putty.
Step 3: Copy Your public.key
We now need to copy the public key into your GridPane account.
Step 3.1 Check the key formatting
Open your public.key with notepad and make sure it’s formatted it correctly:
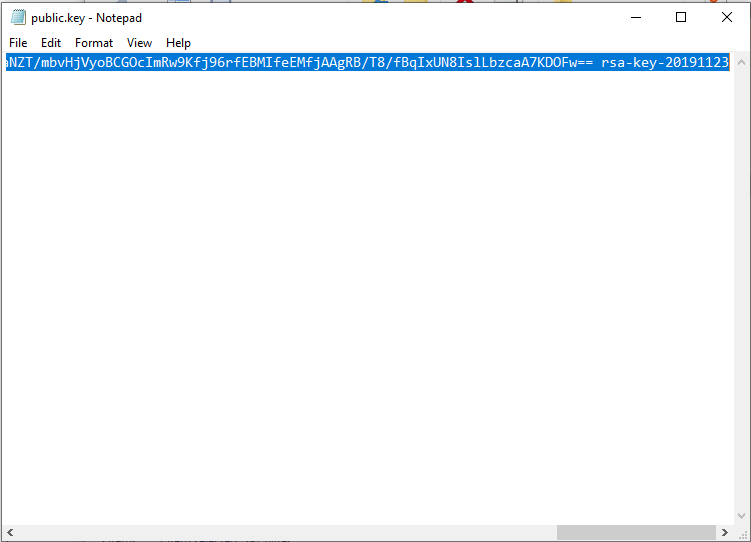
Be sure that it’s all formatted on one line like in the screenshot above, and NOT formatted like below, or your key will not work. If there is an additional line above and/or below, remove those.
This is incorrect and will not work:
ssh-rsa
AAAAB3NzaC1yc2EAAAABJQAAAQEAxznqQ5ic/ctZi1AKS6ysTYo+v3fsADTLup
HqvvtgK0WfFtFYEvdAKjIz1abMXH5srFs6mqDJ56jxtxc9alBnINanKsnYmEzP
3cdcJTREA/BUoShSonXNL3pJs8dtJovldejw6QPB2S2Wnt4FfFOHidwilN15xb
K3PrPqdGyqrmvMkqXRRABfosAzhdLa9t26P9lhcKhEIWmeQipWgjVyNPkkEraa
7HkIPC04t8rjuMtBtHkZ0iv6SqU14d7pODcVR6/nPzm2SqTpDJ8LV8kx1v0ZHo
1k2XYHd6jCB38ns0kjVbPPmFhwUDoLaZa6esKAnJ+SnAc3JExL7Mw1ZtfEjQ==
 rsa-key-20200519
When correctly formatted, it will look like below.
Correct format:
ssh-rsa AAAAB3NzaC1yc2EAAAABJQAAAQEAxznqQ5ic/ctZi1AKS6ysTYo+v3fsADTLupHqvvtgK0WfFtFYEvdAKjIz1abMXH5srFs6mqDJ56jxtxc9alBnINanKsnYmEzP3cdcJTREA/BUoShSonXNL3pJs8dtJovldejw6QPB2S2Wnt4FfFOHidwilN15xbK3PrPqdGyqrmvMkqXRRABfosAzhdLa9t26P9lhcKhEIWmeQipWgjVyNPkkEraa7HkIPC04t8rjuMtBtHkZ0iv6SqU14d7pODcVR6/nPzm2SqTpDJ8LV8kx1v0ZHo1k2XYHd6jCB38ns0kjVbPPmFhwUDoLaZa6esKAnJ+SnAc3JExL7Mw1ZtfEjQ== rsa-key-20200519
Step 3.2 Copy your key
Once formatted correctly, copy your key and proceed to step 4.
Step 4: Add Your Key to GridPane
For a longer, more detailed guide on adding your SSH key to GridPane, check out this article:
Add/Remove an SSH Key to/from an Active GridPane Server
Step 4.1 Go to Your GridPane Settings Page
Login to your GridPane account and click the Your Settings menu item in the dropdown menu accessible by clicking on your username and icon.

Step 4.2. Add Your Public SSH Key to GridPane
Locate and click the SSH Keys option in the left horizontal menu, and then paste your Public SSH Key in the Add SSH Public Key panel and click Add Key. You should name this key, since the key will be used for root access to your server, I would suggest calling it the root key.
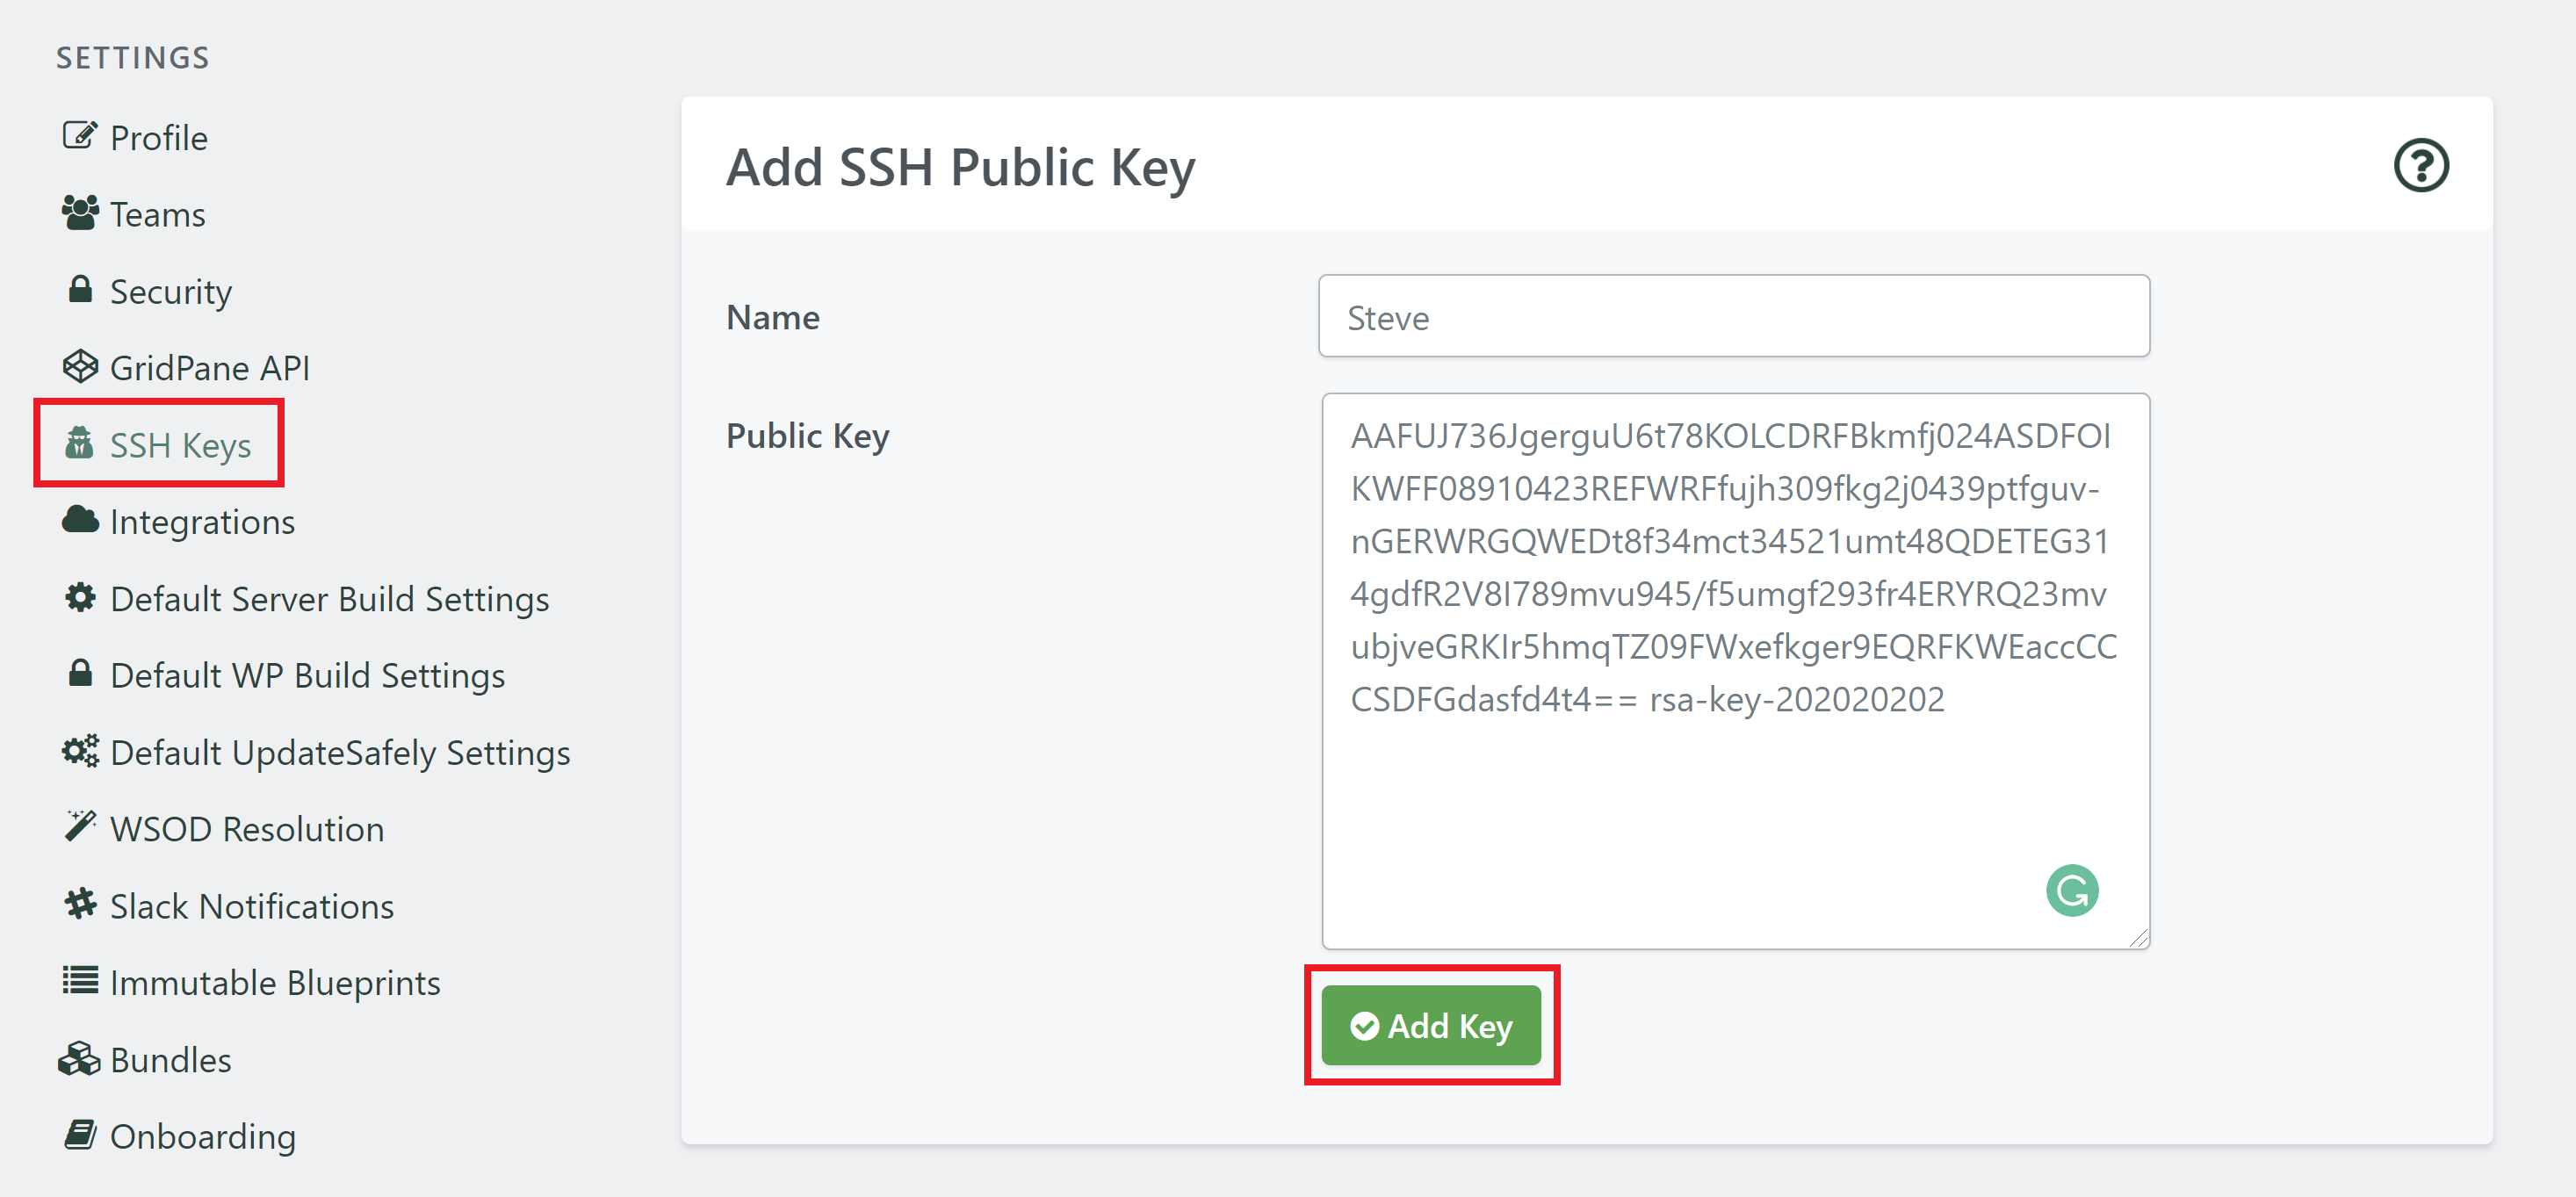
Once you have successfully added your public key, it will be listed in the Active SSH Keys panel.
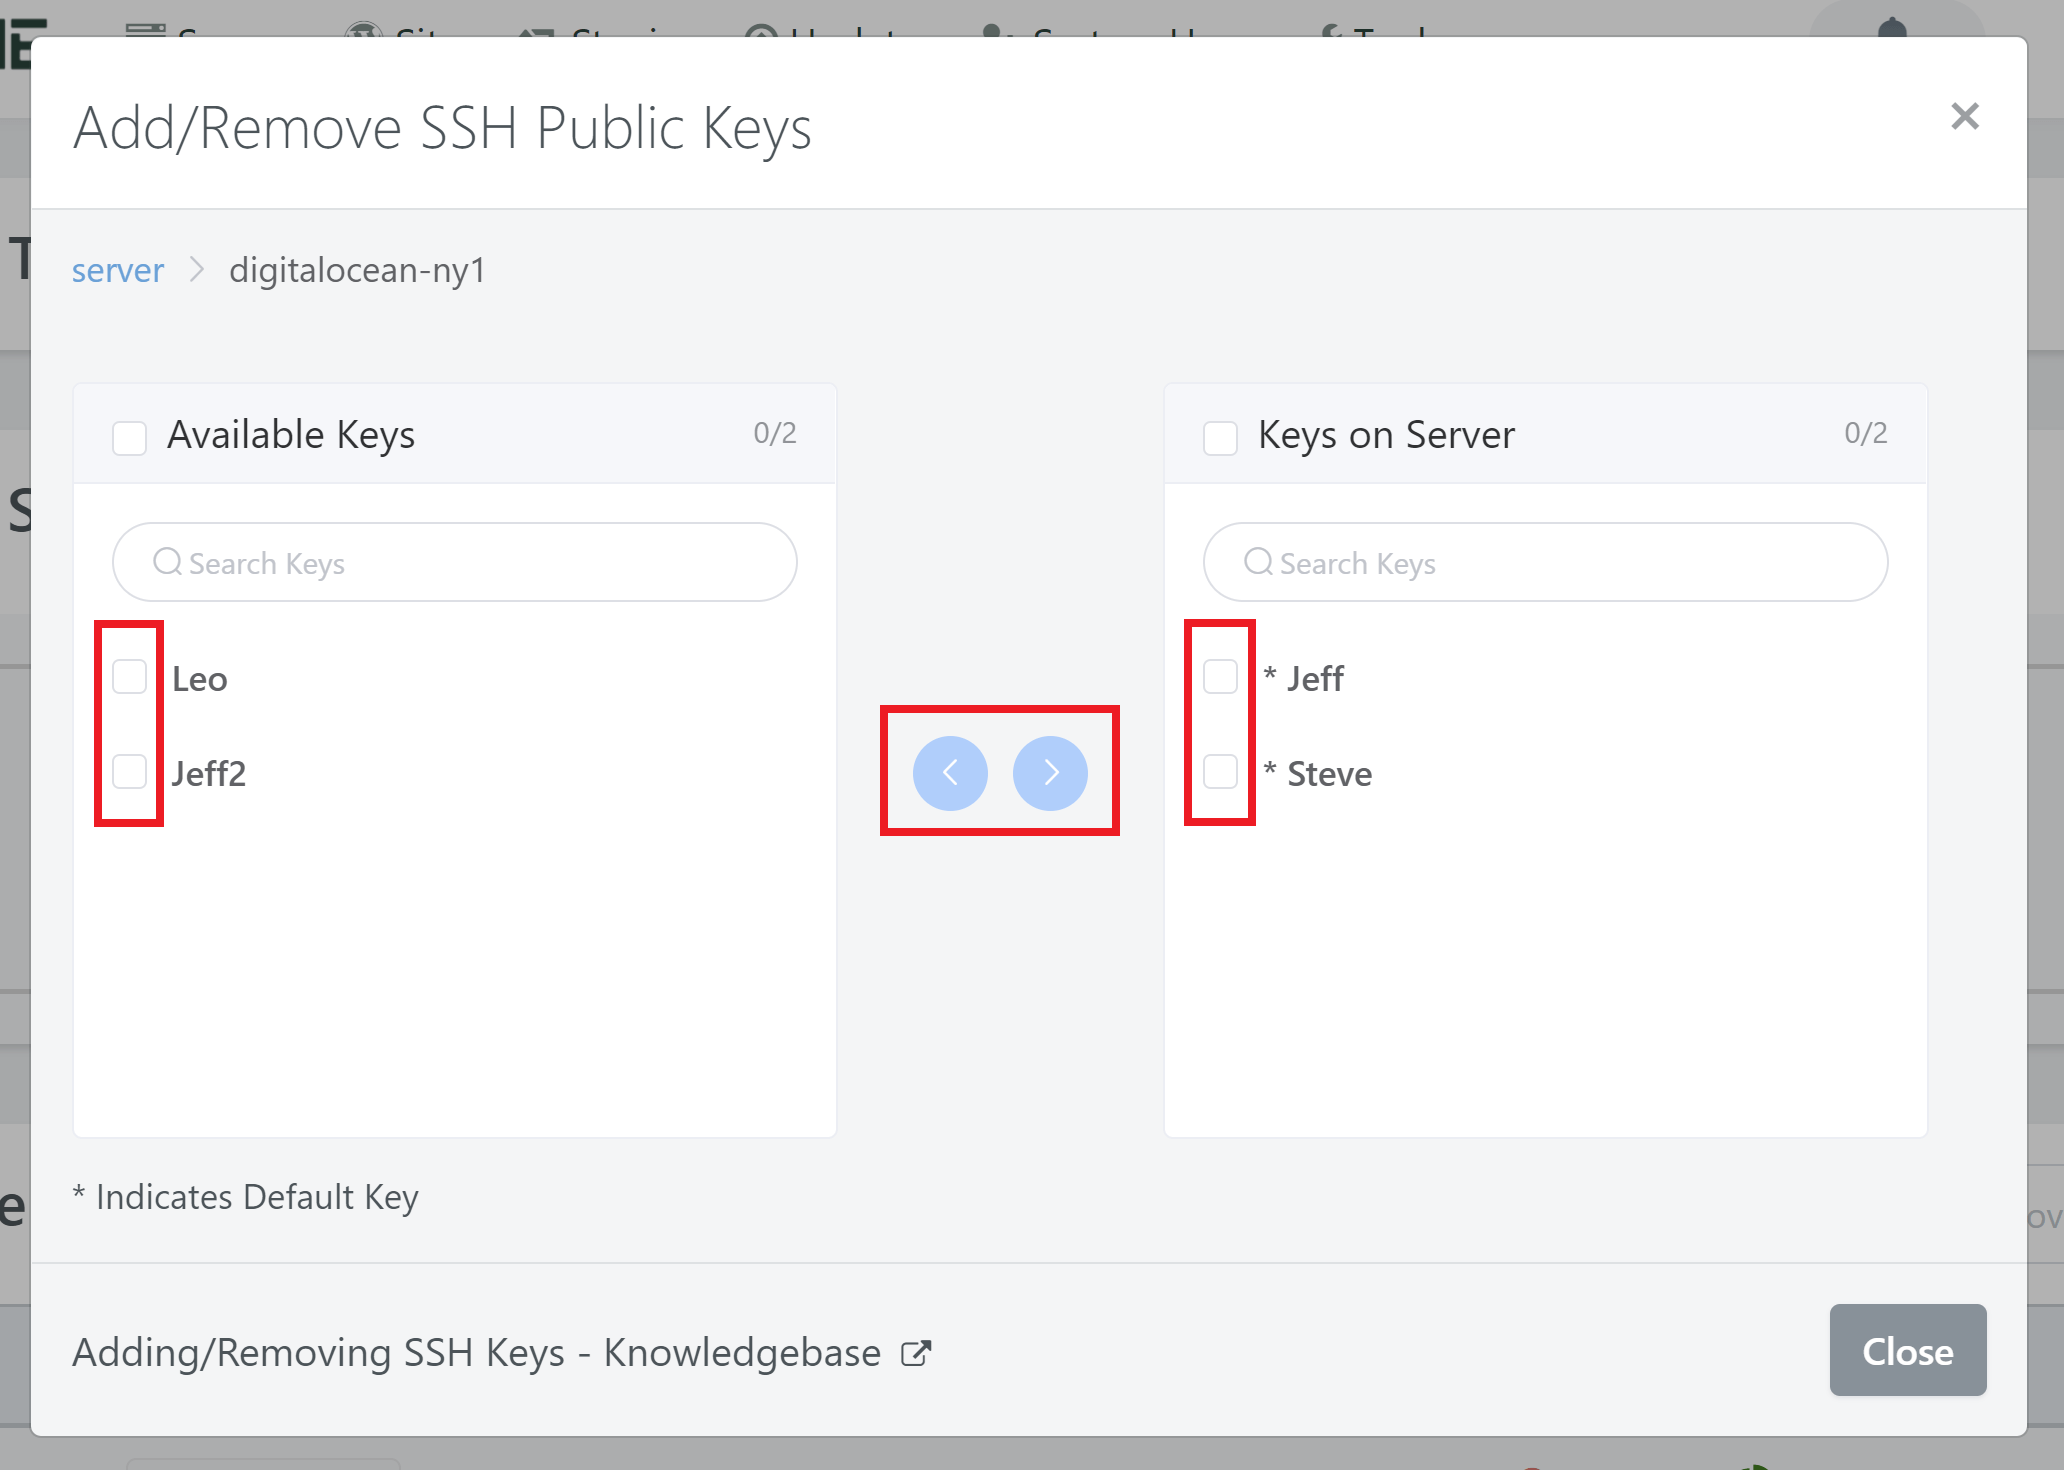
Step. 4.3 Push the Key to the Server
Click on Home in the GridPane UI, click on the “key” symbol beside your server, click on available keys, check your key, and then hit Add Keys to Server.
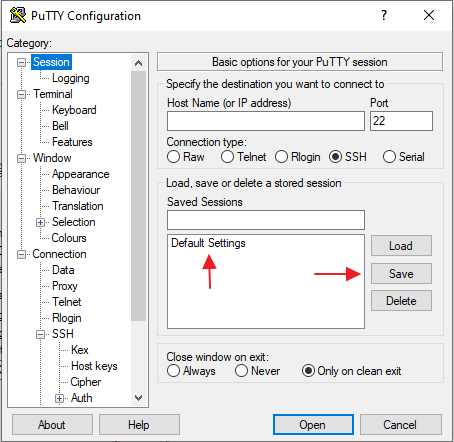
Step 5: Configure Putty and Connect to Your Server
Open Putty, and go to Auth settings. Click browse and find the private .ppk you saved.
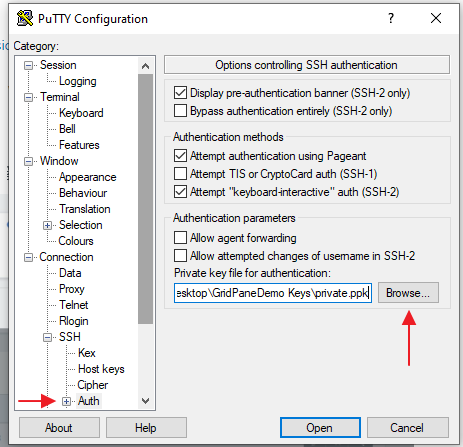
Next, click Default Settings, and click save, this will make the key you have selected stay in Putty. After you save, add the server IP, and press connect. It’ll prompt you for a login name, type in root, and hit enter.
If everything was done correctly, you should see the login prompt.
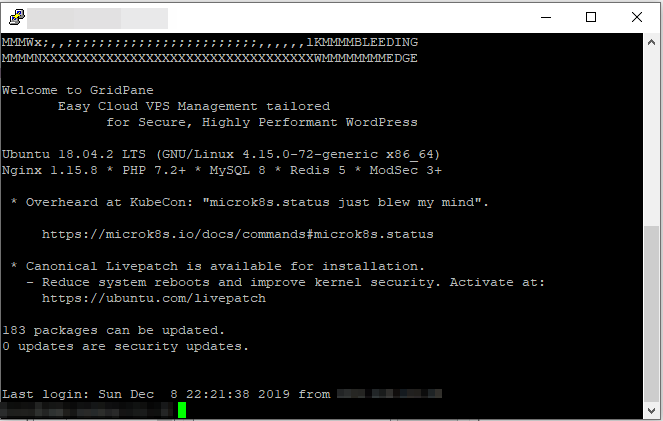
And that’s all there is to it! From there, you can use our GP-CLI, customize files, whatever you would like to do.