Step 2. Launch Termius and Open Preferences
Launch the app, click the gear icon in the upper left corner, and a new window will pop up.

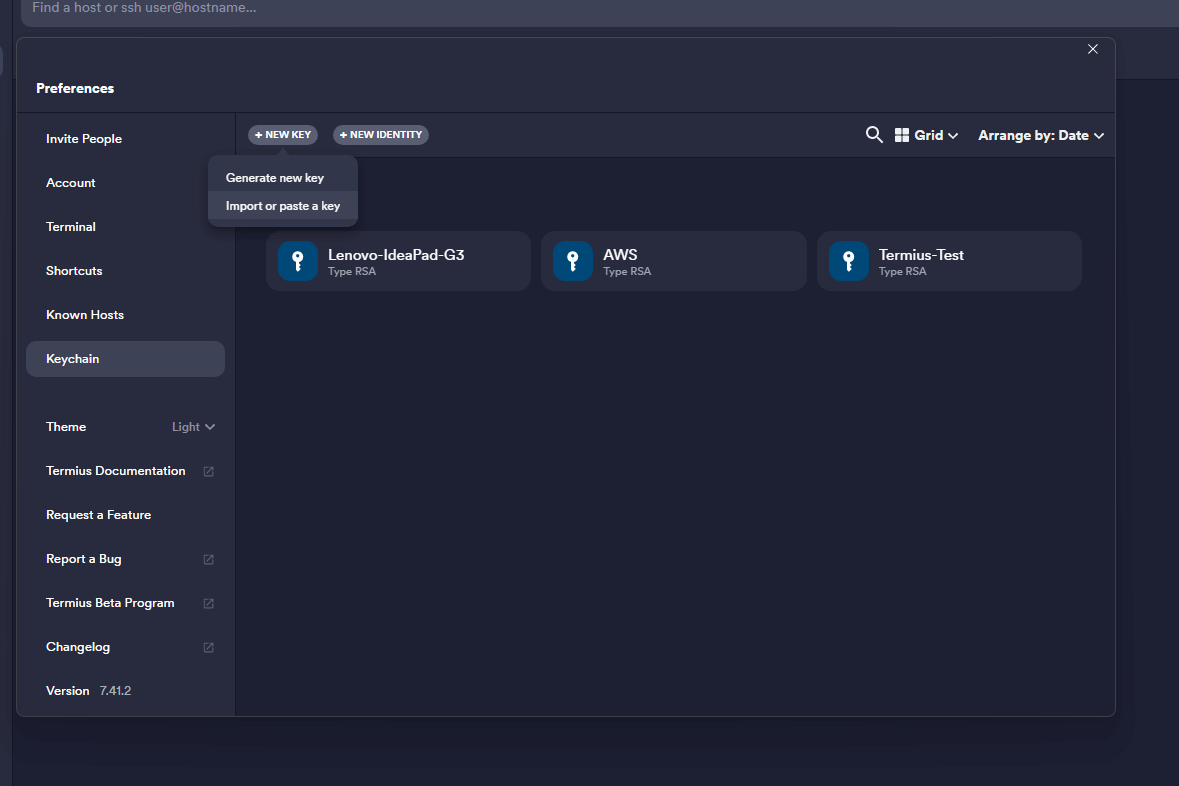
Step 3. Generate Your Key
Select Keychain from the menu on the left, click on “+ NEW KEY” and select “Generate new key” from the dropdown:
Step 4. Configure Your Key Settings
Set a Label for your key and then:
- Select RSA under Key type
- Select 4096 under Key size
You can either set a Passphrase or leave it blank.
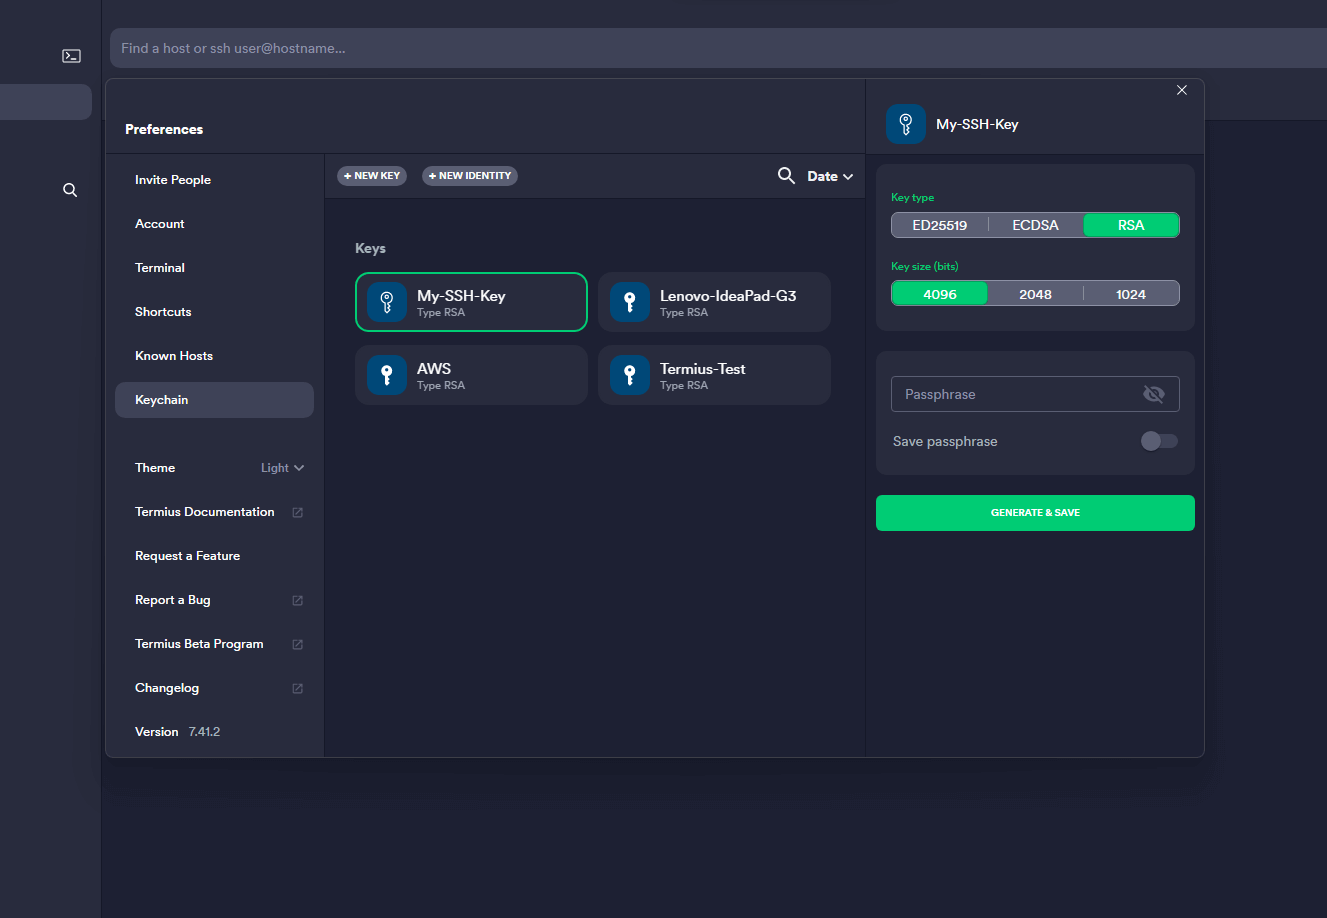
Click Generate & Save.
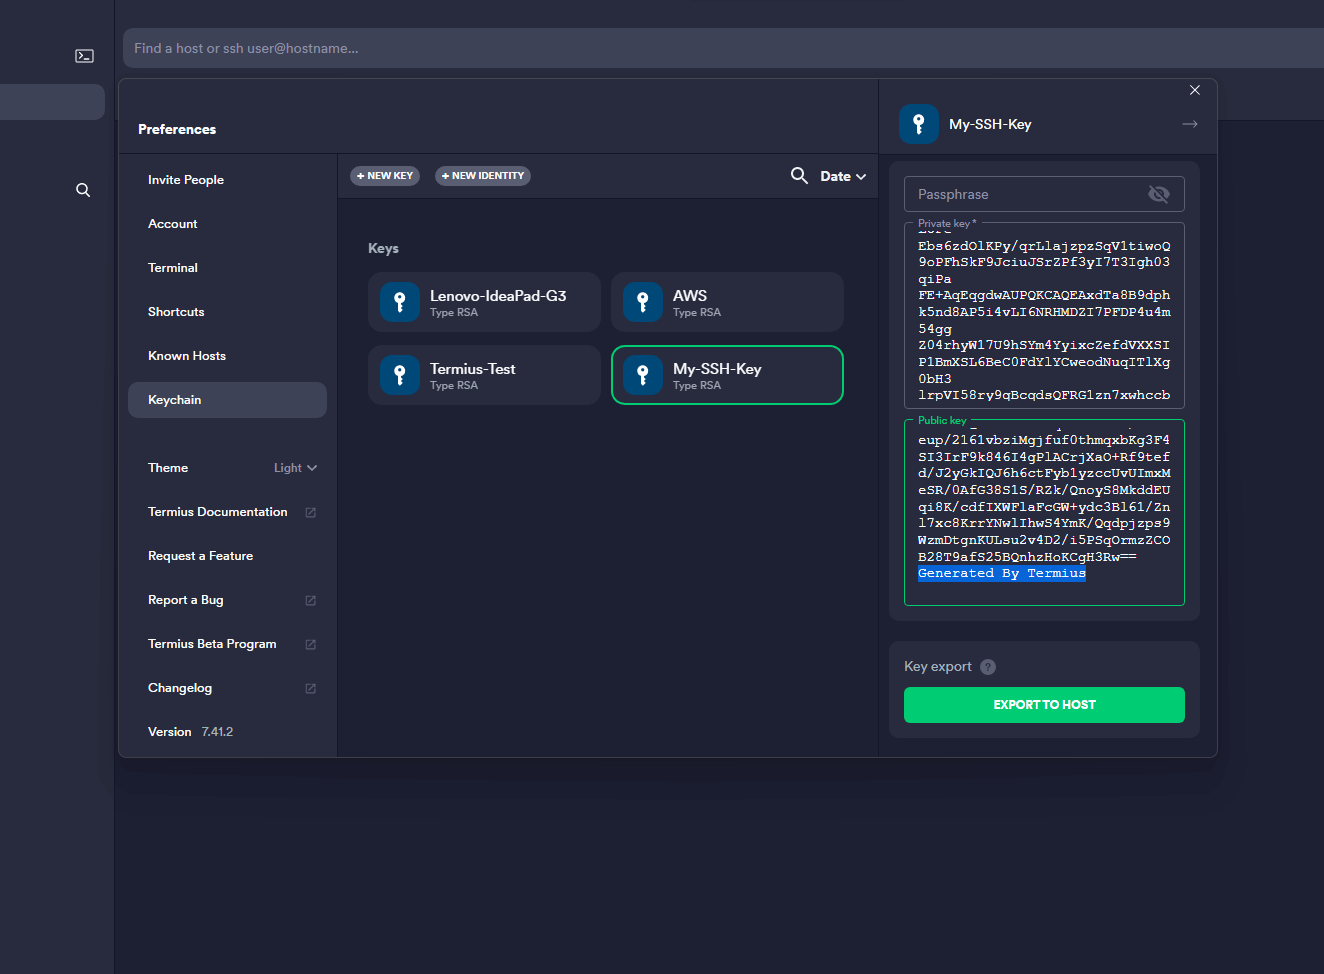
Step 5. Copy Your Public Key
Your key has now been generated and is ready to go. Copy your public key for the next step.

Key Comment Note
Just a quick note that Termius adds spaces in the key comment as shown in the image below. This won’t cause an issue on GridPane, but it’s possible it may be on other platforms. If you’re using it elsewhere, you may want to replace the spaces with dashes or remove/replace it entirely.
Step 6. Add your Public Key to GridPane
1. Go to Your GridPane Settings
Login to your GridPane account and click the Your Settings menu item in the dropdown menu accessible by clicking on your username and icon.

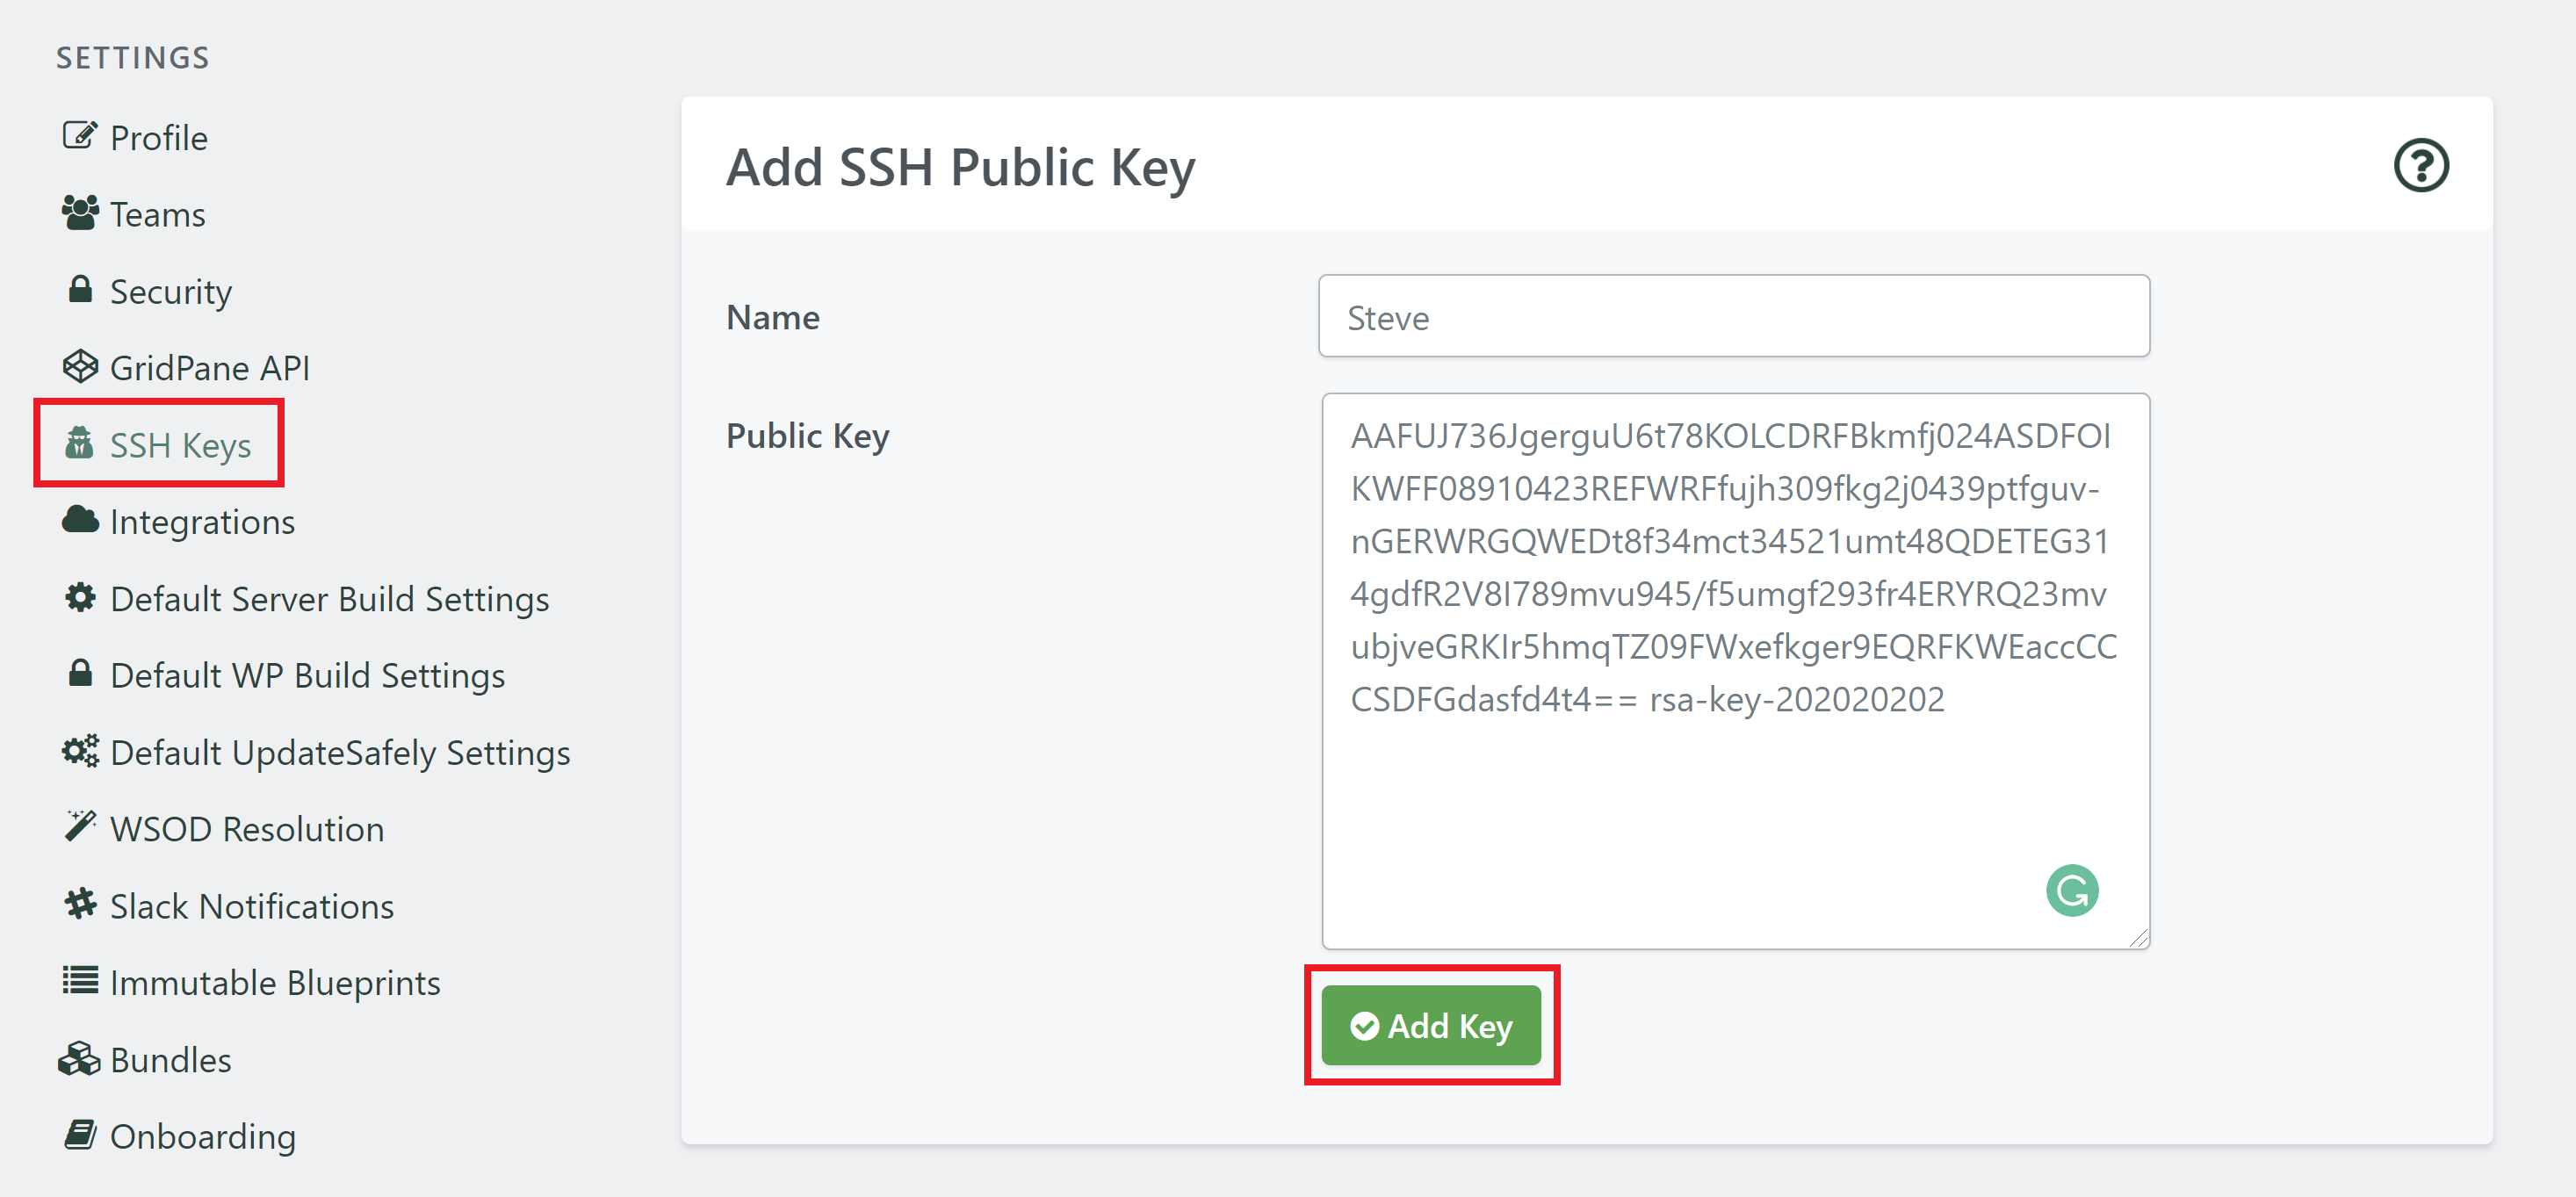
2. Add Your Public SSH Key to the SSH Key Settings Panel
Locate and click the SSH Keys option in the left horizontal menu, and then paste your Public SSH Key in the Add SSH Public Key panel and click Add Key. You should name this key, since the key will be used for root access to your server, I would suggest calling it the root key.
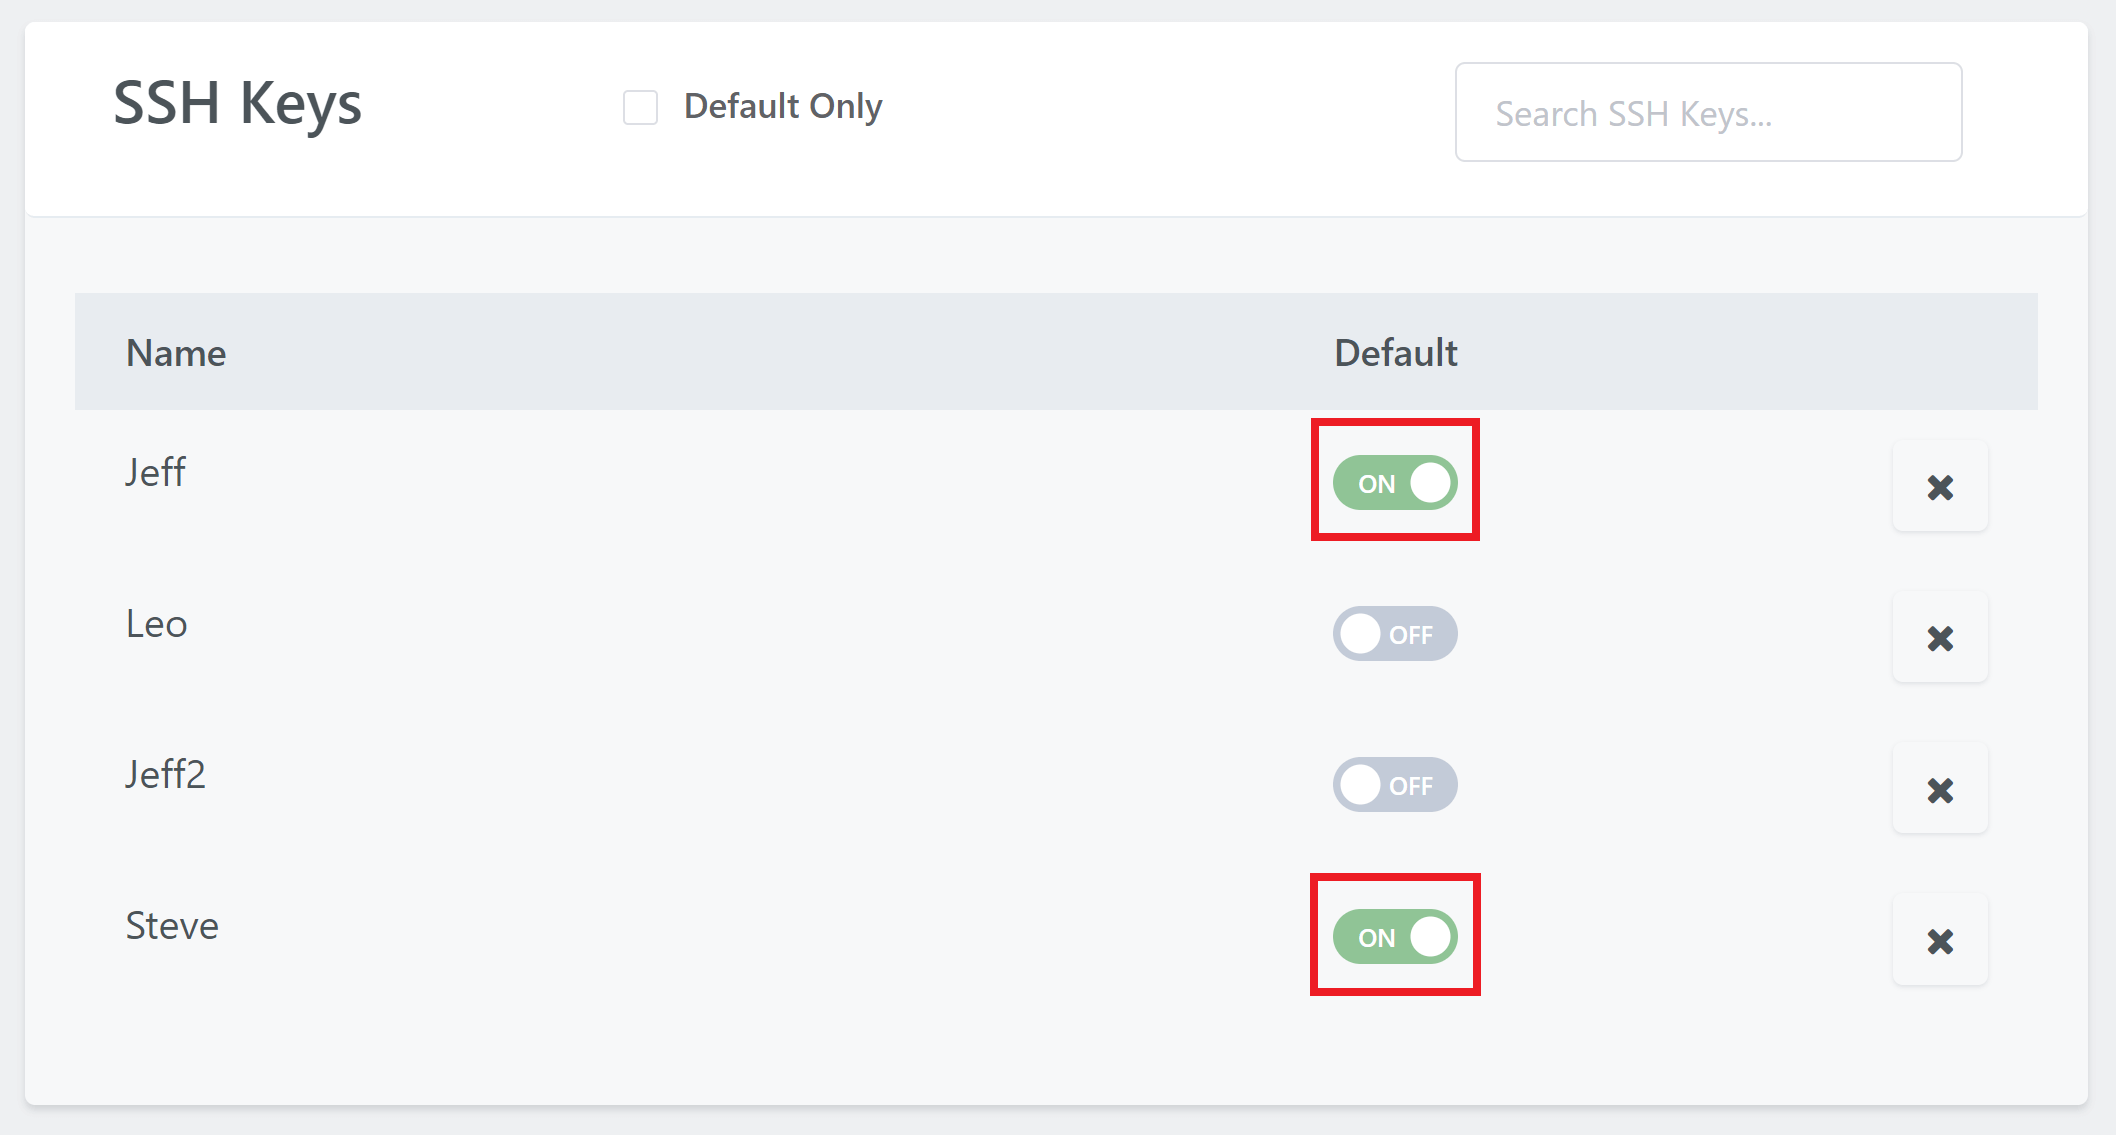
Once you have successfully added your public key, it will be listed in the Active SSH Keys panel.
Mark your SSH Keys as Default (optional)
GridPane has a Default SSH Keys feature which allows you to add your keys to any servers you provision automatically.
We have an easy-to-follow guide to help you enable this feature here.
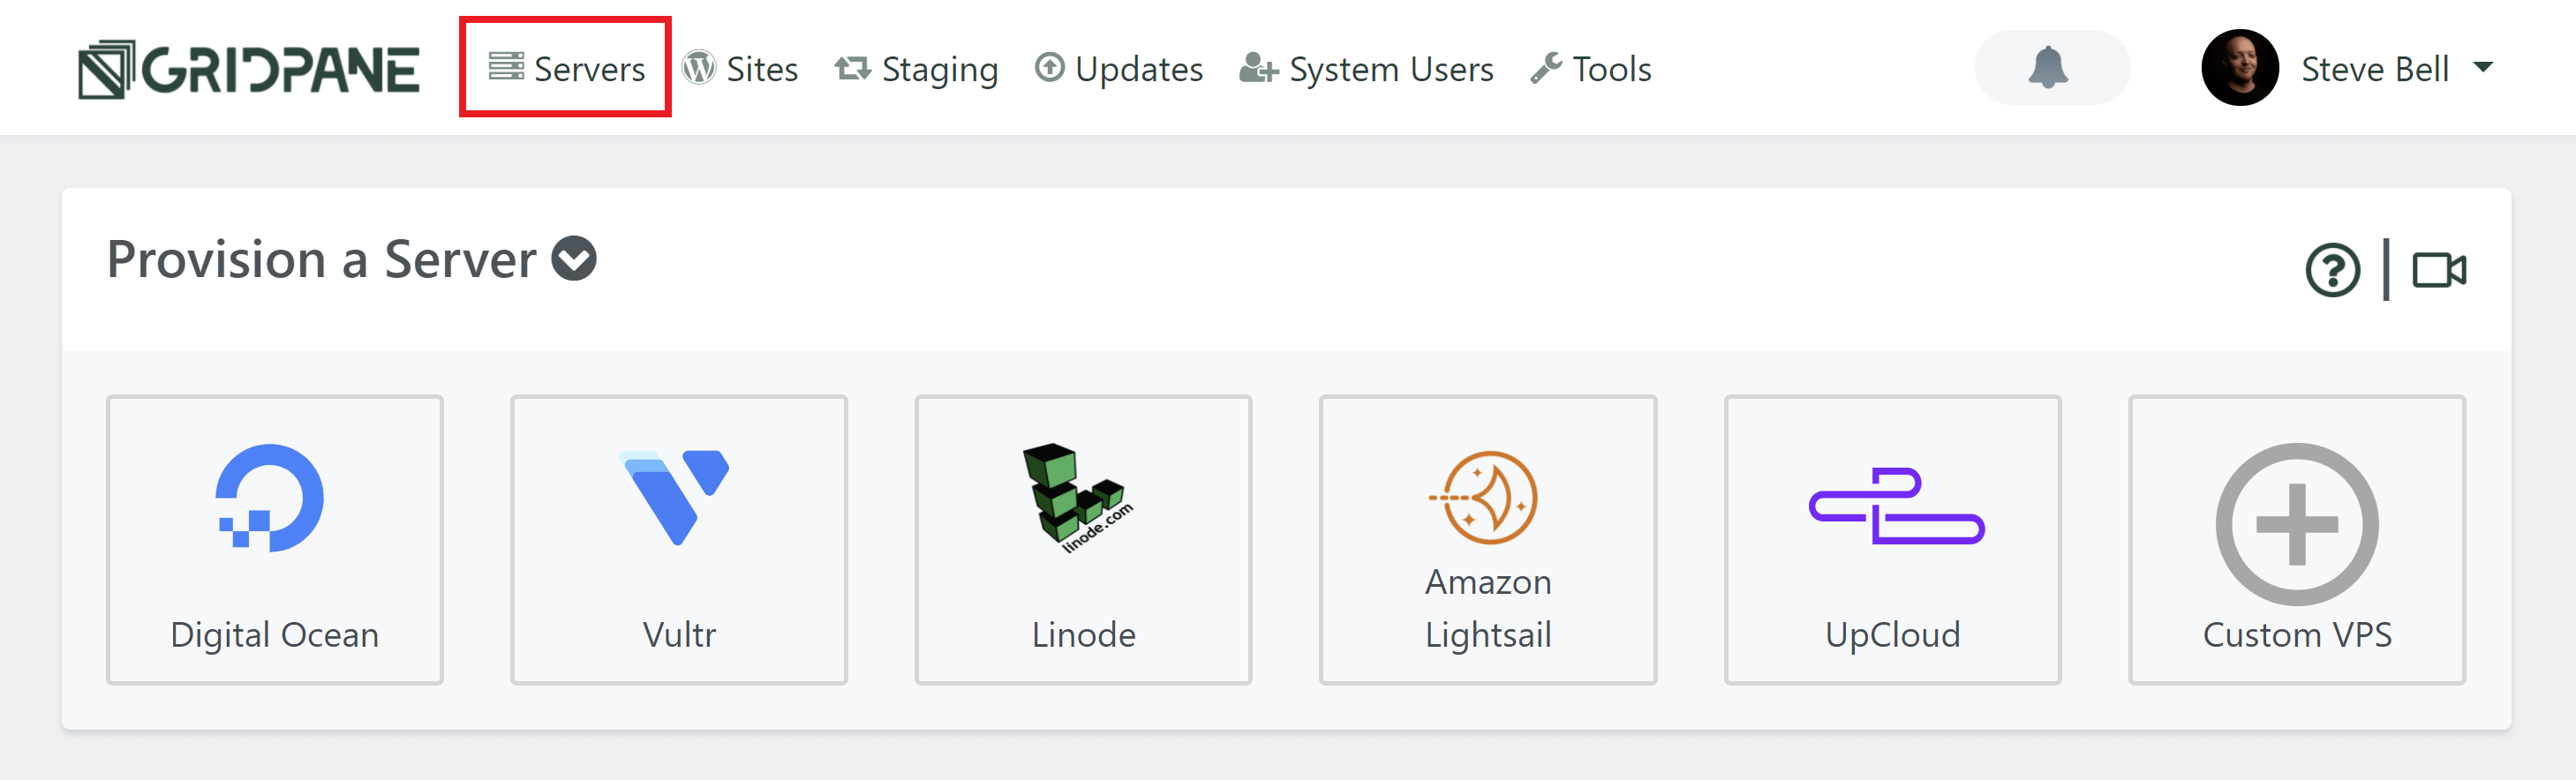
3. Go to Your Servers Page
The list of Active servers is located on the GridPane home page. Click Servers from the GridPane main menu to navigate there:
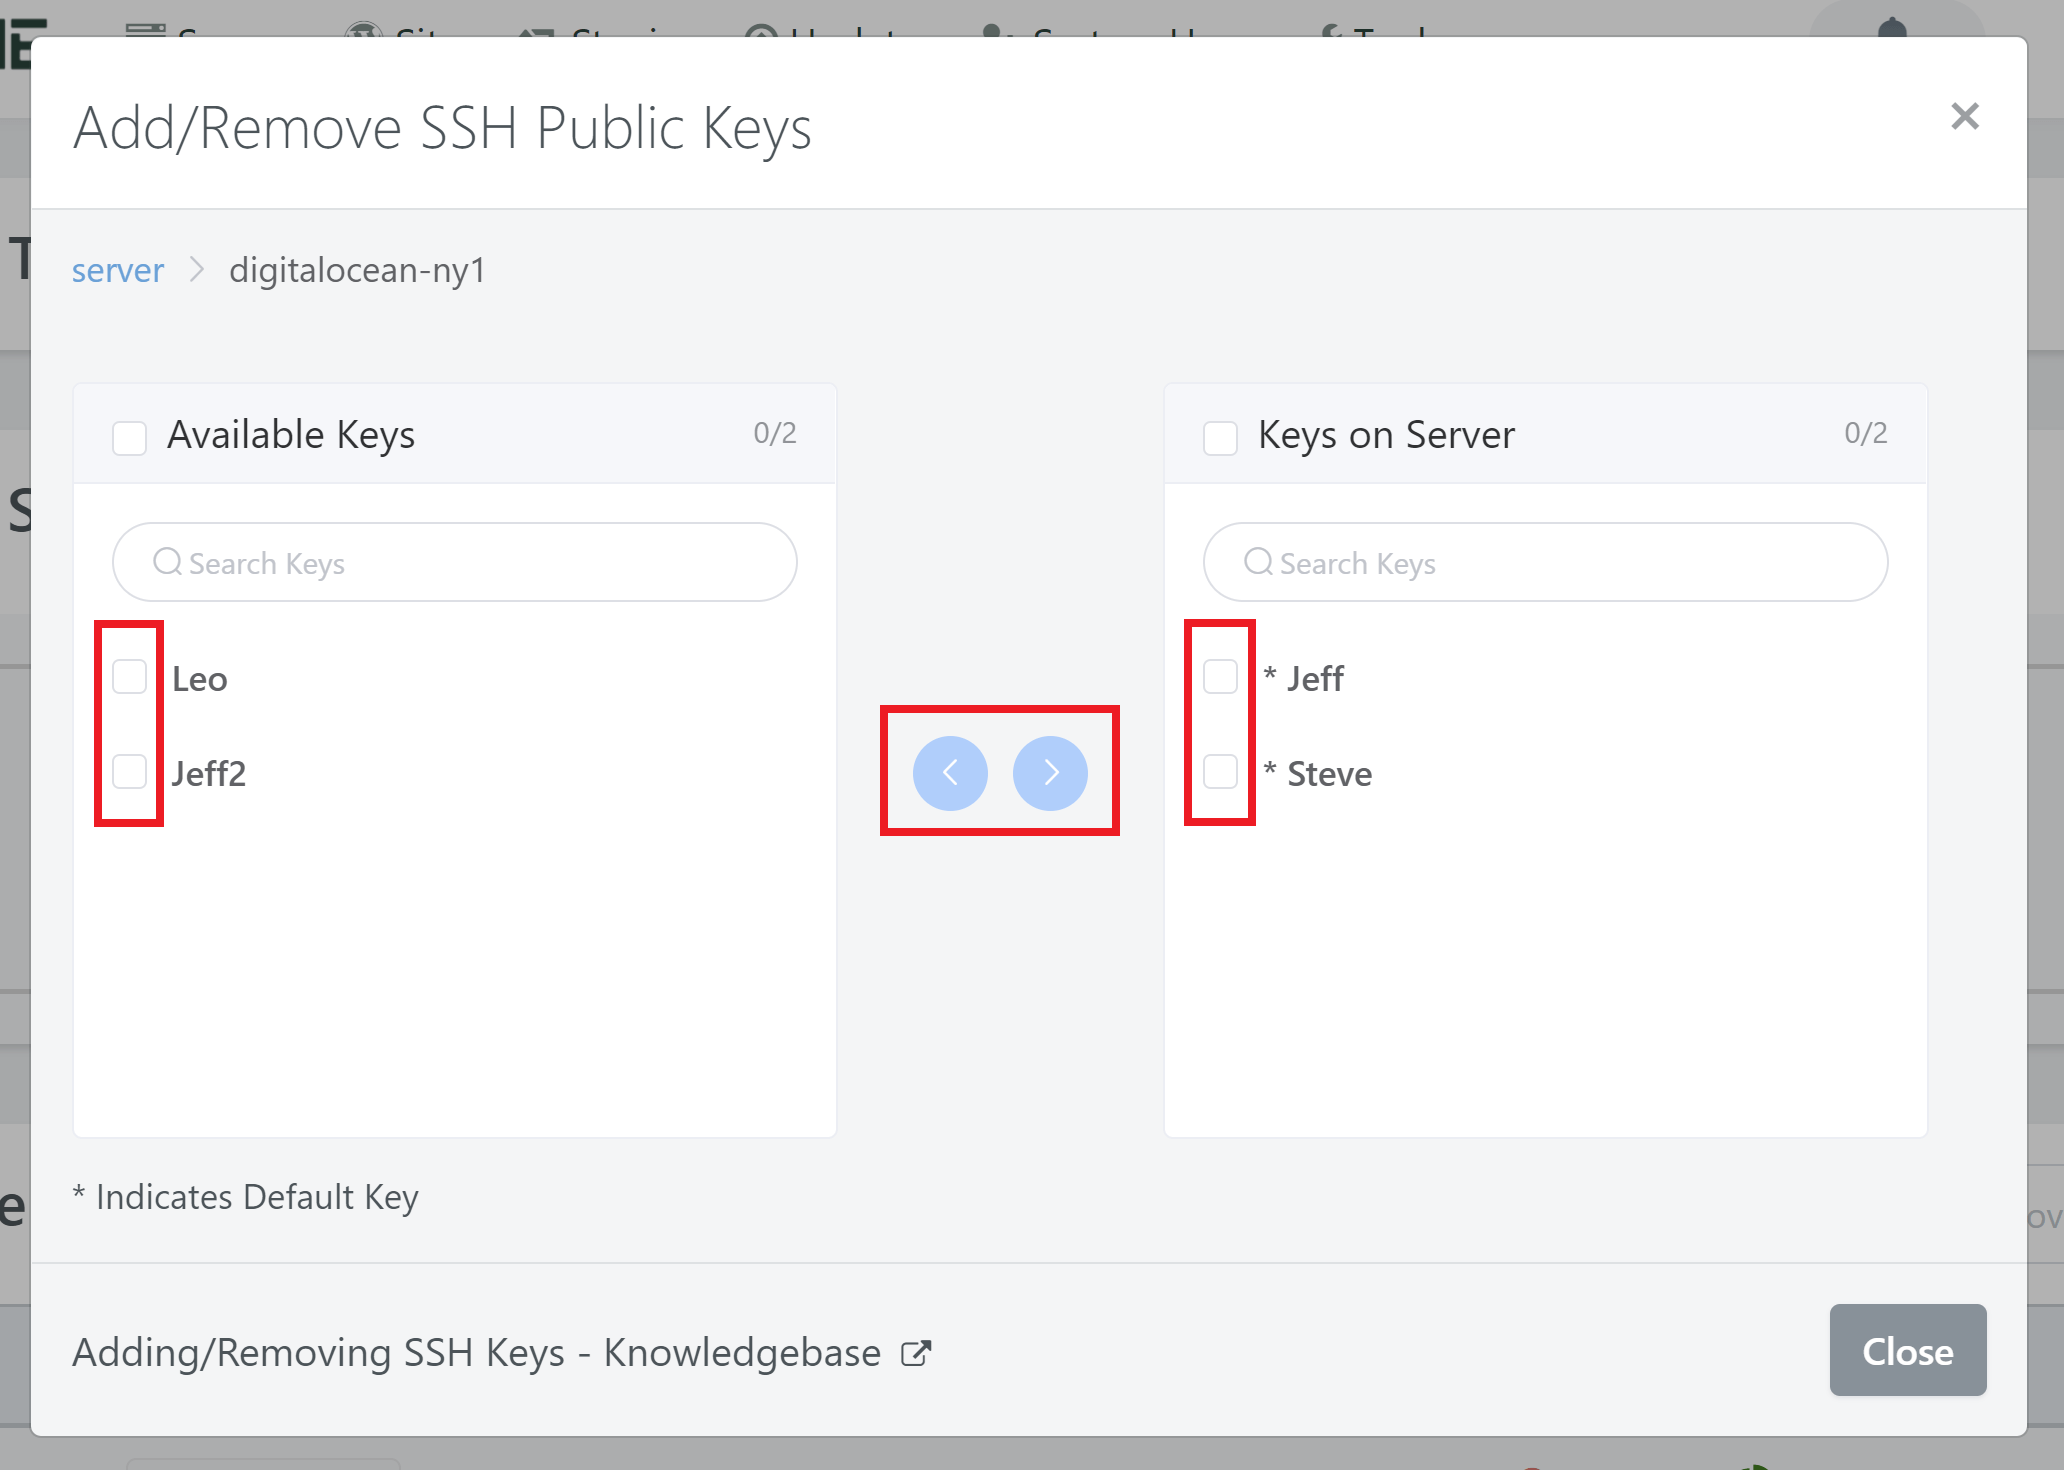
4. Locate and Click the Add/Remove Public SSH Keys Button
In your Active Servers panel, click the Add/Remove Public SSH Keys button located to the right of the server row. The button has a key icon:

5. Add Your SSH Key
A pop-up modal will appear containing checkboxes for all of the Public SSH Keys available from your GridPane Settings.
To add a key, select the key from Available Keys column on the left, and then use the right arrow to add it to your server.