1. Enable Nginx Redis Page Caching
You can enable Redis Nginx Page caching and change the cache TTL inside your website’s customizer.
Enabling Redis Nginx Page Caching
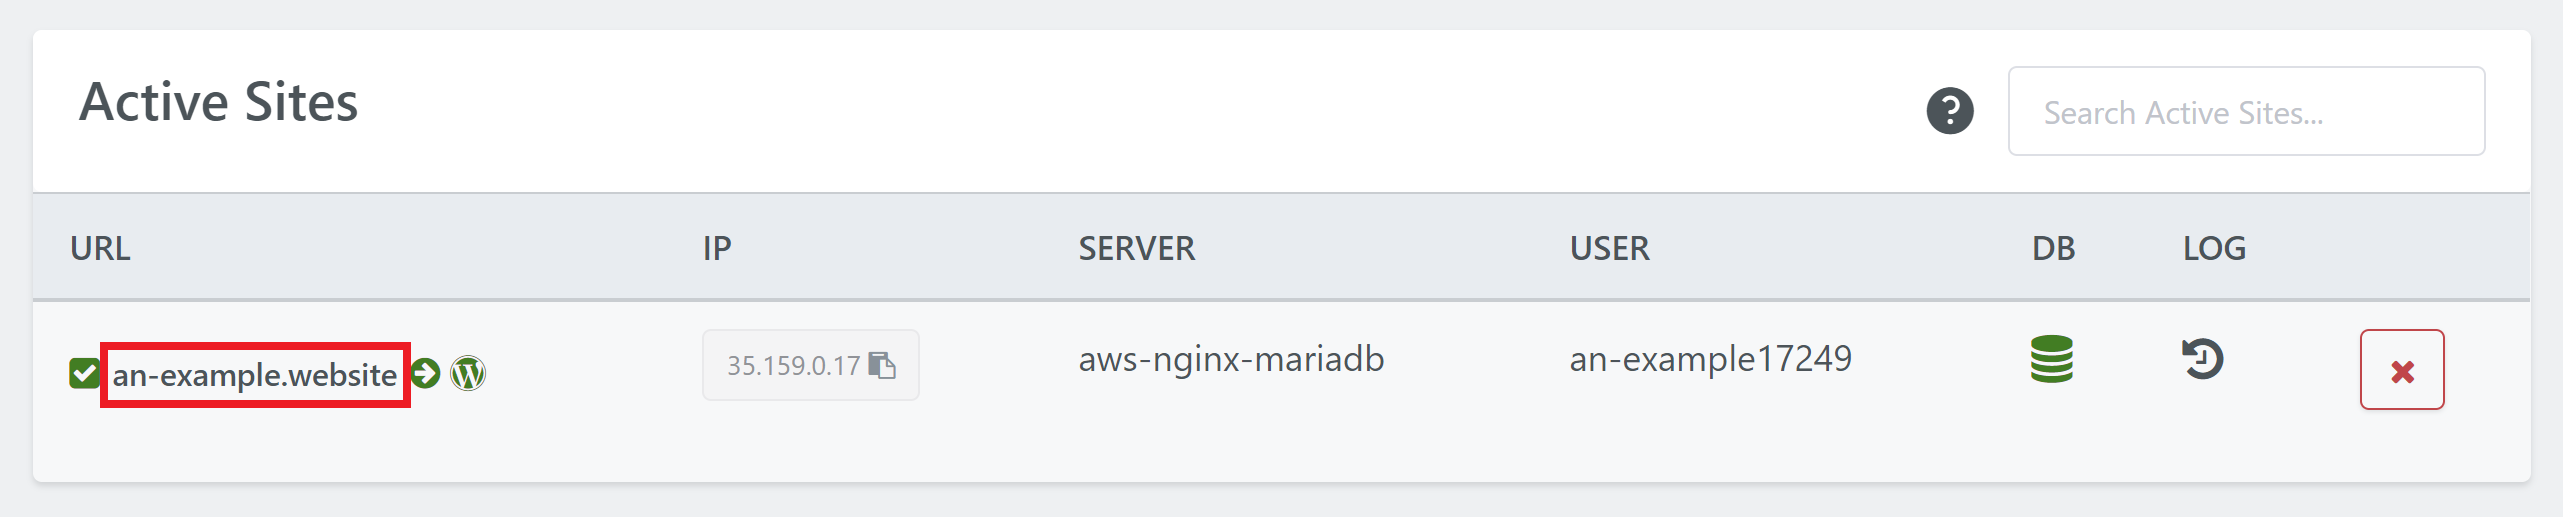
To get started, head over to the Sites page inside your account and click on the website you want to activate caching for to open the Site Customizer:
Click through to the Caching Tab, and then click Redis Caching Toggle:
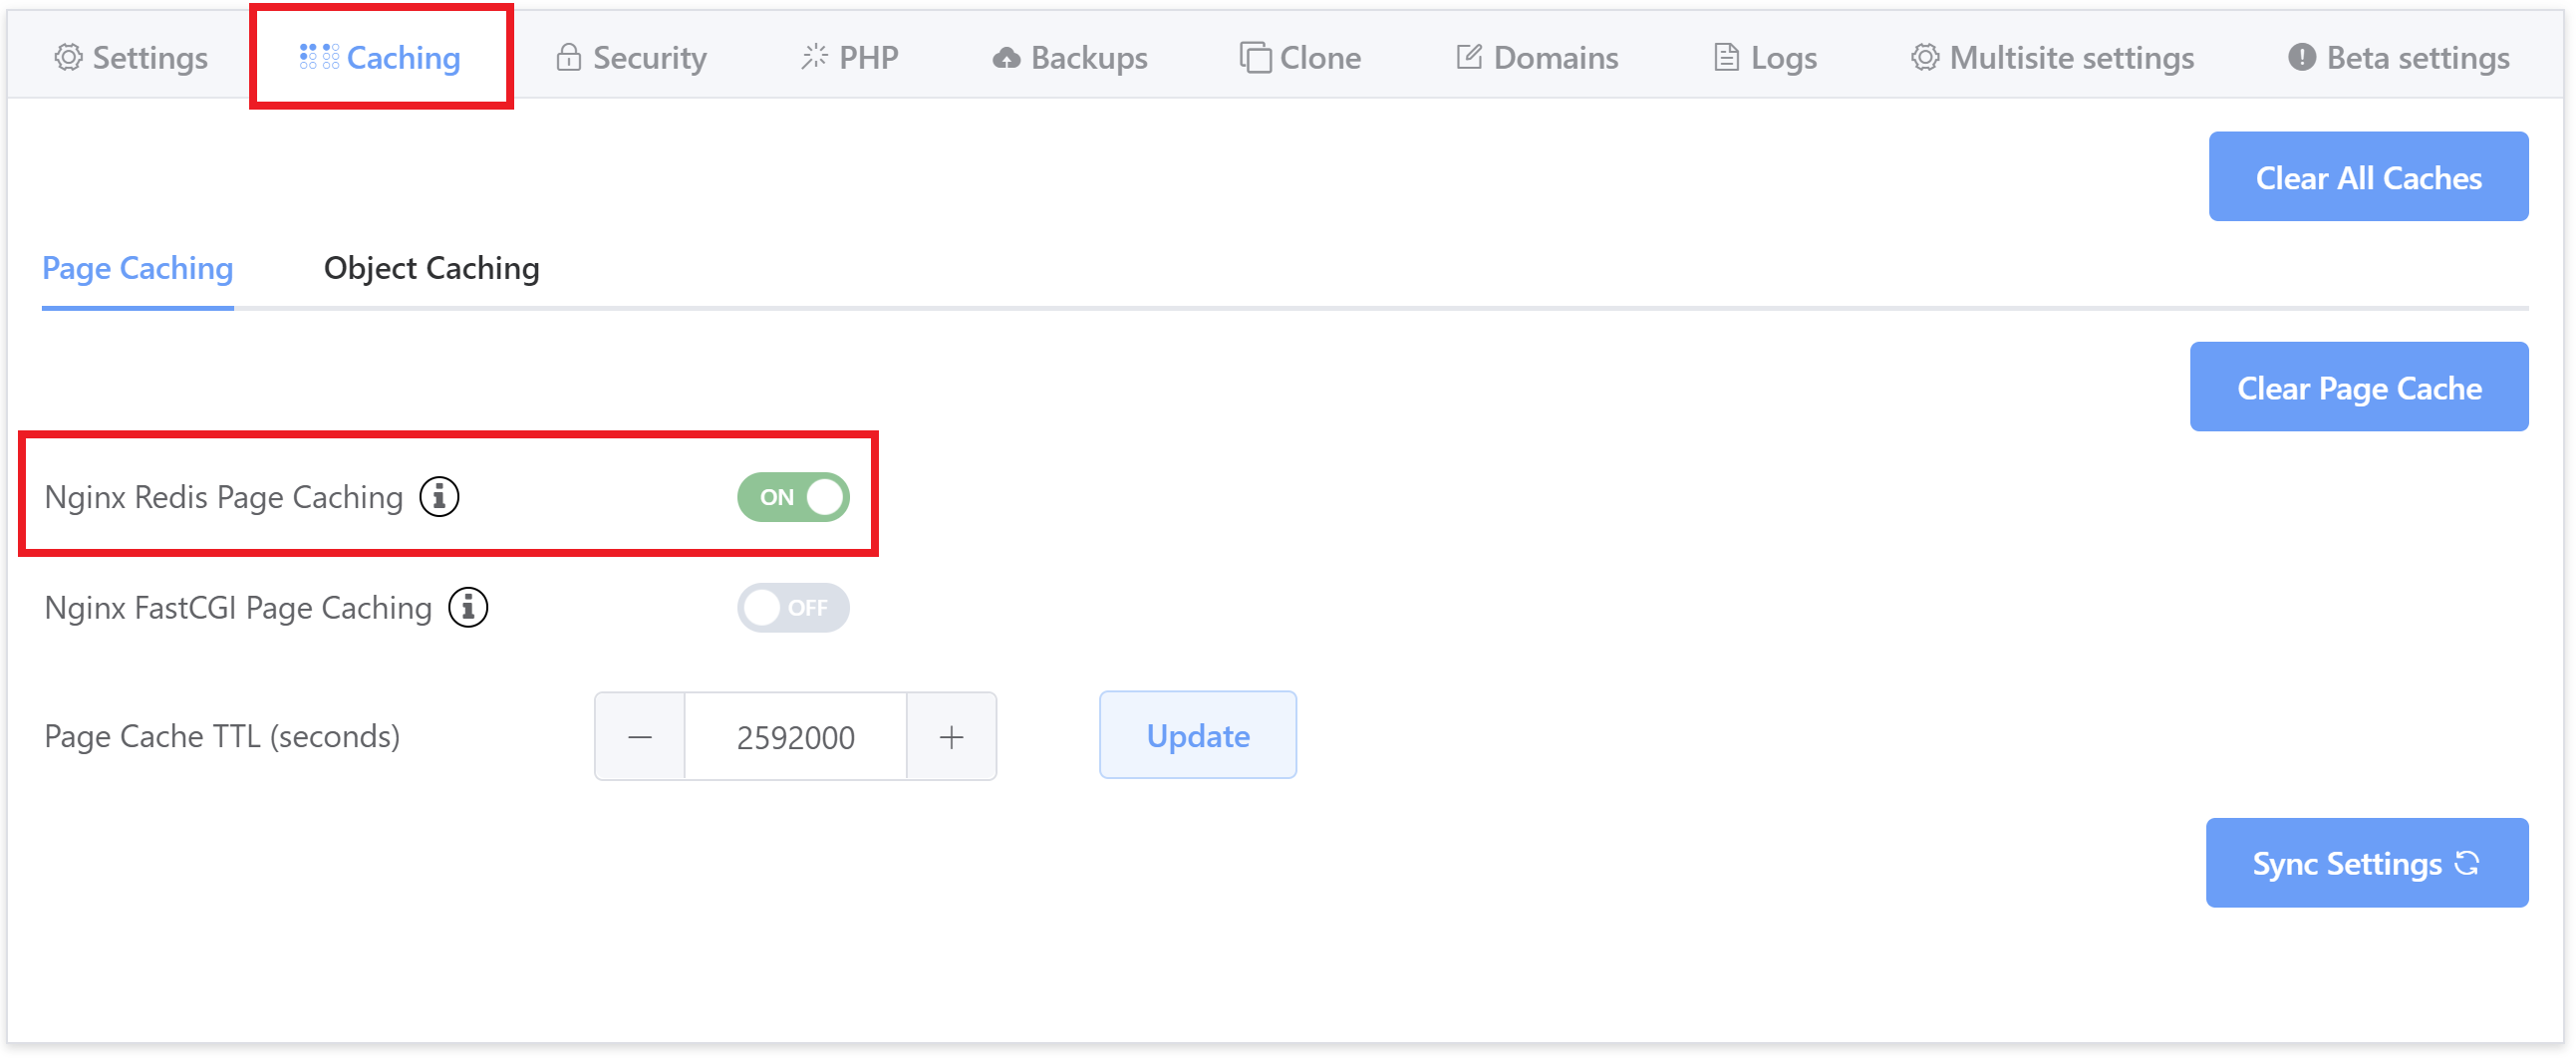
Your site will now have Nginx Redis Caching enabled with GridPane custom configurations.
Adjust Cache Time To Live (TTL)
Time to live (TTL) is the amount of time your page is stored in a caching system before it’s deleted or refreshed.
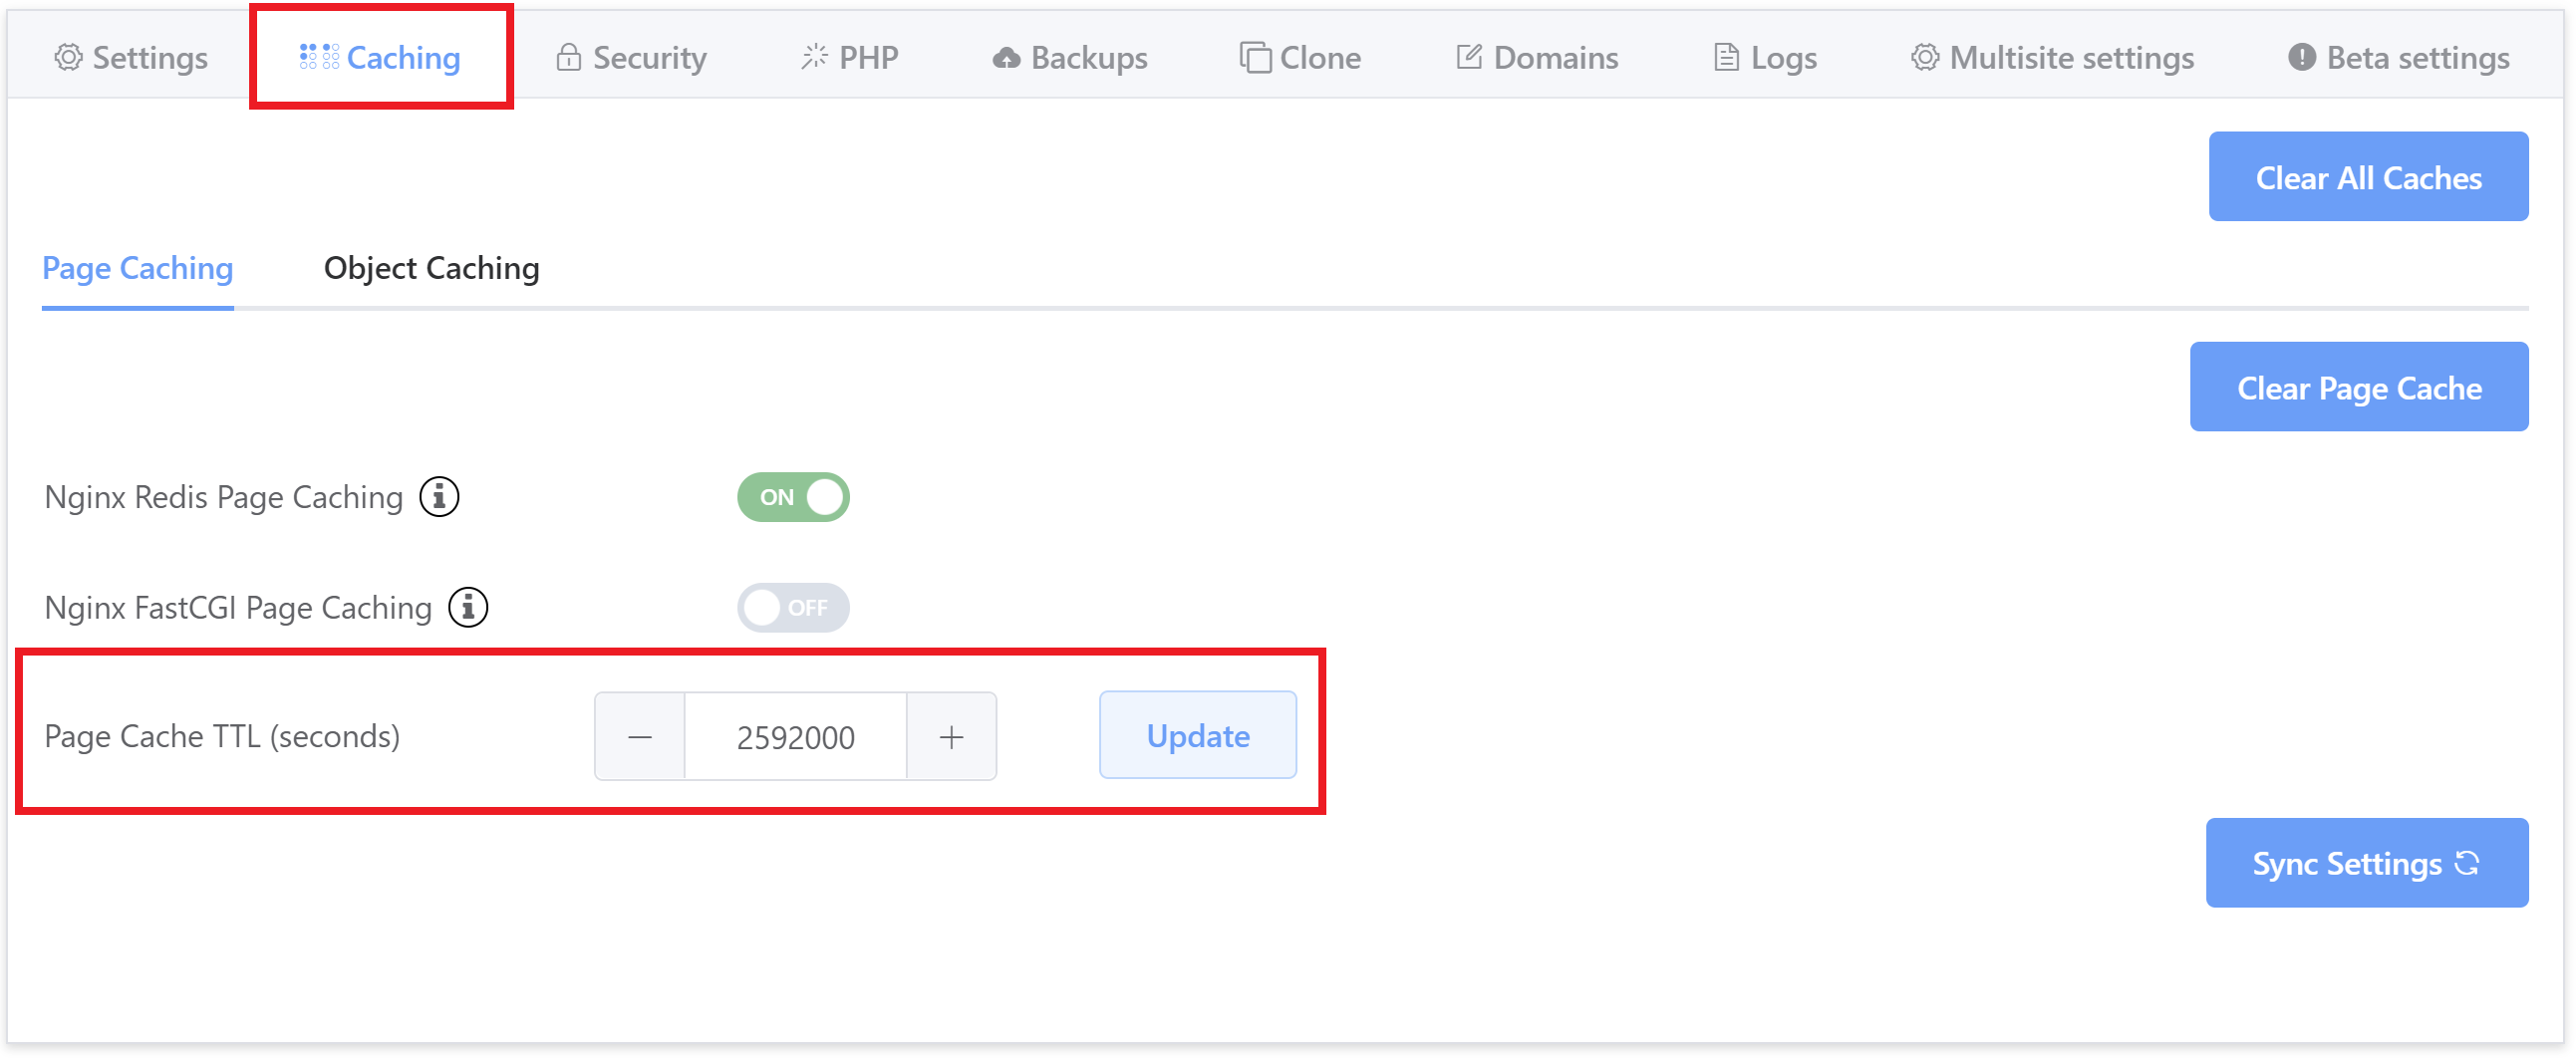
The default setting for Redis Nginx Page caching is 30 days (2592000 seconds).
In most cases, 30 days is a good duration for your cache. However, if you need to change it, you can adjust the TTL inside the Page Cache TTL (seconds) box, and then click Update:
An example use case for this may be that you have a form that requires WordPress nonce validation.
Confirm Your Caching is Active
If you want to confirm your caching is now active, you can visit your site and check the response headers using the site inspector. You will see that caching has been enabled.
Part 3 of this article below covers this in more detail.
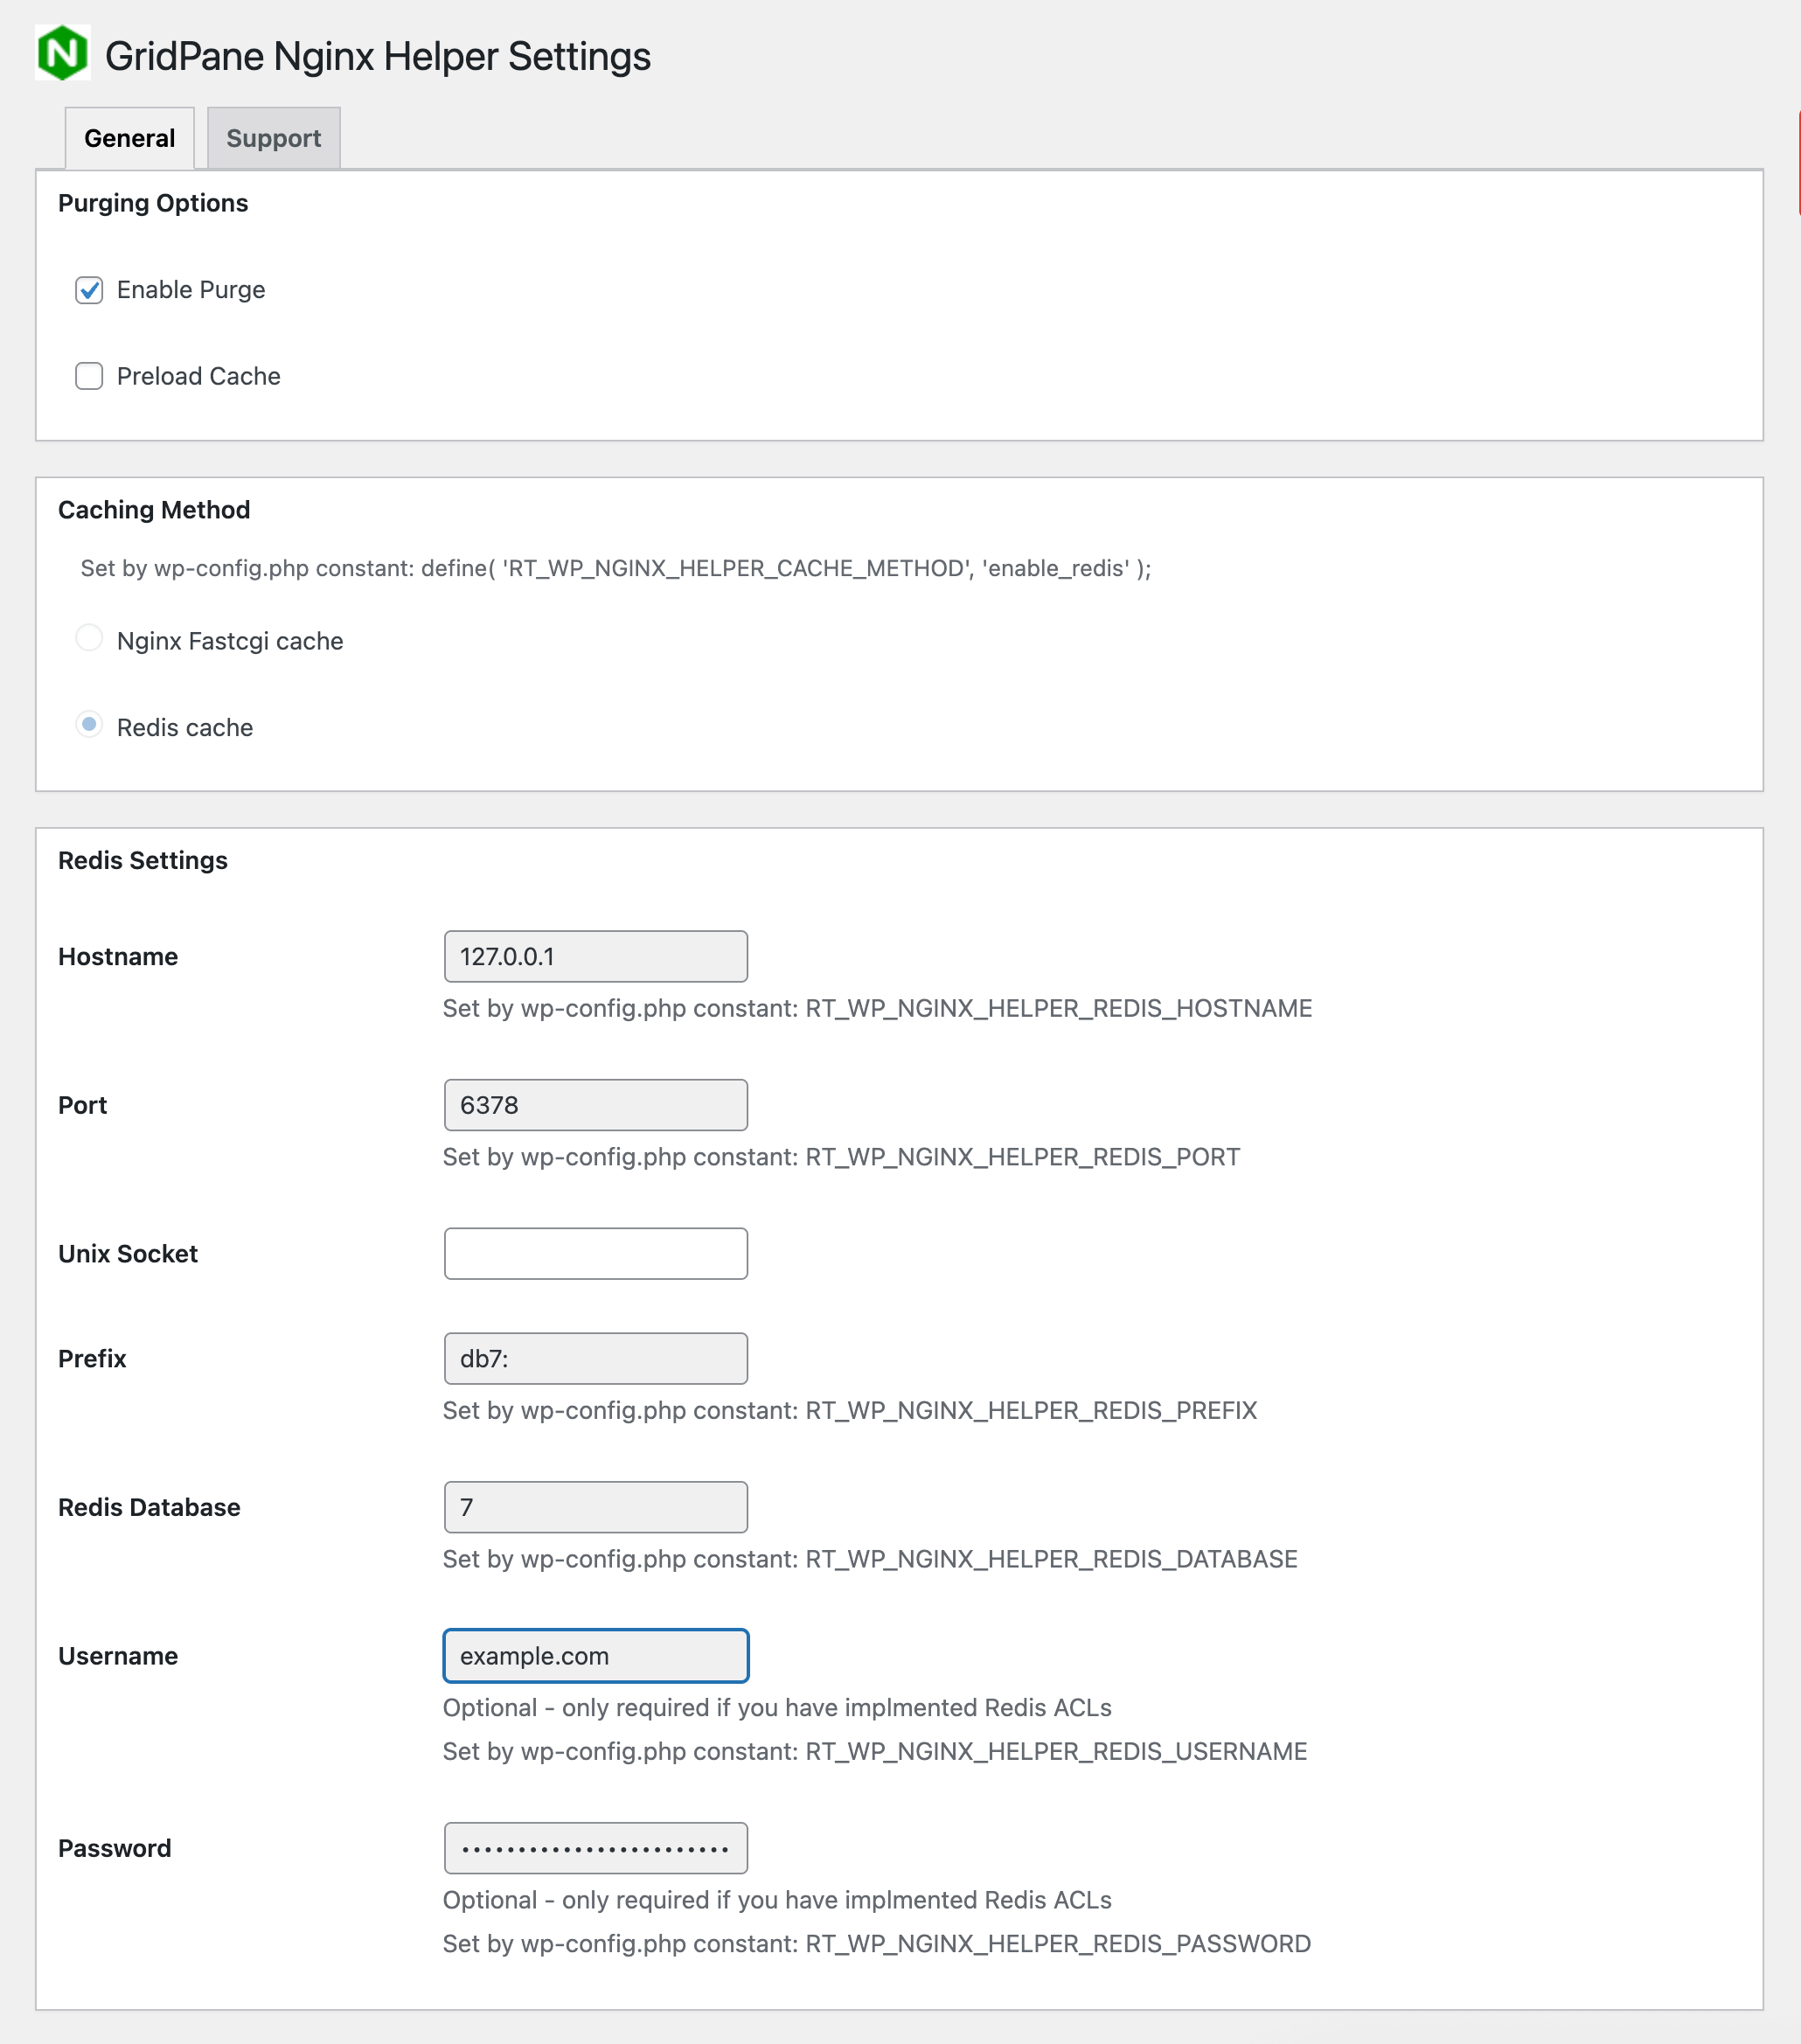
2. Configure the Nginx Helper Plugin
By default, we auto-configure the plugin with the correct caching type (Redis page caching in this case), and we exclude some common pages that should never be cached (learn more here).
Auto-Configuration
If you navigate to the plugin settings within your site dashboard (Dashboard > Settings > Nginx Helper), you’ll see we’ve preconfigured the Purging Options, Caching Method, and Redis Settings so that the plugin works correctly with Redis page caching.
The Caching Method and Redis Settings are set in the wp-config.php file, so they can’t be accidentally misconfigured.
Additional Configuration: Purging Conditions
Under Purging Conditions, you can select what content you would like to trigger the purging and updating of cache.
The default settings are suitable for almost all websites, and the Purge On Update setting is popular for websites using page builders who update the stylesheets on plugin updates.

Click Save All Changes when you have configured the options to suit your needs and now the cache will automatically purge outdated content as you update your GridPane site content.
Debug
The plugin also includes an option for debug, but it is highly unlikely that you will ever need to to use it.
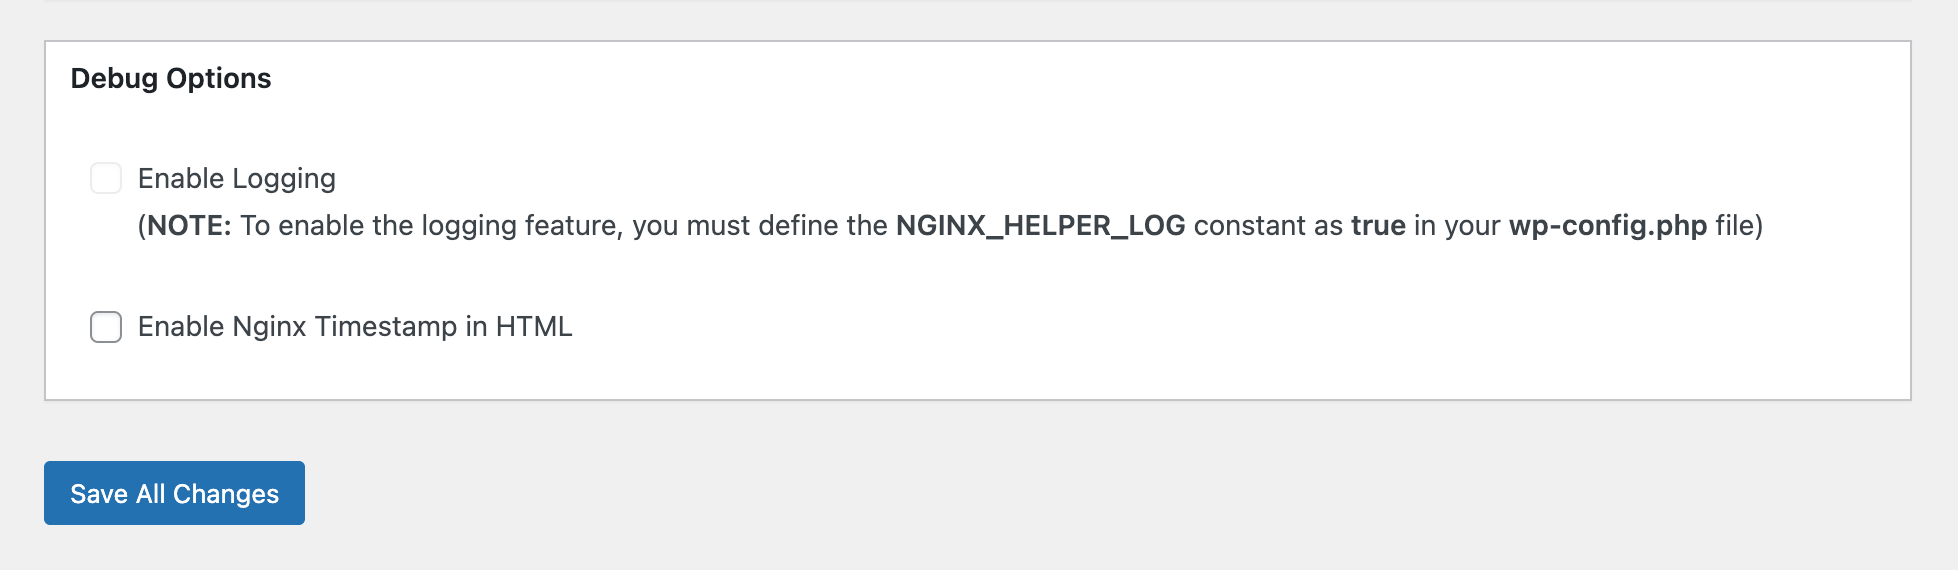
To enable logging, you’ll need to edit your website’s wp-config.php file and add the following line:
define('NGINX_HELPER_LOG', true);Learn more about editing the wp-config.php file via the user-configs.php file on your GridPane servers here.
Once you’ve made your edit, you’ll see an additional box with further info, including the log location. Once you’ve completed your debug, be sure to remove the constant from your wp-config.php / user-configs.php file.
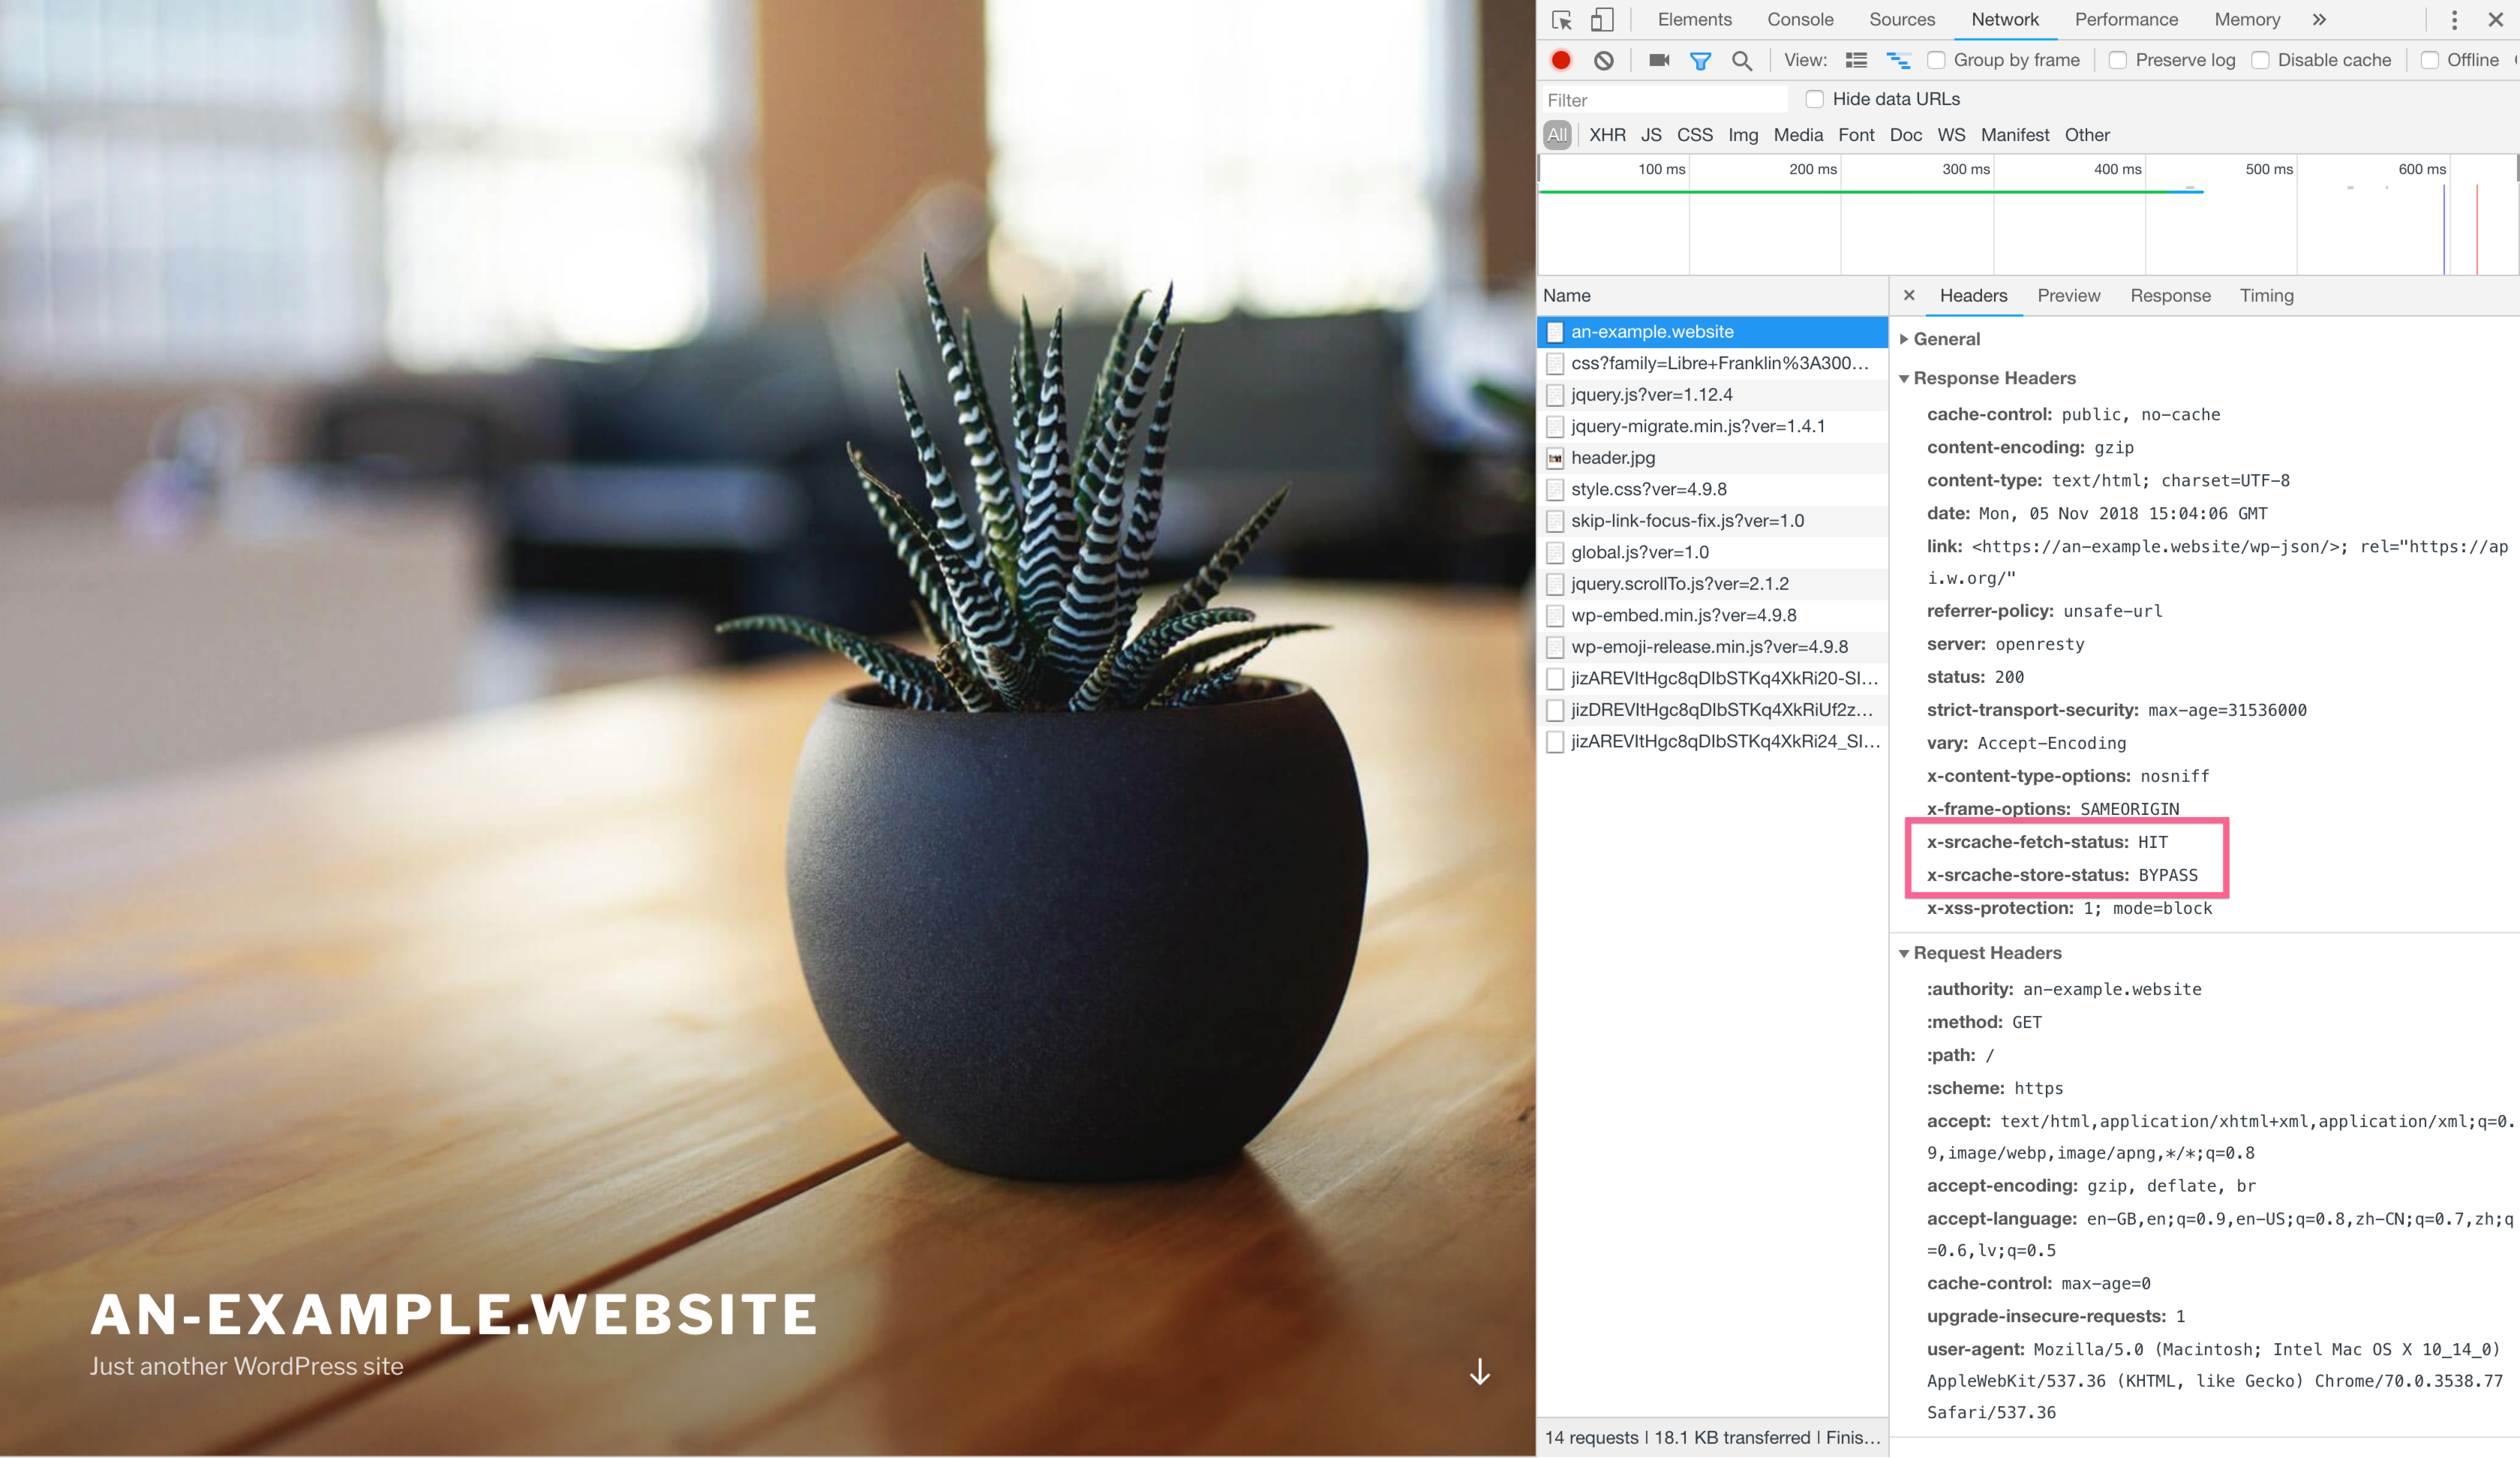
3. How to Check Caching Headers
First, open up your website in an incognito window. Next, right-click and choose “Inspect“, select the “Network” tab, and then reload the page. The result will look similar to the image below.

Click on your URL on the left-hand side to open up the box on the right, then down until you see the “Response Headers” section. If our caching is active you’ll see the following for Redis Nginx Caching:
X-Grid-SRCache-Fetch
If caching is turned on, you’ll see X-Grid-SRCache-Fetch with a value of either:
HIT | MISS | BYPASS
HIT means the website is cached.
MISS means this page hadn’t been cached yet, as it’s the first time it’s been visited since either the cache has been activated or cleared -on reload, it should say HIT.
BYPASS means this page has been excluded and will never be cached.
Here is what Redis Nginx Page caching looks like when turned on (on activating, I got a value of MISS, but now the page has loaded, on reload, I have a value of HIT as shown below):
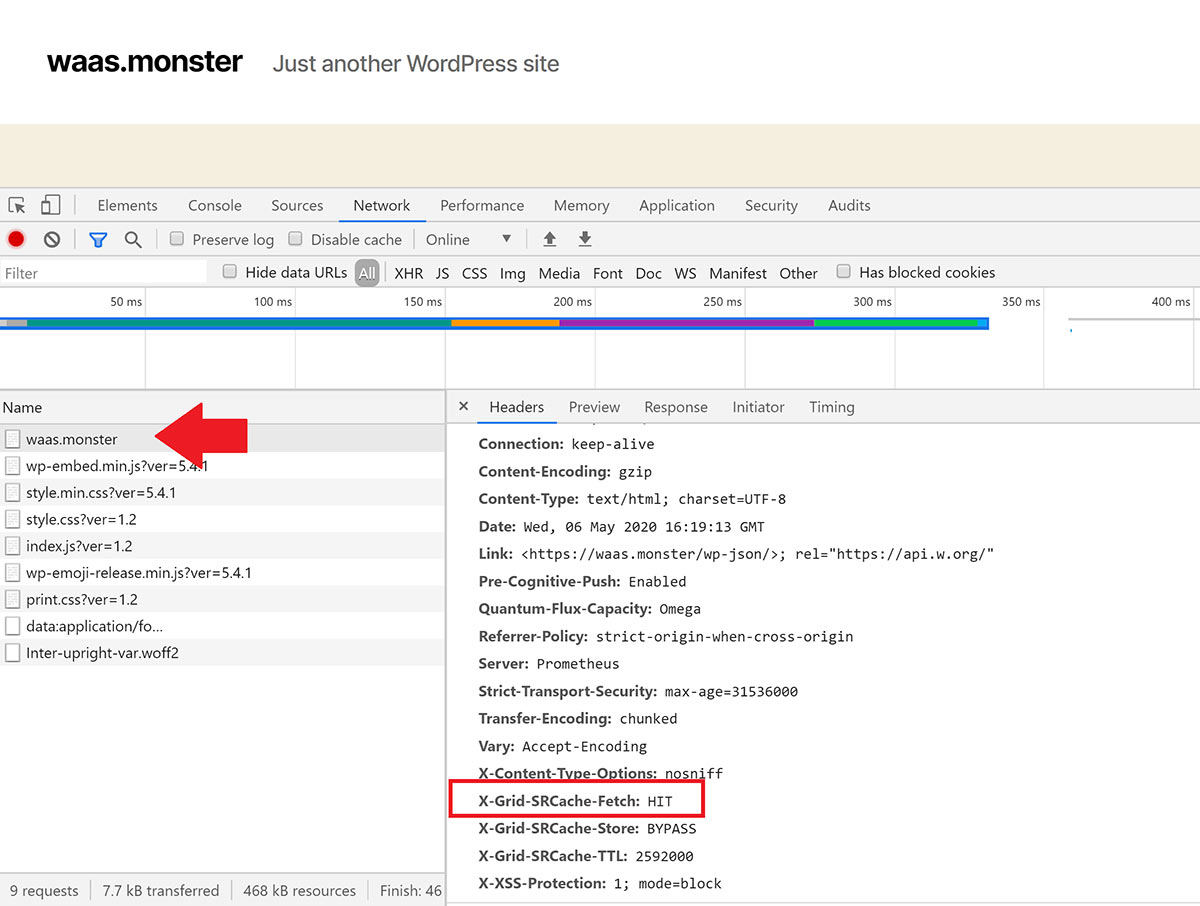
In the above image, you can also see X-Grid-SRCache-TTL: 2592000.
TTL stands for time to live, and this tells your browser how long it should cache this page for. The number next to it is the time in seconds. 2592000 converted into days = 30. This is the default value for Redis Page caching, and X-Grid-SRCache-TTL: 2592000 tells your browser to cache this page for 30 days.
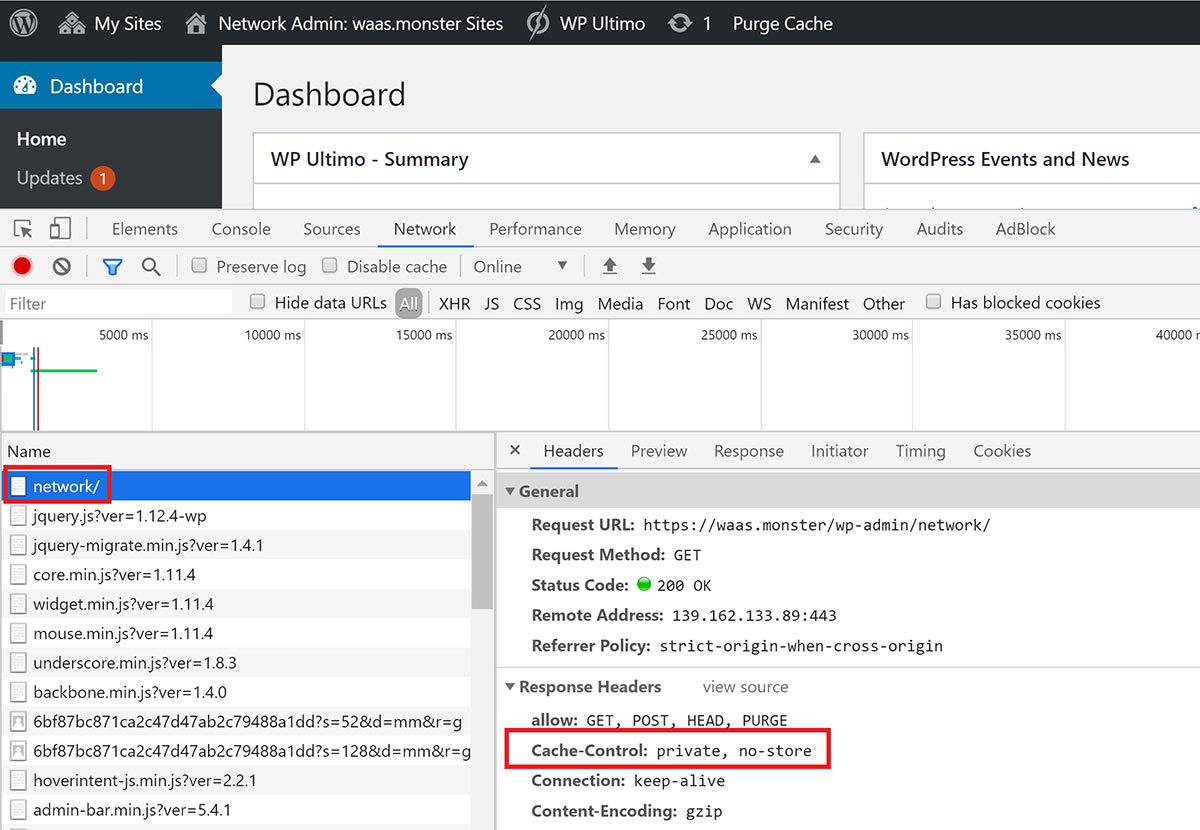
Caching won’t take place while you are logged in
When logged into your website you will see that the cache is bypassed, and in your dashboard you will see:
cache-control: private, no-store
This forces browsers and CDNs to never cache.