Step 3: Get Your Cloudflare API Credentials
Now that you’ve set up your domain in your Cloudflare account, you need to set up and then copy your API key so that you can add it to your GridPane account.
First, log in to your Cloudflare account, and then click here to begin setting up your API key:
https://dash.cloudflare.com/profile/api-tokens/
To view your Global API key, you’ll see an option to view your key directly below the API tokens box. Click the blue “View” button:
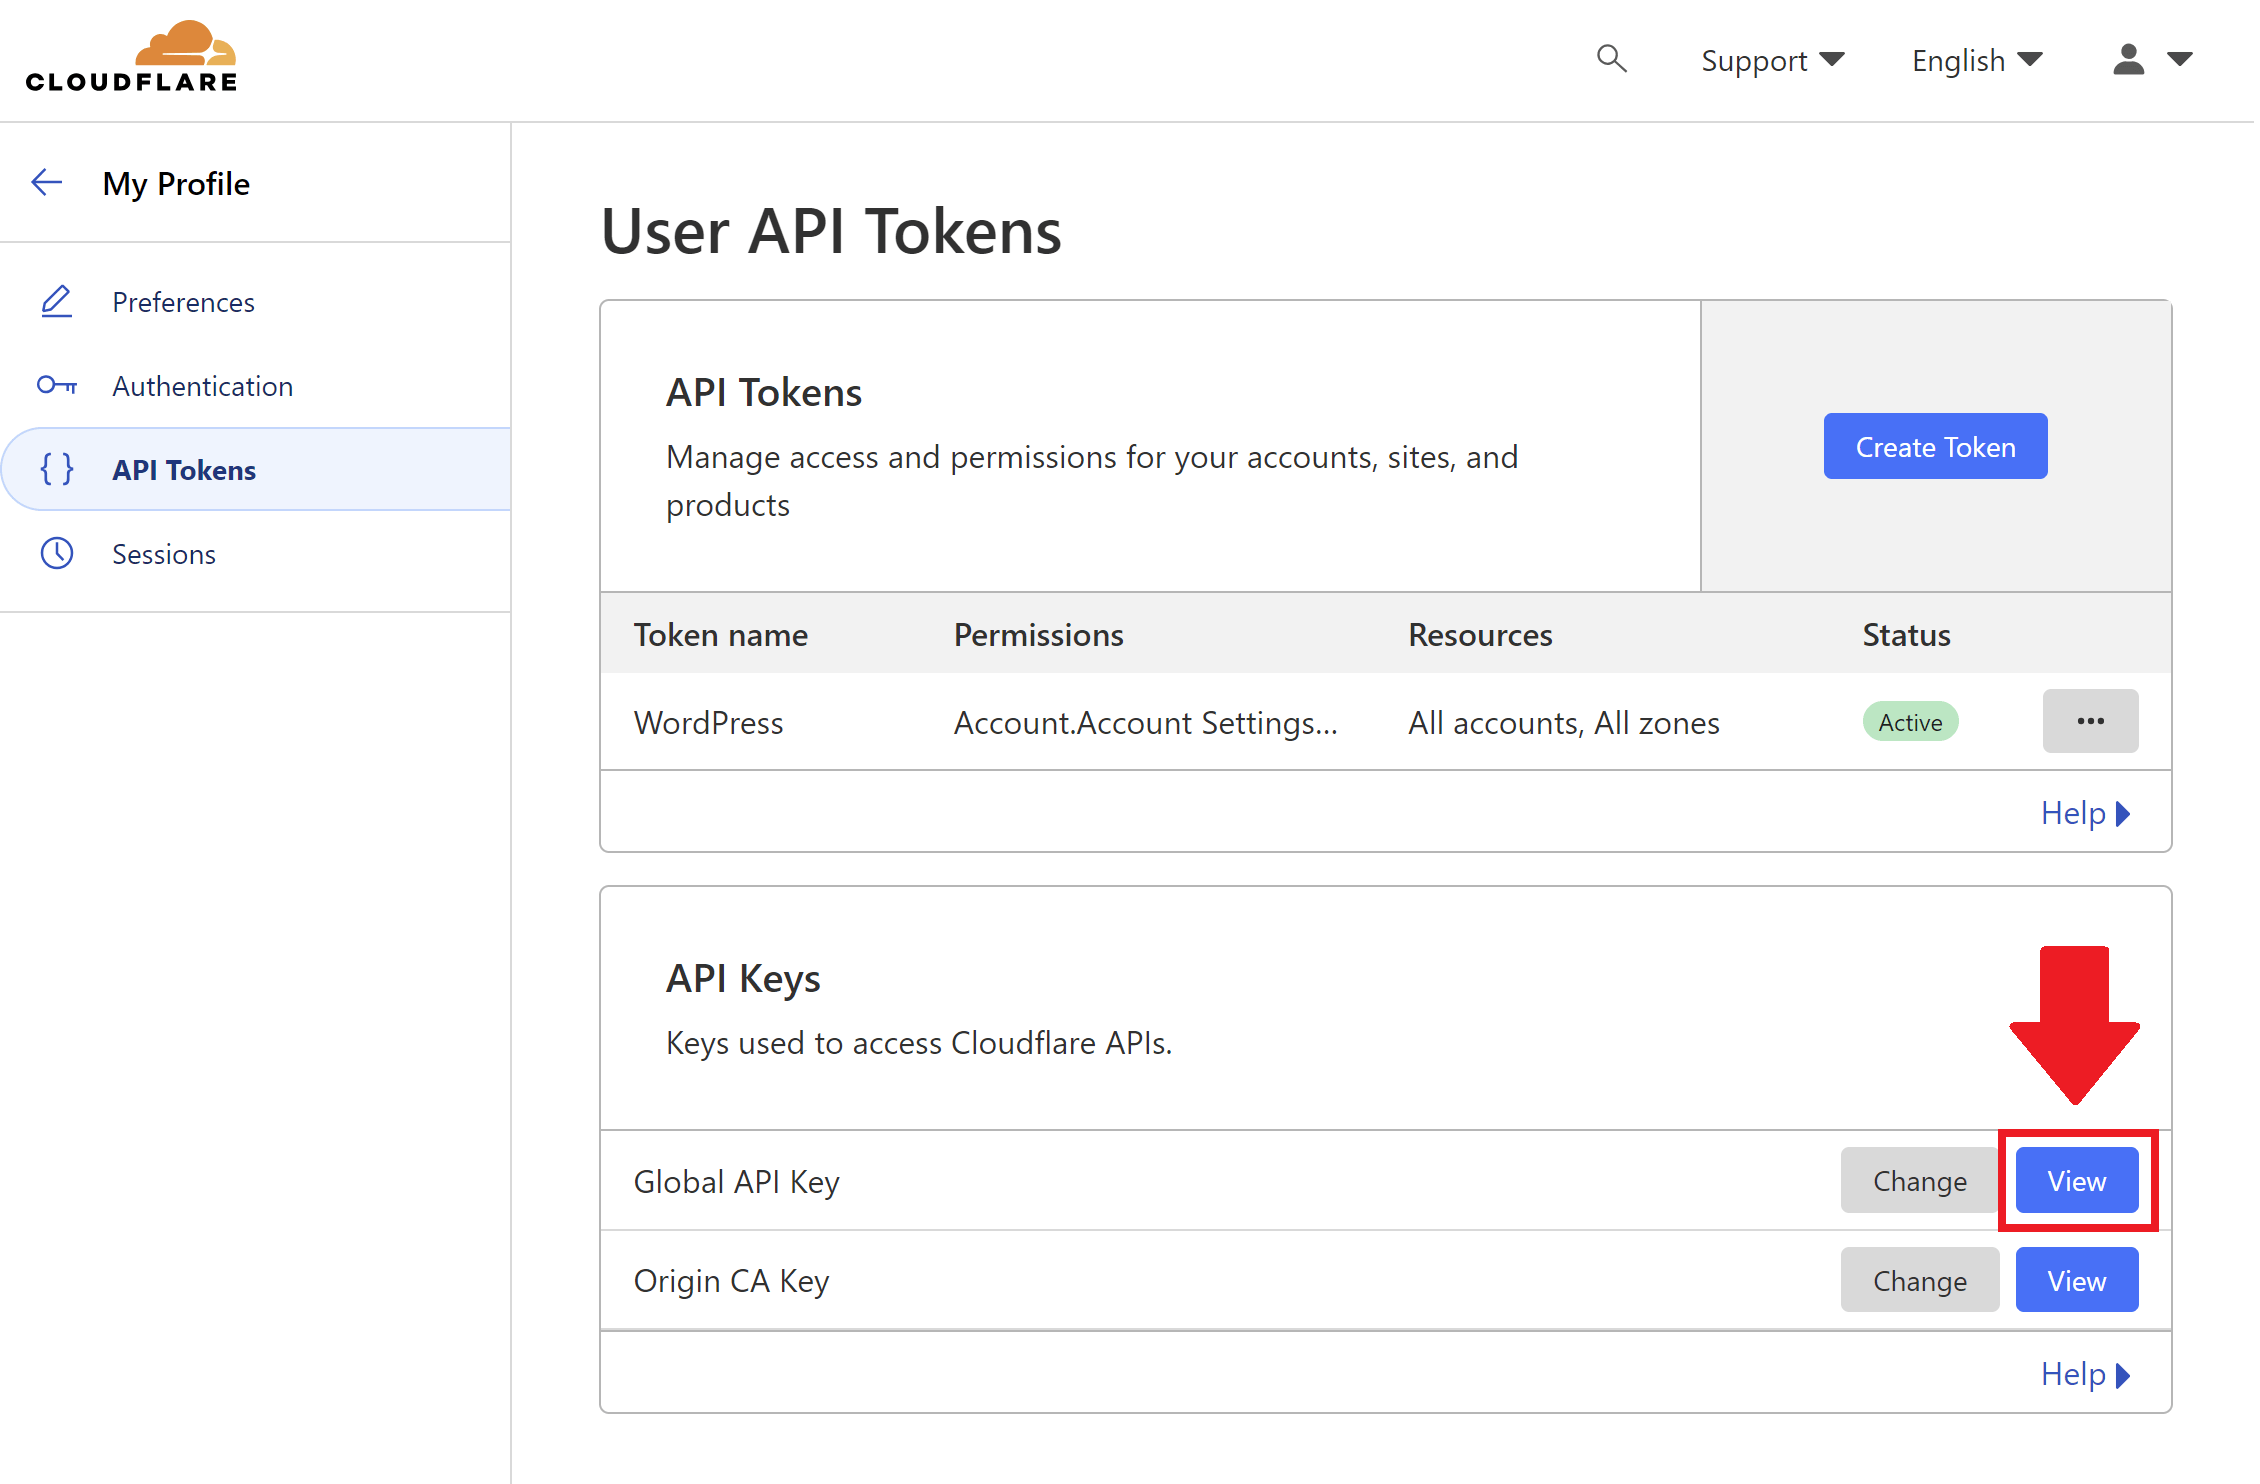
This will open up a modal window asking for your password and to confirm you’re not a robot.
Once entered, you can copy the token and proceed to Step 4 below.
Step 4: Add Your API Key to GridPane
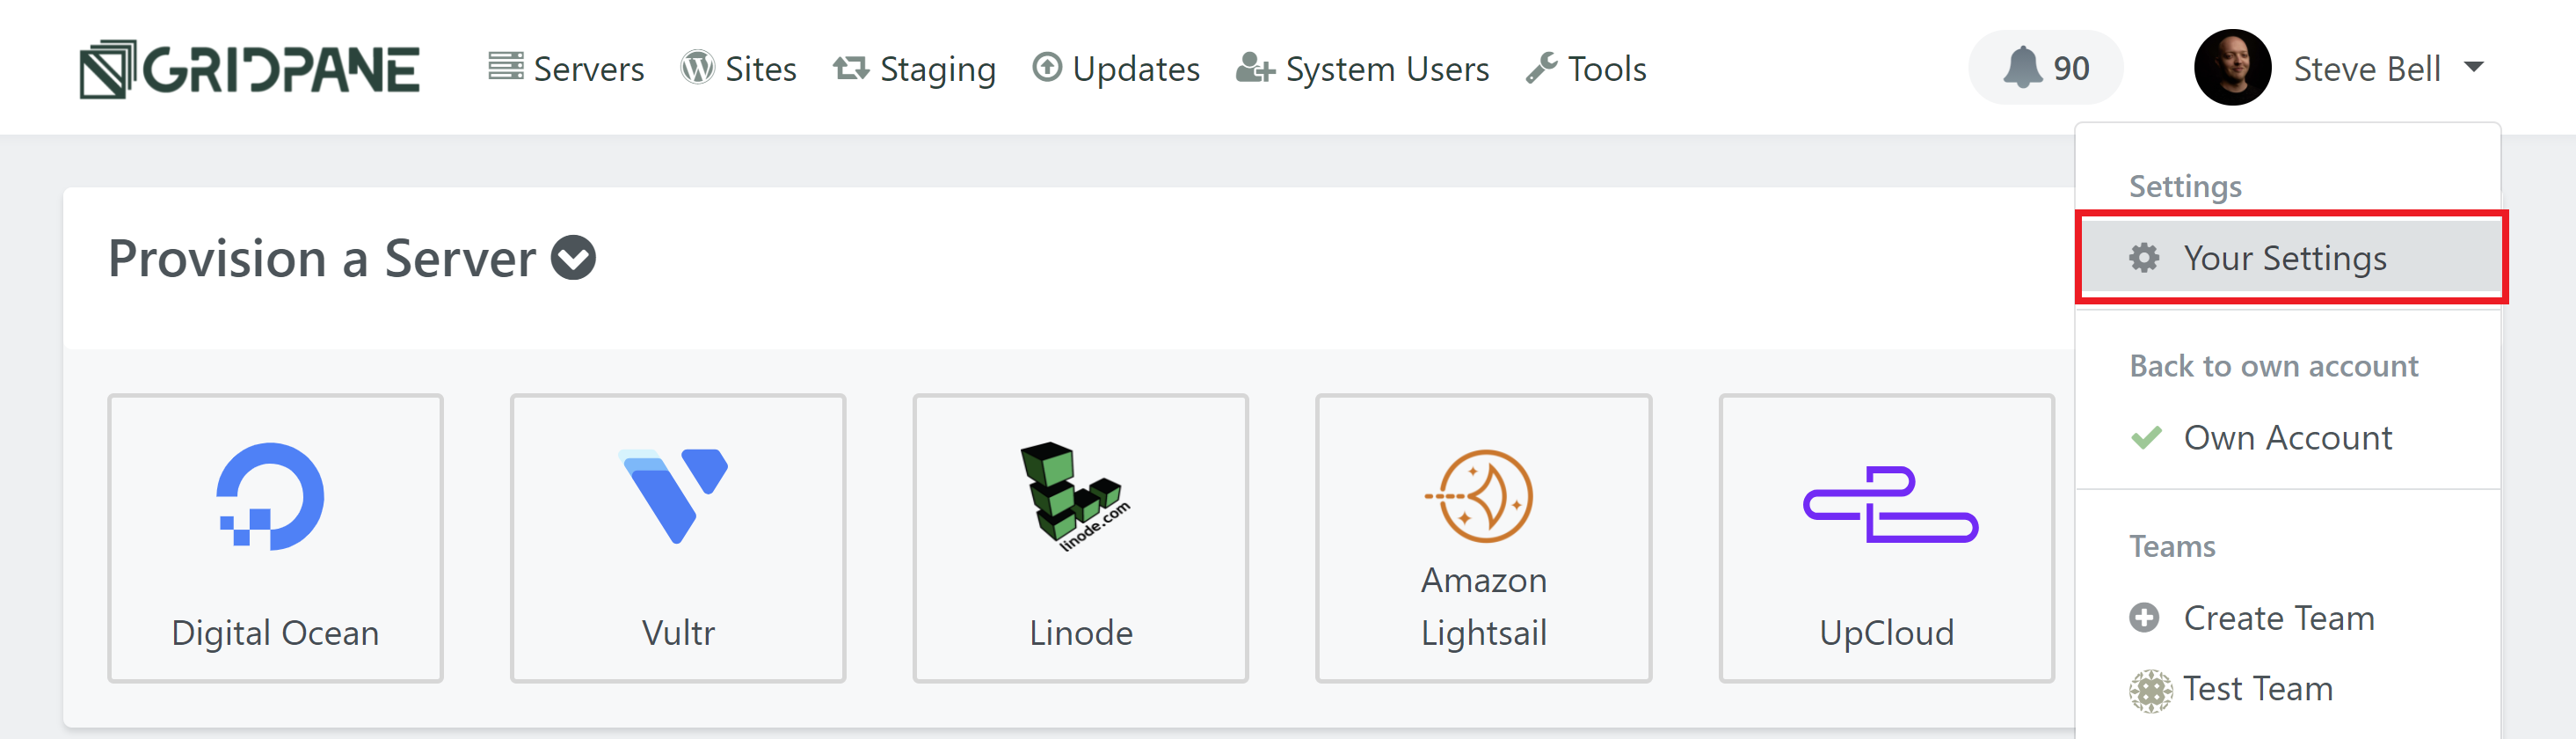
Click on your name in the top right-hand corner of your account and select “Your Settings” from the dropdown.
This will bring you to your account page. Select Integrations in the left-hand menu, then select DNS Providers, and then Cloudflare:
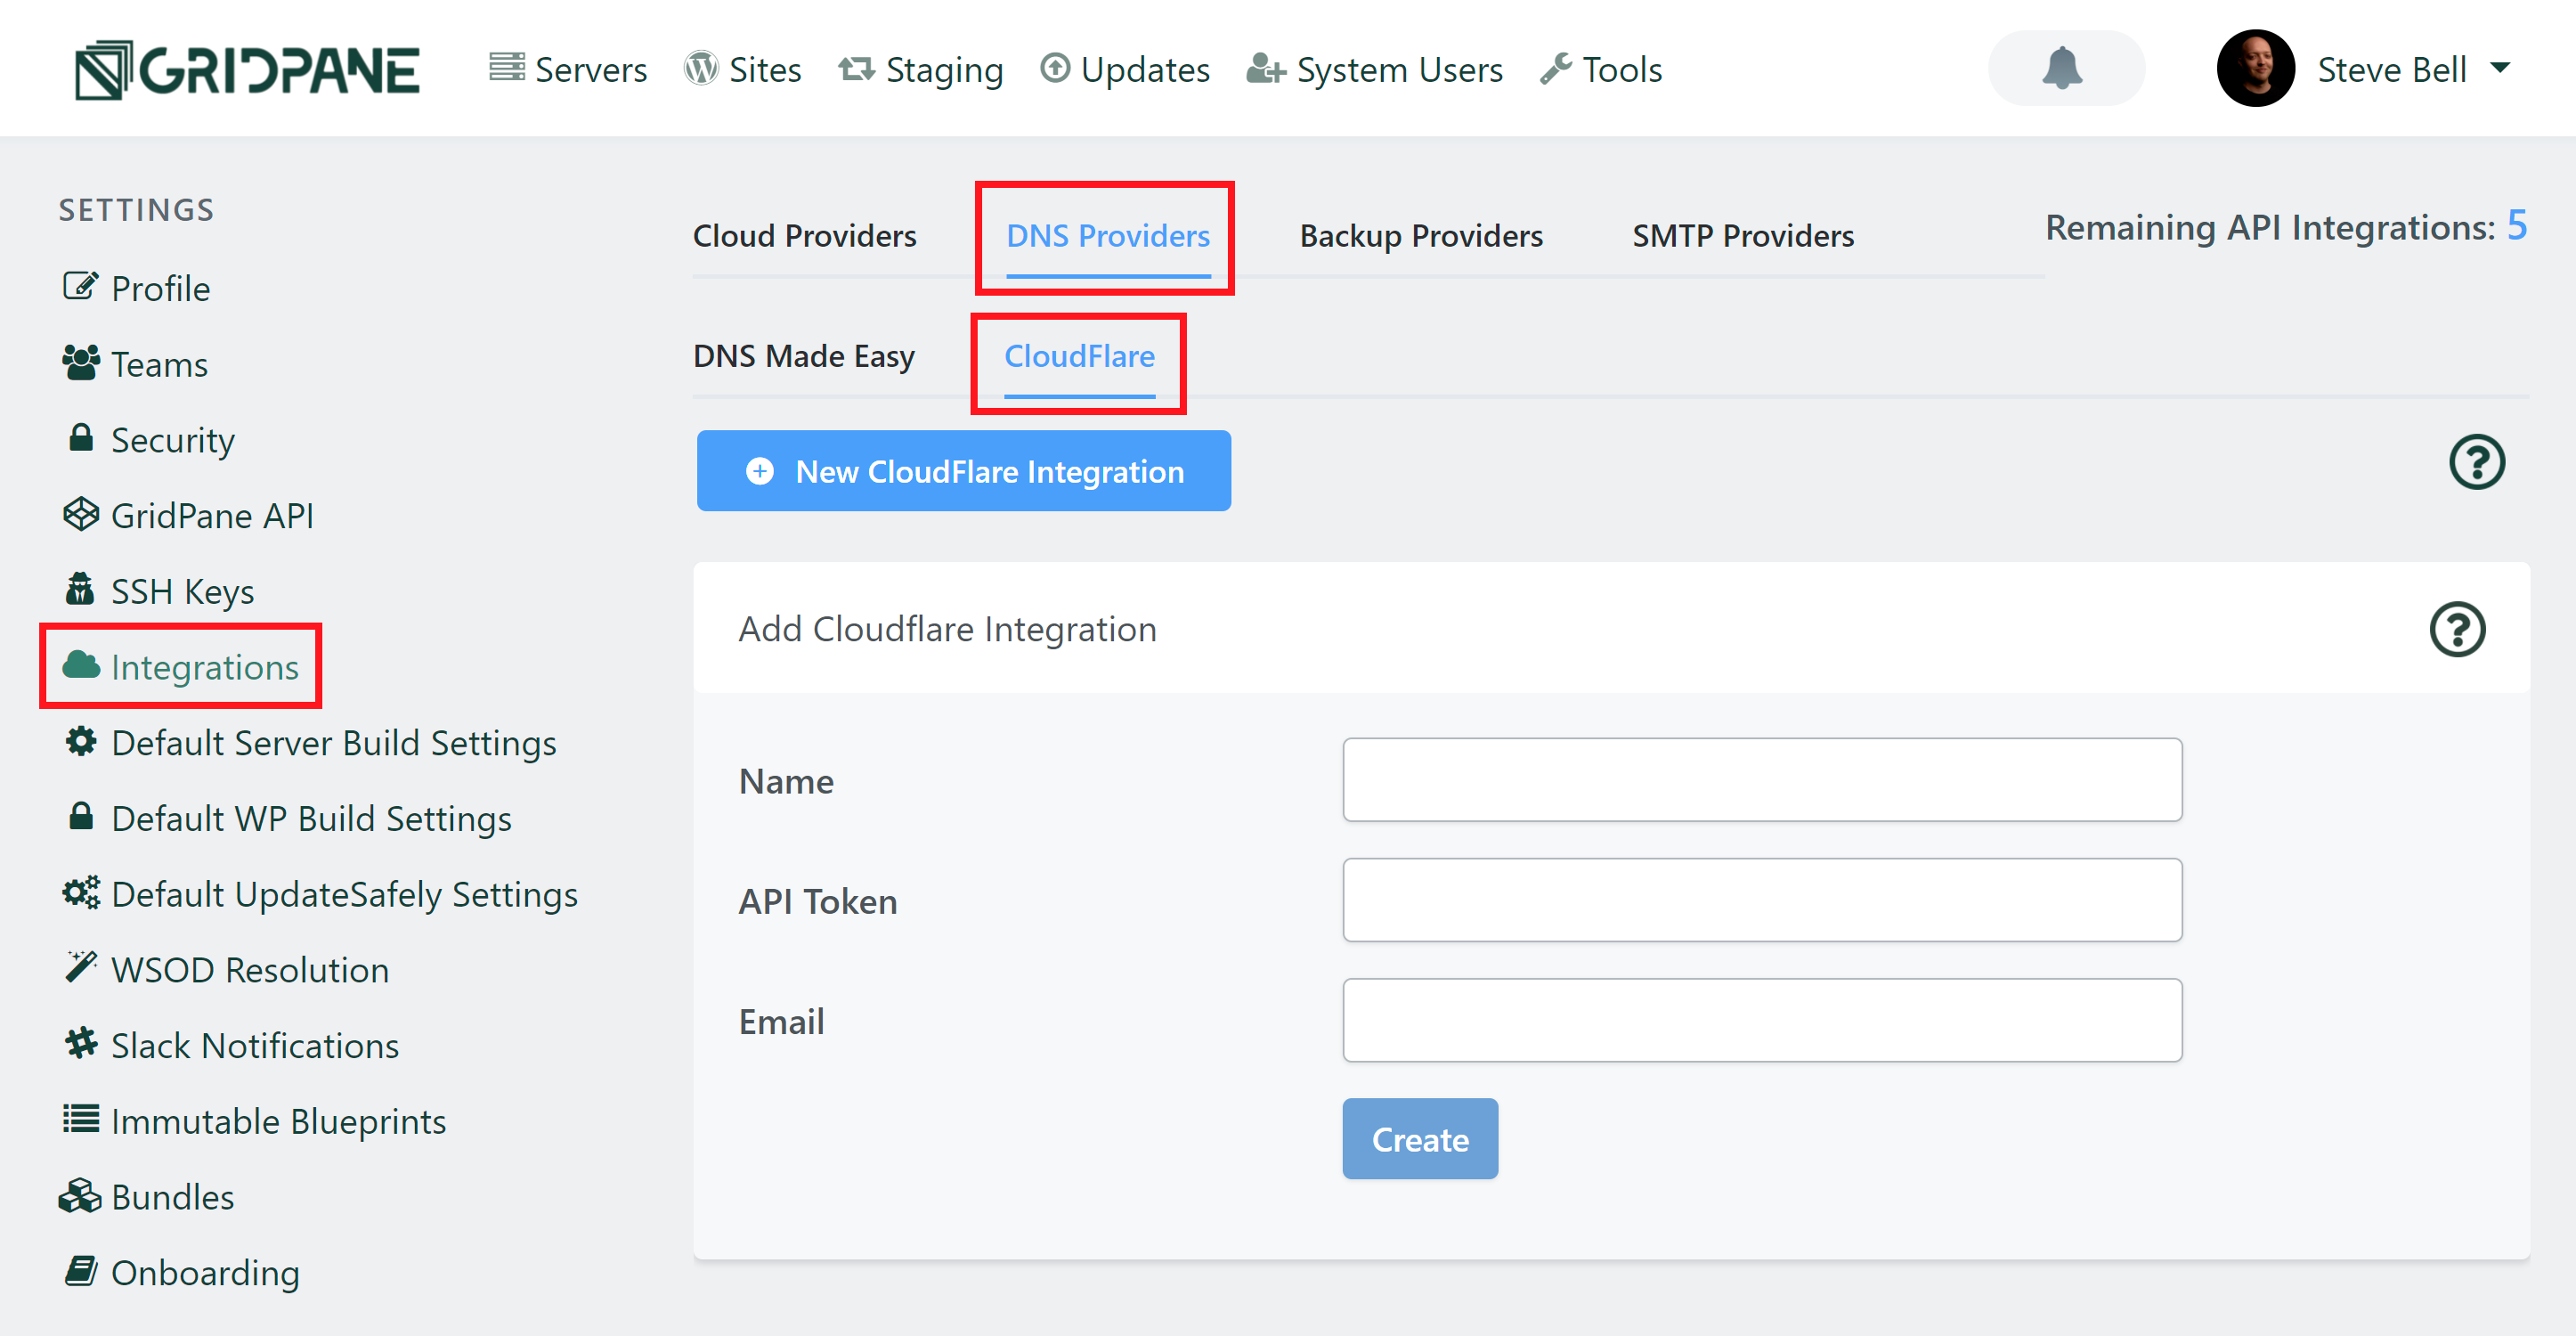
Give your key a name and enter your API key and the email address you use for your Cloudflare account, then click “Create“. You’ve now integrated Cloudflare with your GridPane account.
Your Cloudflare API Credentials will be saved and displayed in the Cloudflare Account Tokens panel as shown below.
If you wish to update your credentials at a later date, you can do this by clicking the down arrow for your key and then the blue pencil icon button.
If you wish to delete your credentials entirely, you may do this by clicking on the X button.
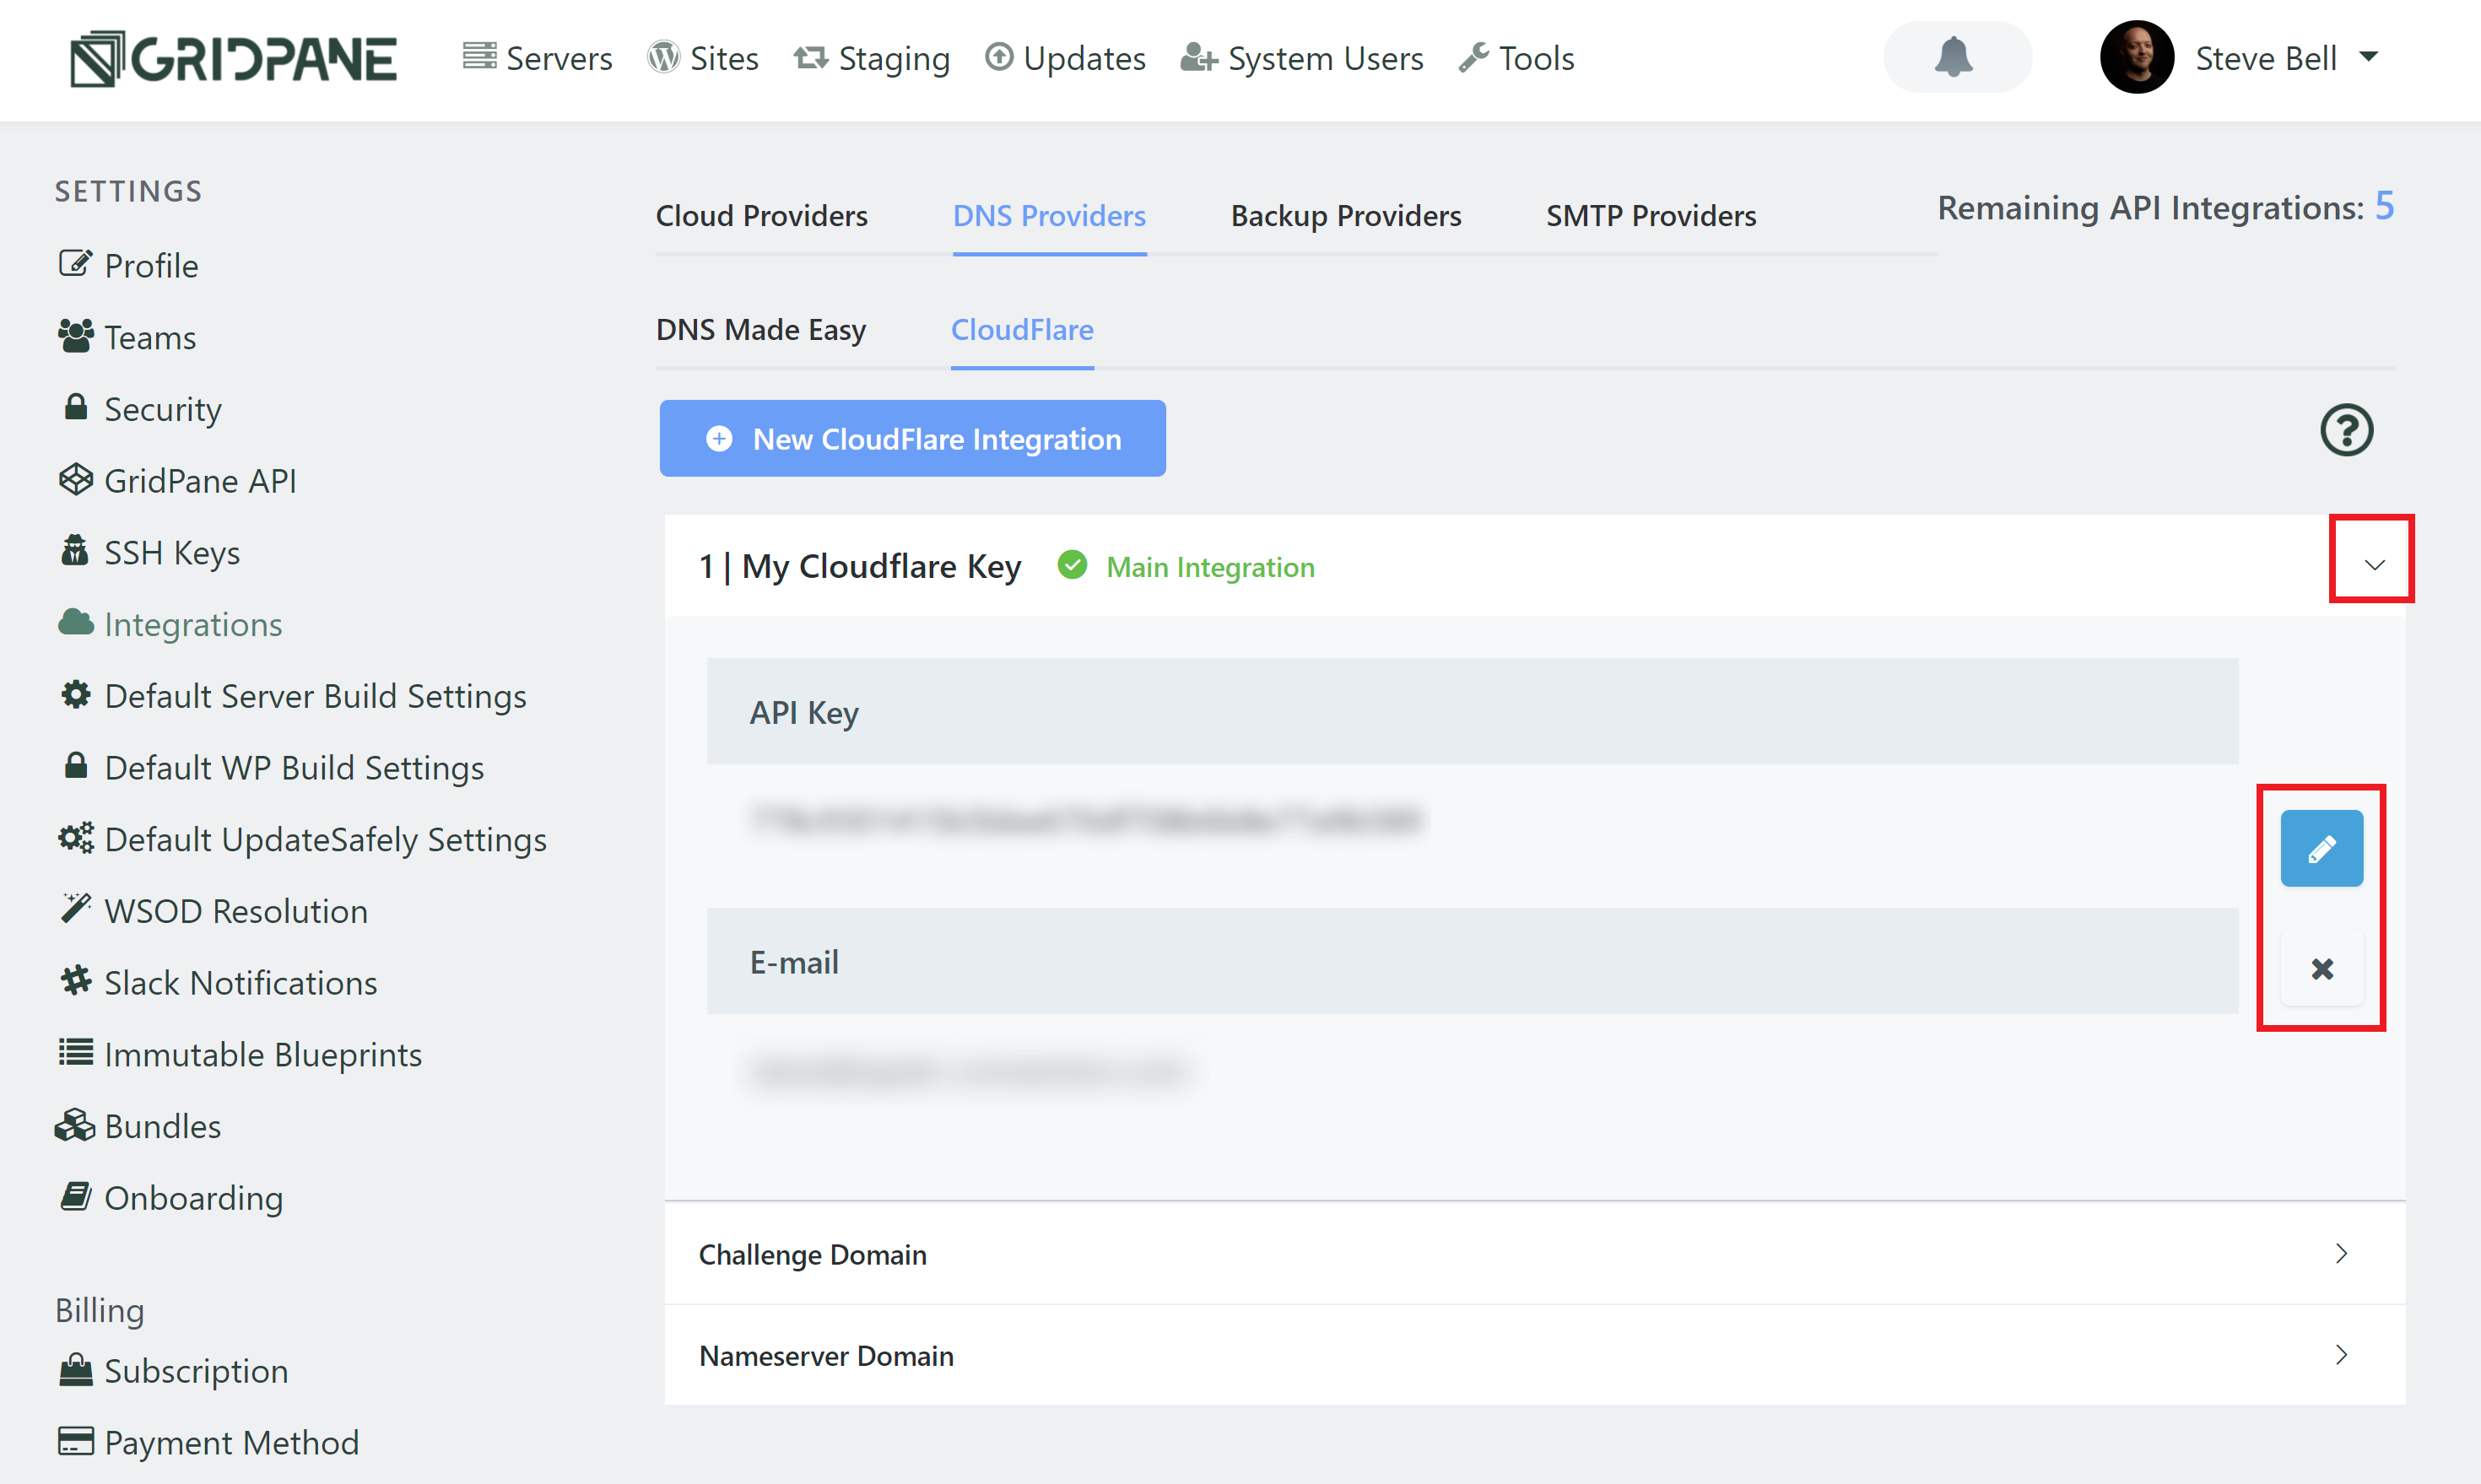
If you have a Developer level account or above you can also add additional API keys by clicking the blue New Cloudflare Integration button.
Learn more about using multiple API keys here:
Adding Multiple API Keys to Your GridPane Account (Multi API)
Challenge Domains & Nameserver Domains
Challenge domains are a way for you to generate an SSL for a client using a DNS API Proxy Challenge before you migrate them over if, for some reason, you can’t add their domain to your Cloudflare account. You can learn more about this here: Provisioning an SSL for a domain using DNS API Domain verification by Proxy Challenge
Nameserver domains are for if you’re using vanity nameservers e.g. ns1.yourdomain.com instead of one.ns.cloudflare.com etc. You’ll need to enter your vanity nameserver here if you’re using one.
Step 5: Provision a GridPane Site Using Cloudflare to Update DNS
Next provision your GridPane WordPress site. We have an easy-to-follow guide that takes you step by step through the process here.
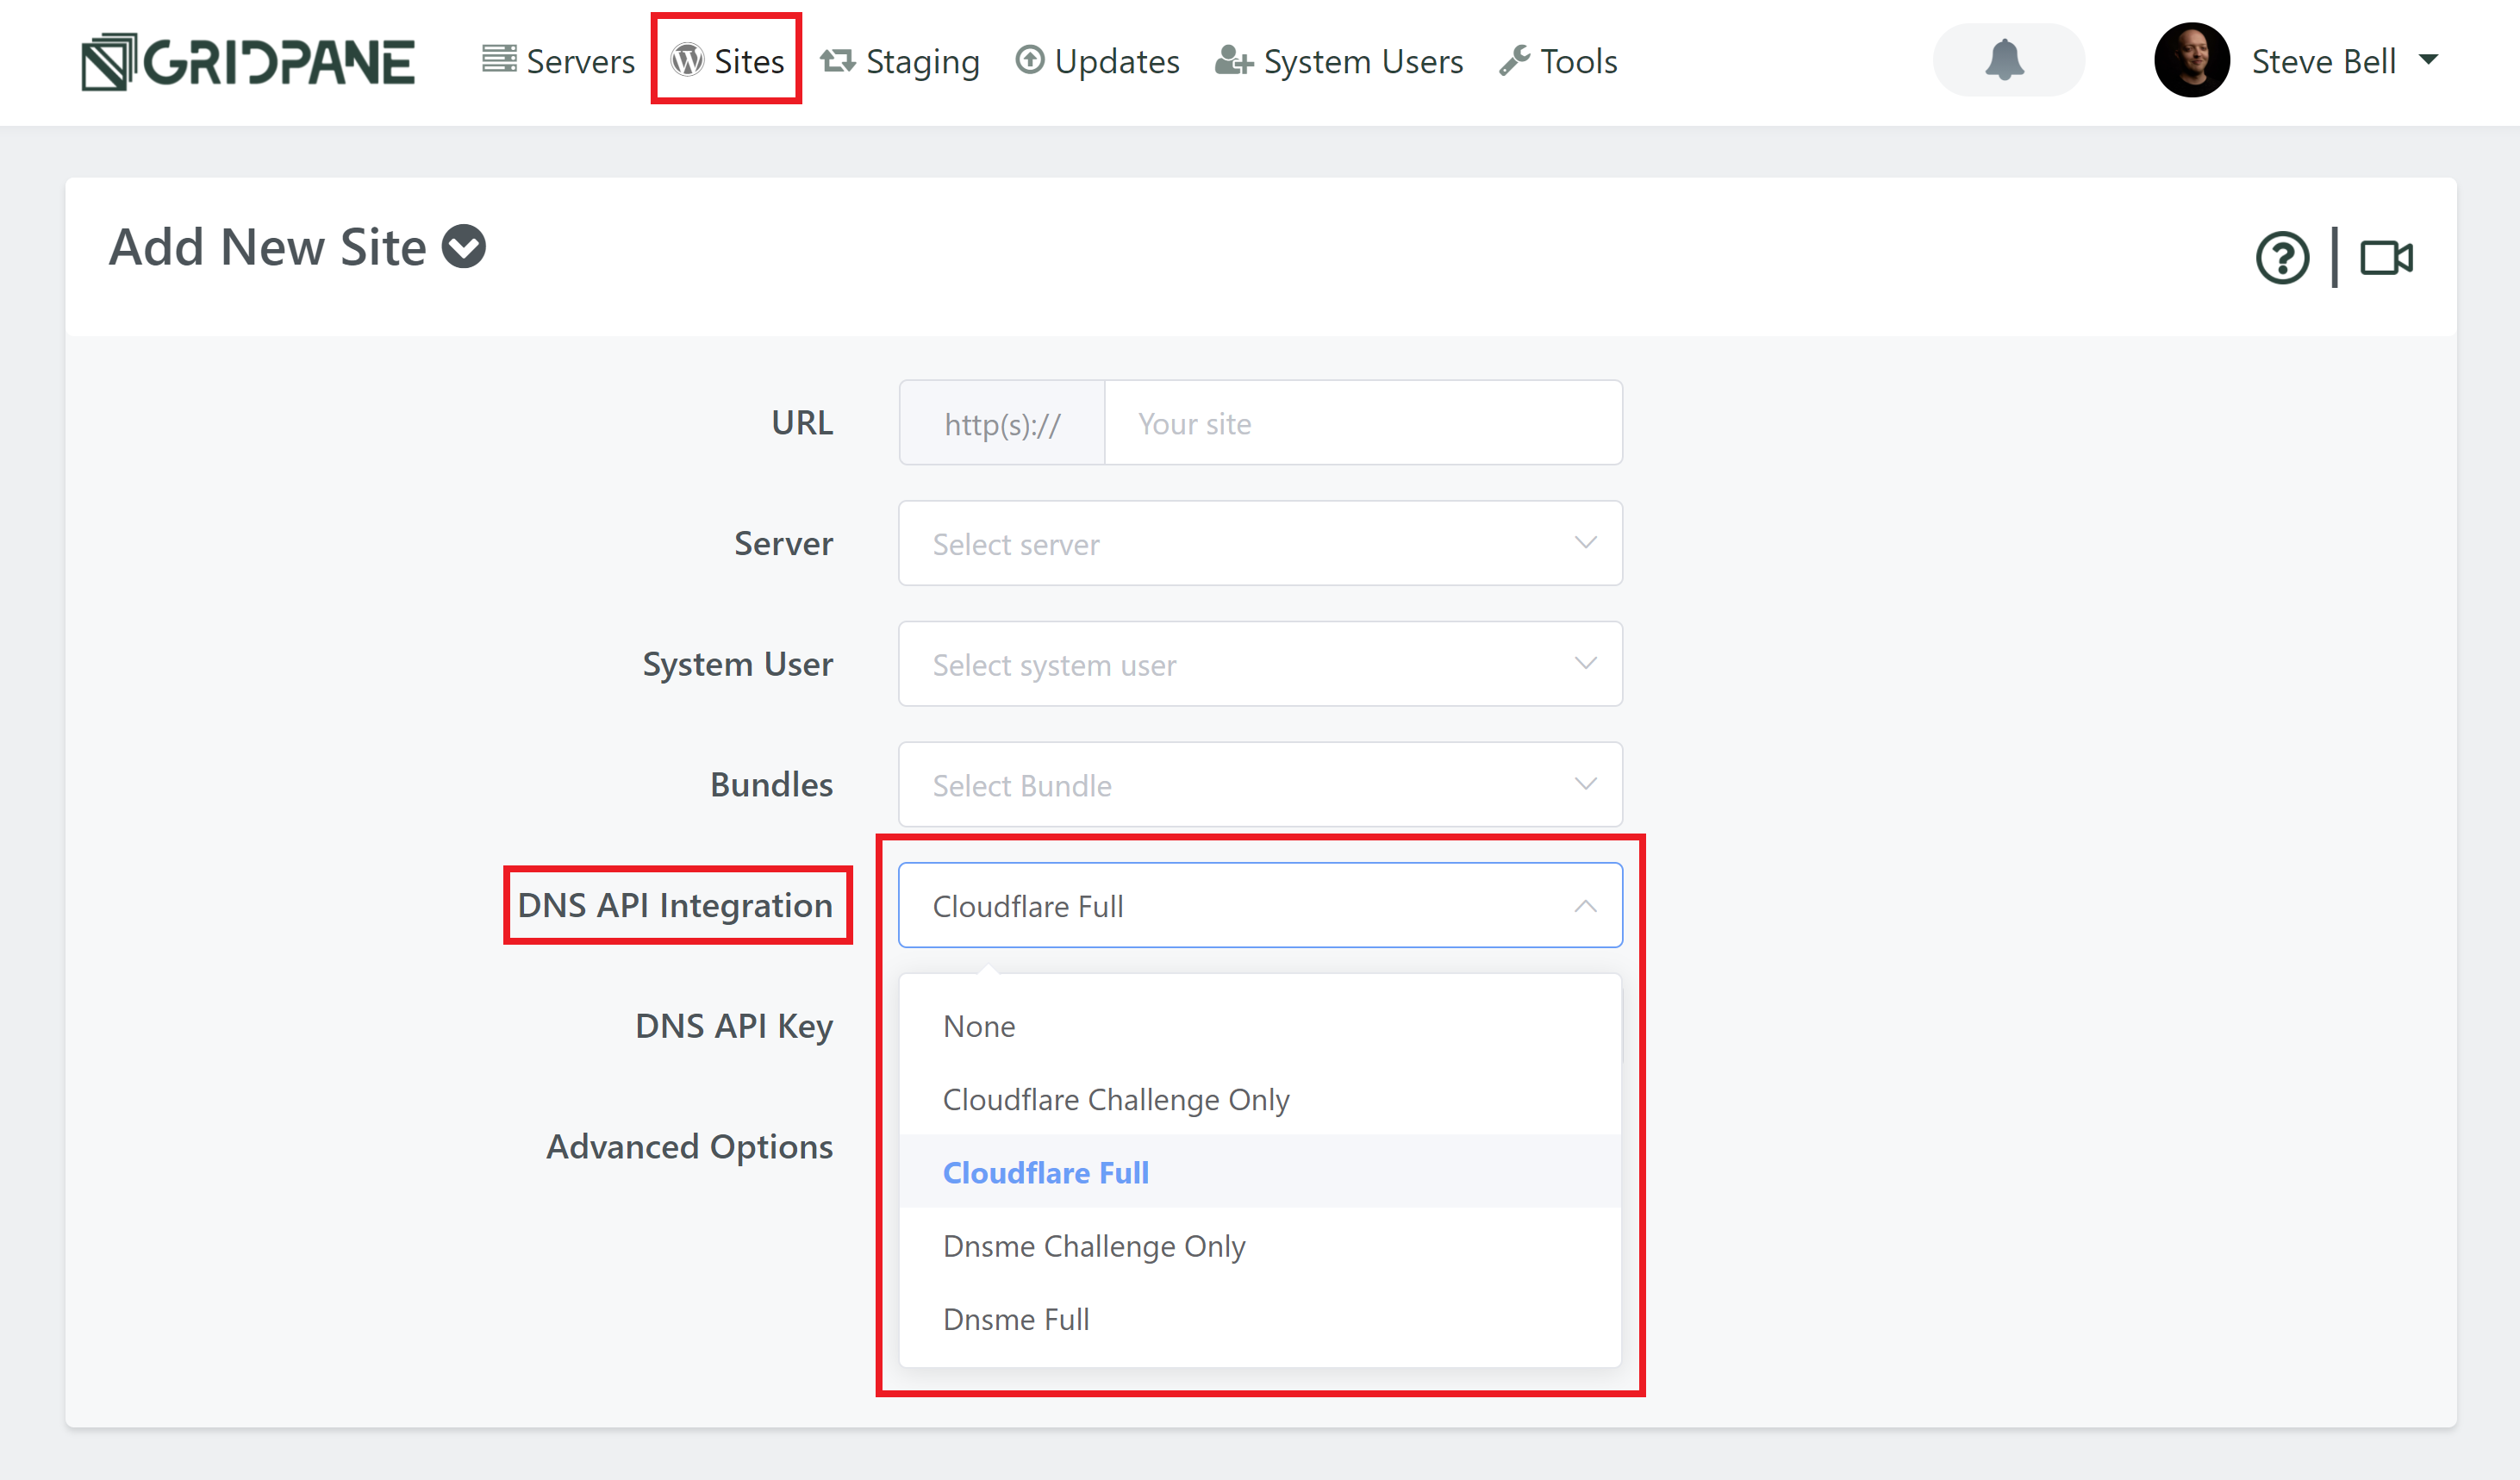
In the DNS API Integration section of the Add New Site panel, make sure you select Cloudflare from the dropdown before you click “Add Site”.
If you’re using a Challenge domain or Nameserver domain, these will also display in the drop-down, be sure to select the correct one.
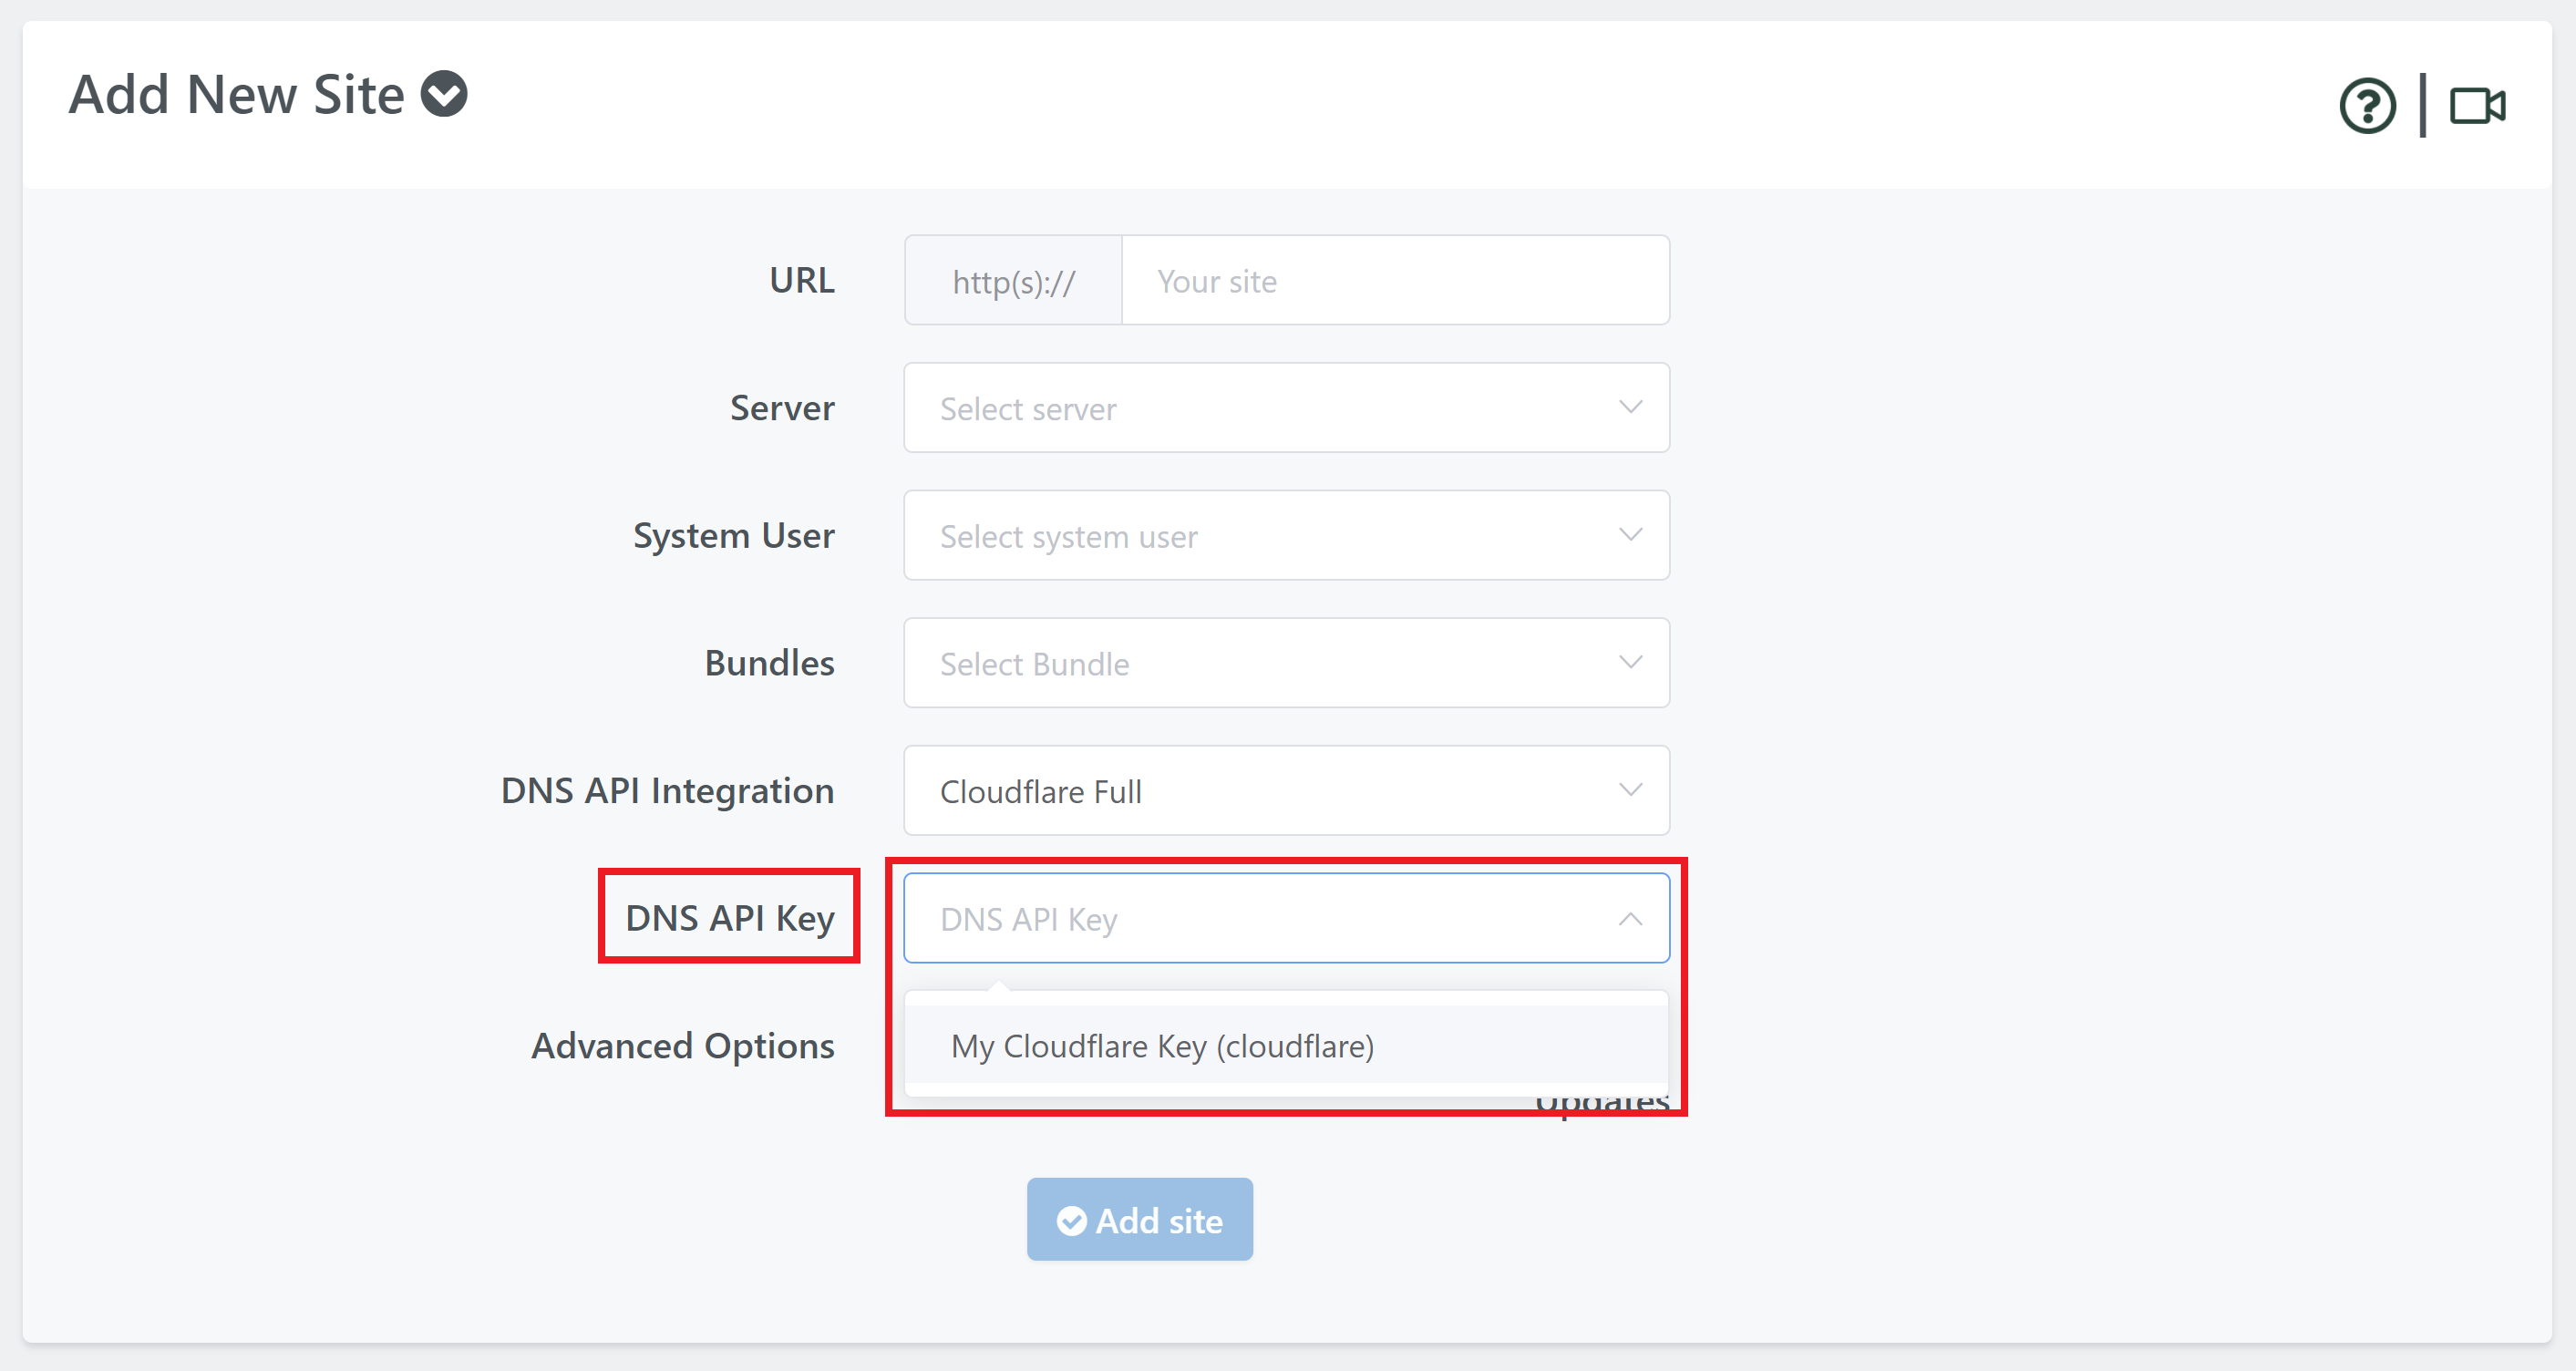
Next, select your API key:
Your site will provision as normal. When it is complete, it will appear in the Active Sites panel.
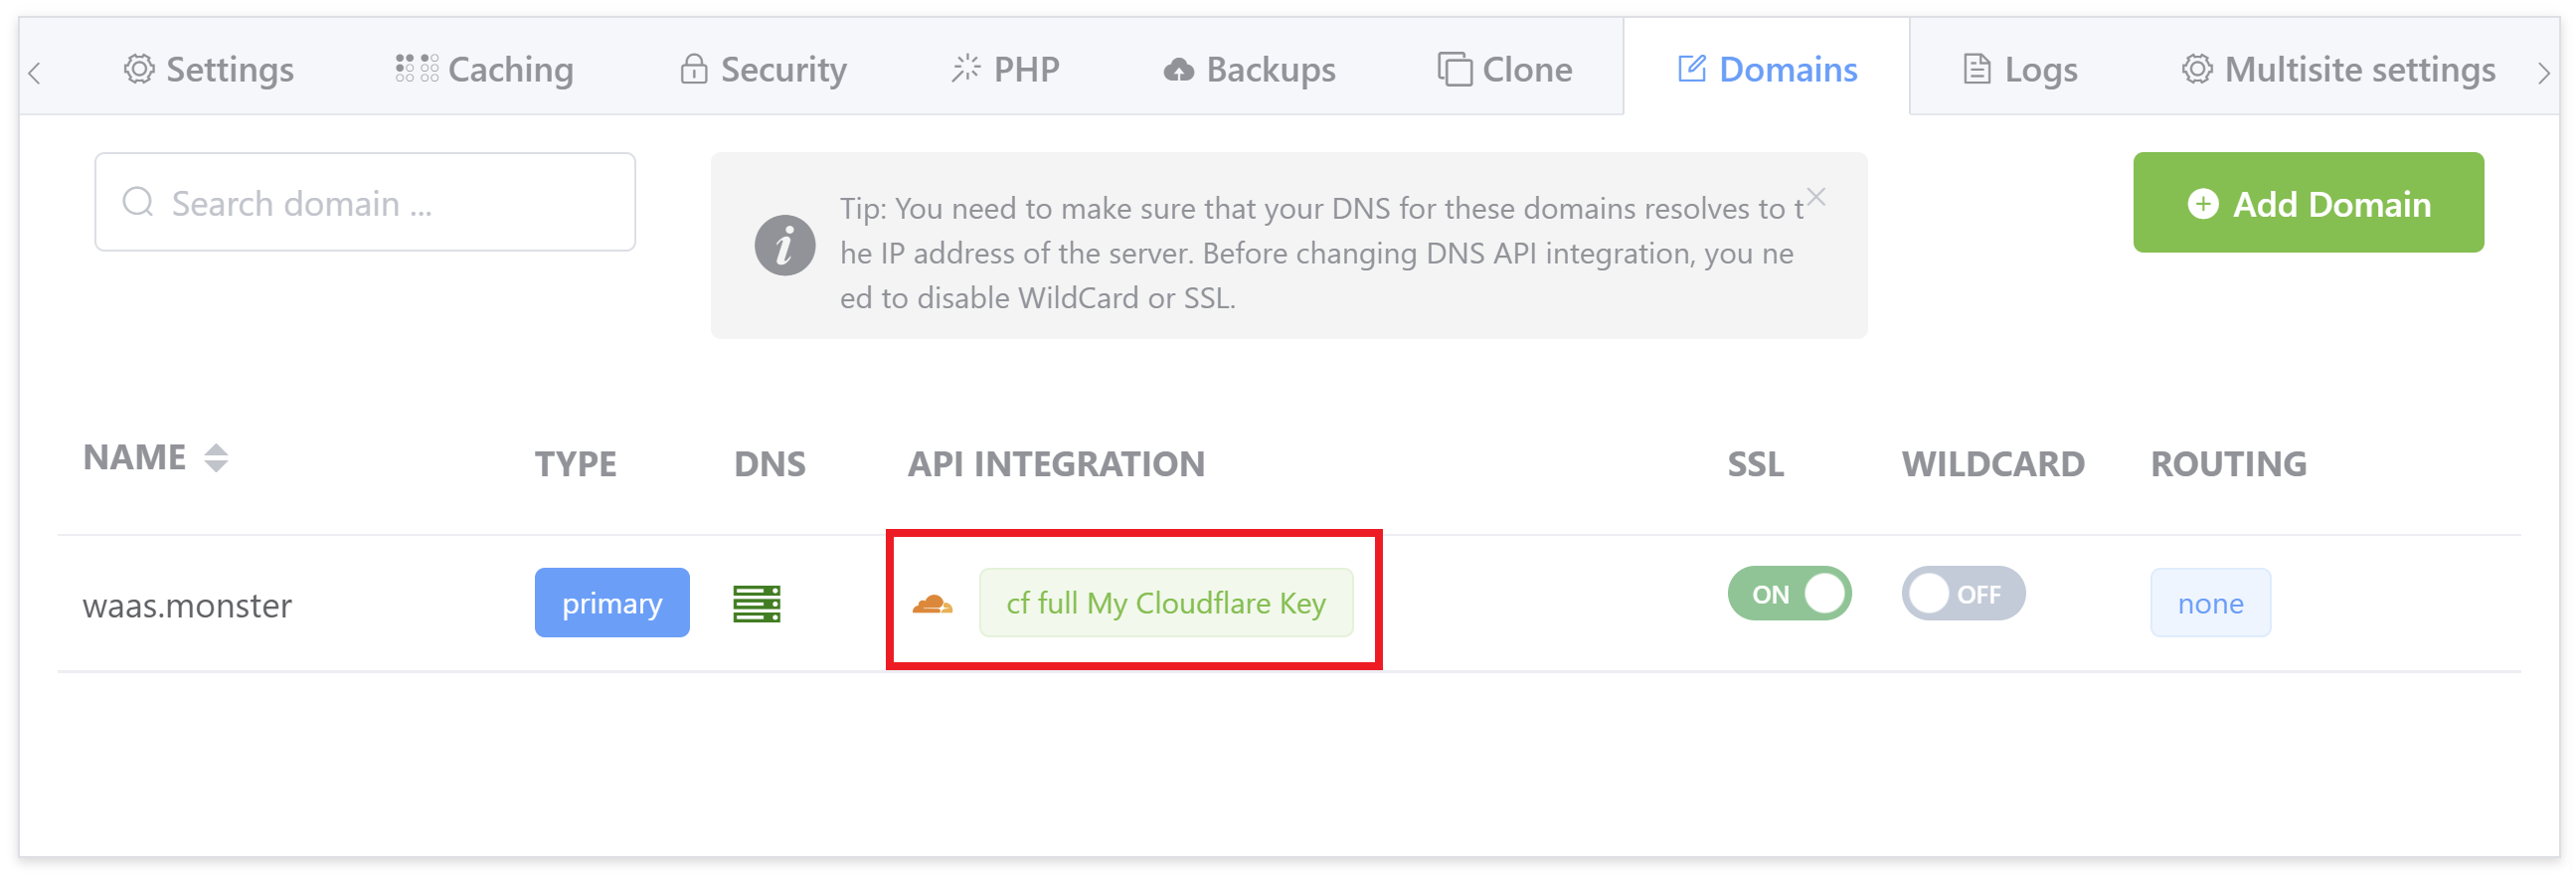
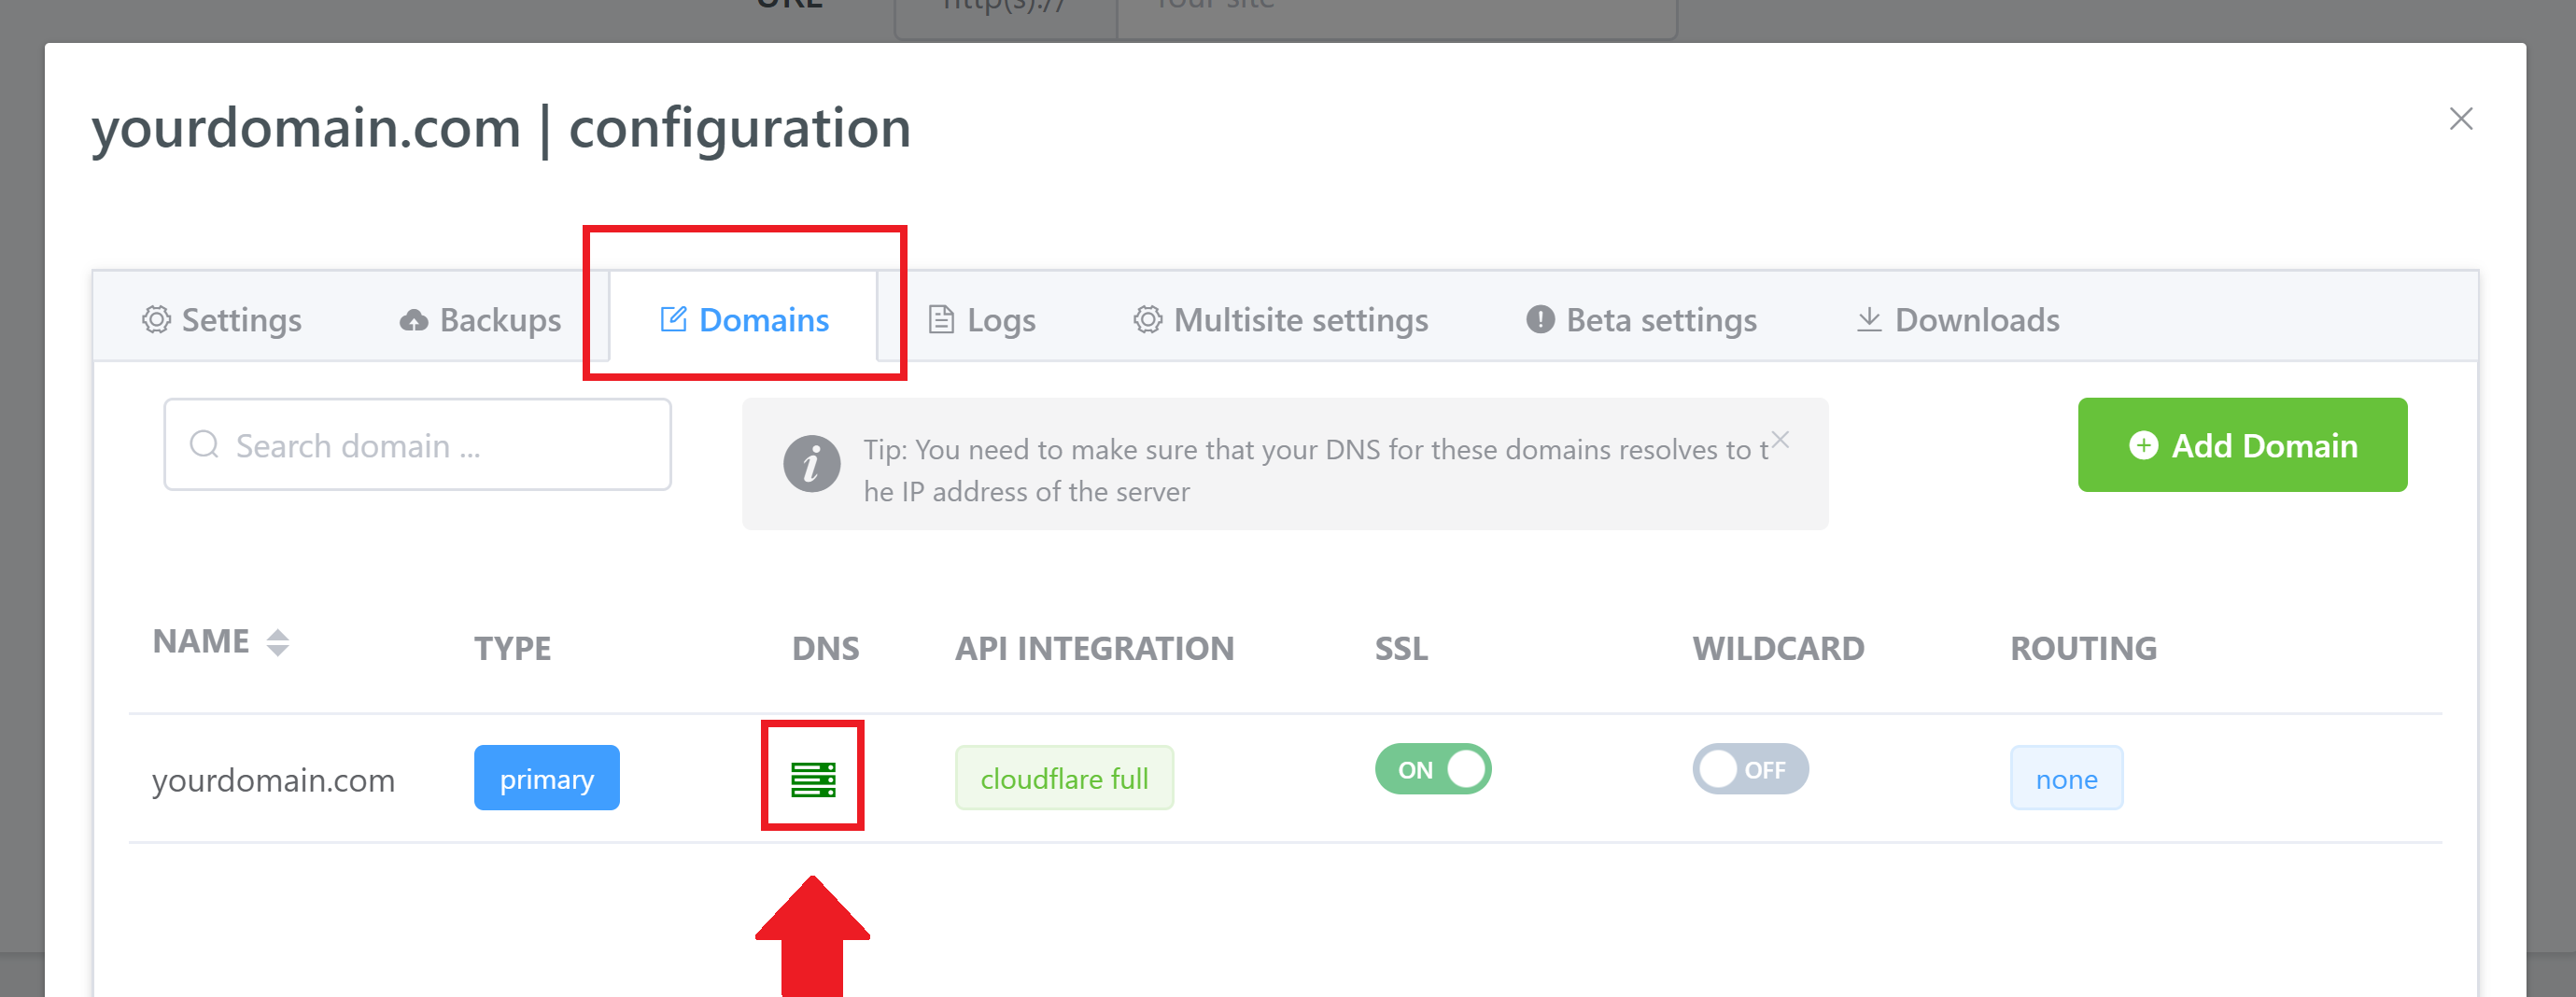
You can confirm the Cloudflare integration by clicking on the name of your website to open up the configuration modal, and clicking through to the domains tab. The Cloudflare option you’ve selected will be displayed in green underneath “API Integration”.
[Bonus] Step 6: Manage Your DNS Records Inside Your GridPane Account
Now that your website is set up with the Cloudflare API integration you can edit your DNS records directly inside your GridPane account.
First, open up the configuration modal and navigate to the domains tab, and then click on the server icon:
This will bring up the DNS record selection. You can manage your A records, CNAME records, TXT records, and NS. Please see the following articles to learn about setting your DNS records and managing your client’s DNS:
NOTE: We sometimes see non-standard CNAMEs or no CNAMEs at all. These are important for your “www” records, and be incredibly useful for ongoing client management. If you’re new to DNS, please check the articles above as they will be a big part of your hosting setup/business.
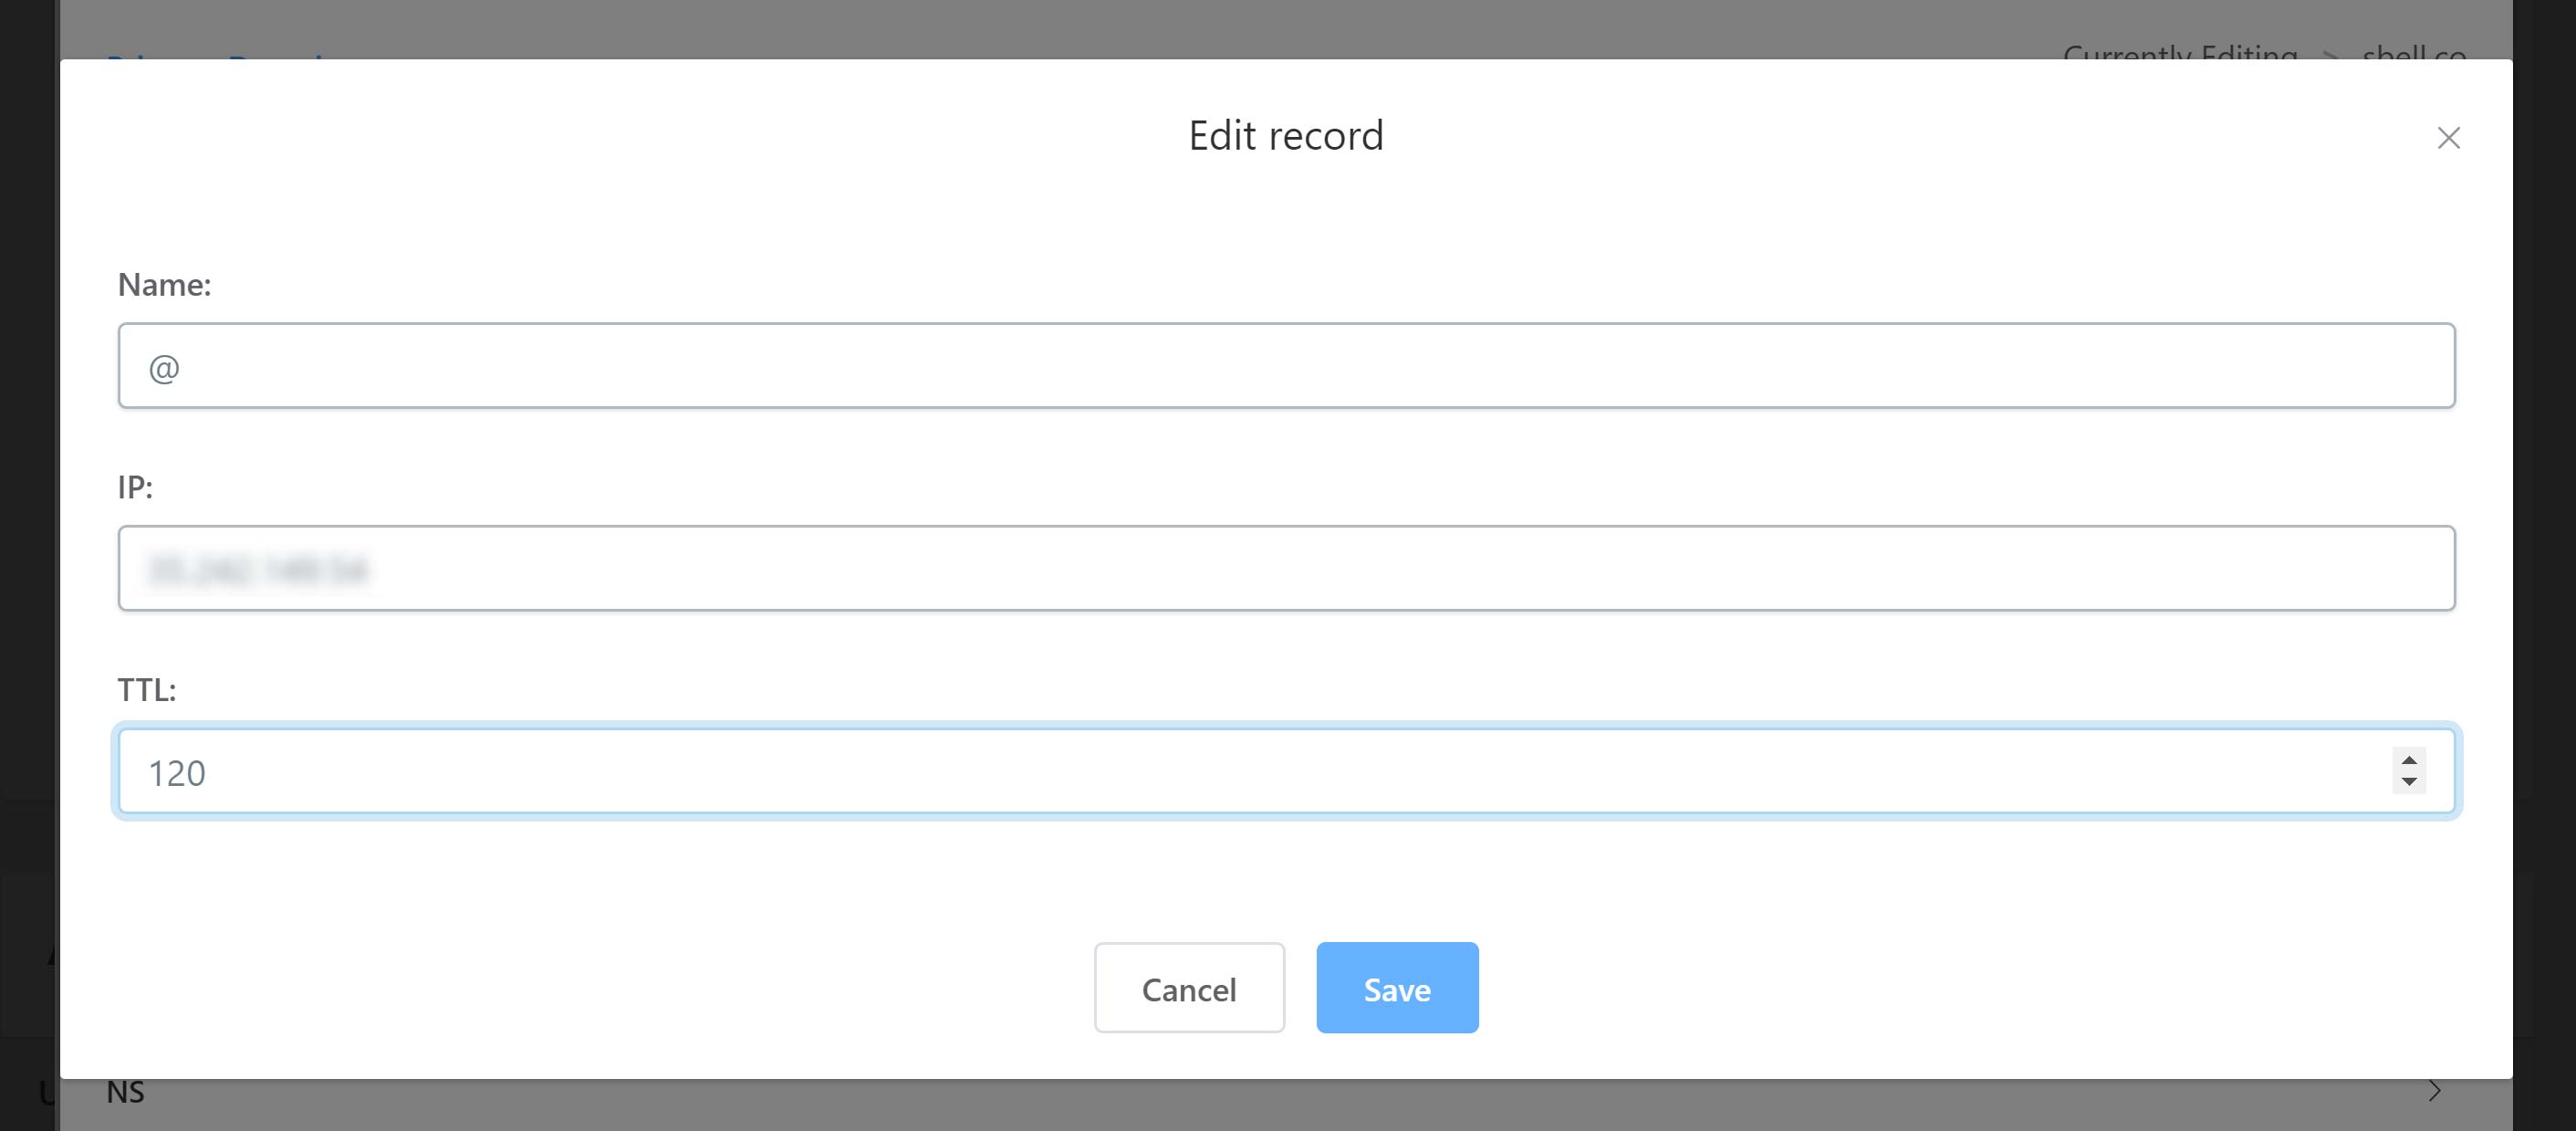
Click on the type of record you’d like to edit, and here you can either add a new record or edit an existing record:
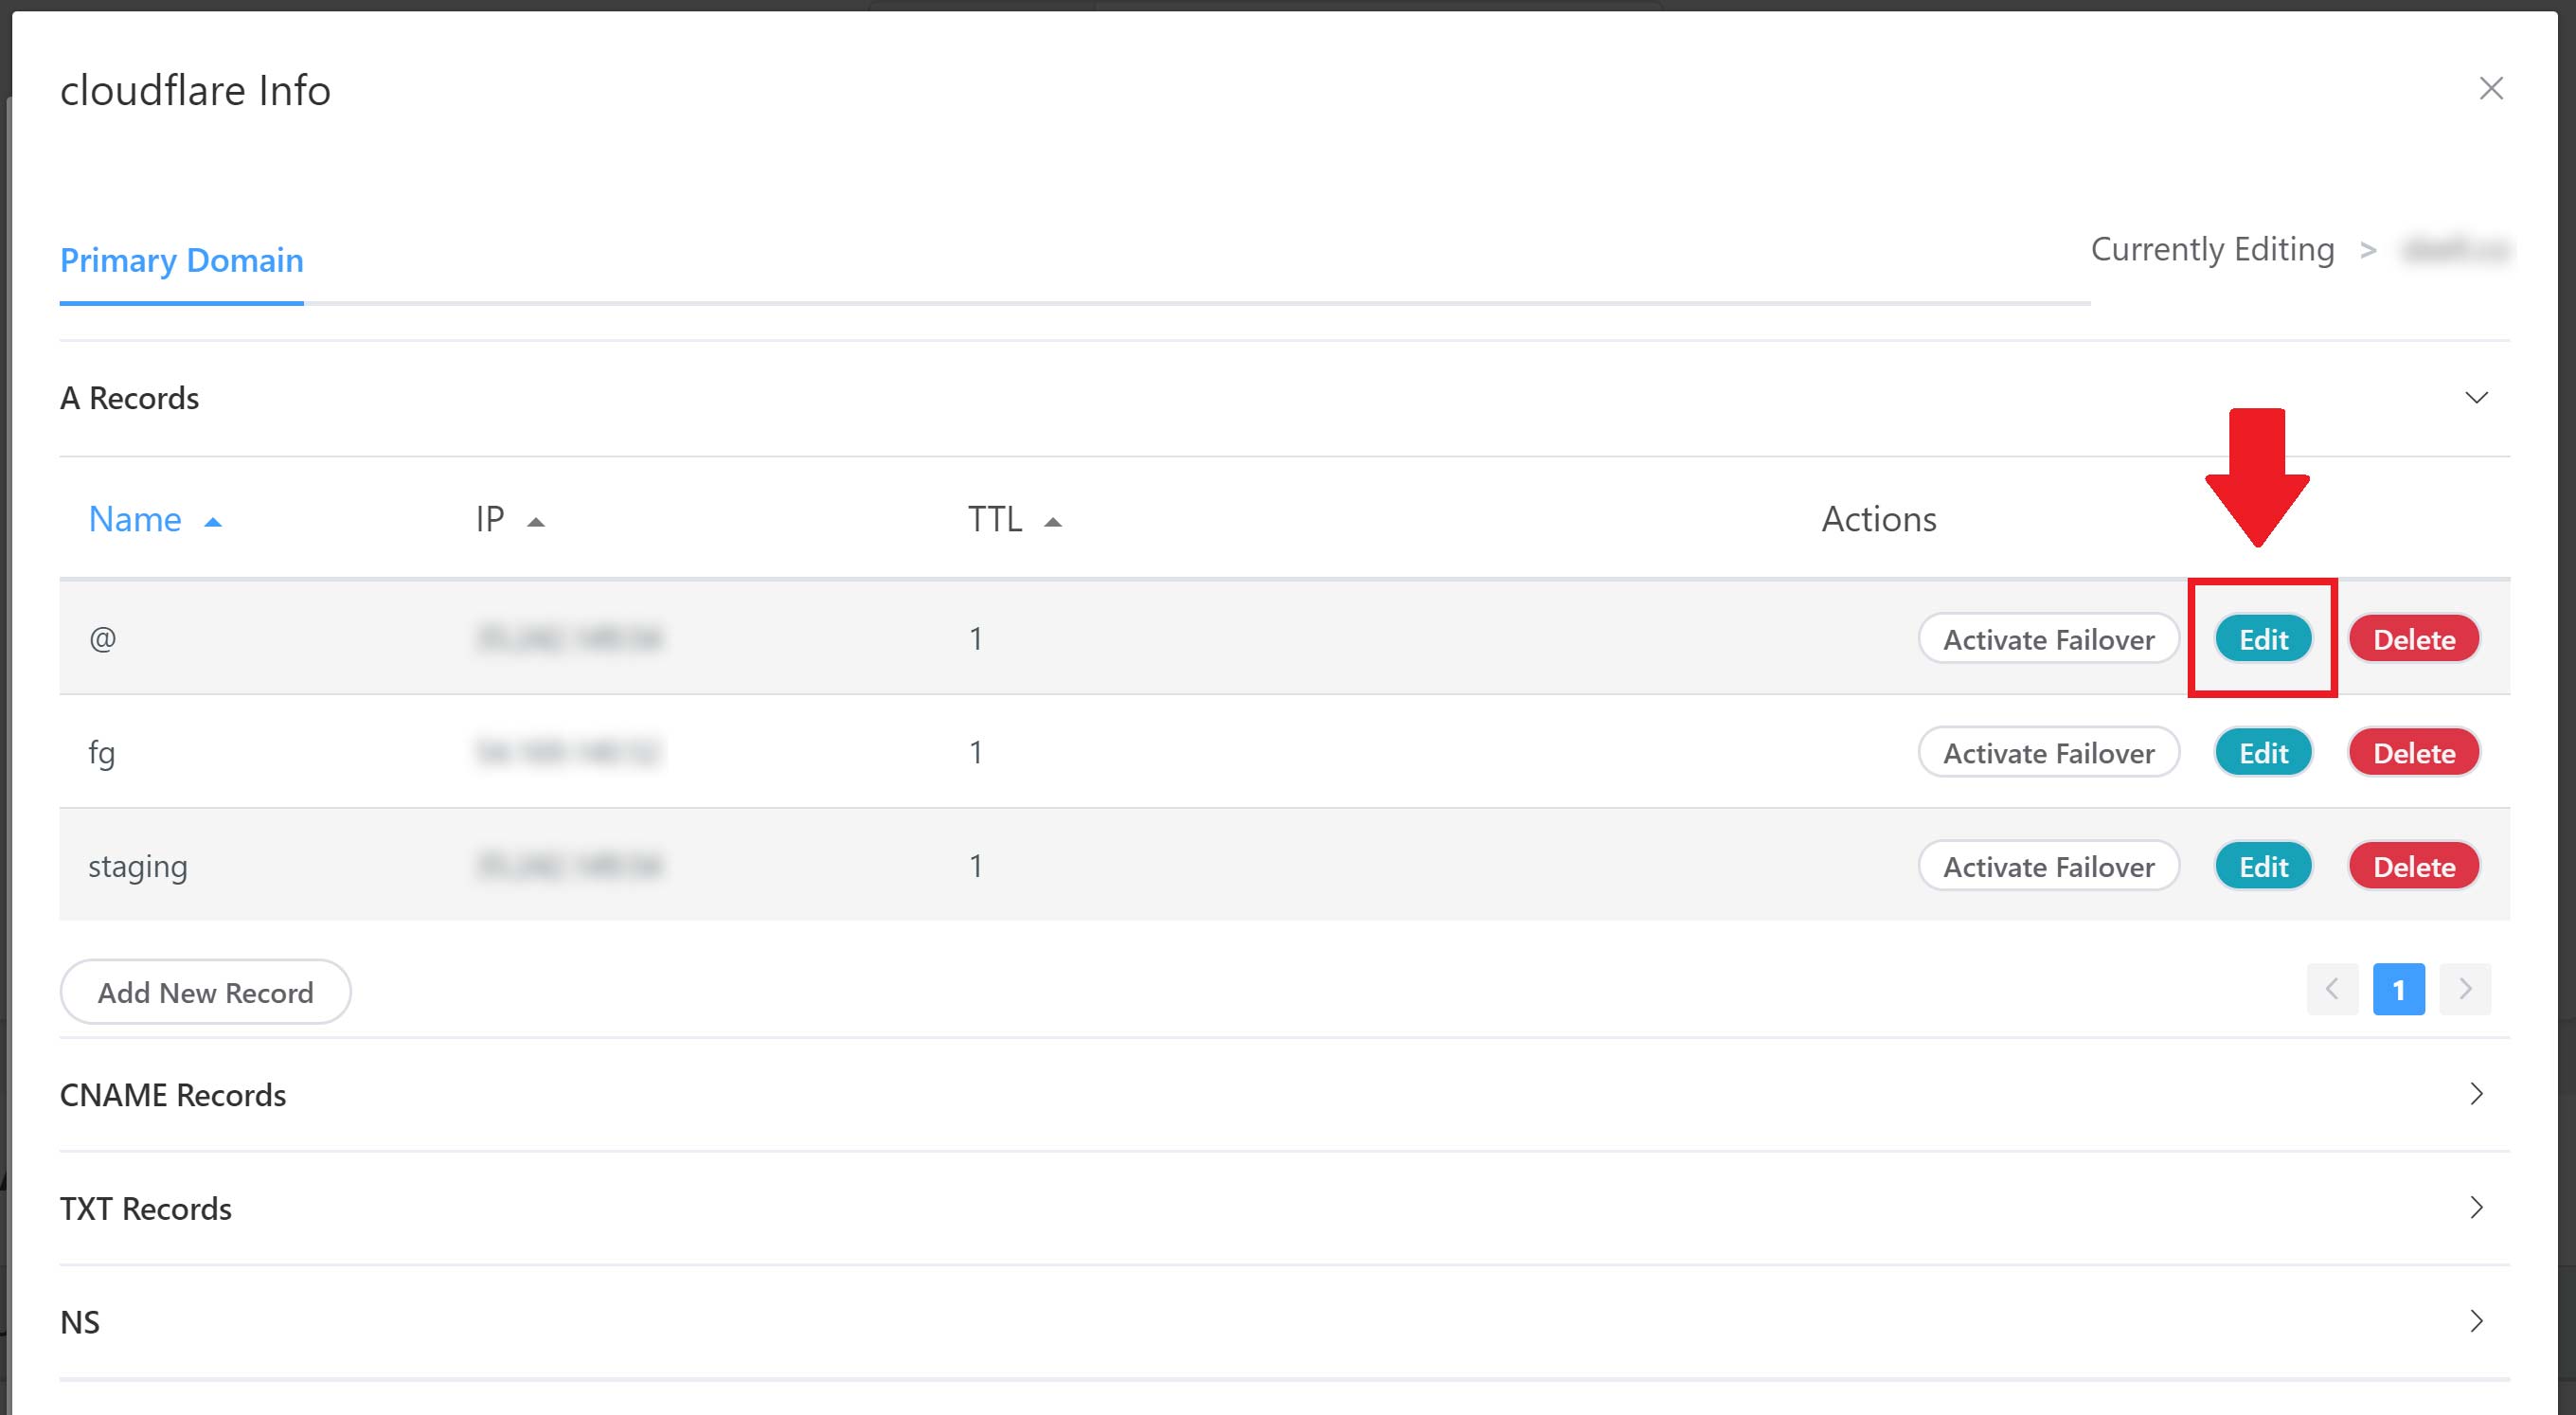
Edit your record and hit save: