Part 1. UpdateSafely Default Settings
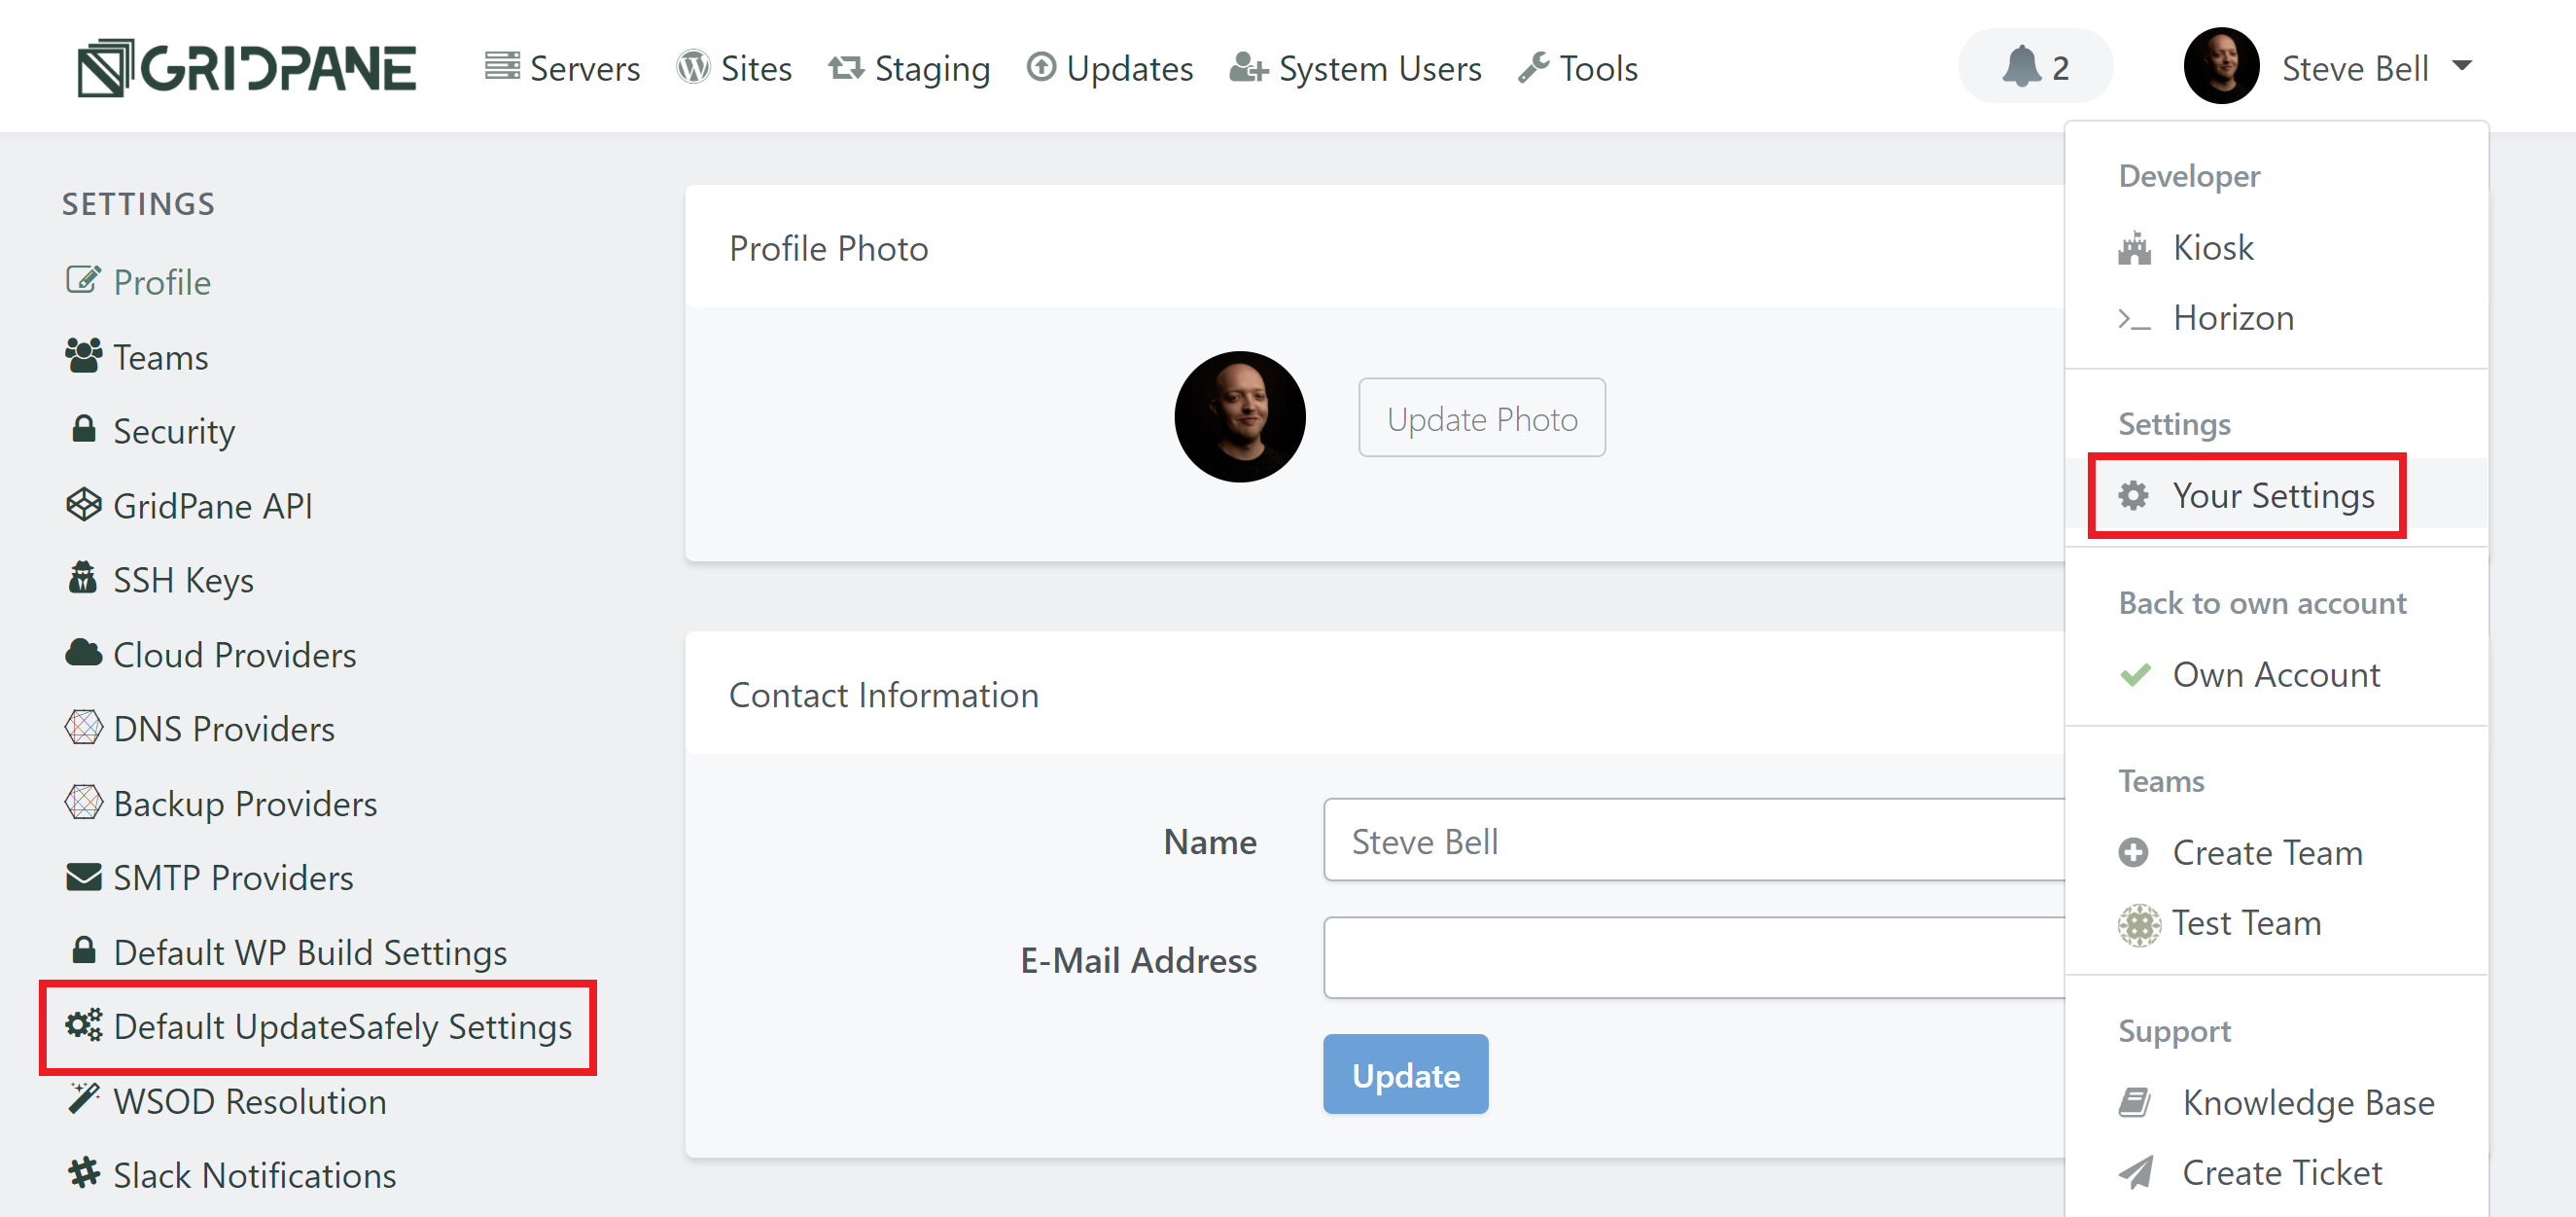
You can configure the default settings for UpdateSafely™ inside your account settings. Log into your account and click on your name to display the dropdown pictured below. Then, inside your settings, click through to Default UpdateSafely Settings from the left-hand sidebar.
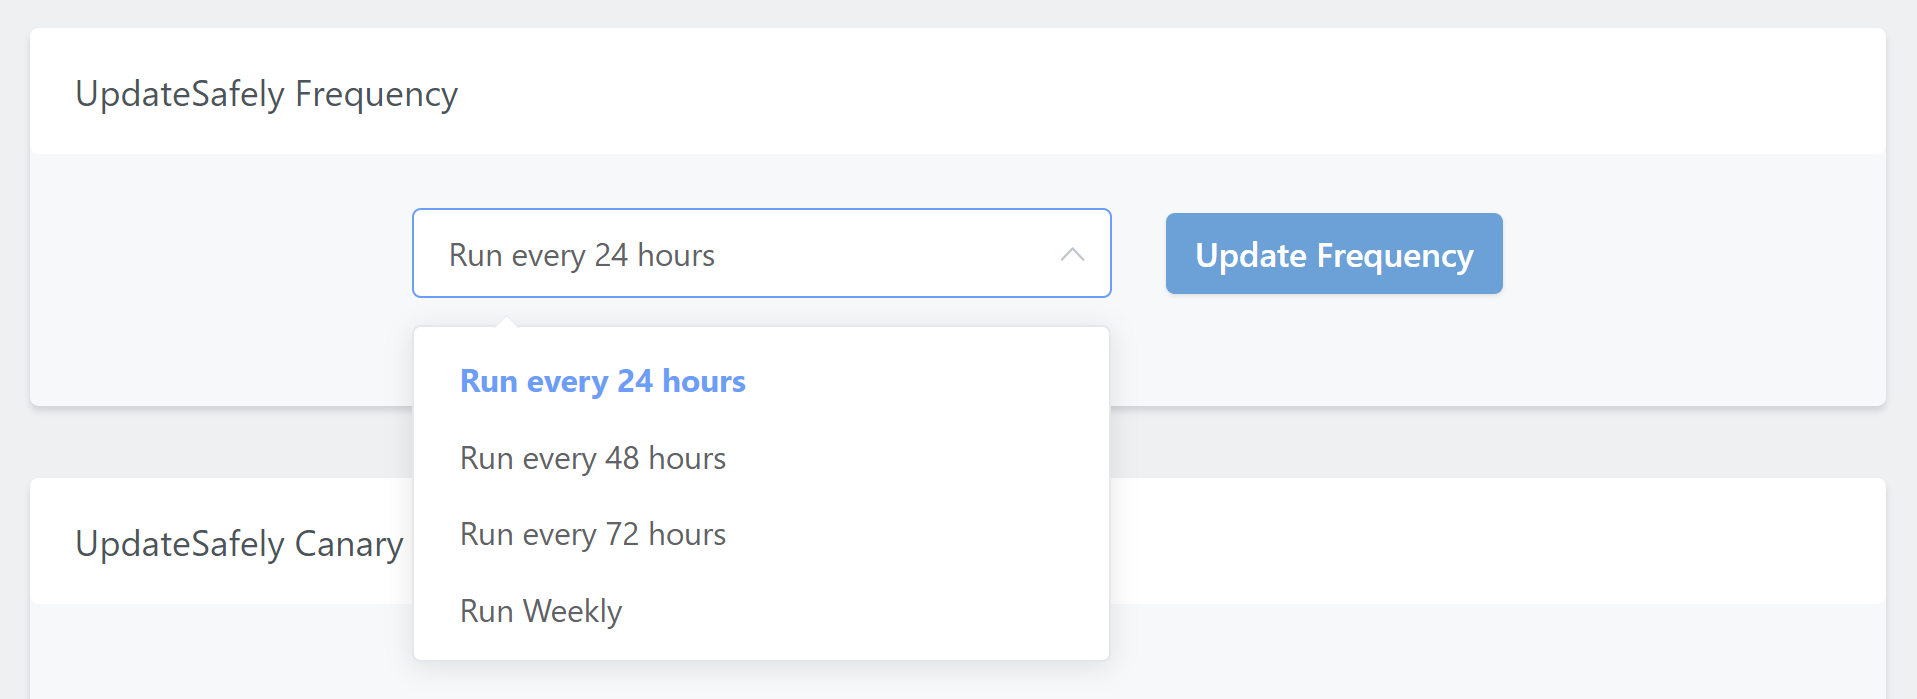
UpdateSafely Frequency
Here you’ll see two panels. The first is the UpdateSafely Frequency setting. Here you can set how often you would it to run, and choose from once per day, once every 2 days, once every 3 days, or weekly.
UpdateSafely Canary Site Defaults
The second is the UpdateSafely Canary Site Defaults. These settings are automatically applied to newly created canary websites, however, you can also configure these on a per-site basis (more in part 3).
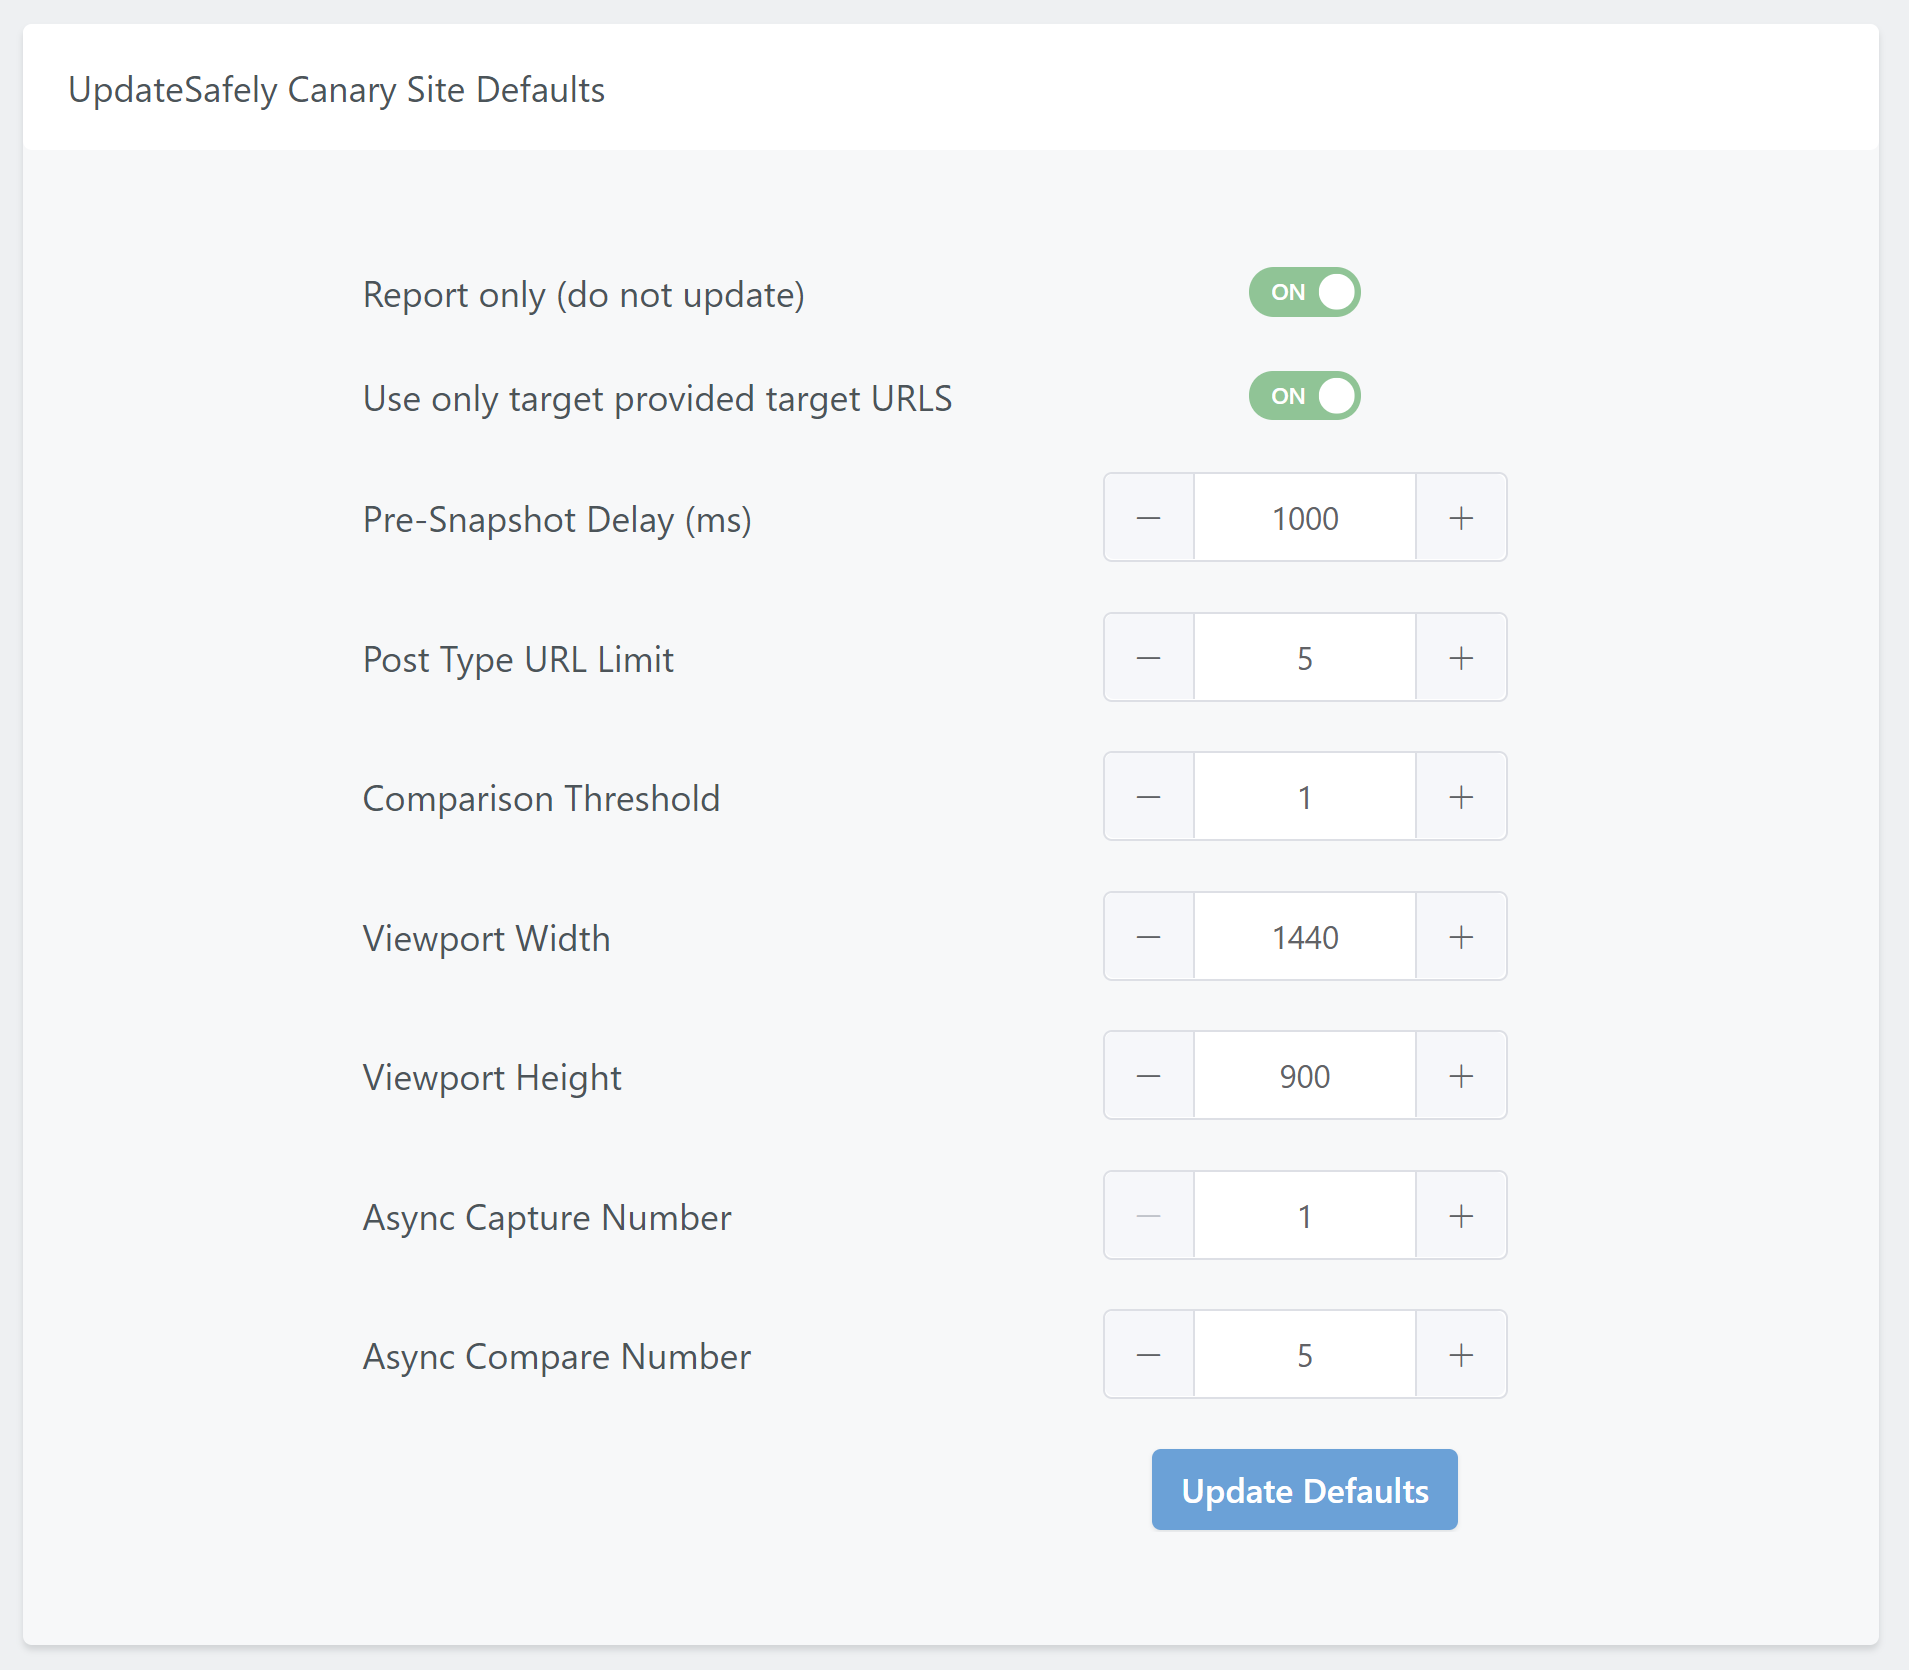
Our defaults are going to serve most use cases very well and are a safe bet for performance and accuracy.
Report only (do not update)
This option allows you to choose whether UpdateSafely runs updates on your live websites or not. By default, it’s set to report only, which means it will run the visual comparison tests and then create a report for you, but will not run updates. If you would like to set updates to run, you can toggle this option off.
Part 2. Activating UpdateSafely
As mentioned in the introduction, this feature requires a minimum of 4 CPU cores to operate. Without this, UpdateSafely cannot be activated.
Server Activation
To activate UpdateSafely on your servers, head to the servers page inside your GridPane account and click on the server name to open up its configuration modal.

Here, you’ll see the new tab, and a toggle to activate it on your server.
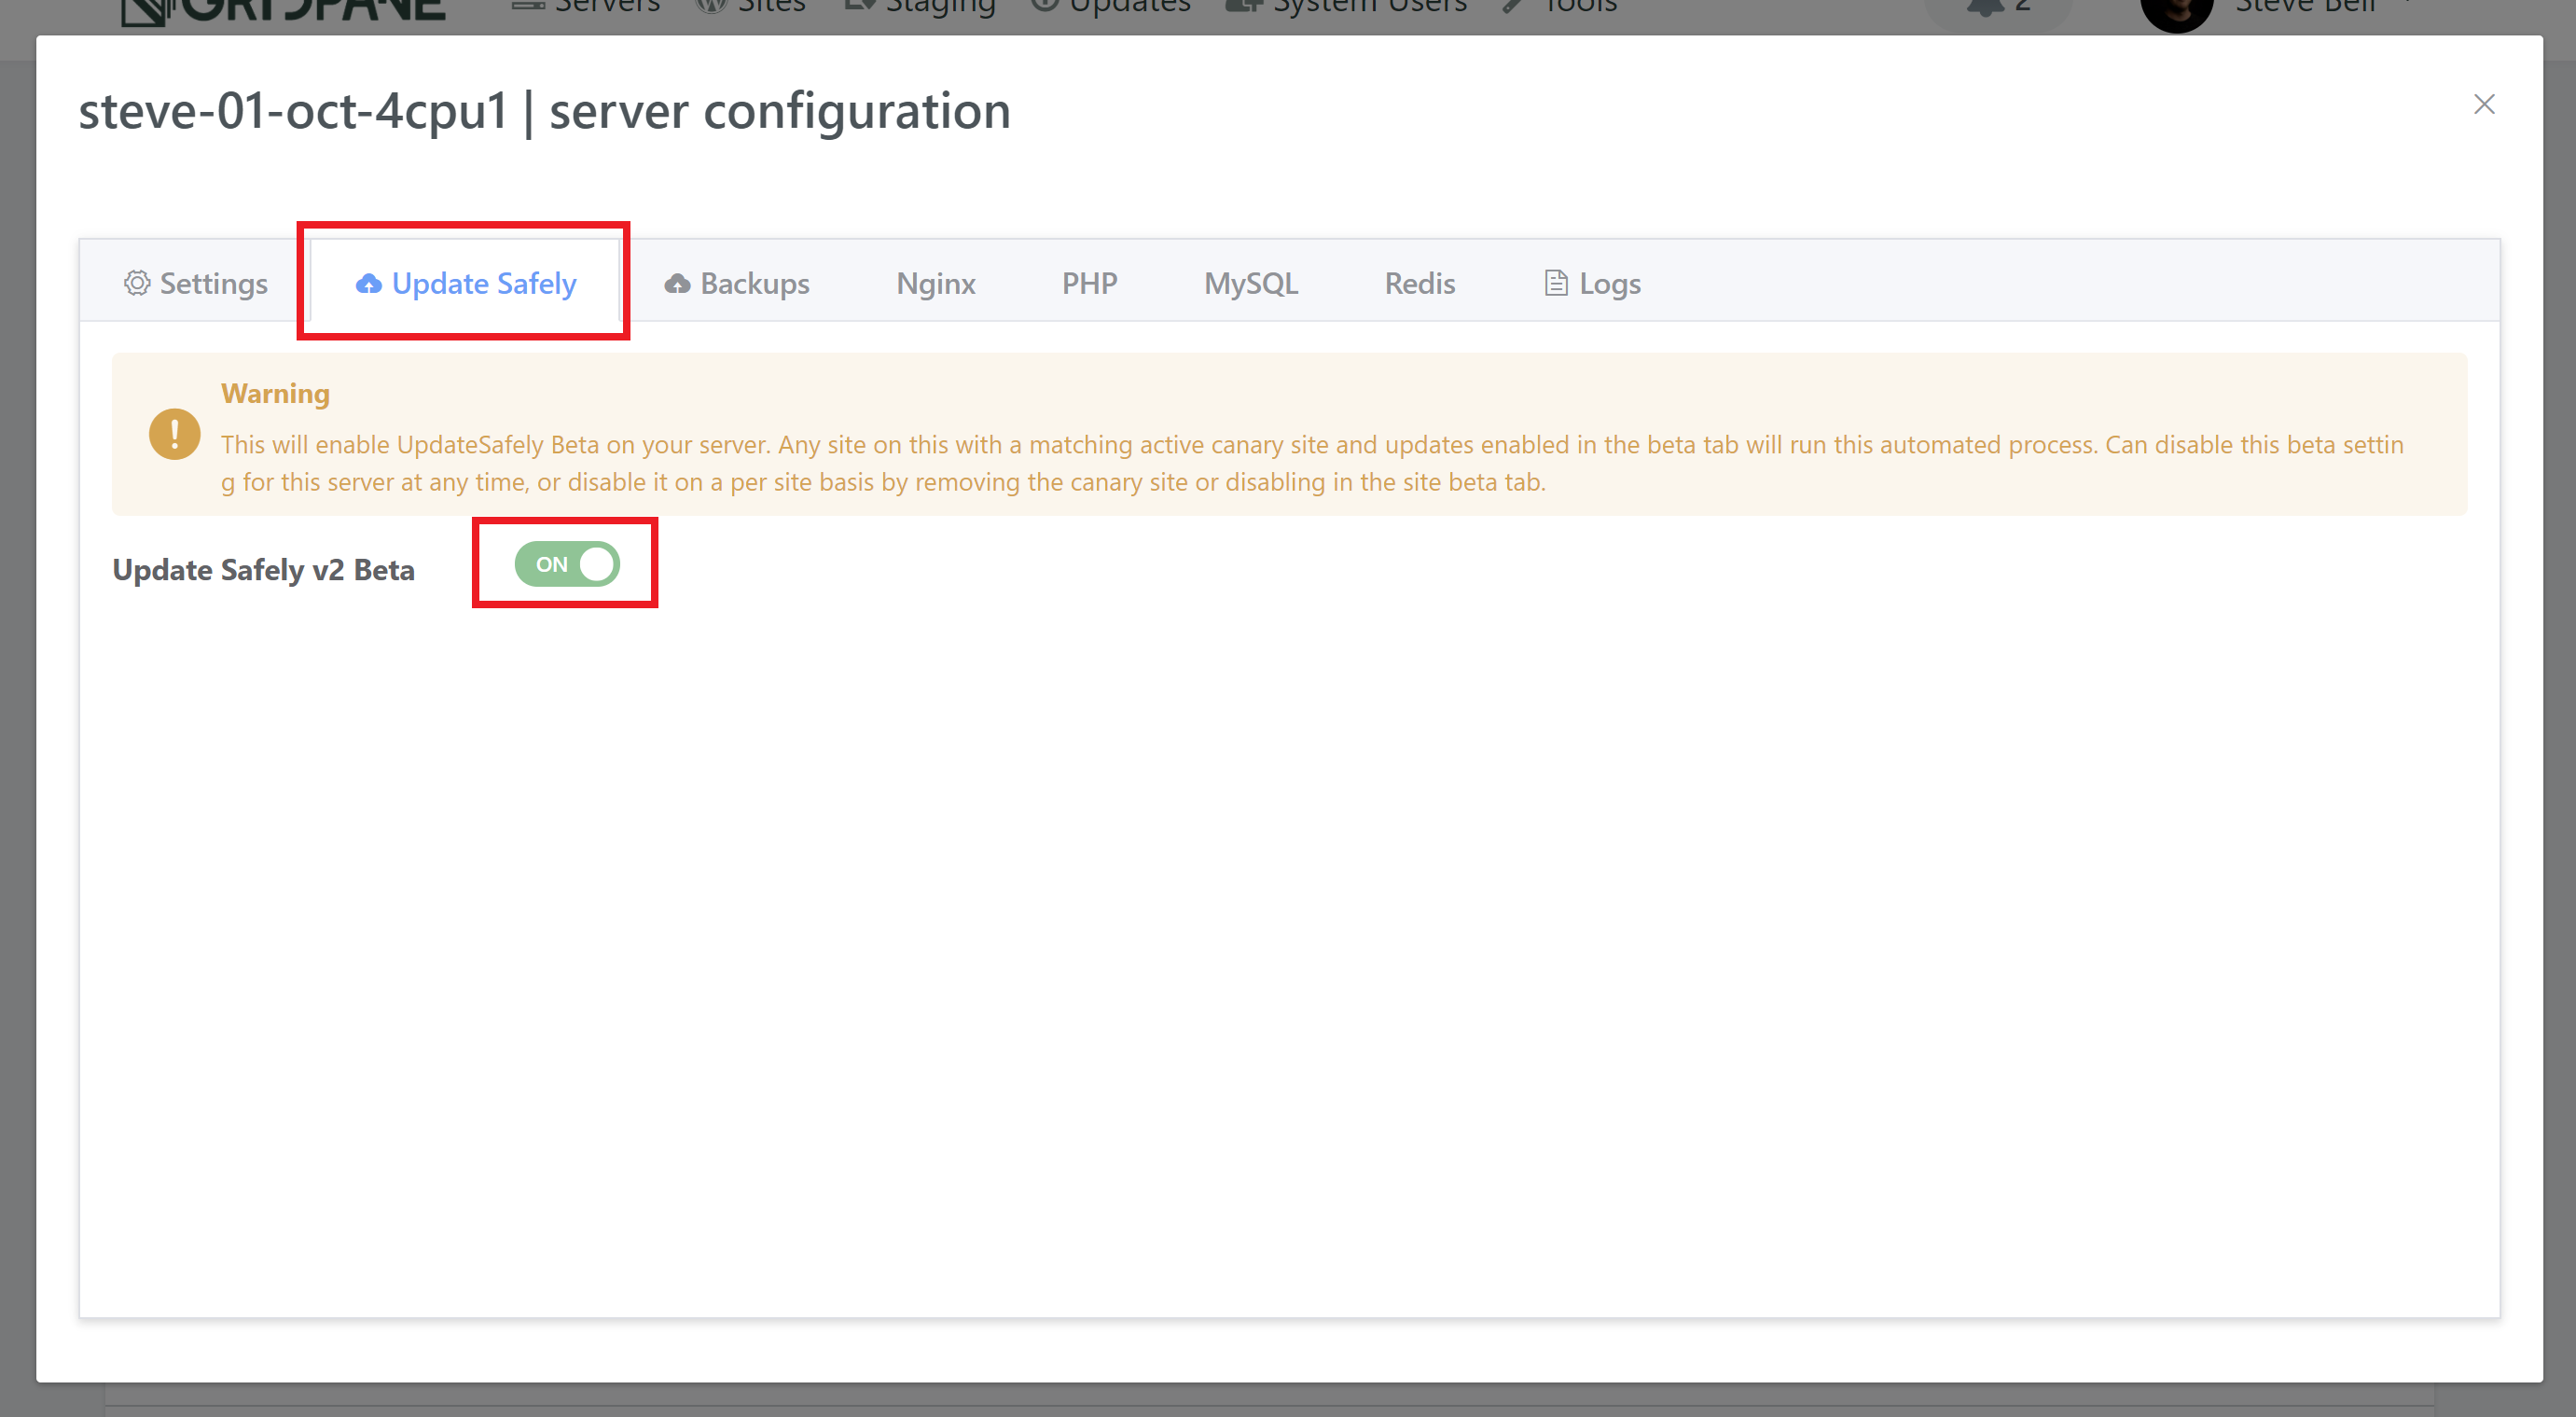
Once activated it will run once a day at a random time between 1AM and 5AM.
Website Activation
To activate UpdateSafely on one or more of your websites, you simply need to enable the canary site for each production site over on the Updates page.
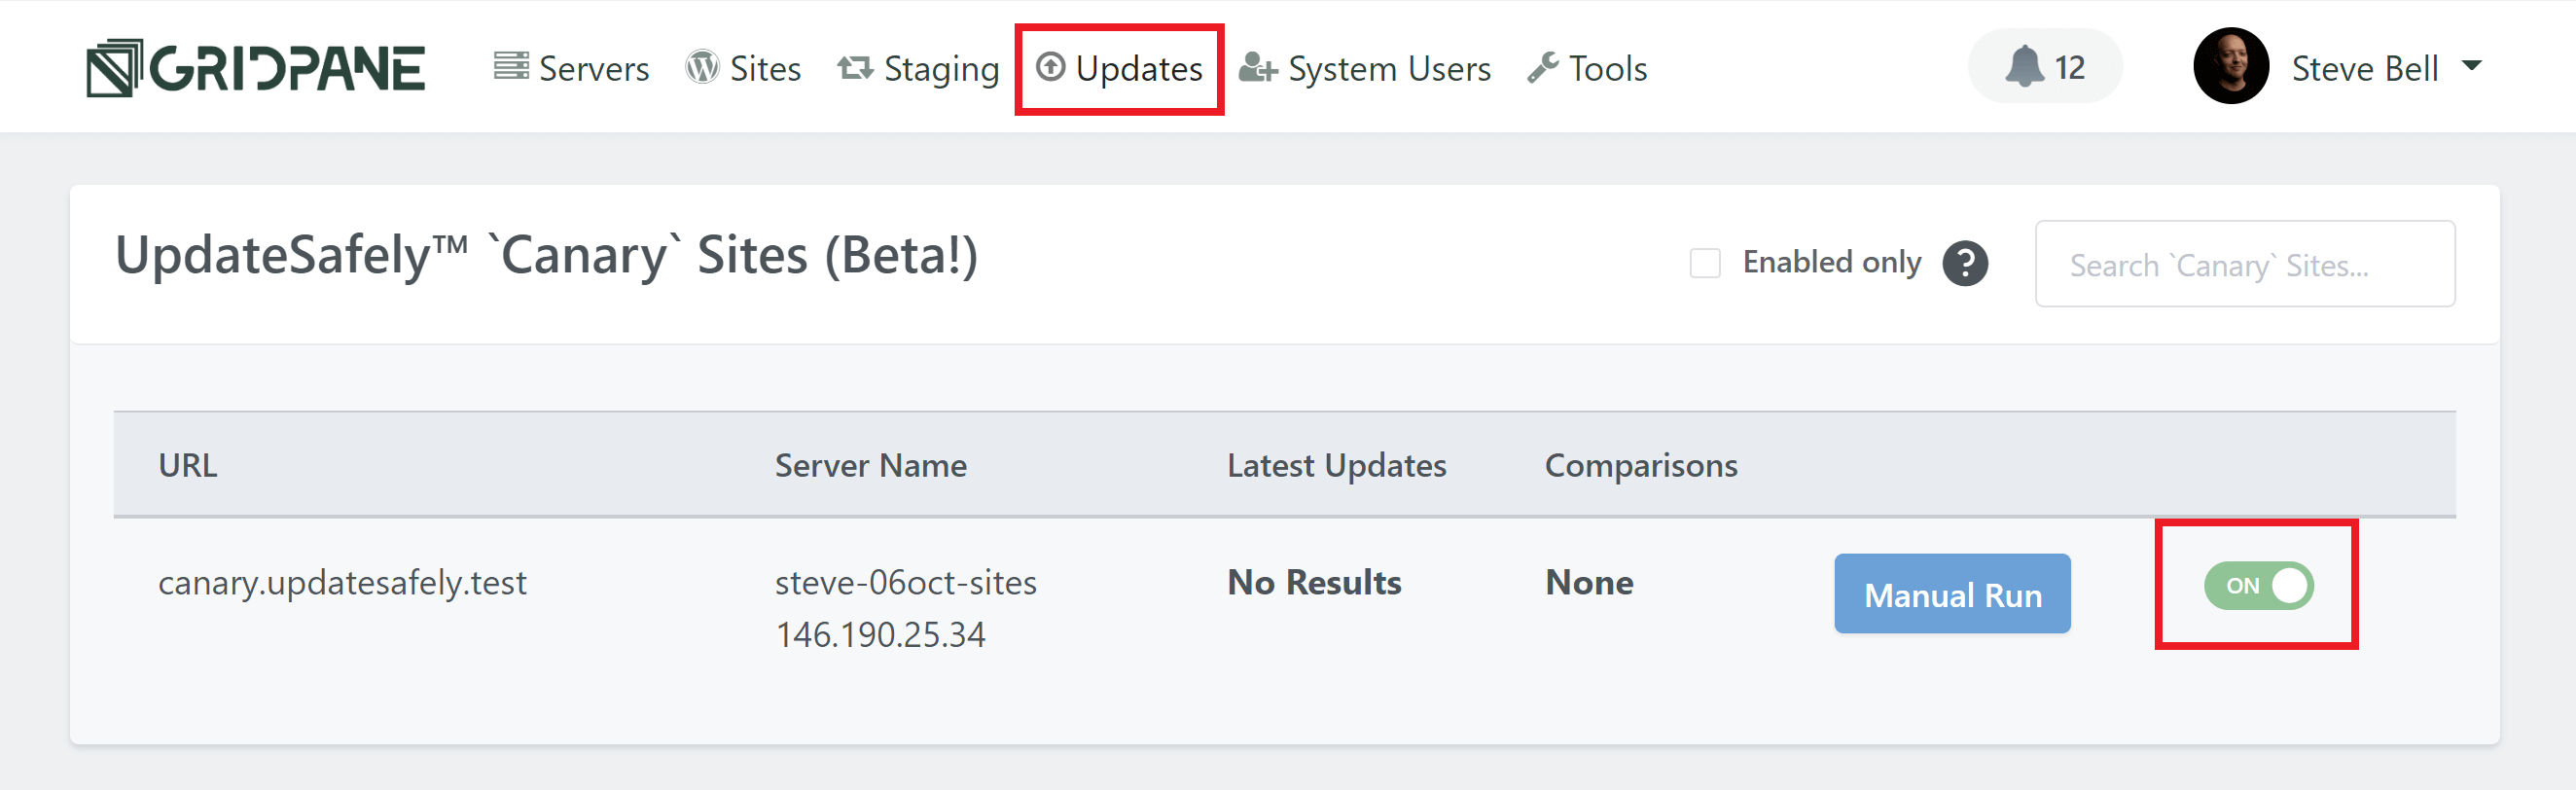
From here, you can configure the specifics of how you want UpdateSafely to run on a per-site basis.
Part 3. Configuring Your Canary Websites
As you create new websites, you have the option to also create a canary website (and of course a staging site), at the same time, but you can also create and delete a canary website any time you would like to do so on the Updates page in your account.
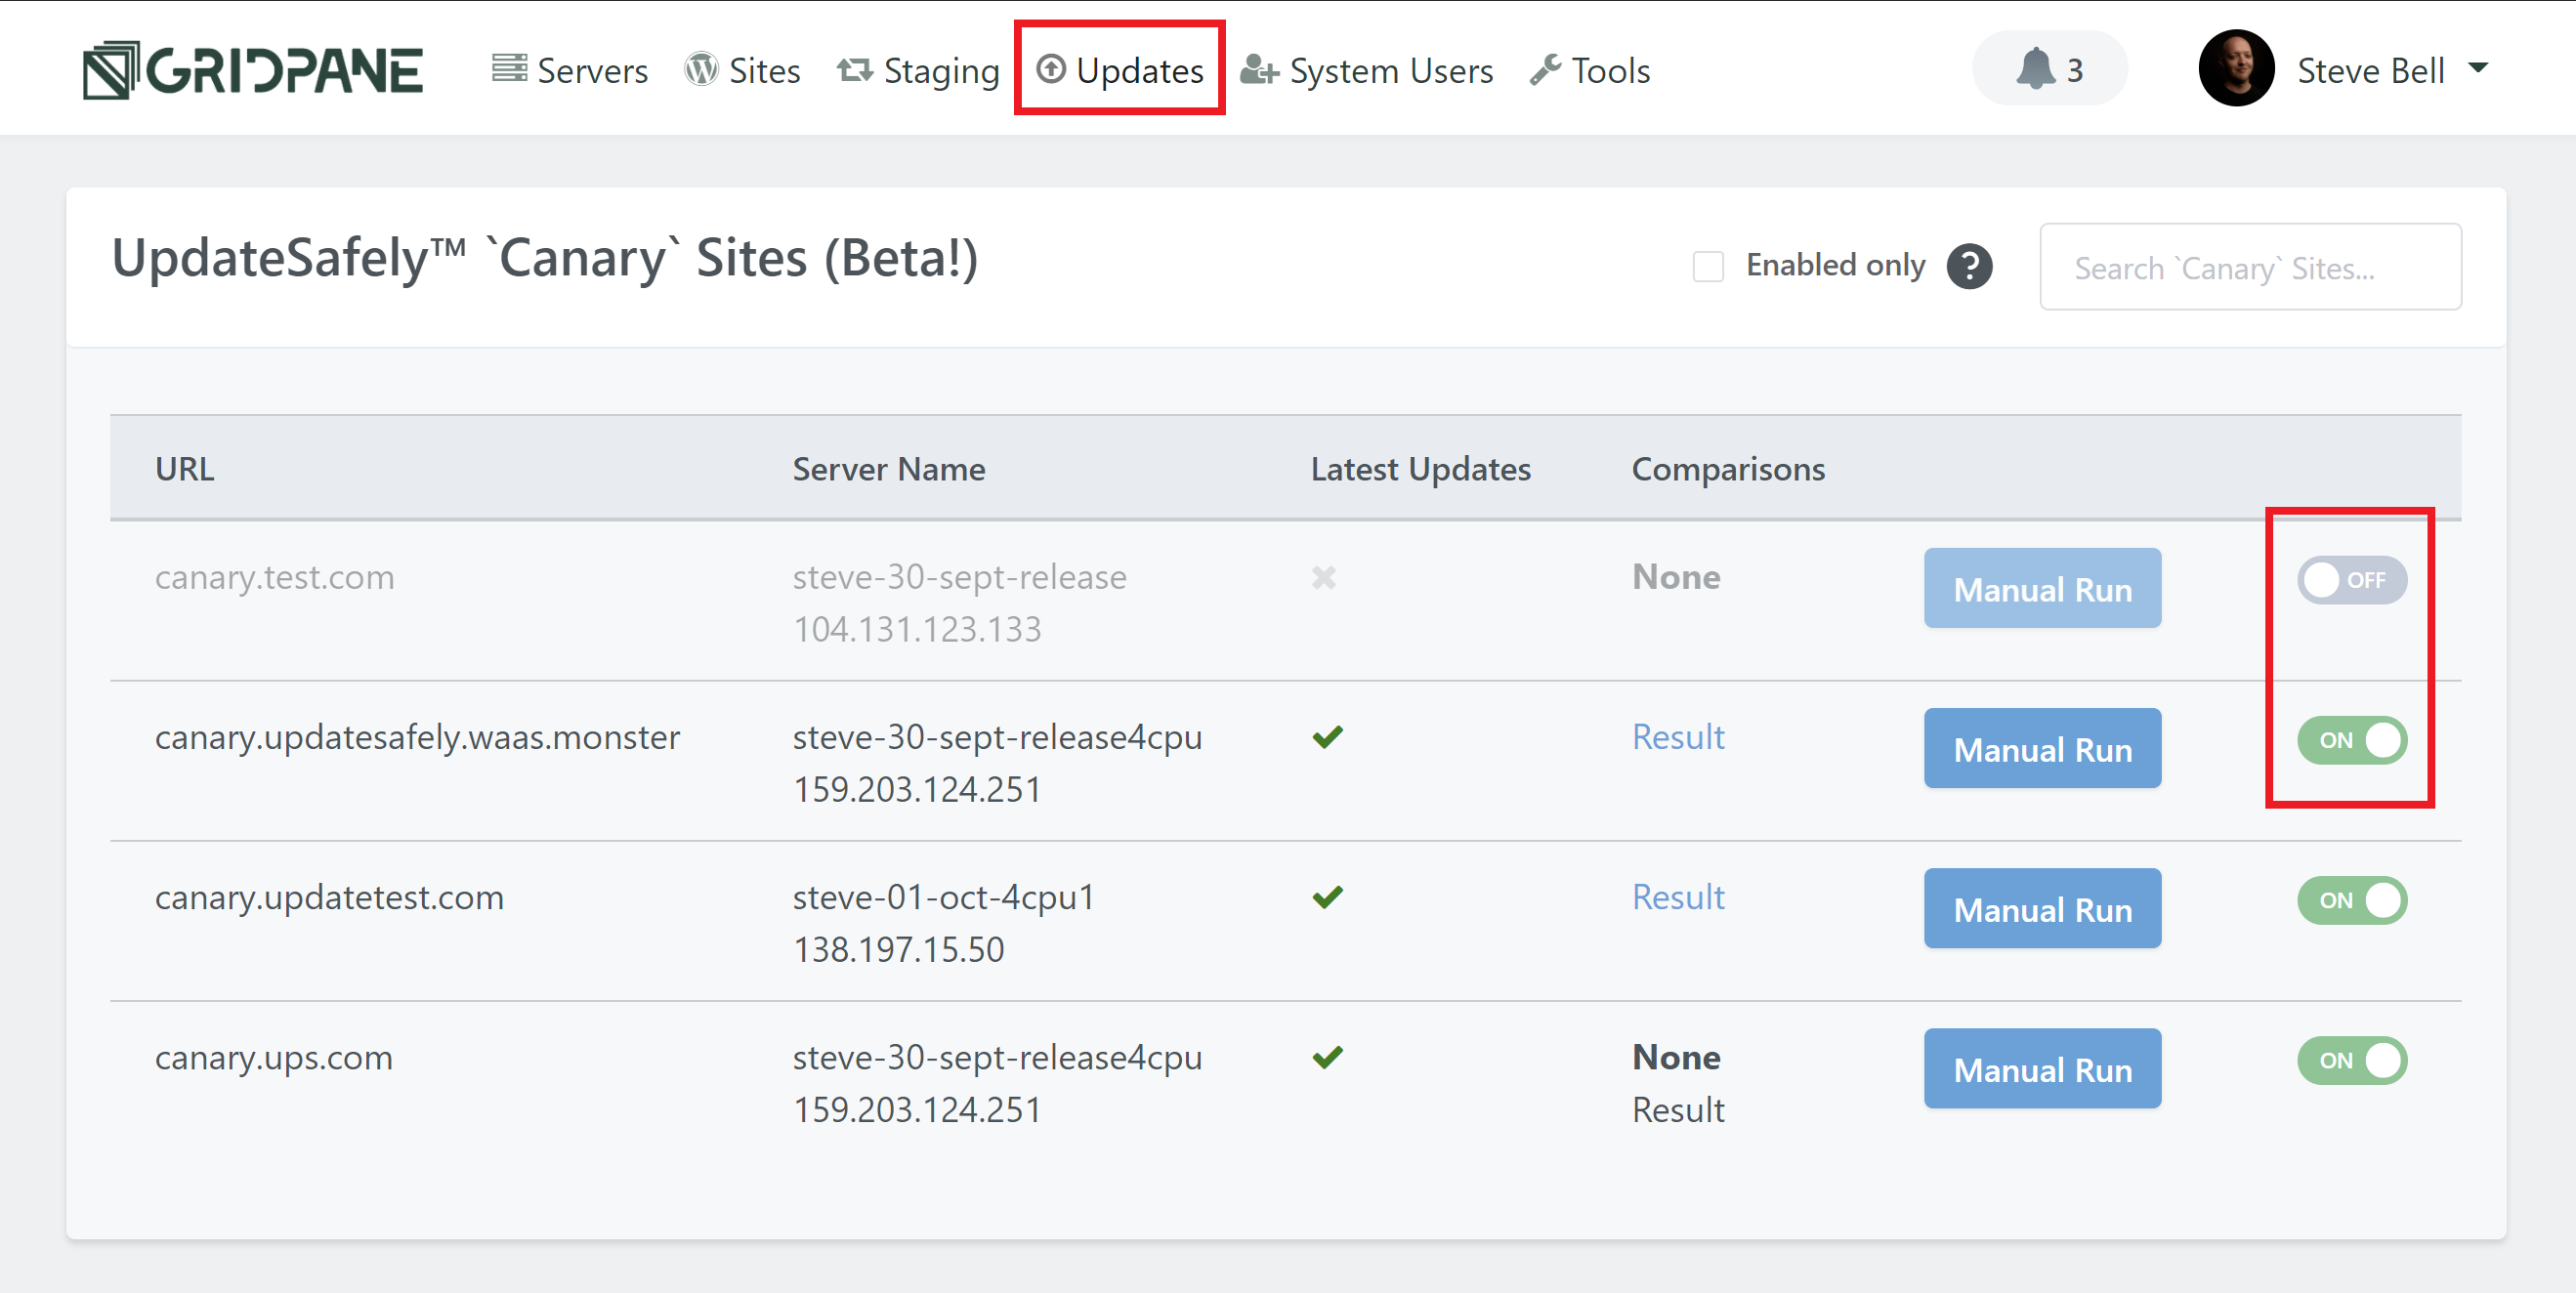
To activate or delete a canary site for any of your live production sites, just hit the toggle.
Then, click on your canary websites domain name to open up the configuration modal.
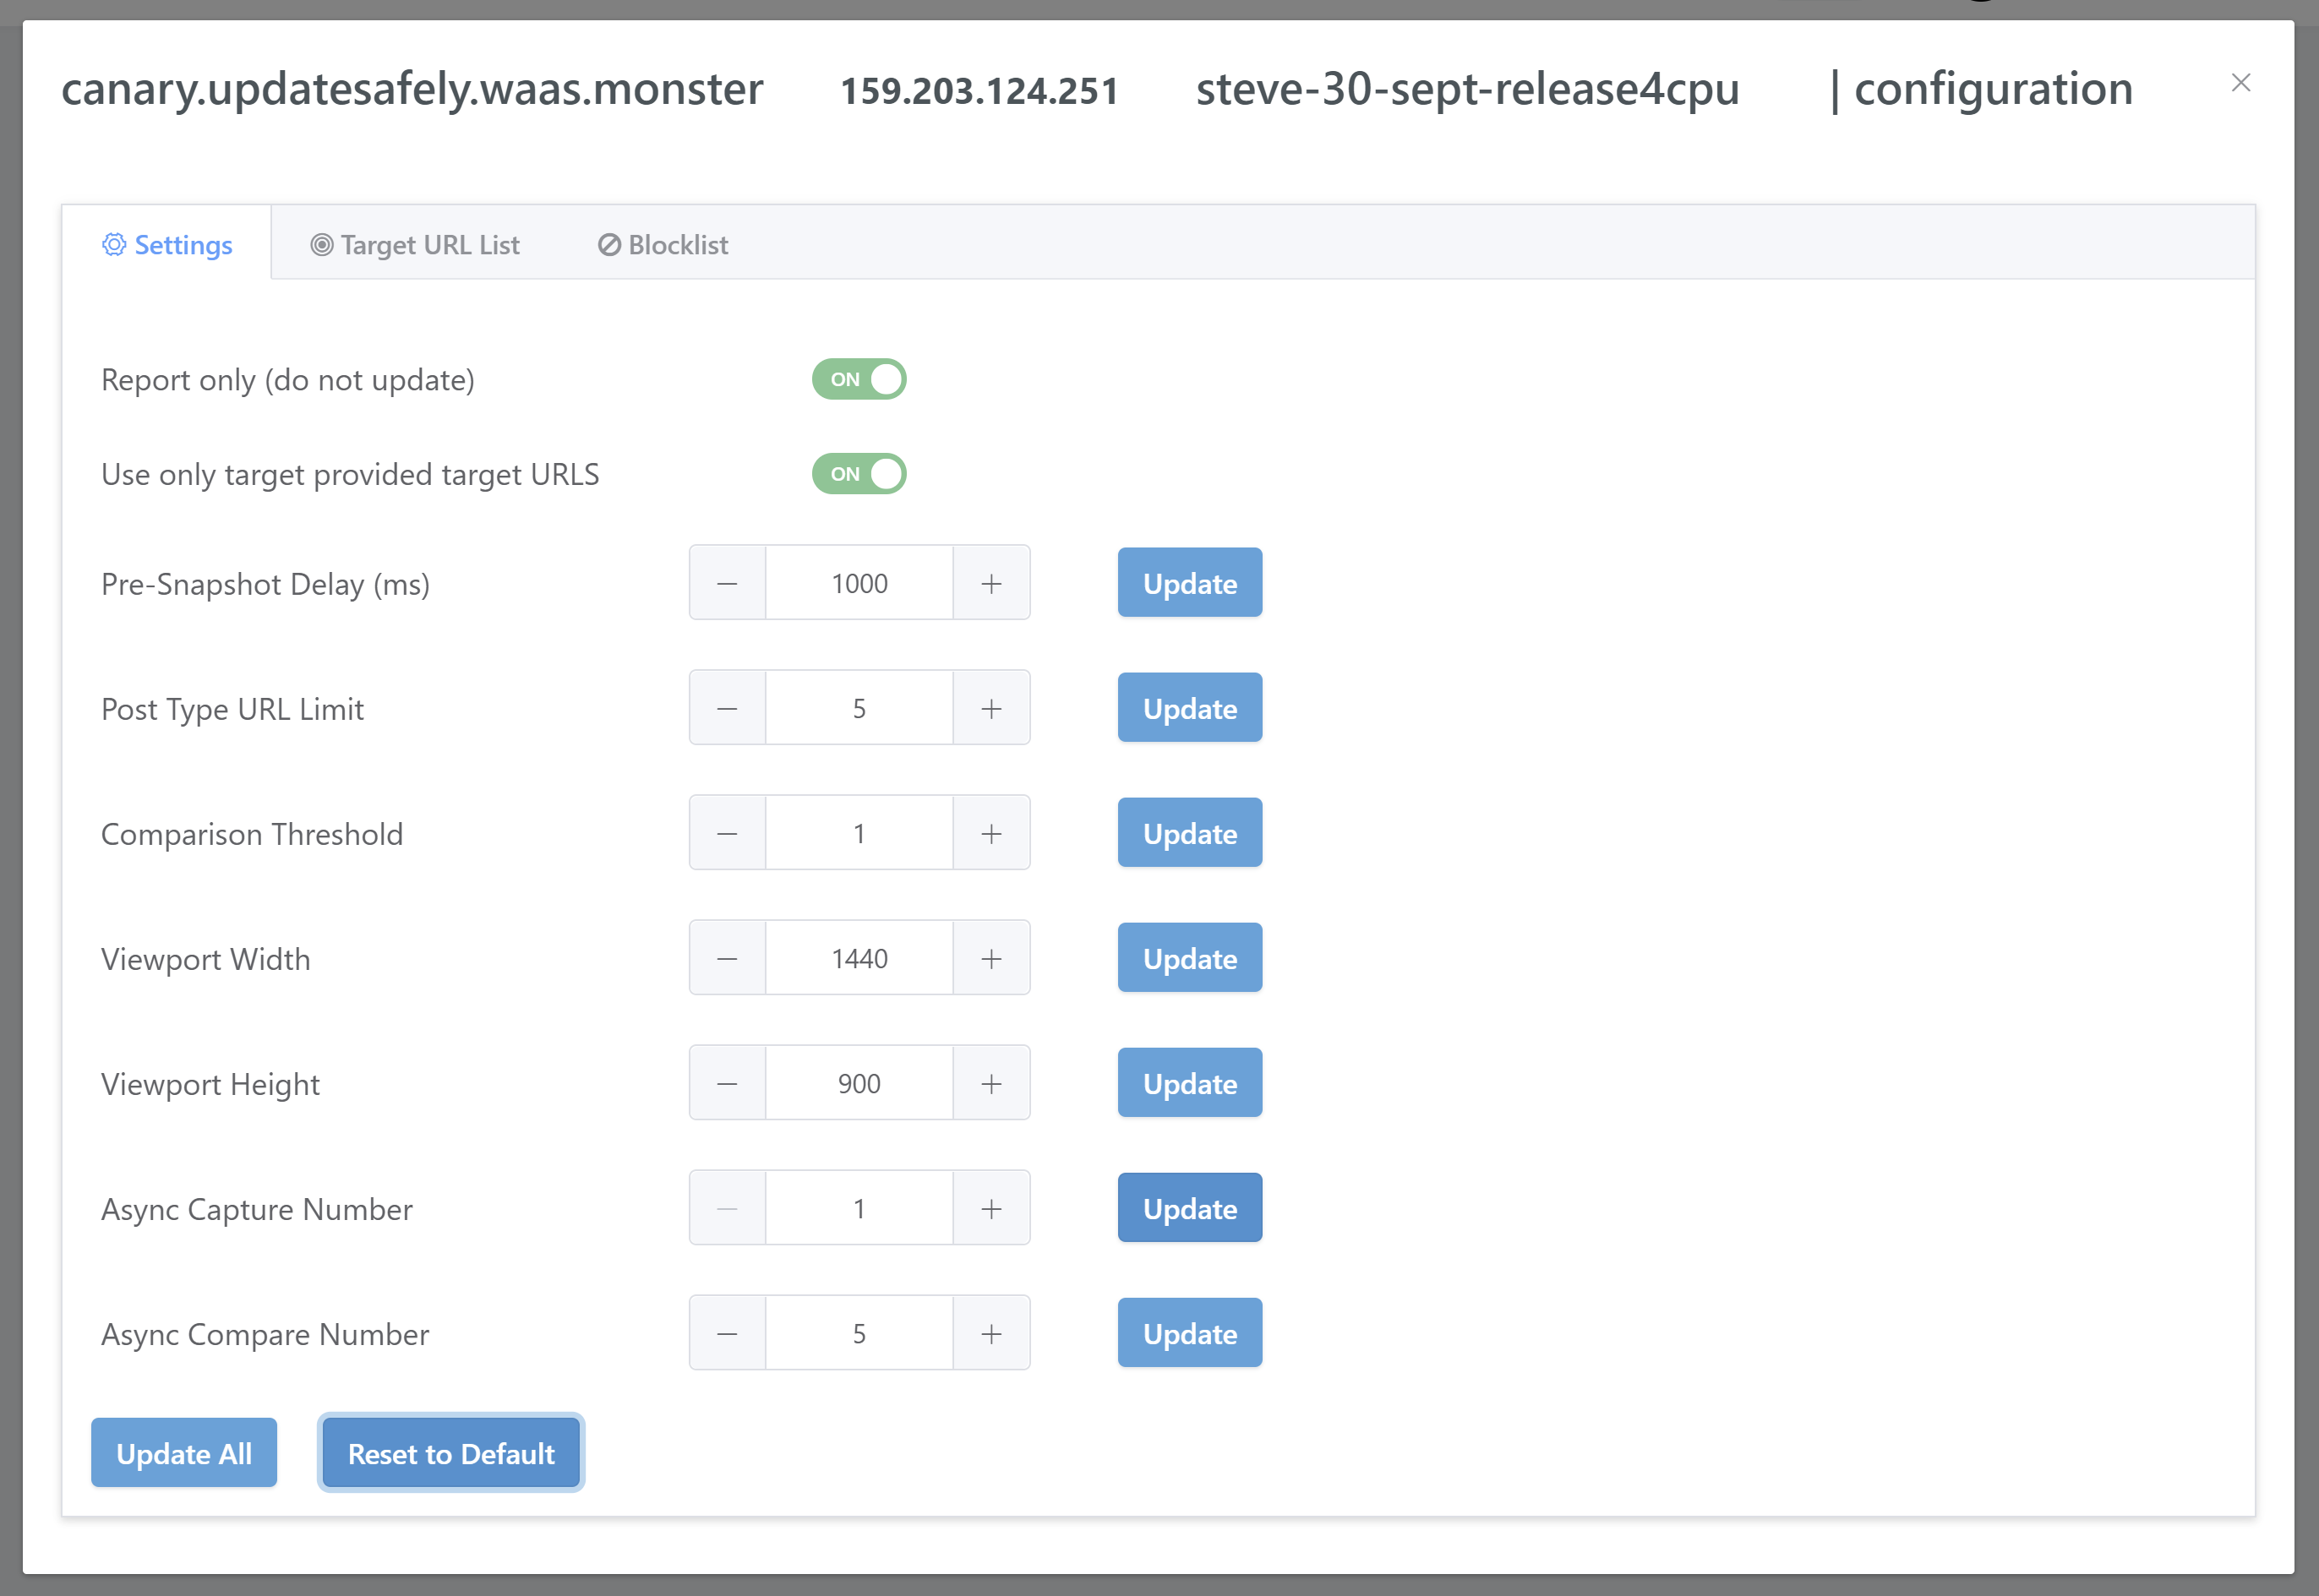
Settings
Here you’ll see the settings tab. This allows you to adjust the default settings covered in part 1 for your individual websites. You can also reset them back to your defaults any time by hitting the Reset to Default button.
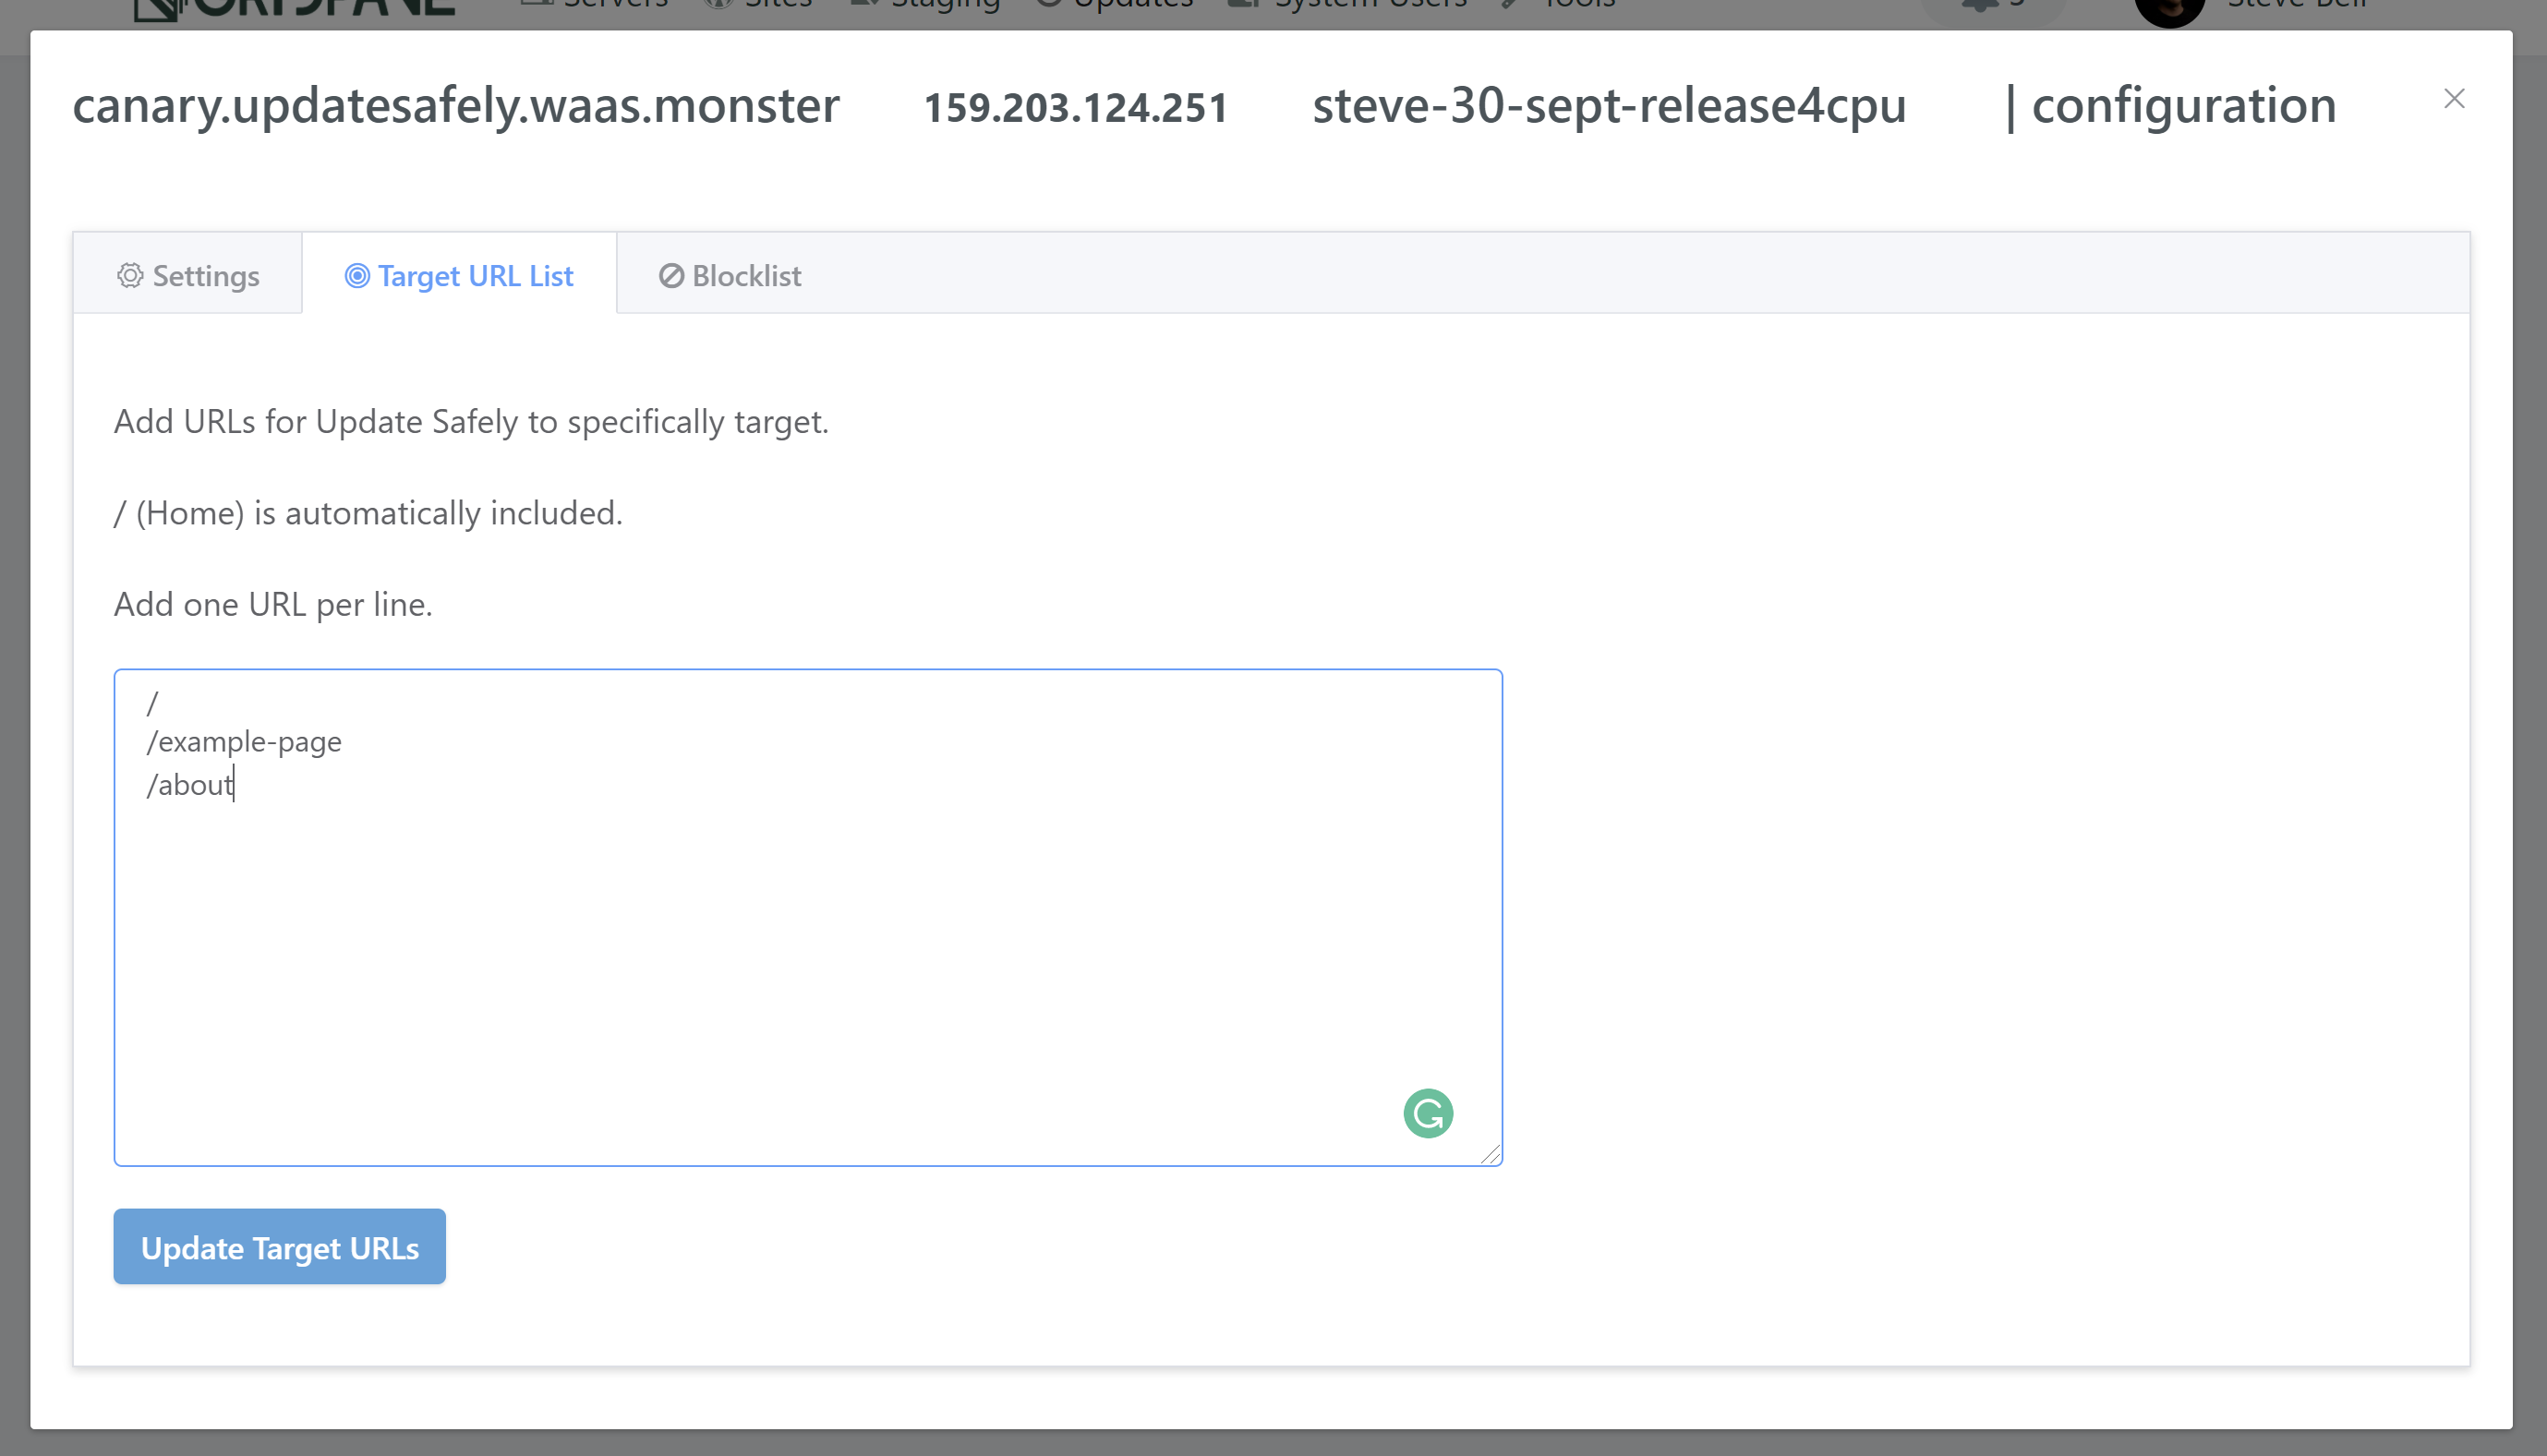
Target URL List
Here you can set a list of your websites pages that you would likely UpdateSafely to specifically test against. Add each of your pages, one per line, and then hit update. This only requires the /page specific part of your URLs, not the full address.
For example:
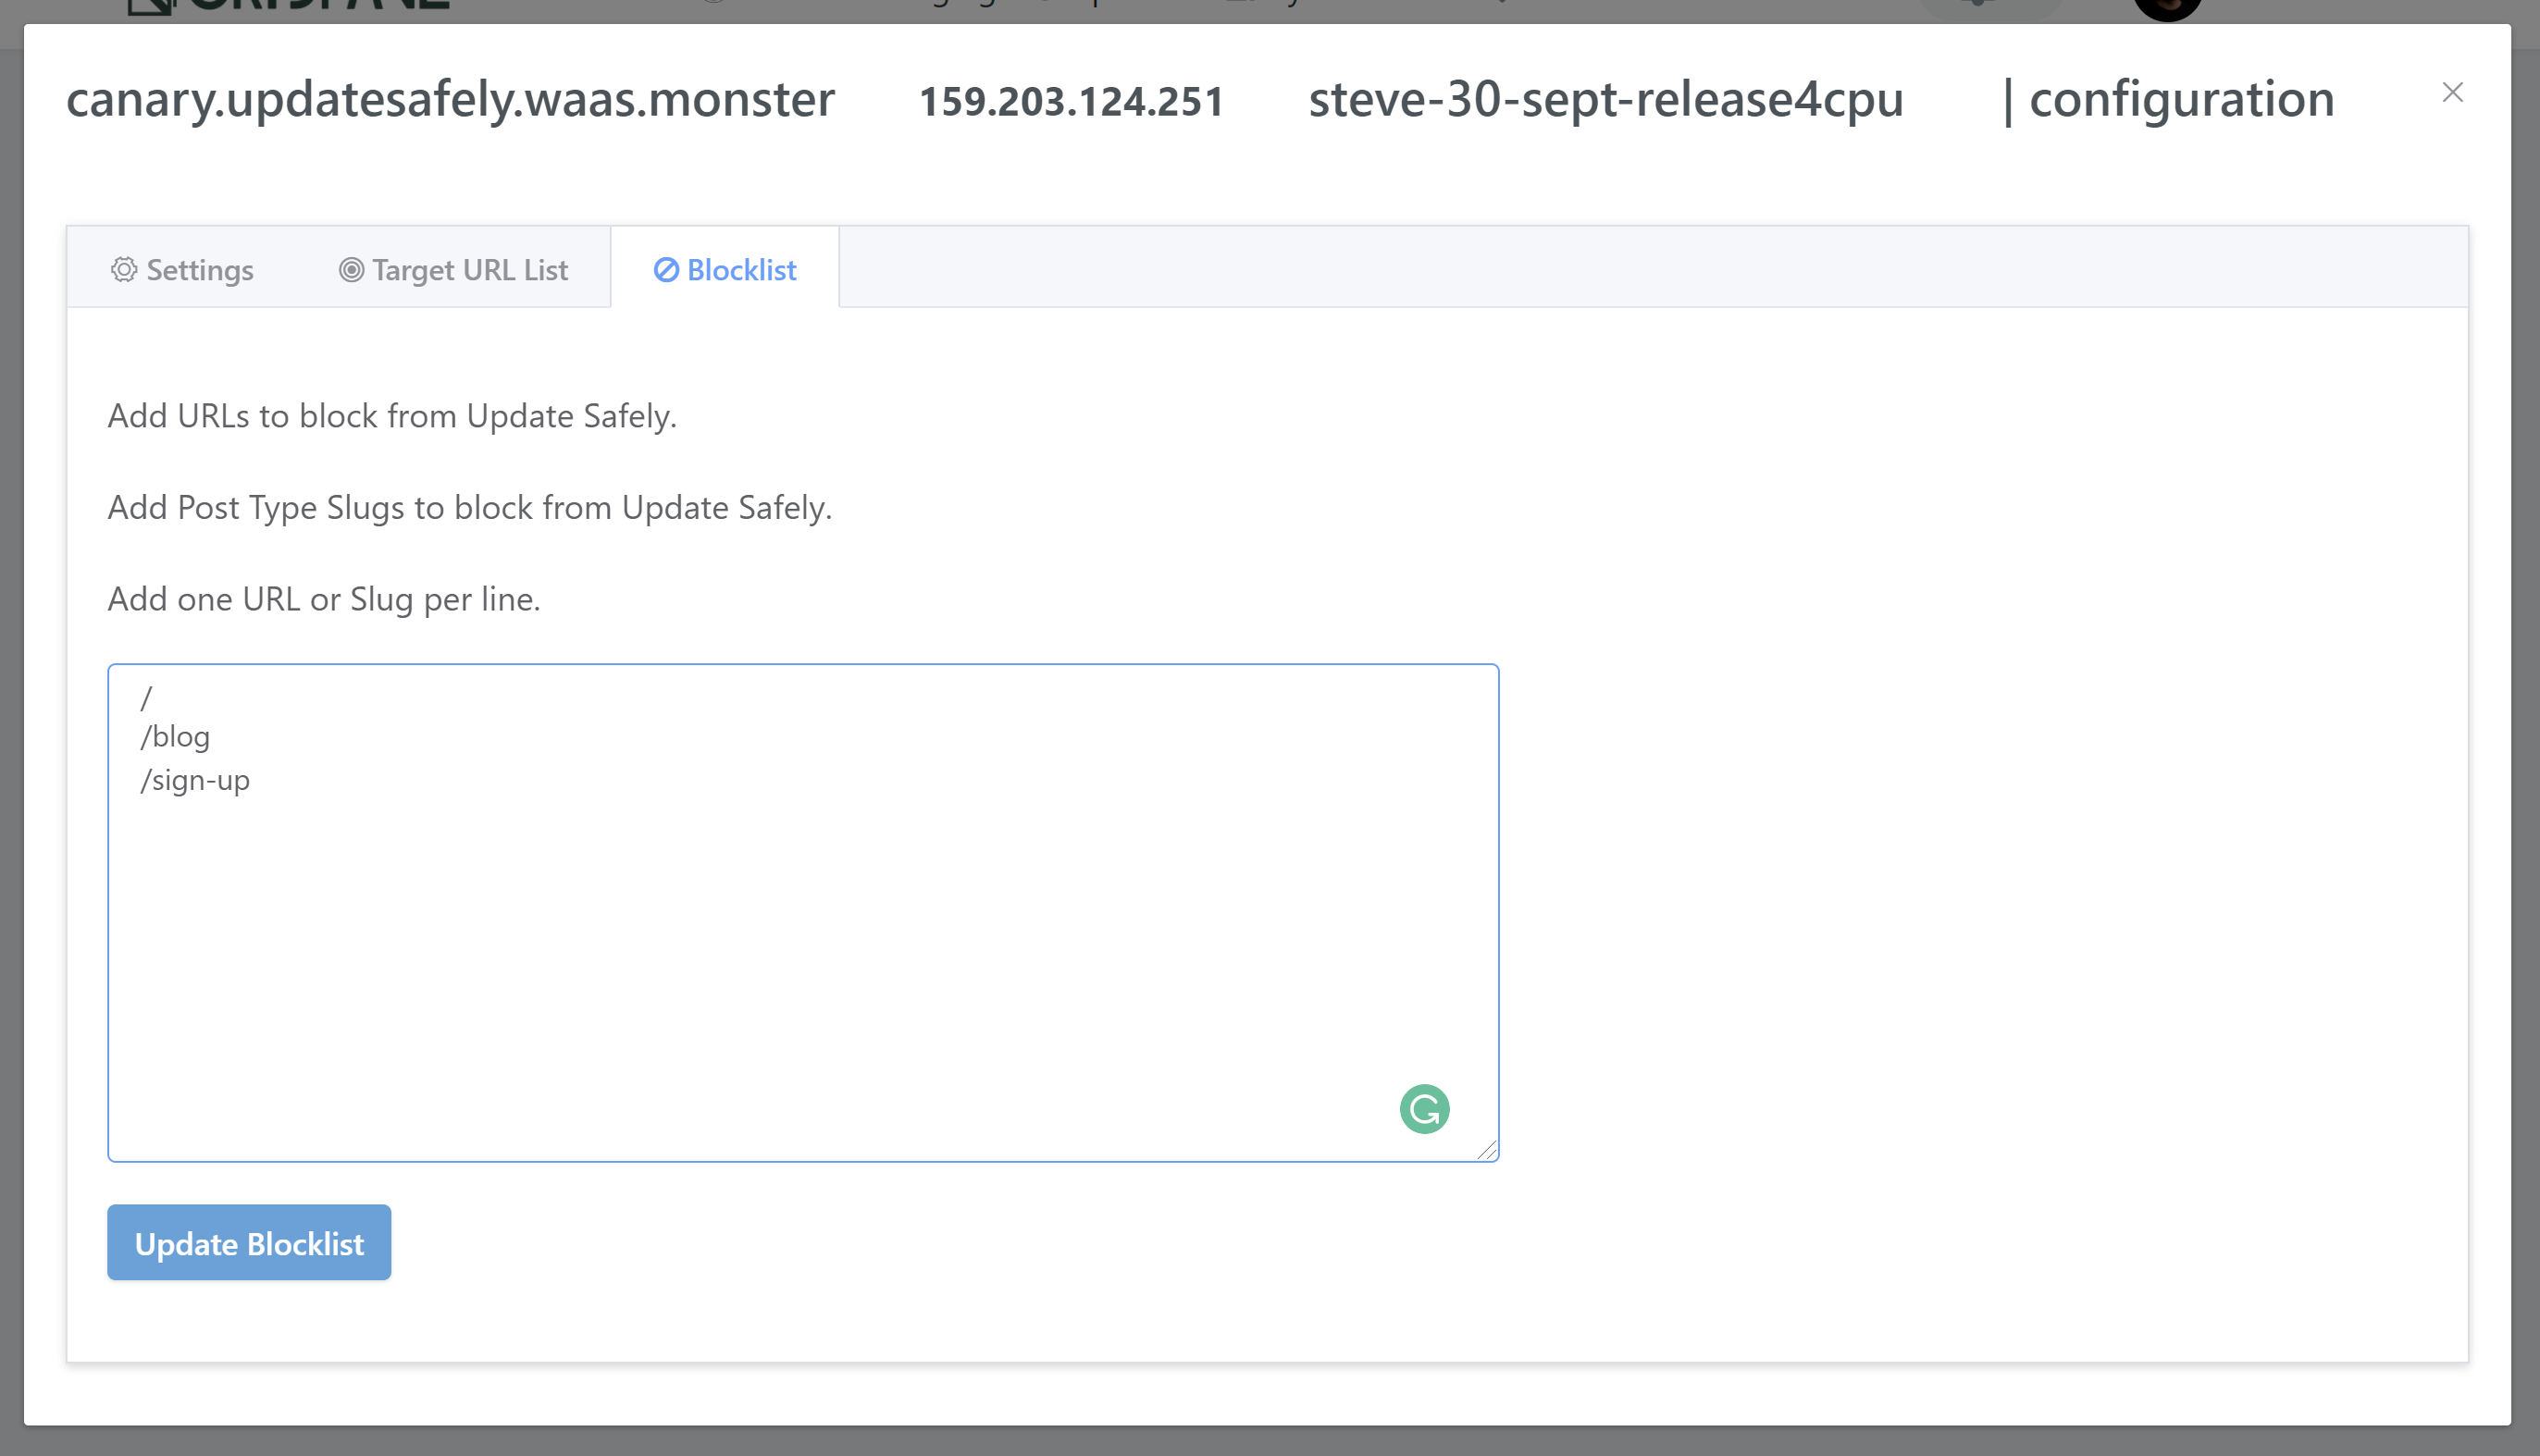
Blocklist
Here you can set any pages that you NEVER want UpdateSafely to run comparisons for. Add each of your pages, one per line, and then hit update.
Part 4. Visual Comparison Testing
Now that you’ve activated UpdateSafely on your server and at least one website, it will automatically run between the hours of 1AM and 5AM, at the interval that you’ve configured inside your settings page (once per day, once every 2 days etc).
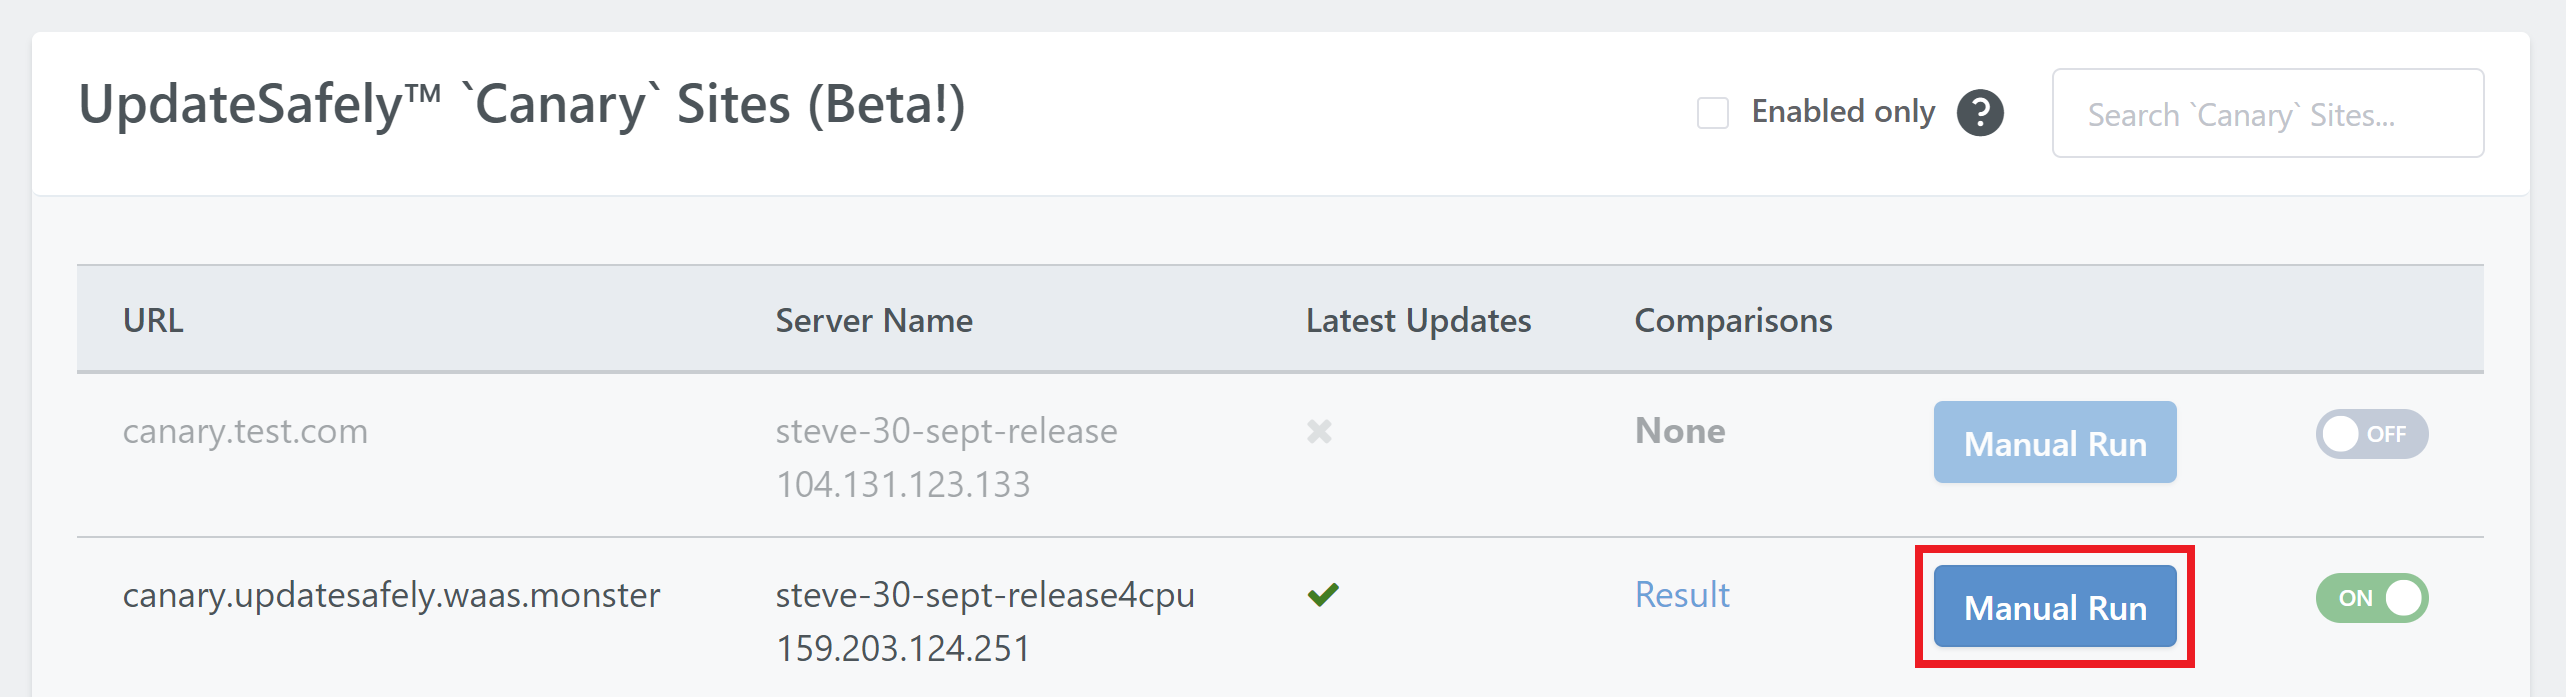
You can also run it manually at any time by clicking on the Manual Run button for your canary site.
The UI will notify you once the test begins and completes, and it the results will be compiled into a report.
If you’re testing on an existing server, and not a newly created server, the first manual run may take a few minutes to get started while it prepares and installs some necessary components. You may need to wait a few minutes and then try again if the first run doesn’t complete. After that first run you should be all set and there won’t be any further delays on future tests.
Note that for large websites, it can take some time to clone and run updates.
Part 5. Reporting
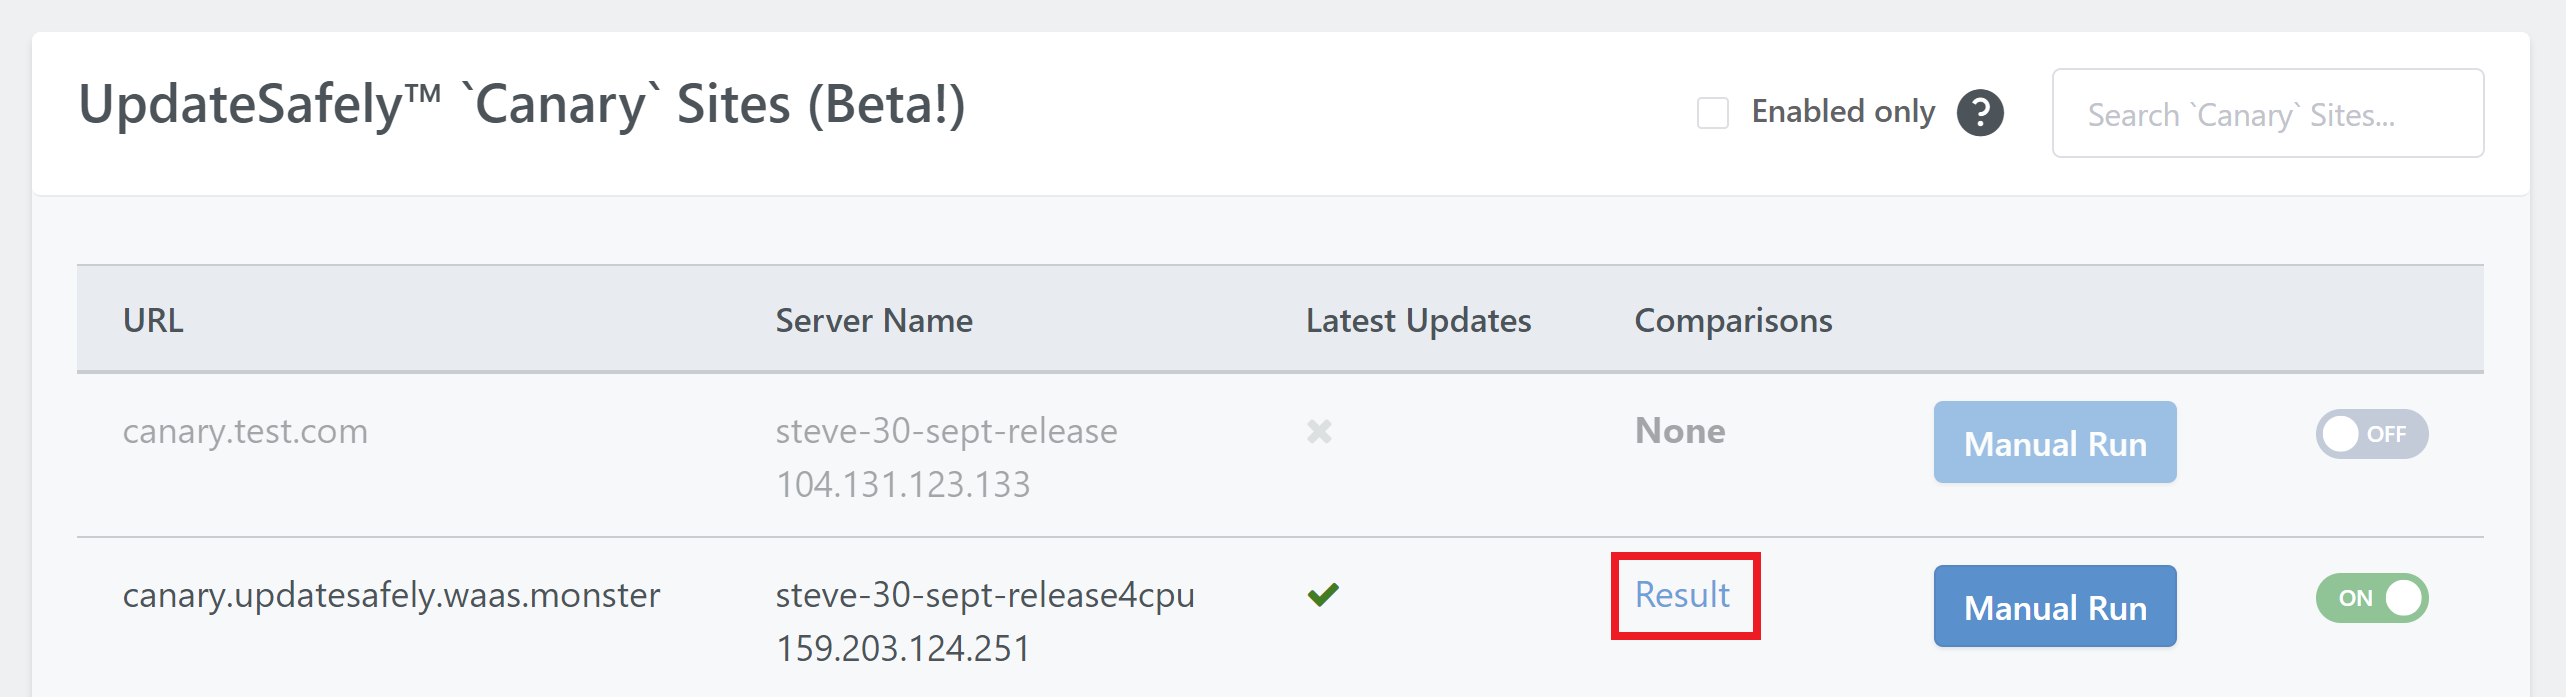
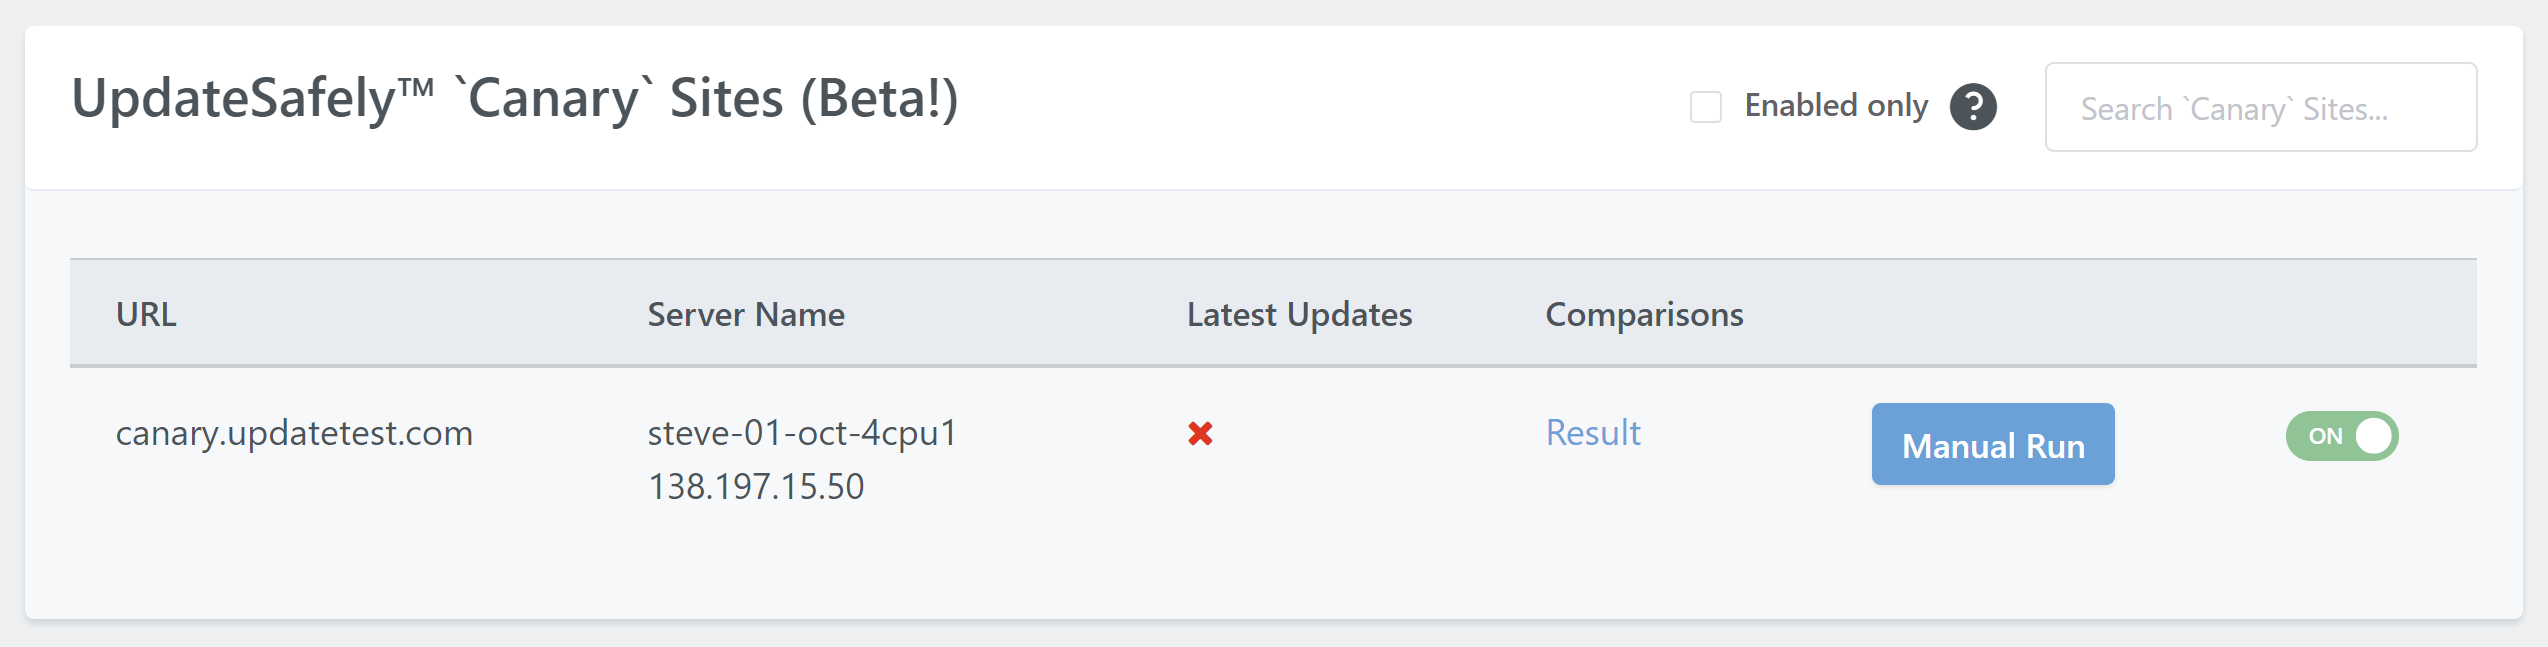
UpdateSafely will create a report each time it runs. You can view the results of the most recent run by clicking on the “Results” link in the Comparisons column.
The will open a page that looks as follows:
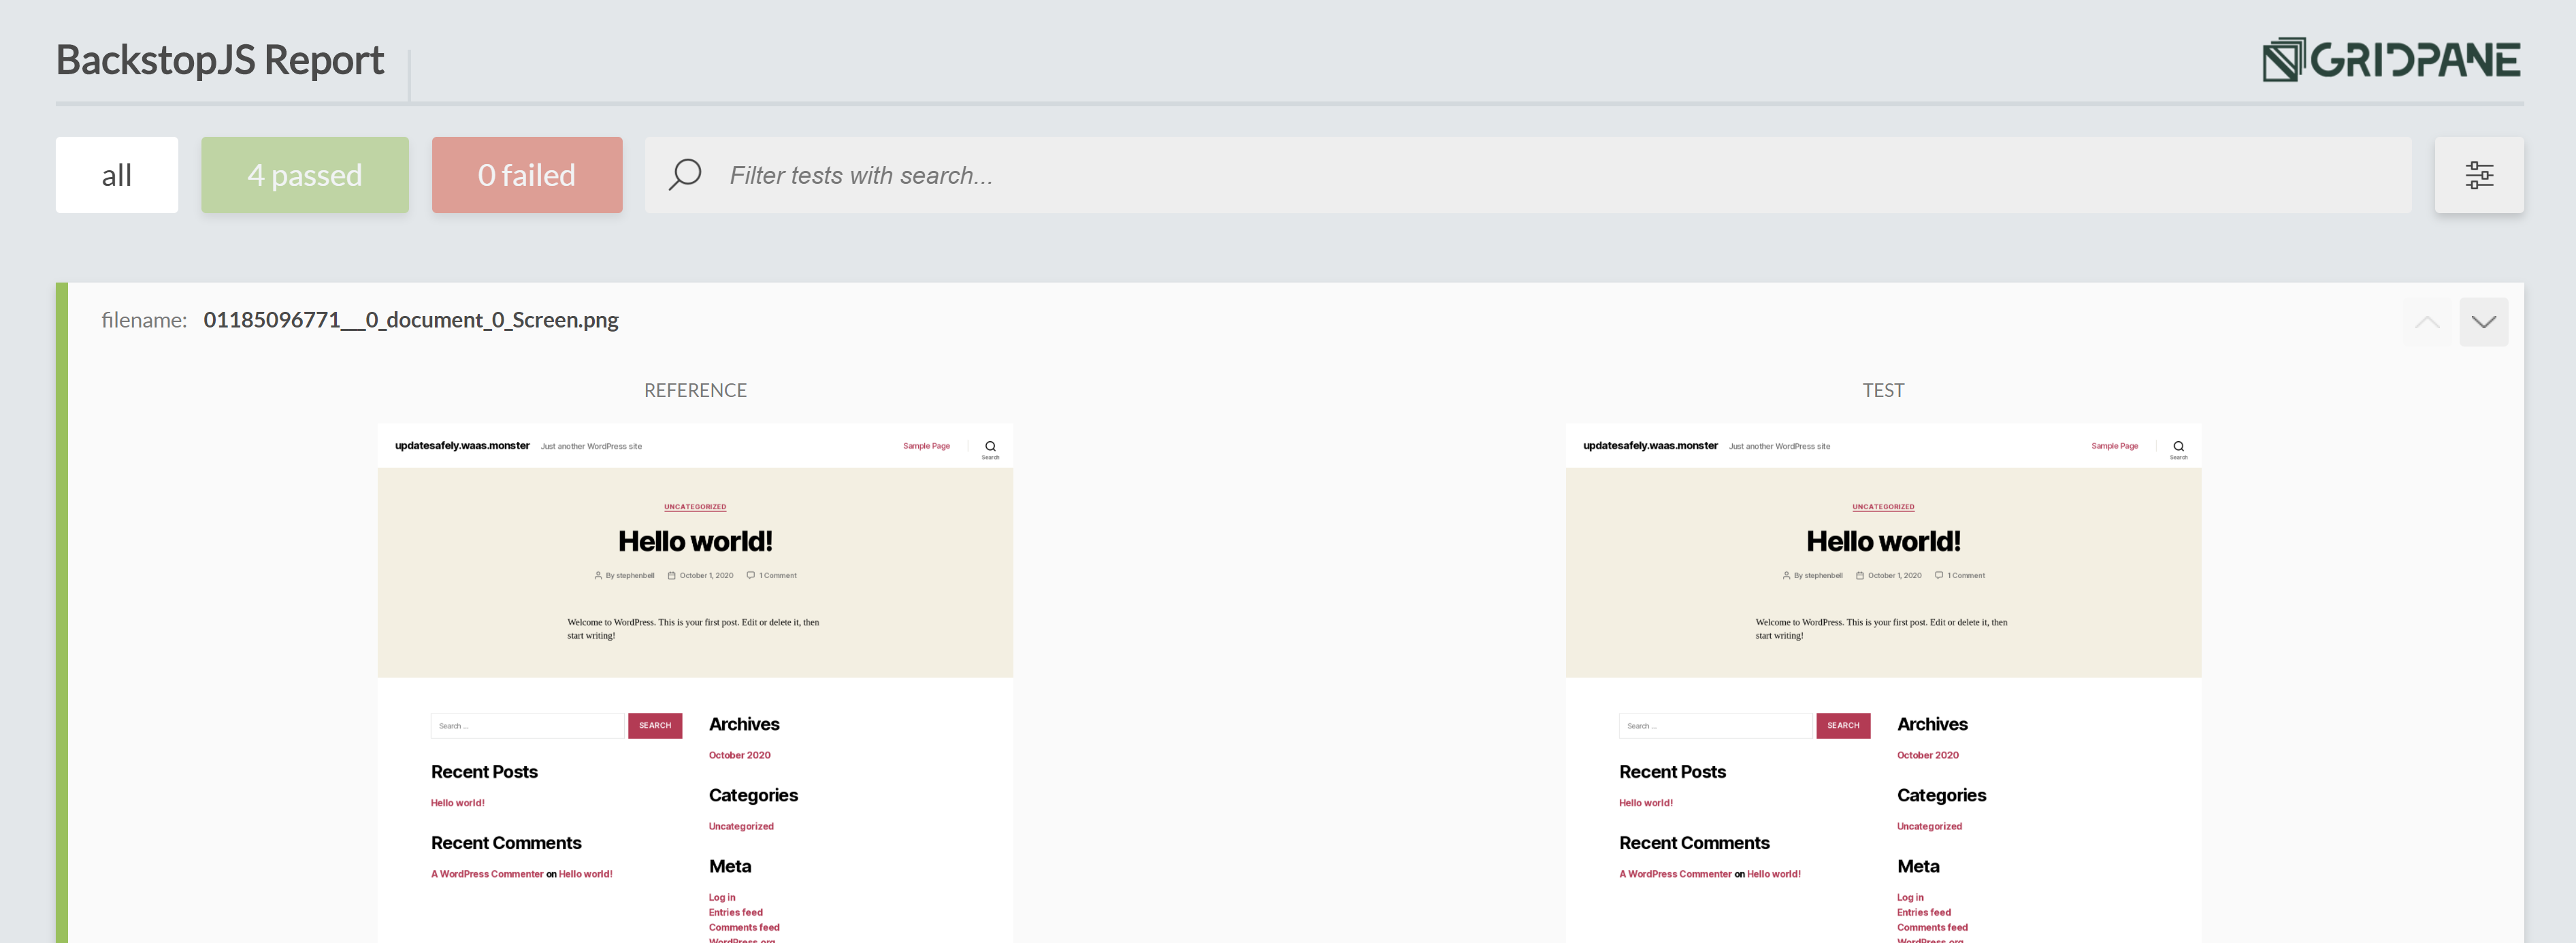
The report will let you know how many comparisons have passed/failed, and you’ll be able to view screenshots from the live site and canary site side by side, and also open each of these up individually to check for visual anomalies.
If your using the report only option and would now like to have UpdateSafely run the updates, you can open up the site configuration modal, toggle off “Report only (do not update)”, and then hit the manual run button. UpdateSafely will then re-run the tests and update your website upon completing (assuming all comparisons pass once again).
Failed Tests
When a test does fail, you’ll see red cross in the “Last Updates” column like so:
And your report will give you a detailed look at where things have gone wrong. Here’s an example of a site I purposely caused to fail by altering the typography of its parent theme (never make changes in a parent theme), which is was overwritten (fully deleted) when the parent theme is updated by UpdateSafely:
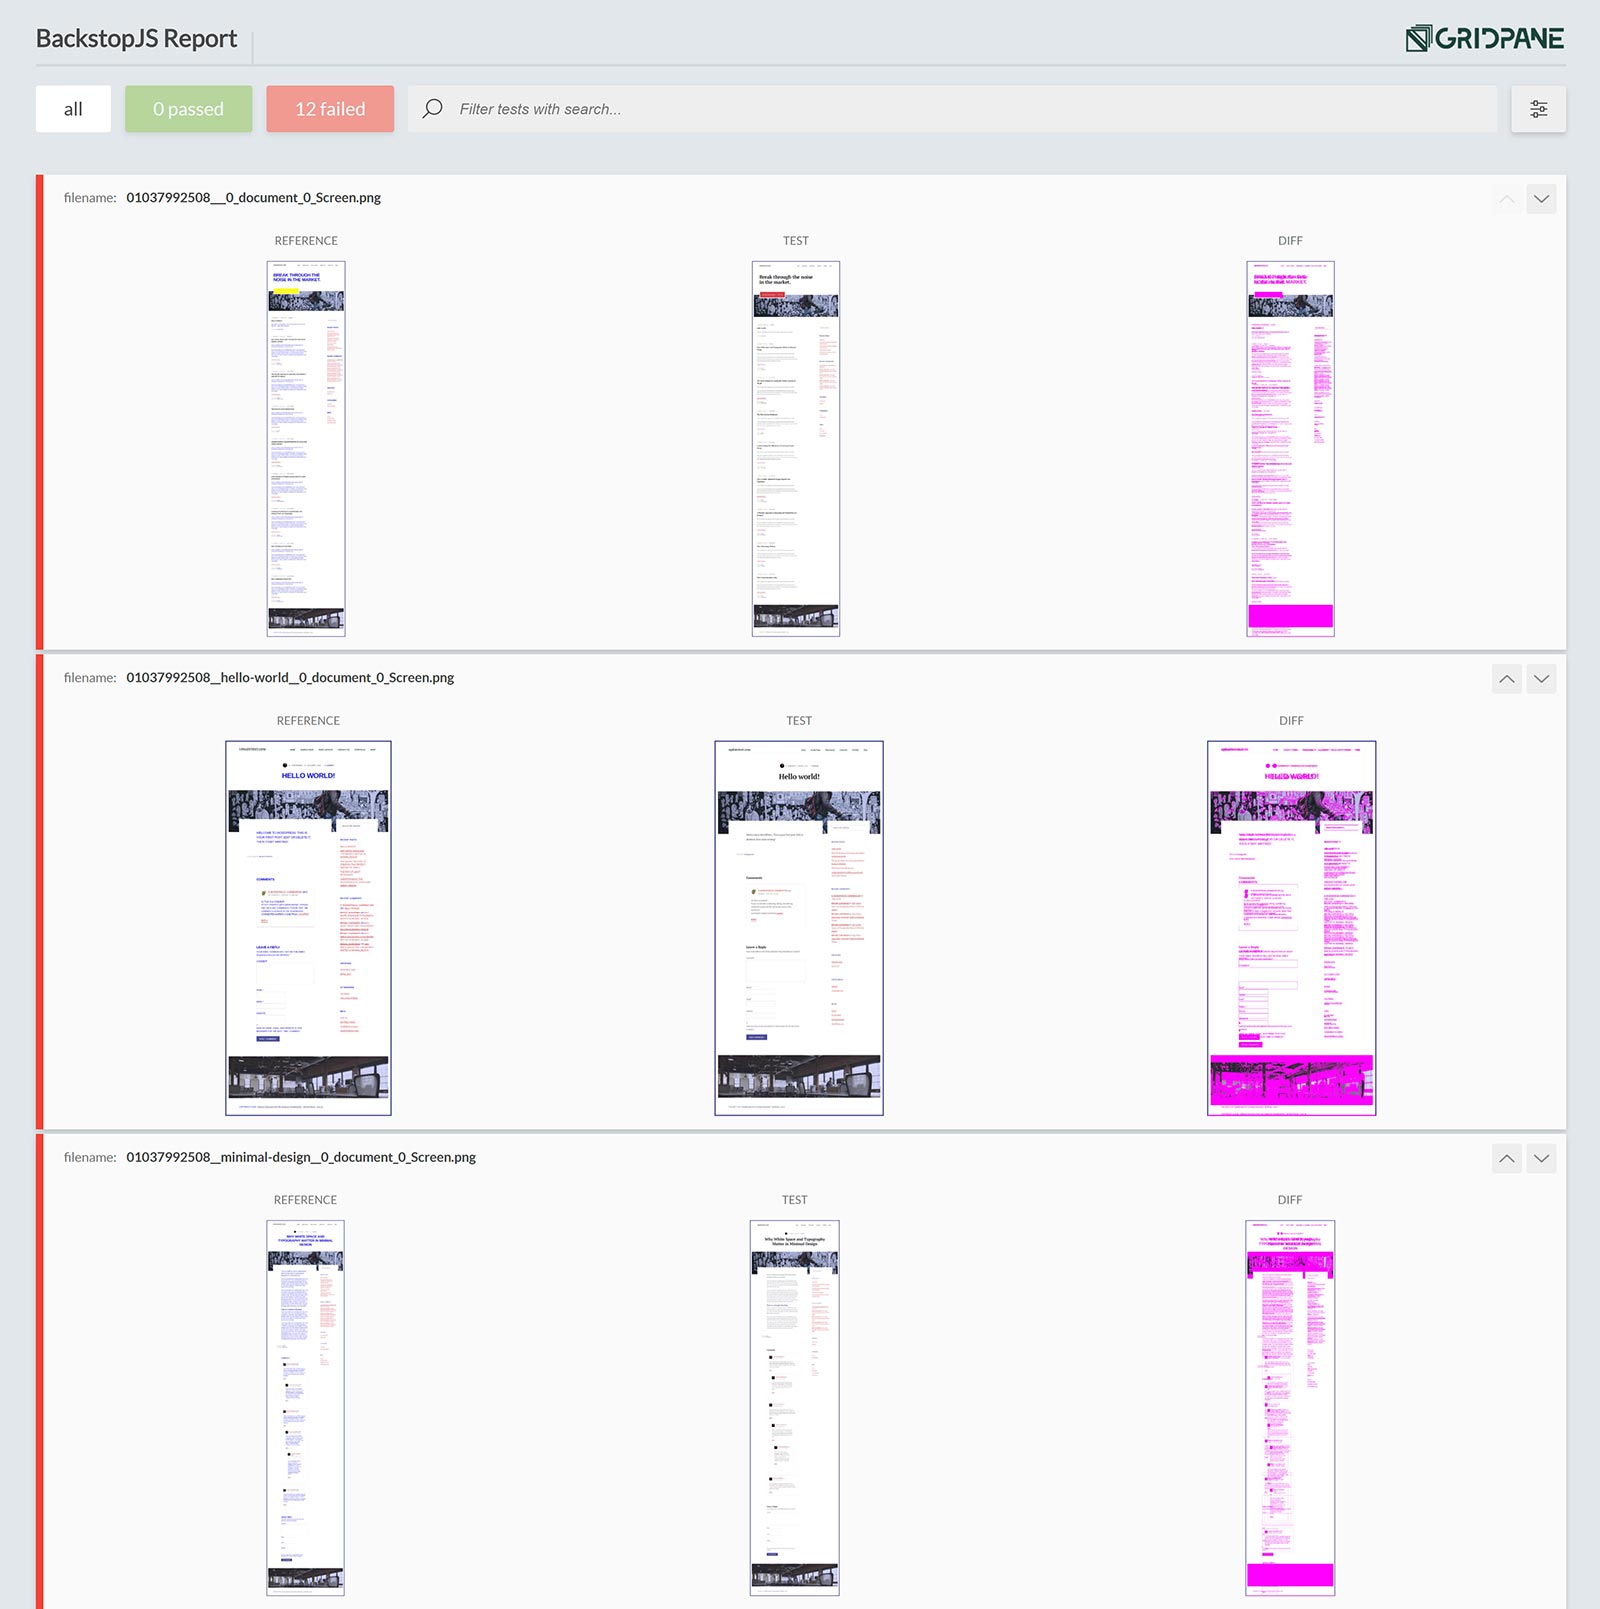
This test was set to fail if there was a 1% variance, and the changes I made to the typography were enough to ensure that UpdateSafely would not have gone ahead with the updates had there actually been a genuine issue. All 12 tests have failed (I cut the image above short).
Each of the screenshots contained in the report can be viewed at full size so you can get a full look at the live pages and test pages and diagnose where things have changed after your core/theme/plugin updates have taken place.
For a test like this you could then push your live site to staging, and then update things one by one until you find the cause of the issue, all without harming your live production website.