DigitalOcean
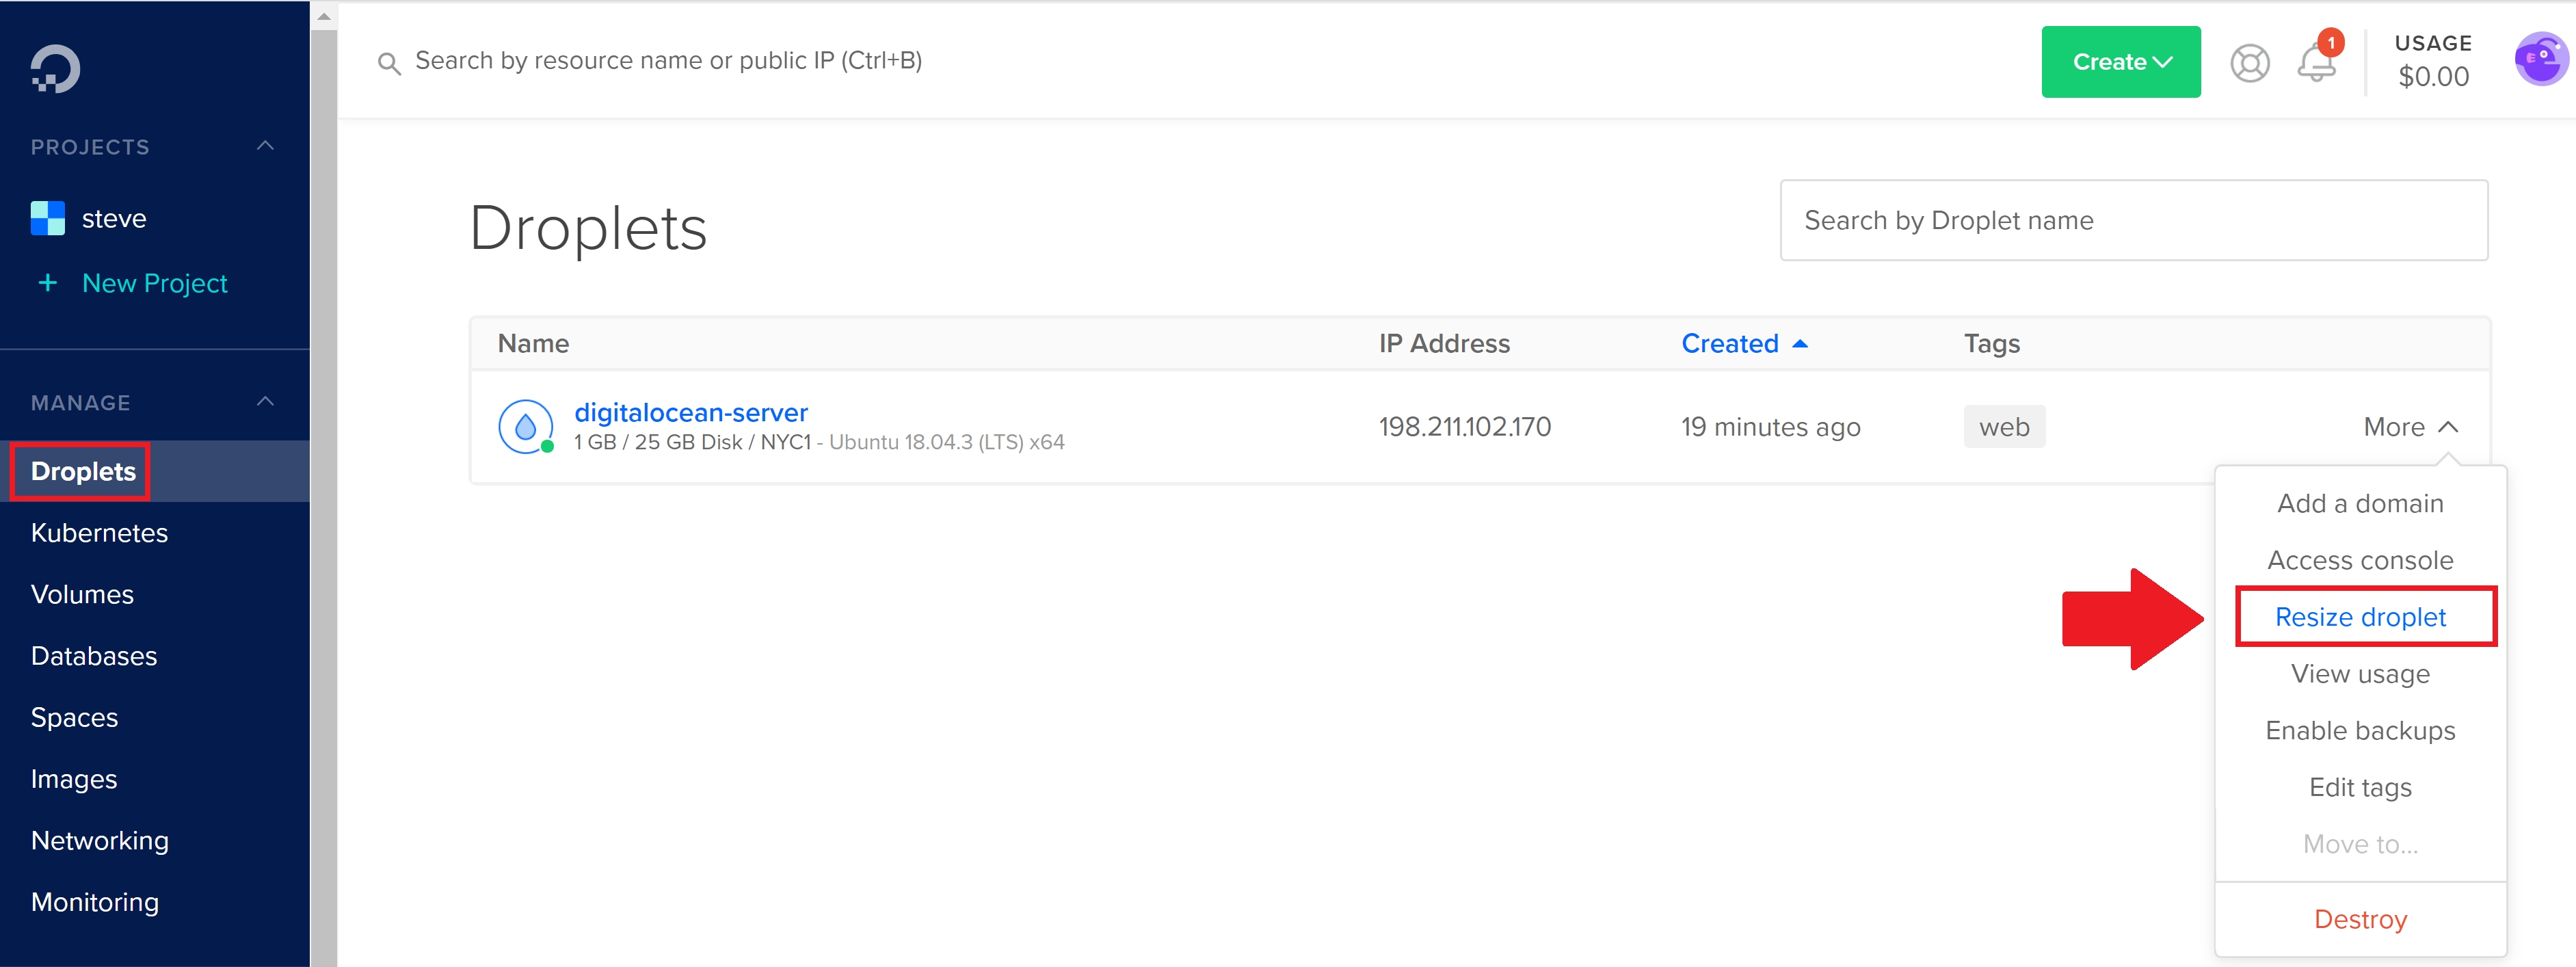
Login to your DigitalOcean account and click on “droplets” in the left-hand sidebar.
The droplets page will show you a list of your droplets (servers). Click on “More” on the server you wish to resize and click “Resize“:
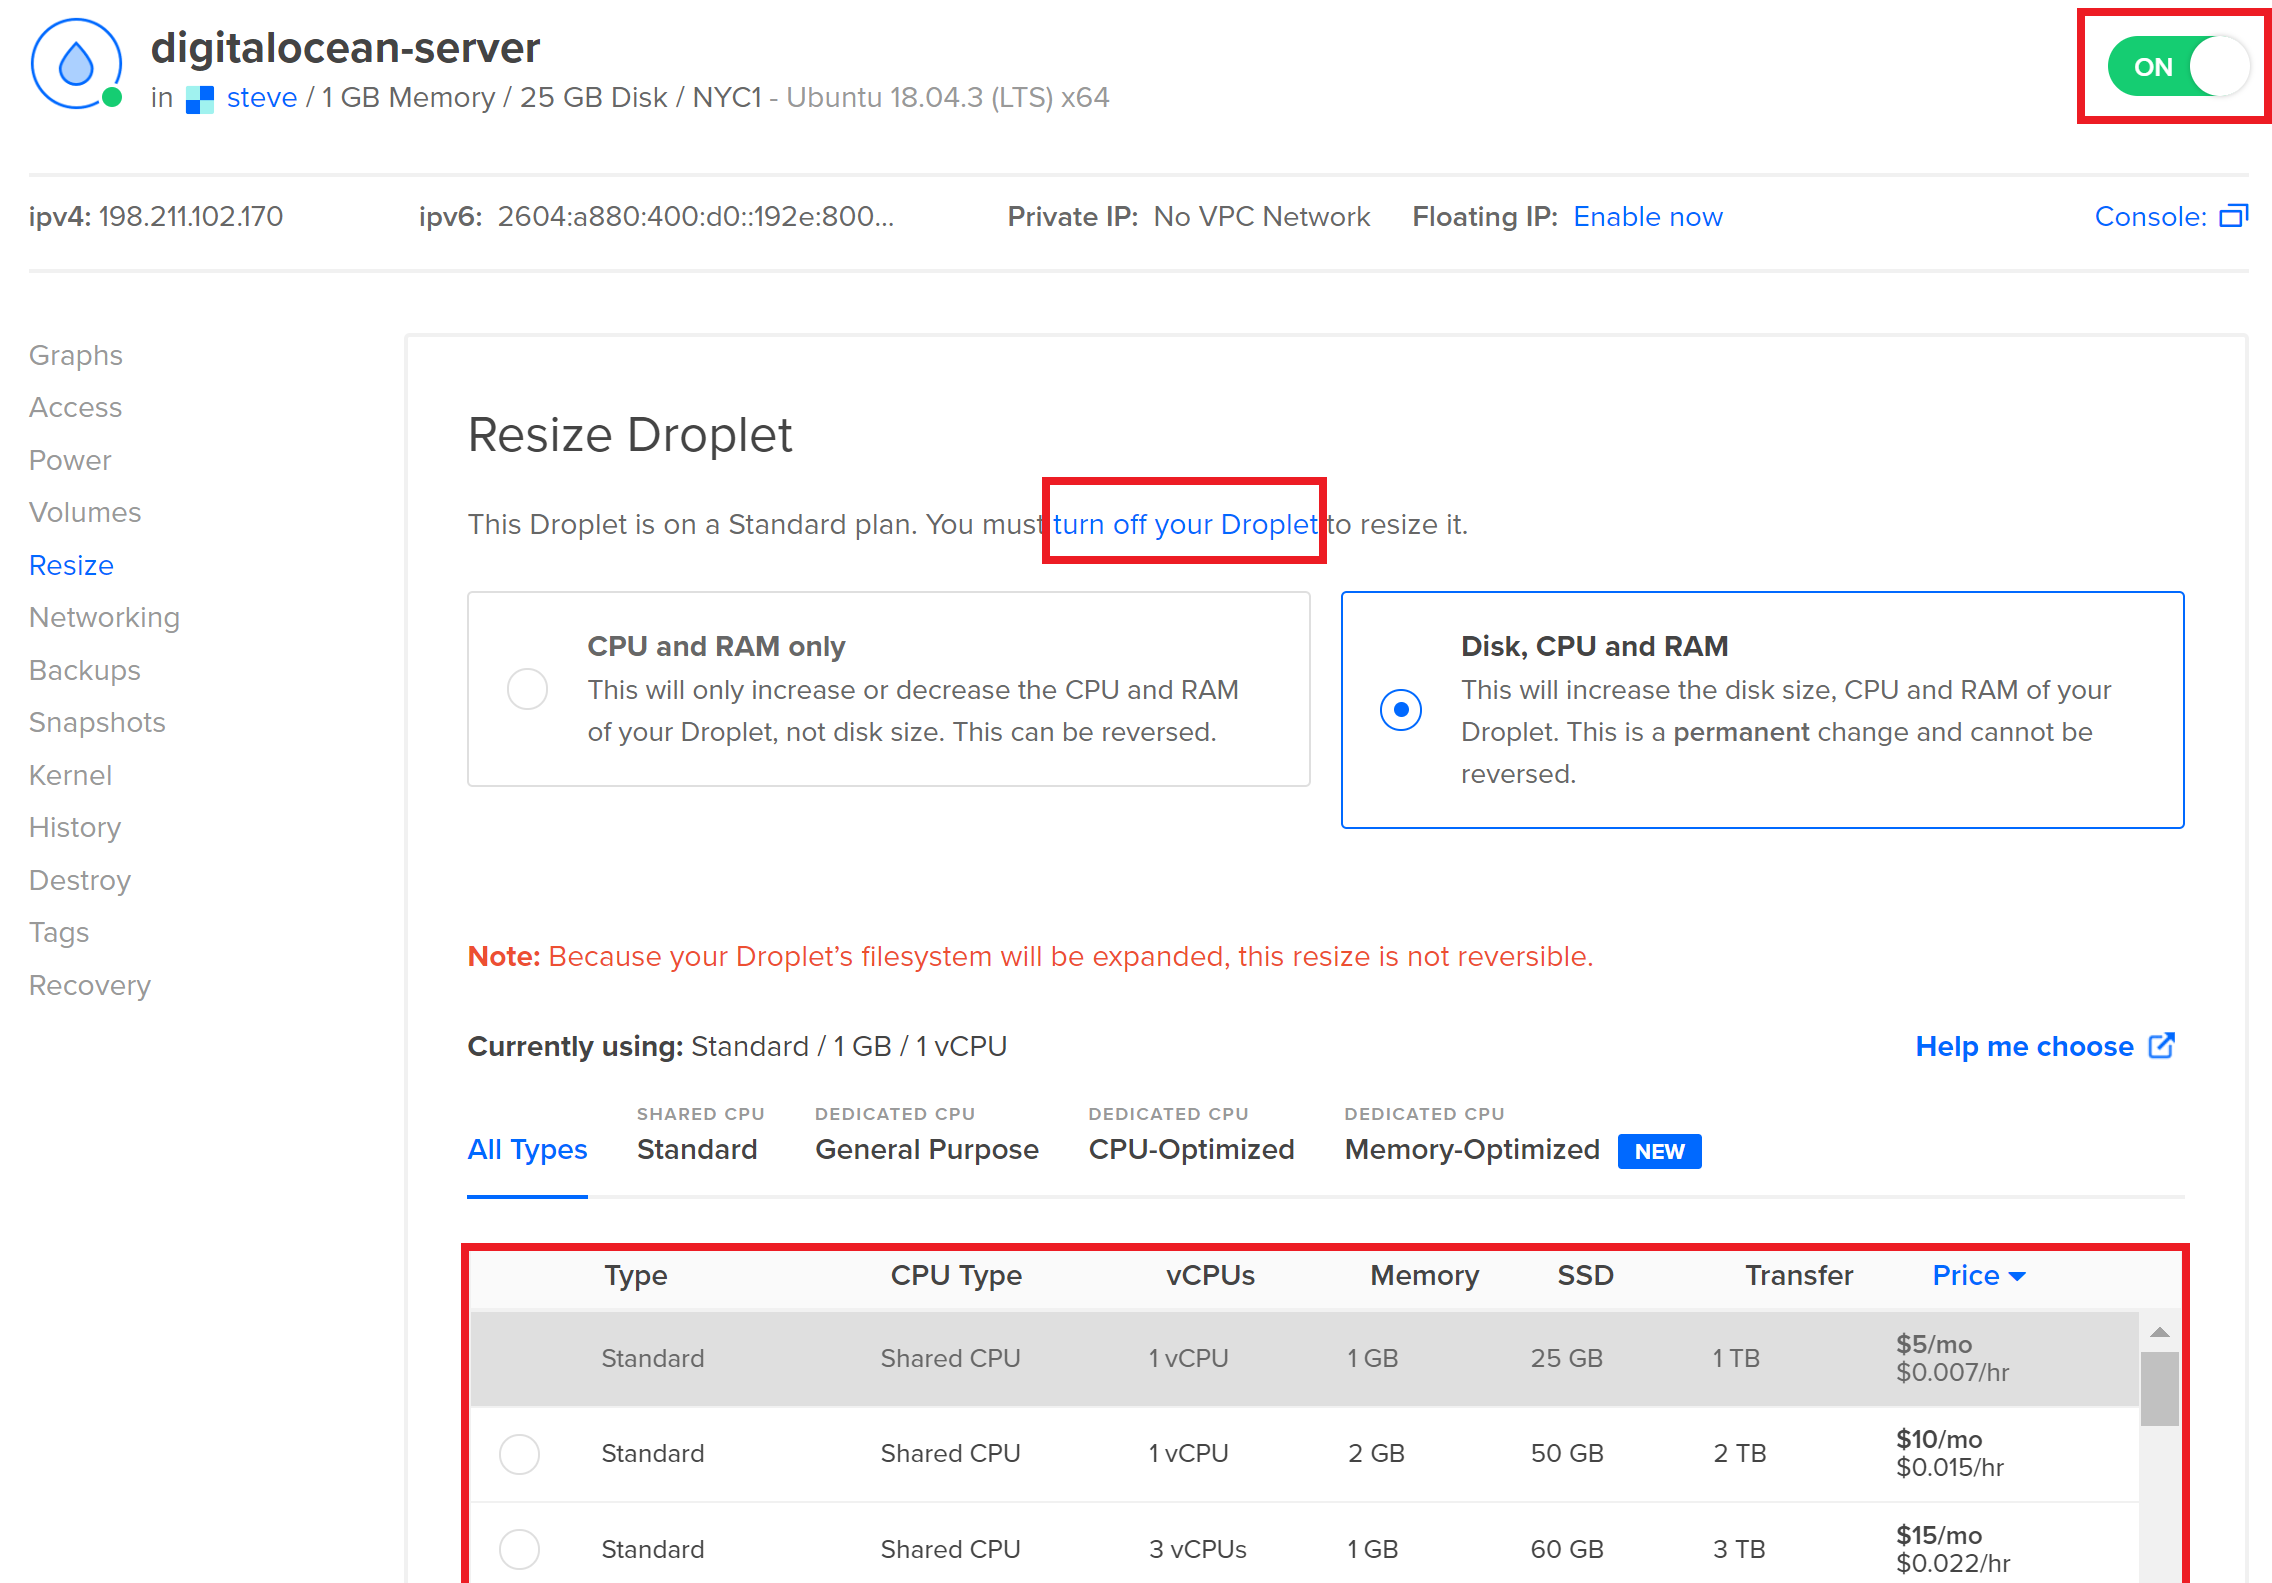
You’ll be presented with a list of server sizes, and you can choose between scaling up only RAM and CPU, or scaling RAM, CPU, and disk space. In most cases, the extra disk space is a good idea, but choose the option that is right for you.
Once you’ve selected your server size, you will need to power off your server. Click on the “ON” toggle in the top right.
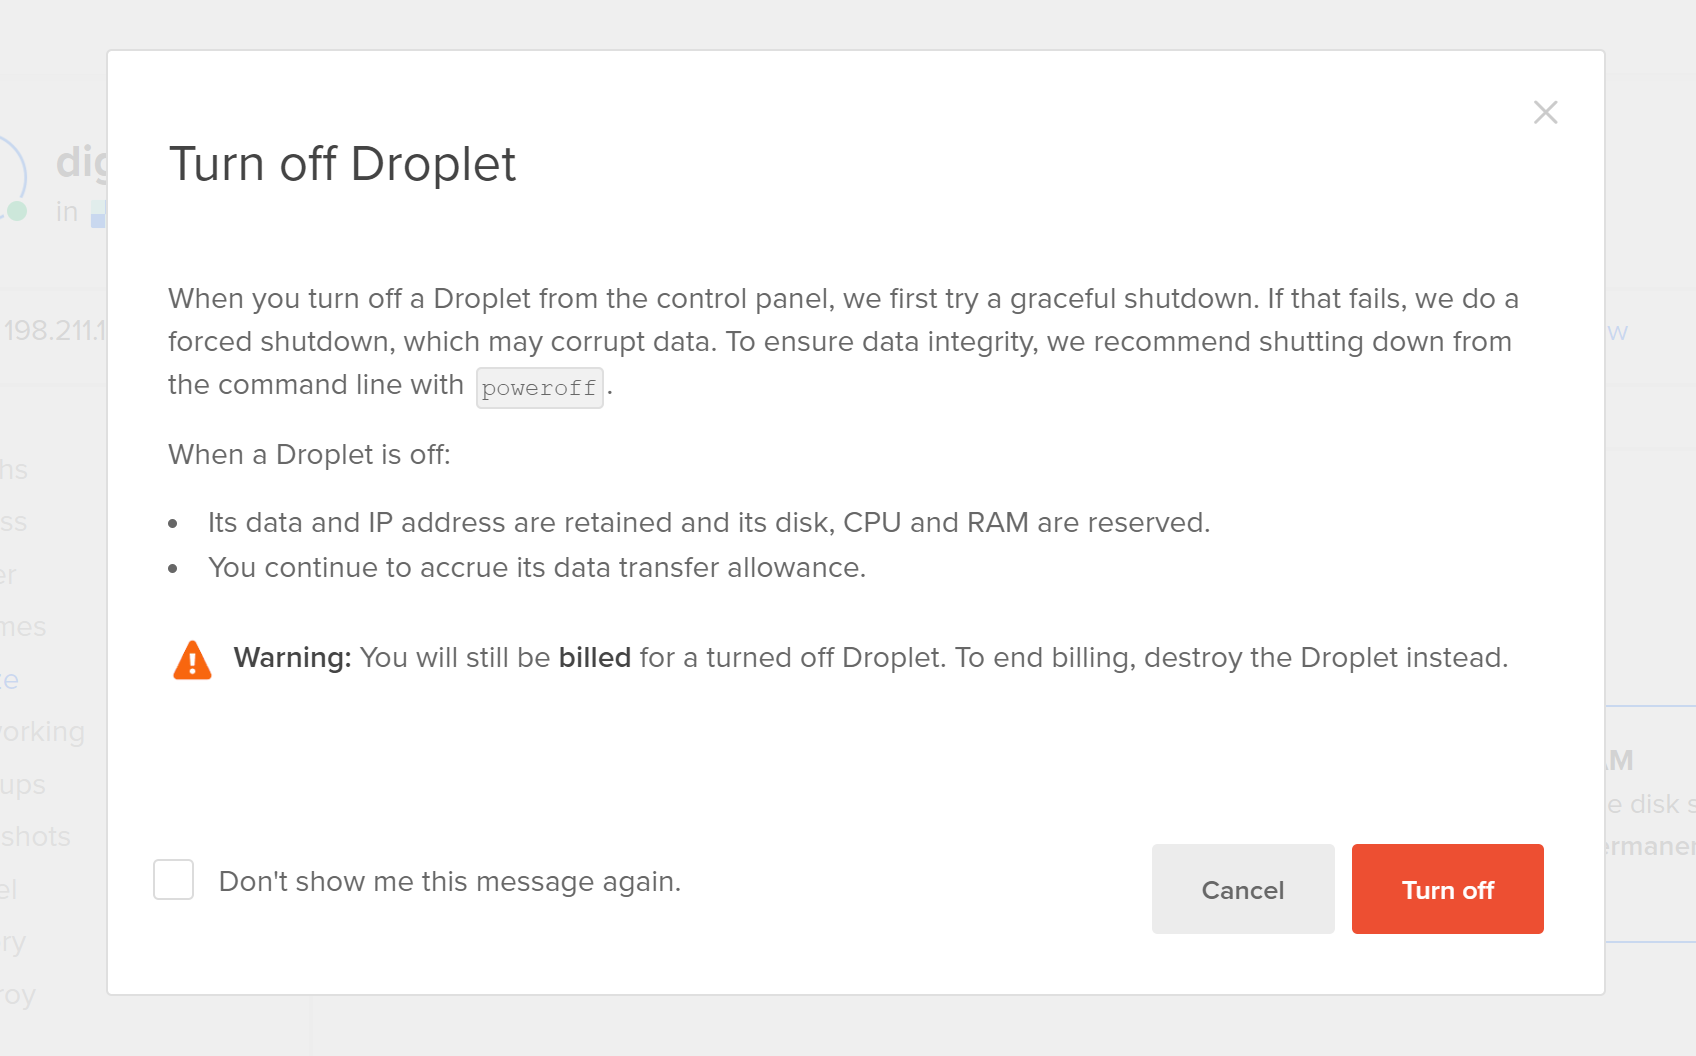
Confirm you want to power off inside the modal:
Now the droplet is powered down, you can click the blue resize button:

DigitalOcean will begin the resize of your droplet and notify you once it’s complete.

You can now power your droplet back on, and GridPane will automatically pick up the changes.
Vultr
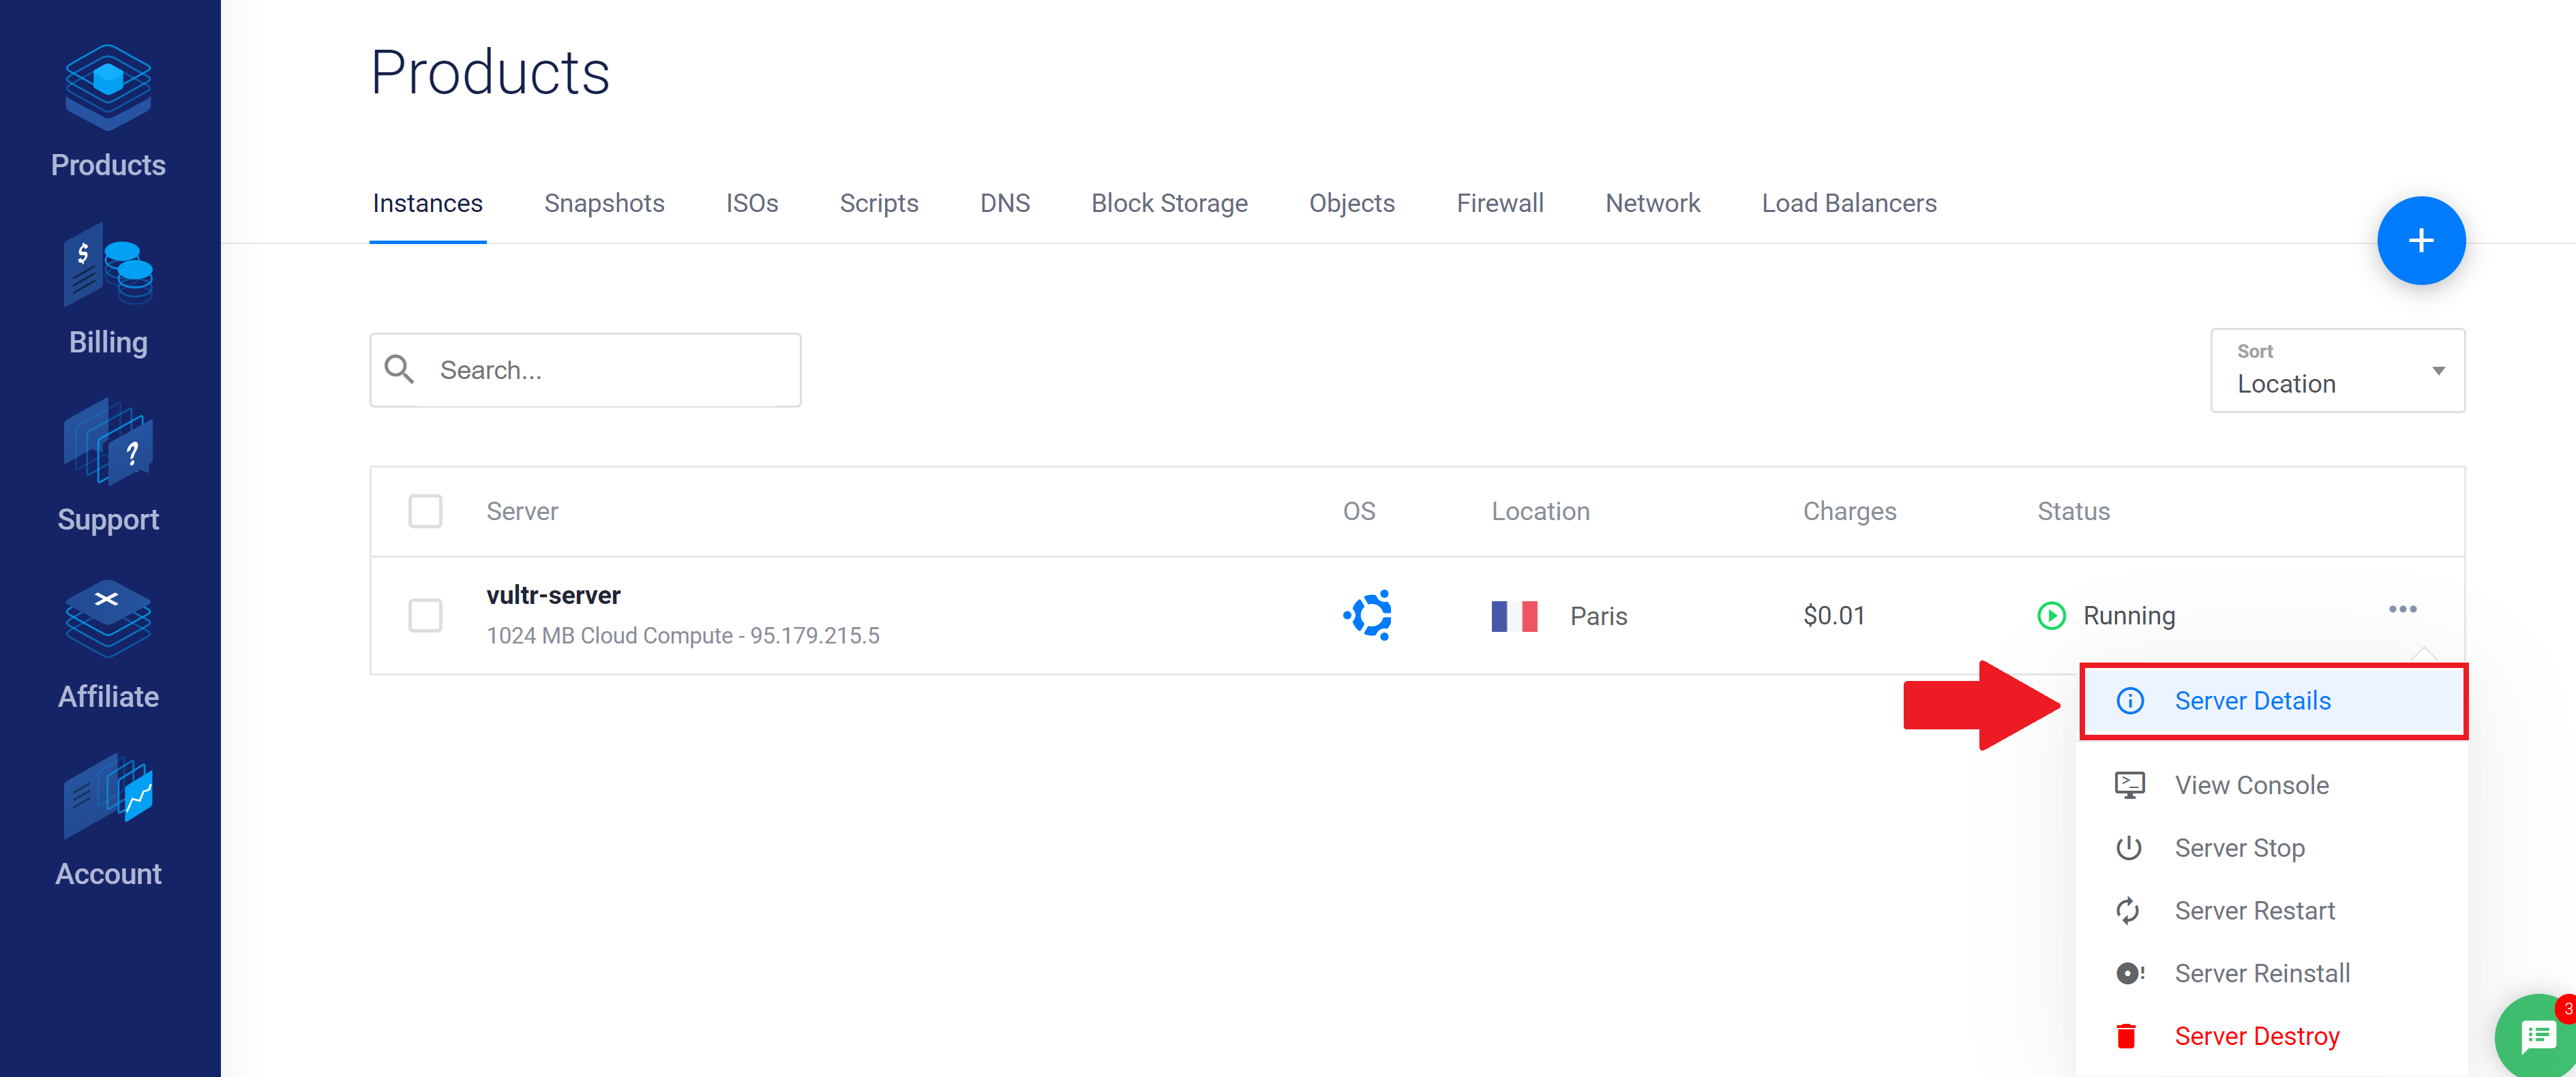
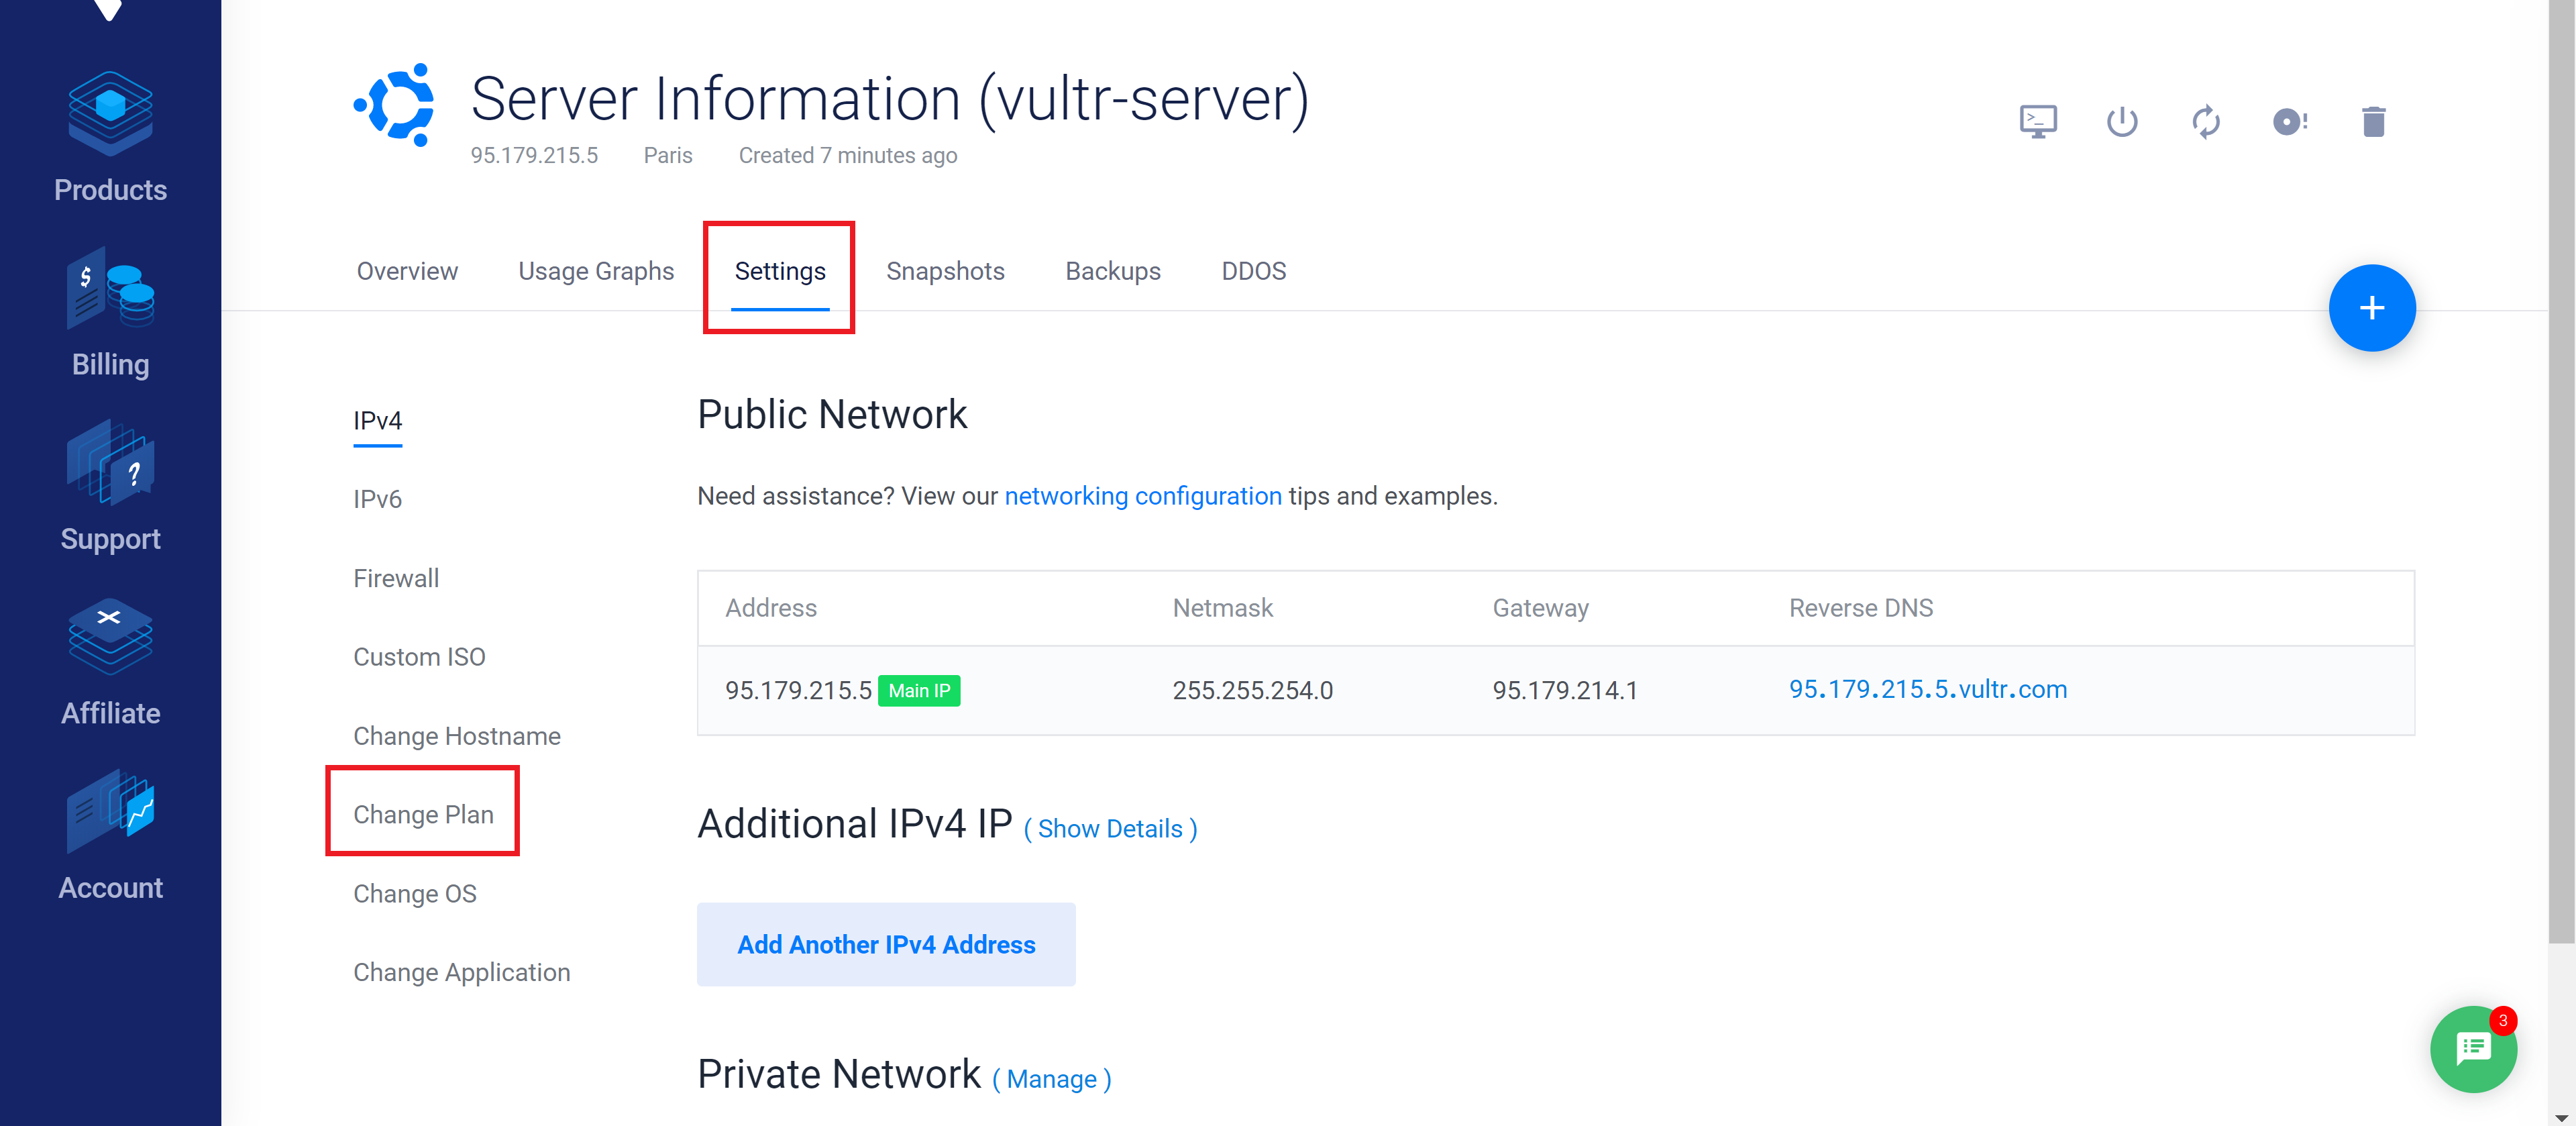
Login to your Vultr account and click through to the server you wish to resize:
Click the “Settings” tab and select “Change Plan” in the left-hand menu:
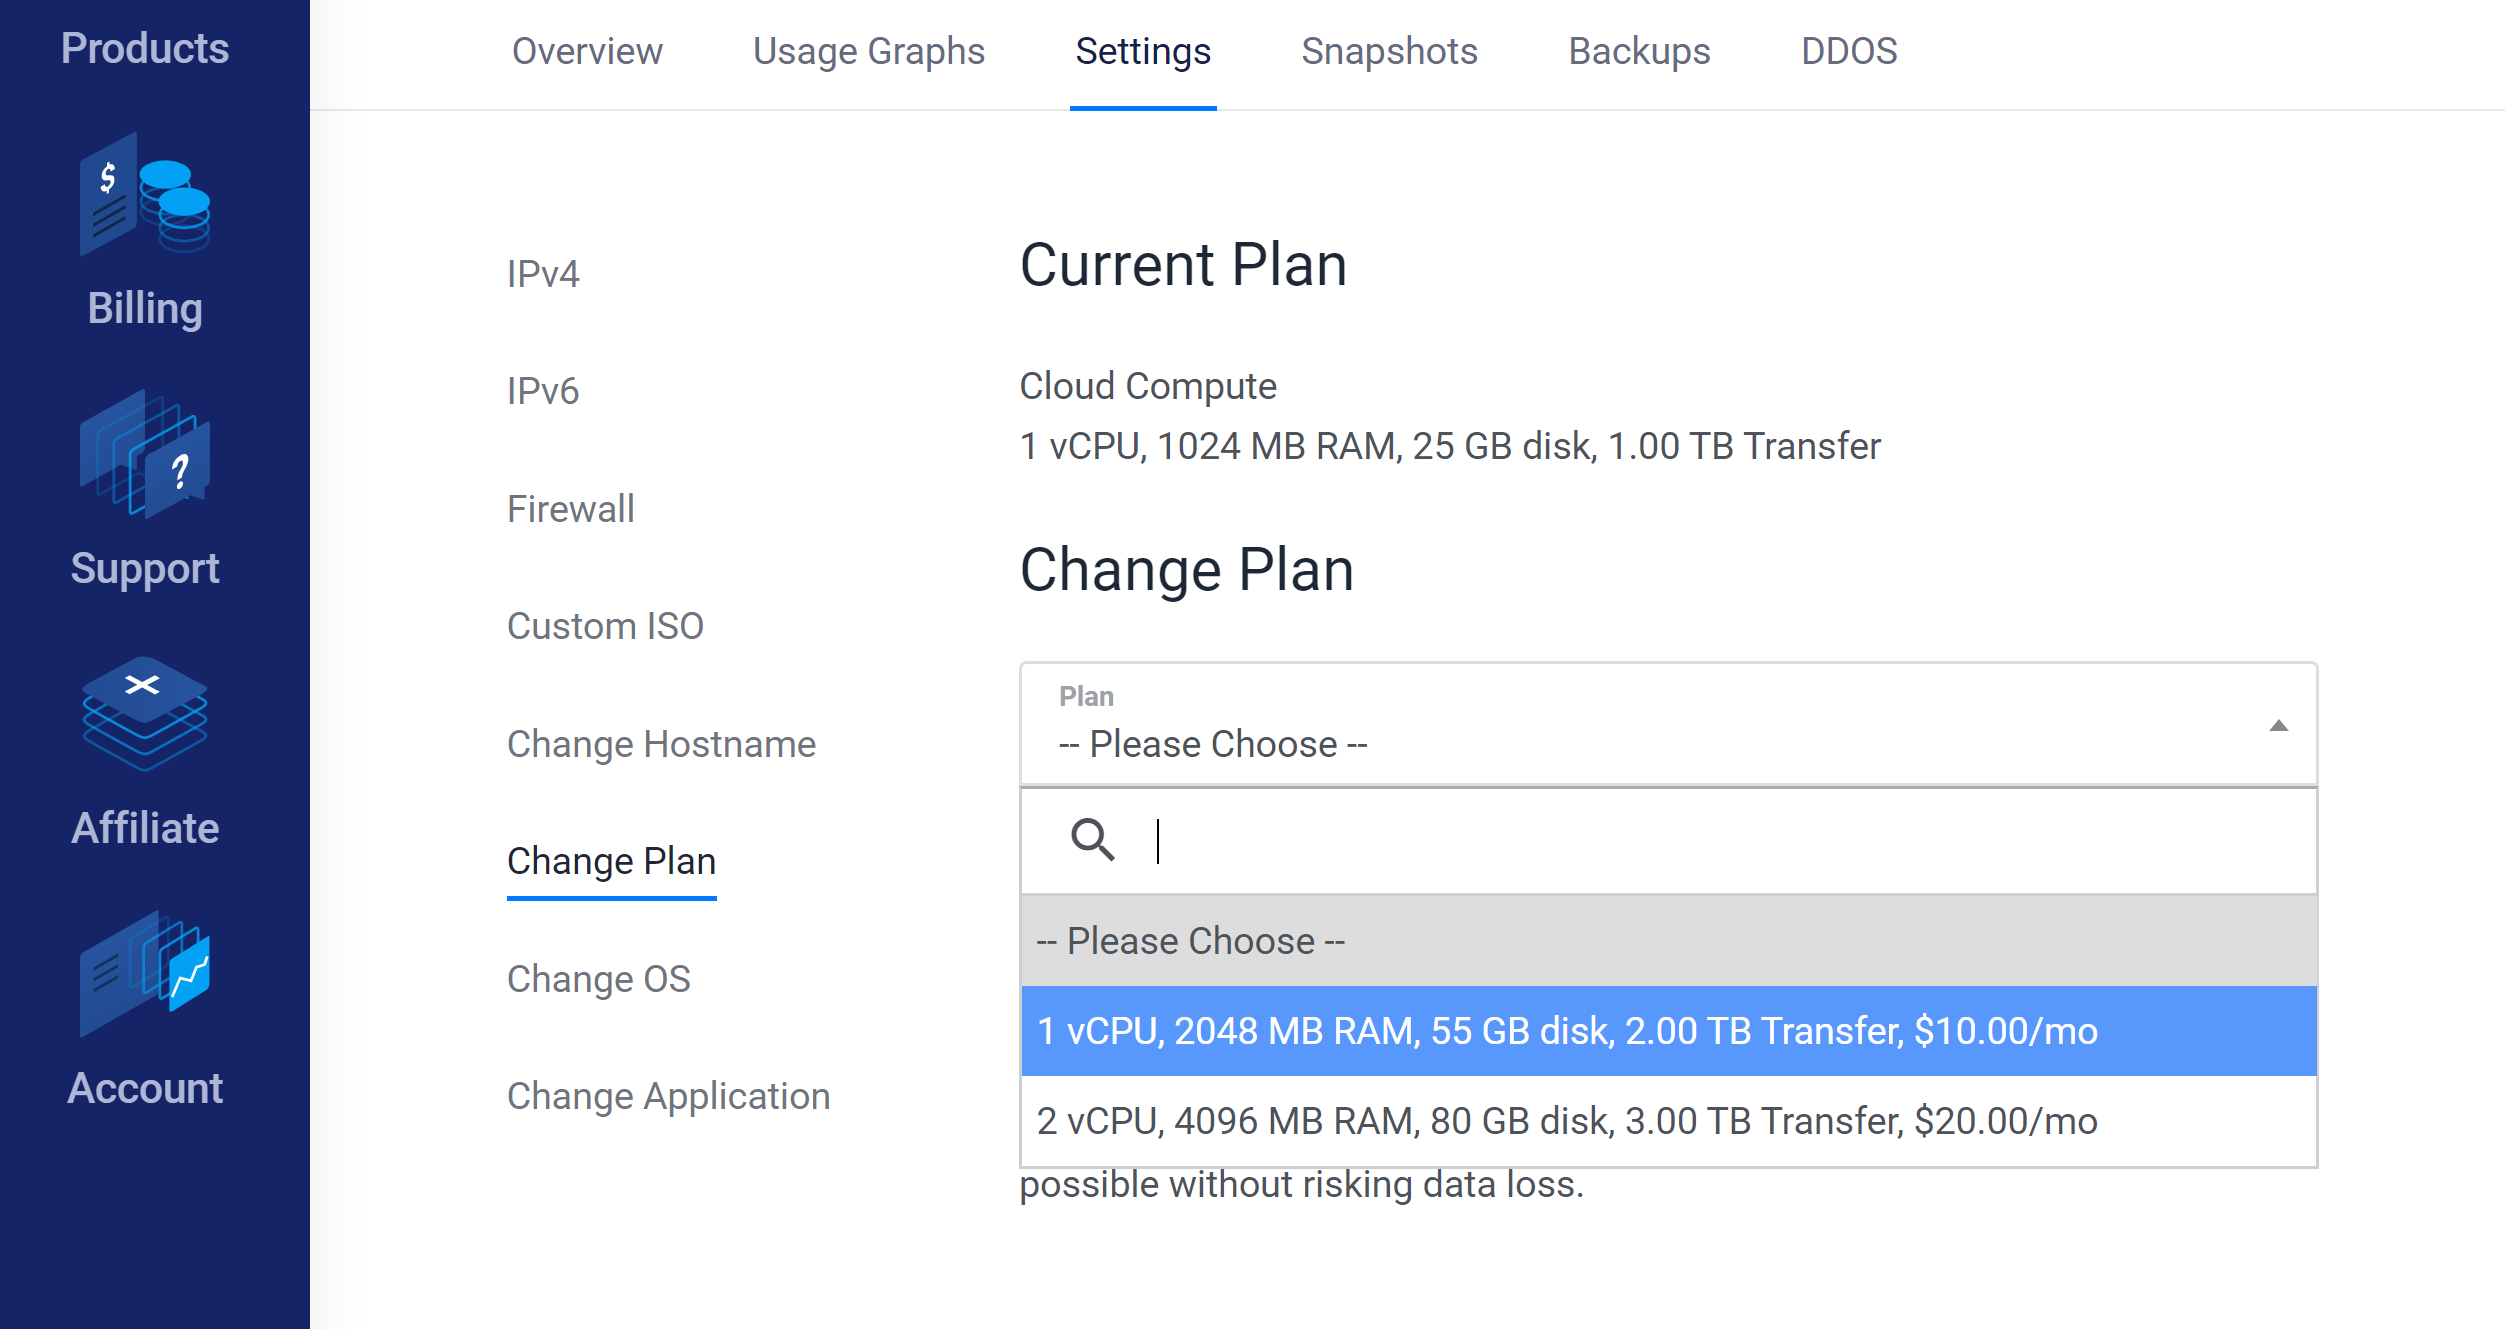
Select the plan you wish to scale to from the dropdown. Be sure that the next size up at your datacentre is the correct one as some jumps can be a significant price increase. This cannot be reversed once resized:
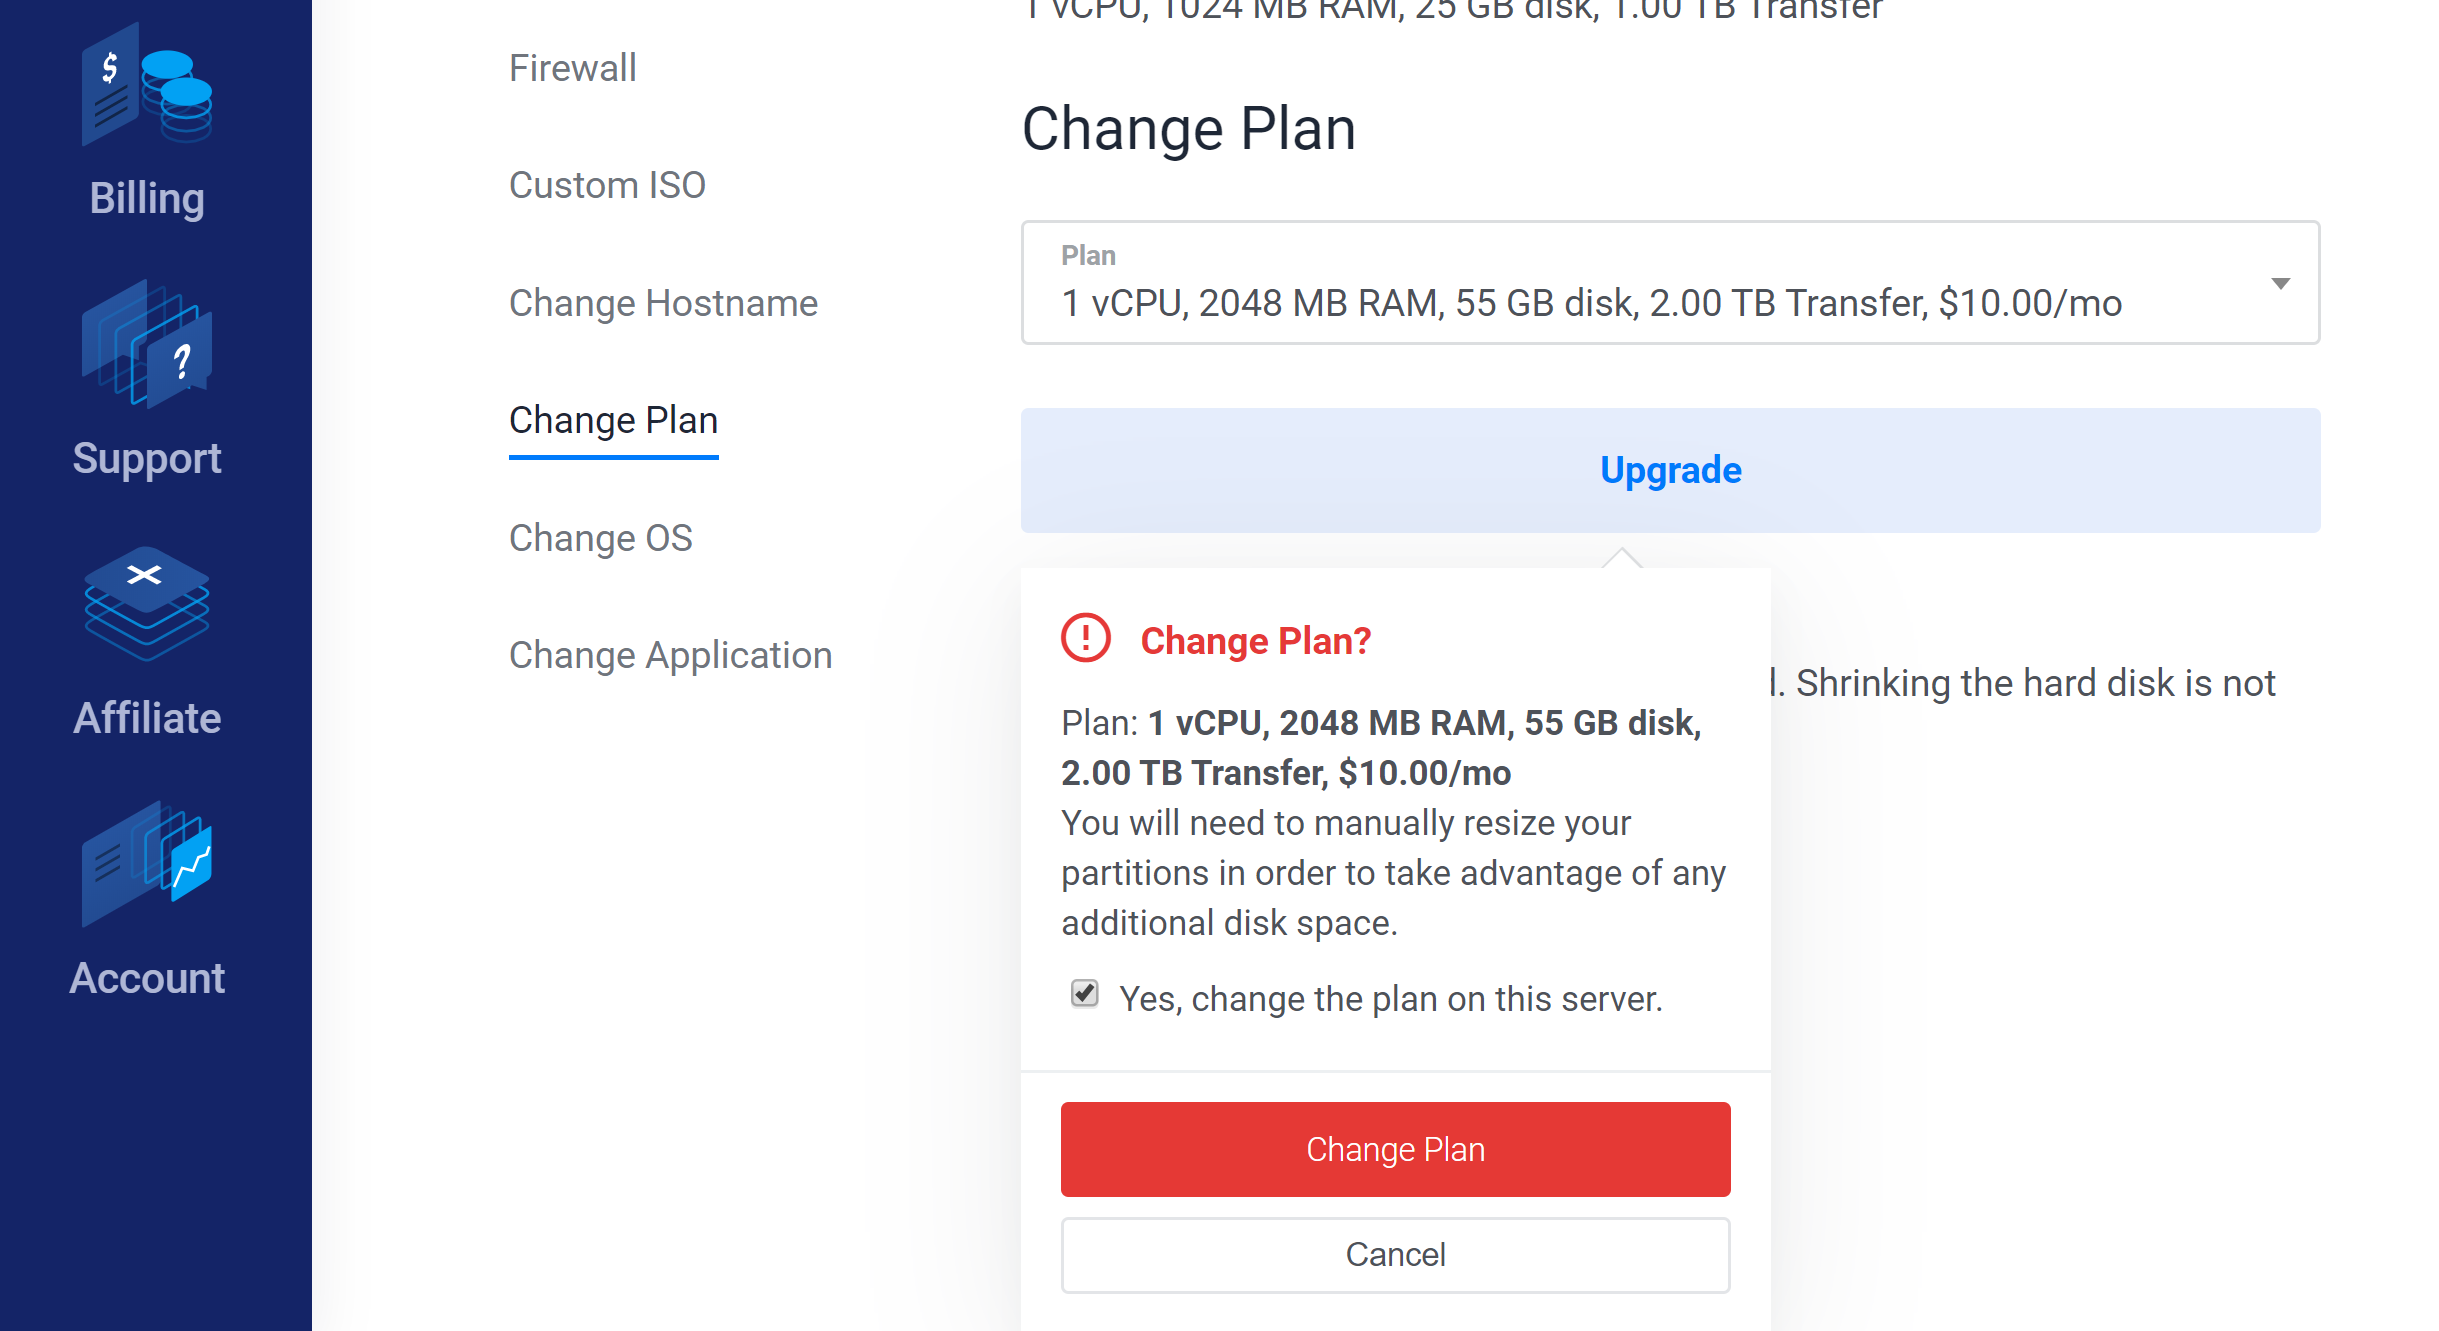
Confirm your plan, check the box and click “Change Plan“:
Vultr will now power down and automatically scale your server.

Once it’s complete, it will reboot (it’s always a good idea to confirm the reboot!) and GridPane will automatically pick up the changes.
Linode
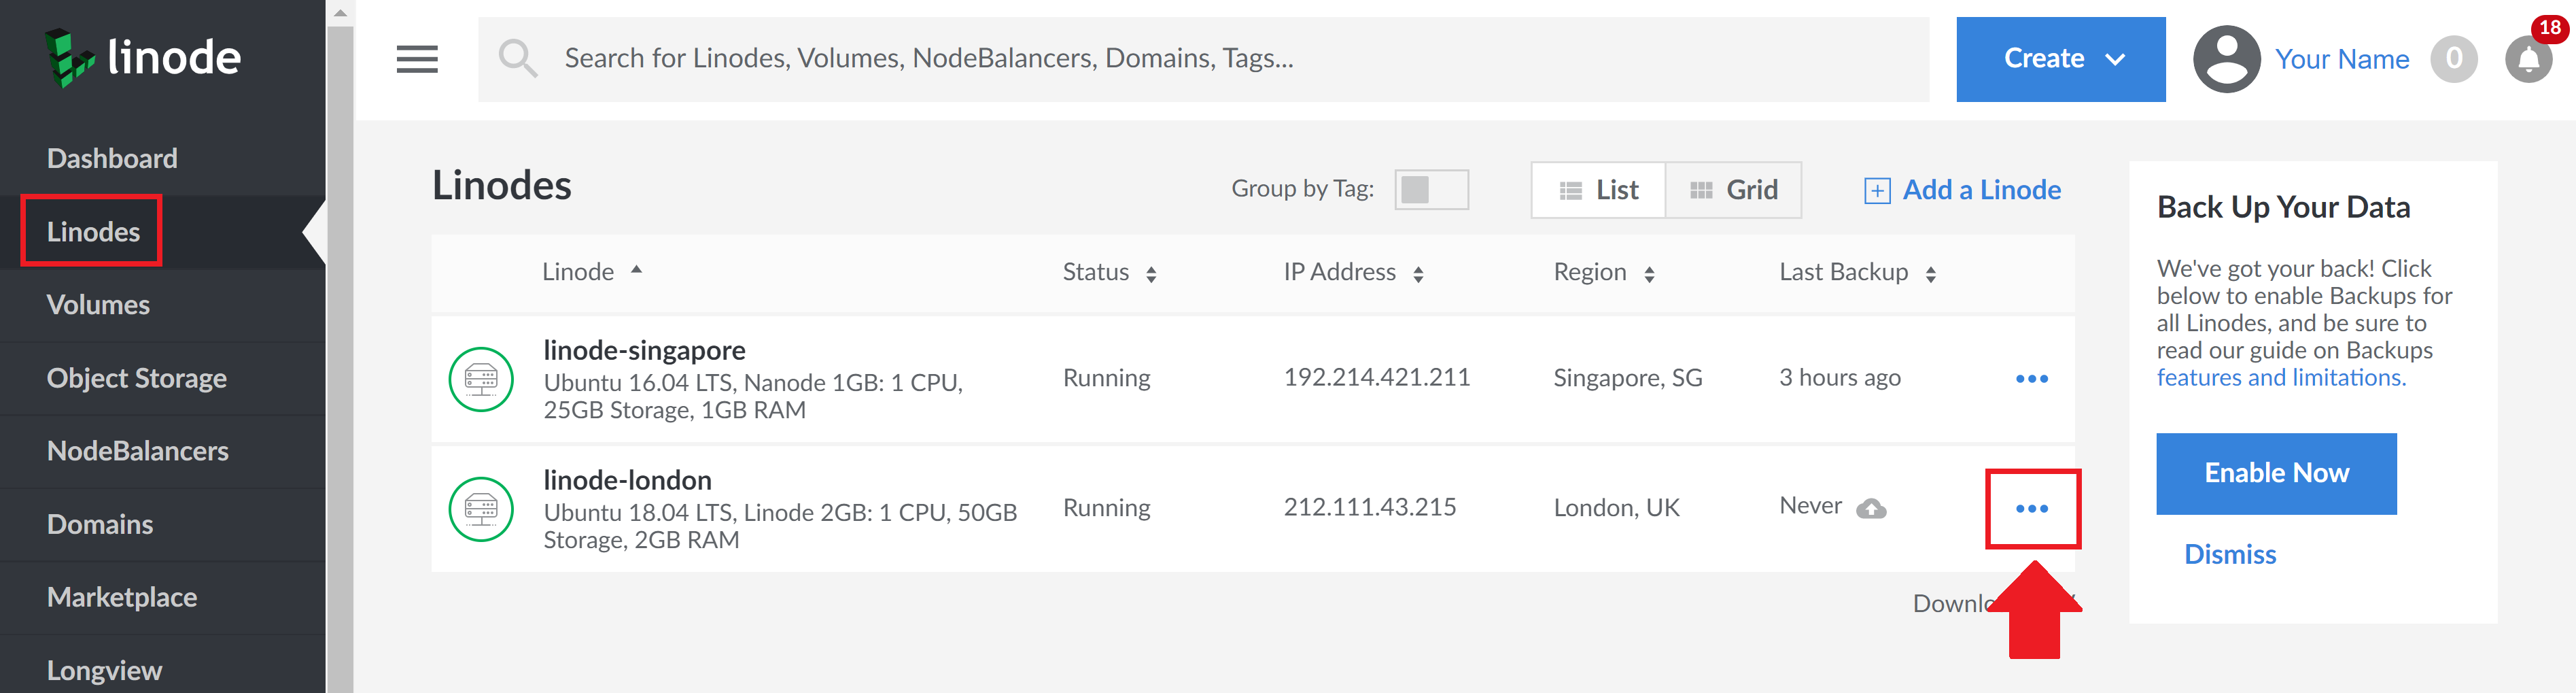
Log in to your Linode account and click through to “Linodes” in the left-hand sidebar.
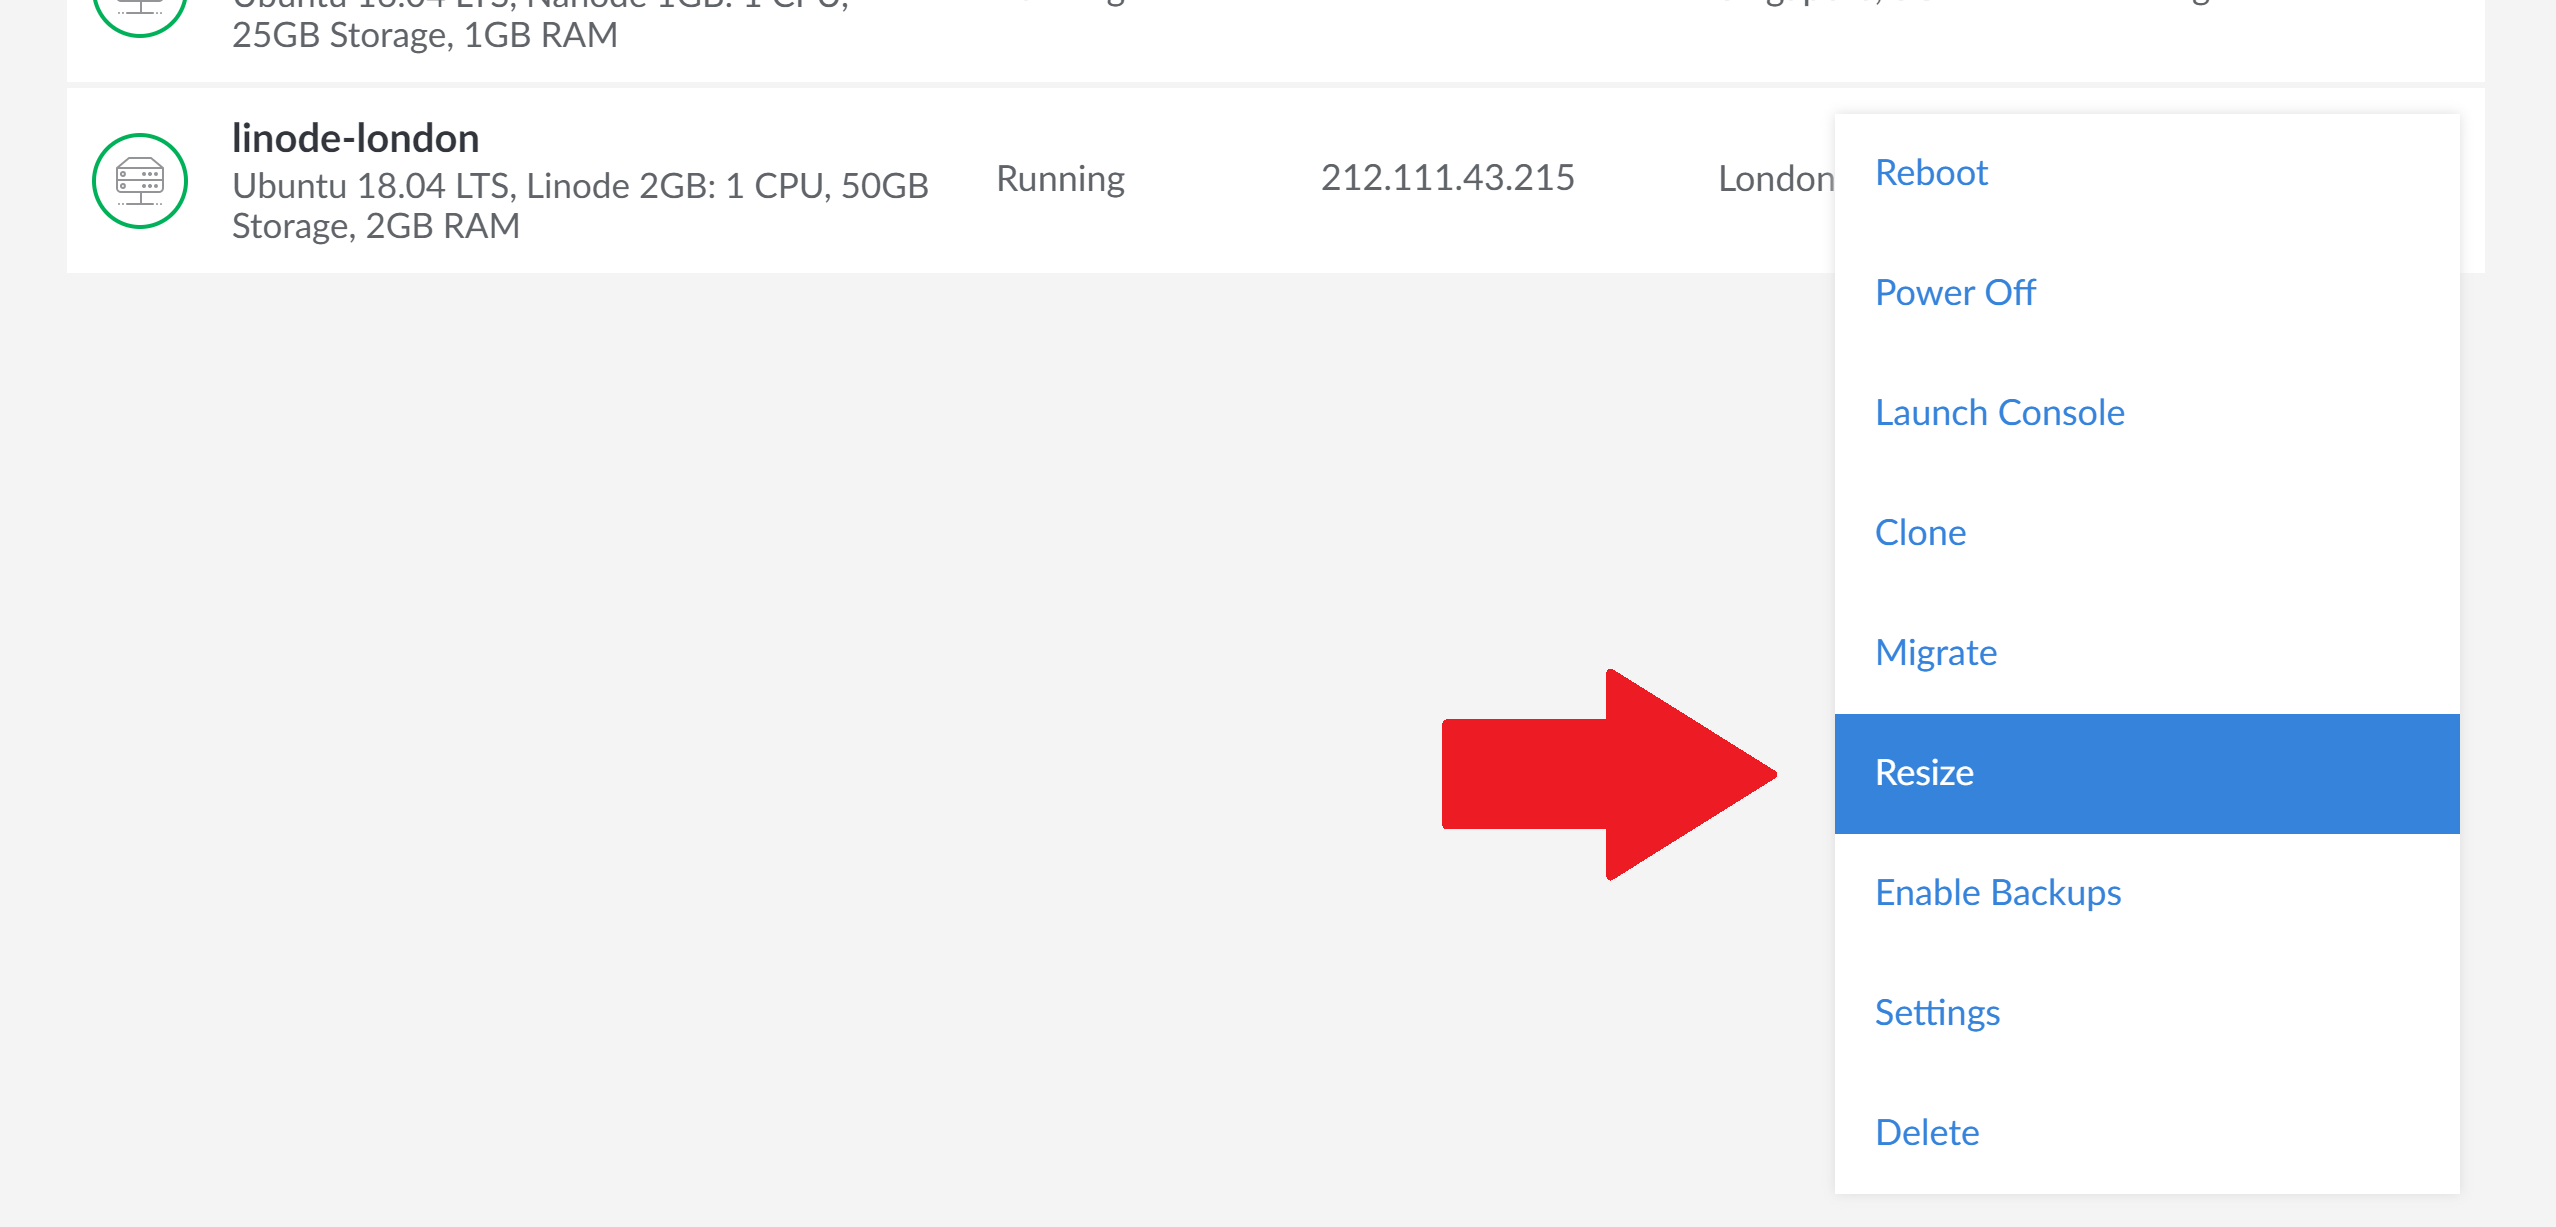
Next to each of your servers, there are 3 small blue dots. Click on these to drop down your VPS options
Select “Resize” from the dropdown:
Here you can choose the plan you wish to resize to:
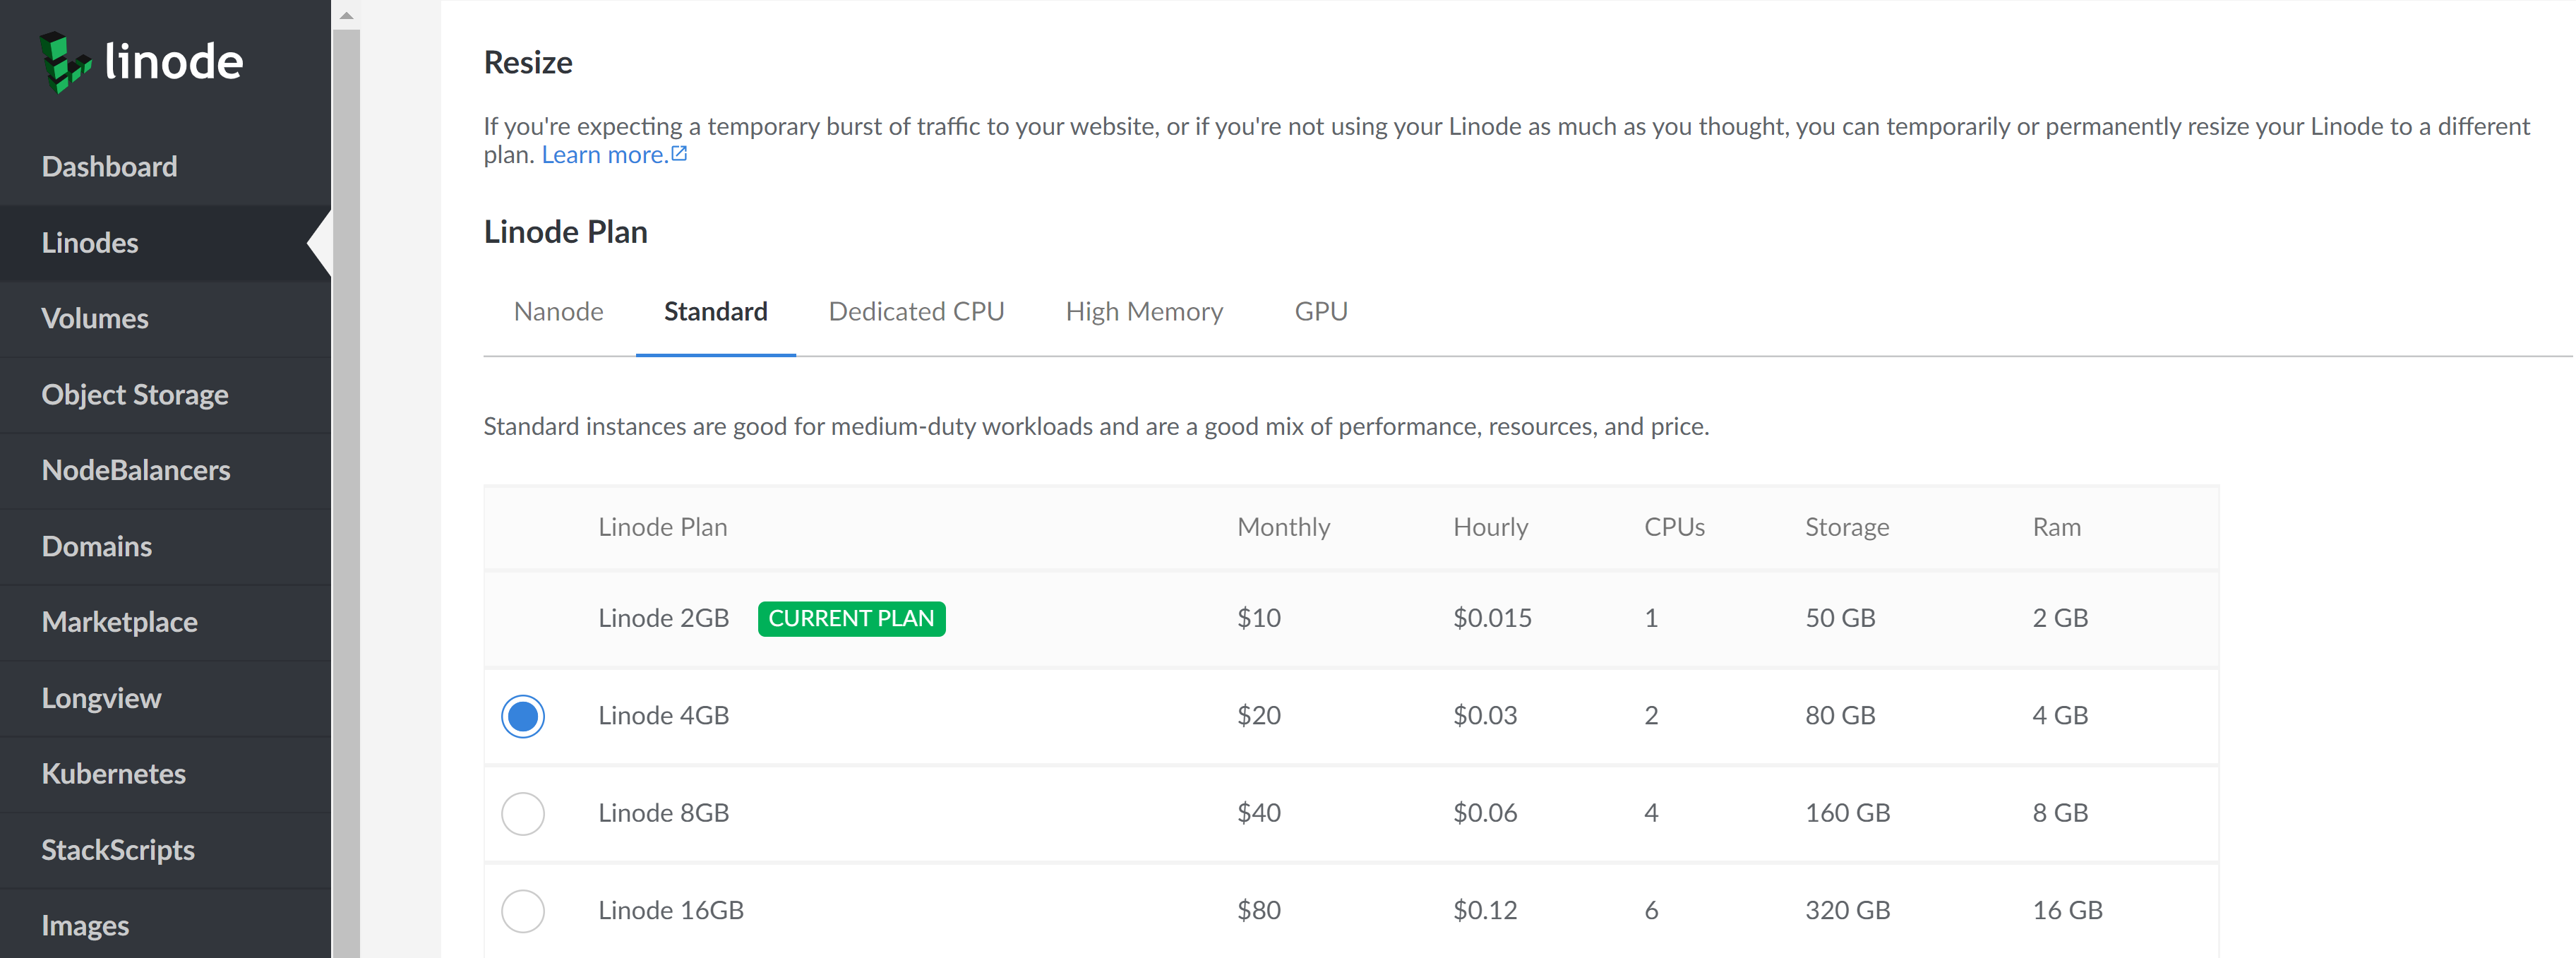
Scroll down to the bottom and click the Resize button:

Confirm:
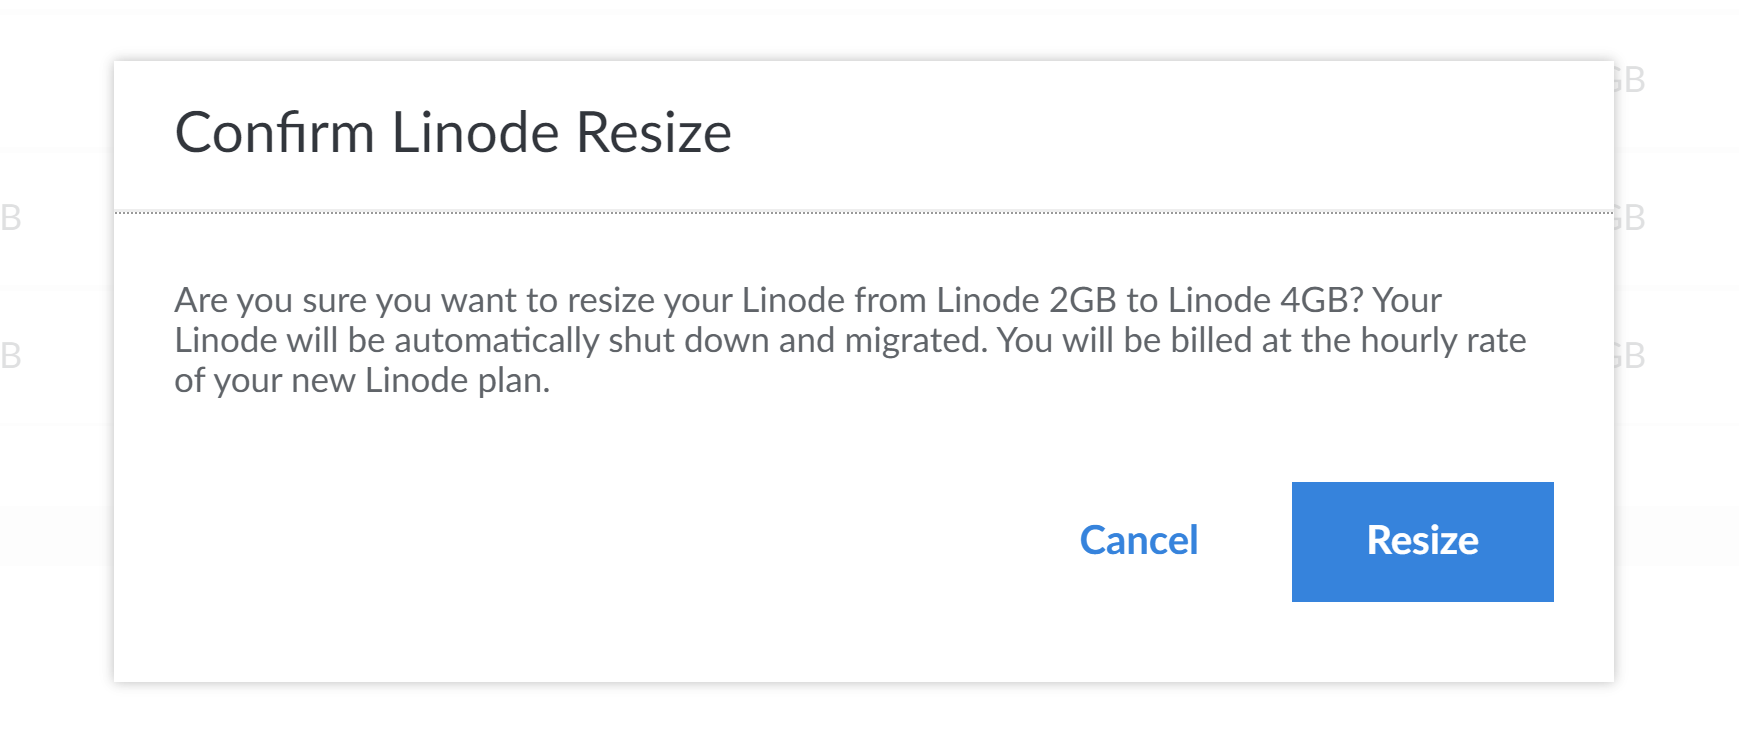
Linode will now automatically shut down and scale up your server. Once completed it will reboot, and GridPane will automatically pick up the changes (it’s always a good idea to confirm the server has rebooted though!).

You can also check out Linode’s guide on resizing a Linode (VPS) here:
https://www.linode.com/docs/platform/disk-images/resizing-a-linode/
UpCloud
Scaling up a server at UpCloud is a 2 step process:
- First, you need to scale it up inside your UpCloud account
- If you don’t plan to scale back down again, then you need to connect to your server and increase the disk space on the command line
It’s all straightforward and below details both steps.
Step 1 Upsize the Server
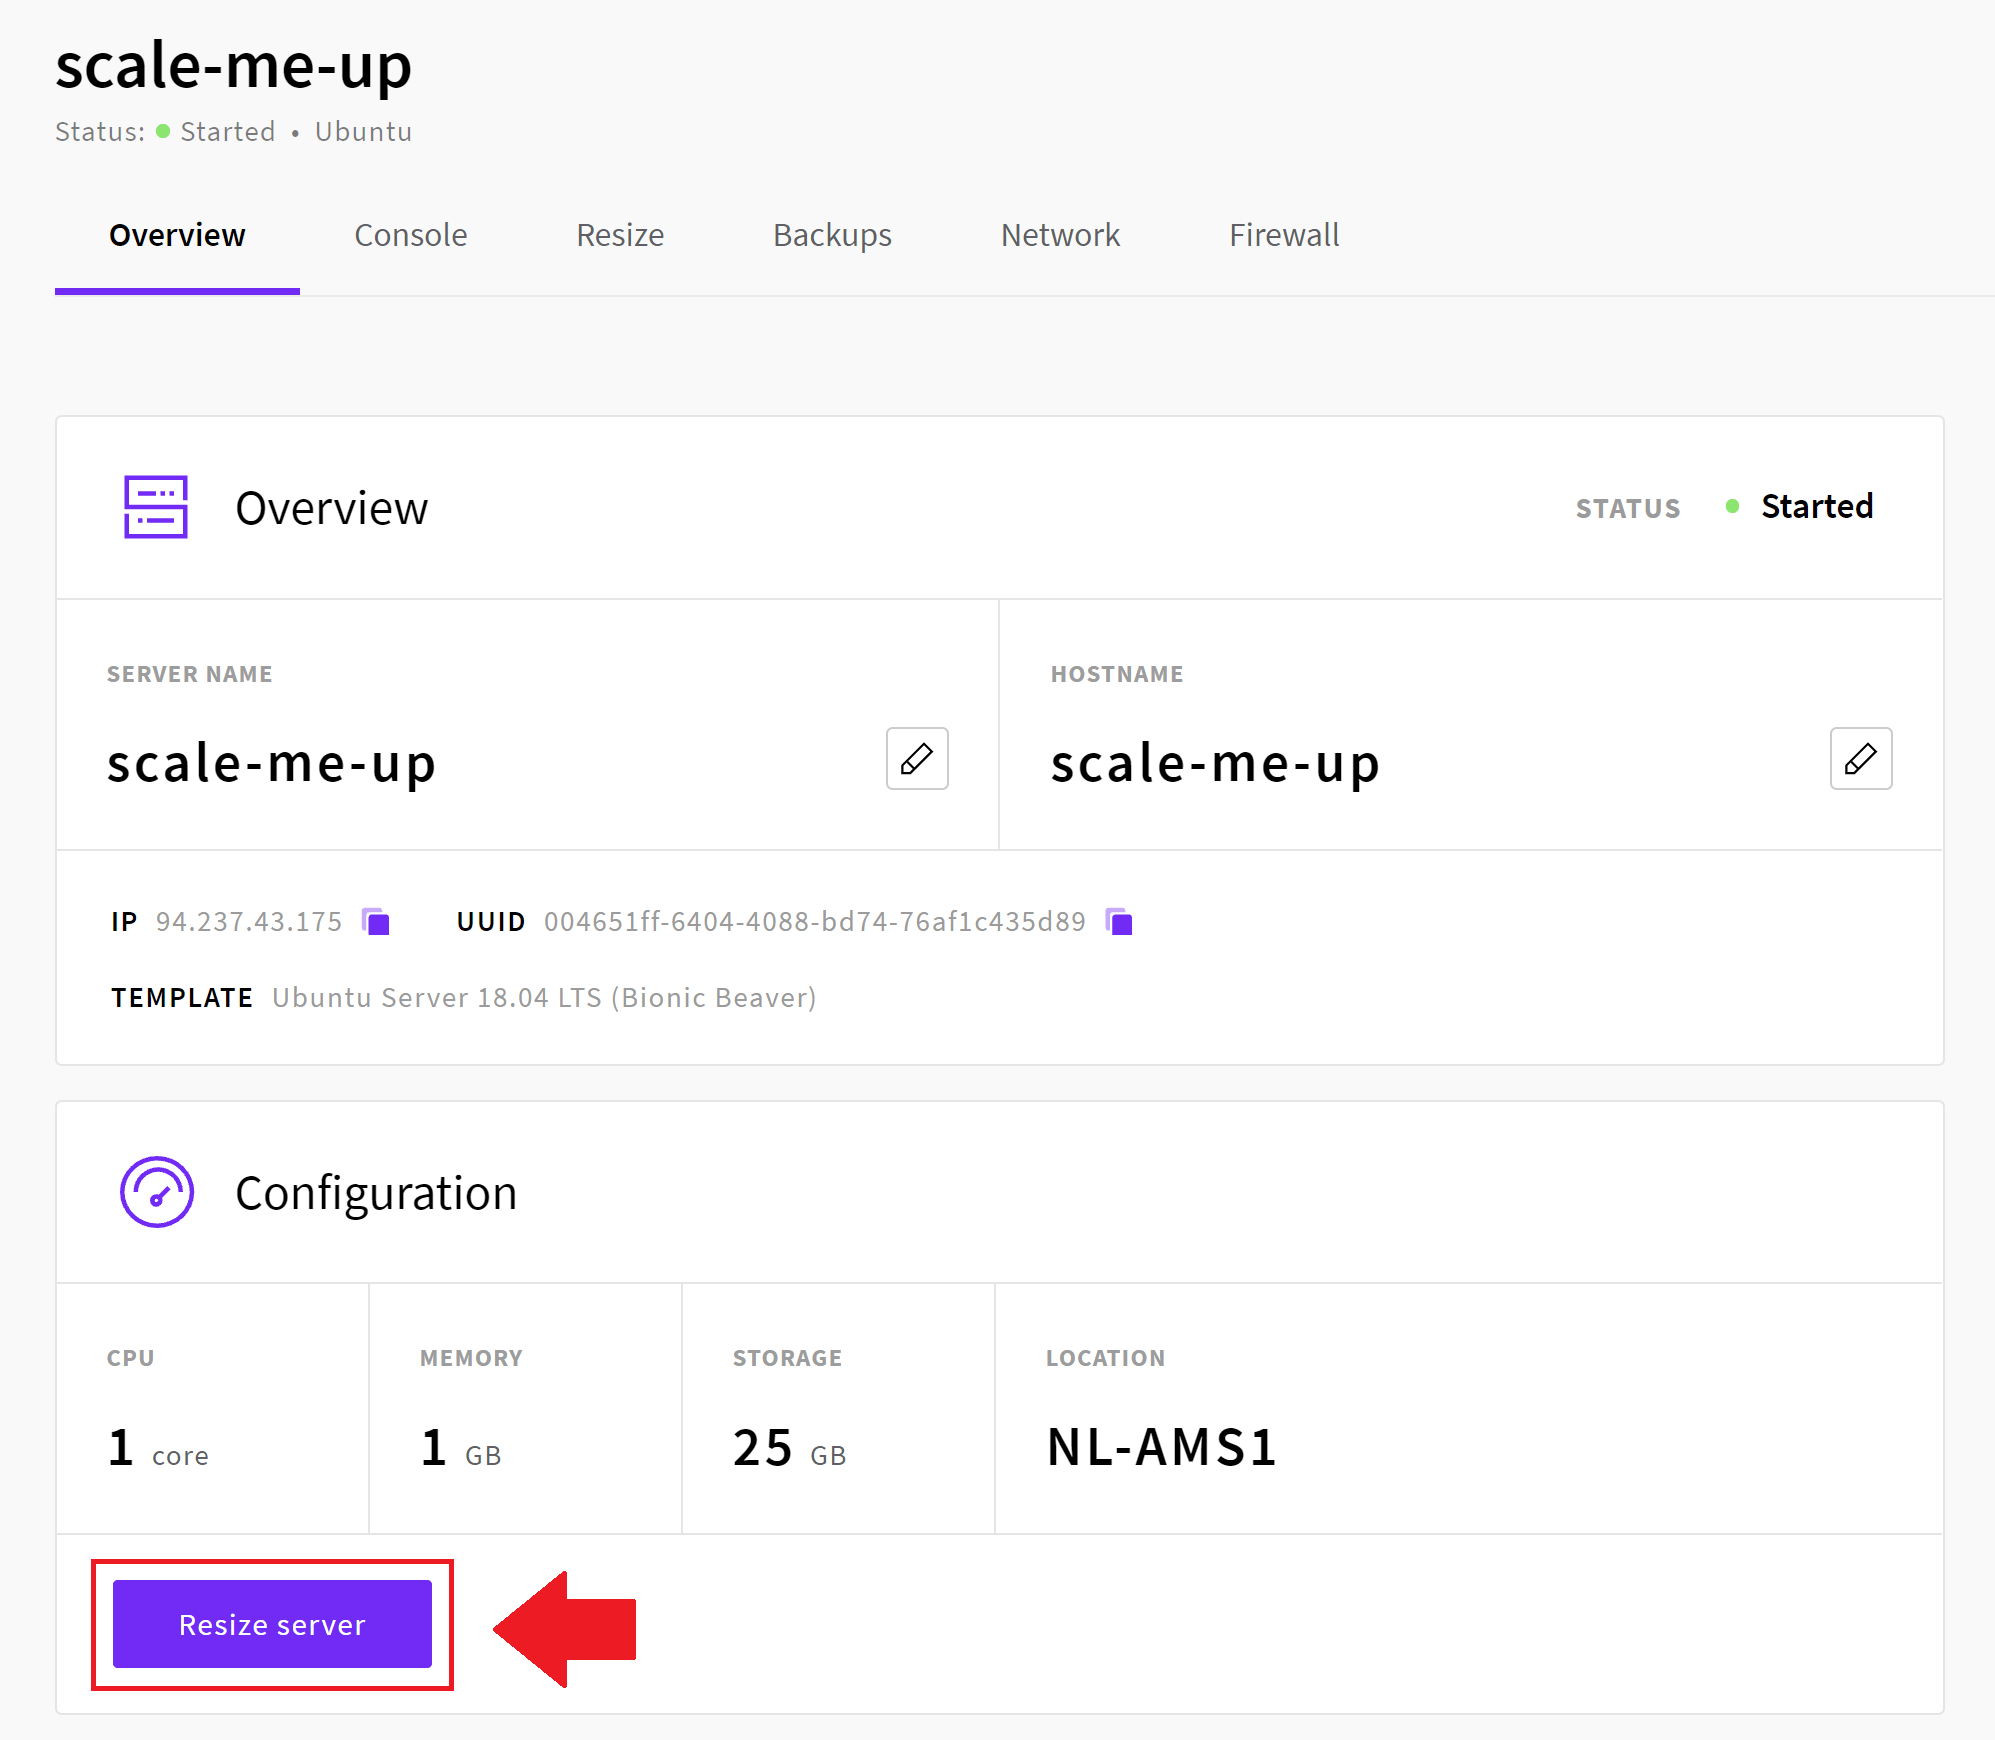
Login to your UpCloud account and click on the server you wish to resize:
This will open up the server configuration options, and here you’ll find a button that reads “Resize Server“:
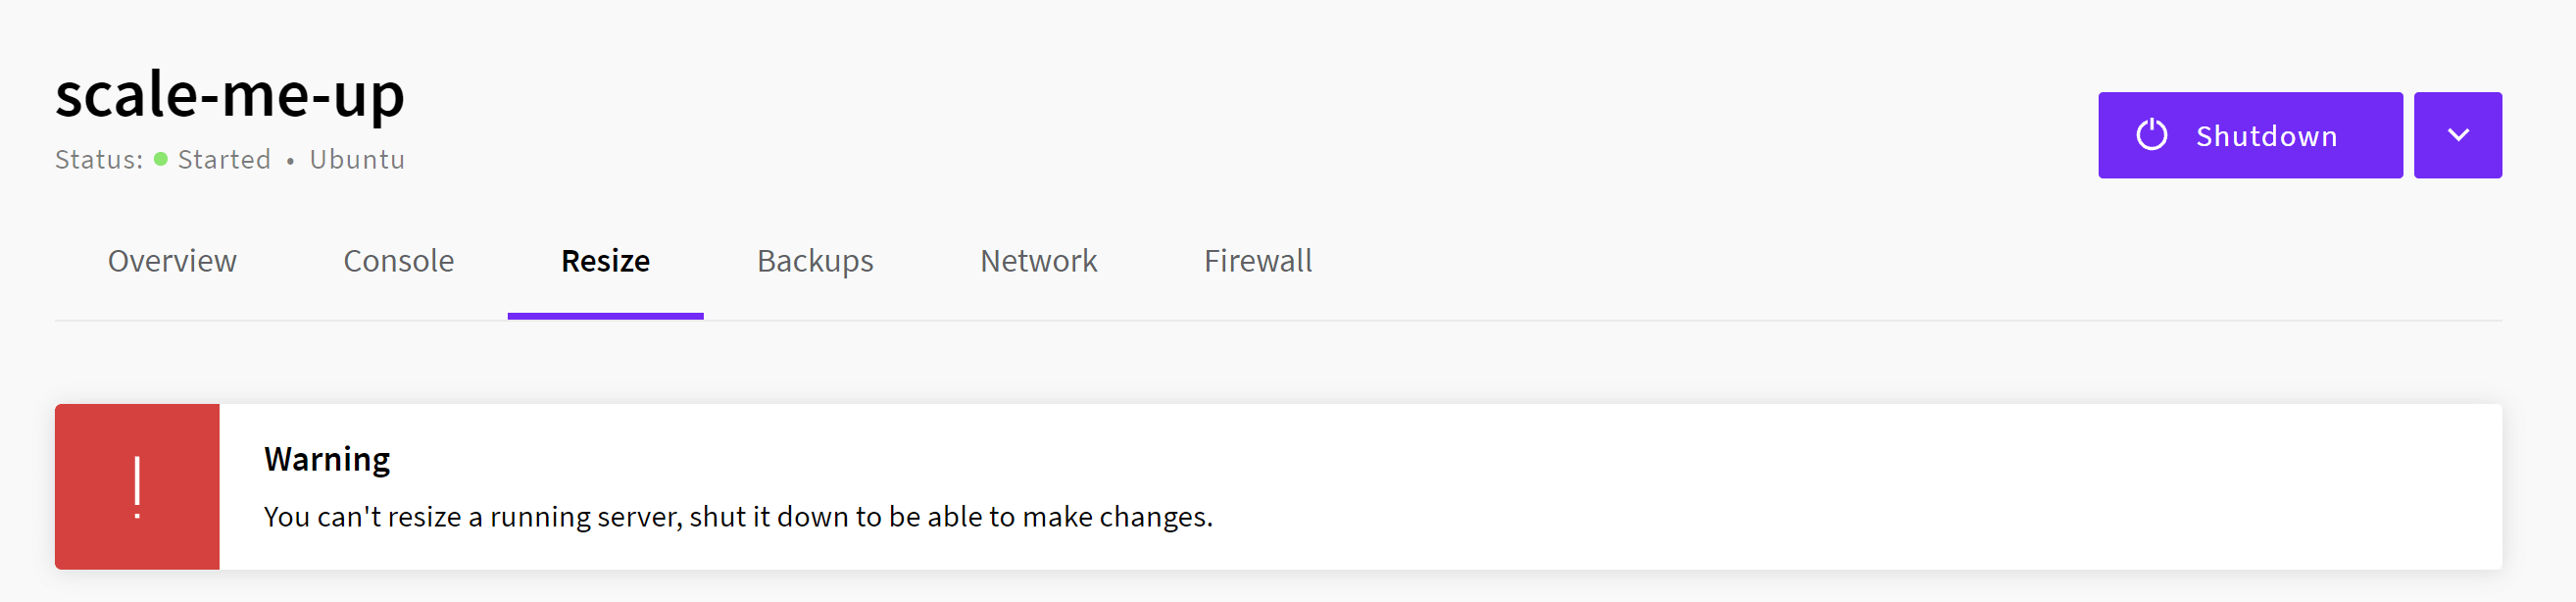
Click the button to view the available plans. Here you’ll see a notification that states you first need to shut down your server before you can resize – click this button:
Now you can select the server plan you wish to scale up to:
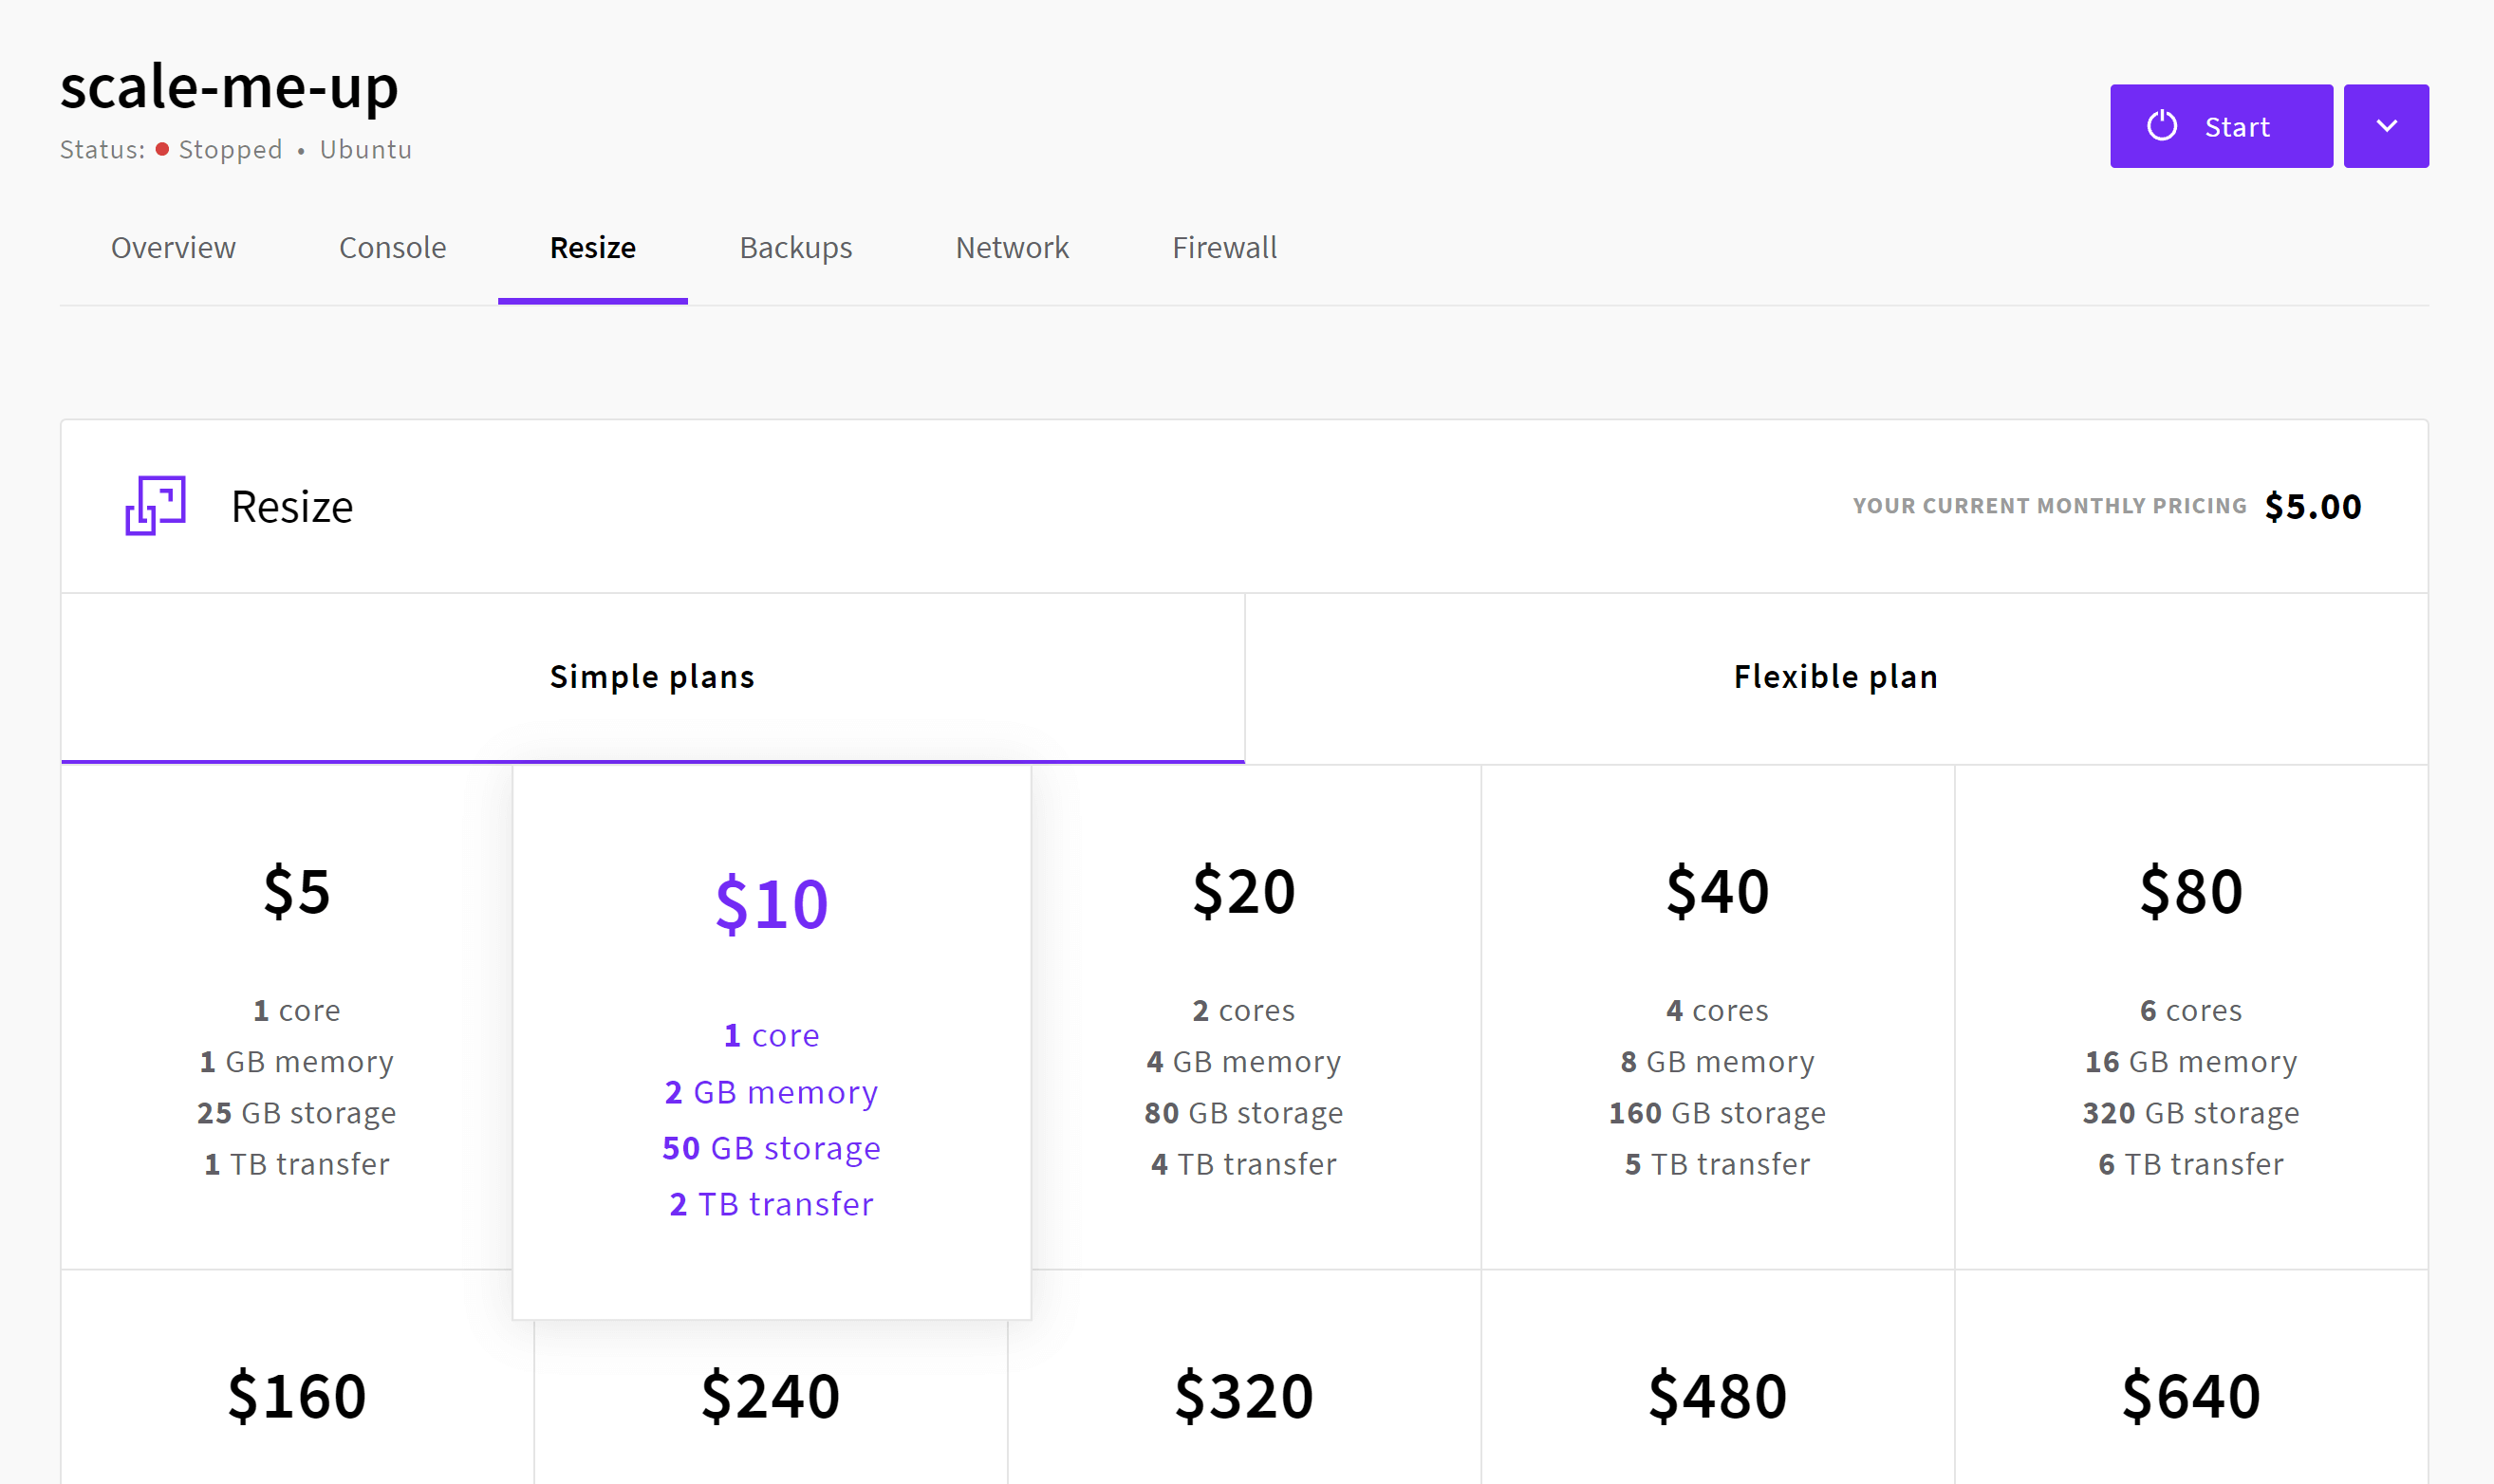
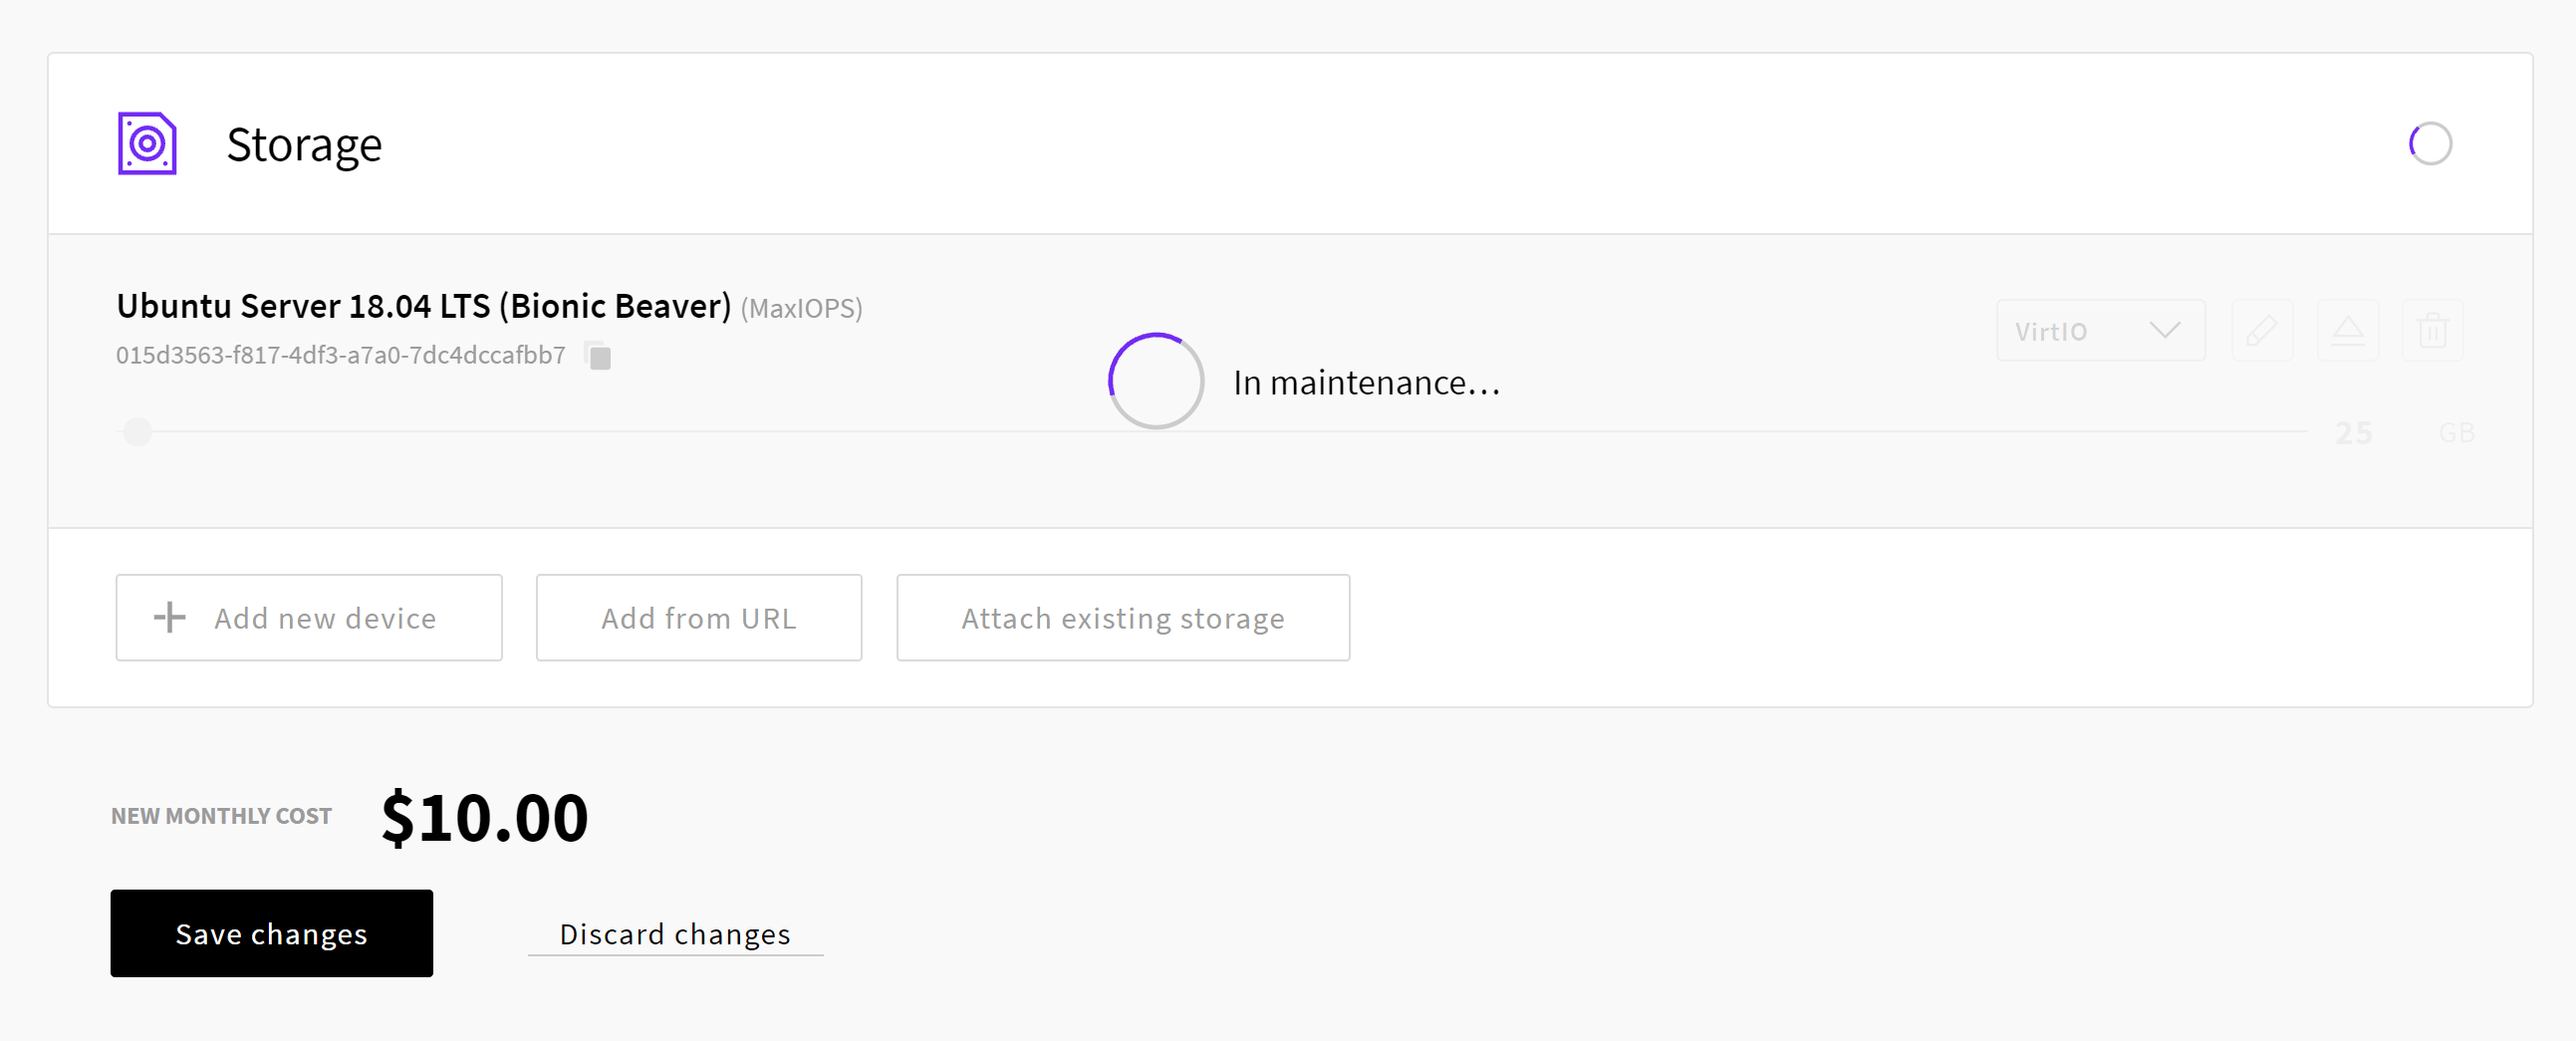
Then, if applicable, use the sliding bar section below to increase the disk space (you can type the exact number as outlined):
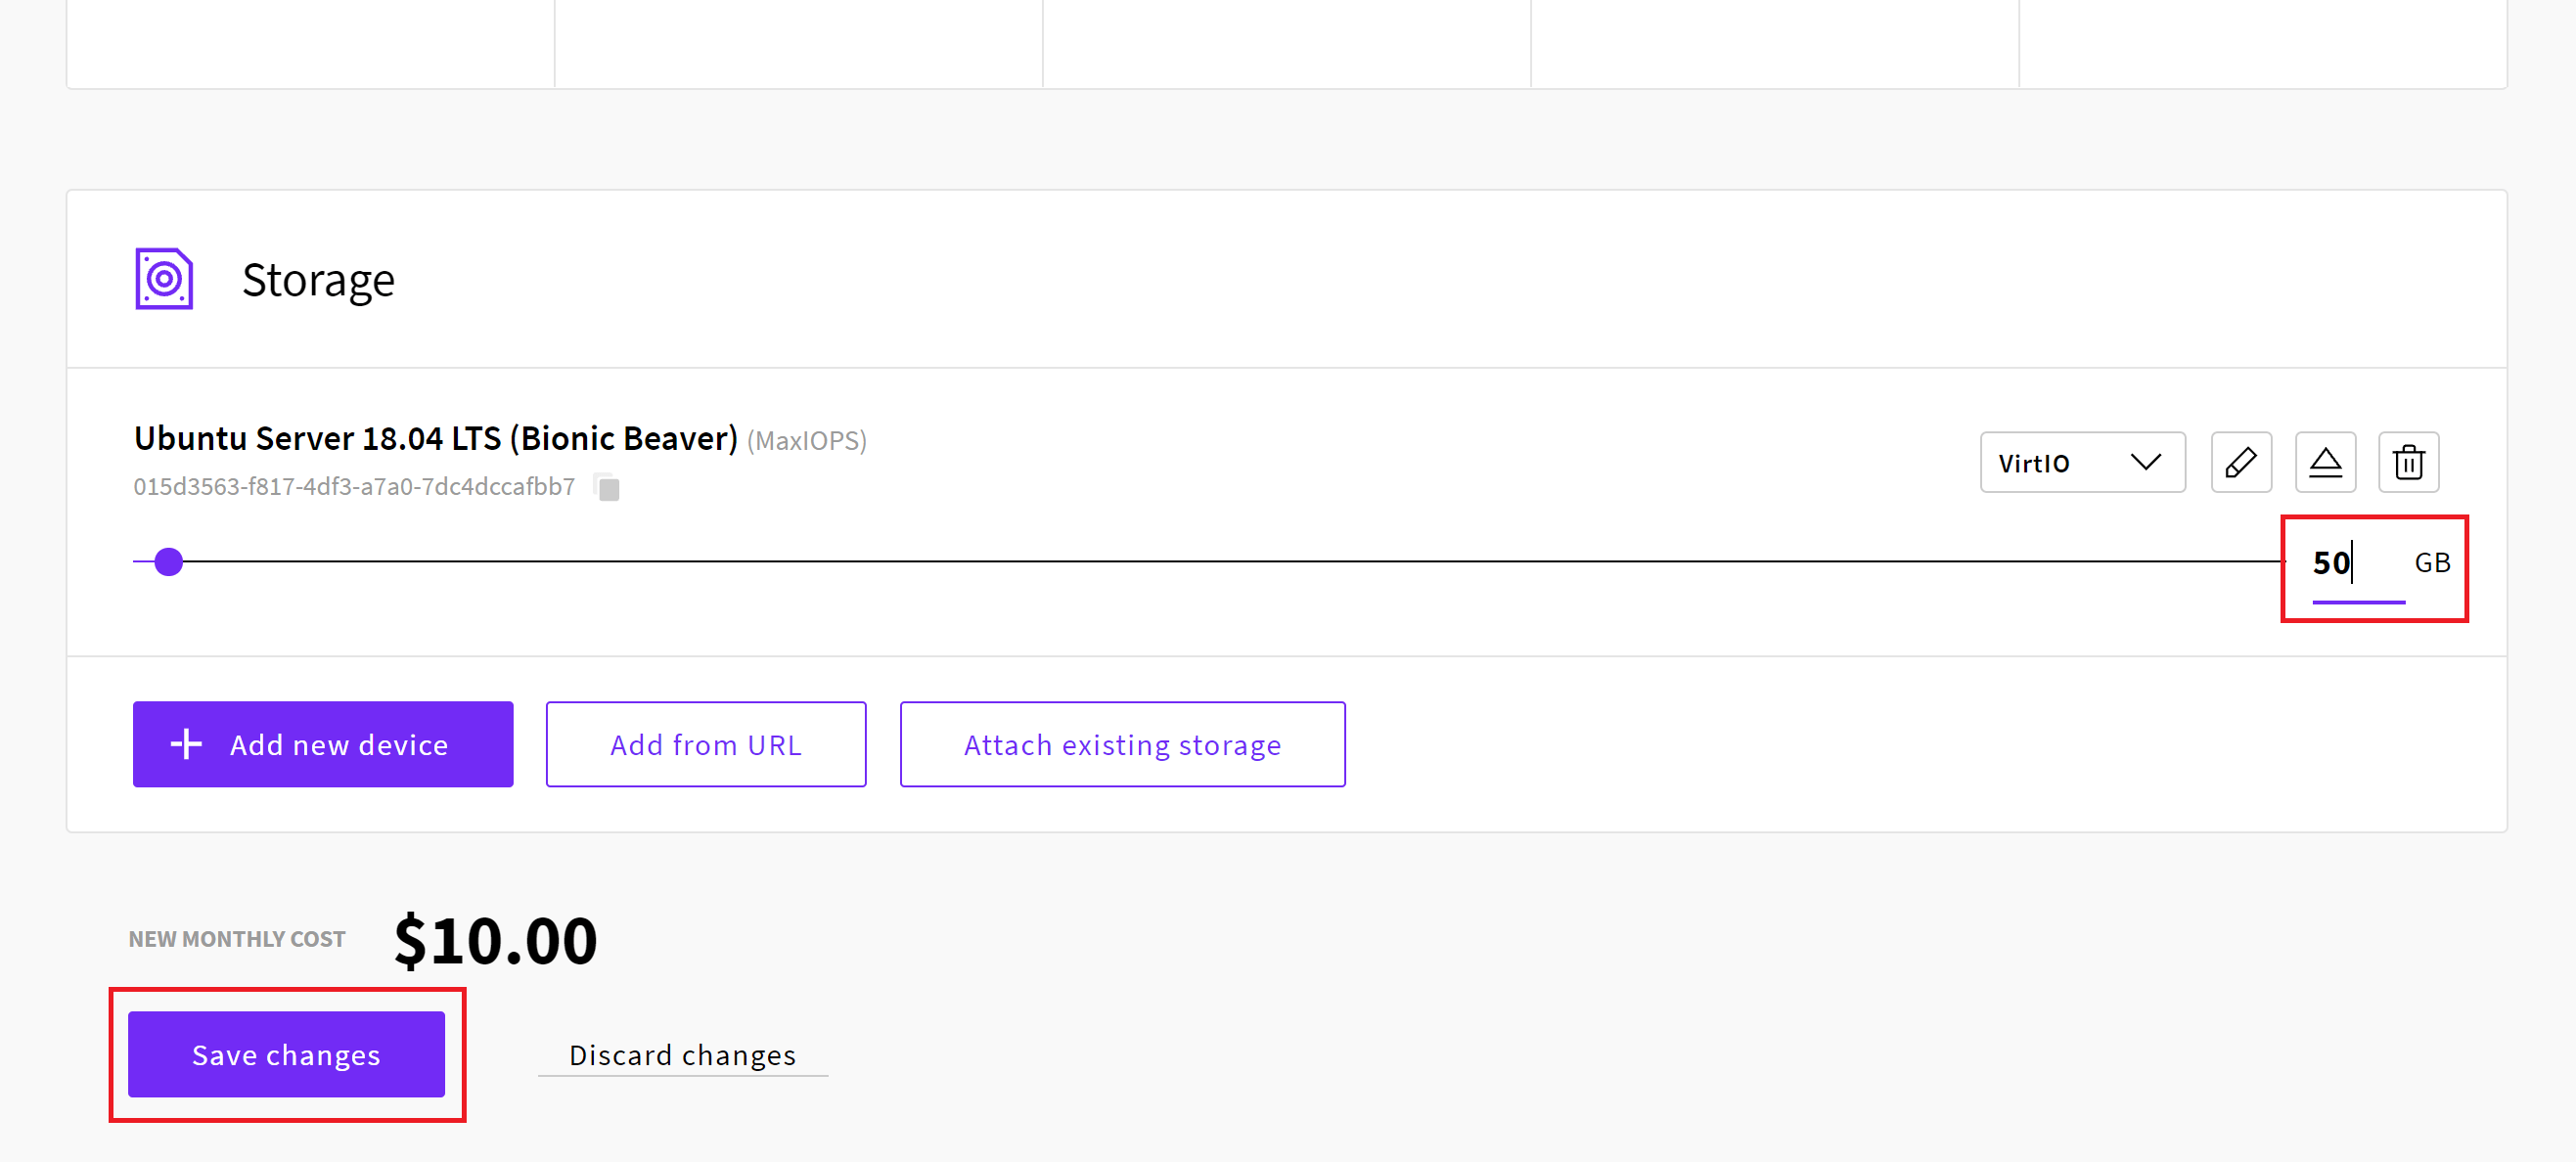
Click the “Save Changes” button to begin the resize.
This will provide a visual “In Maintenance” message as the server resize occurs:
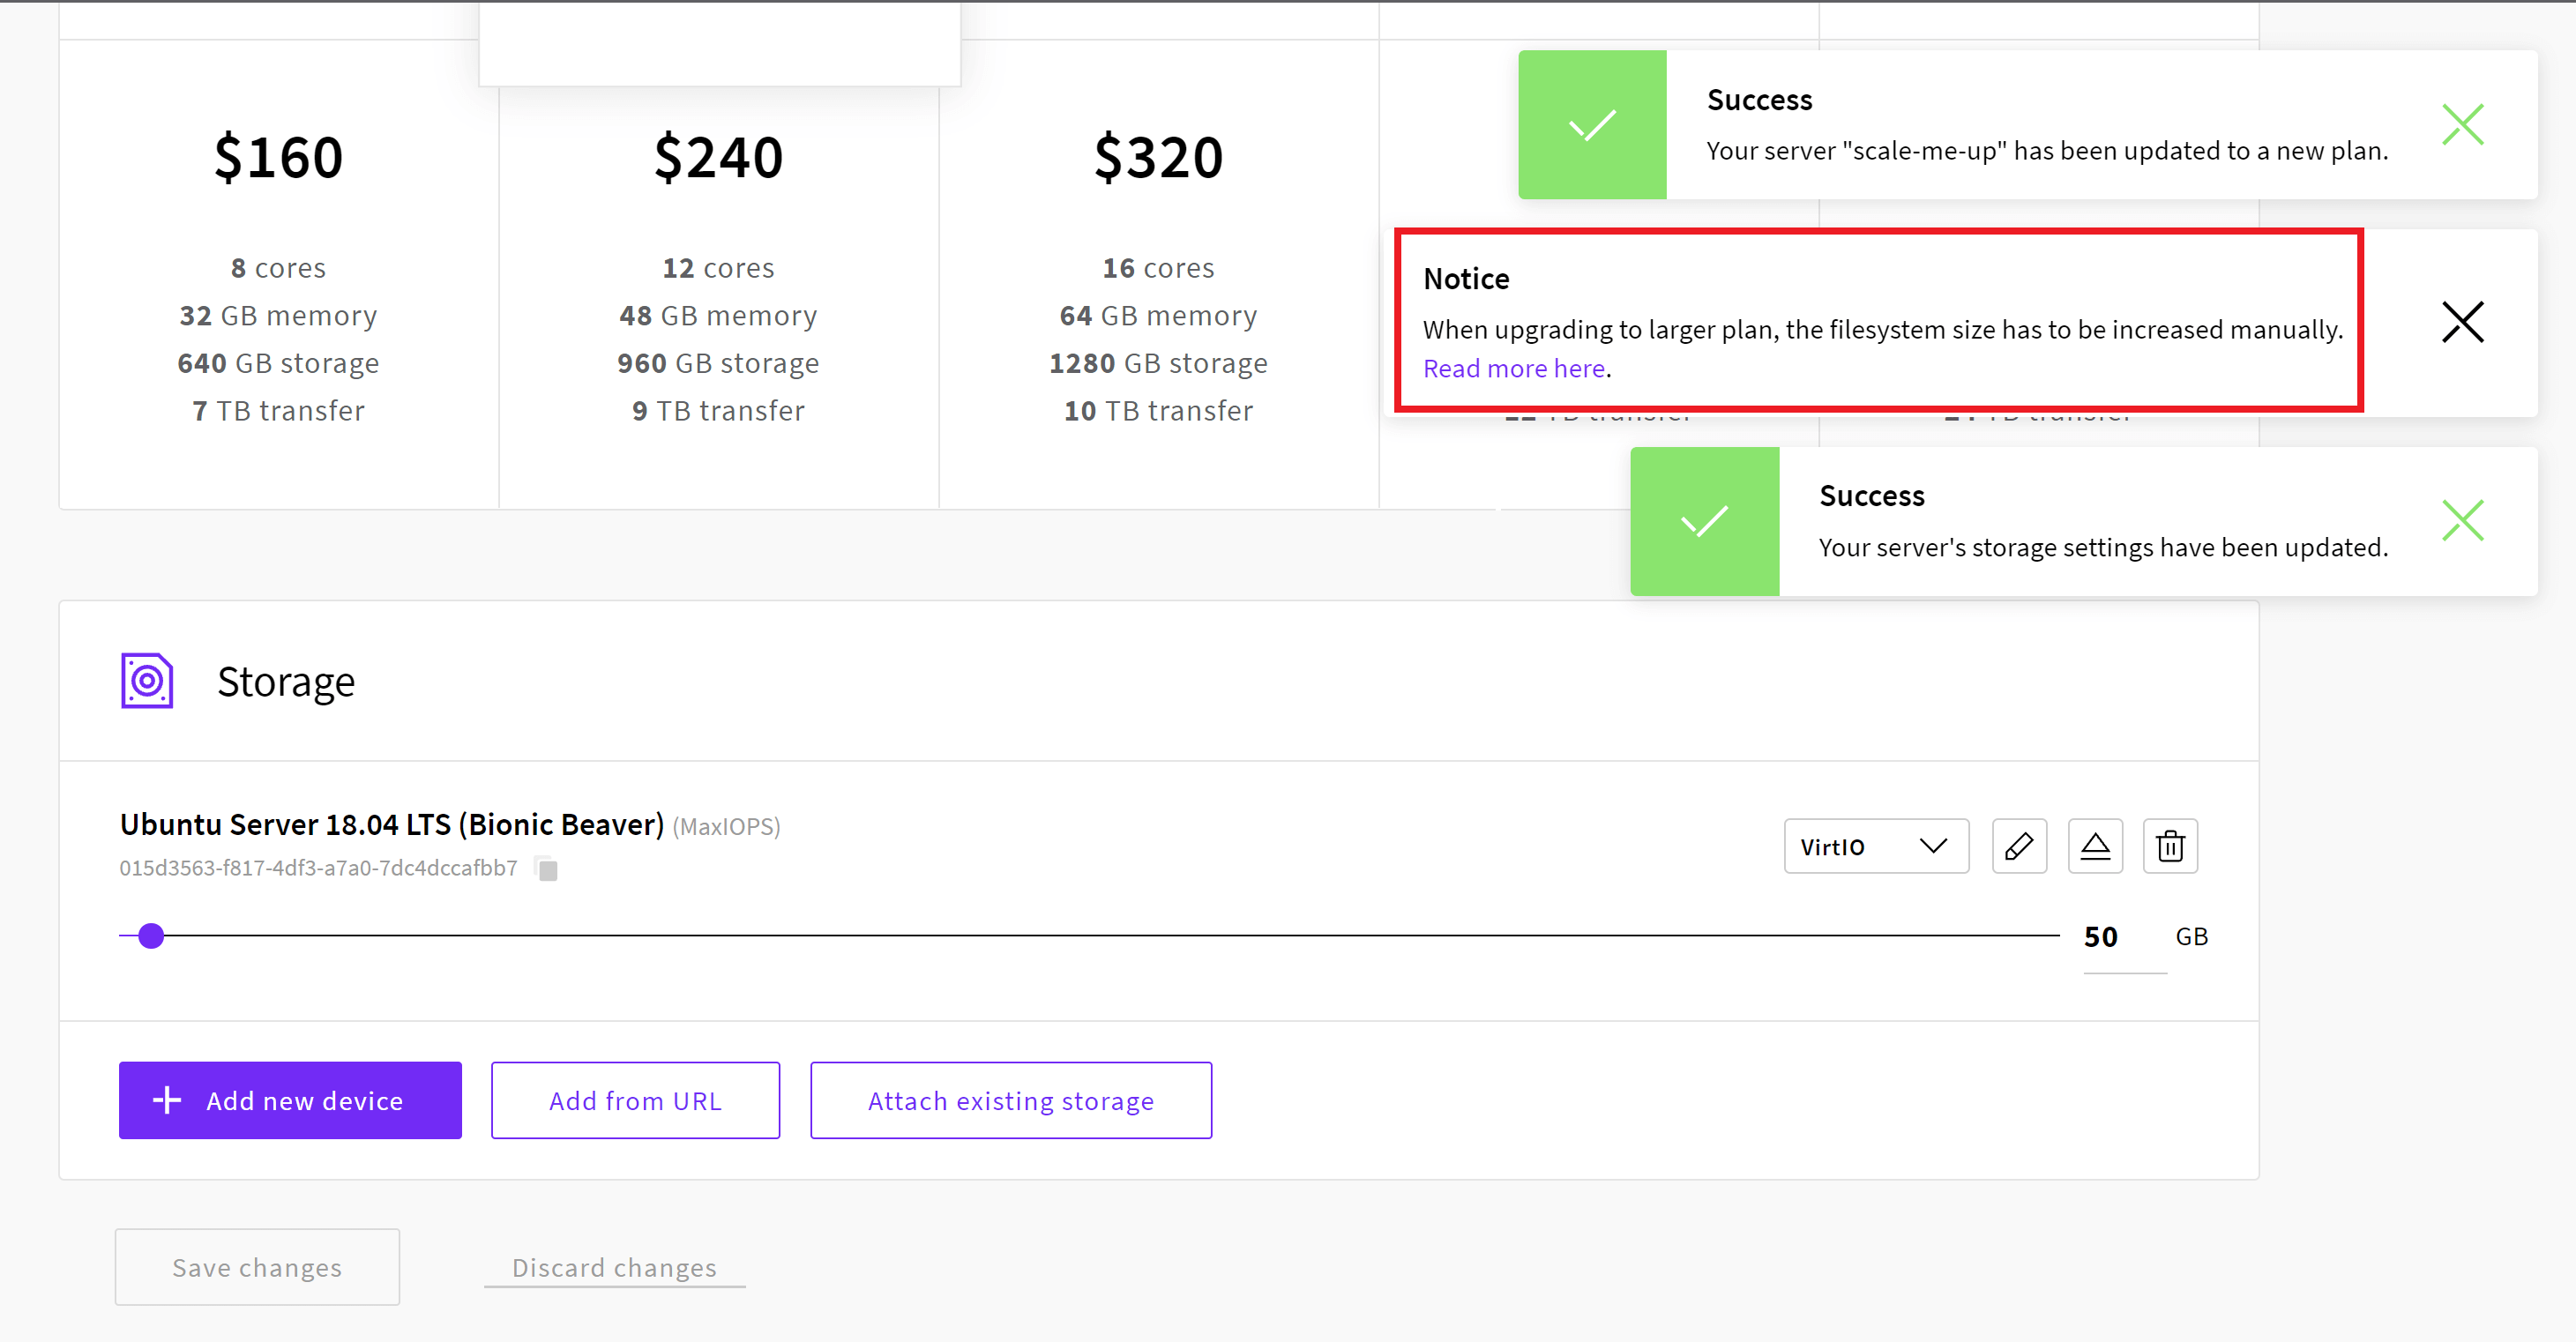
Once complete, UpCloud will then send through success notifications (note the disk space resize message):
Now you can scroll back to the top of the page and click the “Start” button to set the server live again.
Step 2. Resize the disk space on the server
UpCloud has their own detailed guide for increasing disk space. First, connect to your server via SSH, and then follow their instructions here: