Introduction
In this article, we’ll be walking through all the steps to get started with UpCloud and GridPane. We’ll first take a look at getting things set up in your UpCloud account, and then we’ll provision an UpCloud VPS directly from within our GridPane dashboard using the UpCloud API.
IMPORTANT
UpCloud have an IPv4 limit on accounts, which means that after creating your first 15 servers, you may need to get in touch to get this limit removed. The UpCloud team will able to do for you quickly and efficiently upon request.
Step 1. Create an UpCloud Account and Log In
Sometimes UpCloud has free credit to go along with their free trial. You can usually find these offers easily through a quick Google search if you don’t already have an UpCloud account.
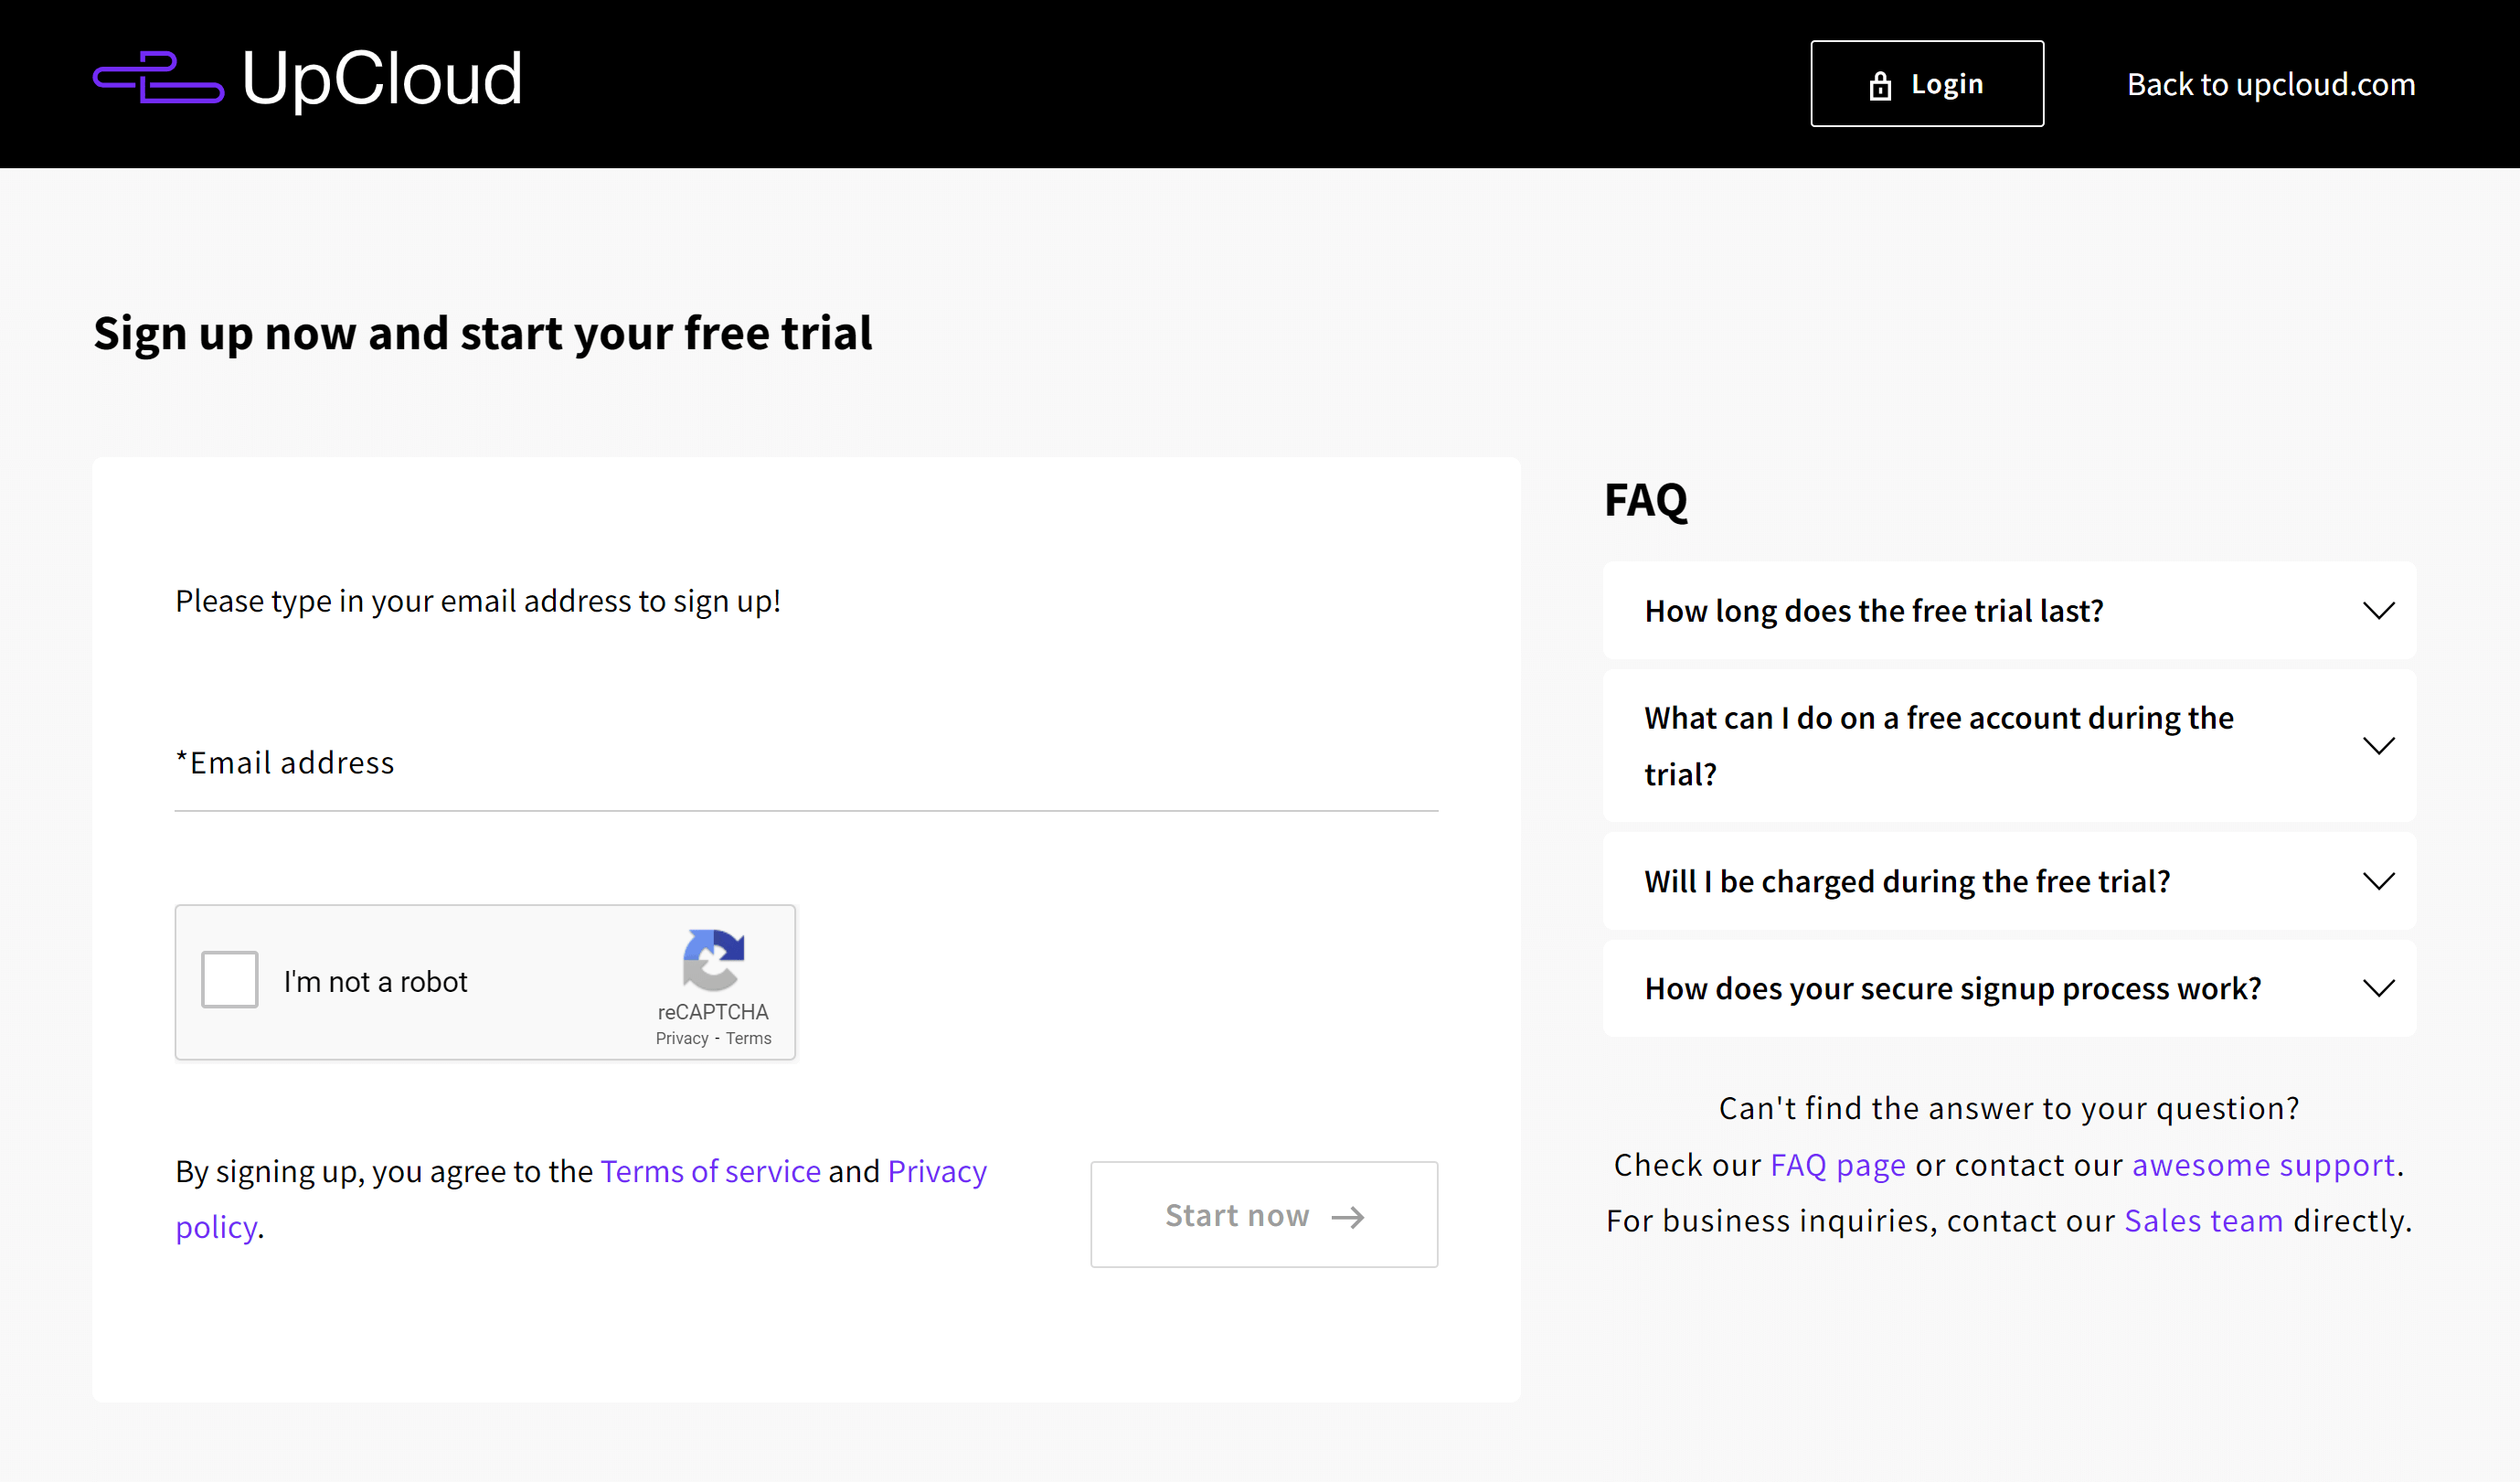
You’ll need to verify your email address to complete your sign-up. Once complete, log in to your account.
Step 2. Create a New Sub-User for Your Account
Inside your UpCloud account, click on People in the main menu:

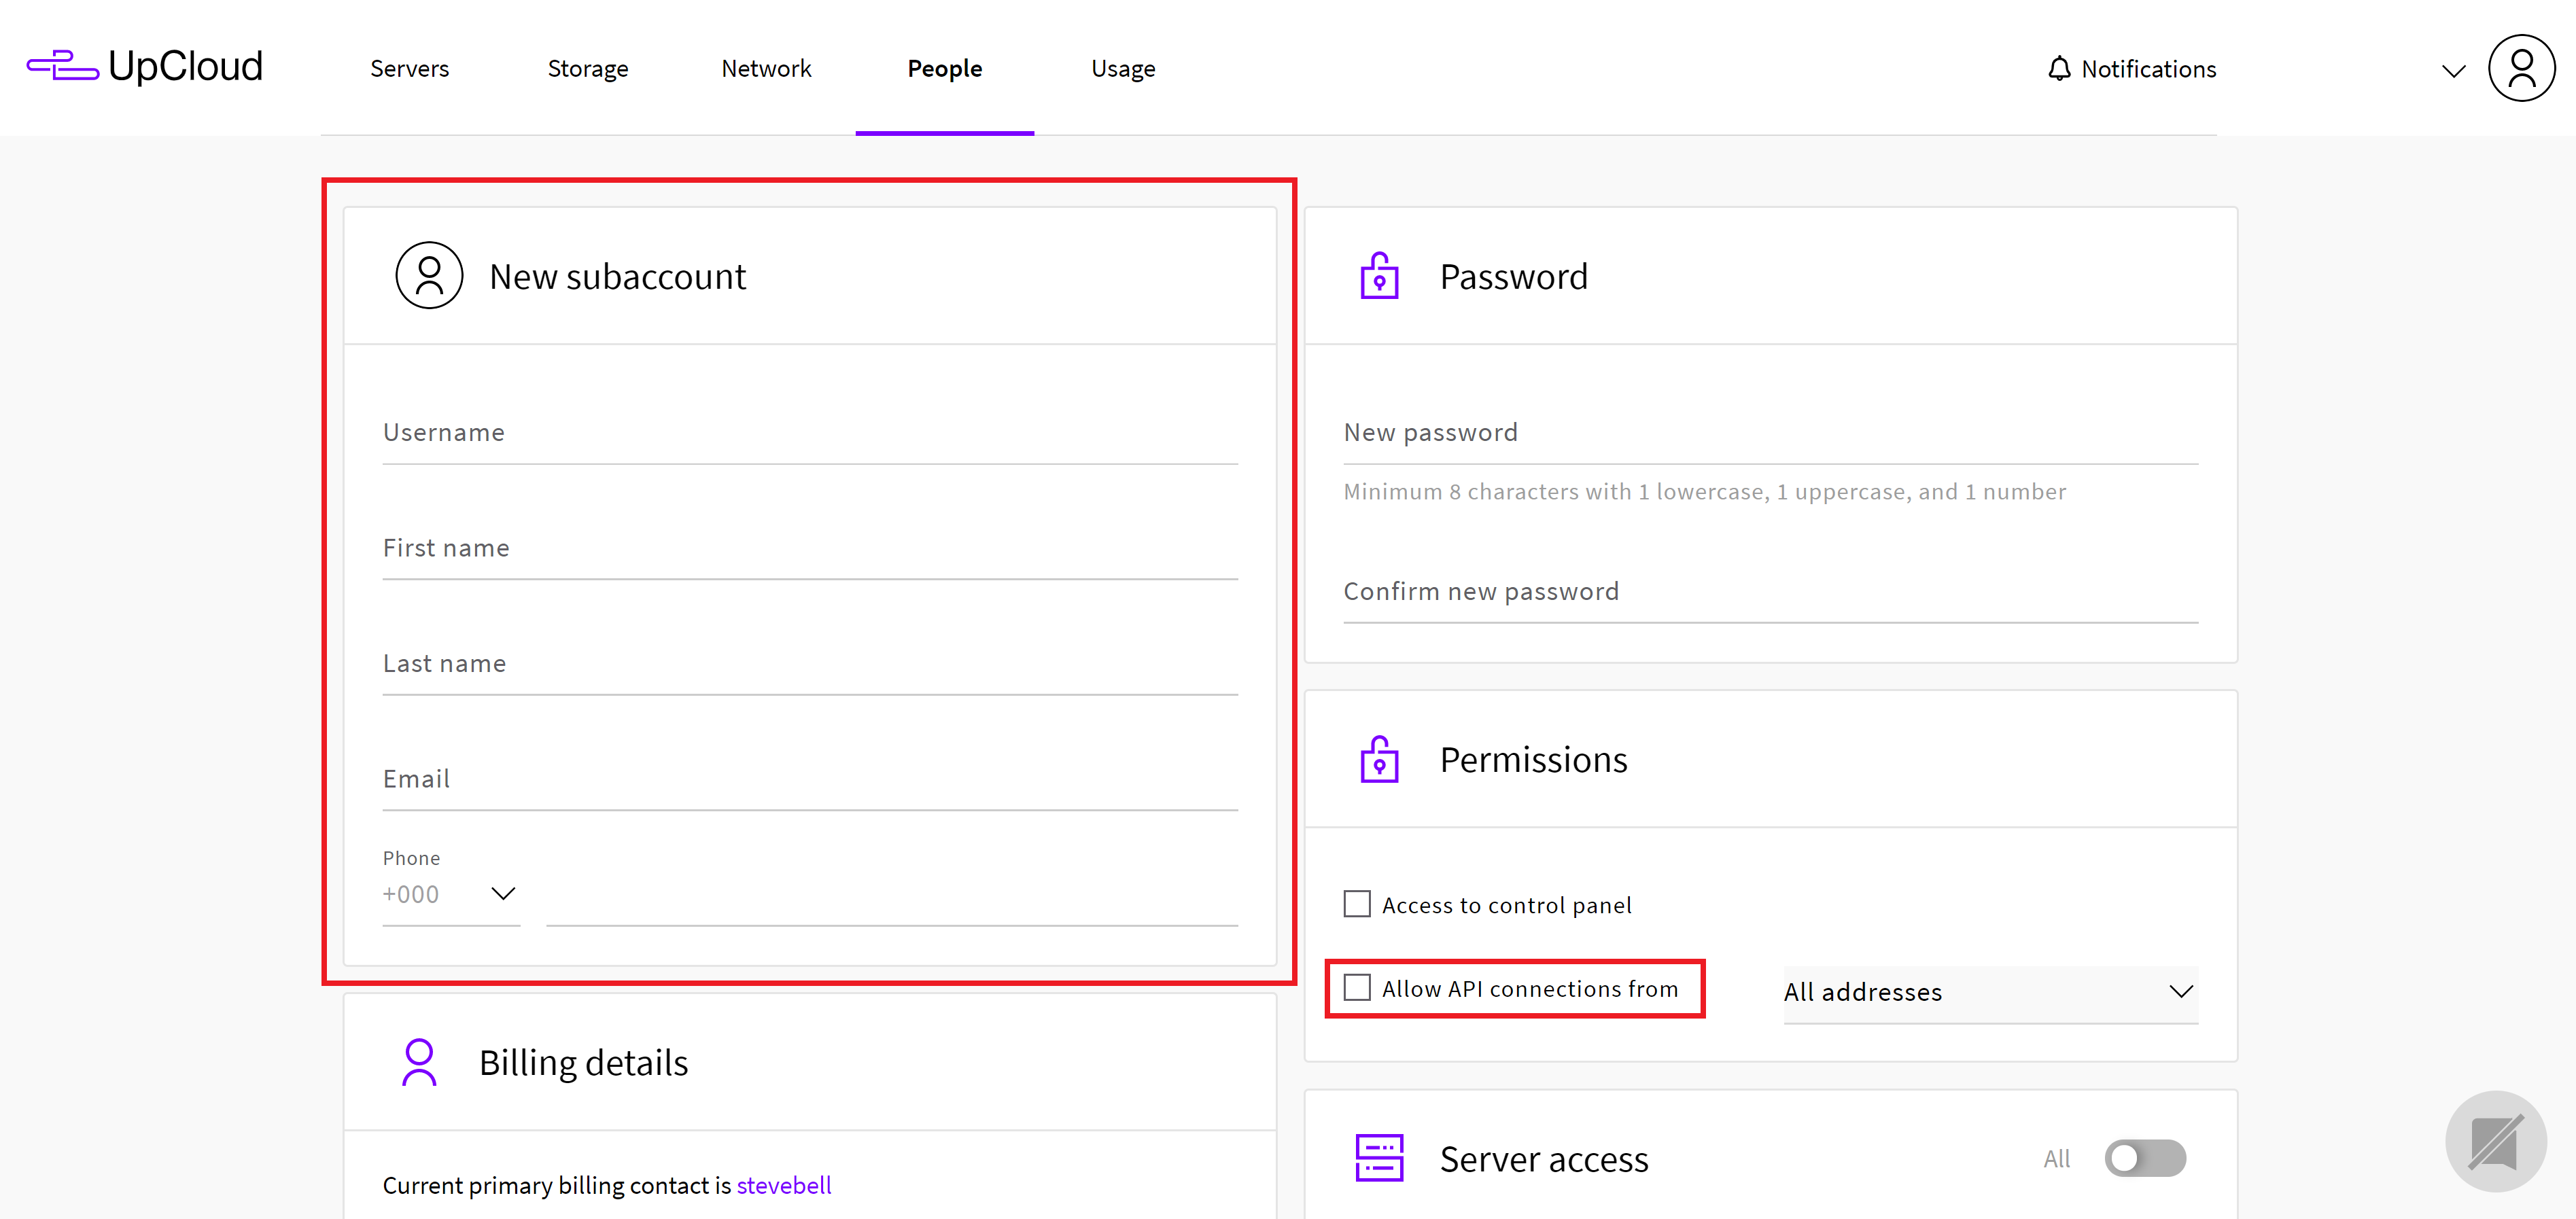
The way UpCloud works is a little different from other API providers. We’ll be creating a new sub-user and giving them API access. We’ll then use this sub-users login details inside your GridPane account to use the API.
This user needs to be unique, which means that it can’t already exist on UpCloud as a whole, not just in your account.
Fill in the subaccount details and check the API checkbox as outlined in the image below:
Tip: If you’re using Gmail or GSuite, you can use the same email address by using a handy feature that works as follows:
- Email address = [email protected]
- Workaround = [email protected]
Use a + followed by whatever you wish, and emails will go to your primary inbox as usual. This is useful for many things (like email newsletter signups and spotting companies who sell your info), but here means you don’t require a new email account.
Always use a strong password.
When you’re done click the create user button

IMPORTANT
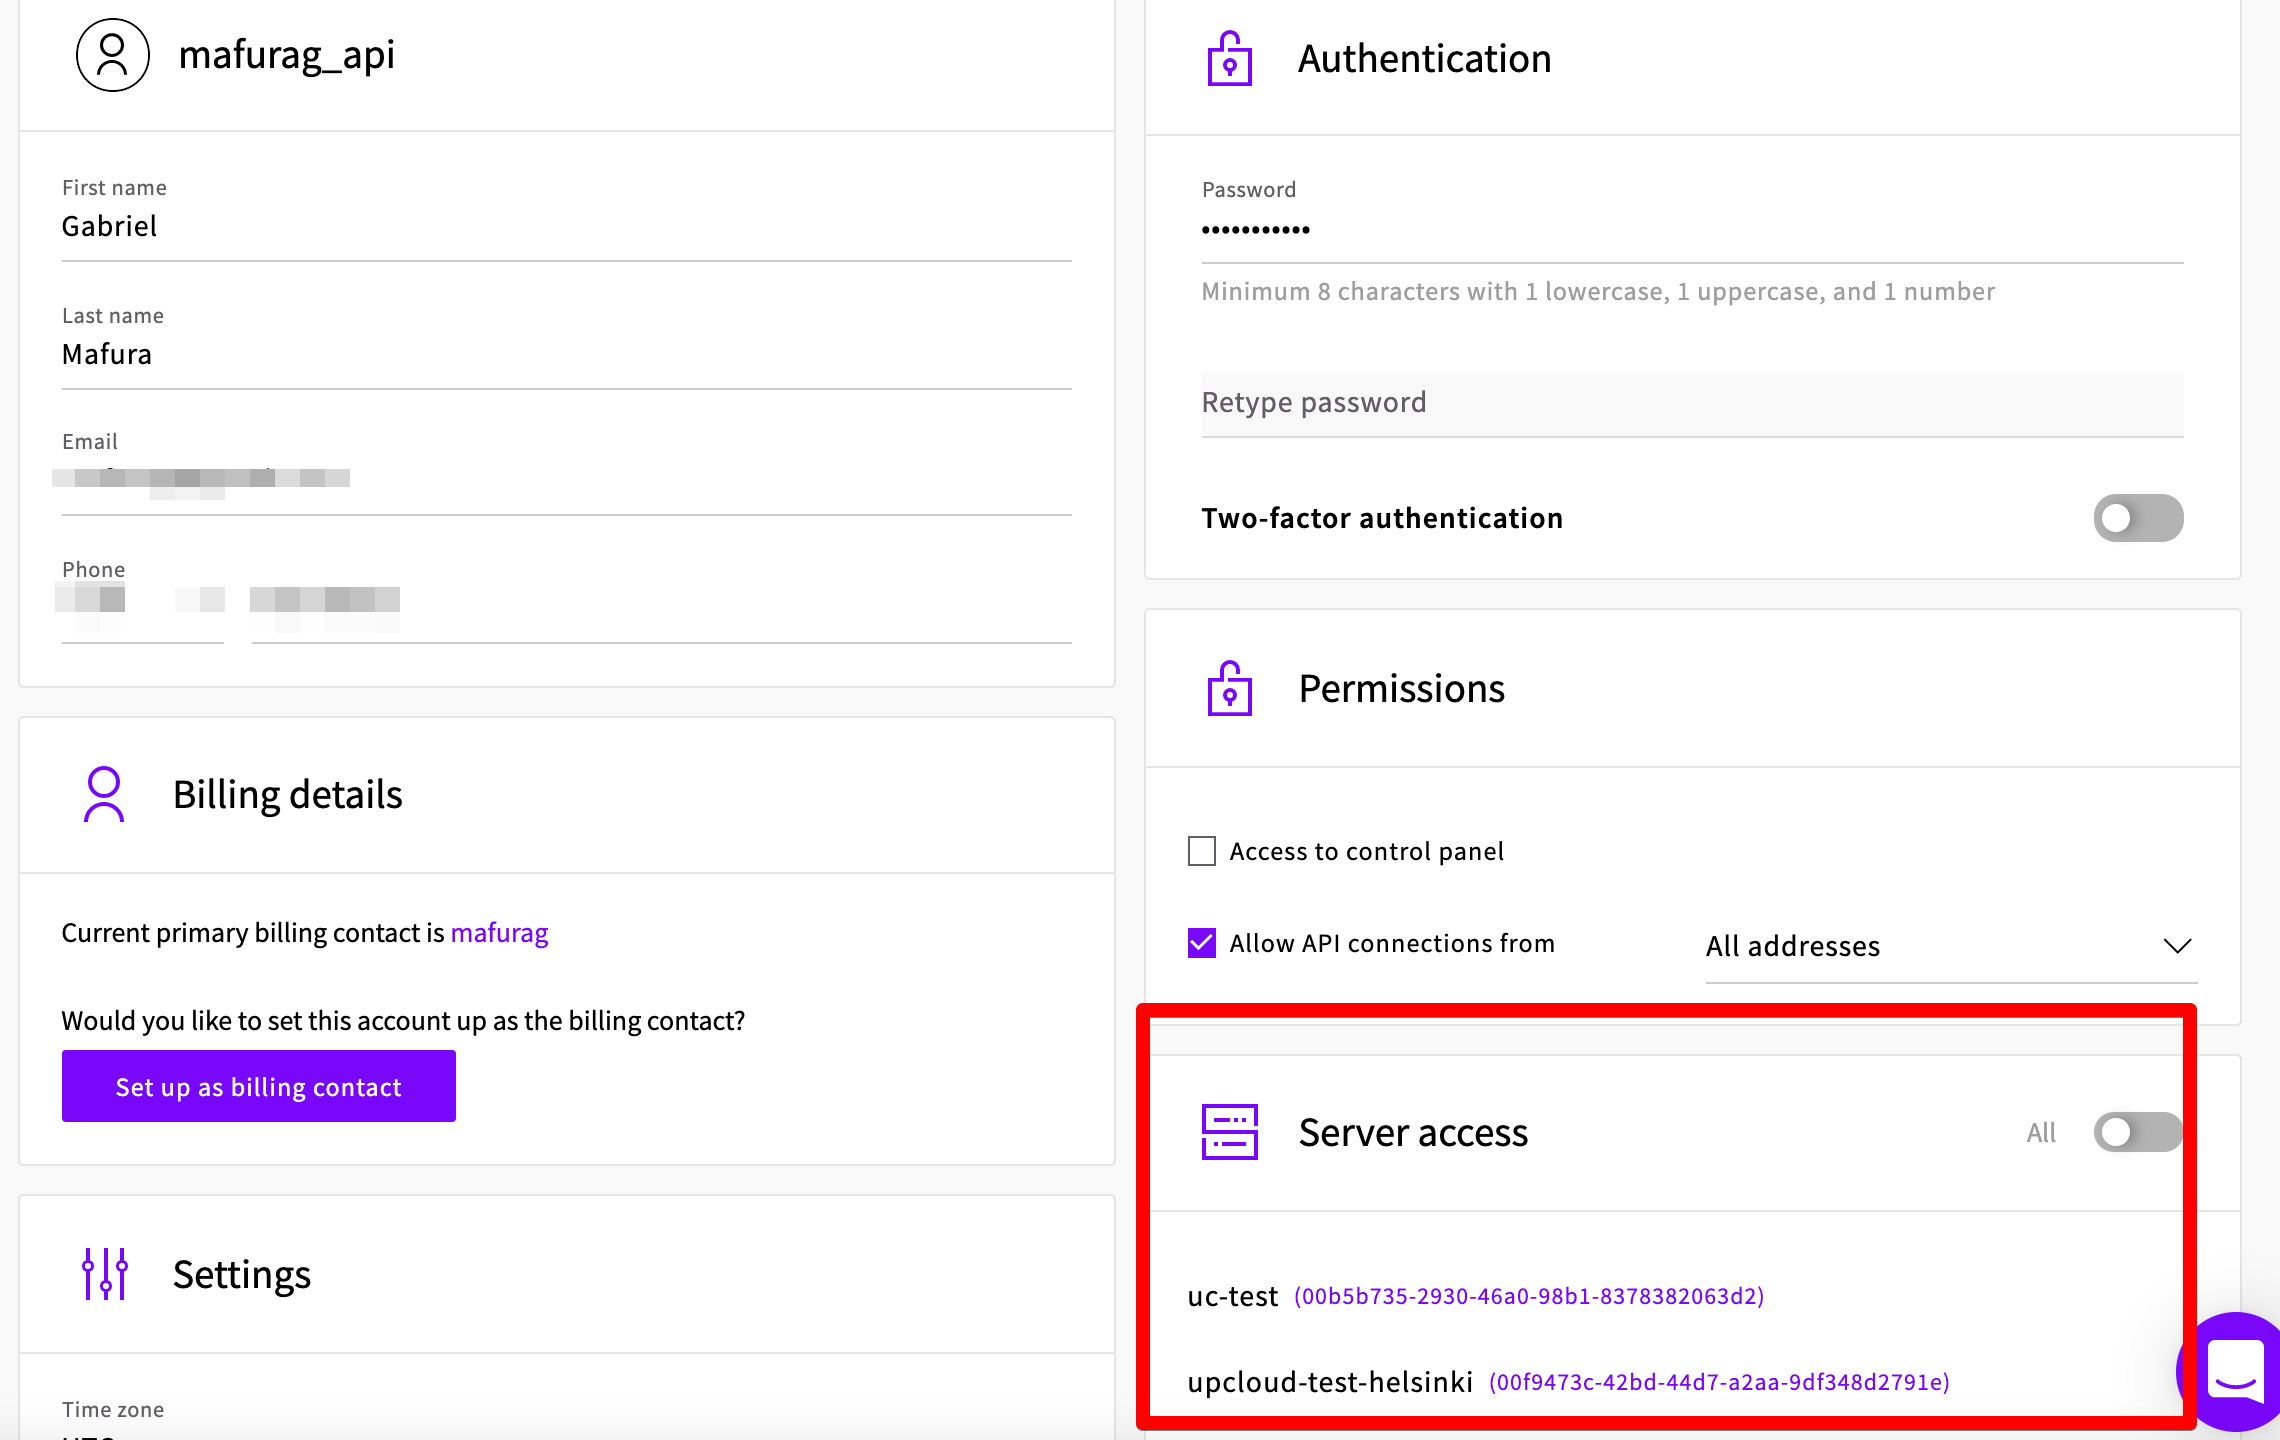
If the sub-user in Upcloud is deleted and a new sub-user added, please make sure that the new sub-user has access to all the servers in your GridPane account.
This can be done in the Server Access section:
Step 3. Connect Your Sub-User to GridPane
Head over to your GridPane account and navigate through to the settings page.

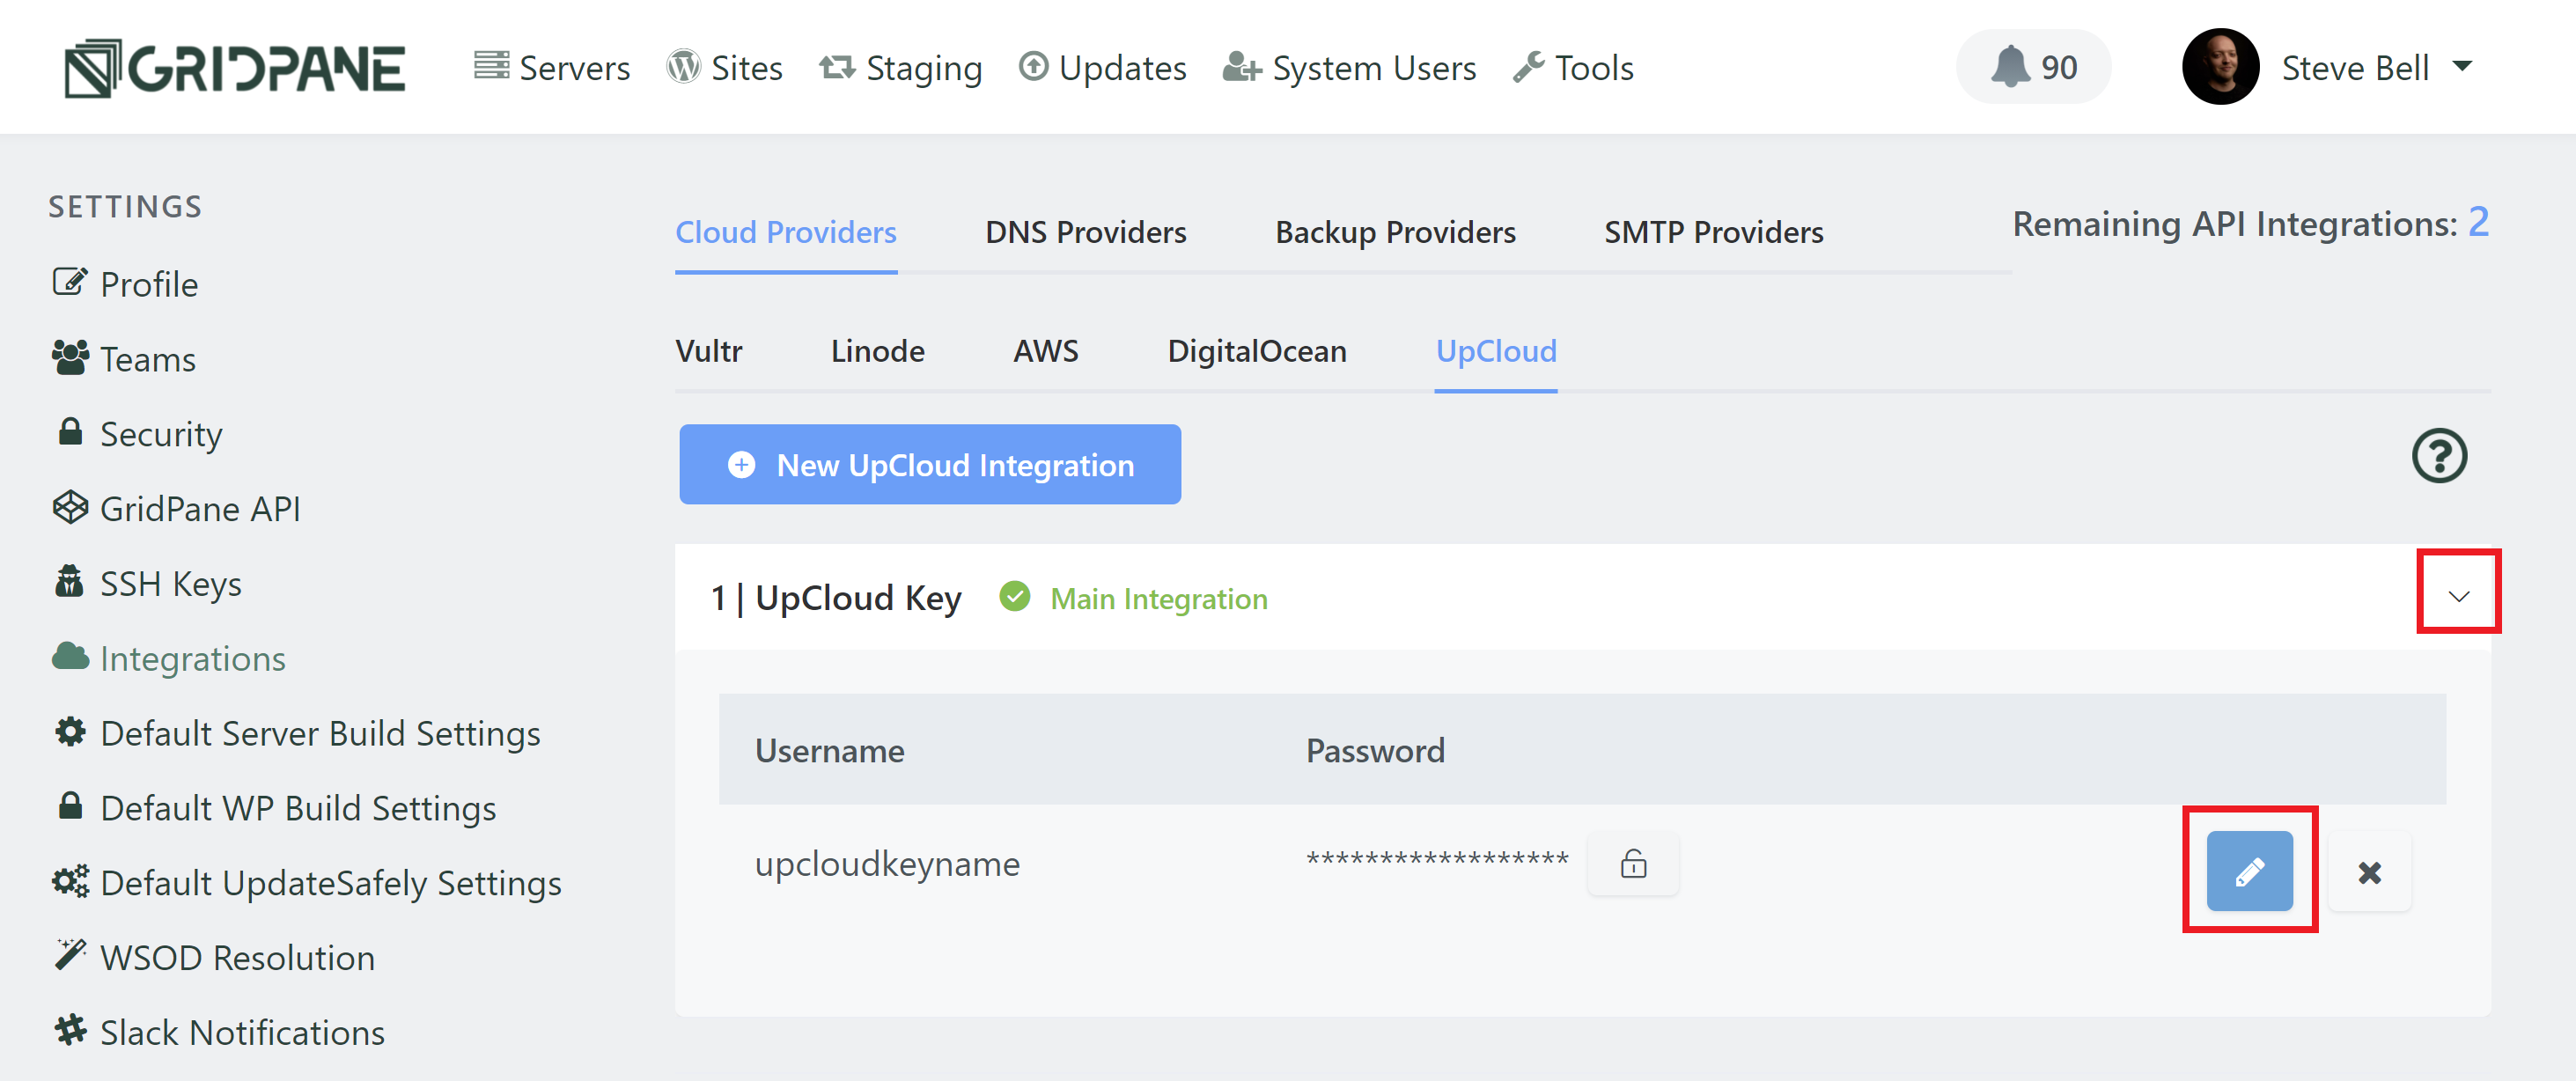
In the left-hand sidebar select Cloud Providers and then click on the UpCloud tab. Here you can enter the username (not the email address) and password of the sub-user you just created in step 2.
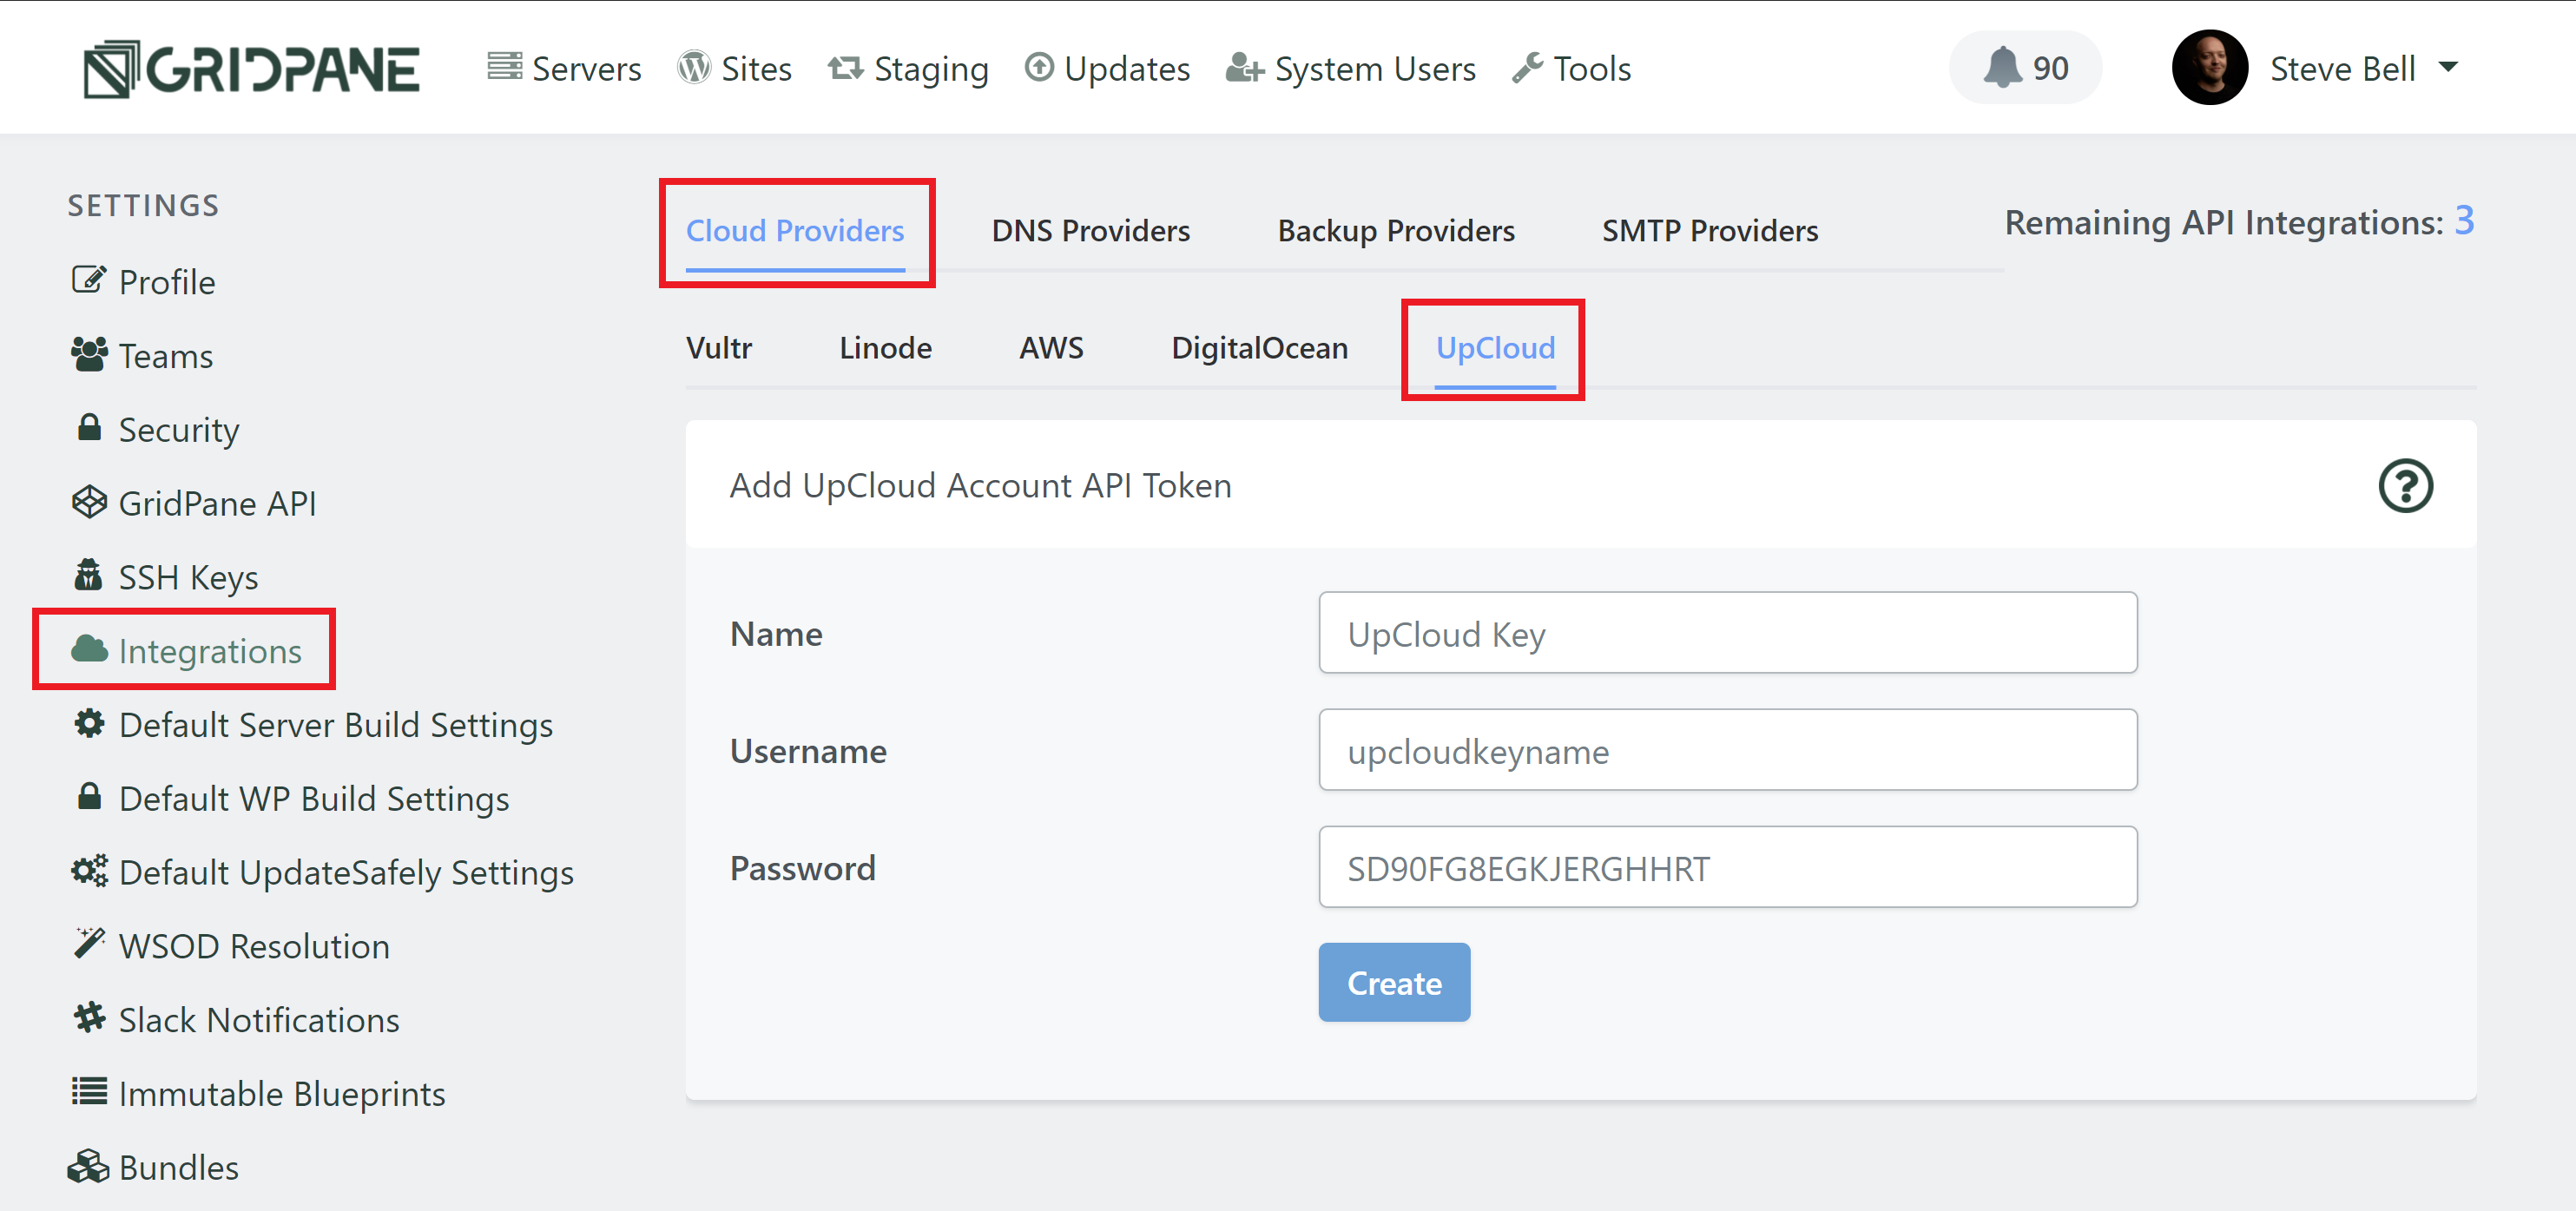
Once you’ve saved your details it will look like this:
UpCloud: Backups Notice
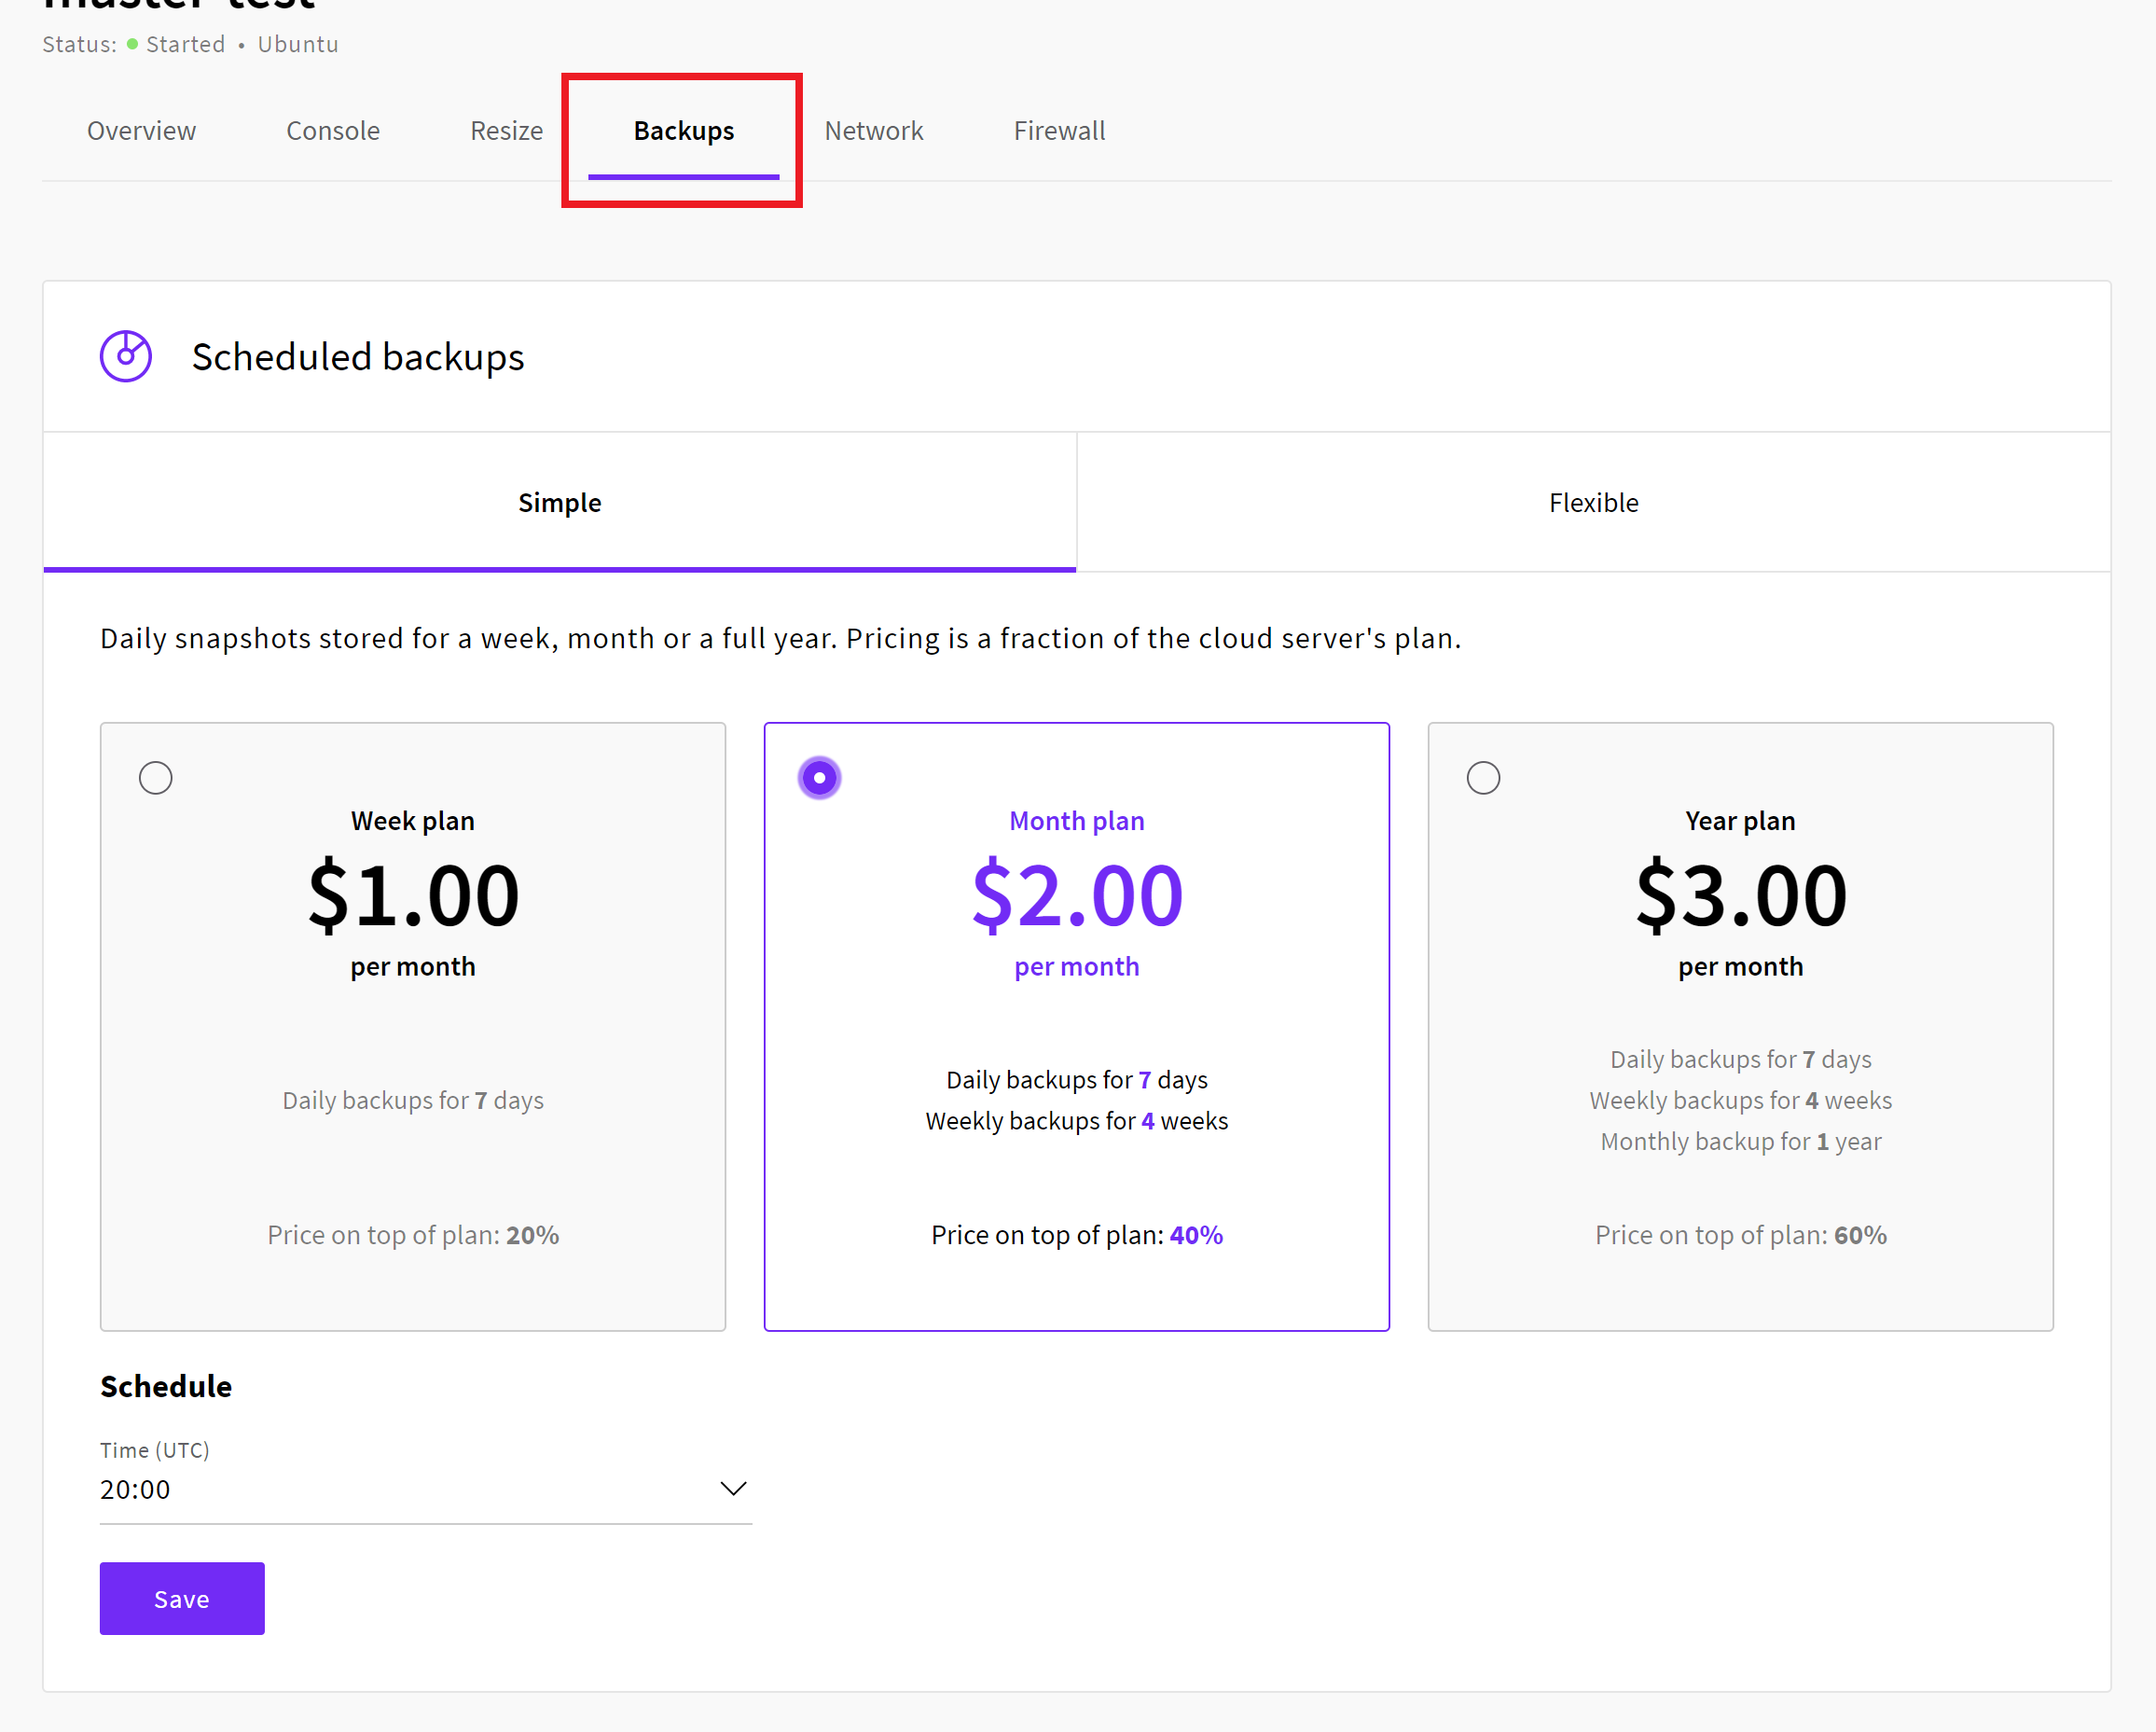
UpCloud's new simple backups feature has not yet been implemented via their API and PHP SDK, but they will be releasing it in just a few weeks. In the meantime, if you would like to enable server backups at UpCloud you will need to do so inside of your UpCloud account.
To do this, login to UpCloud and click through to your Servers page, then click on the server you wish to edit. Here you will see a backups tab at the top, and in the tab you will see the various different options that they offer. Choose your preferred backups window and click save.
Step 4. Provision a New UpCloud Server
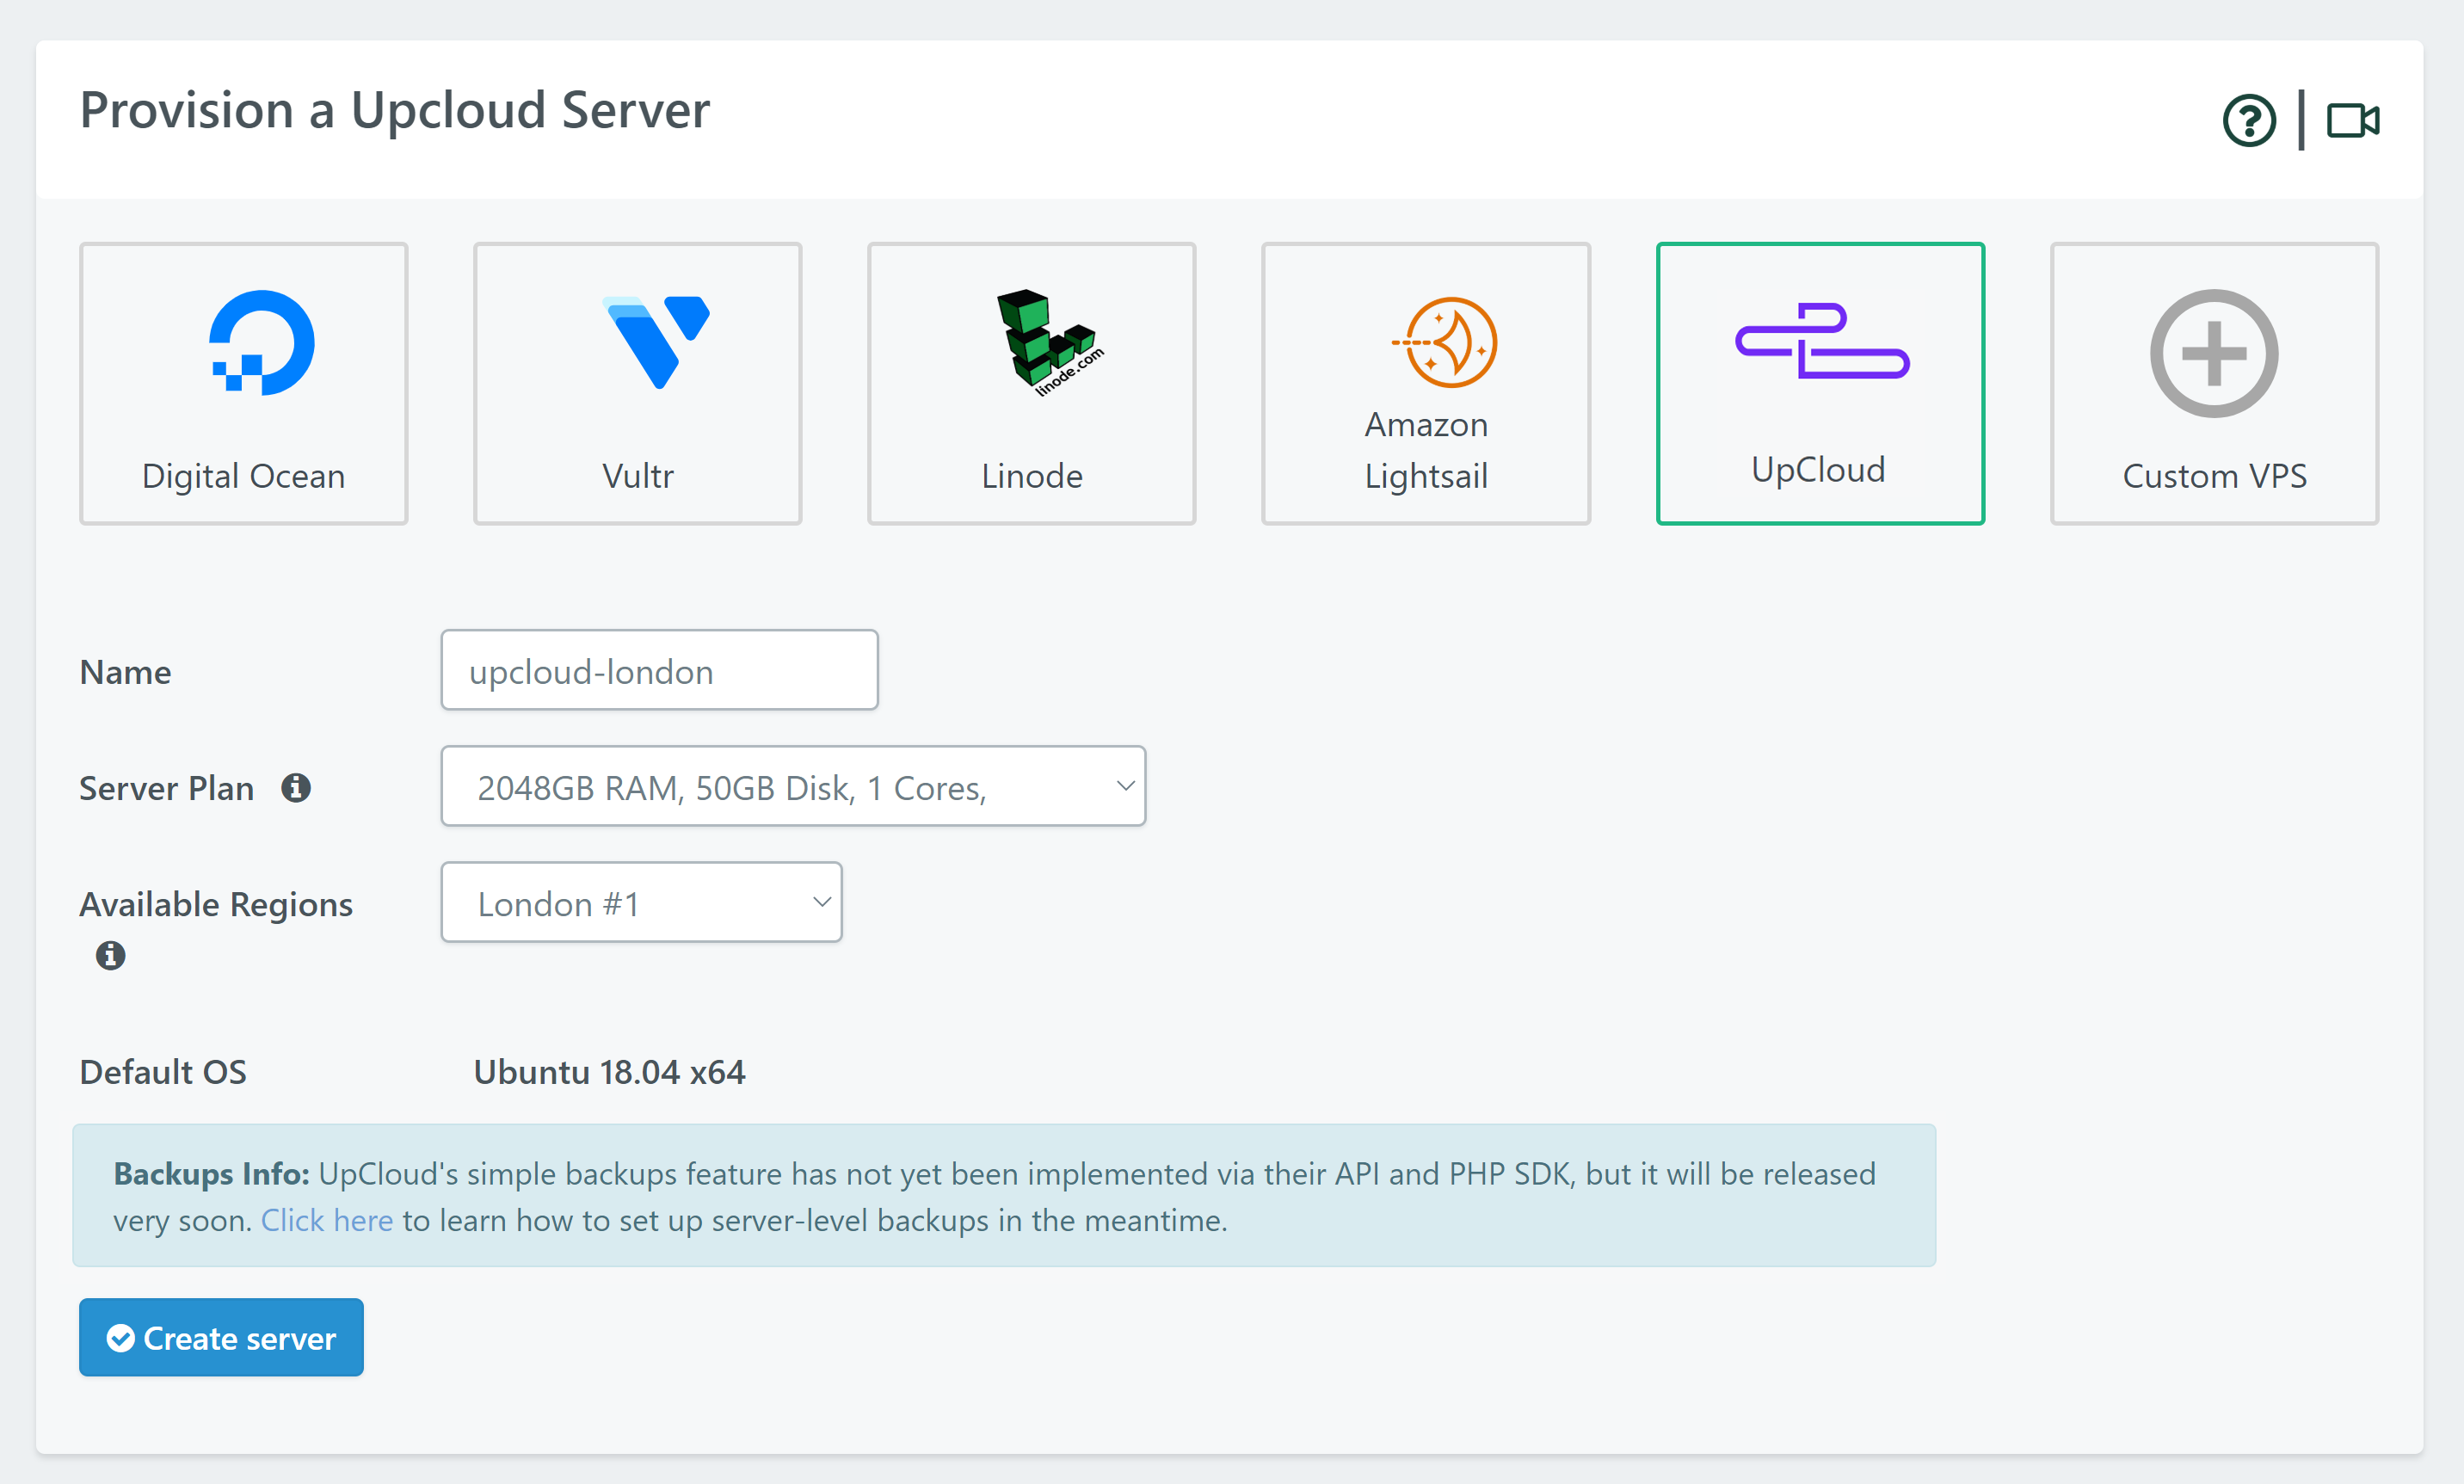
Head to your servers page and click on UpCloud. You’ll be presented with options for your server – choose your server size and whether you wish to enable UpCloud server backups (we highly recommend that you enable provider level backups – but please ensure you read the above backups notice and set backups inside your UpCloud account until further notice – we’ll update this article again ASAP).
UpCloud Free Trial Limitations
If you’re using UpCloud’s free trial, there may be a restriction on your account to 1GB RAM servers and you may need to deposit money in your account to lift this restriction. If that’s the case, you may get a generic “Server Error” when trying to spin up a new server.
Configure Your Server
Give your server a name, choose the size, region, and stack options, then hit the Create server button – more details below.
OS Version
We recommend that you always choose the latest available Ubuntu OS version (unless it’s in beta). Learn more here.
Choose Your Web Server
You have the option to choose between Nginx and OpenLiteSpeed. This is largely personal preference. If you’re unsure which one to choose, start with Nginx.
Choose your database
If you’re on the developer plan you’ll have the option to choose between Percona and MariaDB for your database.
Percona is a drop-in replacement for MySQL and includes security, availability, and availability features that are only available in enterprise MySQL. It has removed query caching, and it has more advanced aspects for things like storing and managing JSON as a storage format.
MariaDB could mean fewer issues importing old WordPress websites from low-quality hosting environments. It will likely use less RAM than Percona and may offer performance benefits for some websites.
Both are excellent options.
Provider backups
We highly recommend that you enable provider backups. It’s a small price to pay for the extra insurance they offer.
Additional note: You will need to set this up directly at your server provider when using our custom server option.
Create your server
Click the Create Server button when you are happy with your configuration choices.
Step 5. Wait for 10-15 Minutes
UpCloud works a little differently from our other API integrations. Servers are built using terraform which is an “infrastructure as code” software tool. During the server build there won’t be any callbacks/updates on the process, it will simply display as “Active” along with a green “Provisioned” bar.

Congratulations! Next Steps
Now that your server is live, you’re ready to start creating and configuring new WordPress websites.
To deploy a site click on the Sites link in the GridPane main menu to begin the process. We have a separate article that details the steps in detail for you.

