Step 1. Configure and Create Your Azure Server
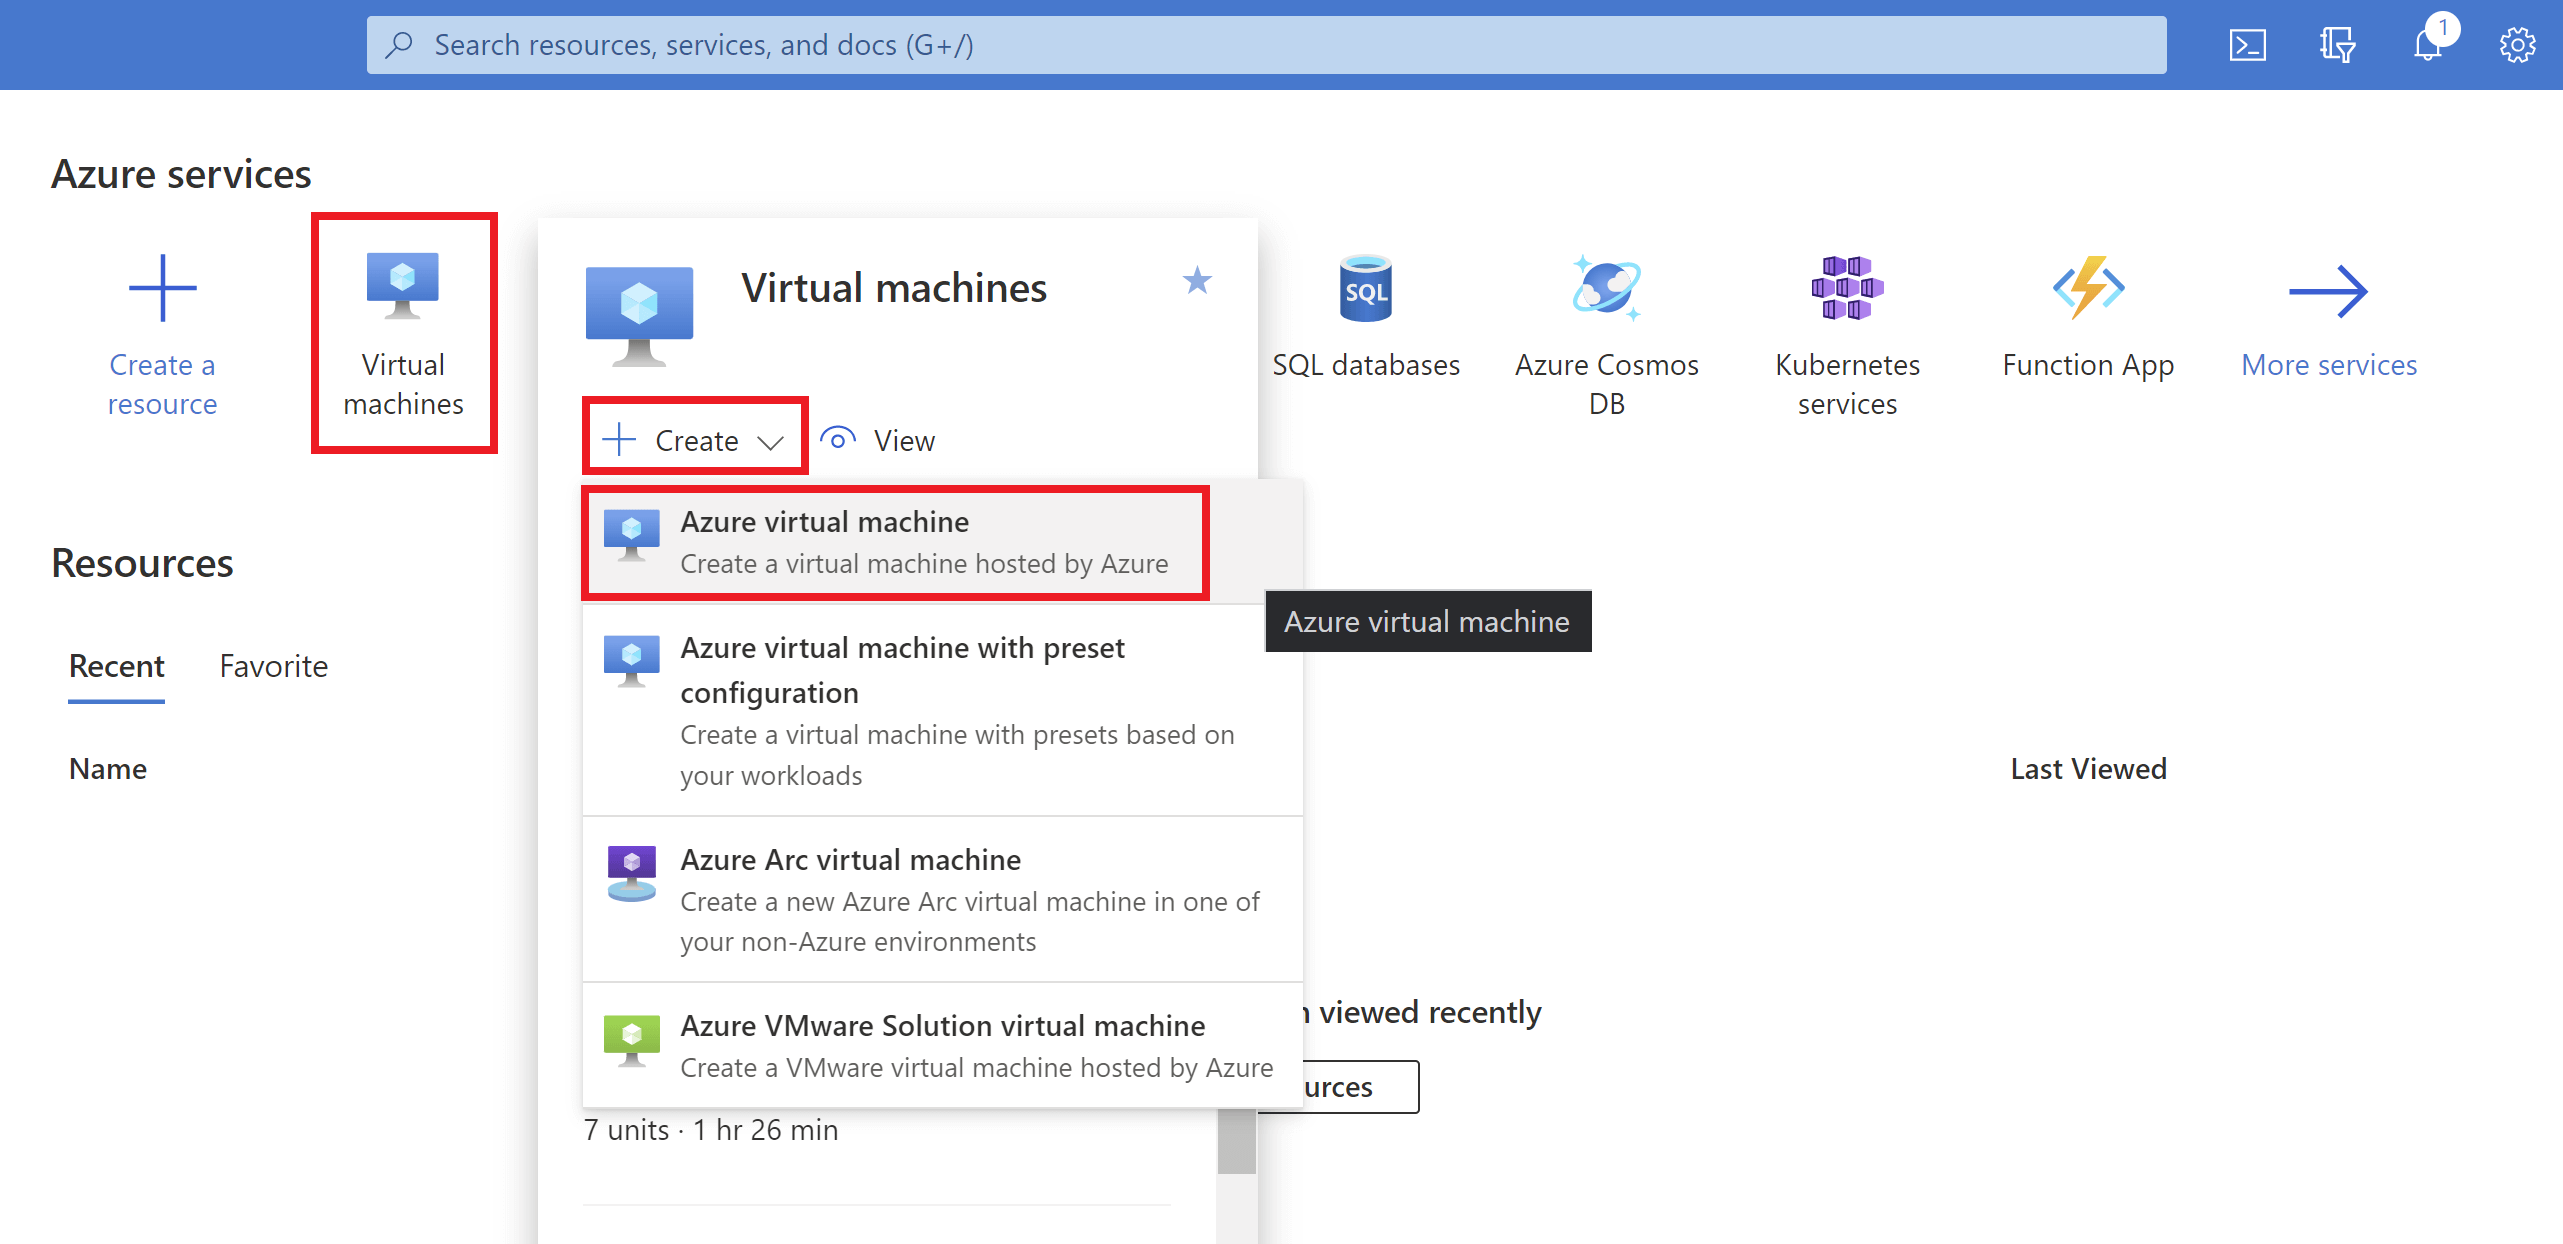
To get started, log in to your Microsoft Azure account, hover over Virtual machines, and create a new “Azure Virtual Machine”.
The following are only guidelines, and you are welcome to explore additional features that Azure offers. We specifically require that you have the correct ports open and do not select ARM architecture, but it’s possible that some other features/configurations may not work with GridPane.
1. Basics
Project details:
- Choose your subscription and either use an existing resource group or create a new one that’s specific to GridPane.
Instance details:
- Virtual machine name: Give your server an easy-to-identify name.
- Region: Choose the region closest to your target audience.
- Availability zones: If you’re spinning up multiple servers, then you may want to set their Availability zones to each be different.
- Security type: Standard.
- Image: Ubuntu Server: We recommend that you always choose the latest available Ubuntu OS version (unless it’s in beta). Learn more here.
- VM architecture: x64.
- Run with Azure Spot discount: Leave unselected.
- Size: Choose the server that makes sense for your workloads. Availability is subject to change and differs per region.
Administrator account:
- Authentication type: Here, you can choose either an SSH key or a password. We recommend setting up SSH keys, but if you use a password, you can remove the system user afterward (instructions below).
- Username: Azure does not allow for the use of the “root” username. Create any user that you wish.
Inbound port rules:
- Public inbound ports: Allow selected ports.
- Select inbound ports: Select all three: 80, 443, and 22.
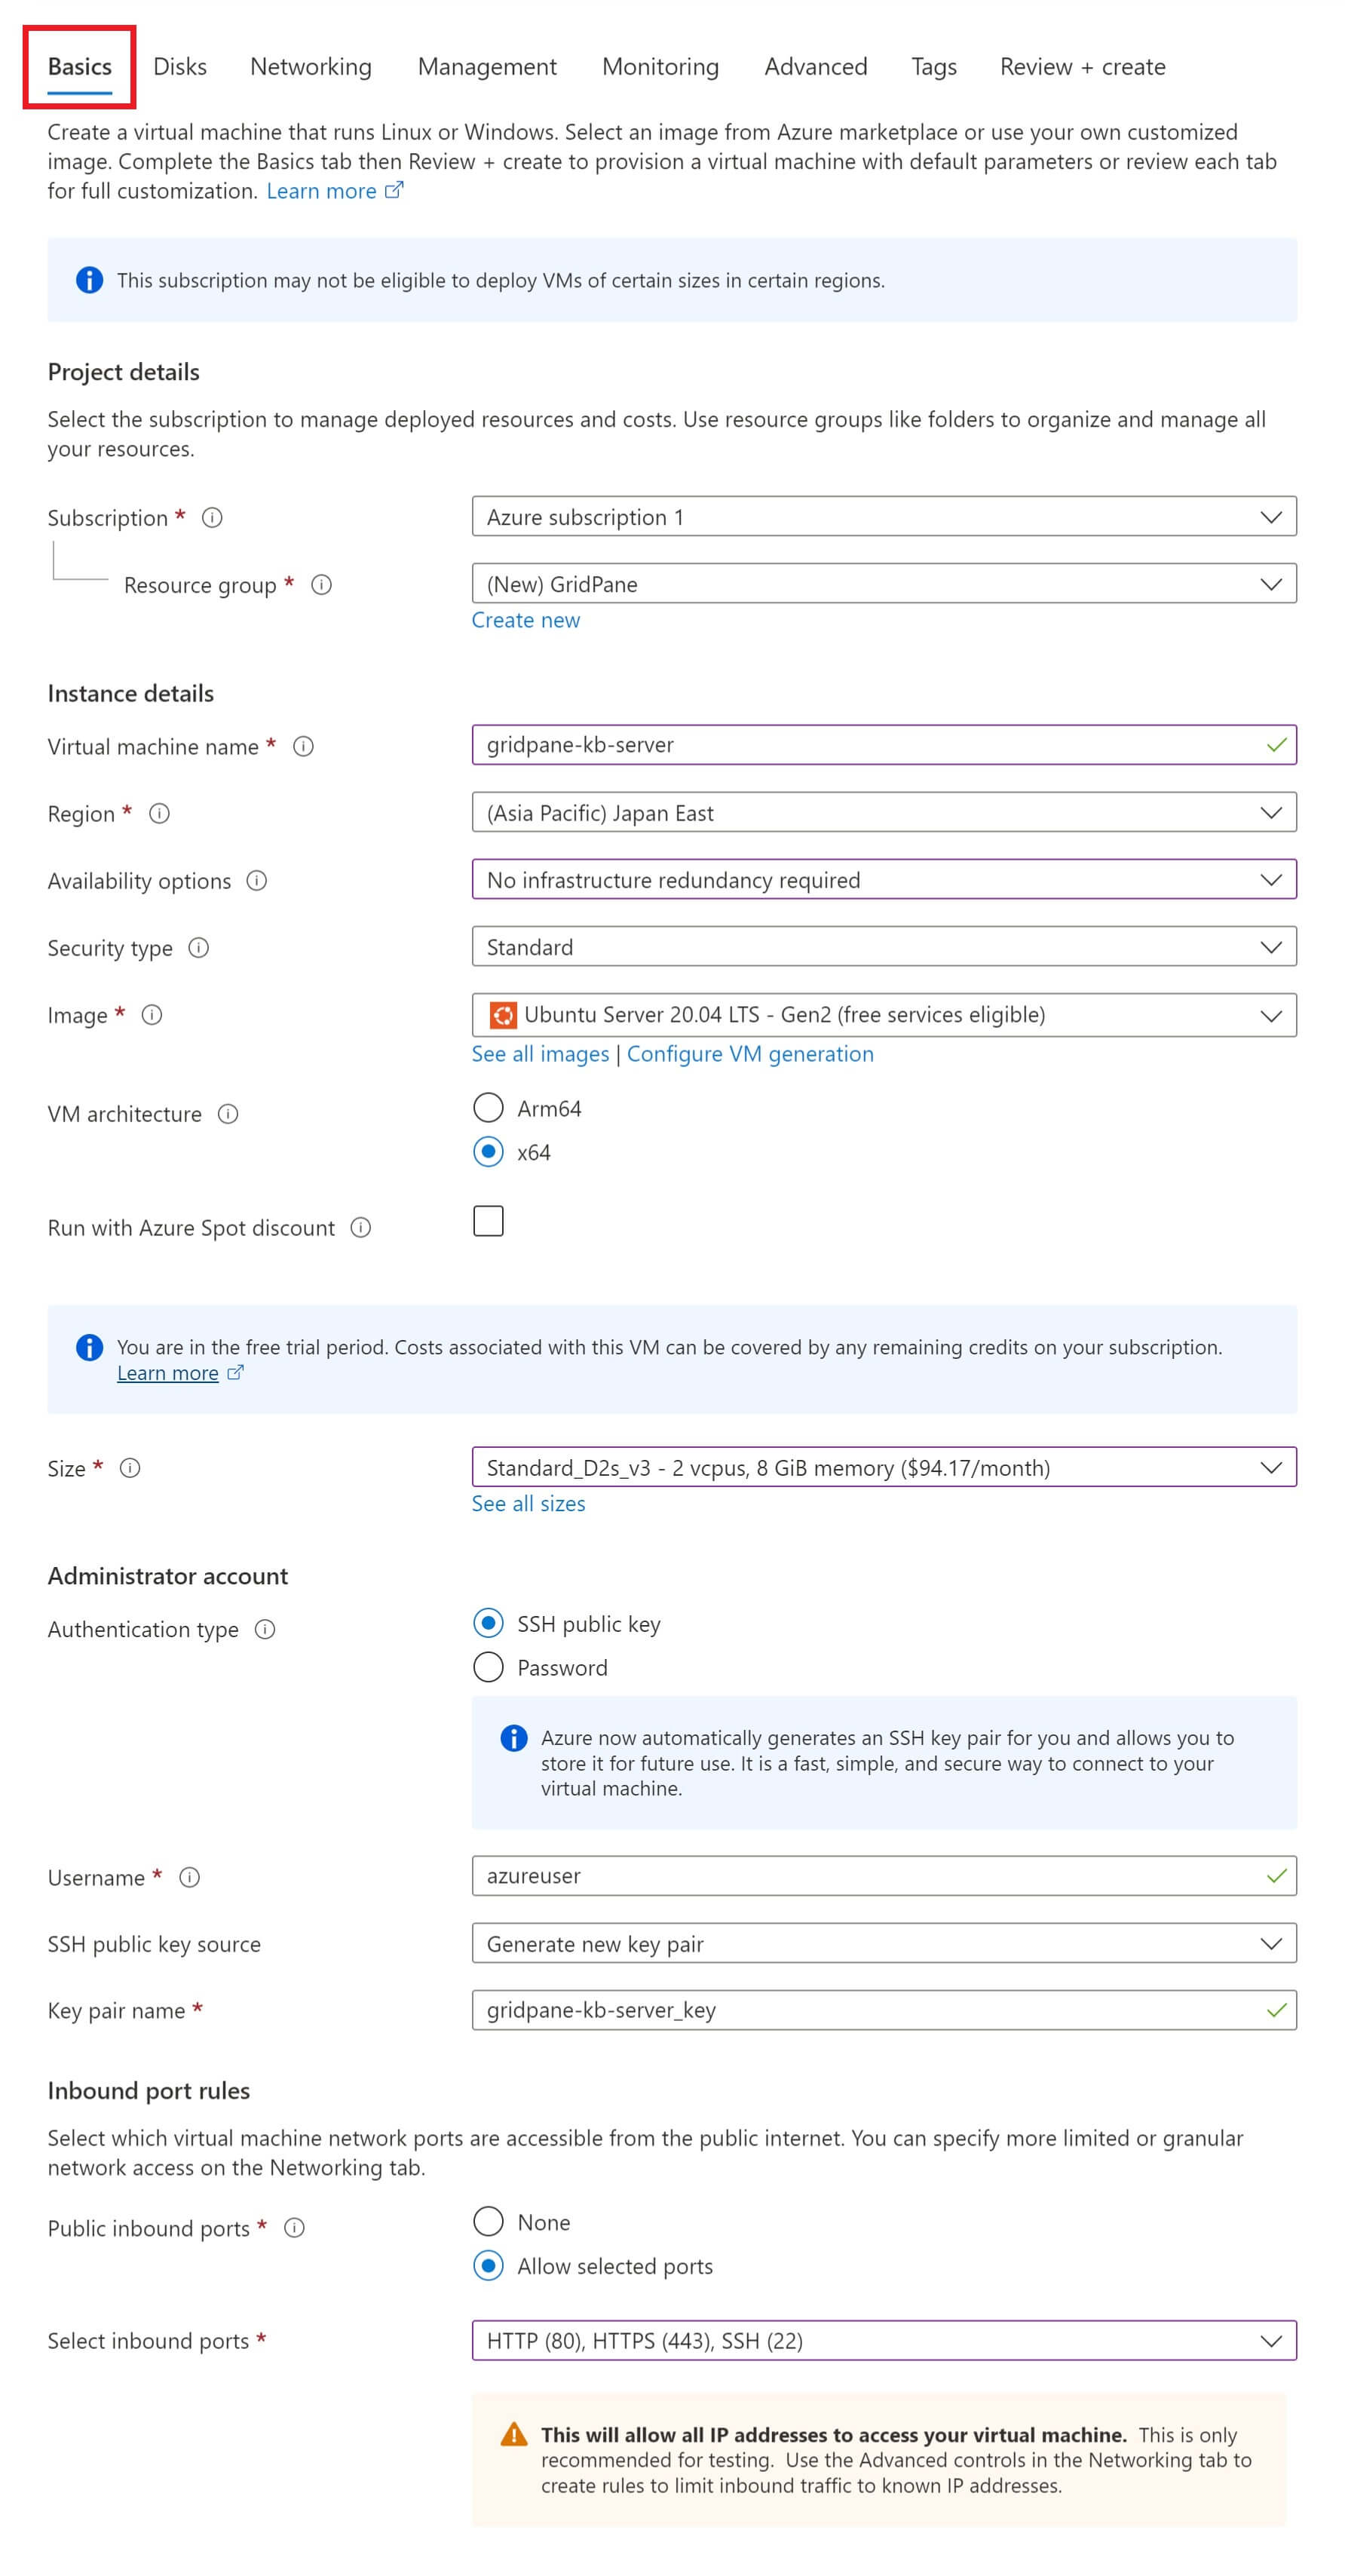
Click the Next : Disks > button to continue.
2. Disks
Disk options:
Leave the default settings.
Data disks for “server name”:
Click the Create and attach a new disk option.
Here, you can choose the amount of disk space you want to use and whether you want to delete this disk space when you delete the VM itself. Leave the other options as their default settings.

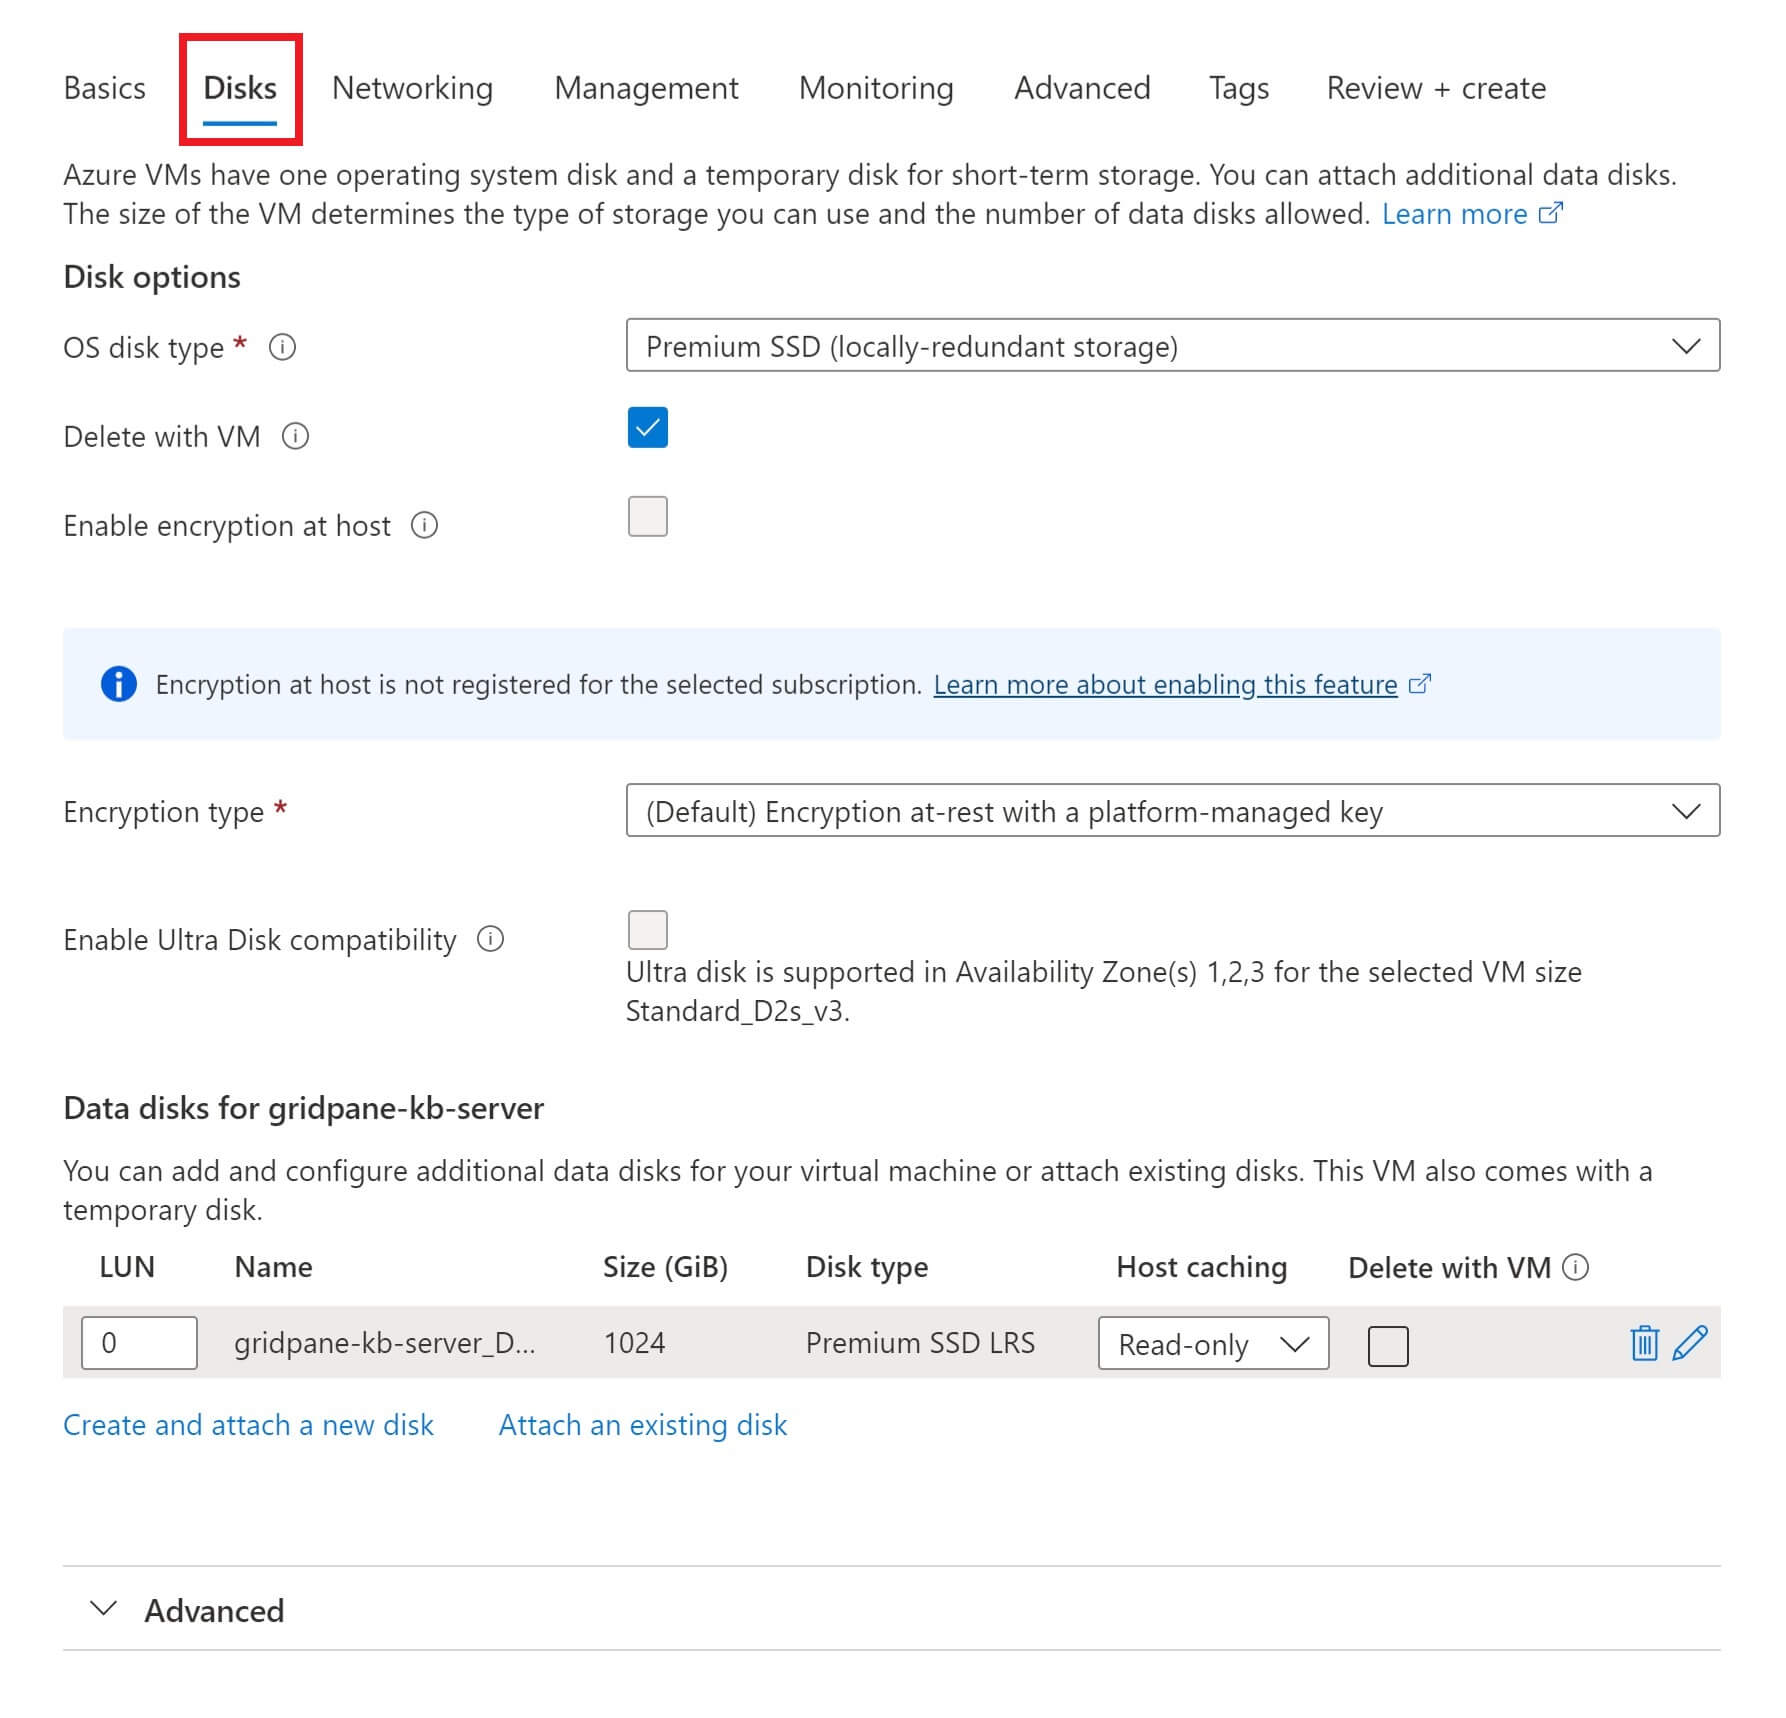
As an additional note, the “Enable Ultra Disk compatibility” may be worth exploring, but I have not had time to look into it while writing this article.
Click the Next : Networking > button to continue.
3. Networking
Leave the default networking settings as they are.

Click Next : Management > to continue.
4. Management
Here, you can leave most of the default settings as they are. However, I would highly recommend that you select one of the two backup options for your server:
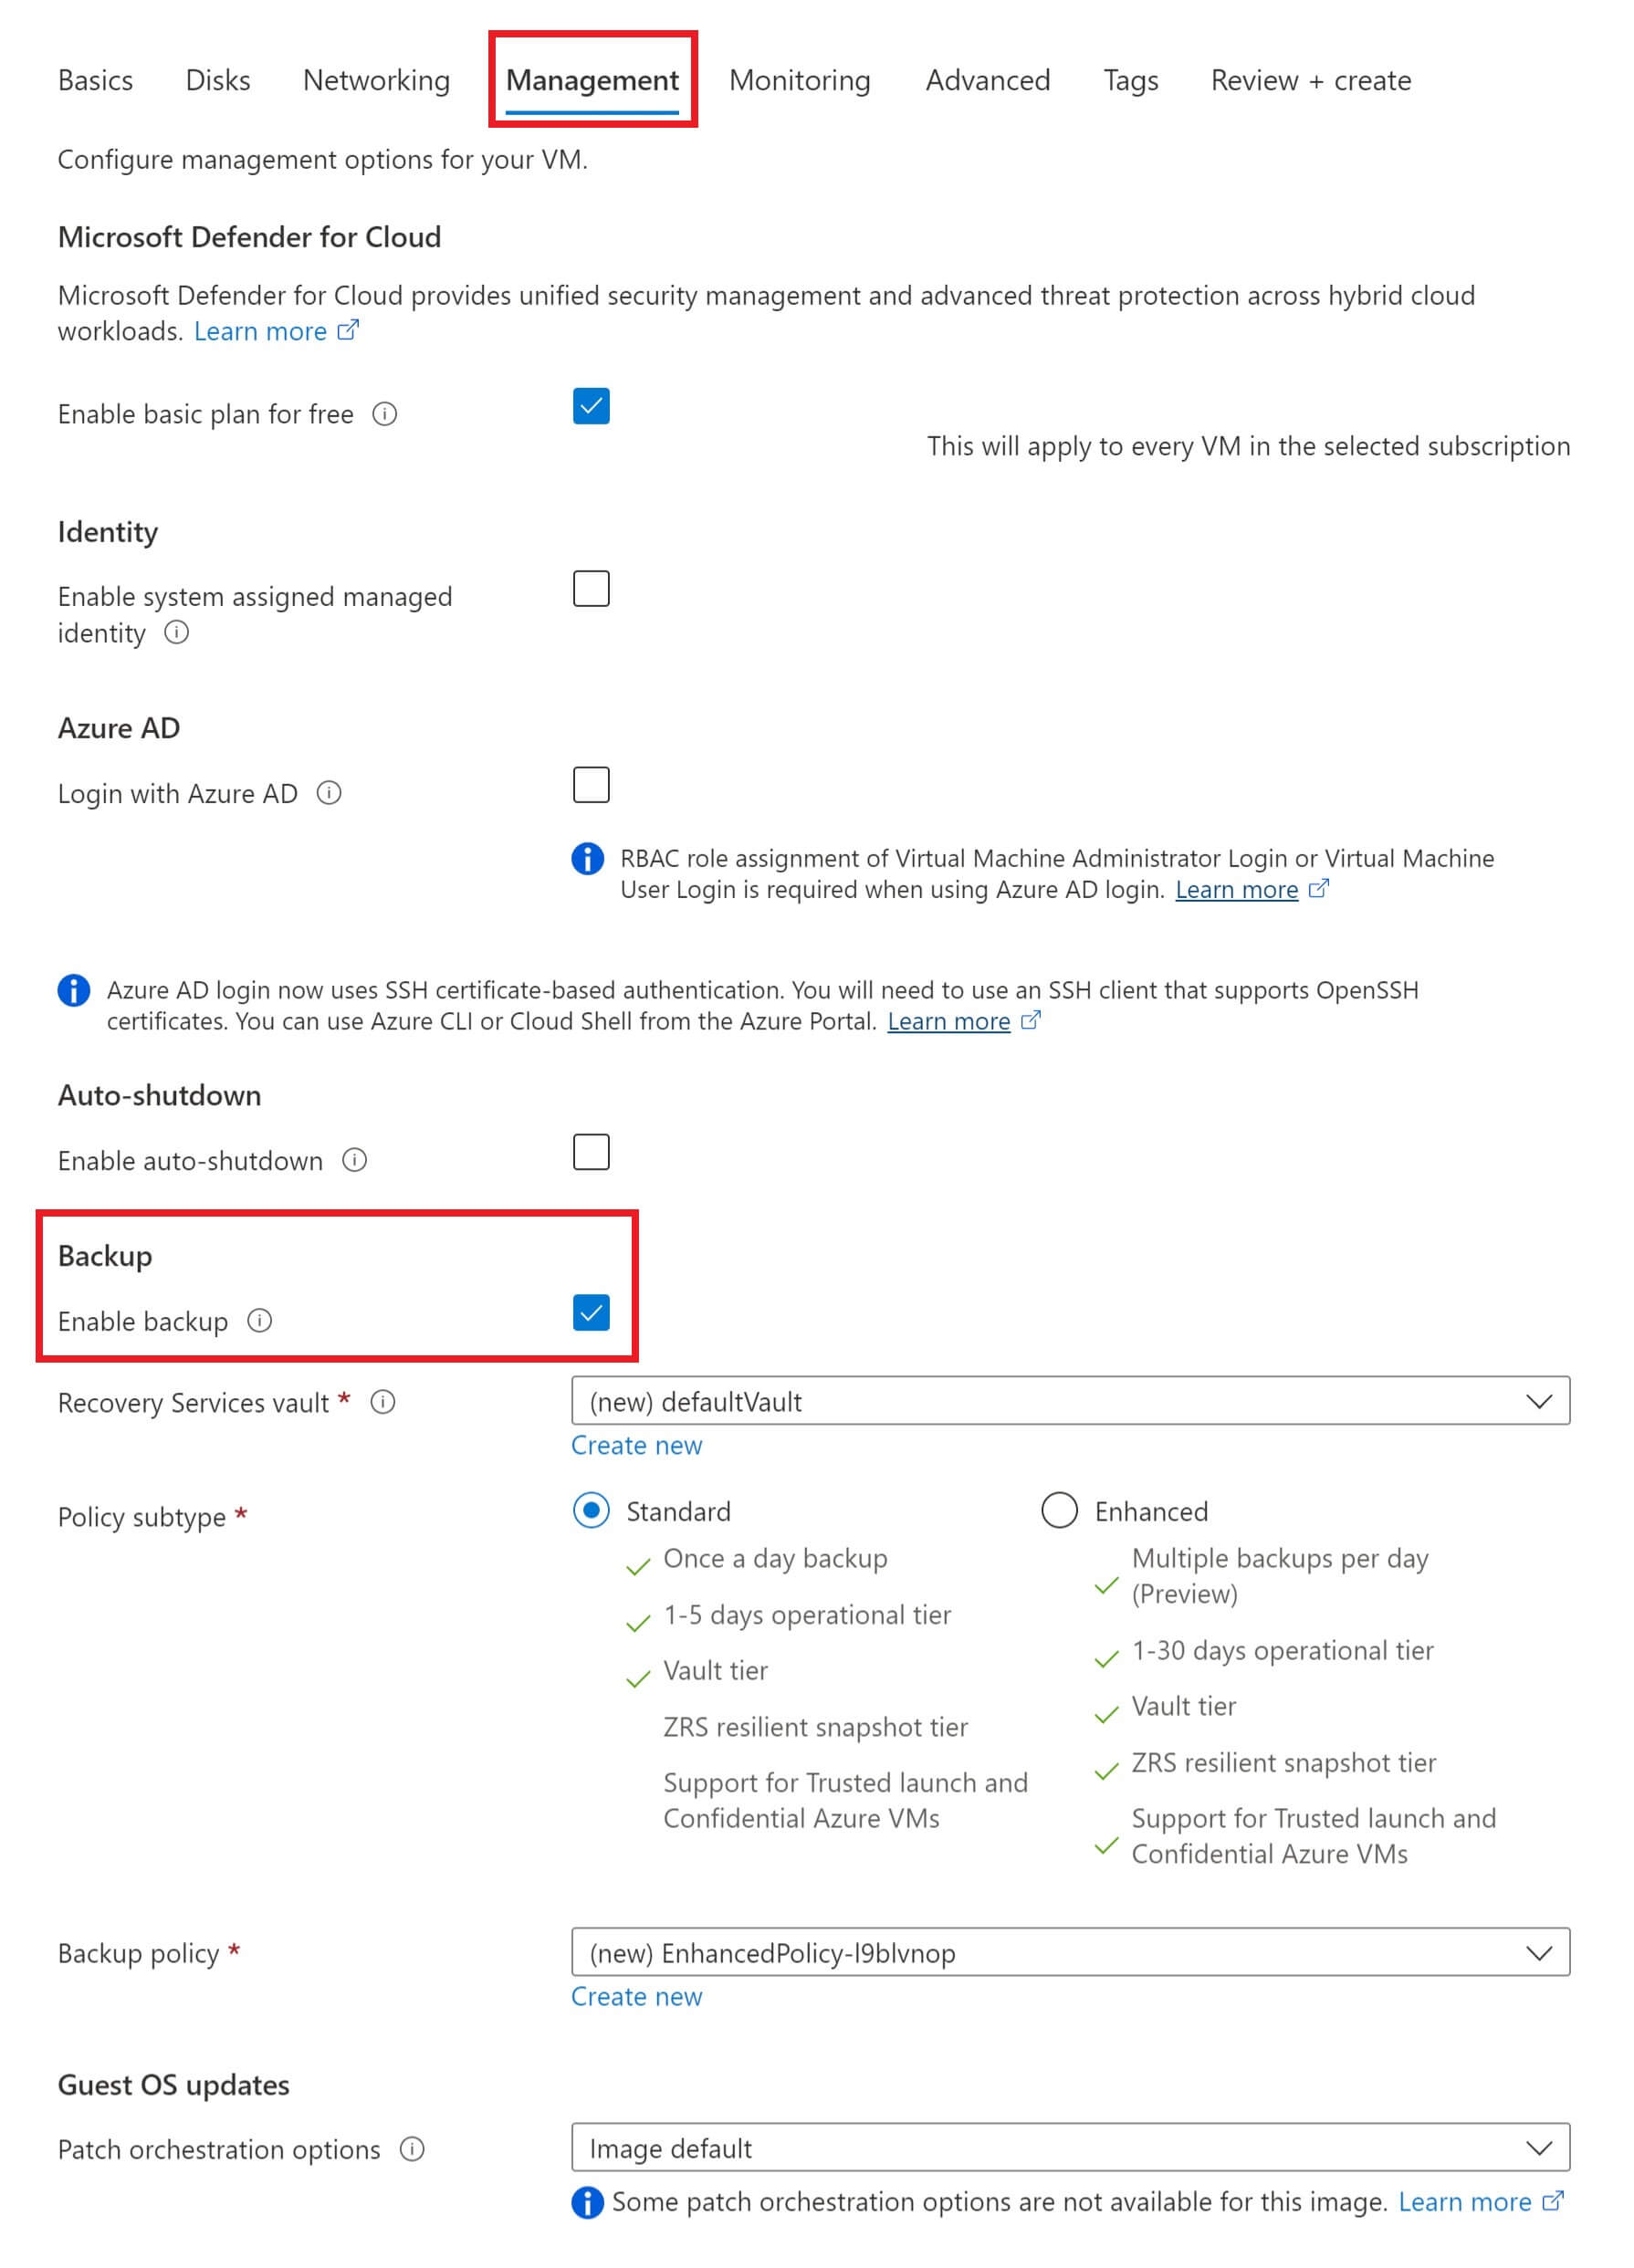
Click Next : Monitoring > to continue.
8. Review + Create
Here, you can review your settings, and when ready, you can click the Create button to create your new Azure server.
You can also download these settings as a template for future use as well.
The deployment process may take a minute or two to complete, and it will then display a notification once it’s up and running.
You’ll be able to see your resource over on the main Home screen and then again under Virtual Machines.

Step 2. Copy Your Server’s IP Address
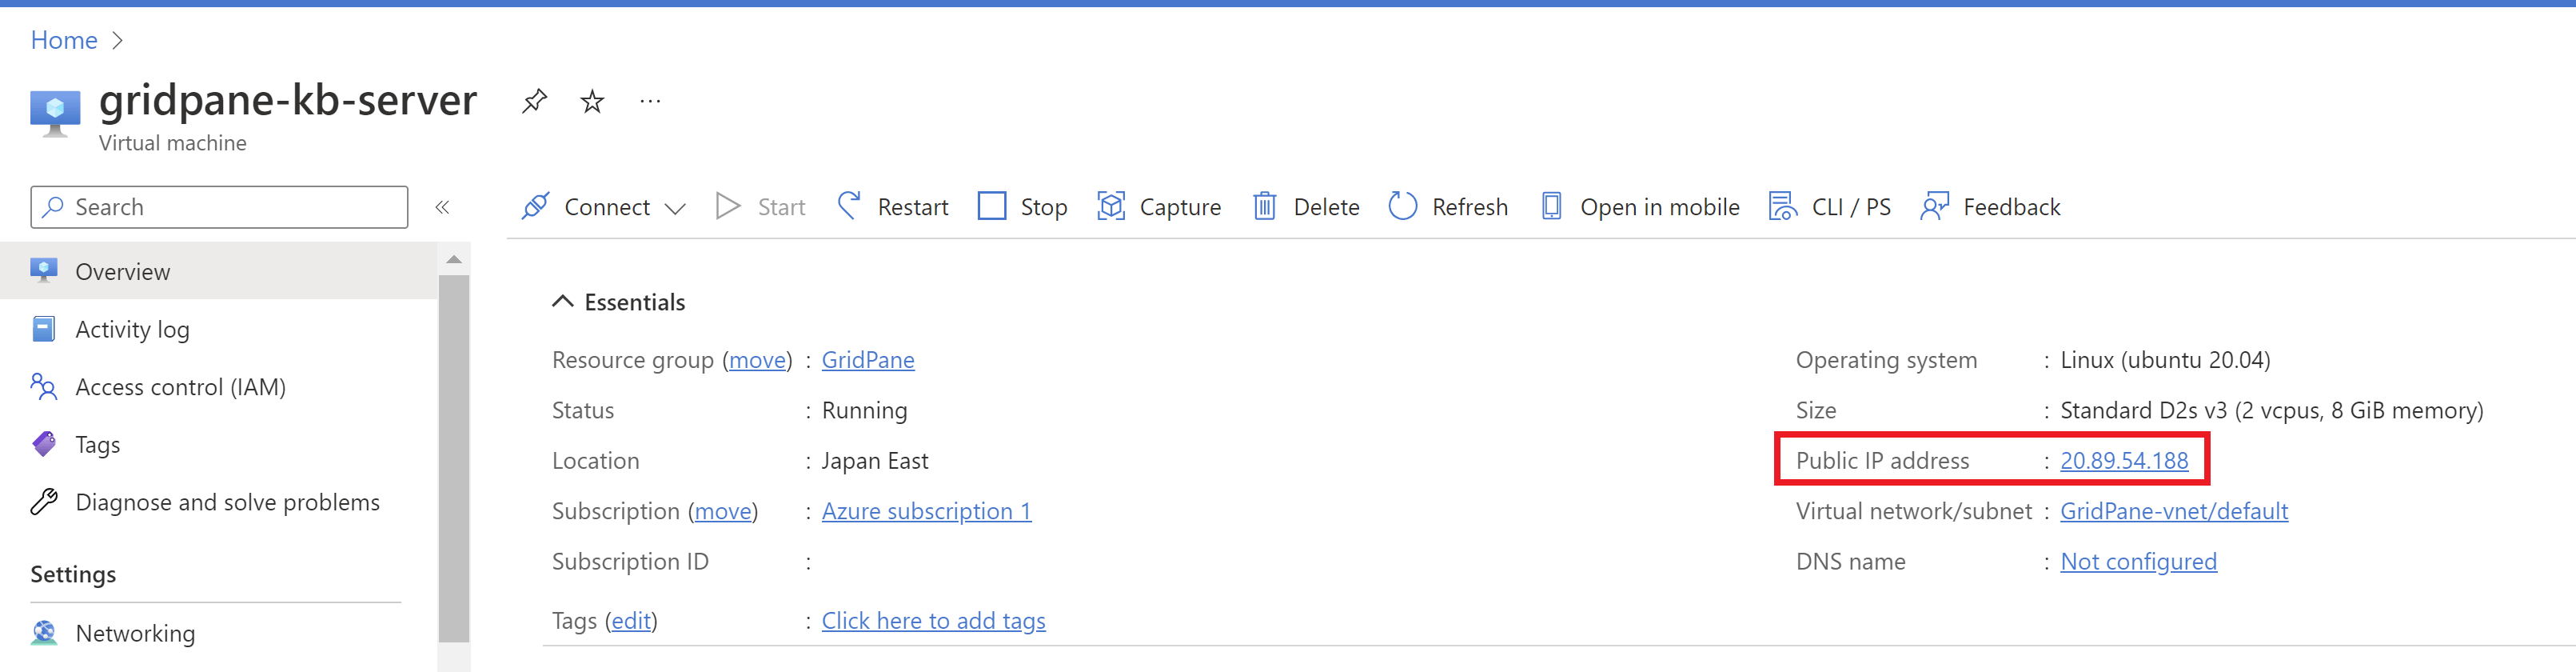
To copy your server’s IP address, you will need to open up your server’s configuration settings.
Inside your Azure account, locate your new server on your account home page or inside the Virtual Machines page, and click on the server’s name to open up the settings.
Here, you can copy your IP address:
Step 3. Connect Your Server to GridPane
Back in your GridPane dashboard, navigate to your Servers page and click on Custom VPS:
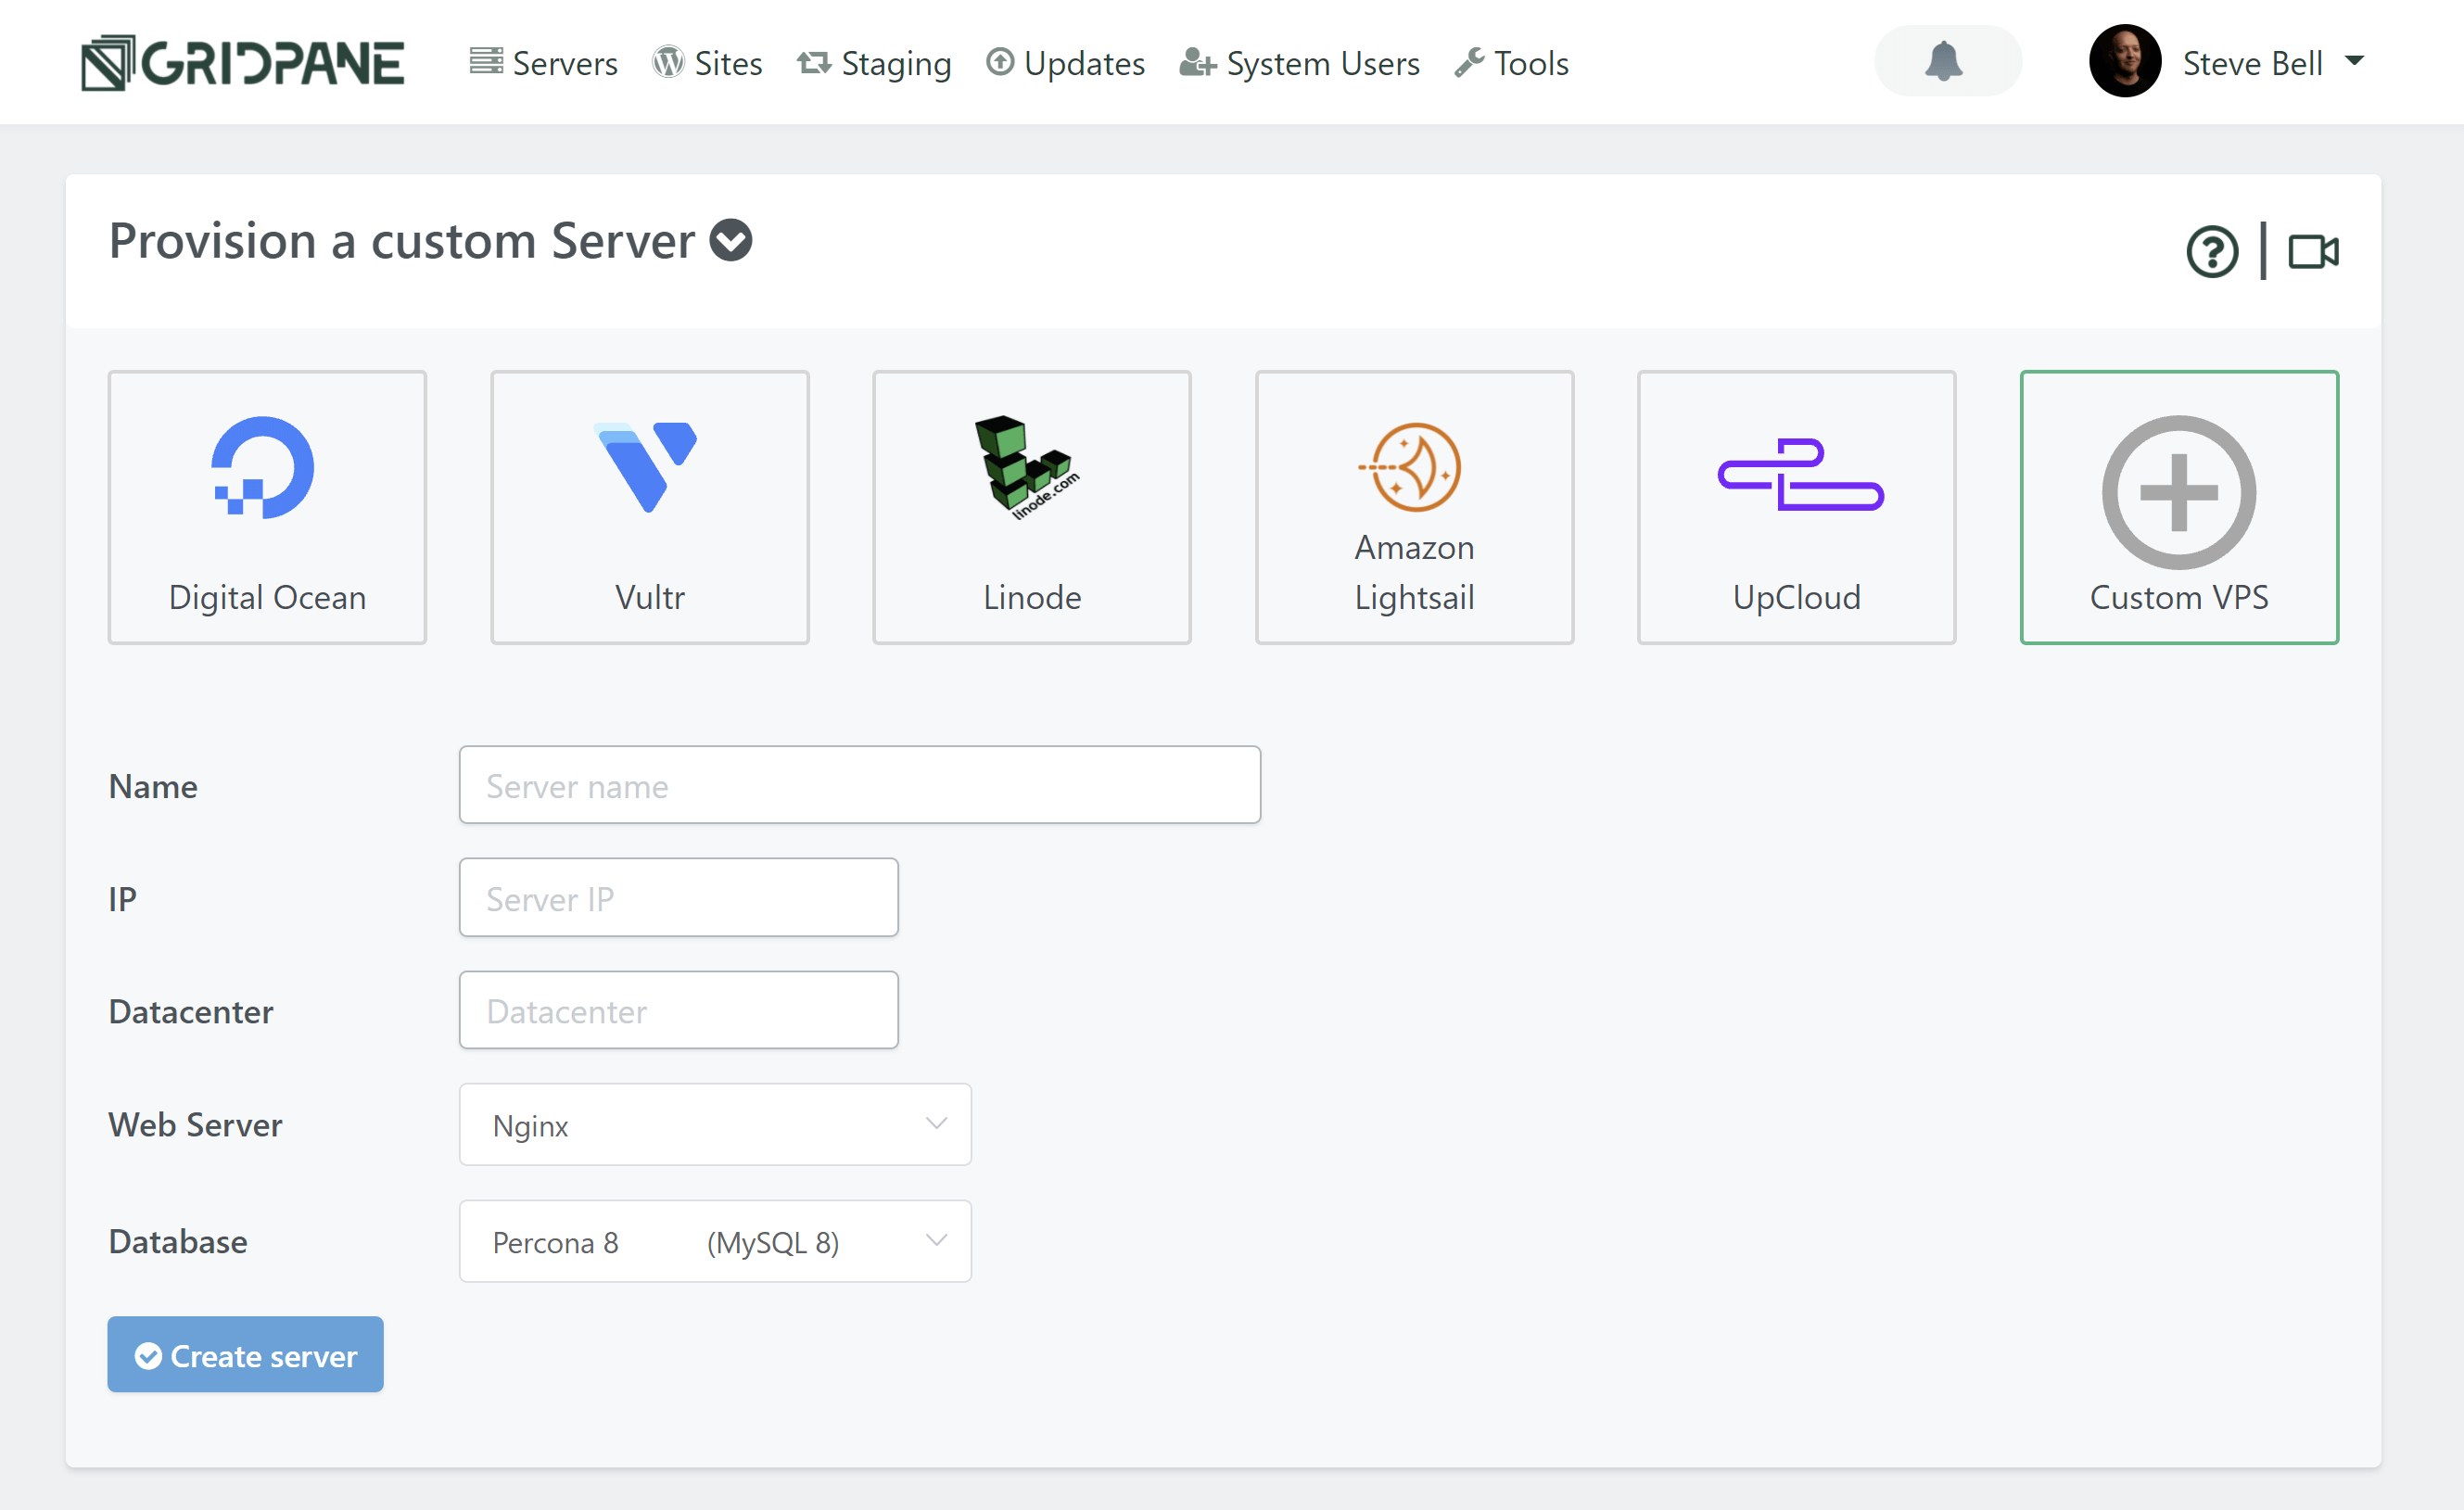
Configure Your Server
Enter the name, server IP address, and the data center name you wish to use.
Note: The Datacenter name is for your reference only, so feel free to give it a name that makes the most sense for you. As this example’s server is in Falkenstein, we’ll go ahead and enter this.
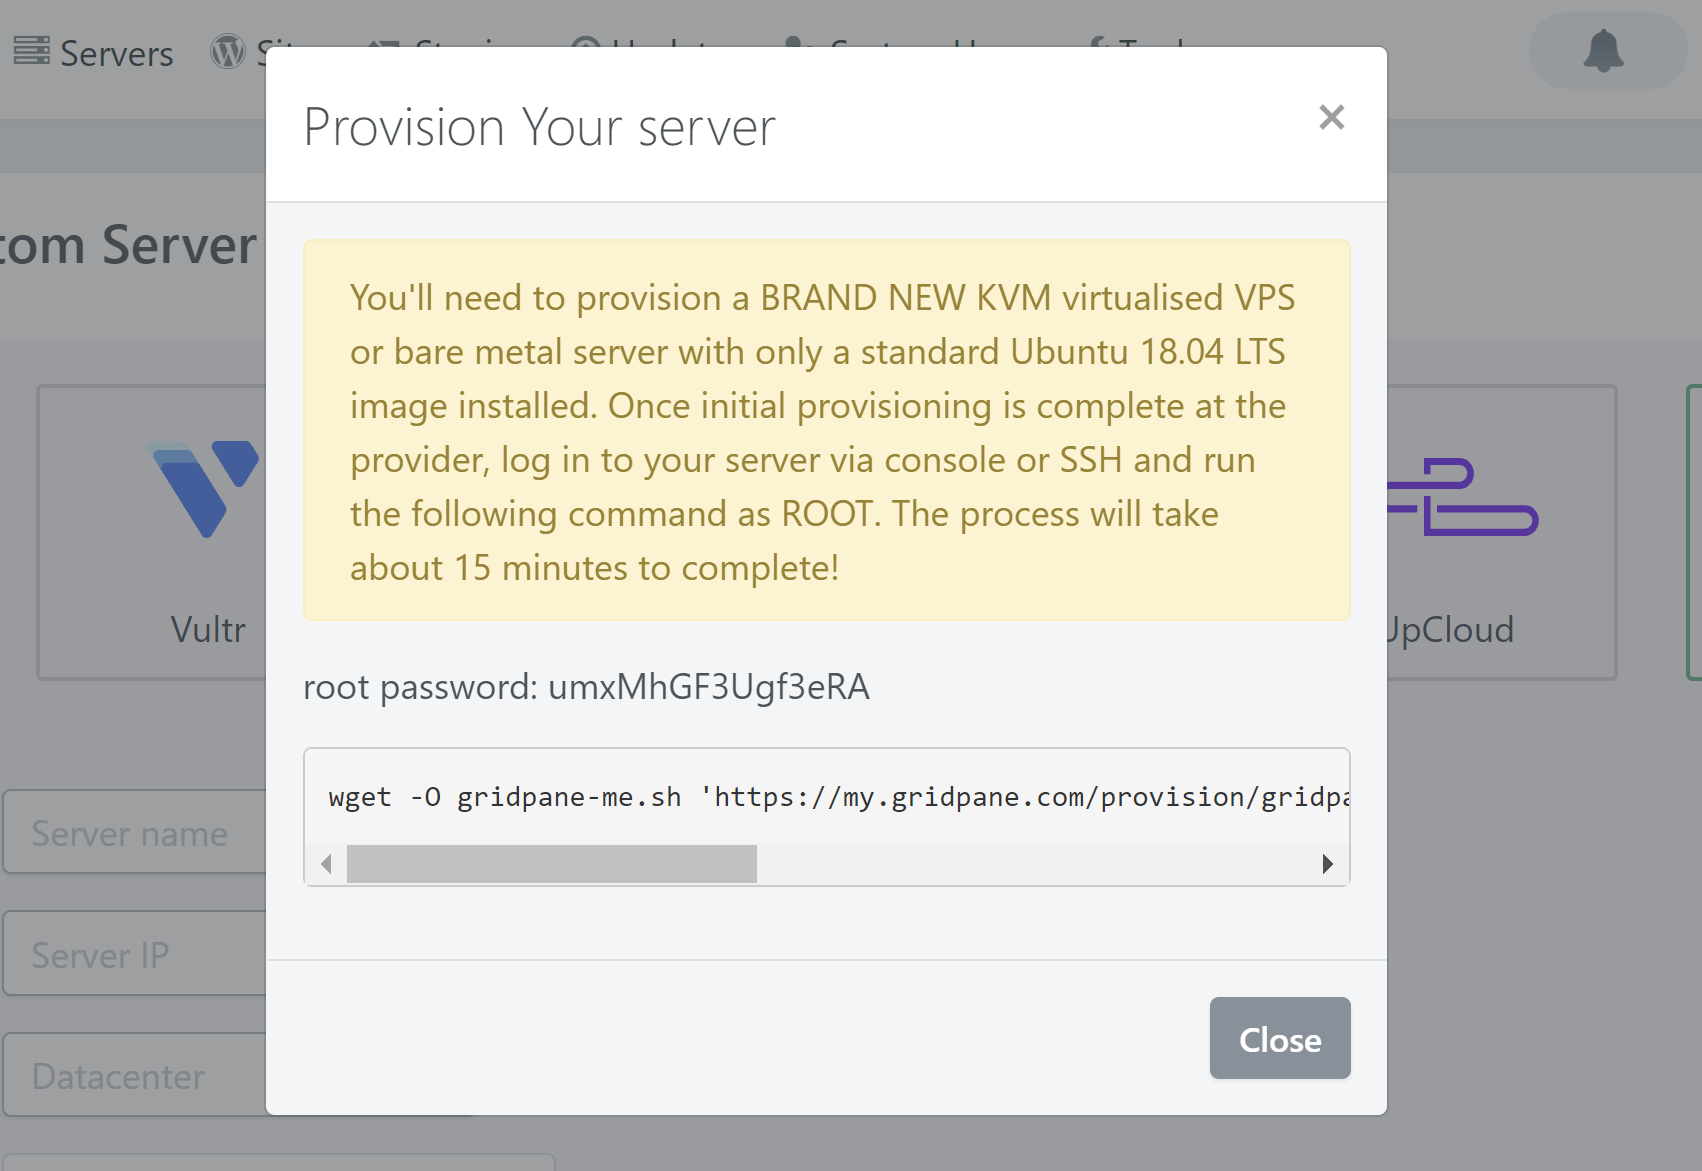
Once you click Create Server, a popup modal will contain your root password and a command-line string. Copy that string and paste it into a text document – you’ll need it in a moment.
Step 5. Run the Provisioning Code
Now, connected to your server, you can complete the final steps.
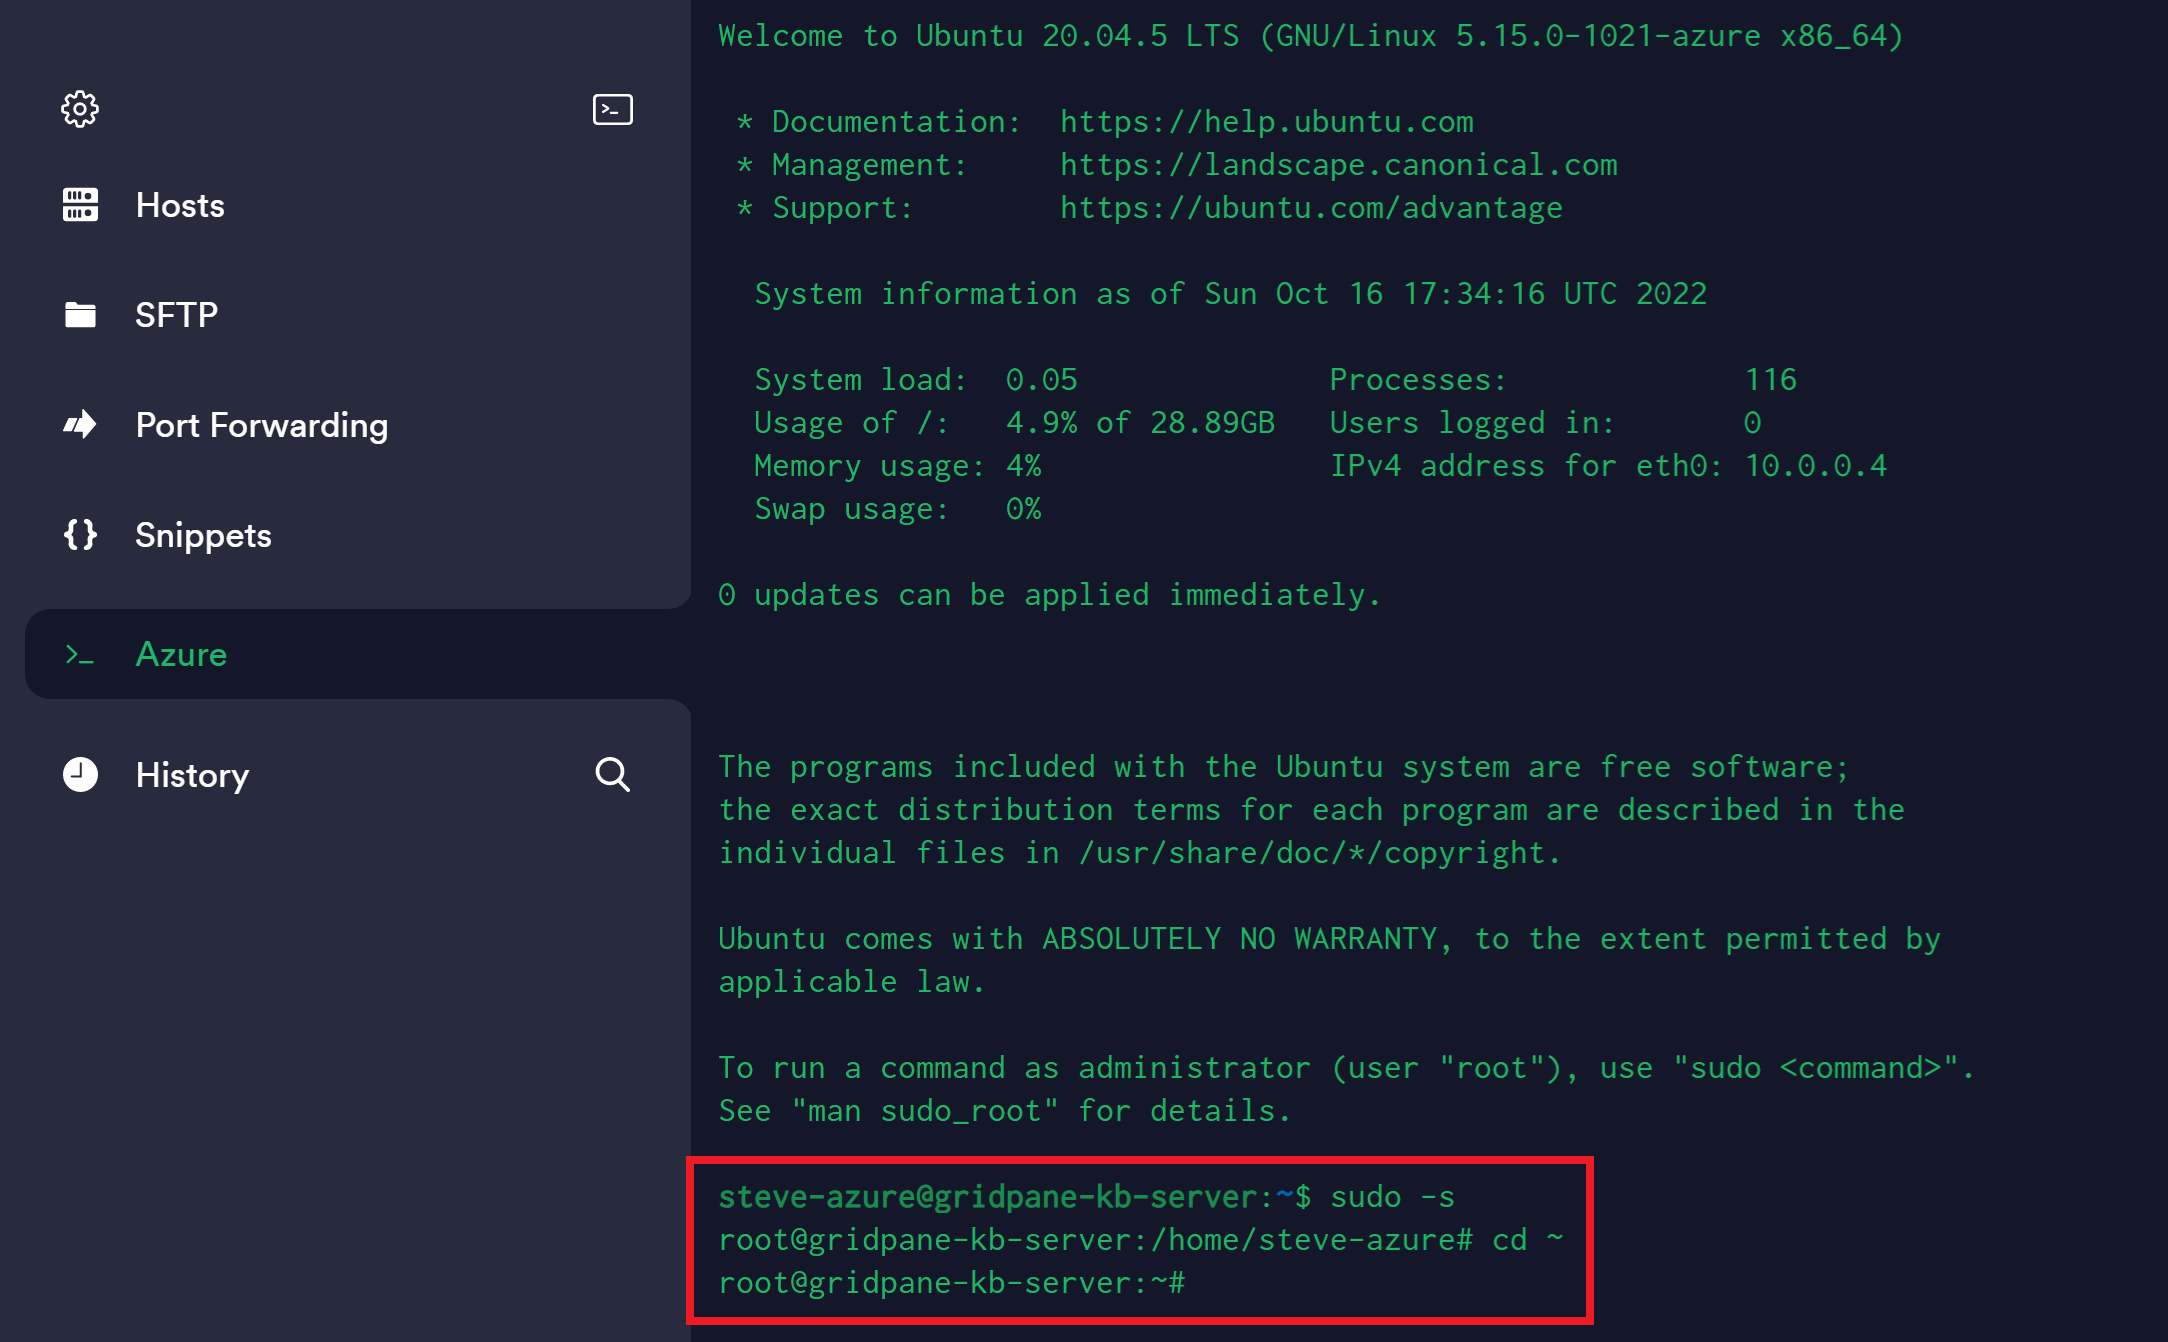
1. Change to the Root User
In my case, I chose the username steve-azure when I created my server, and we can only connect to your Azure instance via this user right now.
However, the GridPane provisioning code needs to be run as the root user. Before running your provisioning code, first paste the following and hit enter:
sudo -s
Next, cd into the root directory with:
cd ~
Step 6. Wait for Approx 10 Minutes
You can monitor the rest of your server’s provisioning progress inside the Servers page of your account. Approximately 10 minutes later, it will be ready to use inside your GridPane account.
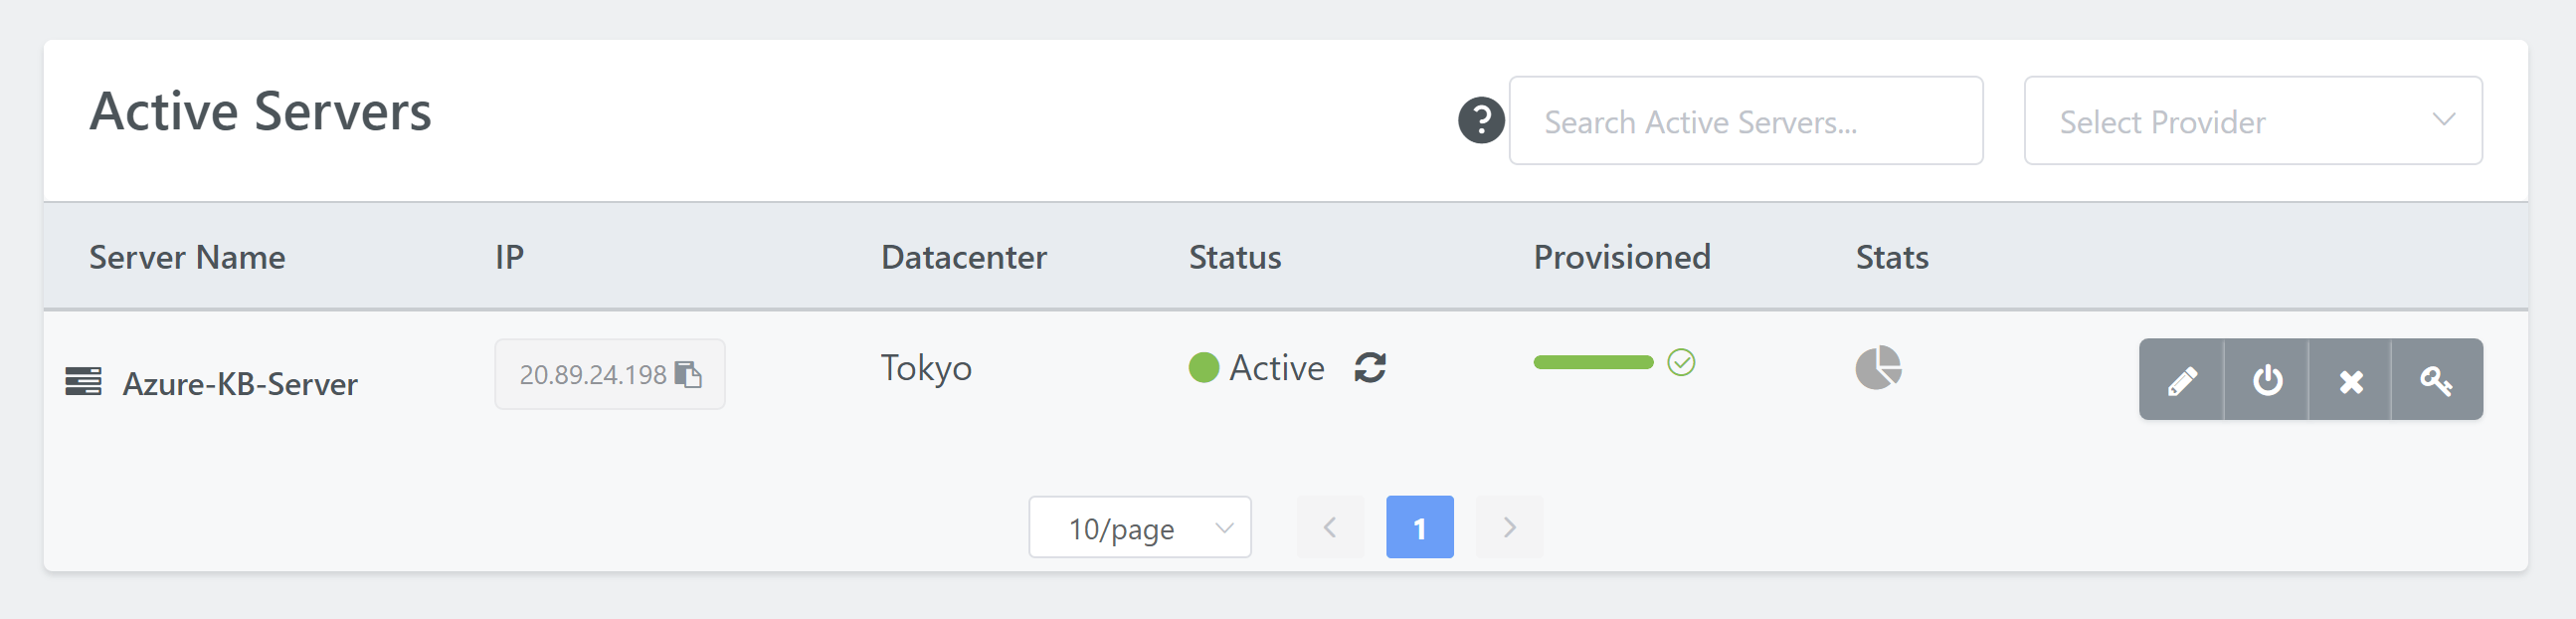
Congratulations! Next Steps
Now that your server is live, you’re ready to start creating and configuring new WordPress websites.
To deploy a site, click on the Sites link in the GridPane main menu to begin the process. We have a separate article that details the steps in detail for you.
