Manage Site Domains and Site Routing (non www vs www)

5 min read

Table of Contents

  1. Introduction
  2. Background Information
  3. Routing and wp-config.php
  4. Configuring Routing for Your Websites

Introduction

GridPane includes functionality in the Control Panel to easily manage and configure the domains for your WordPress sites.

We have three settings: –

  • None – this is the default setting, and is the equivalent of root, which means your domain will not be served with “www” at the beginning of the URL.
  • Root – forced without www
  • www – forced with www

For example, if your website is set to either None or Root, it will be served as: https://yourdomain.com.

If set to www, it will be served as: https://www.yourdomain.com

(HTTP vs HTTPS will depend on whether you have an SSL certificate).

Update: Cloudflare APO

Unfortunately, Cloudflare doesn't allow server-based www routing for its APO offering. To take this into account, we now also define routing inside the wp-config.php file as detailed below.

Background Information

Previously, we have always controlled these two wp_options tightly because often users would set their server to redirect one way, have their options direct another way, and have things in the DB directing, which would lead to things like redirect loops.

This has worked well and without issue, because in general, it is much better to do root or www redirect at the server. That is the accepted best practice if you will do this, as opposed to at the application level. This allowed us to ensure that server redirects were always mirrored in the wp-options table.

As technology evolves, and while this is best practice for an optimized server, some of the third-party integrations that can bring their own benefits are not actually compatible with properly optimized servers…

A classic example of this is the Cloudflare Flexible SSL setting that they auto-enable – it doesn’t work if you have a properly configured server for an HTTPS redirect and leads to a redirect loop.

Another example is the new Cloudflare WordPress APO, which allows you to cache your WordPress sites on the Cloudflare edge. Server caching is great, but edge caching is even better in some cases. The problem with Cloudflare APO is that it again assumes that a server is not properly configured for www routing – or more – and it will not work if a site has its www routing configured at a server level. It will only work if the site employs www routing at the application level.

That meant we had to loosen our strict control on these constants so that anyone who wants to use www routing can leave their GridPane server routing set to None and then employ the www routing in their wp-admin settings instead.

Details below!

Routing and wp-config.php

Below we’ll look at how the different routing options affect your website. Be sure to read all of the information about the default None setting as most of the info you need to know is here.

None

GridPane now only takes control of the application level site routing wp_options.home wp_options.siteurl via the wp-config.php file IF server routing is active.

By default, new websites will be built with None routing and this, and any change back to none will lead to this:

/* GridPane site routing */
//define('WP_HOME', 'http://example.com');
//define('WP_SITEURL', 'http://example.com');

The // at the beginning before “define” means that these lines are commented out and this is not active.

Cloudflare APO will not work if a server is properly configured for www or root redirections. The None routing setting leaves the server open to accepting connections on both, and the redirection – if wanted – needs to be done at the application level or downstream in transport.

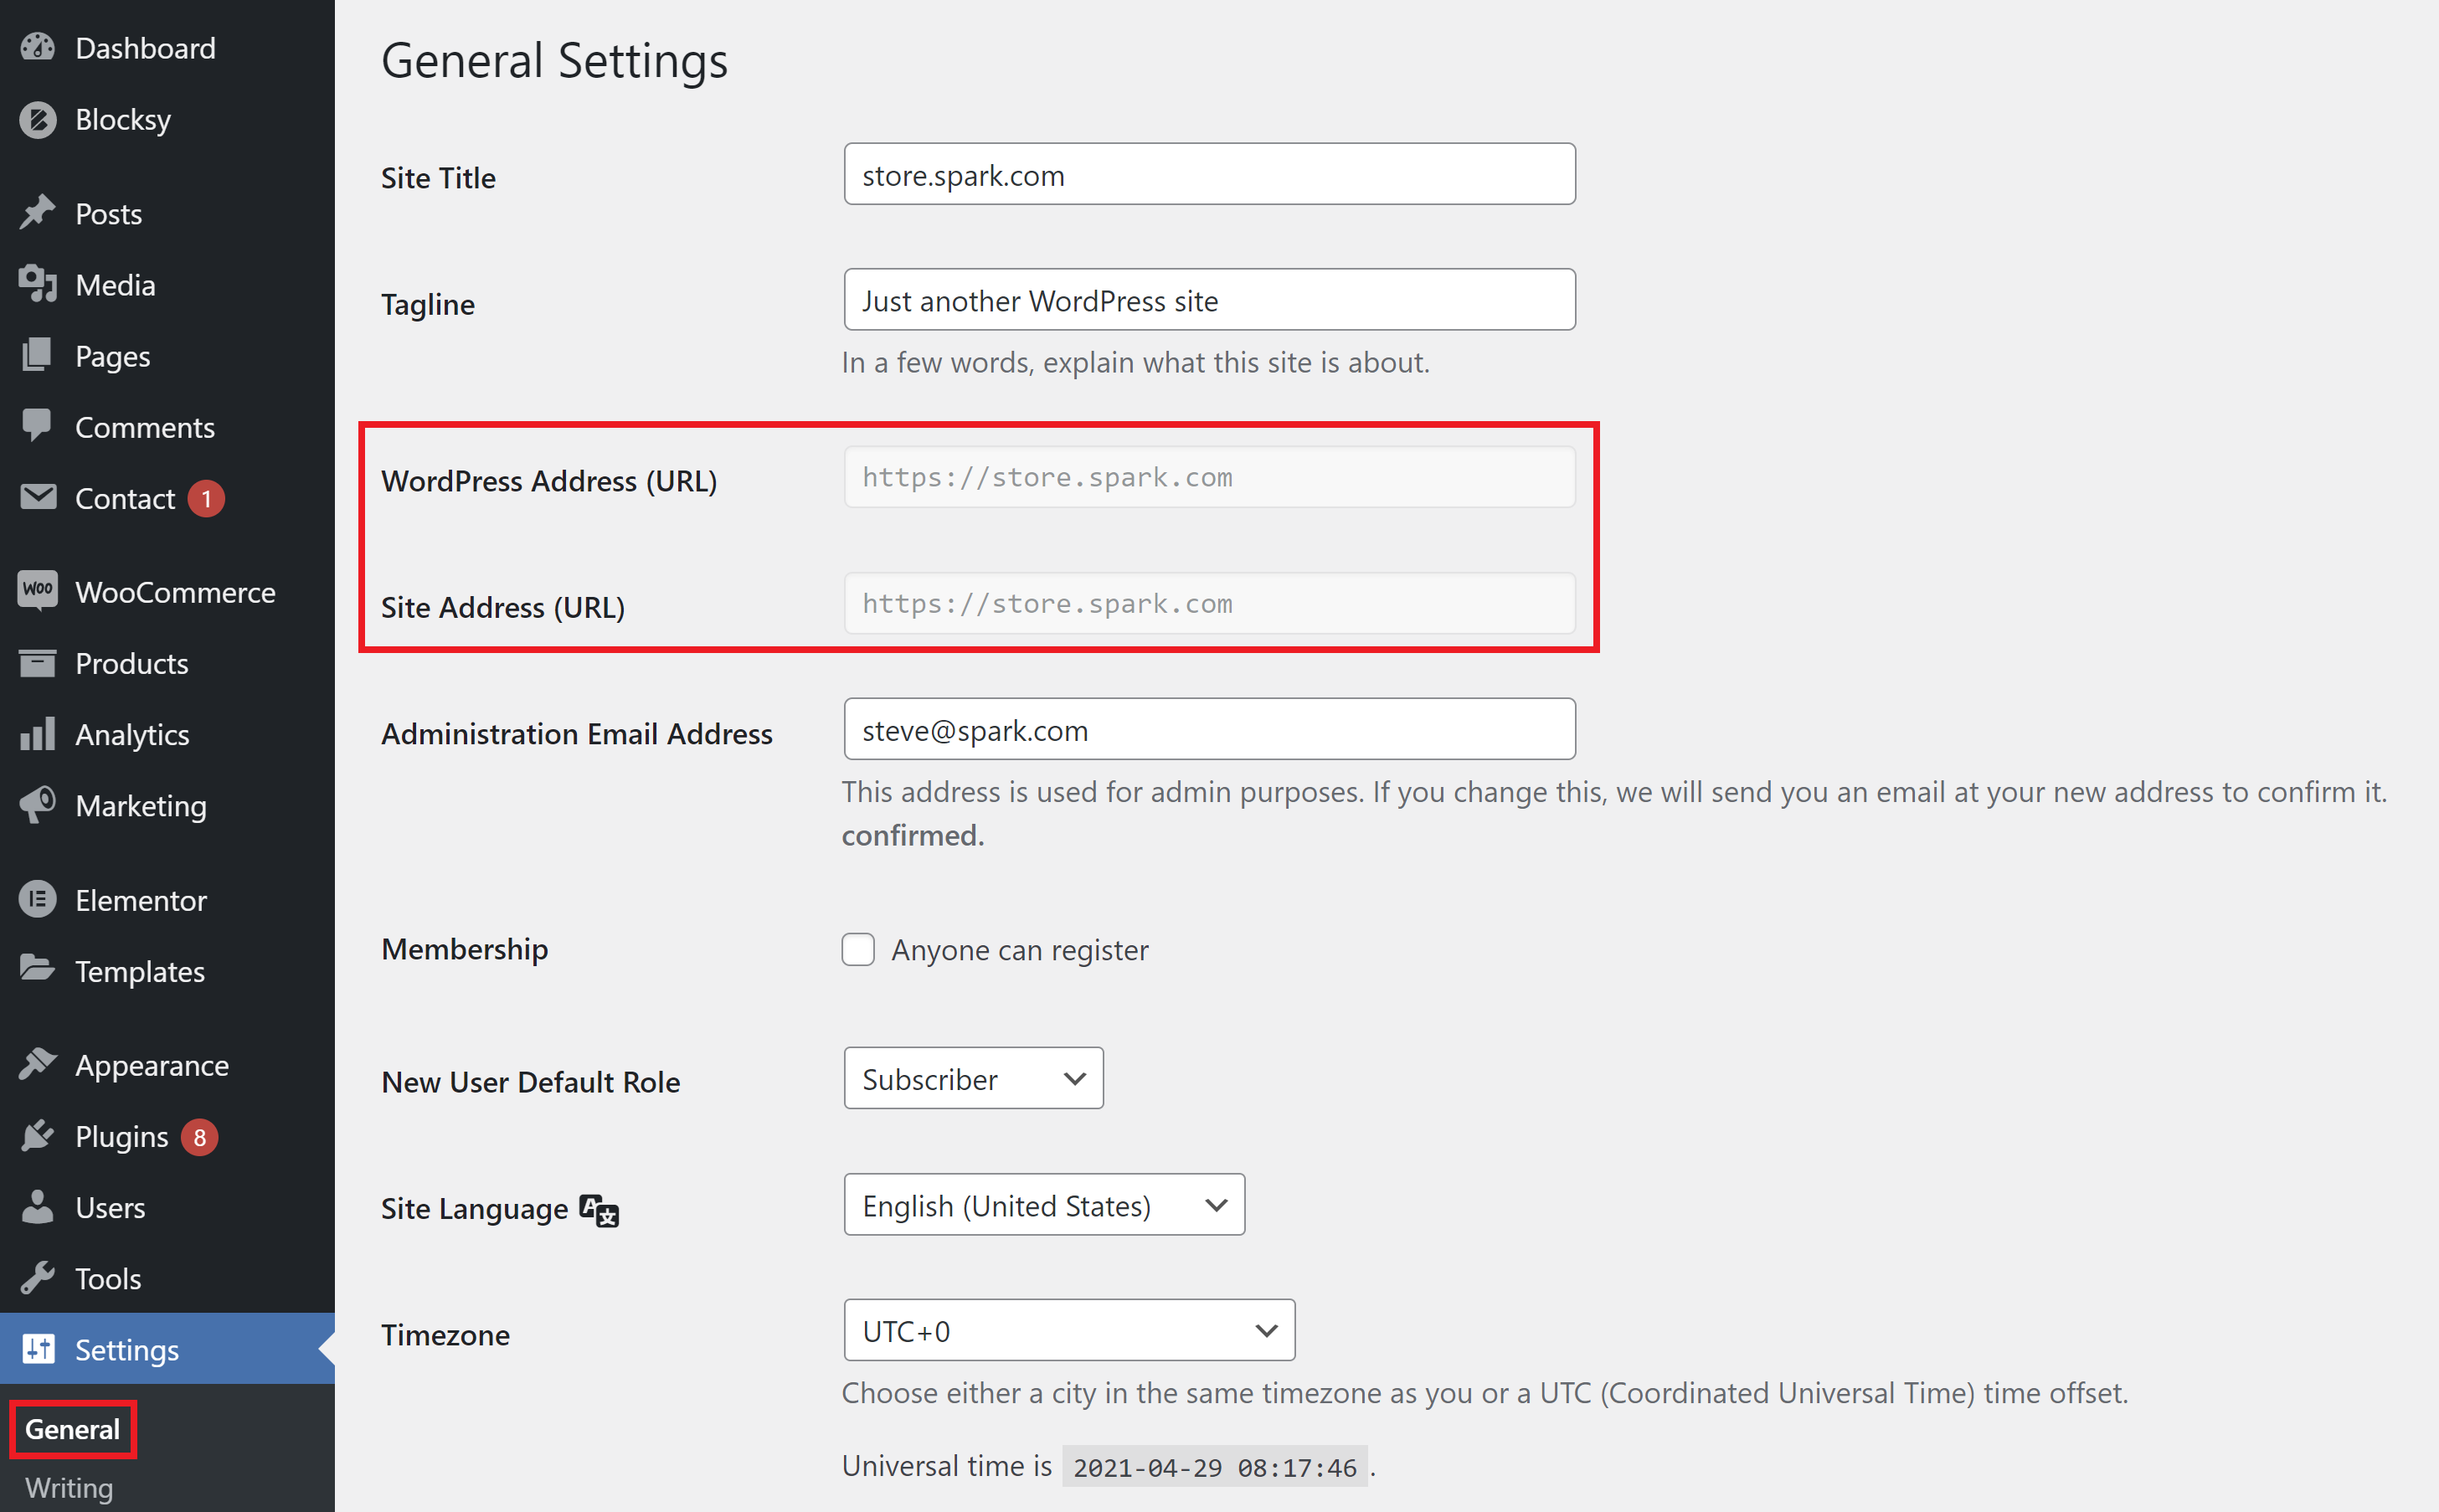
By leaving our routing set to None you can now set the routing via the /wp-admin WordPress Address (URL) and Site address (URL) options in your WordPress website settings, and Cloudflare APO will function correctly.

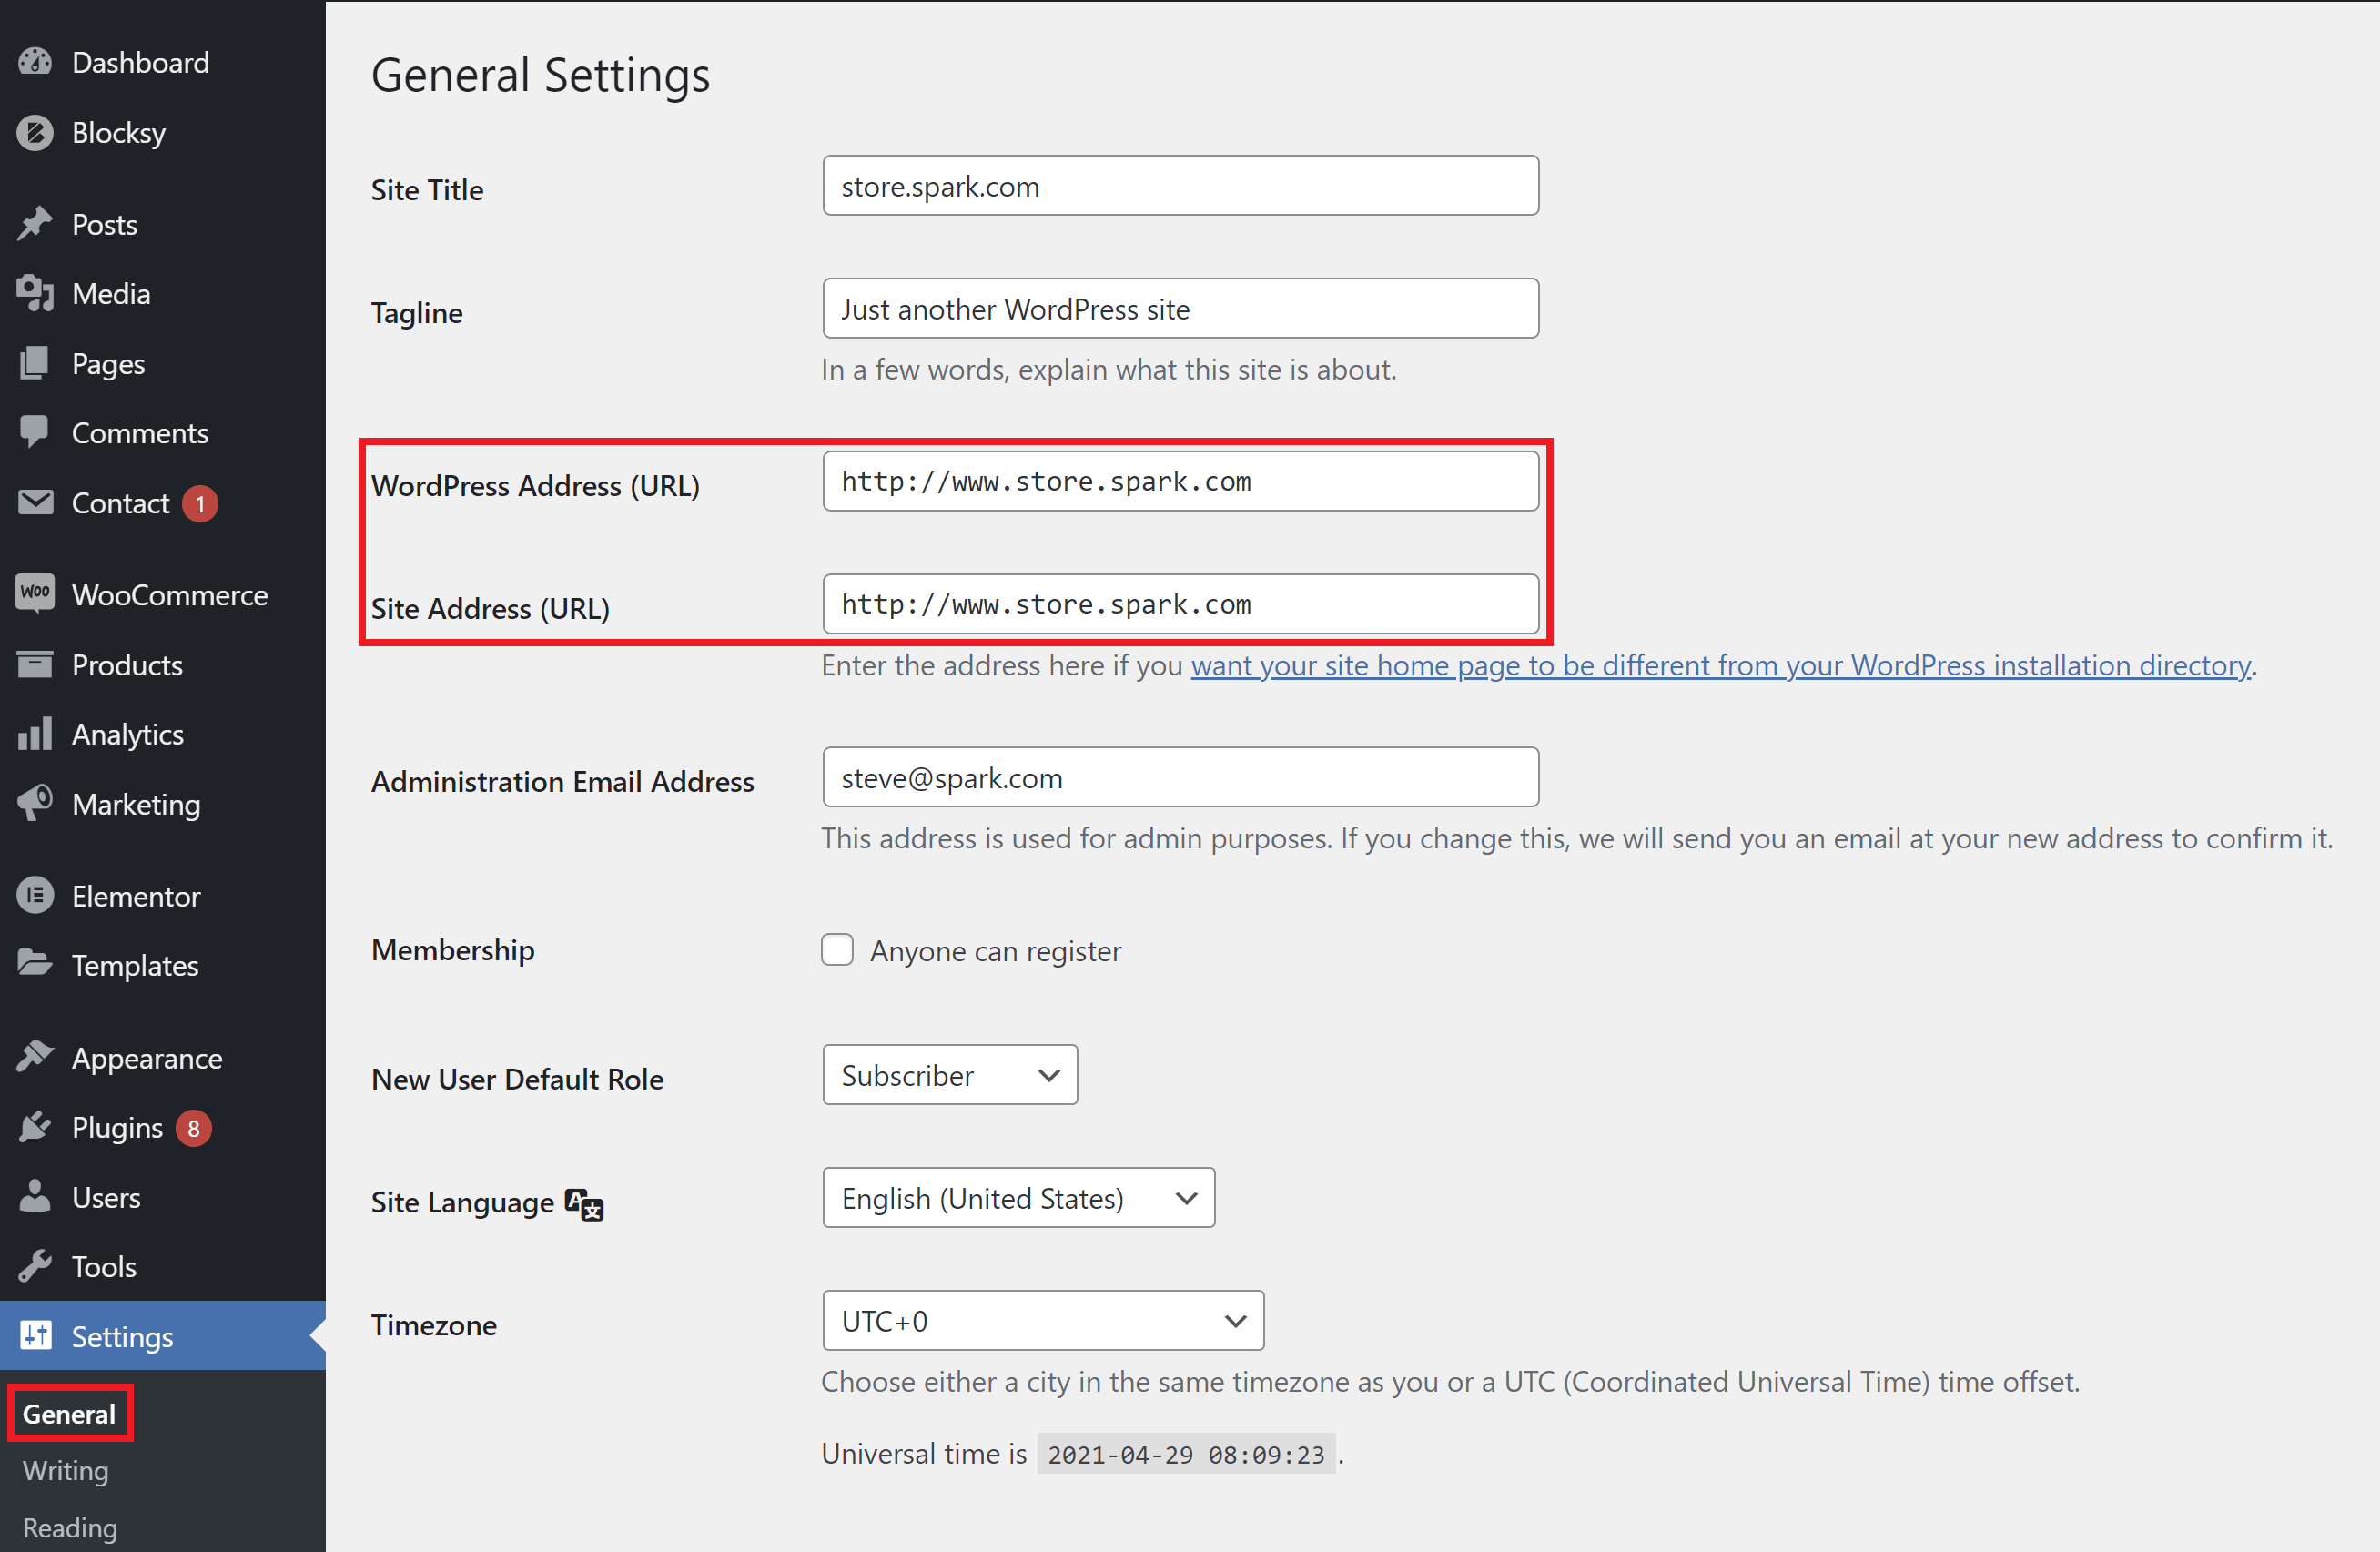
NOTE: Changing this within your website will NOT update the wp-config.php file, so you will still see the routing as commented out.

For www and Root below, you will not be able to configure routing within your WordPress website, and this section is not editable. 

www

If www is active, then this will be updated to:

/* GridPane site routing */
define('WP_HOME', 'http://www.example.com');
define('WP_SITEURL', 'http://www.example.com');

Root

If root is active, then this will be updated to:

/* GridPane site routing */
define('WP_HOME', 'http://example.com');
define('WP_SITEURL', 'http://example.com');

Configuring Routing for Your Websites

Making this change is quick and easy, and we’ll walk through the process step by step below.

Step 1. Open the Website Configuration Modal

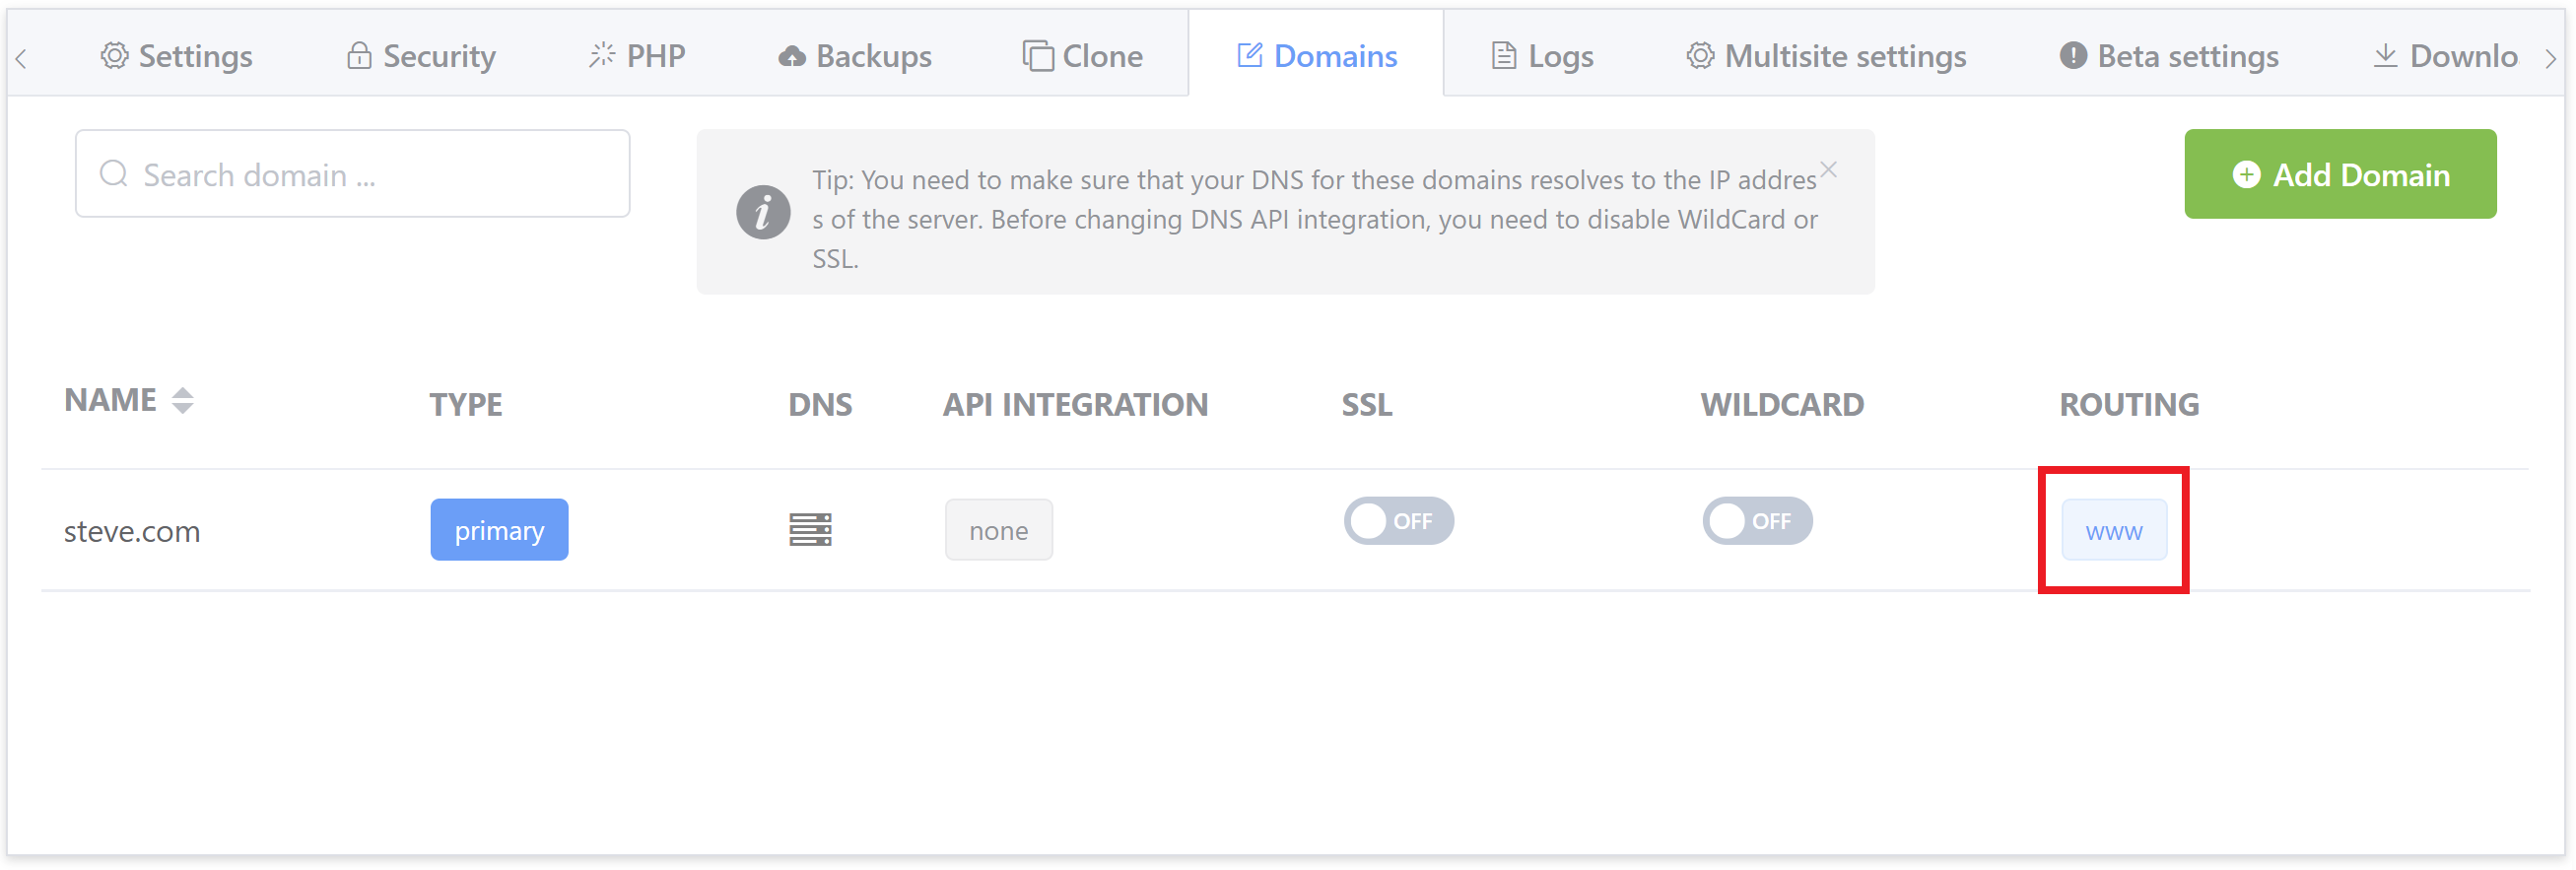
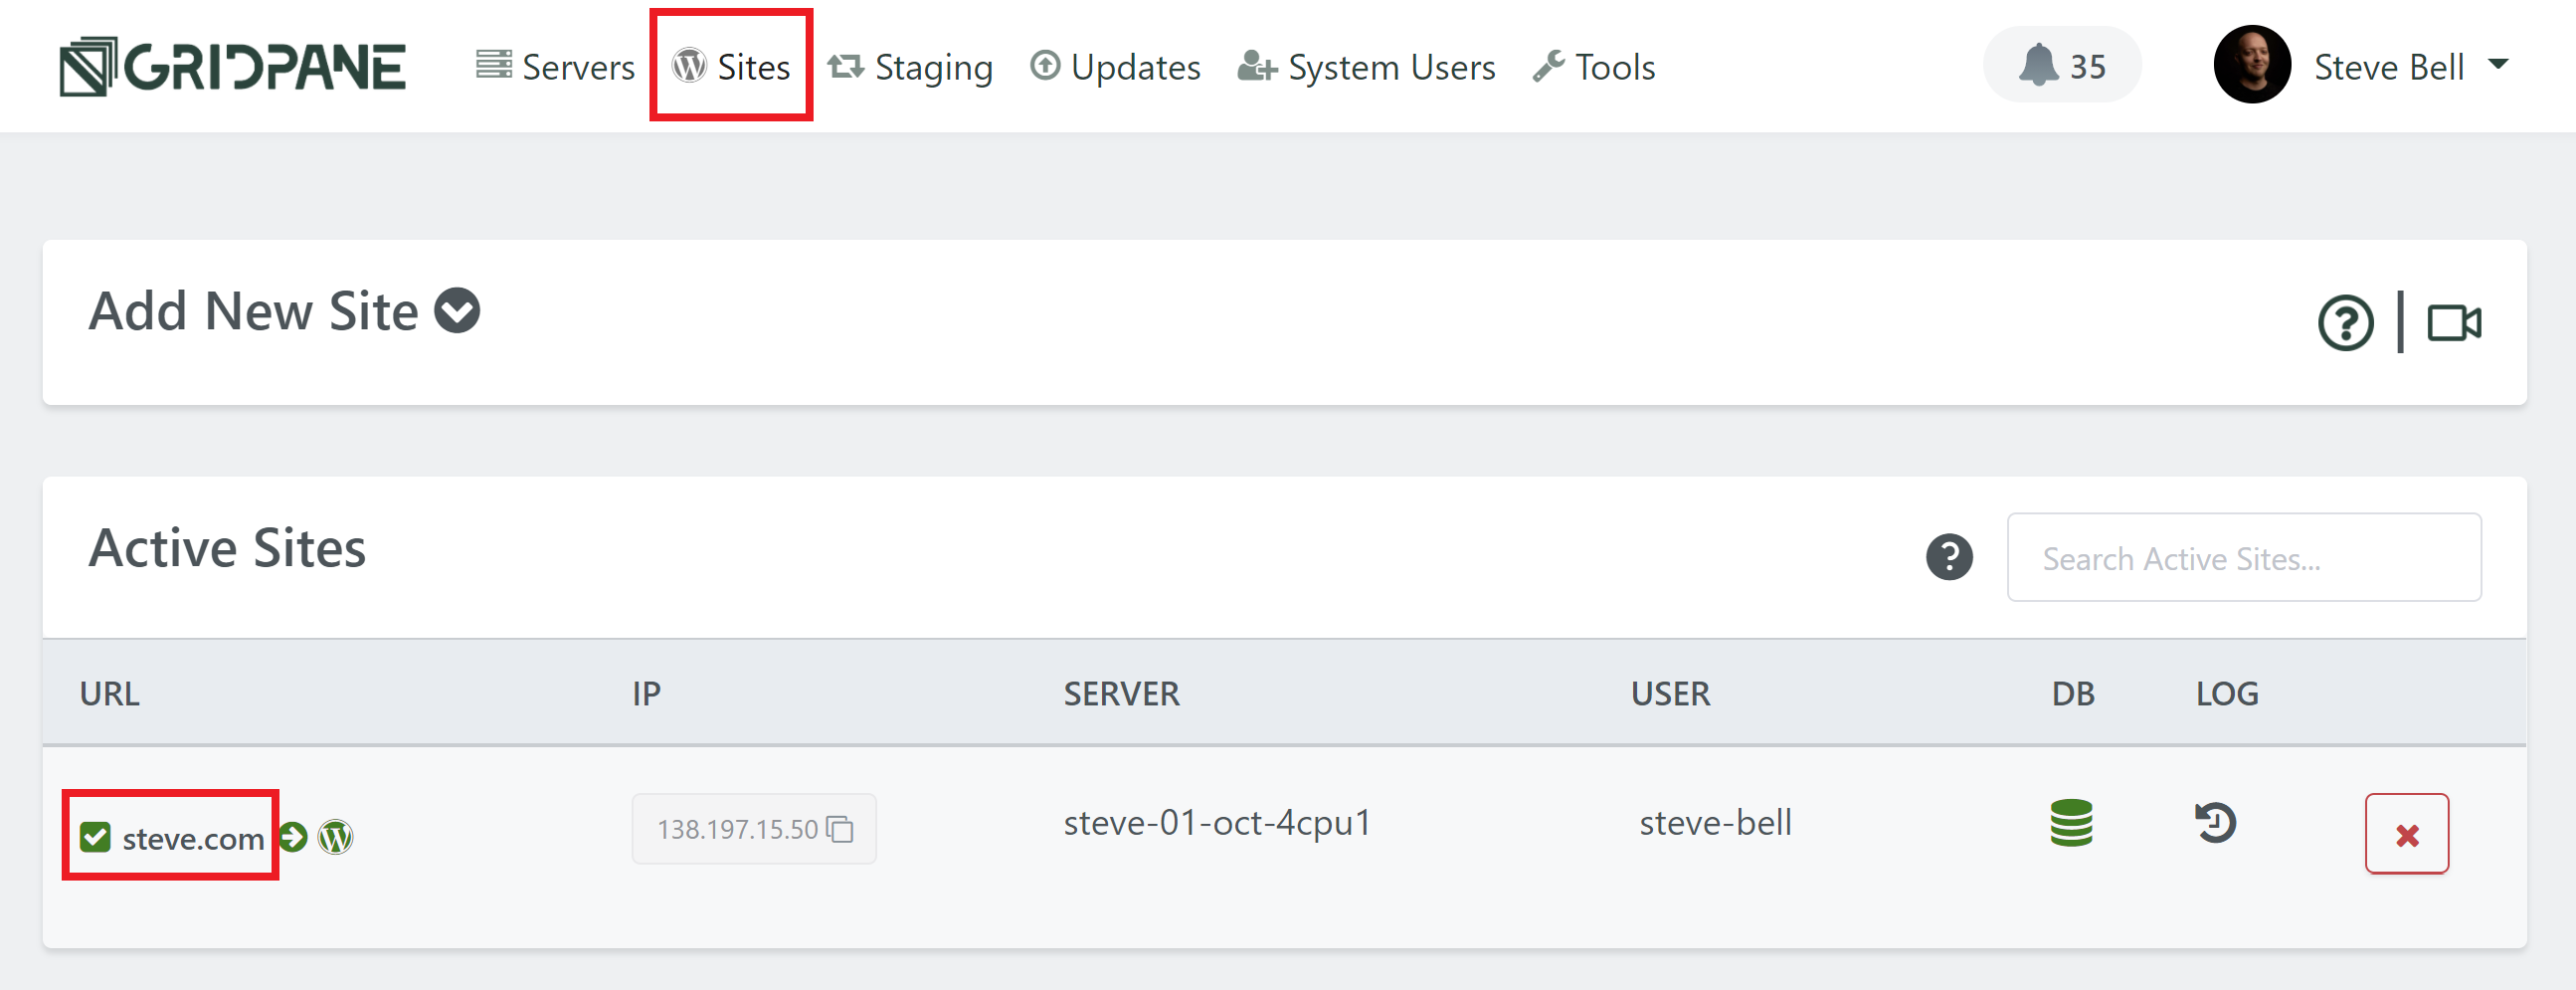
First, head to the Sites page inside your GridPane account and click on the name of the domain you wish to edit:

Step 2. Edit your domain settings

With the website configuration modal open, click through to the domains tab. Here you’ll see a table with your primary domain, as well as any alias or redirect domains attached to it.

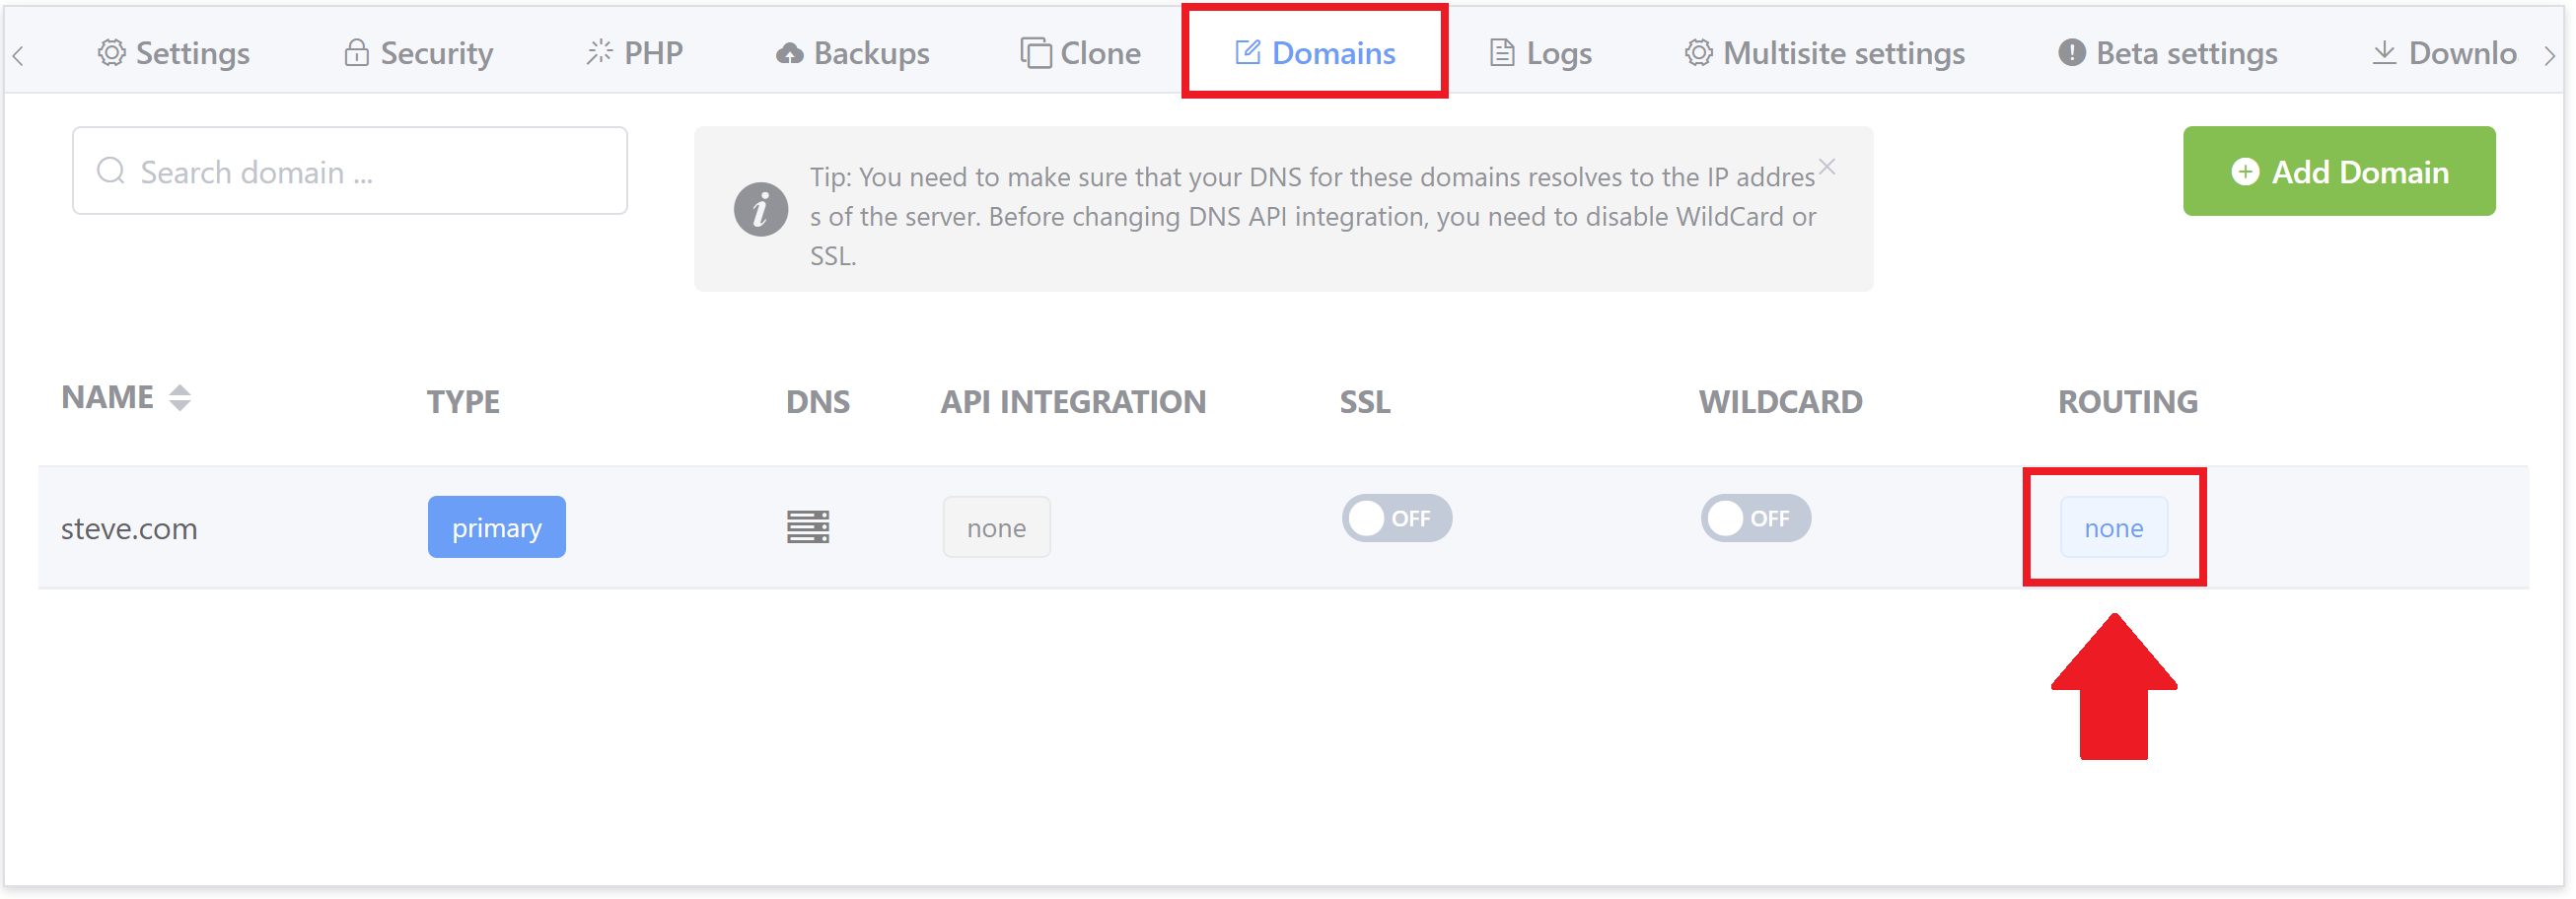
In the routing column, click on the box outlined in the picture above to open the settings modal.

This will present you with a dropdown where you can select your routing setting and select if you want to “Include Database Rewrites“:

Generally, you’re going to want to run database rewrites. This will run a search and replace and ensure that all of your URLs are set correctly. 

Two options are available to you:

  1. InterconnectIT
  2. WP-CLI

InterconnectIT is usually the best option as it’s more comprehensive. WP-CLI maybe a little quicker, but has a higher chance of missing some rewrites.

Make your selection and hit the Save button.

Your routing has now been changed and you’re all set!