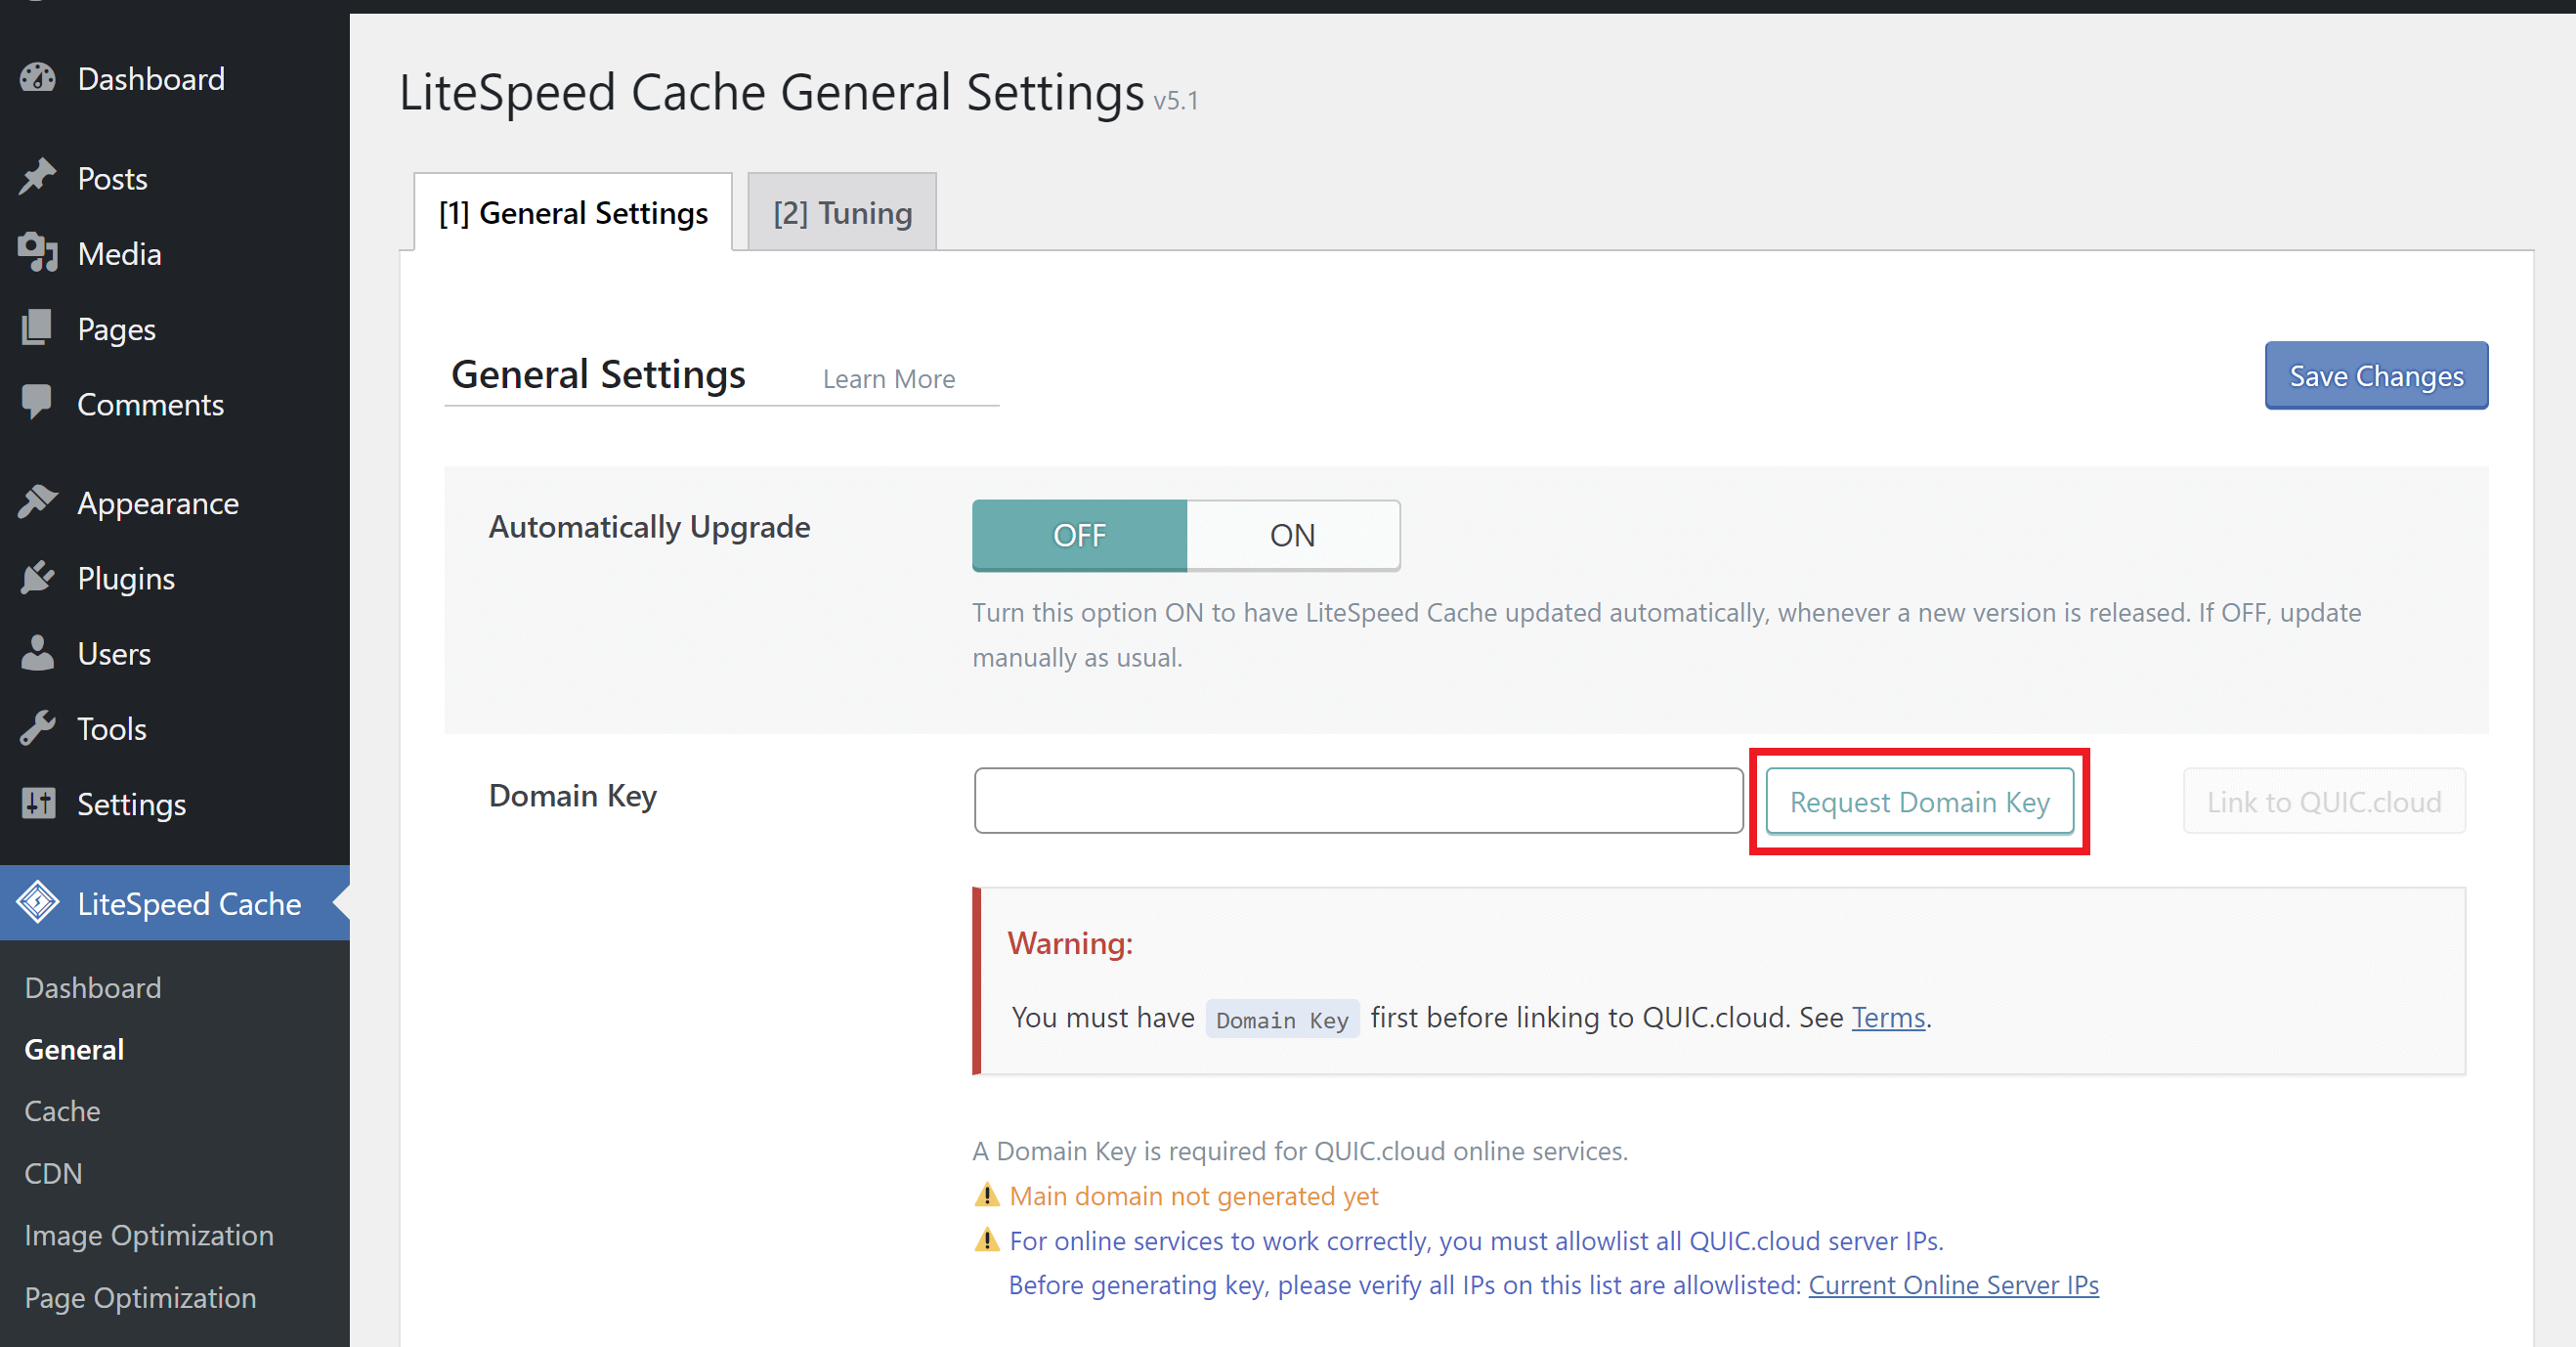
Linking Your Website to Your Account
To begin, first click the “Request domain key” button. This may take a minute or two to go through.
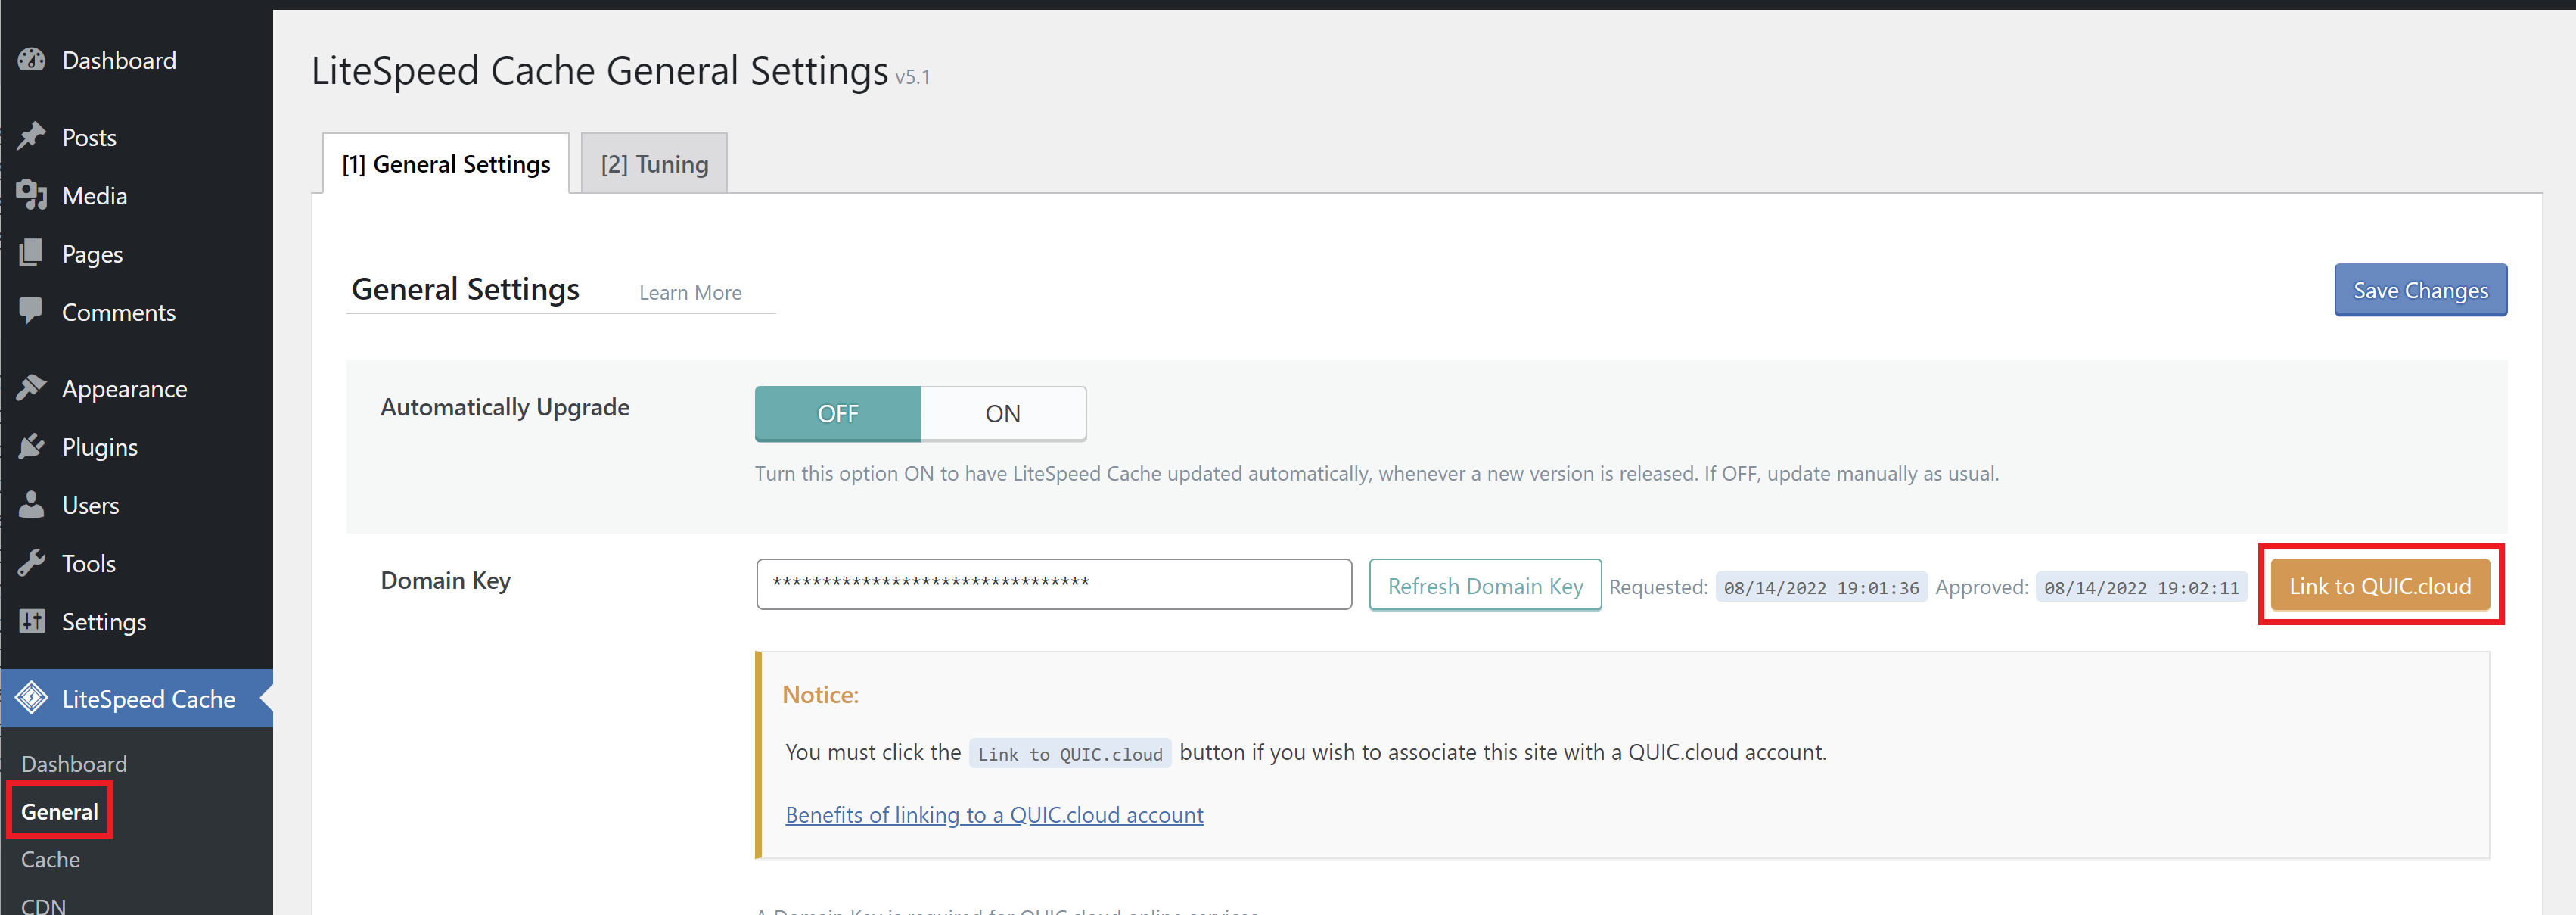
Once you have your domain key, click the “Link to QUIC.cloud” button that is now active:
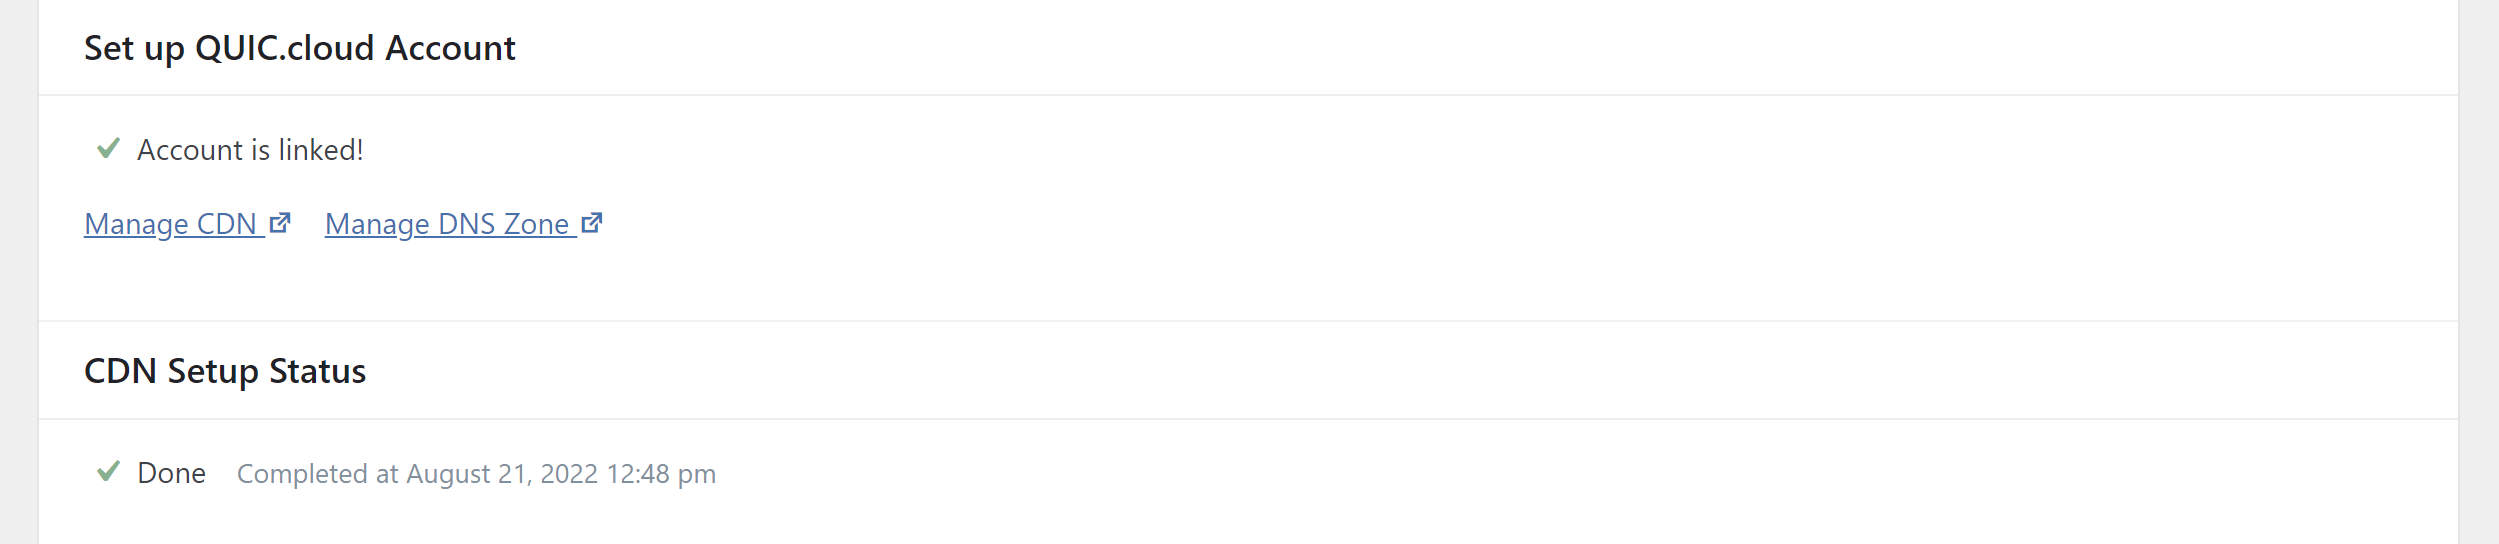
Once connected you’ll see your website in your CDN dashboard, and you manage it by clicking its name:

Turn QUIC.cloud CDN ON
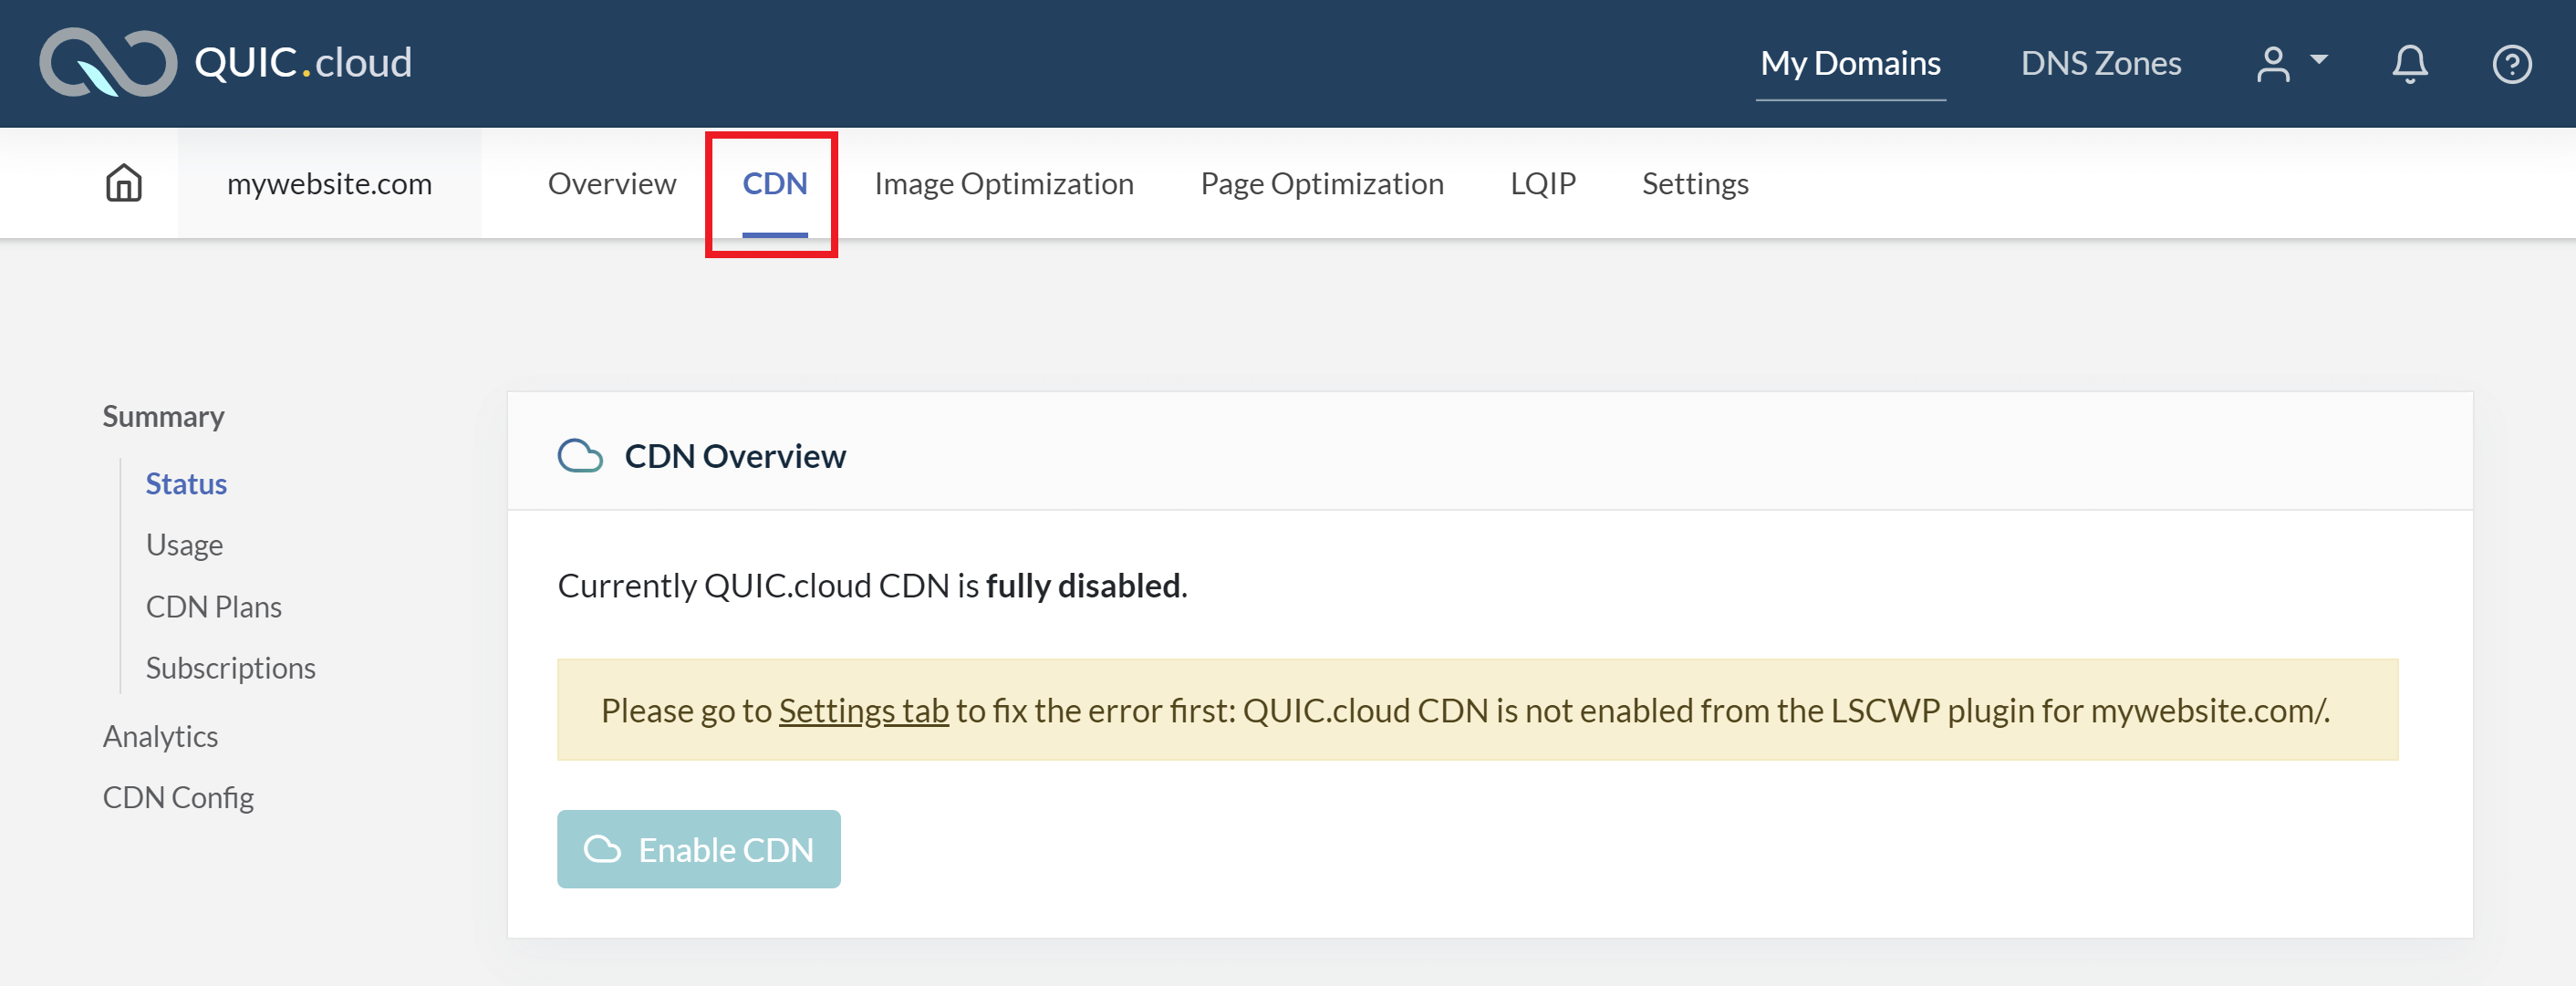
Finally, we need to activate the CDN inside your LiteSpeed cache settings. When this is inactive, you’ll see a notification inside your QUIC.cloud account CDN settings that this first needs to be enabled before it can be configured:
Navigate to your Dashboard > LiteSpeed Cache > CDN settings page, and toggle the CDN to ON:
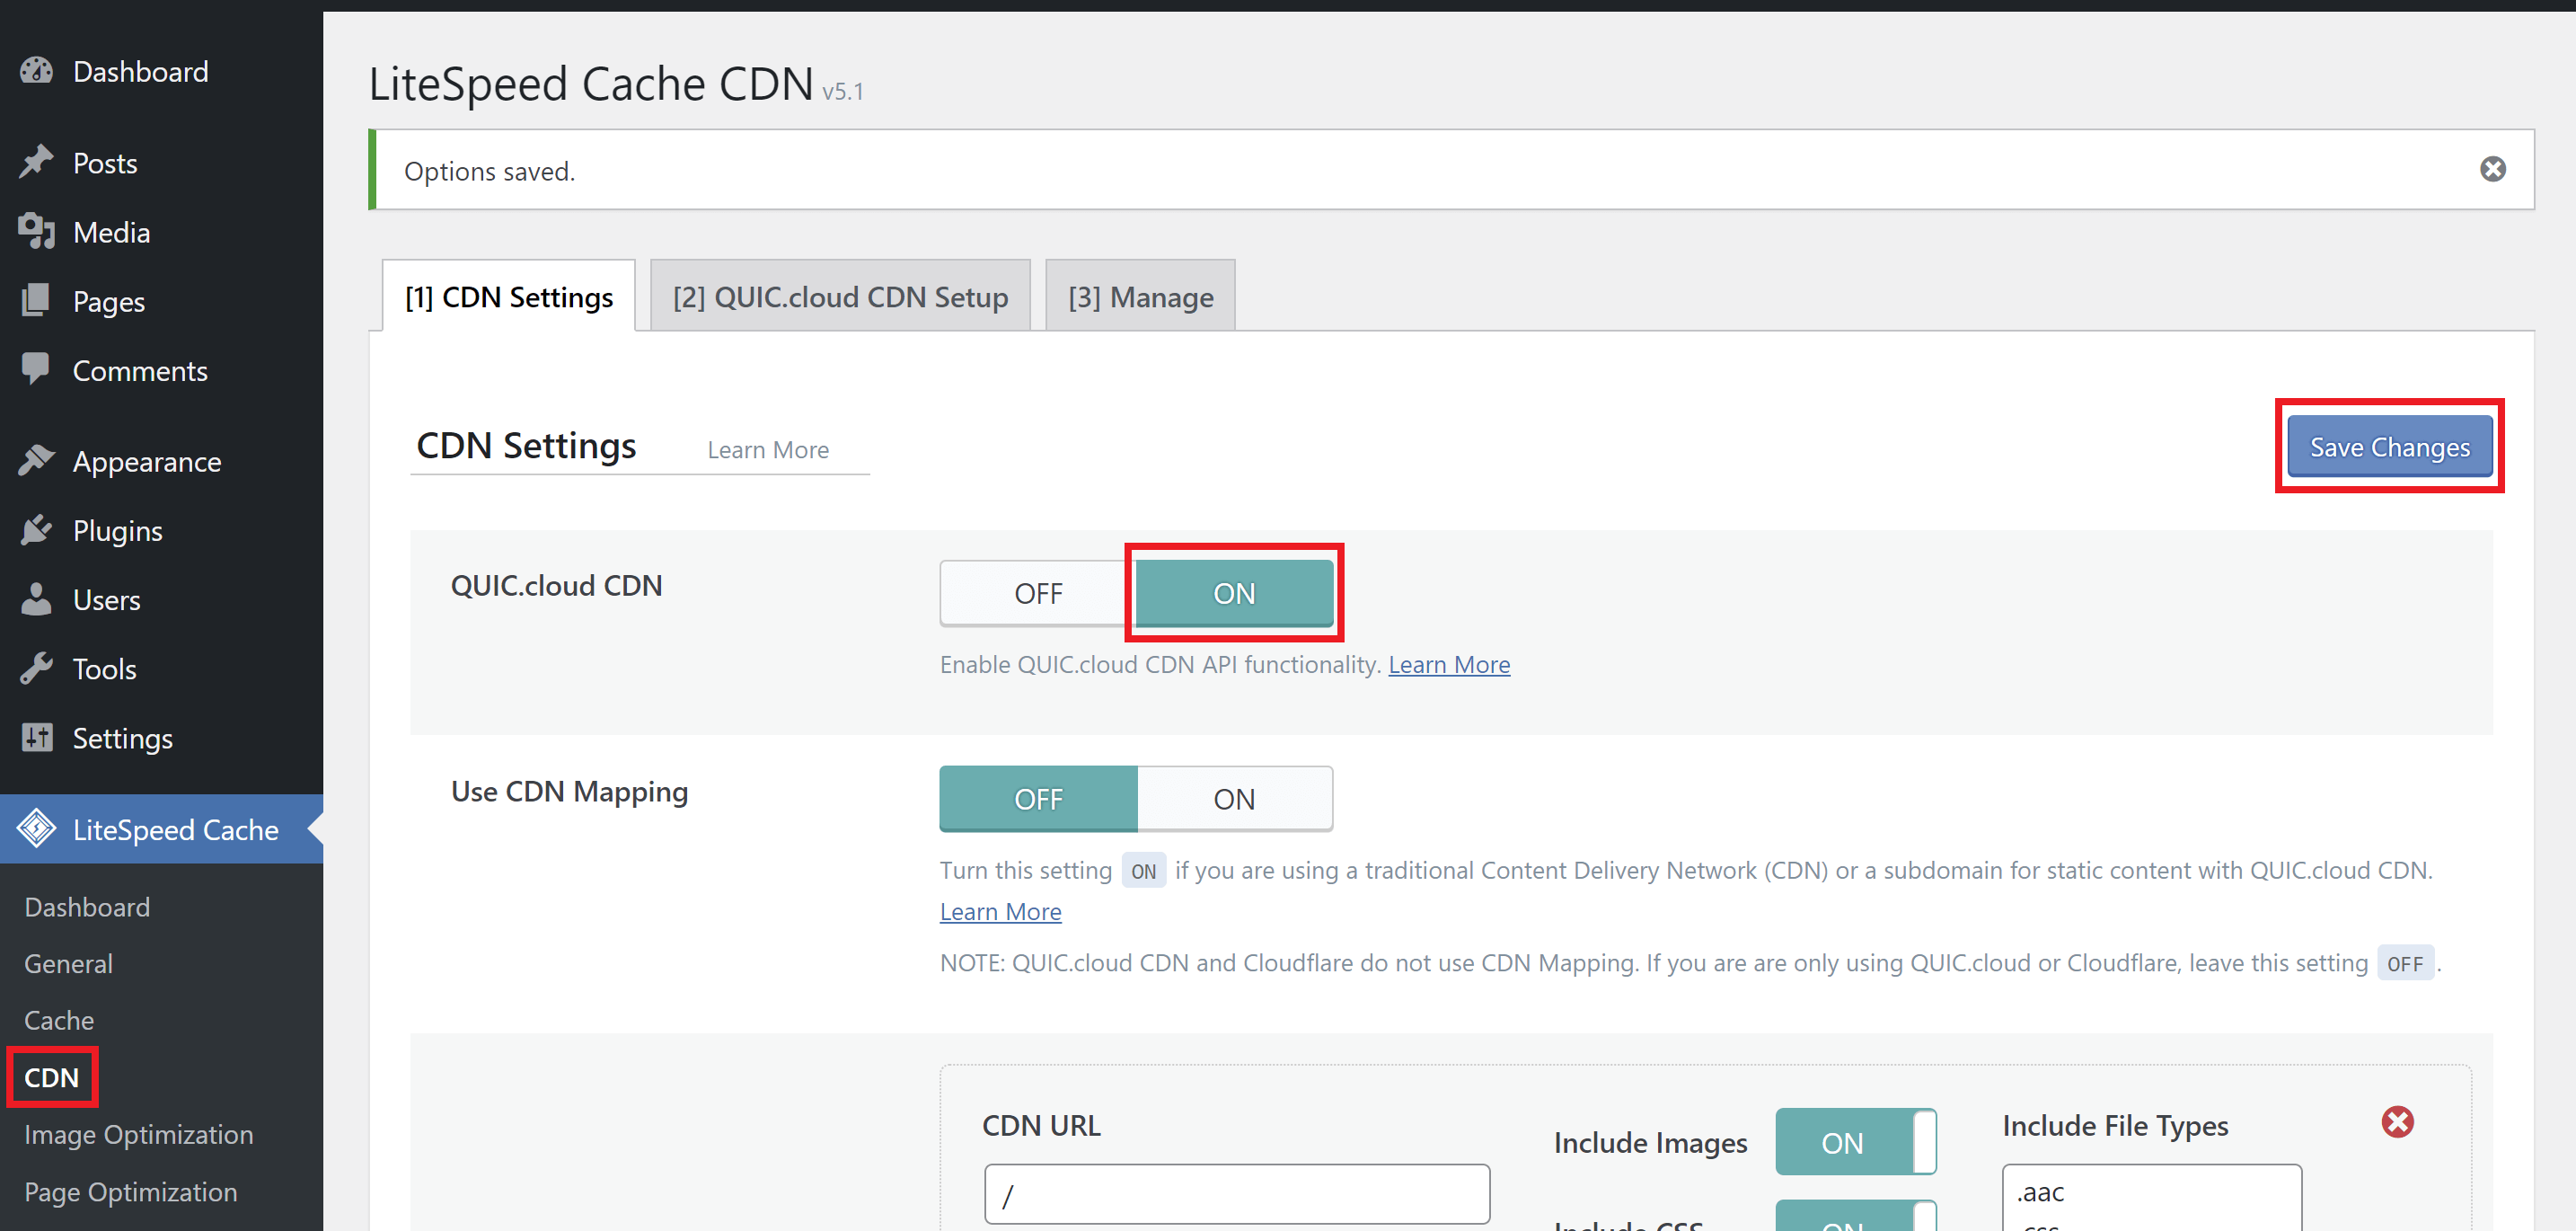
You’re now ready to configure your CDN.
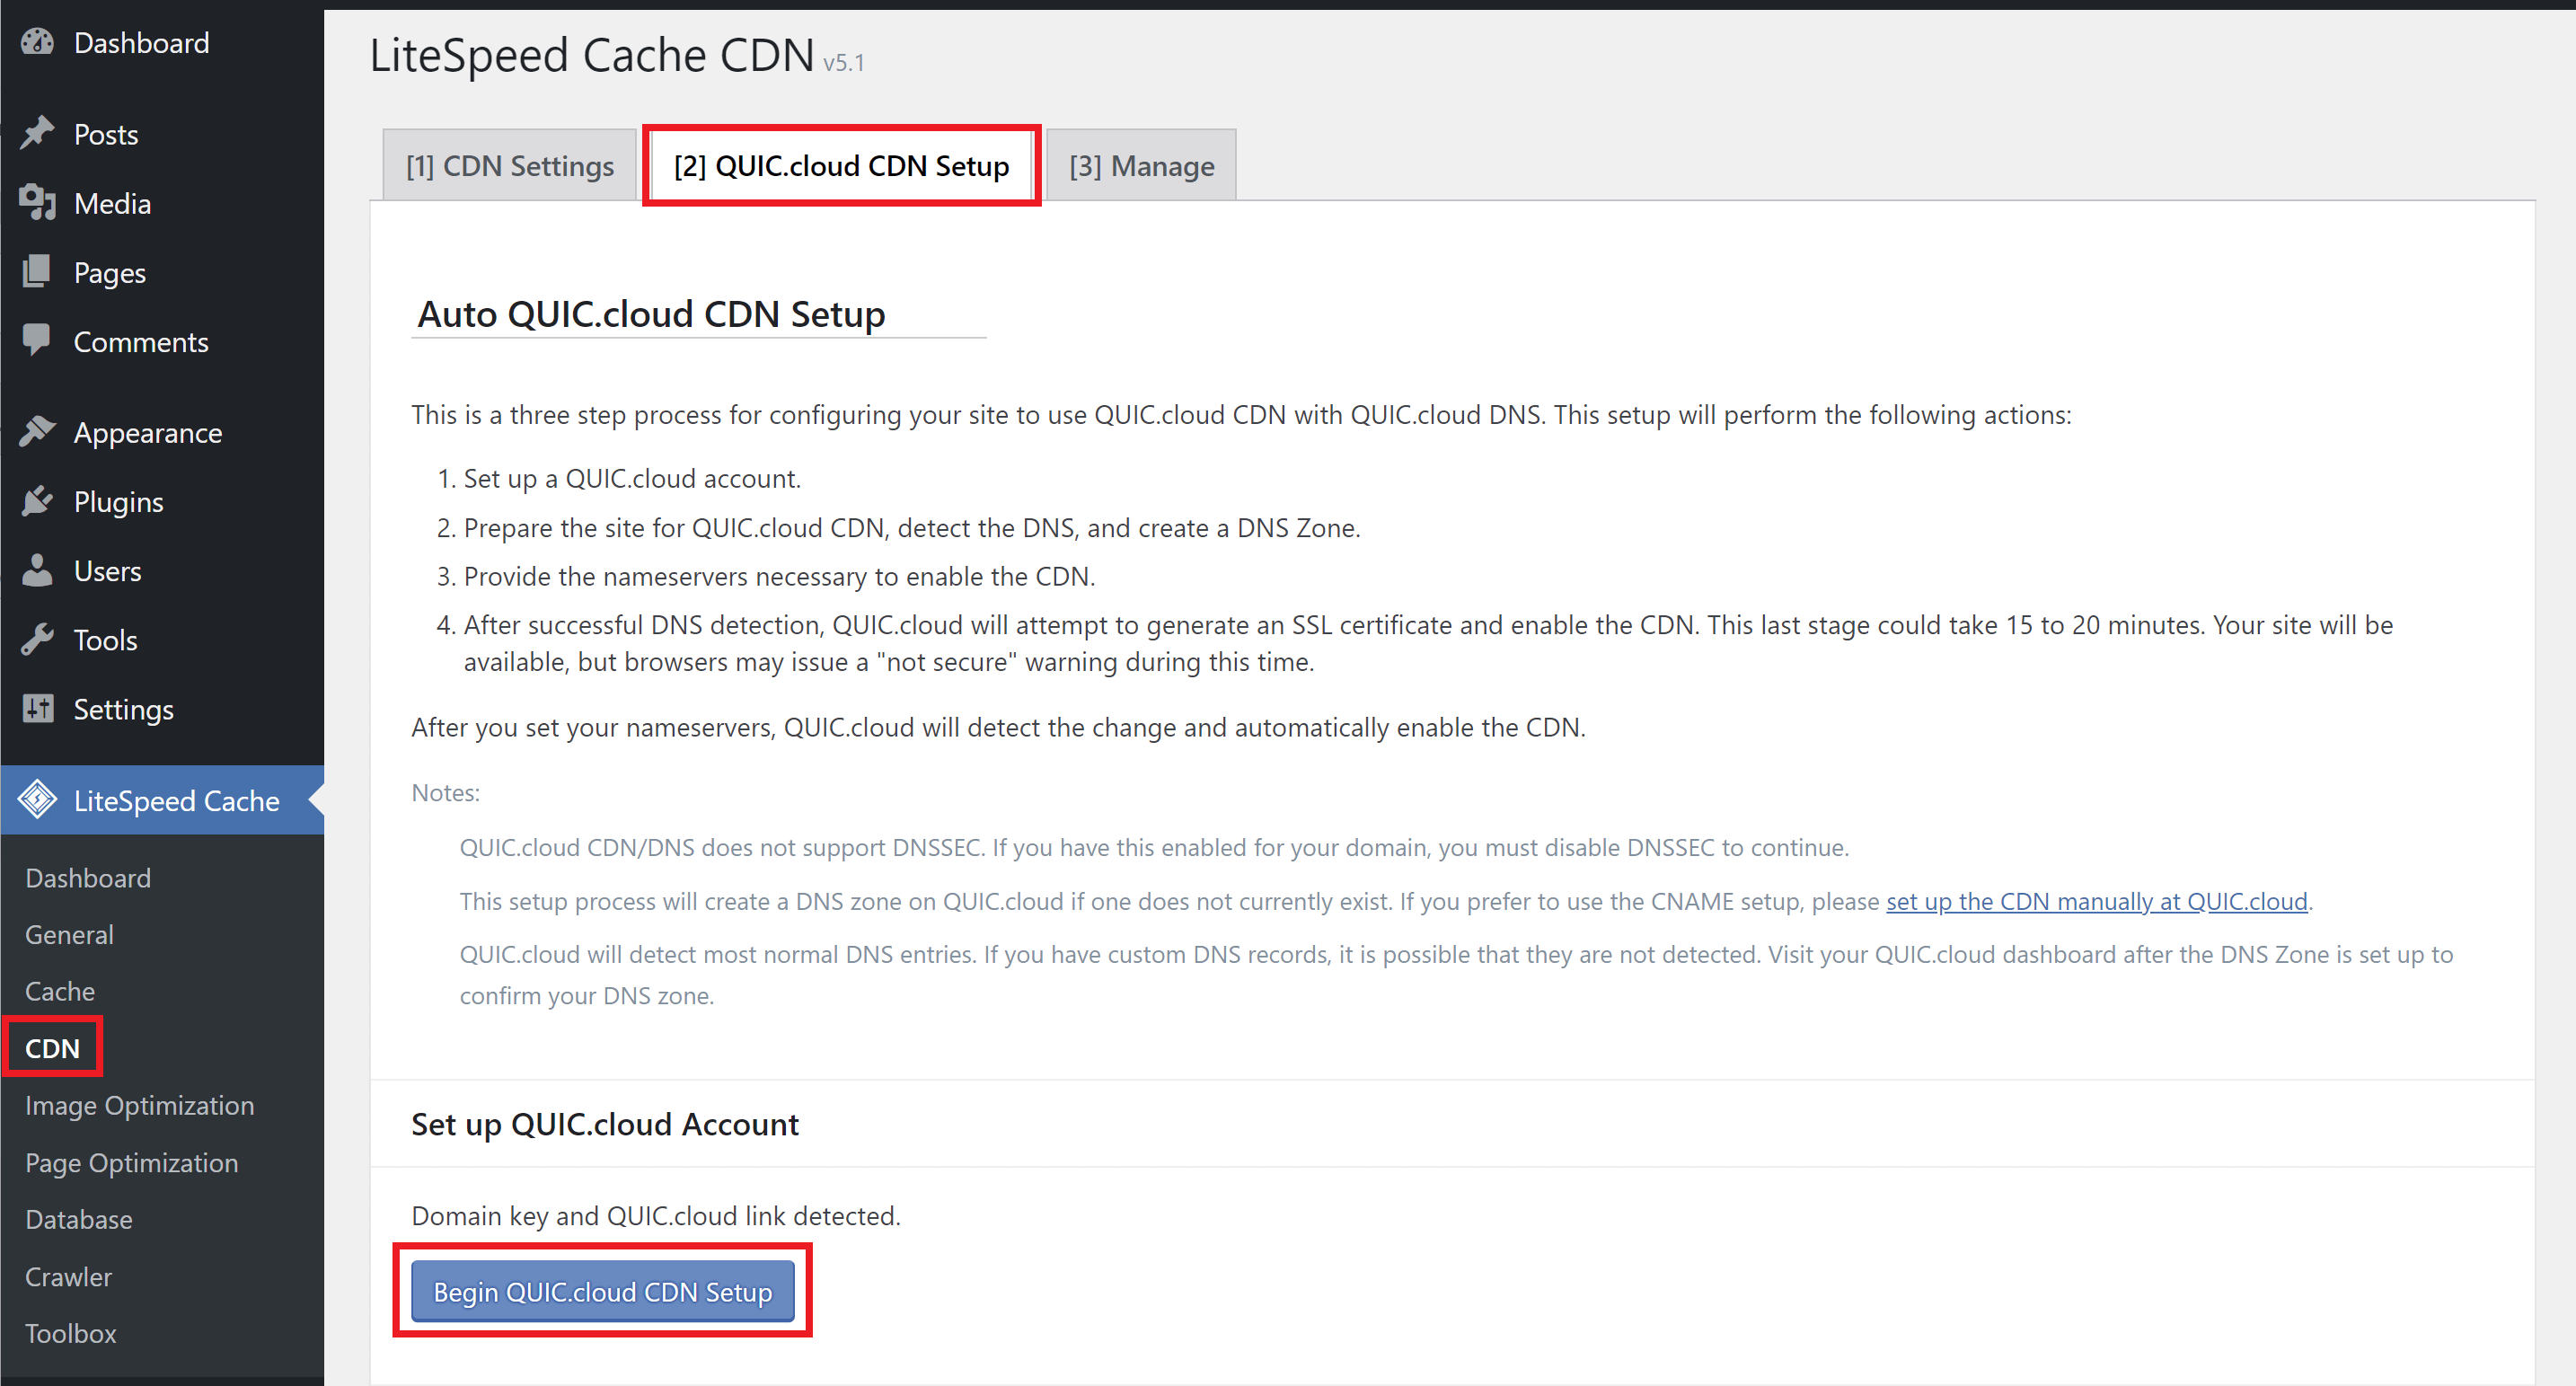
Activate the CDN Settings
Inside the CDN settings page, click through to the “QUIC.cloud CDN Setup” tab.
Here, click the “Begin QUIC.cloud CDN Setup” button:
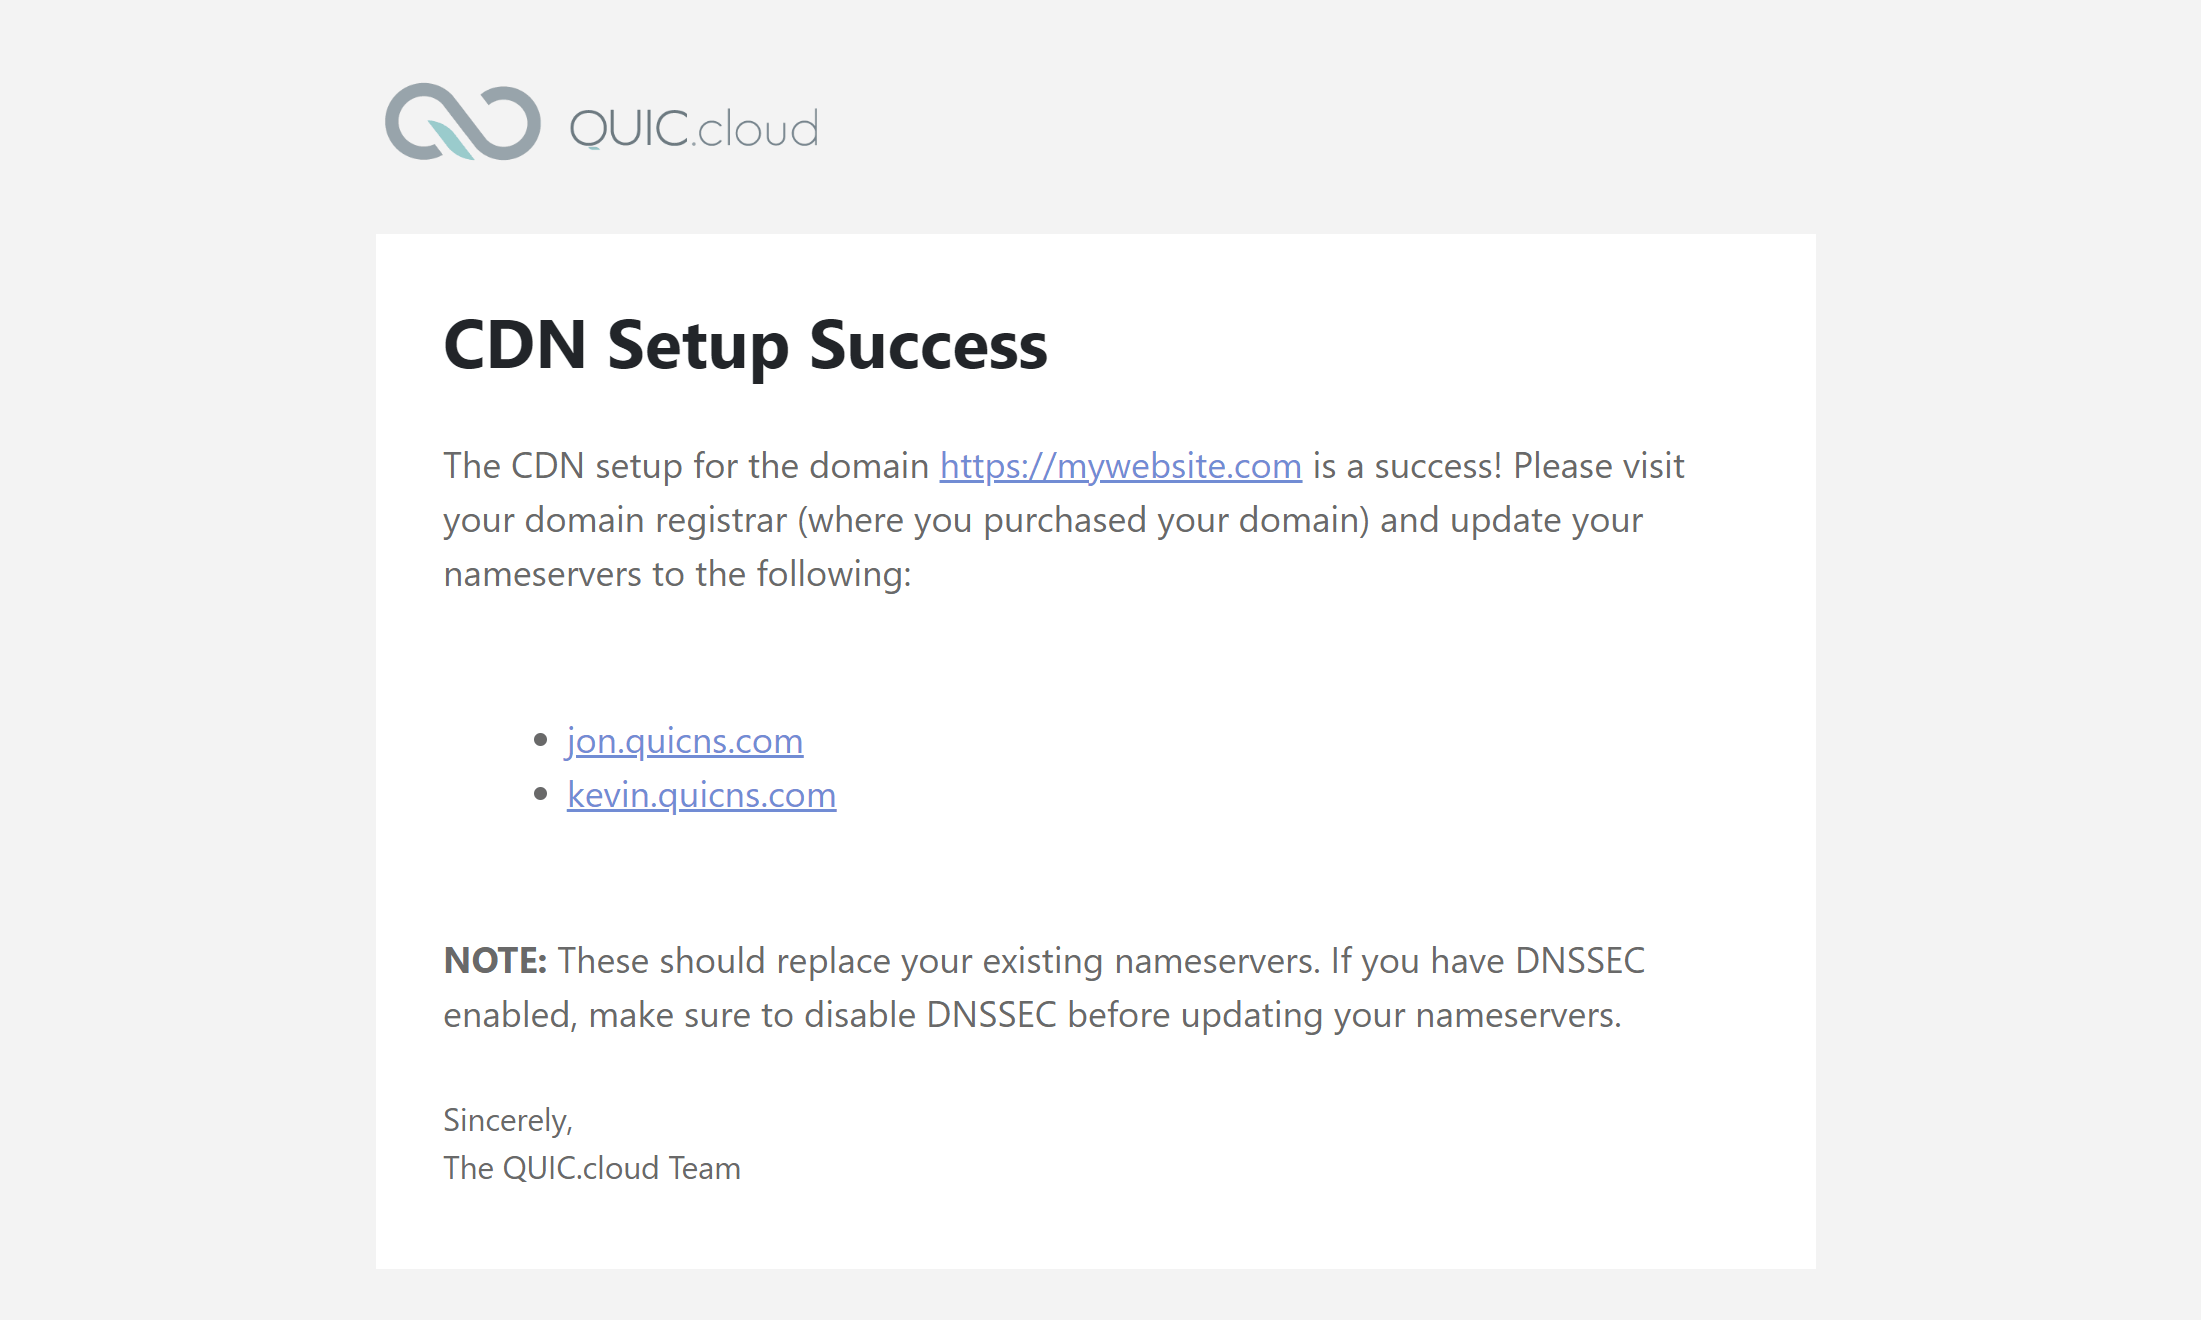
Update Your DNS Nameservers
In order to use QUIC.cloud you’ll need to point your nameservers to their platform. Once you activate the CDN, you’ll receive an email with those nameservers:
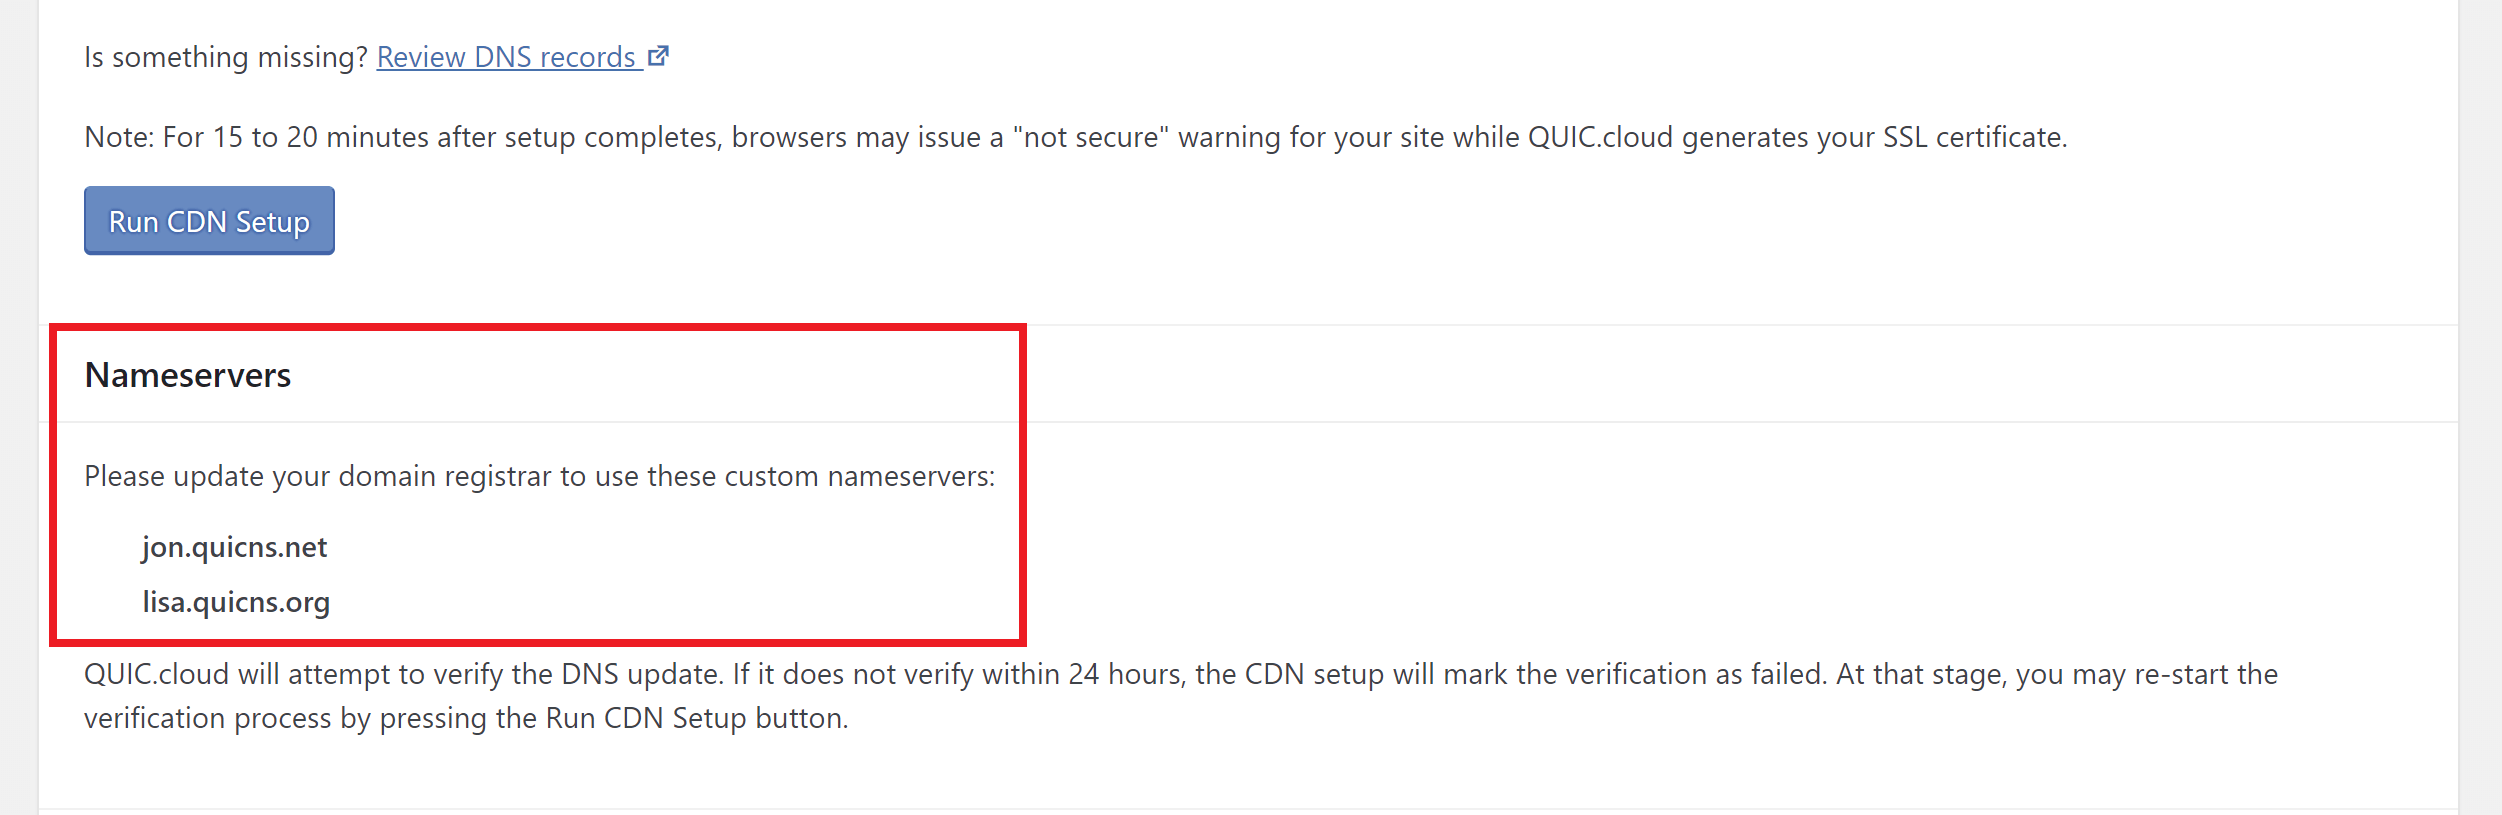
And you can also view them further down the CDN Setup page inside your website as well:
Once updated, you’ll receive another email letting you know:
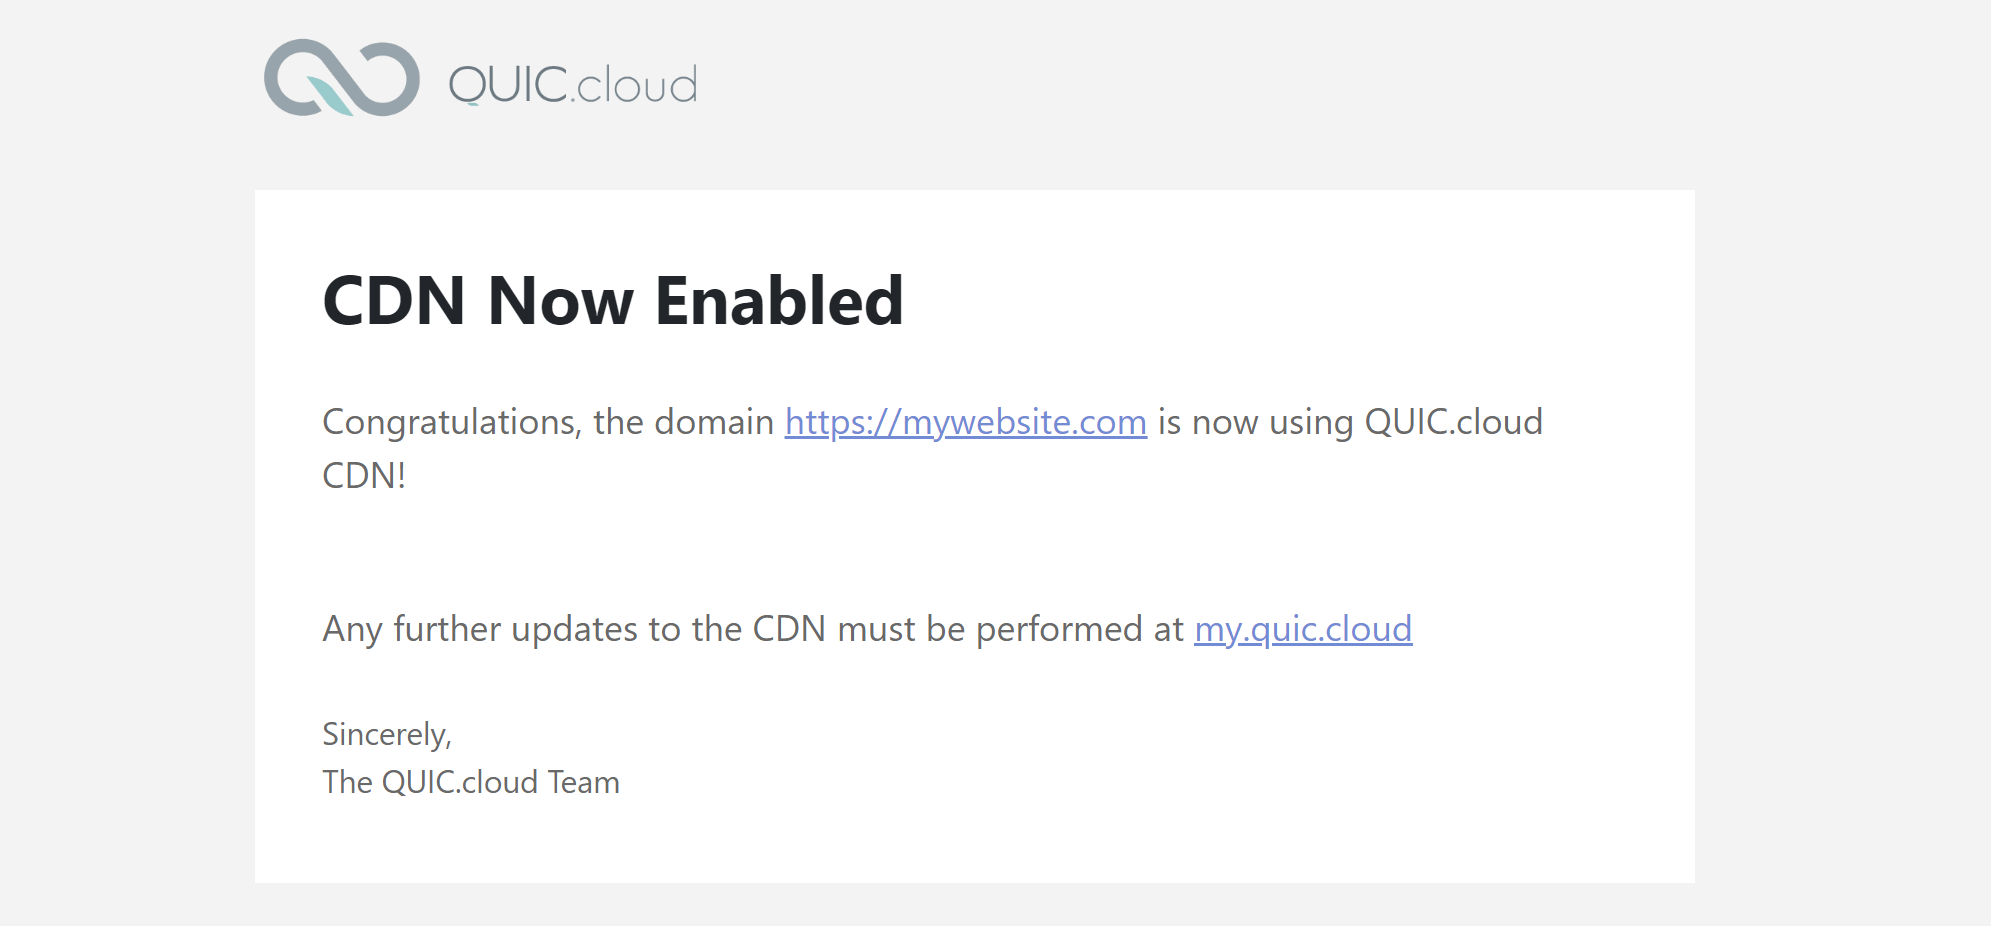
And inside your website you’ll see the same confirmation (you may need to click the setup button again):
1. QUIC.cloud Generated SSL Certificate
QUIC.cloud should automatically attempt to provision a new SSL for your website. However, this may take a little time to complete – in my case, when writing this article, it took around 6 minutes:
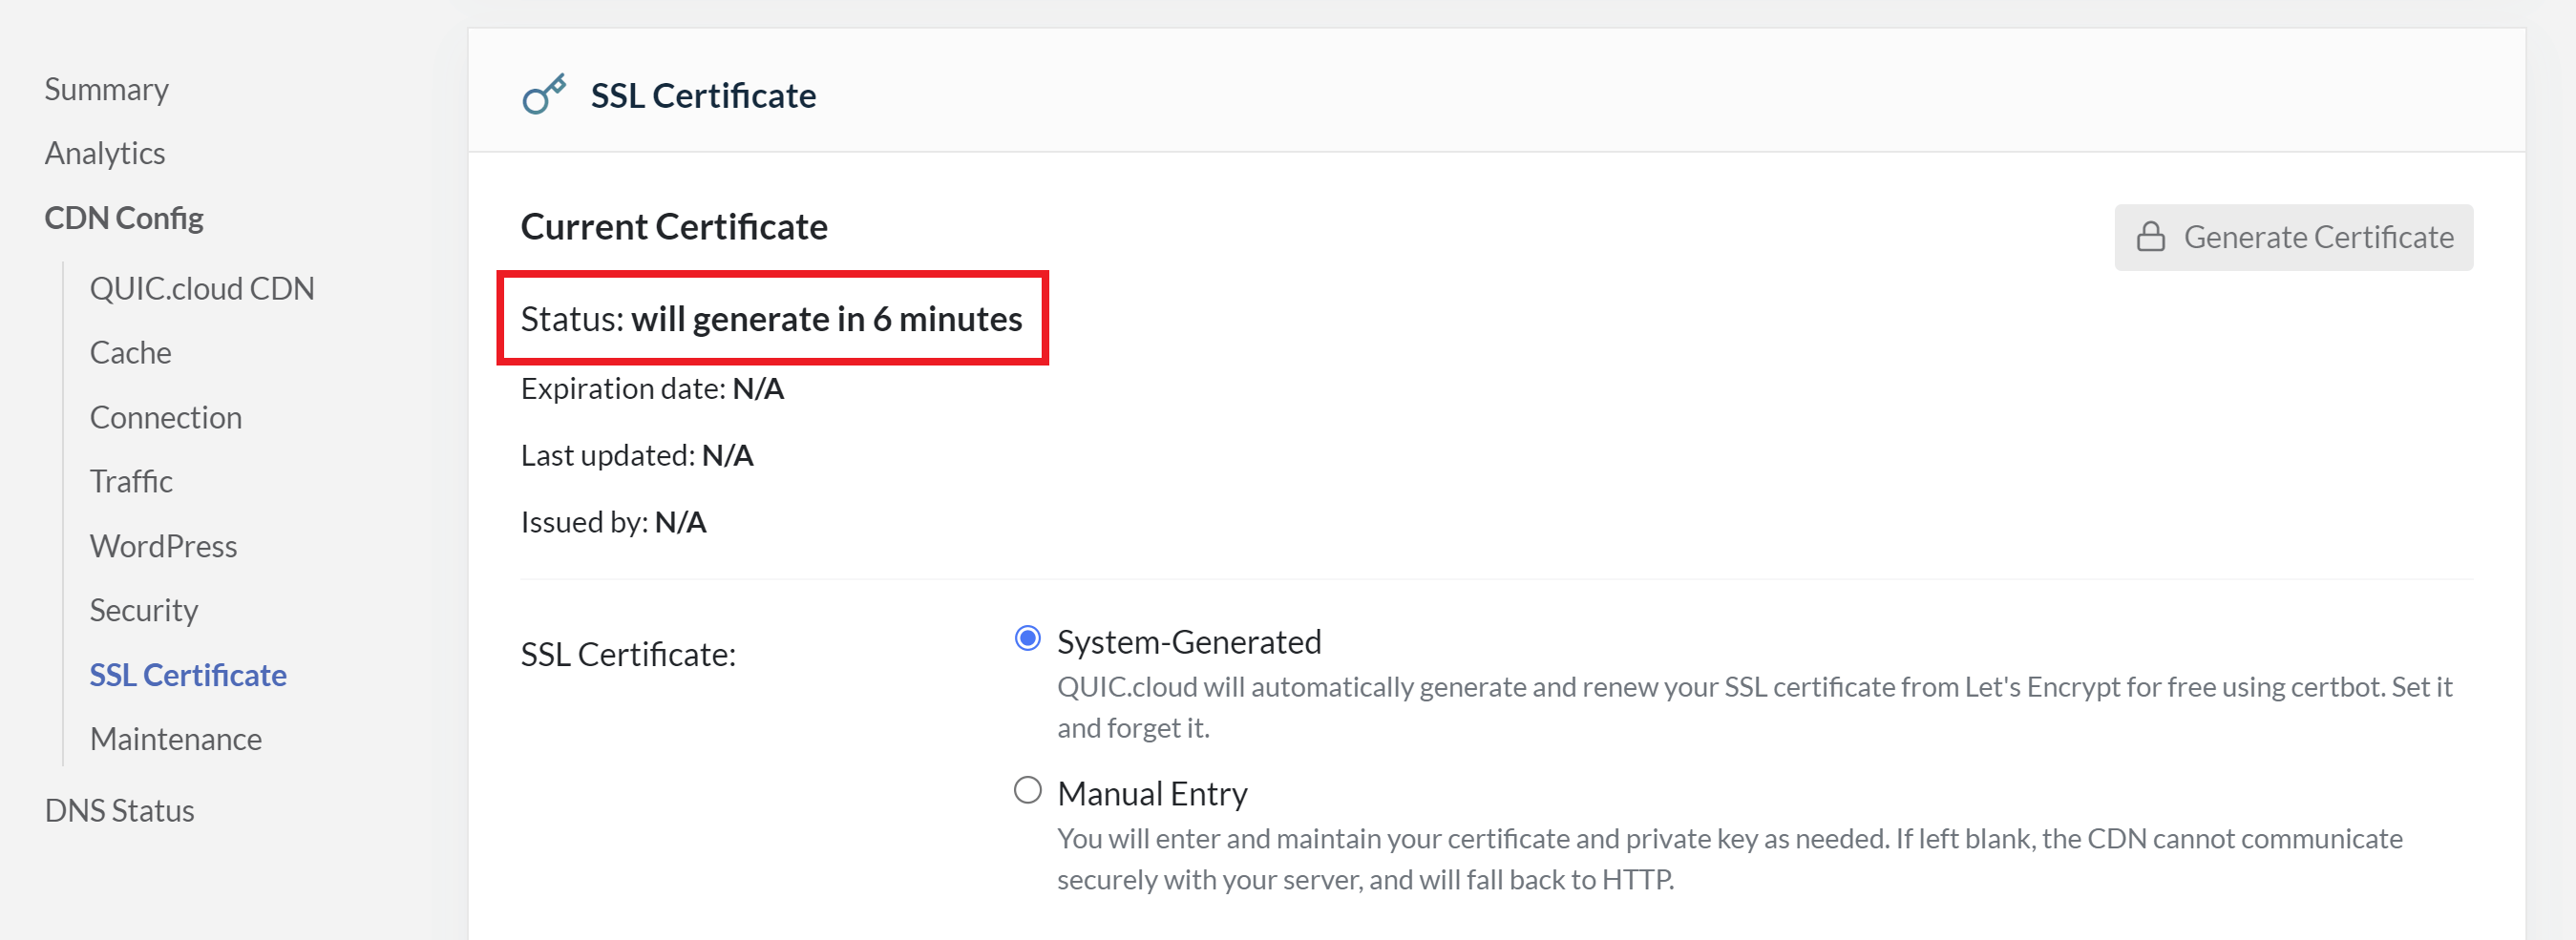
Once provisioned you’ll be able to see its status:
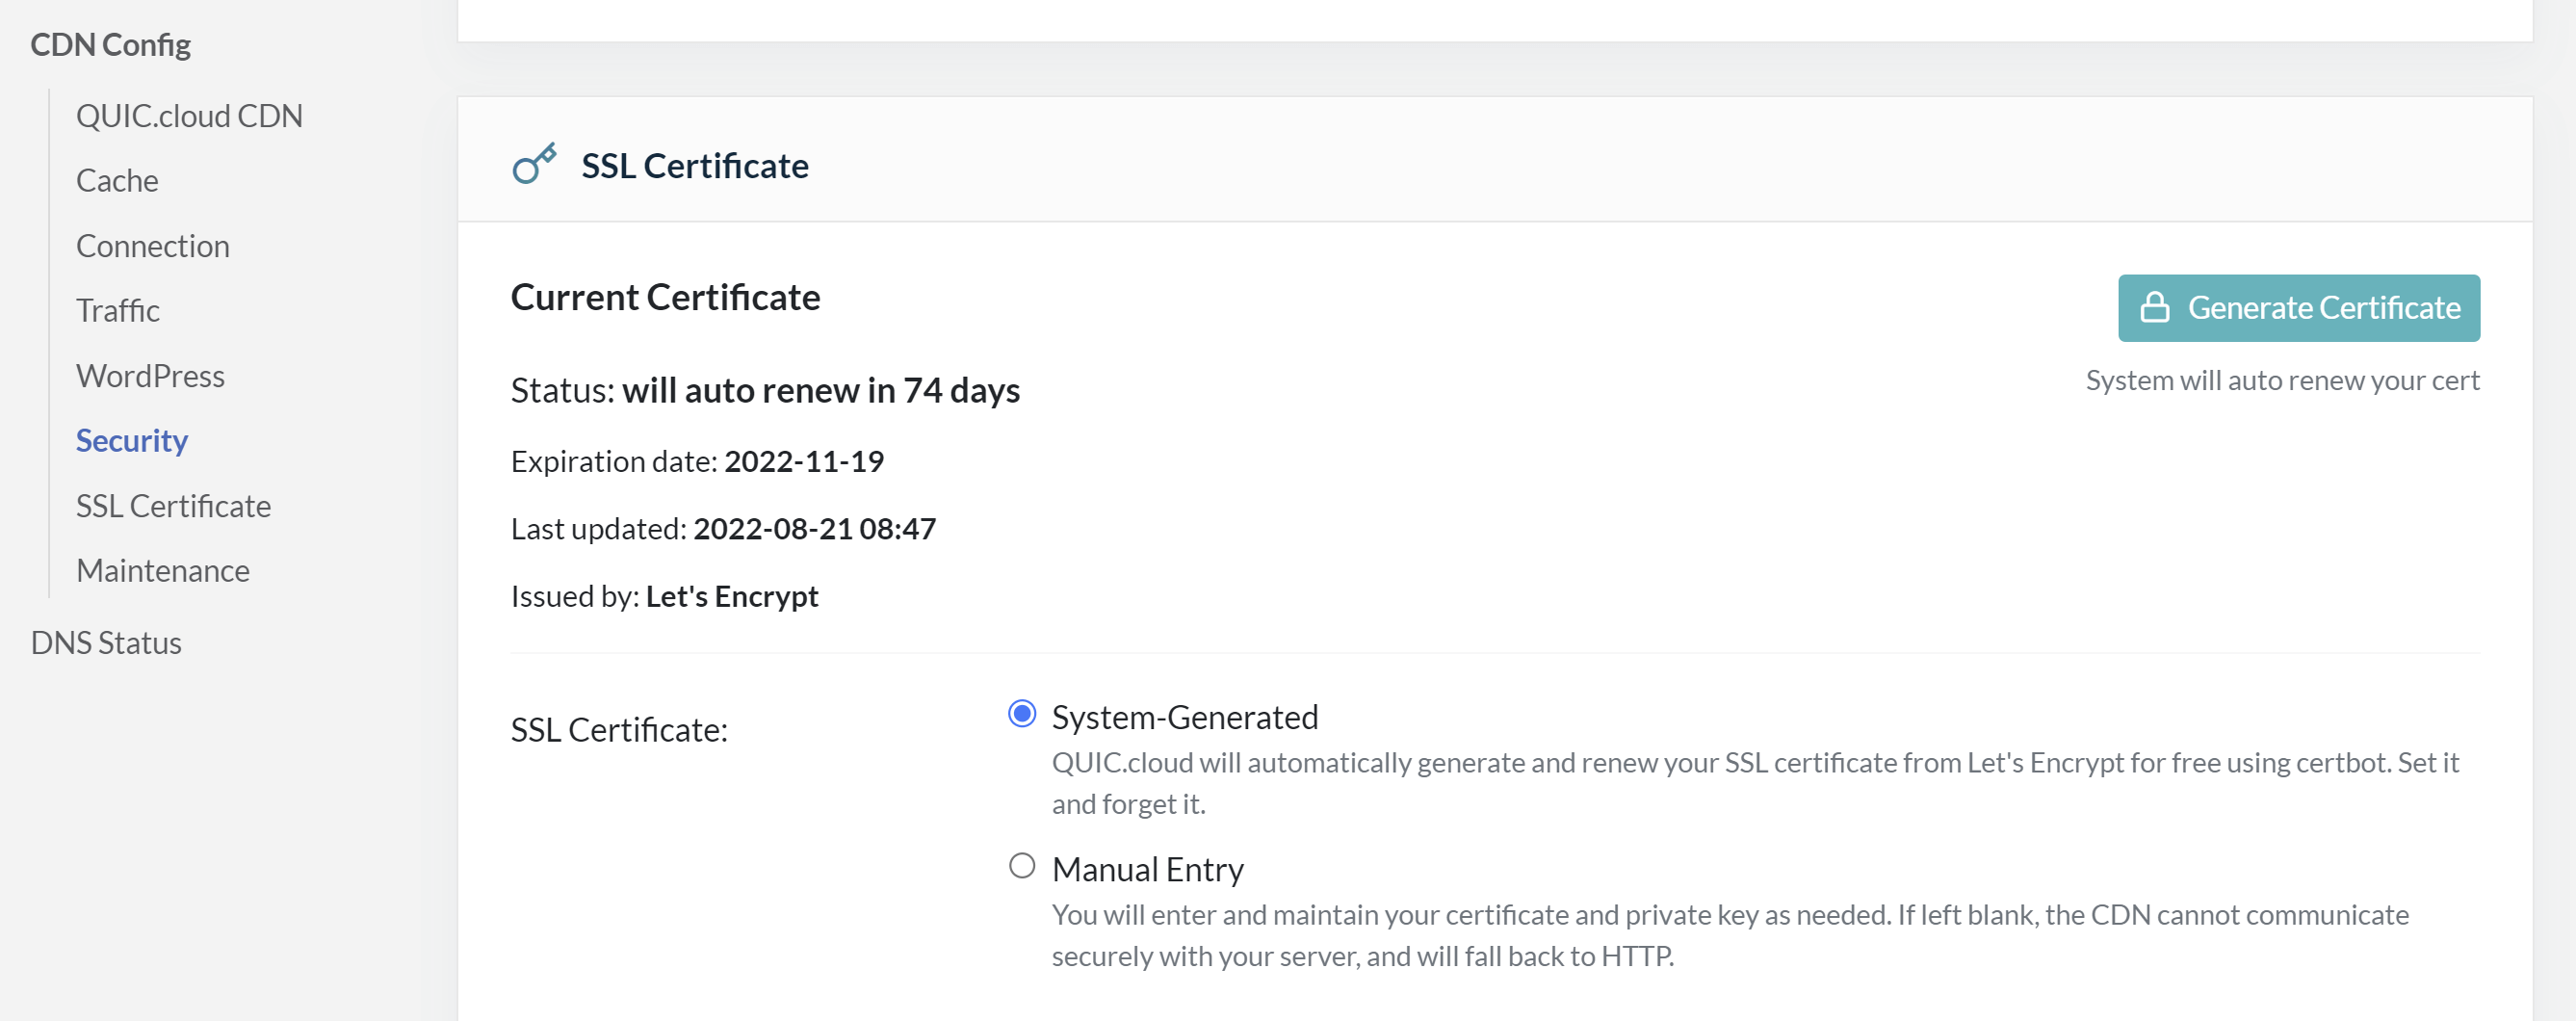
Its validity will be 90 days, and it will automatically renew.
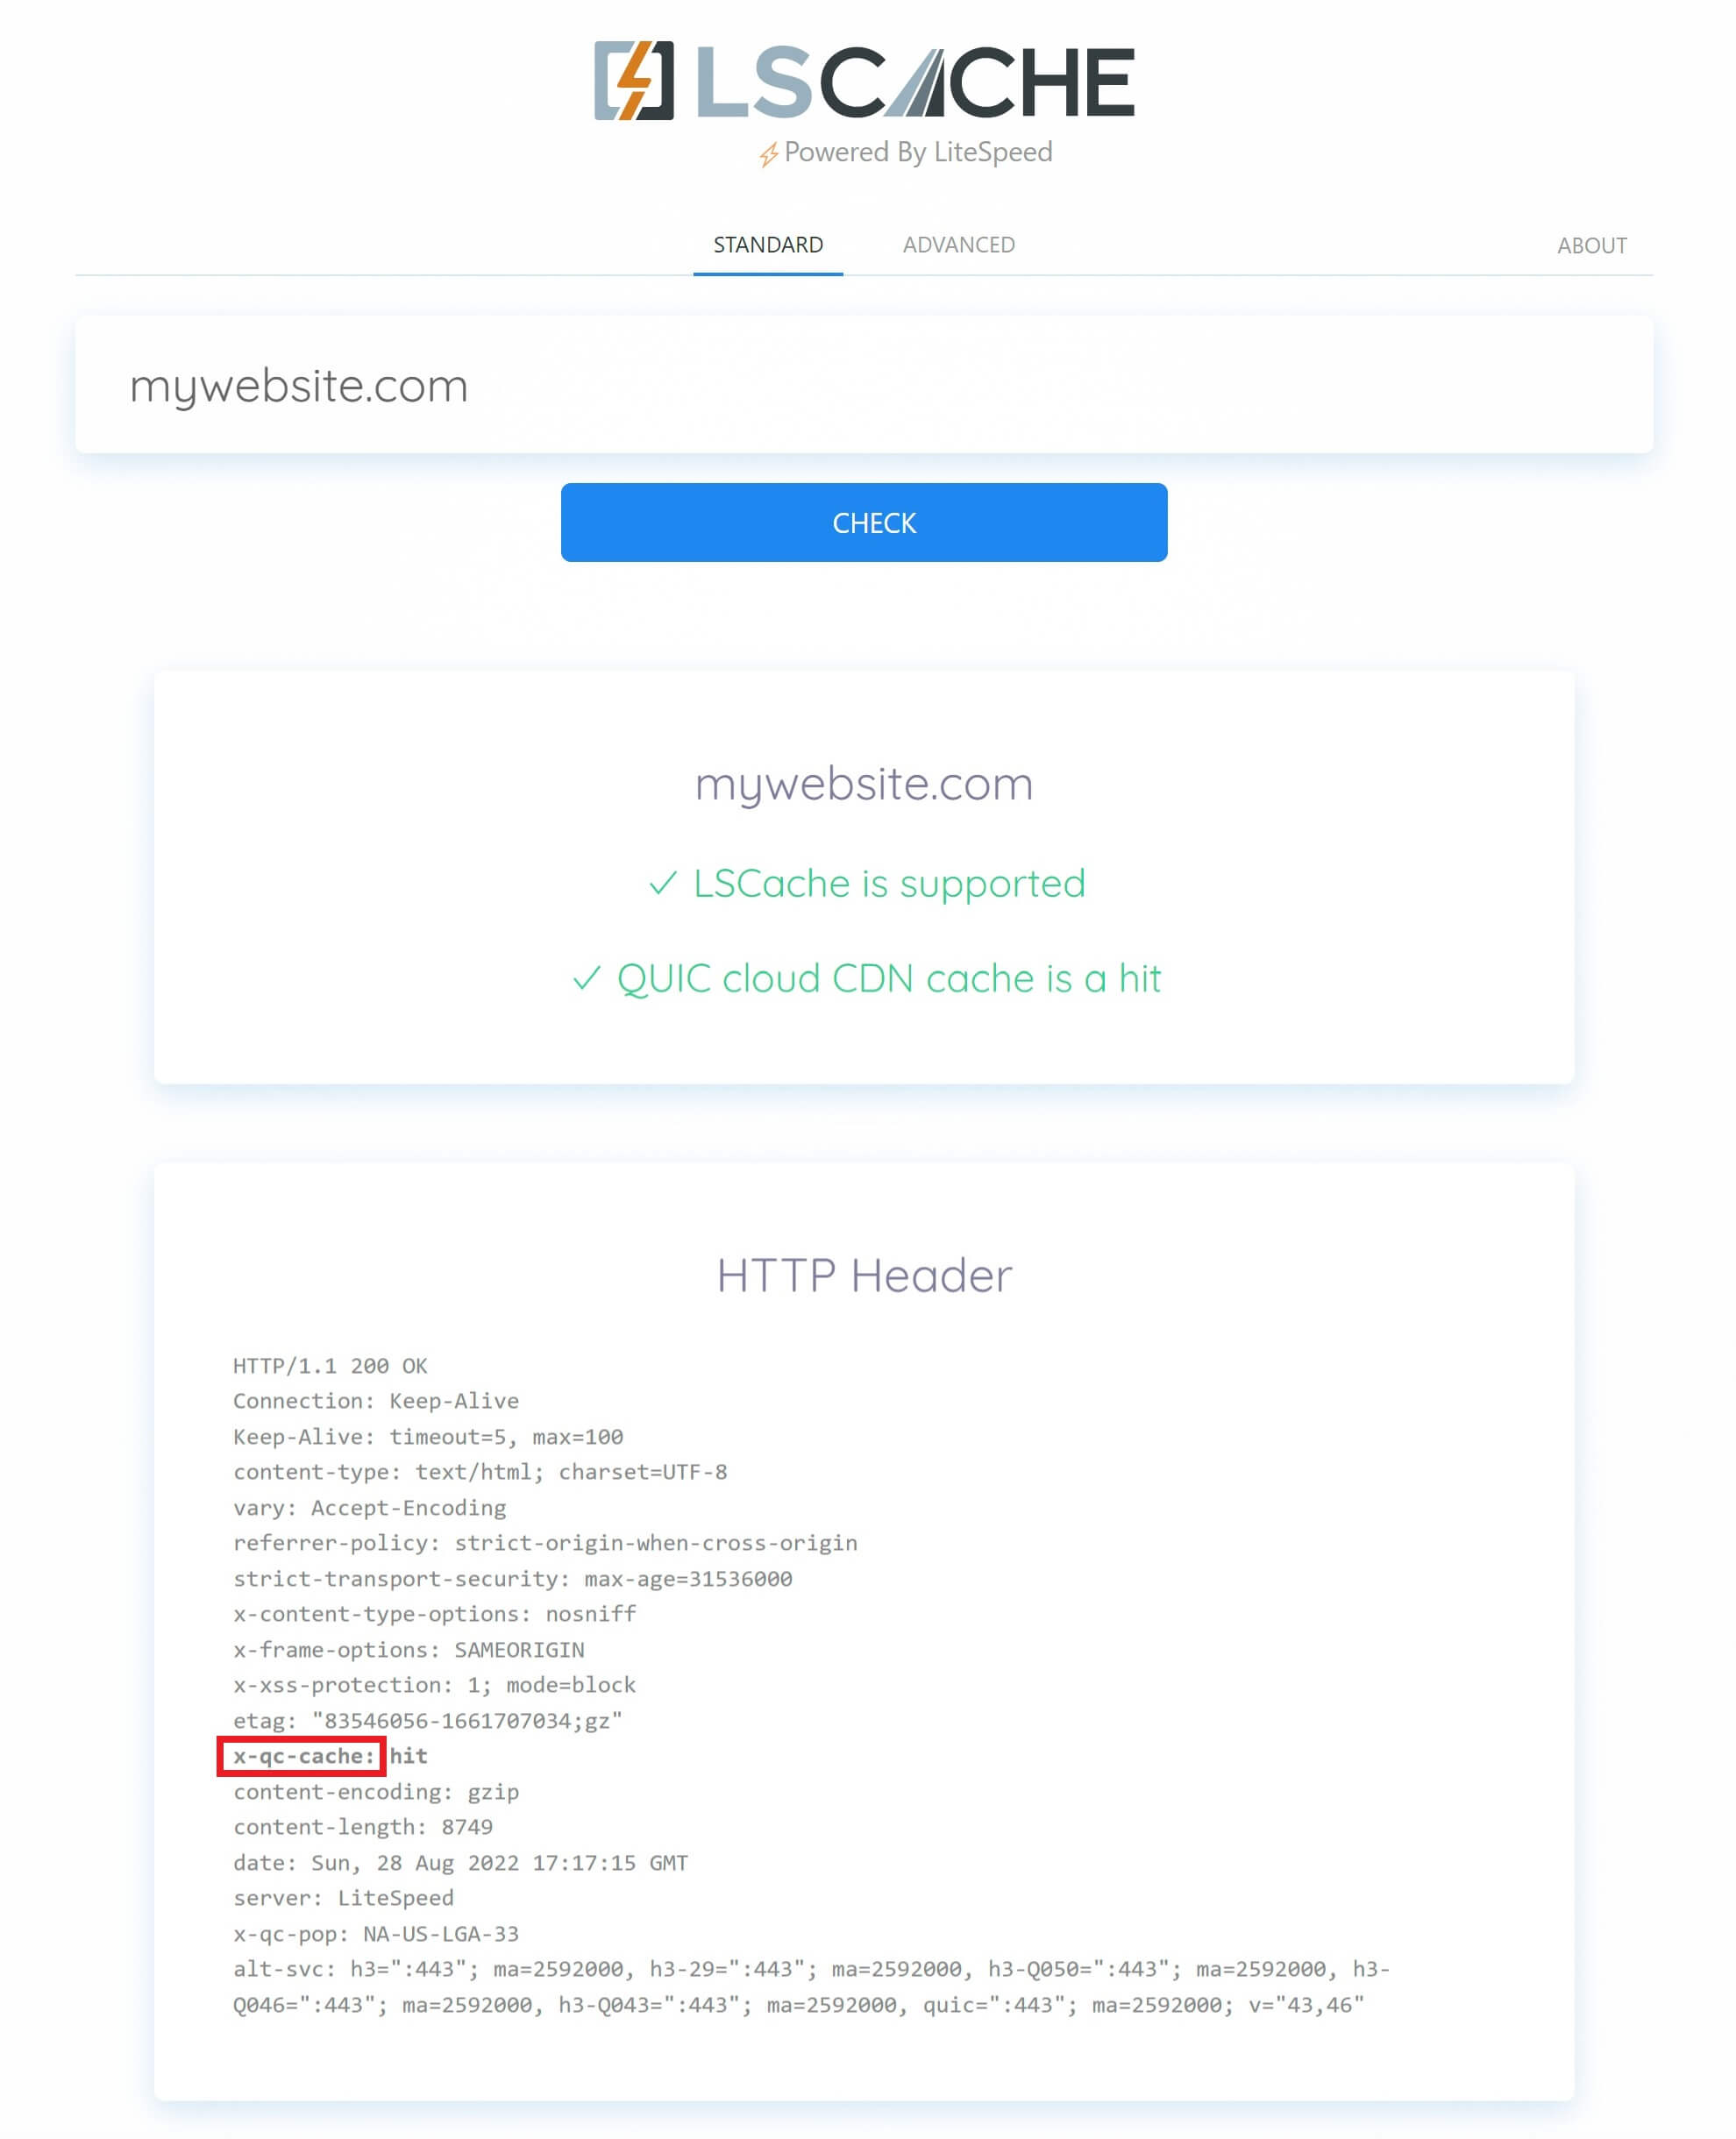
How to Check Your Page and CDN Caching
To check if QUIC.cloud CDN is serving your site you can use LiteSpeed’s LSCache Check tool here.
Enter your URL and hit the Check button. The tool will then confirm your caching status and display your site’s response headers. Look for the x-qc-pop header.
If this is present, then it was served via a QUIC.cloud PoP, and your CDN is active and configured correctly.
Note that it may not be a HIT response for the CDN on your first load. However, if you refresh the page, it should then show a HIT (assuming it’s been served from the same PoP).