How to Set Up Bunny CDN for WordPress

7 min read

Table of Contents

Introduction

BunnyCDN offers a great CDN service at a price point that’s hard to beat. They have their own WordPress plugin, and it starts from $1/month.

In this article, we’ll take a look at how to set up BunnyCDN on your WordPress websites. However, we’ll only be looking at how to serve static files such as CSS, JS, images, etc, and not full-page caching. See this section for further resources.

These instructions apply to any web host, not just GridPane, but we’ll provide some extra info that’s specific to GridPane in the first section below.

Note: Throughout the article, I’ll be using “BunnyCDN” and “Bunny CDN” interchangeably for KB in our search results. Bunny CDN actually does the same thing on their website too.

BunnyCDN and GridPane

Bunny.net’s CDN offering is a popular choice and is excellent value for money. It will work with your GridPane hosted without any issues.

You have the option to only use your CDN for your website assets, or follow additional steps to set up full-page HTML caching.

If you want to configure full-page caching via Bunny, you’ll need to turn off our server-level page caching. You can still leave Redis Object caching turned on.

Learn more about using a CDN with GridPane in this article:
Using a CDN With GridPane

BunnyCDN and DNS

BunnyCDN doesn’t require you to point your nameservers or DNS records towards their service. This means you can continue to use Cloudflare or DNS Made Easy to manage your website’s DNS records.

SSL Certificates

An SSL certificate at GridPane is still a necessity when using a CDN. If you’re configuring full page caching (not covered in this article) by using edge rules and CNAMEs, you may want to use Cloudflare or DNSME integrations to provision an SSL using the DNS API method.

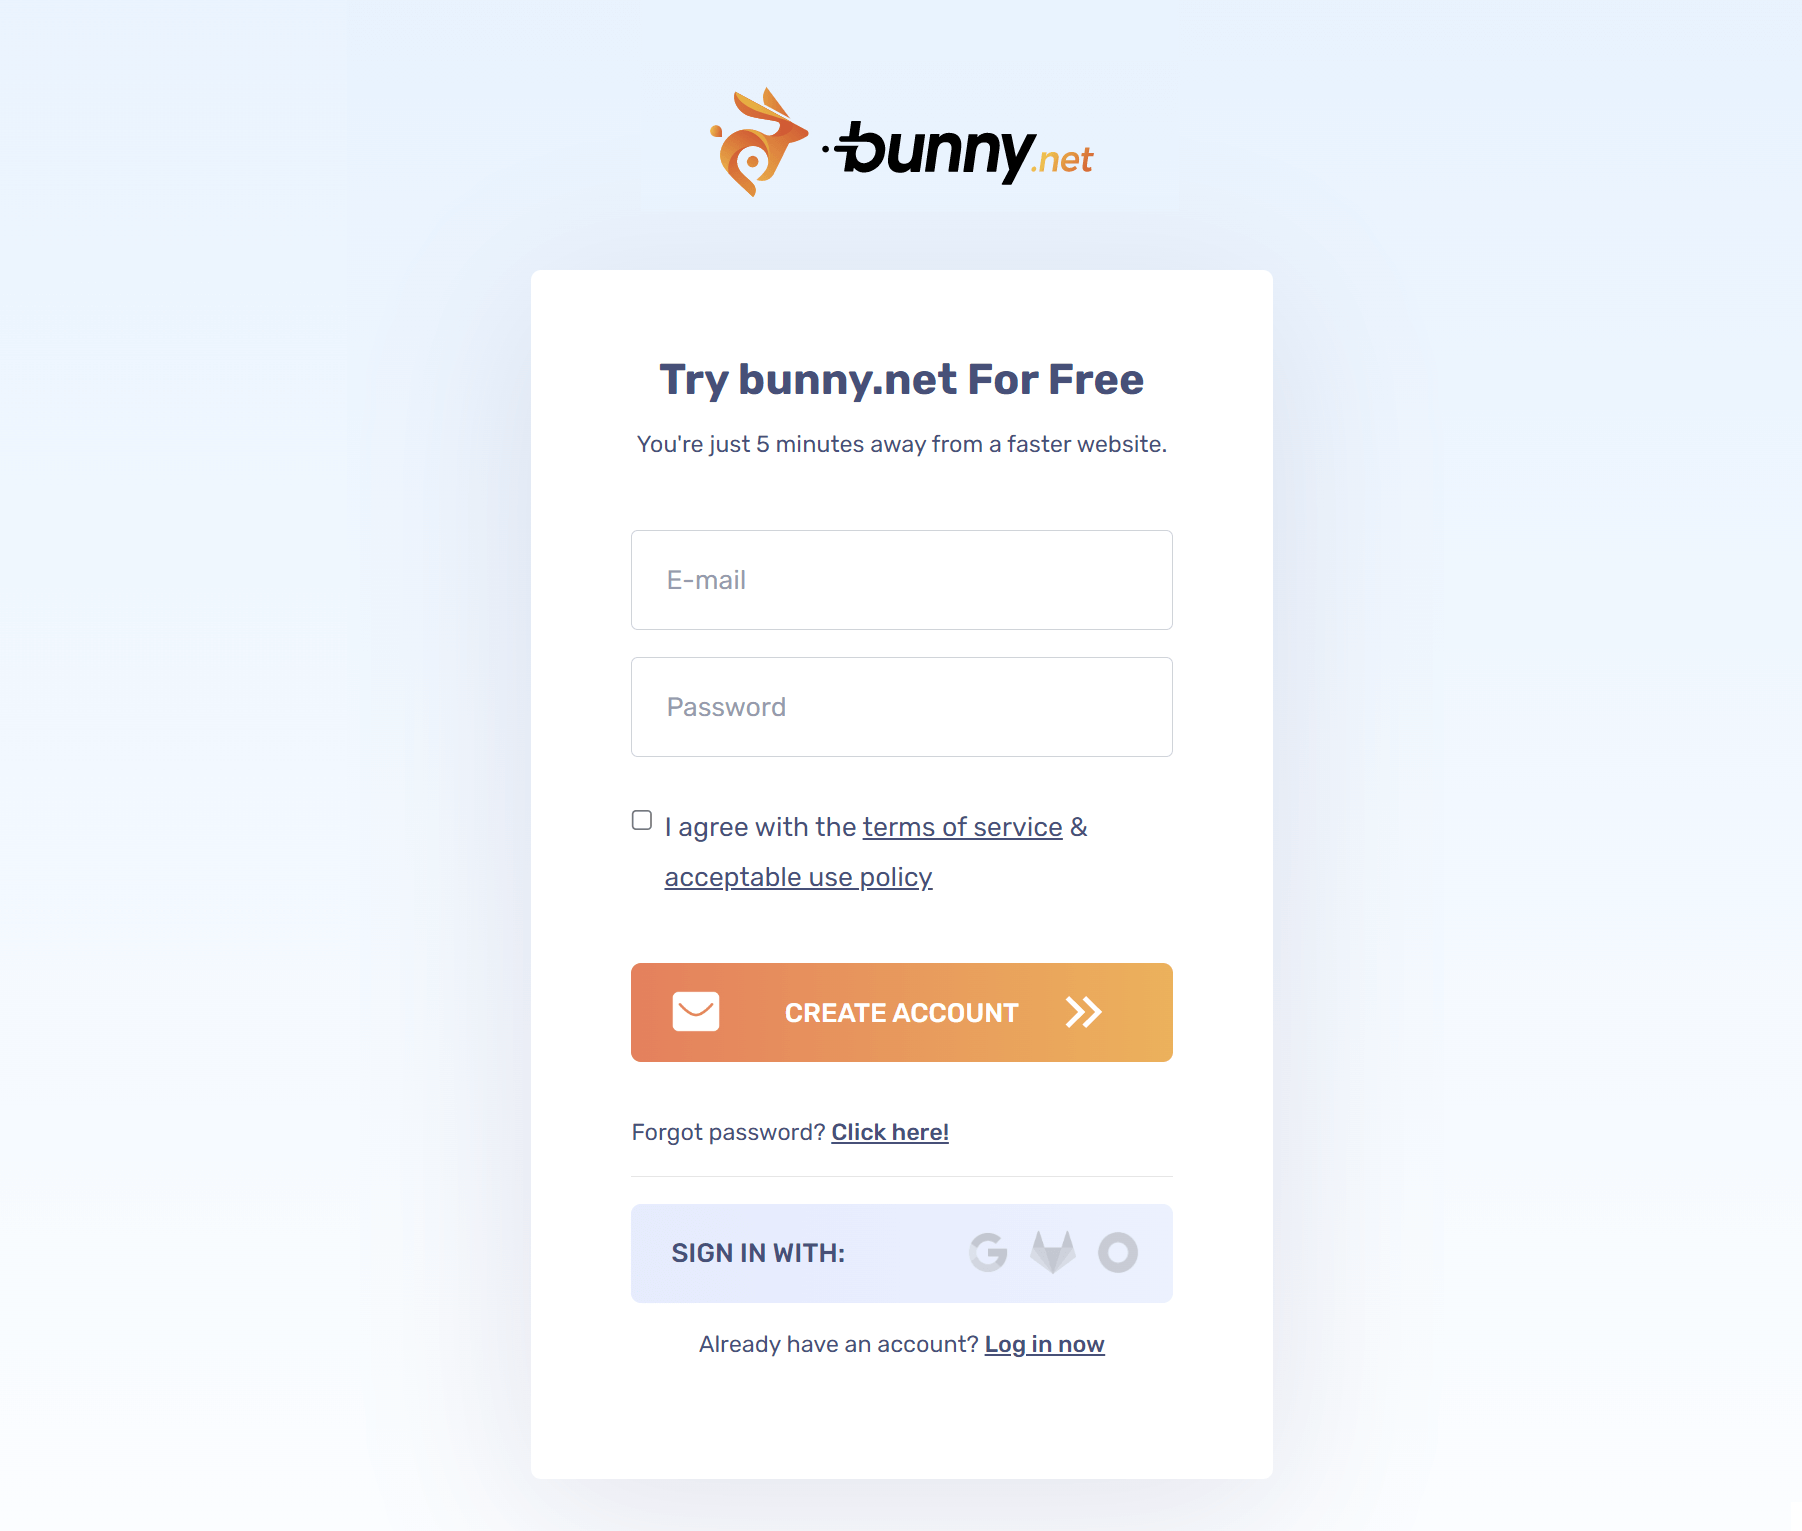
Creating a Bunny.net Account

Creating an account is quick and easy, and it also comes with a 2-week free trial. 

If you already have an account, you can log in now. 

Create Your Account

Click here to open up the website, and sign up to get started. Once signed up you’ll need to verify your account through email, and then you’re all set.

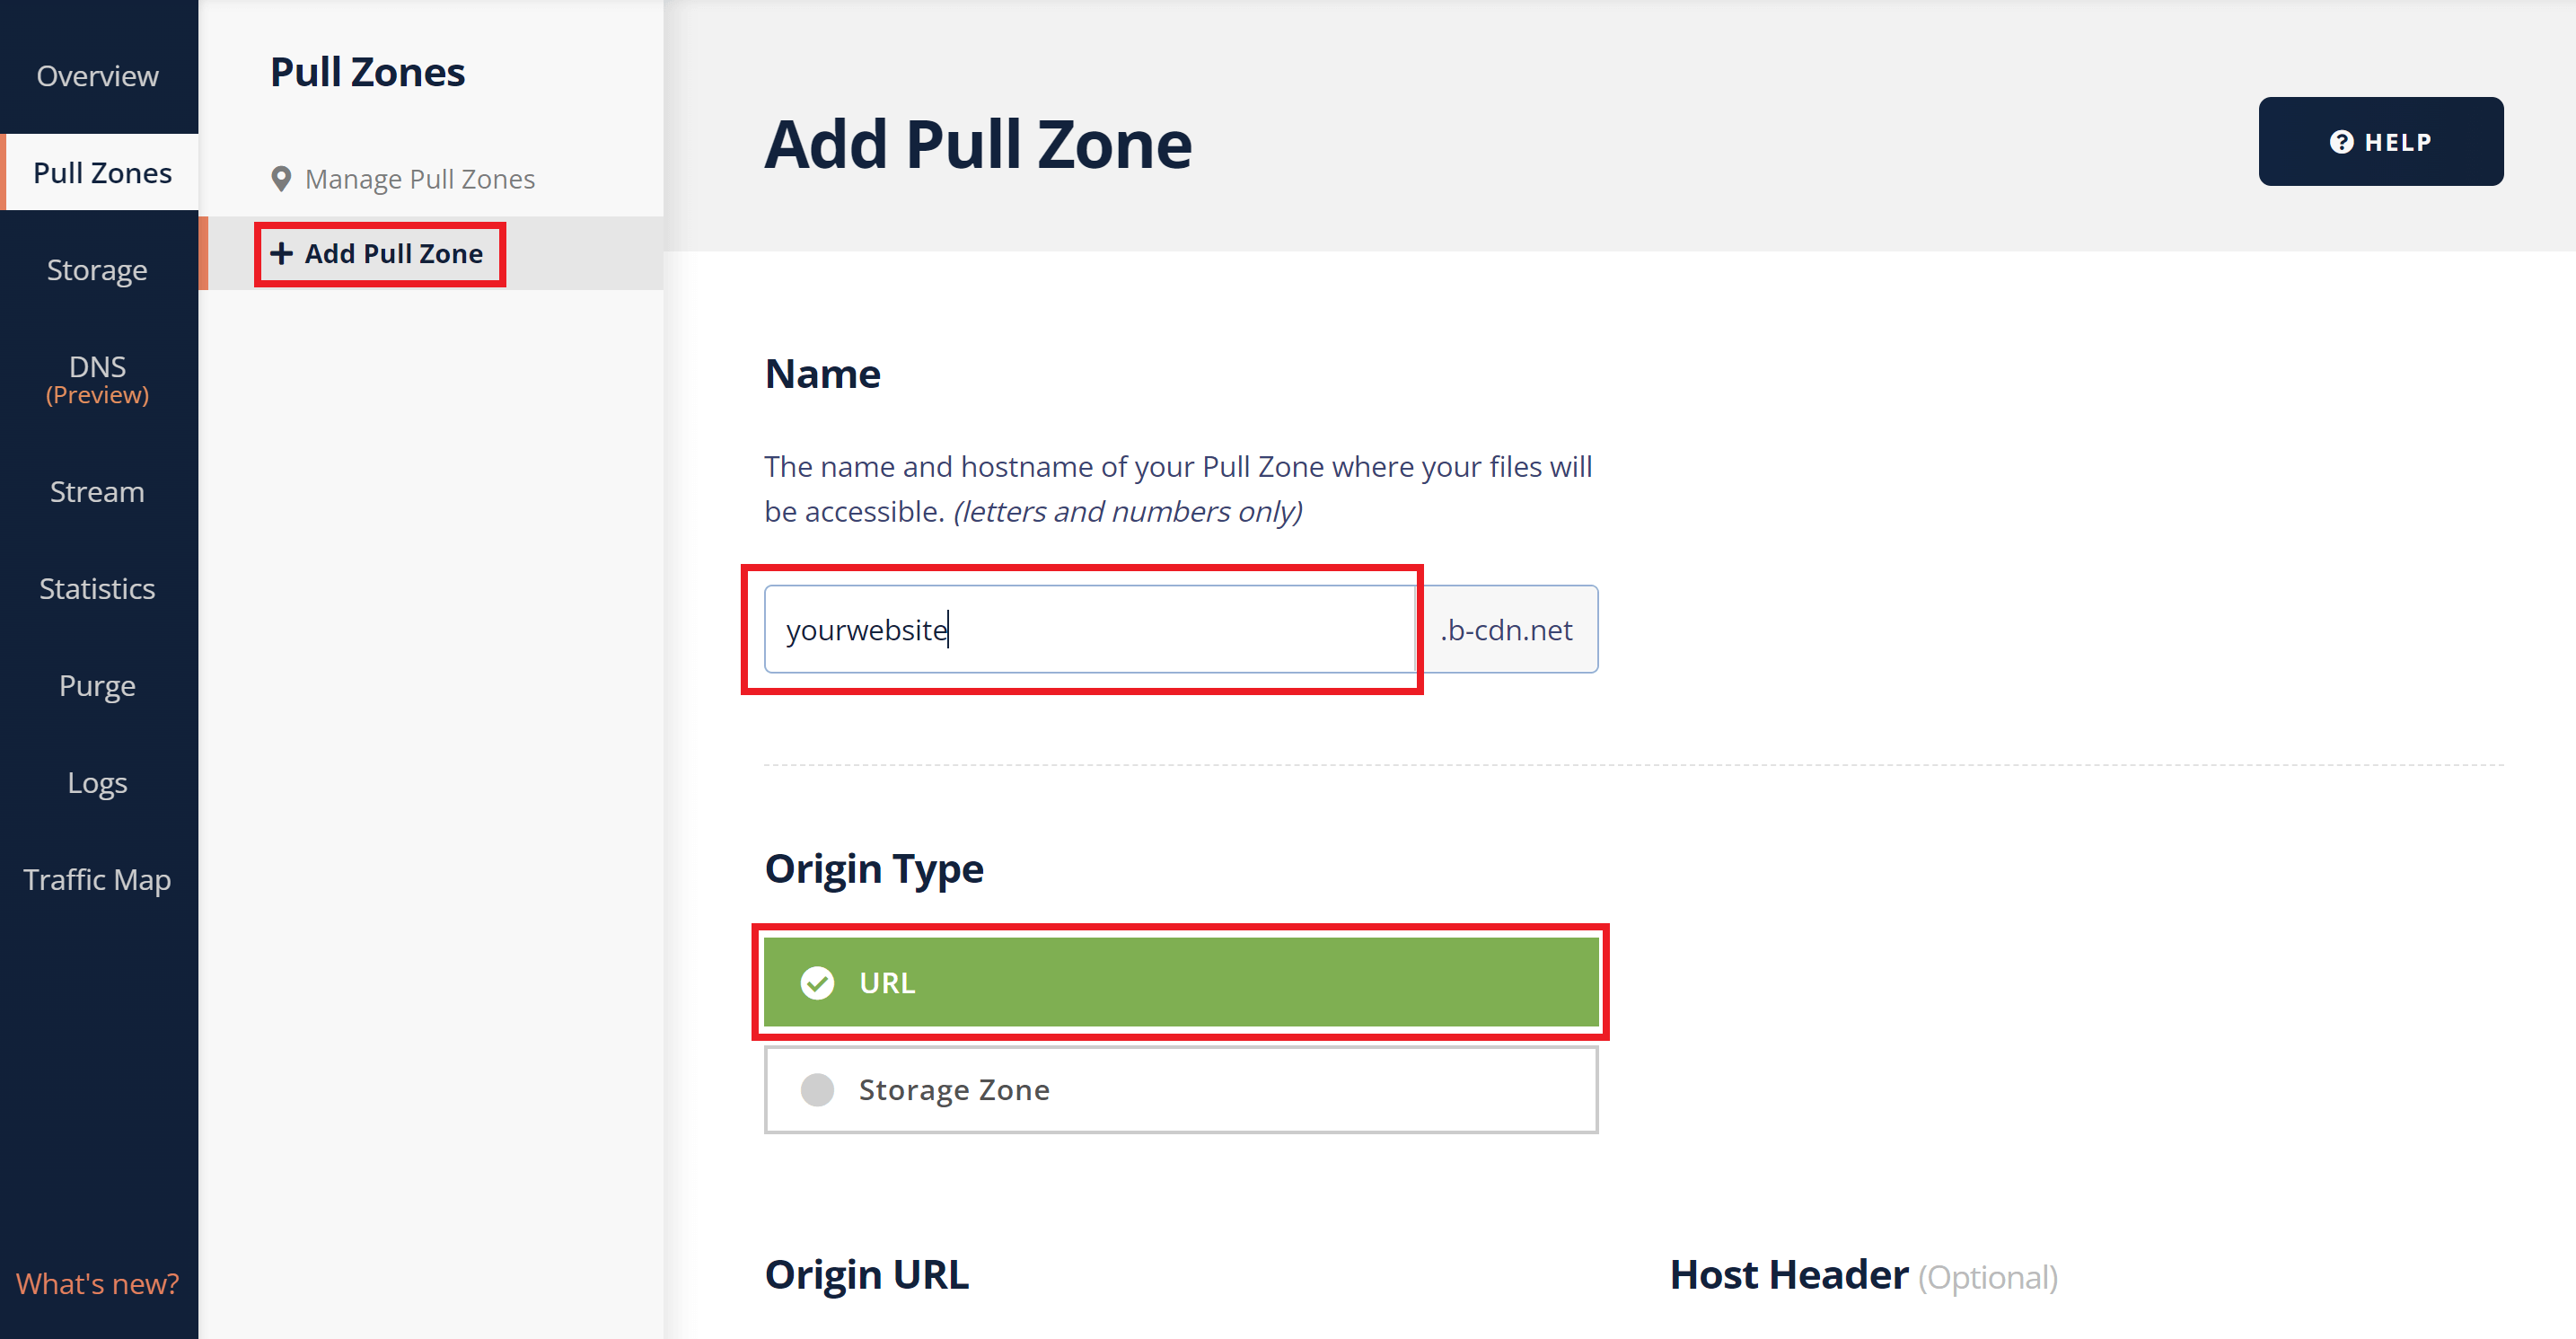
Step 1. Create a Pull Zone For Your Website

To start using Bunny CDN, you will first need to create a Pull Zone inside your Bunny account.

1.1 Create a Pull Zone

Inside your Bunny account click through to Pull Zones from the left-hand menu and then + Add Pull Zone.

Here, enter a name that will become your hostname, and select “URL” as your origin type:
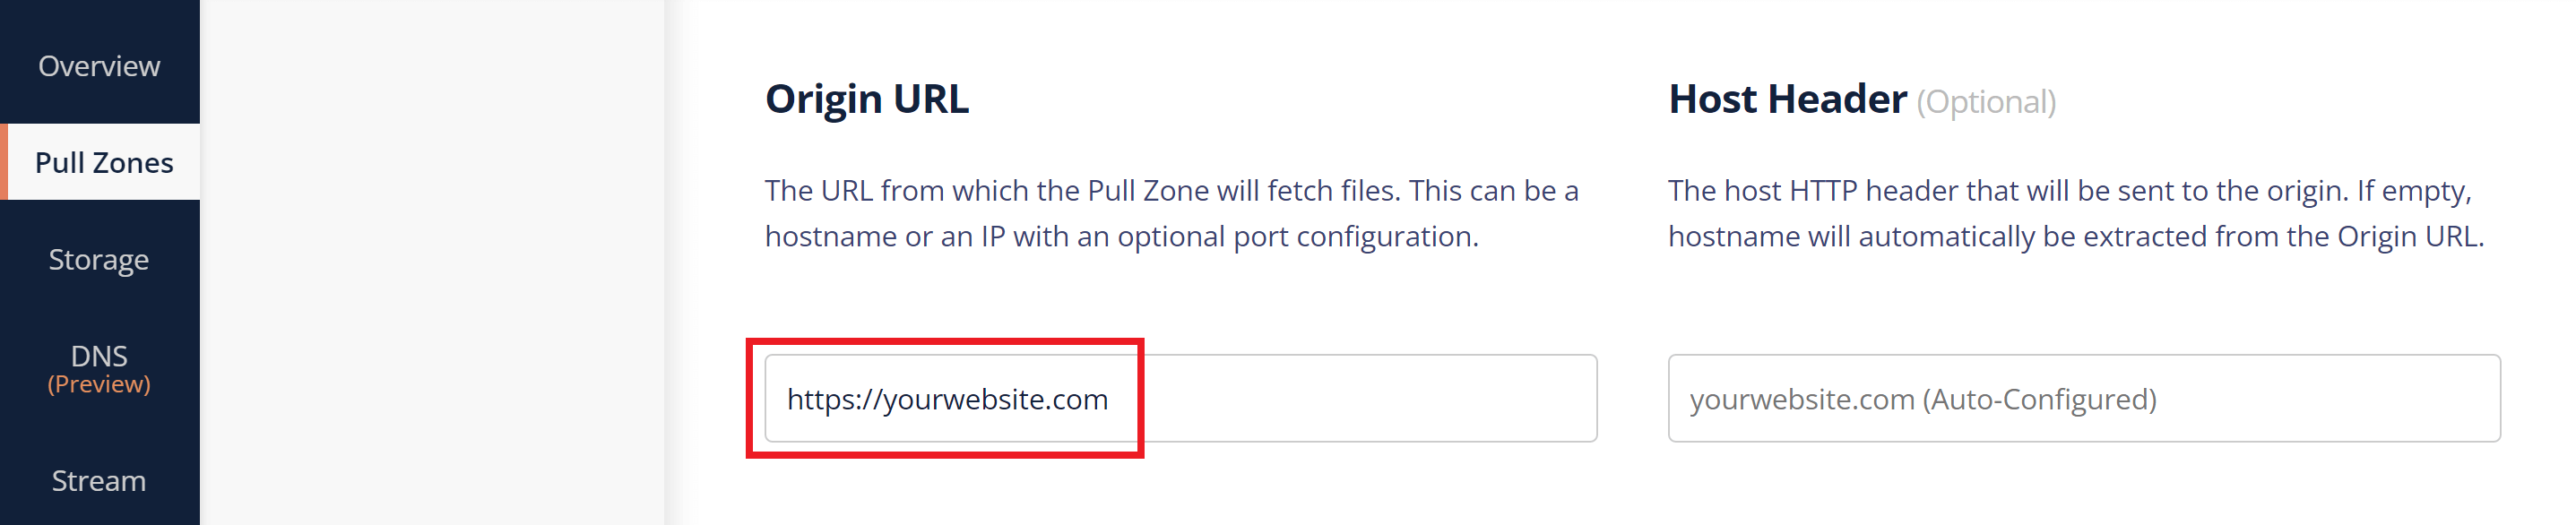
1.2 Add Origin URL

At this point in the setup, add your website’s URL:

1.3 Select Tier and Zones

Choose the tier that’s right for your use case, then select the zones that you want to configure for your CDN. If you have a global audience, then you’ll want to use all available zones. If, for example, your website only serves North America and Europe, then you can switch off the other zones.

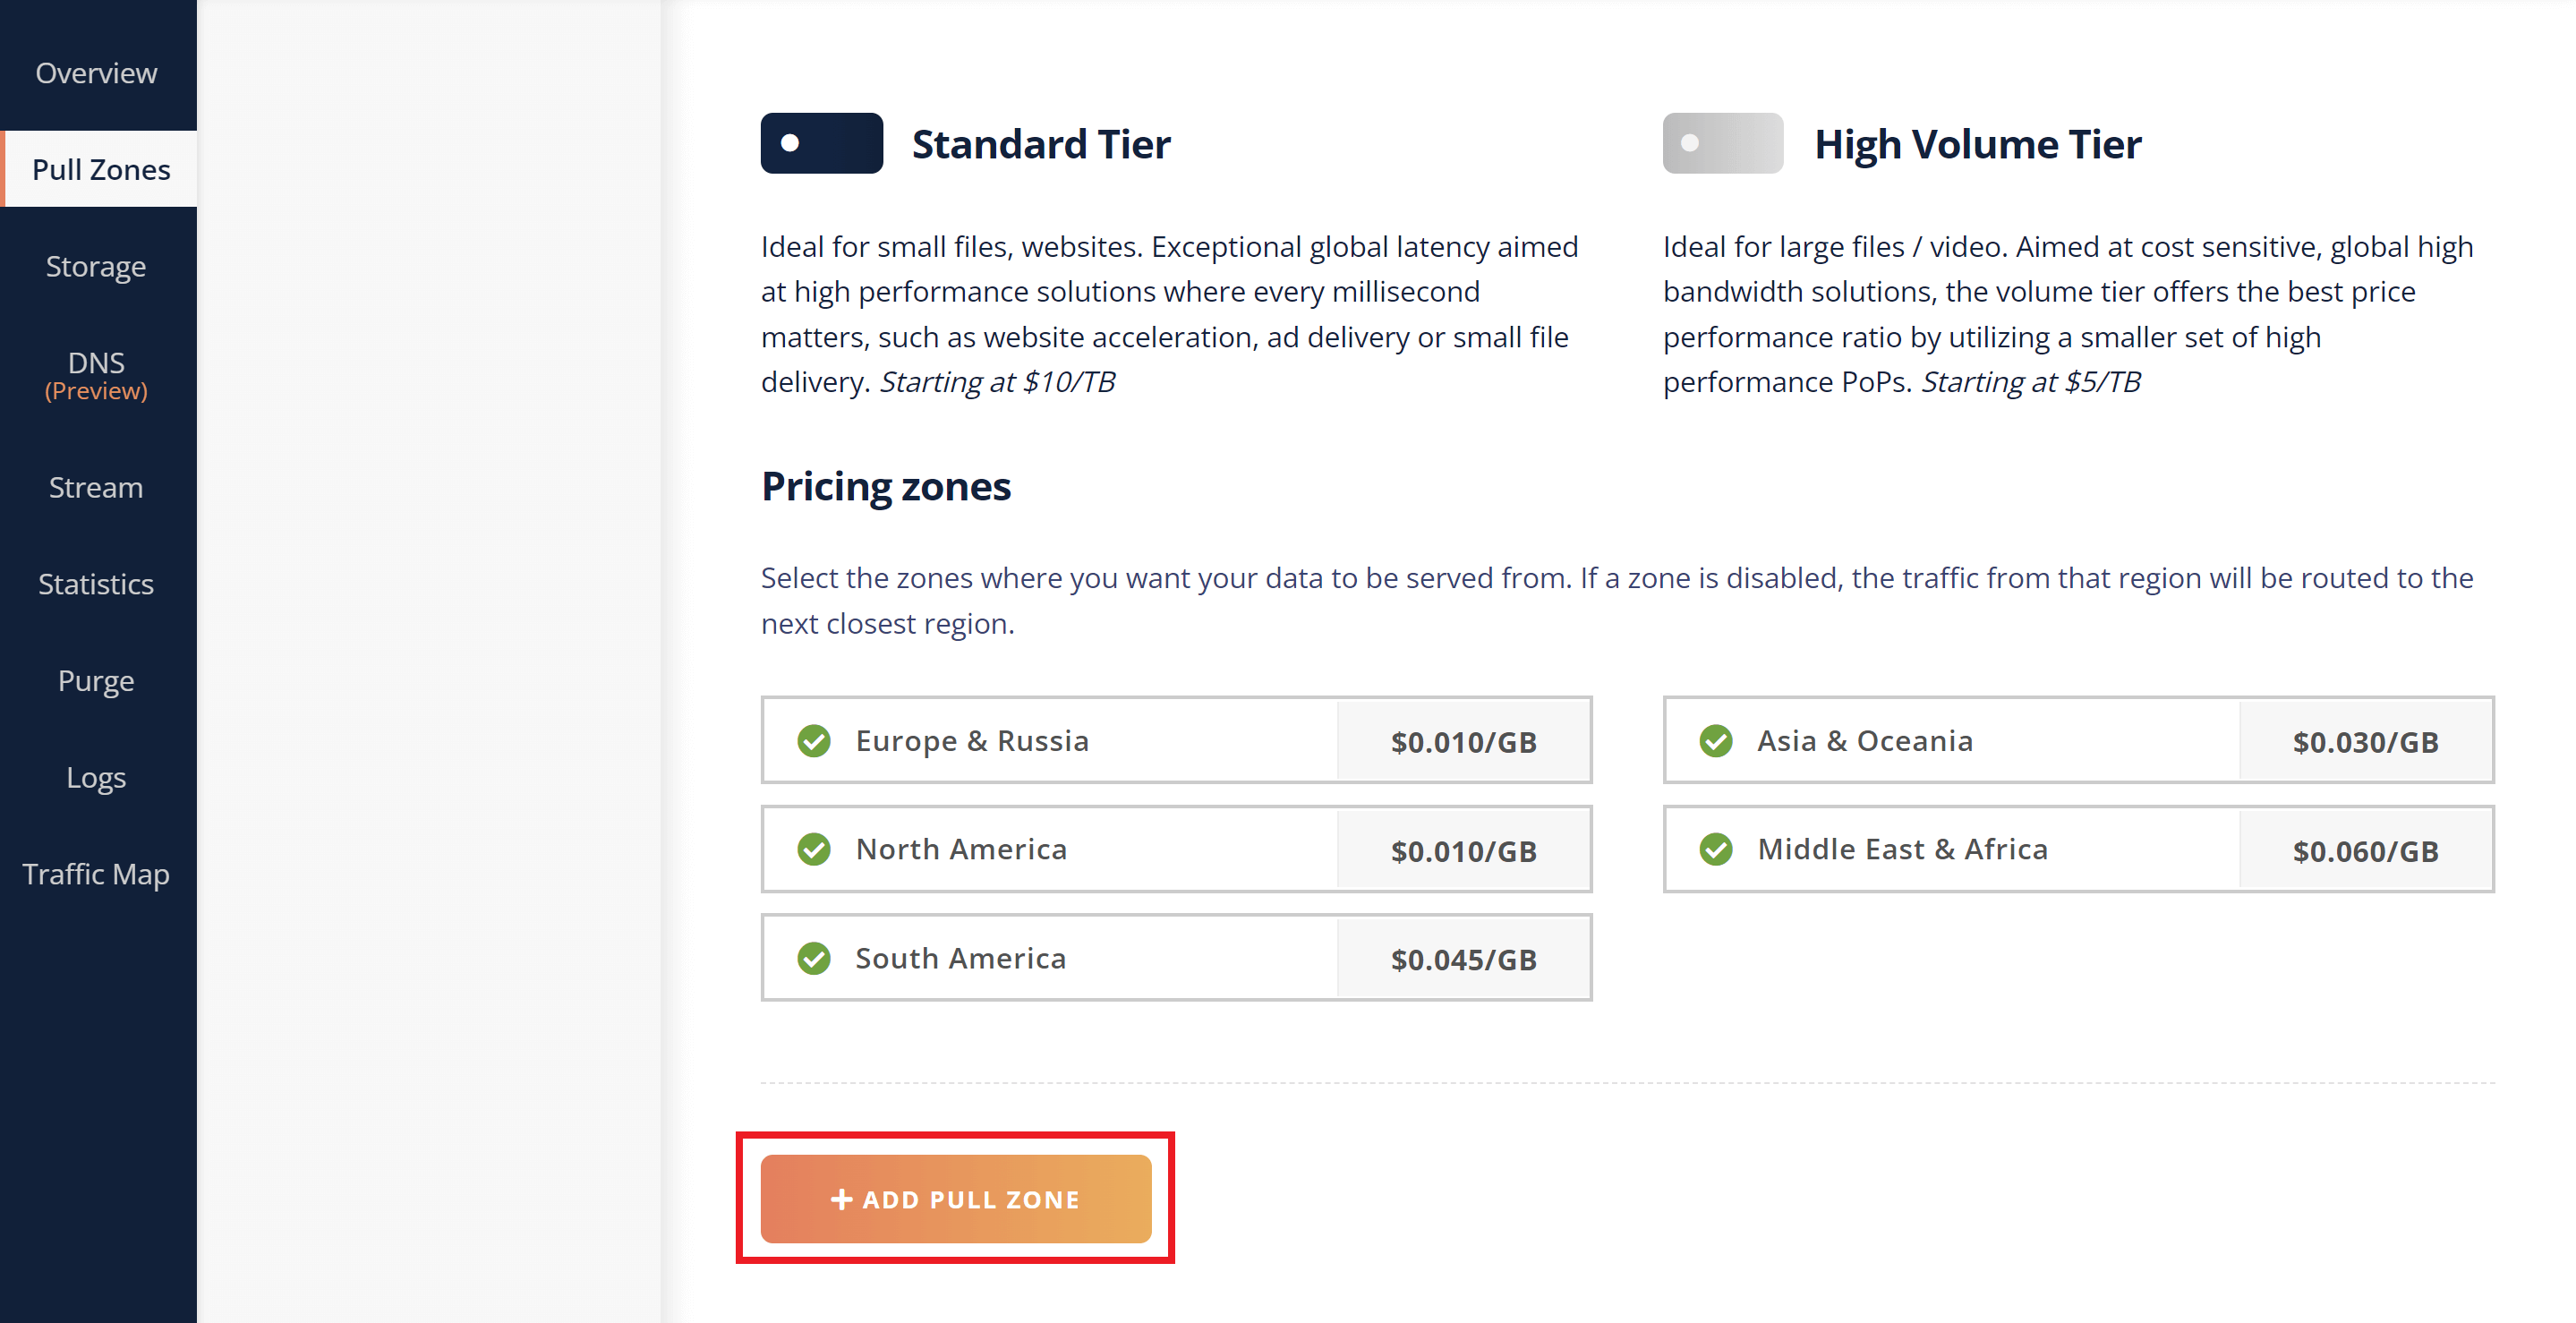
Click the +Add Pull Zone button to save your Pull Zone.

1.4 Select Your Platform

The easiest option is to choose WordPress as your platform (instead of Custom HTML).

Step 2. Configure BunnyCDN On Your Website

At the time of writing, Bunny CDN can be configured using three different plugins:

  1. Bunny’s Official WordPress plugin
  2. WP Rocket
  3. W3 Total Cache

For the purposes of this article, we’ll be using the official Bunny.net plugin, but Bunny’s own instructions for each are also linked above.

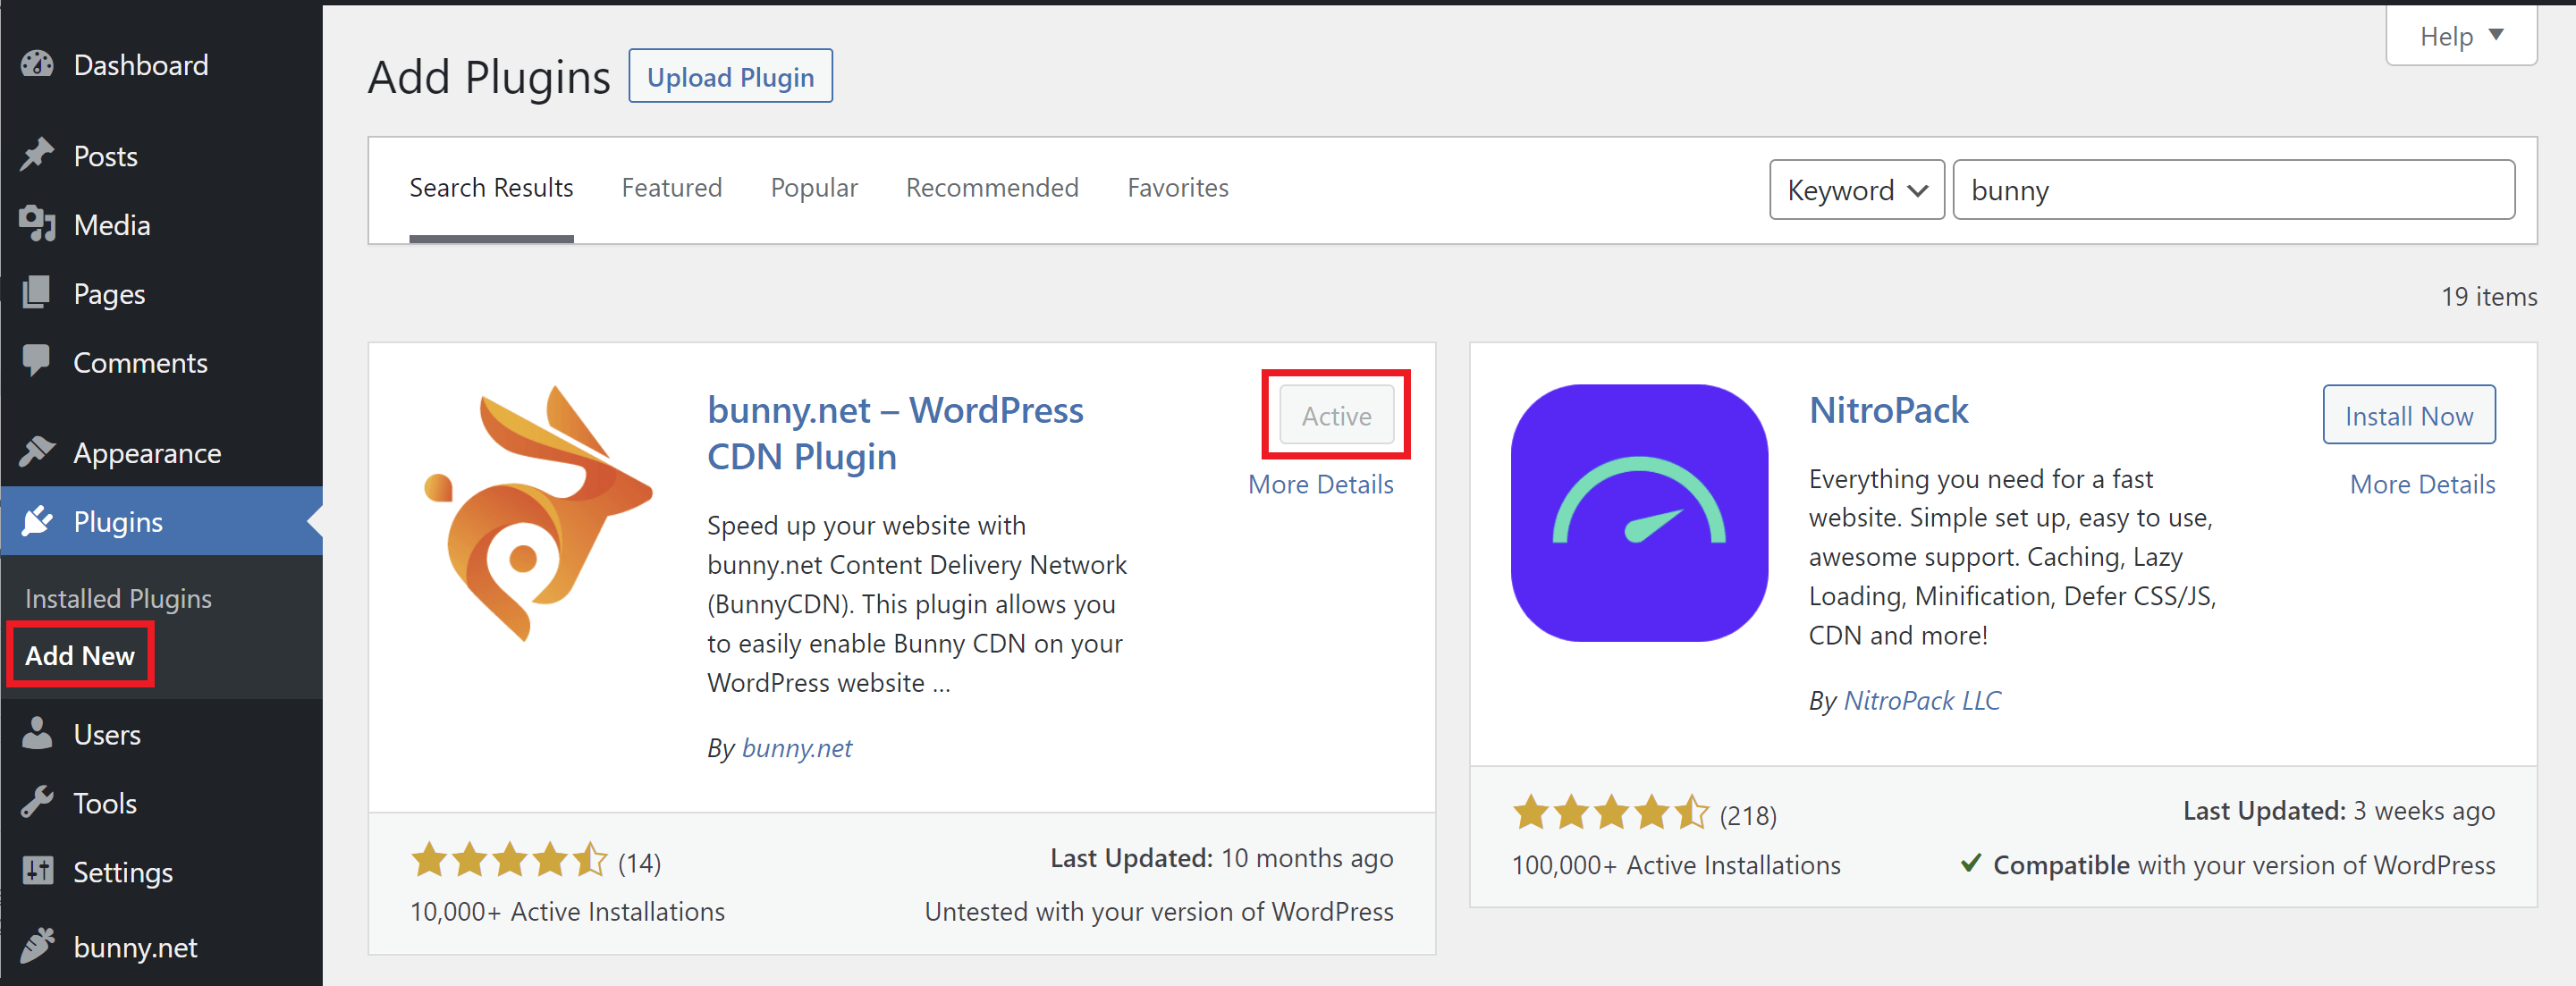
2.1 Install the Bunny.net Plugin

Inside your WordPress website, navigate to Dashboard > Plugins > Add new and install and activate the bunny.net plugin:

2.2 Set Your Pull Zone

Next, we need to set the Pull Zone we created in step 1 inside your plugin settings. Navigate to your Dashboard > bunny.net settings page and add your Pull Zone Name in section 1.1 above:

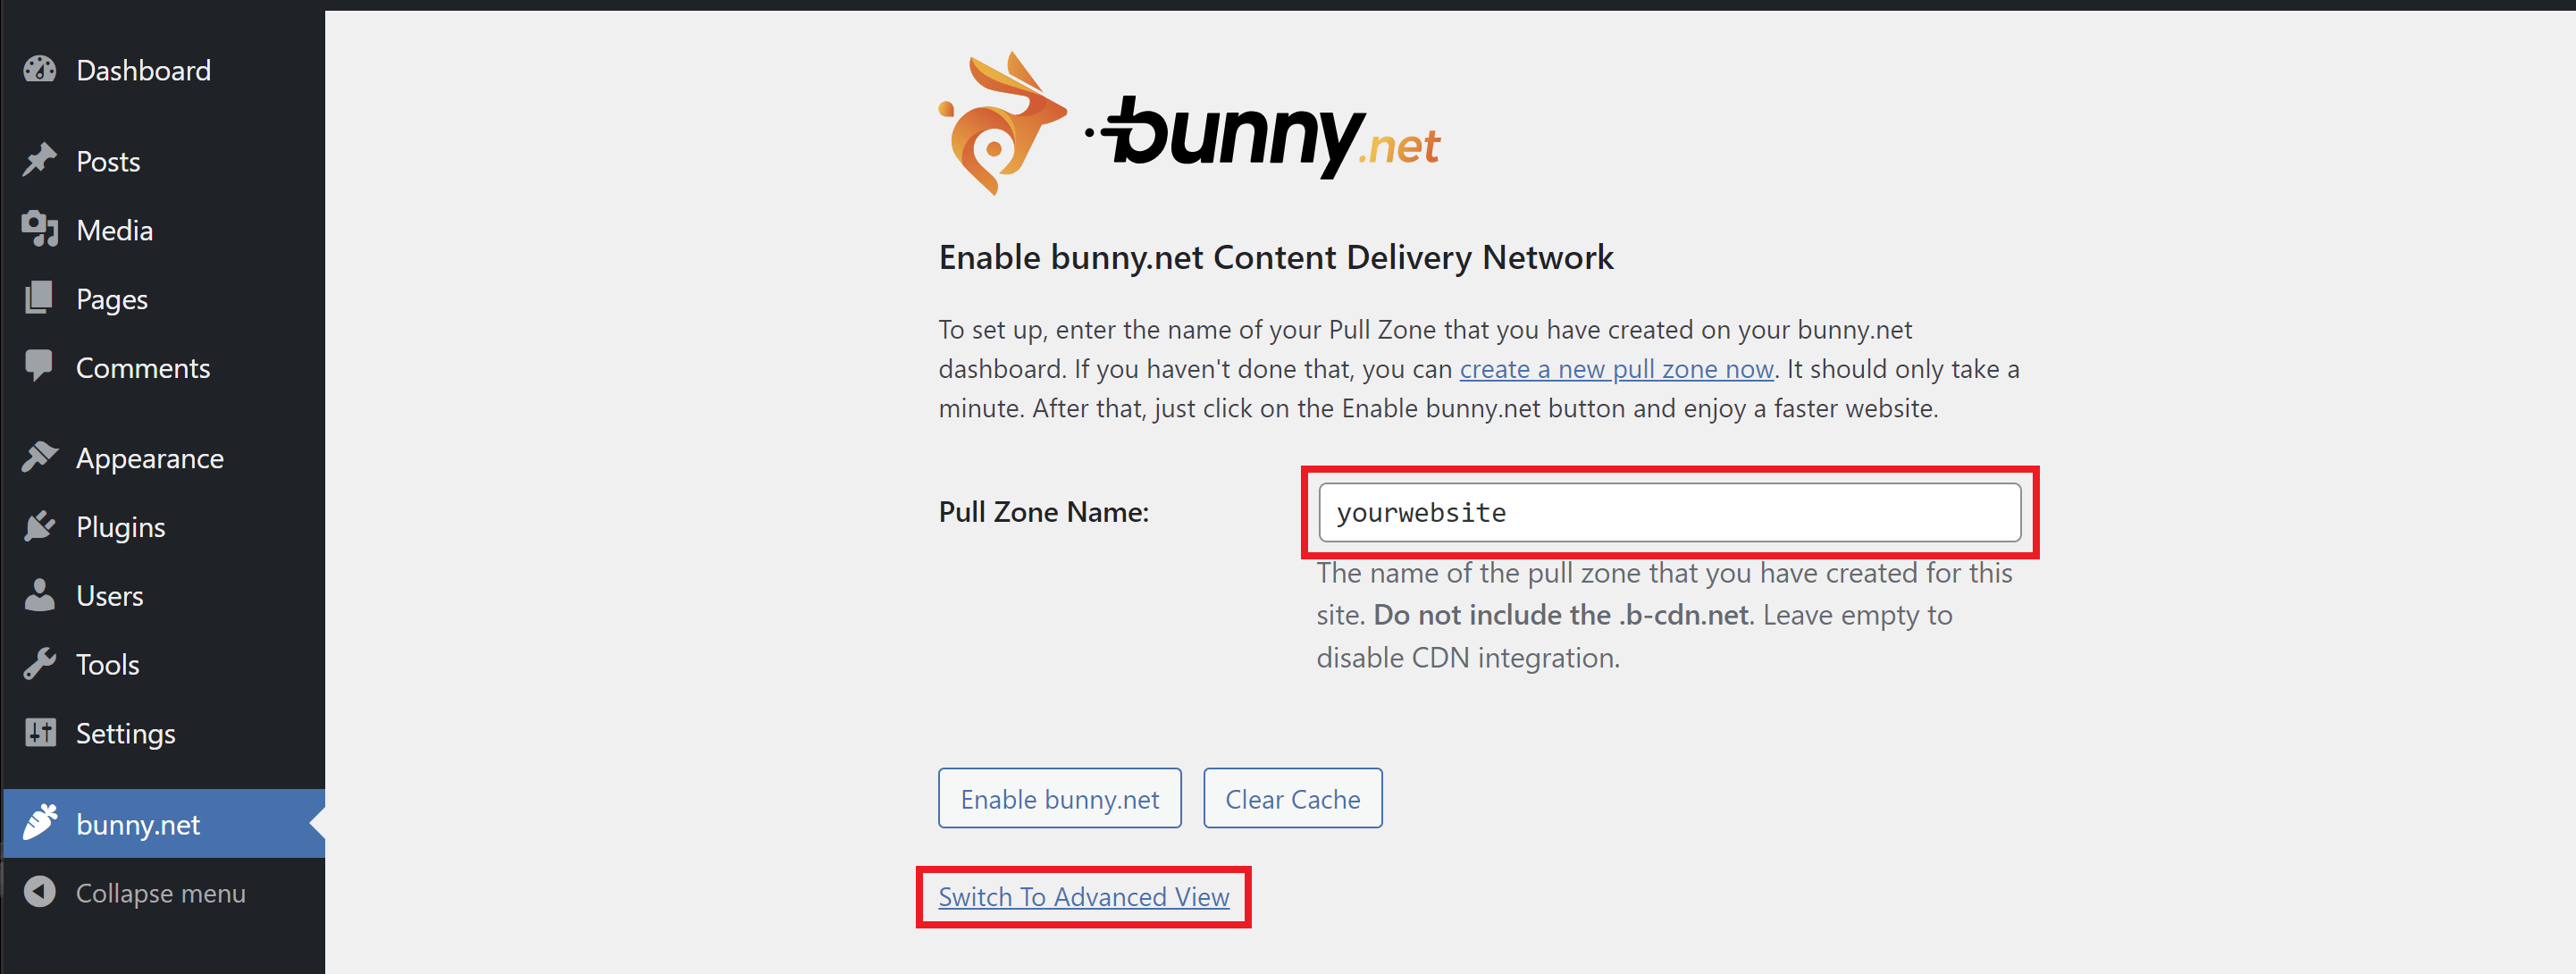
2.3 Configure Settings

Next, open up the advanced view and add your Site URL. You can also add excluded file types, and included directories.

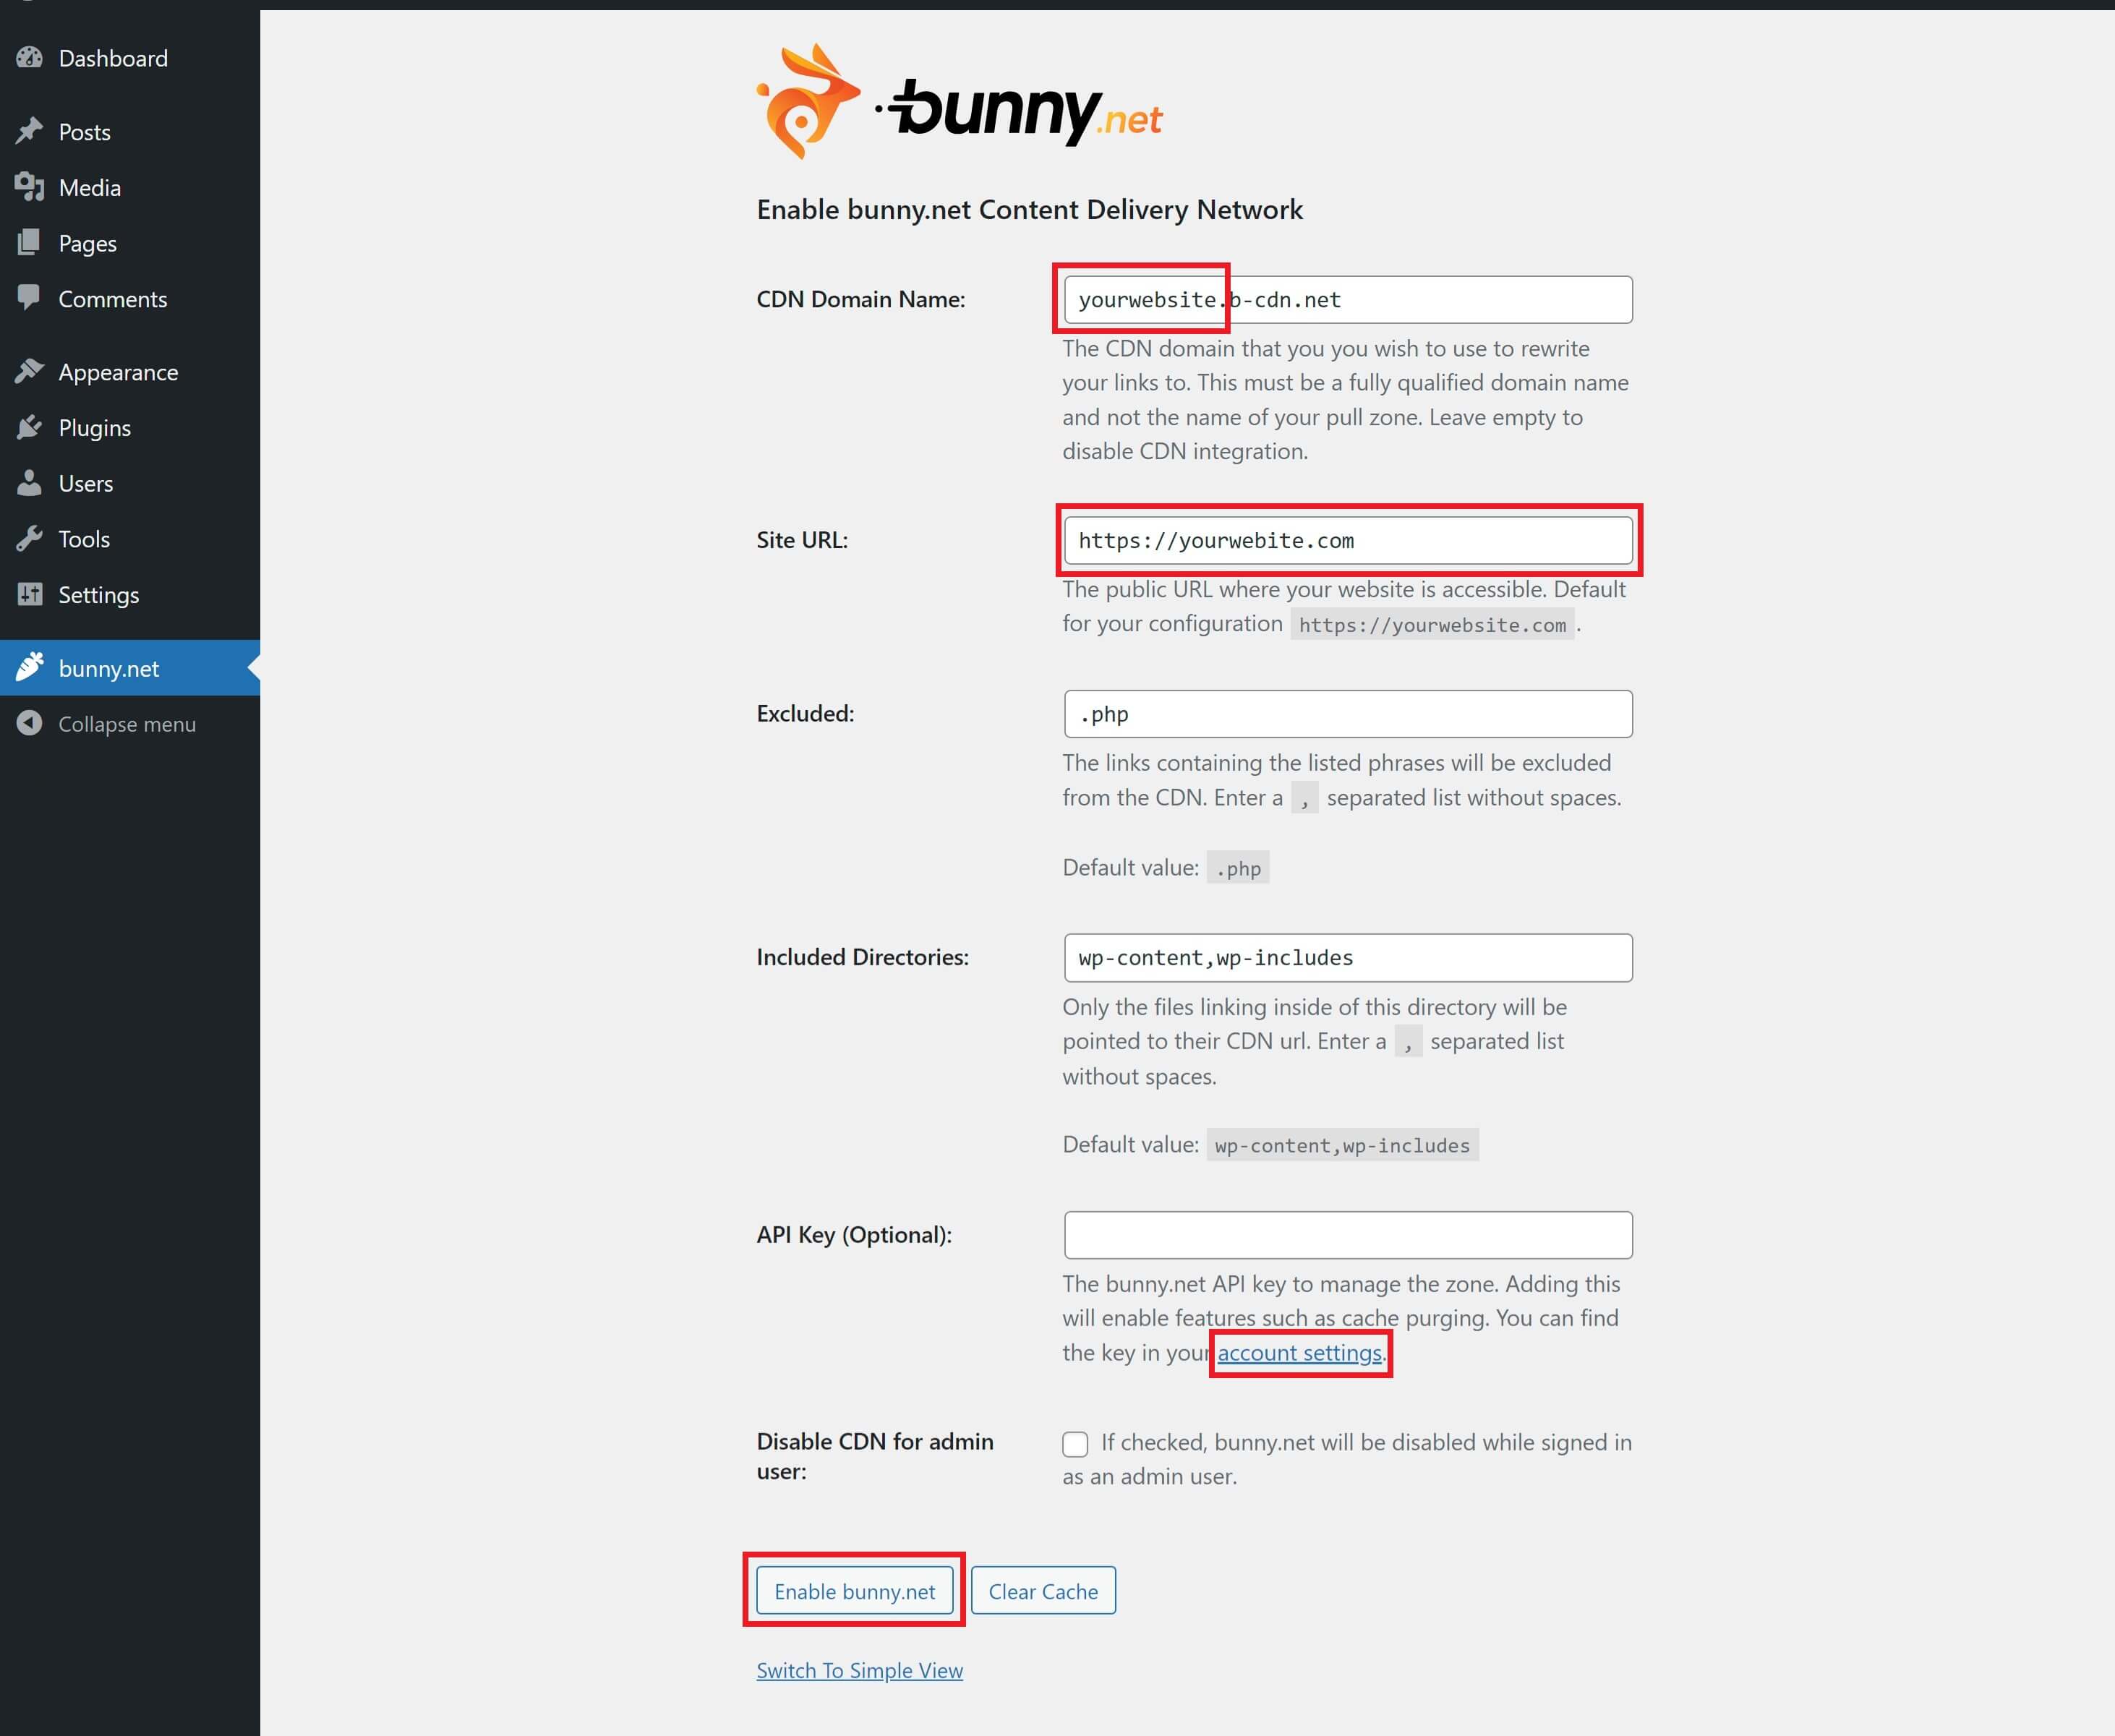
2.4 Optional: Add Your API Key

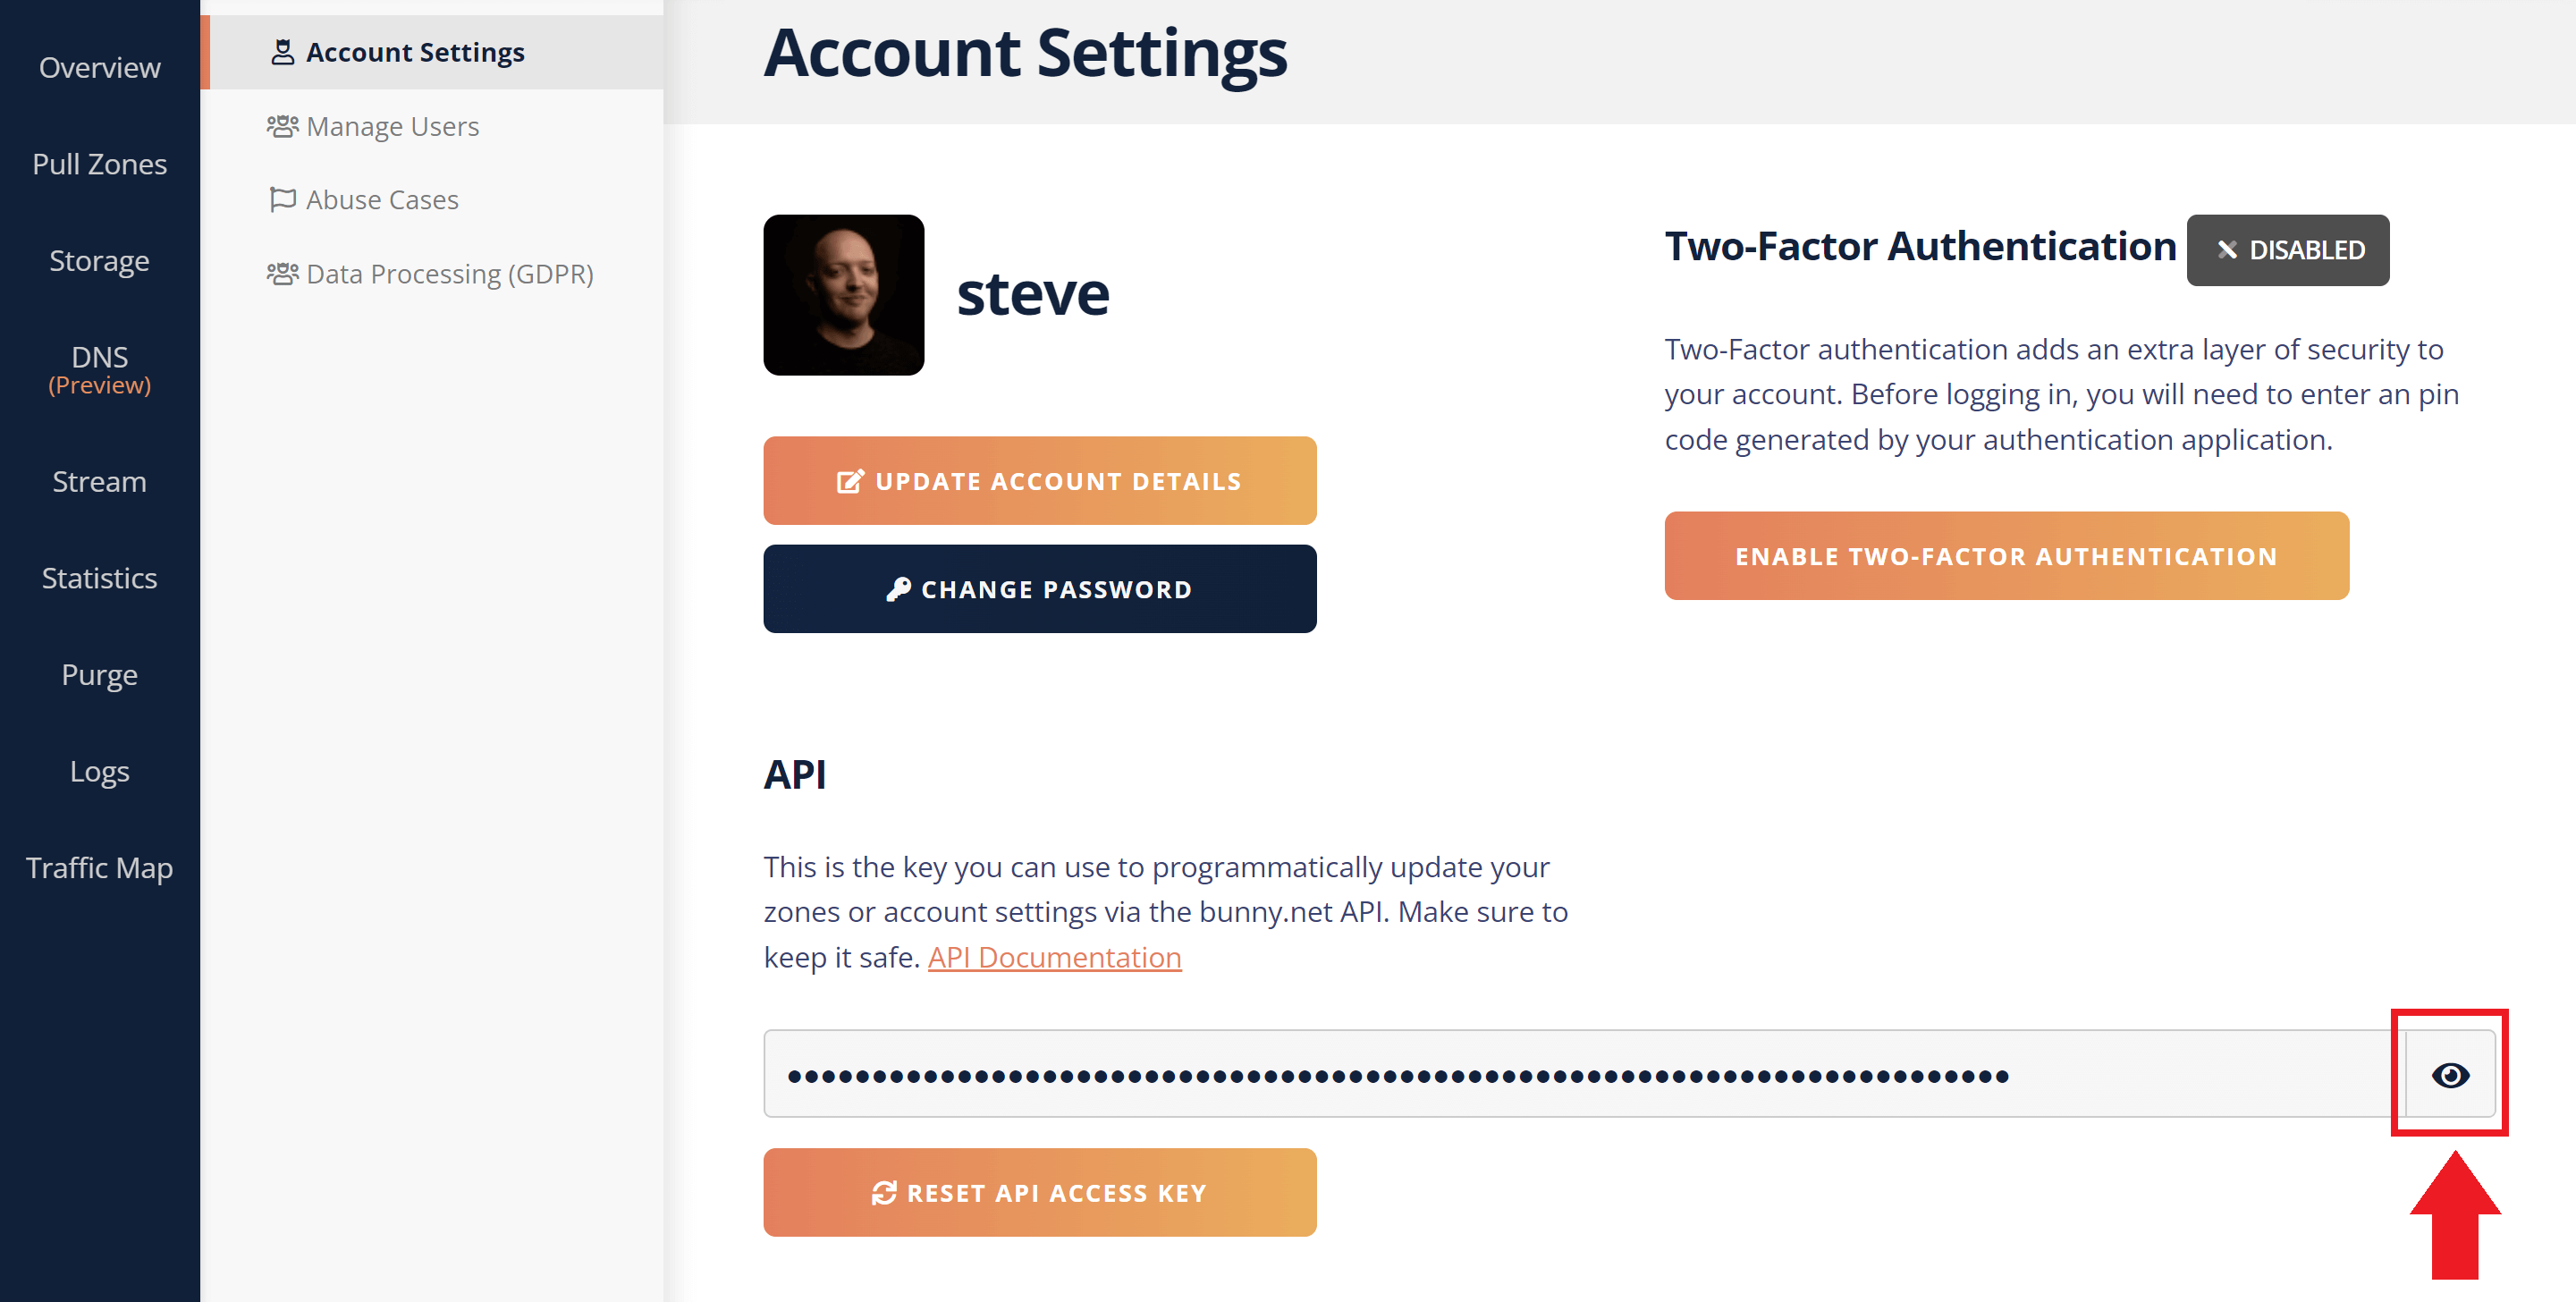
If you would like to add your API key (and I’d recommend you do), open up your account settings inside your Bunny account and click on your name in the top right, and select Edit Account Details.

Here, click the Account Settings tab and you can view and copy your API key. 

Paste this into your WordPress site.

2.5 Enable CDN

Click the Enable bunny.net button to finish your WordPress setup.

Full Page Caching

At this point, your static website assets like CSS, JS, and images will all be served via BunnyCDN. You can confirm this by checking your website’s HTML and/or response headers.

However, if you check your website headers, you’ll see that it’s not currently set up for full-page caching.

For some of you, this may be the desirable setup, and you can continue to use our server-level page caching while serving assets directly from BunnyCDN. 

Information

If you want to use full page caching, I'd recommend using a CDN that makes this process straightforward and easy to configure, especially if your site is dynamic in nature, such as a Woo store.

Edge Rules and CNAMEs

If you want to explore using BunnyCDN to act as your full page cache using BunnyCDN edge rules and CNAME records, here are some resources for learning more:

You will need to:

  1. Set up an edge rule to cache everything
  2. Set your pull zone hostname as your server IP (e.g. https://120.123.123.99)
  3. CNAME your root and www to point to your bunny hostname (e.g. yourwebsite.b-cdn.net)
  4. Configure your Cache Expiration Time

Additional Notes from Steve

I may take another look at this in the future, however, setting up full-page caching while writing this article was an incredibly frustrating experience. Things initially worked exactly as expected, but then they suddenly didn’t – everything broke, one site went down, then when I brought it back up, all the assets were 404. Purging the cache had no effect, and ultimately I was unable to figure out why in the time I had.

The CDN just isn’t built for easy, configurable WordPress page caching. At the time of writing Bunny.net themselves offer no instructions, recommendations, or easy-to-configure WordPress-specific settings.

Final Thoughts

That all said though, full page caching with Bunny was extremely fast when it was all working correctly, and as a traditional CDN for static file delivery, their service is fantastic.